Wario Land 4: Difference between revisions
(→Story) |
m (Text replacement - "<br/>" to "<br>") |
||
| (401 intermediate revisions by more than 100 users not shown) | |||
| Line 1: | Line 1: | ||
{{italic title}} | {{italic title}} | ||
{{ | {{redirect|Warioland 4|the book|[[Warioland 4 (book)]]}} | ||
{{game infobox | |||
|image=[[File:Box NA - Wario Land 4.png|250px]] | |image=[[File:Box NA - Wario Land 4.png|250px]] | ||
|developer=[[Nintendo Research & Development 1|Nintendo R&D 1]] | |developer=[[Nintendo Research & Development 1|Nintendo R&D 1]] | ||
|publisher=[[Nintendo]] | |publisher=[[Nintendo]] | ||
| | |release='''Game Boy Advance:''' <ref>[http://www.gamefaqs.com/gba/524513-wario-land-4/data GameFAQs - Wario land 4 Release Data]</ref><br>{{release|Japan|August 21, 2001|Australia|November 9, 2001|Europe|November 16, 2001|USA|November 19, 2001|China|June 8, 2004<ref>“2004年6月,神游推出小神游GBA,捆绑简体中文版《超级马力欧2》和《瓦力欧寻宝记》” (In June 2004, iQue released the iQue Game Boy Advance, with the Simplified Chinese versions of ''[[Super Mario Advance]]'' and ''Wario Land 4'' bundled.) 大狗 (June 22, 2016). [http://www.chuapp.com/2016/06/22/251110.html 《记录》第17期:神游中国(上)]. 触乐. Retrieved February 28, 2017.</ref>}} '''Virtual Console (3DS) (Ambassador Program Release):''' <ref>[http://andriasang.com/comzcn/gba_3ds_ambassador/ Game Boy Advance 3DS Ambassador Program Begins on Friday]</ref><br>{{release|Australia|December 15, 2011|Japan|December 16, 2011|Europe|December 16, 2011|USA|December 16, 2011}} '''Virtual Console (Wii U):'''<br>{{release|Japan|April 30, 2014|USA|May 8, 2014|Europe|June 5, 2014|Australia|June 5, 2014}} | ||
|genre=2D Platformer | |languages={{languages|en_us=y|jp=y|zh_simp=y}} | ||
|modes=Single player | |genre=2D [[Genre#Platform|Platformer]] | ||
|modes=Single-player | |||
|ratings={{ratings|esrb=E|cero=A|pegi=3|acb=G}} | |ratings={{ratings|esrb=E|cero=A|pegi=3|acb=G}} | ||
|platforms=[[Game Boy Advance]] | |platforms=[[Game Boy Advance]]<br>[[Virtual Console]] ([[Nintendo 3DS|3DS]] Ambassadors, [[Wii U]]) | ||
|media={{ | |media={{media|gba=1|3dsdl=1|wiiudl=1}} | ||
|input={{input|wiiu=1|wiiusideways=1|wiiuclassic=1|wiiupro=1|gba=1|3ds=1}} | |input={{input|wiiu=1|wiiusideways=1|wiiuclassic=1|wiiupro=1|gba=1|3ds=1}} | ||
}} | }} | ||
'''''Wario Land 4''''' is a [[Genre#Platform|platformer]] game released for the [[Game Boy Advance]] in 2001. It was later re-released for the [[Nintendo 3DS]] system on December 16, 2011 via the [[Virtual Console#Nintendo 3DS Ambassador Program|Nintendo 3DS Ambassadors program]], just after its ten-year anniversary, as well as a downloadable [[Virtual Console#Wii U|Virtual Console]] game for the [[Wii U]] on May 8, 2014. It is the fourth game in the ''[[Wario Land (series)|Wario Land]]'' series (fifth counting ''[[Virtual Boy Wario Land]]''), which is a spin-off of the ''[[Super Mario (series)|Super Mario]]'' series. It is also the final ''Wario Land'' game to be released on a handheld system and the last installment in the series for seven years until ''[[Wario Land: Shake It!]]'' | |||
'''''Wario Land 4''''' | |||
In the game, [[Wario]] travels to the [[Golden Pyramid]] after reading a [[:File:WL4-Newspaper.png|newspaper article]] about a rumor of a [[legendary treasure]] hidden inside. His intention is to rob the pyramid, but he accidentally goes on a quest to save the legendary [[Princess Shokora]] from the money-crazed [[Golden Diva]], evil ruler of the Golden Pyramid. The game features 2D graphics with linear transformations (similar to ''[[Super Mario World]]'' and ''[[Super Mario World 2: Yoshi's Island]]''). ''Wario Land 4'' has received very positive reviews from websites and game critics alike, enjoying praise for its soundtrack, collectibles throughout the game, and level design. | |||
==Story== | ==Story== | ||
[[ | <blockquote>''Does [[Wario]] smell treasure again? Oh yes he does! Whilst reading his morning paper and picking his nose, he reads about the legendary [[Golden Pyramid|Pyramid]] of [[Princess Shokora|Shokora]]! With no delay, and even forgetting to take his mid-morning nap, Wario hops into his fantastic [[Wario Car|car]] and heads off to find the Golden Pyramid.'' | ||
[[File:WL4- | – Story from the official European ''Wario Land 4'' website | ||
</blockquote> | |||
[[File:WL4-Newspaper.png|frame|left|The newspaper article shown in the game's intro, with the [[Kuro Neko|black cat]]'s shadow.]] | |||
Sometime before the events of the game, the legendary Golden Pyramid was discovered deep within a jungle. Expeditions were mounted to find the pyramid's treasure, but a series of accidents prevented anything from being found. The game's story properly begins one morning with Wario reading the newspaper in his house. He reads an article about the Golden Pyramid and all the treasure within, and decides to go steal it for himself. He then hops in his car and heads towards the pyramid, almost running over a [[Kuro Neko|black cat]] on the road. | |||
[[File:WL4-WarioFalling.png|frame|[[Wario]] falling down a precipice within the pyramid.]] | |||
Upon arriving at the pyramid, Wario climbs the outer stairs and heads inside, where he finds the same black cat that he almost ran over earlier. The Cat leads Wario deeper into the pyramid and down a hole. Wario lands in a room near the center of the pyramid, and proceeds to complete the challenges of its five [[#Passages|passages]], thus opening the way to the [[Golden Pyramid|inner pyramid]], where the evil ruler of the Golden Pyramid, the [[Golden Diva]], resides. | |||
After exploring the [[Golden Passage]], Wario comes face to face with the Golden Diva. The black cat then jumps in front of Wario and attacks the Golden Diva in vain. The Cat gets swallowed by the Diva, who proceeds to fight Wario and gradually uncovers her many kabuki masks. | |||
[[File:WL4-Shokora Ending.png|frame|left|The black cat transforms into Princess Shokora in front of Wario.]] | |||
After the Golden Diva's defeat, the pyramid begins to crumble. Grabbing his treasure, and with the black cat in tow, Wario hurries to escape the pyramid. They both make it out, and watch the pyramid crumble to the ground from a distance. The Golden Diva's jewelry then flies out of the treasure sack and toward the black cat. This causes the Cat to change form into Princess Shokora, the ancient ruler of the Golden Pyramid who was cursed by the Golden Diva. With the Diva's defeat, the curse is broken, and the princess thanks Wario by kissing him on the cheek. She is taken away by angels, and Wario takes his treasure to his car and heads home. | |||
[[File:WL4 | The ending cutscene shows Wario speeding through the city, almost running over a cat once more. A newspaper flies into the cat's face, with an article that reads: "''STEAKS! EAT AS MUCH AS YOU CAN!!''". The game ends with gold bars forming the words ''THE END''. | ||
{{br}} | |||
==Gameplay== | |||
===Game mode=== | |||
[[File:WL4 Screenshot Game Mode Selection.png|frame|Selecting "Hard" mode upon creating a new save file. Note that "S-Hard" mode is not yet present as an option.]] | |||
Upon creating a save file, the player is asked which game mode they prefer to play. The available game modes are as follows: | |||
*[[File:WL4-Normal Mode Sprite.png]] | |||
*[[File:WL4-Hard Mode Sprite.png]] | |||
*[[File:WL4-S-Hard Mode Sprite.png]] (unlockable, by completing Hard mode) | |||
The chosen game mode affects various aspects of gameplay, such as the location of the [[jewel piece]]s, the type and quantity of [[#Enemies and other characters|enemies]], and the health the player begins with upon entering the level. For example, on S-Hard mode, Wario enters the level with only one [[Heart (item)|heart]] instead of the full eight. The game mode also affects the time given to get back to the [[vortex]] after the player hits the [[Switch (Wario Land 4)|switch]]. In a few levels on S-Hard mode, the switch even changes its location. | |||
Less time is given to defeat the bosses on more difficult modes, and prices at the [[#Item Shop|Item Shop]] are more expensive. When beating the game on Hard or S-Hard mode, extra parts of the credits sequence are shown which feature Wario picking up women in his car. | |||
===Objectives=== | |||
{{WL4 map}} | |||
The game begins in the [[Entry Passage]] which includes [[Hall of Hieroglyphs|one level]] and a boss, [[Spoiled Rotten]]. On completion, the next four areas of the game are revealed. This consists of four more passages, each with four levels relating to a different theme with a [[#Bosses|boss]] at the end. The four passages are the [[Emerald Passage]], [[Ruby Passage]], [[Topaz Passage]], and [[Sapphire Passage]]. These can be completed in any order. Once each bosses of these four passages have been cleared, an [[Golden Pyramid|inner pyramid]] is revealed on the main map. This includes one last level, the [[Golden Passage]] and the final boss, the [[Golden Diva]]. | |||
[[File:WL4-Boss Door.png|frame|left|Four [[jewel]]s need to be collected in each main passage.]] | |||
Unlike [[Wario Land (series)|previous installments]] in the series, Wario is given a [[Health Meter|Heart Meter]], containing a total of eight [[Heart (item)|heart]]s. Wario can collect additional hearts throughout the stages. Wario loses a heart by touching a threatening part of an [[#Enemies and other characters|enemy]], such as spikes. He can fully replenish his meter by opening a [[Full Health Item]] box. Below the Heart Meter is a heart gauge. Most enemies drop a [[little heart]] when defeated, which fills the gauge by an eighth. Filling it gives Wario an extra heart, and the gauge is then emptied. Completely filling Wario's hearts and gauge will cause most enemies to drop an extra 100-point coin. | |||
[[File:WL4- | |||
Each of the eighteen levels contains four [[jewel piece]]s, found within boxes, that need to be collected. When four jewel pieces in a level are joined, they form a [[jewel]]. The color of the Jewels varies on the passage they are collected in. The player must collect all jewel pieces in a passage to gain access to the boss. A [[Keyzer]] must be collected to unlock the next level. Without the Keyzer, the four jewel pieces in that level can still be collected, but the door to the next level remains locked. | |||
Each of the eighteen levels contains four [[ | |||
Wario enters a level through a [[vortex]] which closes behind him. The only way to open it again is to find the [[Switch (Wario Land 4)|switch]] somewhere in the level. This reopens the vortex and allows Wario to return to the map screen. A time limit is given to return to the vortex. The player should focus on finding the four jewel pieces and the Keyzer before hitting the switch if possible. However, there are some areas that can only be accessed by hitting the switch, due to the [[Kaeru Block]]s. When the switch is hit, all transparent Kaeru Blocks become solid, while all solid blocks become transparent. This opens up new areas that can only be accessed when the switch is hit, so there may be some other jewel pieces or the Keyzer to find in that new area. | |||
[[File:WL4-Frog Switch HoH.png|frame|left|Wario about to exit a level through a [[vortex]], which was opened by the [[Switch (Wario Land 4)|switch]].]] | |||
As soon as the switch is hit, a timer appears on screen. The amount of time given to reach the vortex varies on the level and the [[#Game mode|game mode]] the player has selected. If the timer runs out, the player's score quickly depletes and the level becomes black and white. When the score reaches zero, Wario is sent back to the main map and must start the level again. | |||
{{multiframe | {{multiframe | ||
|[[File:WL4-Bronze Crown Sprite.png]] [[File:WL4-Silver Crown Sprite.png]] [[File:WL4-Gold Crown Sprite.png]] | |[[File:WL4-Bronze Crown Sprite.png]] [[File:WL4-Silver Crown Sprite.png]] [[File:WL4-Gold Crown Sprite.png]] | ||
|The crowns. | |The crowns. | ||
|align= | |align=right | ||
}}The game records the player's best score | }} | ||
The game records the player's best score according to their points collected in each level. The amount of points obtained in a level affects what icon appears on the map screen when standing at the entrance of that level, next to the best score. A score of above 10,000 shows a gold crown, 8,000 to 9,990 shows a silver crown, and a score of 6,000 to 7,990 shows a bronze crown. A score of below 6,000 shows no crown. | |||
There are a total of twelve [[ | There are a total of twelve [[treasure chest]]s in ''Wario Land 4''. Each of the four main boss rooms contain three treasure chests which are embedded into the wall in the background, as well as a piece of jewellery kept by the boss. During the boss battle when the time starts to run low (usually under a minute), the treasure chests in the background begin to disappear one by one. | ||
Once Wario defeats a boss in a main passage, the treasure chests that are left over are collected and stored in the [[Golden Pyramid]], along with the jewellery retrieved from the boss. The amount of treasure chests collected does not affect the main game. However, it does affect the game's [[completion]], as the more treasure chests Wario obtains, the more beautiful [[Princess Shokora]] appears in the game's ending cutscene. | |||
===Controls=== | |||
{{quote2|So these are my basic controls! You got a problem with that?|Wario|[[Wario Land 4]] instruction booklet}} | |||
{|width=100% class="wikitable" | |||
!width="70"|Controls | |||
!Purpose | |||
{|width=100% | |||
| | |||
! | |||
|- | |- | ||
|align="center" | | |align="center"|{{button|gba|start}} | ||
| | |Open pause menu, confirm | ||
| | |||
|- | |- | ||
|align="center" | | |align="center"|{{button|gba|A}} | ||
| | |Jump, swim upwards, confirm | ||
| | |||
|- | |- | ||
|align="center" | | |align="center"|{{button|gba|B}} | ||
| | |Attack, throw (hold to build power), swim forwards or in direction of {{button|gba|Pad}} | ||
| | |||
{{ | |||
|- | |- | ||
|align="center"|{{button|gba|Pad}} | |||
|Move ({{button|Padleftright}}), look up ({{button|Padup}}) | |||
|- | |- | ||
|align="center" | | |align="center"|{{button|Padup}} + {{button|gba|B}} | ||
| | |Throw upwards | ||
| | |||
|- | |- | ||
|align="center" | | |align="center"|{{button|Paddown}} | ||
| | |Smash Attack (break blocks below or defeat [[#Enemies and other characters|enemies]]; ends when player releases the D-pad), roll on 45 degree slope, Super Smash Attack (break stronger blocks; hold D-pad down for more than one second while falling; does not end if the player releases the D-pad) | ||
|- | |- | ||
|align="center" | | |align="center"|{{button|Paddown}} + {{button|gba|B}} | ||
| | |Slide down ladder | ||
| | |||
|- | |- | ||
|align="center" | | |align="center"|{{button|Paddown}} + {{button|Padleftright}} | ||
|Crawl | |||
| | |||
| | |||
|- | |- | ||
|align="center" | | |align="center"|{{button|gba|L}} or {{button|gba|R}} | ||
| | |Dash Attack | ||
| | |||
|} | |} | ||
===Wario's moves=== | |||
{|width=100% | {{quote2|How 'bout it? You can even do this stuff!|Wario|[[Wario Land 4]] instruction booklet}} | ||
Wario has several different moves which are all required to make progress in the game. | |||
! | {|width=100% class="wikitable" | ||
! | !Image | ||
!Name | |||
!Description | |||
! | |||
|- | |- | ||
|align="center"|[[File:WL4-Ram.png]] | |||
|align="center | |align="center"|Attack | ||
| | |Wario can shift his body weight to ram into objects. He can hit the weak spot of [[#Enemies and other characters|enemies]] to destroy them, or break blocks to make a path. | ||
|- | |- | ||
|align="center"|[[File:WL4 Ramming Sprite.png]] | |||
|align="center | |align="center"|Dash Attack | ||
|Just like the regular Attack, but with more power. Wario must run for a short distance to build up momentum, allowing him to break stronger, more solid blocks. | |||
| | |||
|- | |- | ||
|align="center"|[[File:WL4-GroundPound.png]] | |||
|align="center | |align="center"|Smash Attack | ||
| | |A version of the [[Ground Pound]] that is mainly used in the [[Super Mario (franchise)|''Super Mario'' franchise]]. Wario can use it to break blocks below, or defeat enemies. | ||
|- | |- | ||
|align="center"|[[File:WL4 Super Smash Attack Sprite.png]] | |||
|align="center | |align="center"|Super Smash Attack | ||
|Similar to the normal Smash Attack but with more strength. Triggered by continuously Smash Attacking for a certain amount of time without hitting the ground, Wario can break more solid blocks by performing this move. The move will not cancel until he hits the ground. | |||
| | |||
|- | |- | ||
|align="center"|[[File:WL4-Roll.png]] | |||
|align="center | |align="center"|Roll | ||
|On a 45 degree slope in the floor, Wario can begin to roll. He can jump while moving, destroy blocks, and defeat enemies by using this move. He stops rolling if he either hits something solid or falls into water. | |||
| | |||
|- | |- | ||
|align="center"|[[File:WL4-Swim.png]] | |||
|align="center | |align="center"|Swim | ||
|Wario is able to swim when he is in a body of water. He is unable to swim against water currents. | |||
| | |||
|- | |- | ||
|align="center"|[[File:WL4-Crawl.png]] | |||
|align="center"|Crawl | |||
| | |When Wario has a small space to squeeze through, he can crawl to pass through. He can also jump while crawling. | ||
|align="center | |||
| | |||
|- | |- | ||
|align="center"|[[File:WL4-Throw.png]] | |||
|align="center" | | |align="center"|Throw | ||
| | |If Wario picks up an enemy, rock or [[Chomp ball]], he is able throw it upwards or sidewards. He can also break blocks from a long distance away. | ||
|} | |} | ||
== | ===Wario's reactions=== | ||
{{ | {{quote2|Even the powerful Wario gets into some embarrassing situations in this game! I eat too much and get all chubby, a bee stings my face and makes it swell like a balloon, my body catches fire, and all kinds of other bad things happen to me!!|Wario|[[Wario Land 4]] instruction booklet}} | ||
All of Wario's reactions in ''Wario Land 4'' return from the last two games. Wario has a total of ten different reactions in the game, all having a different purpose to assist Wario in progressing through the level. This can include turning into a bat to reach a high place or catching fire to break [[Bonfire Block|certain blocks]]. | |||
{|width=100% class="wikitable" | |||
{|width=100% | |||
!Image | !Image | ||
!Name | !Name | ||
! | !Description | ||
|- | |- | ||
|align="center" |[[File: | |align="center"|[[File:WL4 Wario1.png]] | ||
|align="center" |[[ | |align="center"|[[Wario]] | ||
| | |Wario in his standard form. He can perform a Smash Attack, ram [[#Enemies and other characters|enemies]] or [[block]]s, crawl to get through narrow spaces, and throw small objects like enemies or rocks. | ||
|- | |- | ||
|align="center" |[[File: | |align="center"|[[File:WL4 Wario2.png]] | ||
|align="center" |[[ | |align="center"|[[Puffy Wario]] | ||
| | |Wario after getting stung by a [[Beezley]], or getting struck by the arrow of a [[Bow Balloon]]. His cheeks puff up in a supposed allergic reaction, and he is able to float continually upwards. When Wario hits a ceiling or gets hurt, he will turn back into his normal form. | ||
|- | |- | ||
|align="center" |[[File: | |align="center"|[[File:WL4 Wario3.png]] | ||
|align="center" |[[ | |align="center"|[[Flaming Wario]] | ||
| | |Wario after catching fire from a [[Kaentsubo]] or [[Pig Head Statue]]. He runs without stopping while the fire spreads, but the player can still make Wario jump by pressing {{button|gba|A}}. He runs in the opposite direction when he hits a wall, and can destroy [[Bonfire Block]]s towards the end of his reaction. Touching water returns Wario to his normal form. | ||
|- | |- | ||
|align="center" |[[File: | |align="center"|[[File:WL4 Wario4.png]] | ||
|align="center" |[[ | |align="center"|[[Flat Wario]] | ||
| | |Wario after being crushed by a [[piston]]. His body becomes very flat and lightweight, and he is able to get into small spaces. If he leaves the ground or jumps, he falls down slowly while swaying from side to side. Wario can turn back into his normal form by entering a [[Decompressor]] or touching water. | ||
|- | |- | ||
|align="center" |[[File: | |align="center"|[[File:WL4 Wario5.png]] | ||
|align="center" |[[ | |align="center"|[[Fat Wario]] | ||
| | |Wario, only heavier and fatter. He can turn into this form by eating [[apple]]s thrown by a [[Ringosukī]]. Wario is invulnerable to enemy attacks, and enemies are killed by only touching them. Wario returns to normal after walking a certain distance or jumping a number of times. | ||
|- | |- | ||
|align="center" |[[File: | |align="center"|[[File:WL4 Wario6.png]] | ||
|align="center" |[[ | |align="center"|[[Bubble Wario]] | ||
| | |Wario after touching an underwater [[bubble]]. He can float upwards until he reaches the surface. This allows him to bypass water currents, allowing the player to access certain areas. | ||
|- | |- | ||
|align="center" |[[File: | |align="center"|[[File:WL4 Wario7.png]] | ||
|align="center" |[[ | |align="center"|[[Snowman Wario]] | ||
| | |Wario after a mound of snow falls on him from a ceiling. If he touches a slope, Wario turns into a snowball and start rolling, breaking any [[Snowman Block]]s that get in his way. | ||
|- | |- | ||
|align="center" |[[File: | |align="center"|[[File:WL4 Wario8.png]] | ||
|align="center" |[[ | |align="center"|[[Frozen Wario]] | ||
| | |Wario after getting hit by a [[Yeti]]'s sneeze. He becomes immobile and start sliding backwards. He can pass through spikes in this form. The ice breaks once Wario hits a wall or object. | ||
|- | |- | ||
|align="center" |[[File: | |align="center"|[[File:WL4 Wario9.png]] | ||
|align="center" |[[ | |align="center"|[[Bouncy Wario]] | ||
| | |Wario when a [[Menhanmā]] strikes him with its hammer. He curls up into a spring and transforms into Bouncy Wario. The player is able to make Wario bounce up high by pressing {{button|gba|A}}. After a while or if Wario bounces up high and hits a ceiling, he will transform back into his normal form. | ||
|- | |- | ||
|align="center" |[[File: | |align="center"|[[File:WL4 Wario10.png]] | ||
|align="center" |[[ | |align="center"|[[Zombie Wario]] | ||
| | |Wario when a [[Skeleton Bird]] regurgitates on him. He moves slow, and jumping above a thin platform causes him to fall through the floor, reaching otherwise inaccessible places. Like ''[[Wario Land 3]]'', he is still able to jump, but not as high as he would normally. Wario can transform back by either touching water or being exposed to bright light. | ||
|- | |- | ||
|align="center" |[[File: | |align="center"|[[File:WL4 Wario11.png]] | ||
|align="center" |[[ | |align="center"|[[Bat Wario]] | ||
| | |Wario after touching a [[Minicula]]. In this form, Wario takes on the appearance of a bat, and is able to fly by repeatedly pressing {{button|gba|A}}. Unlike ''[[Wario Land 3]]'', he cannot transform into an actual vampire. He can return to normal by touching water or being exposed to bright light (similar to Zombie Wario). | ||
| | |||
| | |||
|} | |} | ||
== | ==Objects and obstacles== | ||
{|class="wikitable" | |||
!width=1|Image | |||
!width=100|Name | |||
!Description | |||
{ | |||
! | |||
! | |||
| | |||
! | |||
|- | |- | ||
|align="center"|[[File:WL4-Switch Single Sprite.png]] | |||
|align="center | |align="center"|[[Switch (Wario Land 4)|Switch]] | ||
| | |Stepping on a switch opens a [[vortex]], which transports Wario to and from levels. Switches found within levels reveal a [[bomb]] when pressed, initiating a time limit for Wario to find the vortex and return to the [[Golden Pyramid]]. If Wario runs out of time, he loses coins until he is kicked out of the level. | ||
| | |||
|- | |- | ||
|align="center"|[[File:WL4-Vortex.png]] | |||
|align="center | |align="center"|[[Vortex]] | ||
| | |A vortex opens whenever a switch is pressed. Entering it can transport Wario from the Golden Pyramid to a level, and vice versa. | ||
|- | |- | ||
| | |align="center"|[[File:WL4-Kaeru Sprite.png]] | ||
|align="center"|[[Kaeru Block]] | |||
|Kaeru Blocks can be found either solid or transparent. The form of these blocks swap once Wario presses the switch, granting access to new areas or preventing the player from returning to previous ones. | |||
|- | |- | ||
|align="center"|[[File:WL4-Block Sprite.png]] | |||
|align="center | |align="center"|[[Brown block]] | ||
| | |Regular stone blocks which are found blocking paths or concealing [[Diamond]]s. They can be destroyed using any of [[#Wario's moves|Wario's attacks]]. | ||
|- | |- | ||
|align="center"|[[File:WL4-Blue Block Sprite.png]] | |||
|align="center" | |align="center"|[[Blue block (Wario Land 4)|Blue block]] | ||
| | |More solid blocks which can only be destroyed by using a [[#Wario's moves|Dash Attack]] or [[#Wario's moves|Super Smash Attack]]. | ||
|- | |- | ||
|align="center"|[[File:WL4-Jewel Piece Box.png]] | |||
|align="center | |align="center"|[[Jewel piece]] | ||
| | |Quarter pieces of a jewel which can be found in each level. Their color depends on the [[#Passages and levels|passage]] they are found in. Collecting them all is necessary for gaining access to the passage's [[#Bosses|boss]]. | ||
|- | |- | ||
|align="center"|[[File:WL4-HeartBox.png]] | |||
|align="center | |align="center"|[[Full Health Item]] | ||
| | |An item which fully restores Wario's [[Health Meter|Heart Meter]]. One can be found in every level, with the exception of the [[Golden Passage]]. | ||
|- | |- | ||
|align="center"|[[File:WL4-CDbox.png]] | |||
|align="center | |align="center"|[[CD]] | ||
| | |A colored CD which can be played in the [[Sound Room]] once collected. A total of sixteen CDs can be found in each of the game's main levels, and they are often well-hidden. | ||
|- | |- | ||
| | |align="center"|[[File:WL4-Heart Little Sprites.png]] | ||
|align="center"|[[Heart (item)|Heart]] and [[little heart]] | |||
|Hearts restore Wario’s [[Health Meter|Heart Meter]]. Little hearts are small, red orbs which fill up a meter under Wario’s health. These red orbs can be found by killing enemies. If the meter is full then Wario will regain a heart. If Wario has full health and fills his meter to the max, then the meter will stay full and enemies will drop an additional 100 coin. | |||
|- | |- | ||
|align="center"|[[File:WL4-Coins.png]] | |||
|align="center | |align="center"|[[Coin]]s | ||
| | |The game's point system and currency, which can be spent at the [[Mini-Game Shop]]. The variants are [[Small Coin]]s, [[Bronze Coin]]s, [[Silver Coin]]s and [[Gold Coin]]s, which are progressively worth a higher amount of points. They are found after defeating enemies or by opening boxes. | ||
|- | |- | ||
|align="center"|[[File:WL4-Red Blue Crystals Sprites.png]] | |||
|align="center | |align="center"|[[Red Crystal (Wario Land 4)|Red]] and [[Blue Crystal (Wario Land 4)|Blue Crystal]]s | ||
| | |Red and Blue Crystals are worth ten and one hundred points respectively. Unlike coins, they are found suspended in mid-air and don't disappear after an amount of time. | ||
| | |||
|- | |- | ||
|align="center"|[[File:Diamond WL4 Sprite.png]] | |||
|align="center | |align="center"|[[Diamond]] | ||
| | |Diamonds are often hidden throughout levels, within [[pink area]]s and as a prize from a [[chance wheel]]. They are worth 1,000 points. | ||
|- | |- | ||
|align="center"|[[File:Frog Medal.png]] | |||
|align="center | |align="center"|[[Medal (Wario Land 4)|Medal]] | ||
| | |Medals are the currency used in the [[Item Shop (Wario Land 4)|Item Shop]], and are collected by scoring high in the mini-games at the [[Mini-Game Shop]]. | ||
| | |||
|- | |- | ||
|align="center"|[[File:WL4-ExSwitch Sprite.png]] | |||
|align="center | |align="center"|[[! Switch|"!" Button]]s | ||
| | | "!" Buttons can be pressed to fill transparent blocks and vice versa. Sloped varieties exist which allow Wario to [[roll]]. "!" Buttons are often found in [[pink area]]s as part of puzzle sections. | ||
| | |||
|- | |- | ||
| | |align="center"|[[File:WL4-Ladder Sprites.png]] | ||
|align="center"|[[Ladder]]s | |||
|Wario can climb and descend ladders. Their design varies depending on the passage. | |||
|- | |- | ||
|align="center"|[[File:WL4-Pipe Sprites.png]] | |||
|align="center | |align="center"|[[Warp Pipe|Pipe]]s | ||
| | |Warp Pipes take Wario to a different area. Purple warp pipes lead to [[pink area]]s. | ||
| | |||
|- | |- | ||
|align="center"|[[File:WL4-Rock Sprite.png]] | |||
|align="center | |align="center"|[[Rock]] | ||
| | |Wario can pick up and throw rocks to break [[brown block]]s or defeat enemies. | ||
|- | |- | ||
|align="center"|[[File:WL4-Flower Single Sprite.png]] | |||
|align="center | |align="center"|[[Flower (environmental object)|Flower]] | ||
| | |Only being seen in [[Wildflower Fields]], flowers are pollinated by [[Beezley]]s to produce coins. The value of the coins depend on how ripe the flower's fruit is. | ||
| | |||
|- | |- | ||
|align="center"|[[File:WL4-Bubble Sprite.png]] | |||
|align="center | |align="center"|[[Bubble]] | ||
| | |Wario can swim into a bubble to become [[Bubble Wario]], allowing him to move through water currents. In some areas, bubbles should be avoided as they can divert Wario back to an unwanted area. | ||
|- | |- | ||
|align="center"|[[File:WL4-Togetoge Sprite.png]] | |||
|align="center | |align="center"|[[Togetoge]] | ||
| | |Togetoge resemble a chestnut and are only seen in [[Mystic Lake]]. They fall out of trees and harm Wario on contact. | ||
|- | |- | ||
| | |align="center"|[[File:WL4-Spikes Sprite.png]] | ||
|align="center"|[[Spike (Wario Land series)|Spike]]s | |||
|Spikes are immovable objects which can only be passed through by [[Frozen Wario]] and [[Zombie Wario]]. | |||
|- | |- | ||
|align="center"|[[File:WL4-Piston Sprite.png]] | |||
|align="center | |align="center"|[[Piston]] | ||
| | |Pistons turn Wario into [[Flat Wario]] if they hit him. A [[decompressor]] reverses this effect. | ||
|- | |- | ||
|align="center"|[[File:WL4-Bonfire Sprite Alt.png]] | |||
|align="center | |align="center"|[[Bonfire Block]] | ||
| | |Bonfire Blocks are unbreakable unless Wario is fully engulfed in flames, which happens a short period of time after gaining the [[Flaming Wario]] reaction. | ||
|- | |- | ||
| | |align="center"|[[File:WL4-Snowman Block.png]] | ||
|align="center"|[[Snowman Block]] | |||
|These are blocks which can only be broken by [[Snowman Wario]], after he has fallen down a slope and gained some speed while rolling. | |||
|- | |- | ||
|align="center"|[[File:WL4-Icicle Sprite.png]] | |||
|align="center"|[[Icicle]] | |||
|Icicles continually form and fall from the ceiling. They can be safely passed through while rolling as [[Snowman Wario]] or as [[Frozen Wario]]. | |||
|- | |- | ||
|align="center" |[[File:WL4 | |align="center"|[[File:WL4-Pinball Sprite.png]] [[File:WL4-Pinball Tulip Sprite.png]] | ||
|align="center" |[[ | |align="center"|[[Chomp ball]] and [[pinball tulip]] | ||
|In [[Pinball Zone]], Wario must carry and throw each chomp ball into a pinball tulip to open the door to the next room. | |||
|- | |- | ||
|align="center" |[[File:WL4 | |align="center"|[[File:WL4-Pinball Digital Sprite.png]] | ||
|align="center" |[[ | |align="center"|[[Pinball digital counter]] | ||
| | |This counts how many [[pinball tulip]]s remain in a room. It disappears once it reaches zero, releasing a 500 coin and opening up the door to the next room. | ||
|- | |- | ||
|align="center" |[[File:WL4 | |align="center"|[[File:WL4-Electric Sparks Sprite.png]] | ||
|align="center" |[[ | |align="center"|[[Electric spark]] | ||
| | |These continuously emit sparks which travel across the ground, harming Wario. | ||
|- | |- | ||
|align="center" |[[File: | |align="center"|[[File:Triangle block.png]] | ||
|align="center" |[[ | |align="center"|[[Triangle block]] | ||
| | |An object in [[Toy Block Tower]] which must be carried to [[Toy Block Door]]s, filling a slot to open a door. | ||
|- | |- | ||
|align="center" |[[File: | |align="center"|[[File:Rolling Toy Block Sprite.png]] | ||
|align="center" |[[ | |align="center"|[[Round red rock]] | ||
|Wario | |Wario can use round red rocks to reach higher areas. They can be rolled in either direction using an attack. | ||
|- | |- | ||
|align="center" |[[File:WL4 | |align="center"|[[File:WL4-Chance Sprites.png]] | ||
|align="center" |[[ | |align="center"|[[Chance wheel]] and Goal Block | ||
| | |In [[The Big Board]], chance wheels spin and can cause certain events depending on the number hit. Such events include switching blocks, causing lightning to strike or making enemies appear. | ||
|- | |- | ||
|align="center" |[[File:WL4 | |align="center"|[[File:WL4-Button Sprites.png]] | ||
|align="center" |[[ | |align="center"|[[Button (Wario Land 4)|Button]]s | ||
| | |These are found at the end of rows of dominos in [[Domino Row]]. If Wario hits the button before the dominos fall, it will break nearby [[domino block]]s. | ||
|- | |- | ||
|align="center" |[[File:WL4 | |align="center"|[[File:WL4-Domino block.png]] | ||
|align="center" |[[ | |align="center"|[[Domino block]]s | ||
|Wario | |These conceal doors or alternate paths, and can only be broken if Wario hits the [[Button (Wario Land 4)|button]] before the row of dominos does. | ||
|- | |- | ||
|align="center" |[[File:WL4 | |align="center"|[[File:WL4-MagicCarpet.png]] | ||
|align="center" |[[ | |align="center"|[[Magic carpet|Flying carpet]] | ||
|Wario | |Wario can ride flying carpets to gain height and descend slowly. | ||
|- | |- | ||
|align="center" |[[File:WL4 | |align="center"|[[File:WL4-Tube Sprites.png]] | ||
|align="center" |[[ | |align="center"|[[Togemasuku|Tube]] | ||
| | |Tubes are only seen in a single room in [[Arabian Night]]. Depending on which tube Wario enters, [[Beezley]]s or [[Minicula]]s will appear. | ||
|- | |- | ||
|align="center" |[[File:WL4 | |align="center"|[[File:WL4-Chandelier Sprite.png]] | ||
|align="center" |[[ | |align="center"|[[Chandelier]] | ||
| | |In the [[Golden Passage]], certain chandeliers will sway and fall when Wario approaches. They then burst into blue flames and transform Wario into [[Flaming Wario]]. | ||
|} | |} | ||
== | ==Passages and levels== | ||
{{ | {{quote2|My game unfolds inside a [[Golden Pyramid|pyramid]] made up of six passages!|Wario|Wario Land 4 instruction booklet}} | ||
Each of the four main passages have four levels, with a [[#Bosses|boss]] at the end of the passage. The [[Entry Passage]] and the [[Golden Pyramid]] have only one level before the boss. | |||
{|width= | {|class="wikitable" | ||
!width="110px"|Passage | |||
!width="130px"|Level | |||
!Description | |||
!width="90px"|Boss | |||
|- | |- | ||
|align="center"style="background:#D0A0D8"|[[File:WL4-Entry Passage Symbol Artwork.png|70px]]<br>'''[[Entry Passage]]''' | |||
|align="center"style="background:#D0A0D8"|[[File:WL4 Hall of Hieroglyphs Level Icon.png]]<br>[[Hall of Hieroglyphs]] | |||
|style="background:#D0A0D8"|A tutorial level which shows hieroglyphs of the [[shop owner]] on the walls. They indicate actions and animated button commands for the player to learn, such entering a [[Warp Pipe|pipe]] and attacking to break [[block]]s. | |||
|align="center"style="background:#D0A0D8"|[[File:WL4 Spoiled Rotten Level Icon.png]]<br>[[Spoiled Rotten]] | |||
|- | |- | ||
|align="center" | | |align="center"rowspan="4"style="background:#B8E8B0"|[[File:WL4-Emerald Passage Symbol Artwork.png|70px]]<br>'''[[Emerald Passage]]''' | ||
| | |align="center"style="background:#B8E8B0"|[[File:WL4 Palm Tree Paradise Level Icon.png]]<br>[[Palm Tree Paradise]] | ||
|style="background:#B8E8B0"|A straightforward level with few alternate paths. It contains many [[block]]s, basic enemies, and introduces the [[Fat Wario]] transformation. | |||
|align="center"rowspan="4"style="background:#B8E8B0"|[[File:WL4 Cractus Level Icon.png]]<br>[[Cractus]] | |||
|- | |- | ||
|align="center" | | |align="center"style="background:#B8E8B0"|[[File:WL4 Wildflower Fields Level Icon.png]]<br>[[Wildflower Fields]] | ||
| | |style="background:#B8E8B0"|Wildflower Fields often utilizes the [[Puffy Wario]] transformation, allowing the player to access high areas. There are some underground locations, water currents, and a sub-area where Wario climbs inside a hollow sunflower. | ||
|- | |- | ||
|align="center" | | |align="center"style="background:#B8E8B0"|[[File:WL4 Mystic Lake Level Icon.png]]<br>[[Mystic Lake]] | ||
| | |style="background:#B8E8B0"|Much of the Mystic Lake takes place underwater. The [[Bouncy Wario|Bouncy]] and [[Bubble Wario]] transformations are introduced. [[Togenobi]] is unique to this level, which the player must pass to reach the [[Keyzer]]. The remainder of the level takes place above ground. | ||
|- | |- | ||
|align="center" | | |align="center"style="background:#B8E8B0"|[[File:WL4 Monsoon Jungle Level Icon.png]]<br>[[Monsoon Jungle]] | ||
| | |style="background:#B8E8B0"|The Monsoon Jungle contains many bodies of water and large areas with vines. On the way back to the [[vortex]], the player progresses through an underground area with winding tree roots. | ||
|- | |- | ||
|align="center" | | |align="center"rowspan=4 style="background:#E08080"|[[File:WL4-Ruby Passage Symbol Artwork.png|70px]]<br>'''[[Ruby Passage]]''' | ||
| | |align="center"style="background:#E08080"|[[File:WL4 The Curious Factory Level Icon.png]]<br>[[The Curious Factory]] | ||
|style="background:#E08080"|A level which takes place in an industrial setting, with moving machinery, conveyor belts and [[piston]]s which transform Wario into [[Flat Wario]]. The [[Flaming Wario]] transformation is also used. | |||
|align="center"rowspan=4 style="background:#E08080"|[[File:WL4 Cuckoo Condor Level Icon.png]]<br>[[Cuckoo Condor]] | |||
|- | |- | ||
|align="center" | | |align="center"style="background:#E08080"|[[File:WL4 The Toxic Landfill Level Icon.png]]<br>[[The Toxic Landfill]] | ||
| | |style="background:#E08080"|A level abundant in murky water and blocks resembling rubbish. The [[Puffy Wario]] and [[Fat Wario]] transformations are used. | ||
|- | |- | ||
|align="center" | | |align="center"style="background:#E08080"|[[File:WL4 40 Below Fridge Level Icon.png]]<br>[[40 Below Fridge]] | ||
| | |style="background:#E08080"|An icy level which appears to take place both inside and outside of a fridge, with [[icicle]]s and falling snow being a common obstacle. The [[Snowman Wario]] and [[Frozen Wario]] transformations are introduced. | ||
|- | |- | ||
|align="center" | | |align="center"style="background:#E08080"|[[File:WL4 Pinball Zone Level Icon.png]]<br>[[Pinball Zone]] | ||
| | |style="background:#E08080"|Much of this level is stylized like a pinball machine, with flashing lights and slopes. There are several rooms where [[Chomp ball]]s must be thrown into [[pinball tulip]]s in order to progress. | ||
|- | |- | ||
|align="center" | | |align="center"rowspan=4 style="background:#F8F098"|[[File:Wl4-Topaz Passage Symbol Artwork.png|70px]]<br>'''[[Topaz Passage]]''' | ||
|align="center"style="background:#F8F098"| | |||
| | [[File:WL4 Toy Block Tower Level Icon.png]]<br>[[Toy Block Tower]] | ||
|style="background:#F8F098"|This level takes place in a toy castle. The player must fit [[triangle block]]s in doors to make progress. The [[Flaming Wario]] transformation is also used. An underground area is seen on the way back to the [[vortex]]. | |||
= | |align="center"rowspan=4 style="background:#F8F098"|[[File:WL4 Aerodent Level Icon.png]]<br>[[Aerodent]] | ||
|- | |- | ||
|align="center" |[[File:WL4 | |align="center"style="background:#F8F098"|[[File:WL4 The Big Board Level Icon.png]]<br>[[The Big Board]] | ||
| | |style="background:#F8F098"|The Big Board appears to take place in a toy village. It is the only level to feature the [[chance wheel]], which manipulates the items and transformations used to make progress. The final chance wheel is a different color and releases the [[Keyzer]]. | ||
|- | |- | ||
|align="center" |[[File:WL4 | |align="center"style="background:#F8F098"|[[File:WL4 Doodle Woods Level Icon.png]]<br>[[Doodle Woods]] | ||
| | |style="background:#F8F098"|Doodle Woods features references to drawing, such as pencil obstacles and [[Hoggus]], whose sketches transform into enemies. Some drawings of enemies on the walls also come to life. The level transitions from indoors to outdoors. | ||
|- | |- | ||
|align="center" |[[File:WL4 | |align="center"style="background:#F8F098"|[[File:WL4 Domino Row Level Icon.png]]<br>[[Domino Row]] | ||
| | |style="background:#F8F098"|This level features trails of dominoes which fall once Wario walks past. The player must then race the dominoes to a [[Button (Wario Land 4)|button]], potentially opening up alternate paths. | ||
|- | |- | ||
|align="center" |[[File: | |align="center"rowspan=4 style="background:#C8D0F8"|[[File:Wl4-Sapphire Passage Symbol Artwork.png|70px]]<br>'''[[Sapphire Passage]]''' | ||
|align="center" | | |align="center"style="background:#C8D0F8"|[[File:WL4 Crescent Moon Village Level Icon.png]]<br>[[Crescent Moon Village]] | ||
| | |style="background:#C8D0F8"|This level takes place in a moonlit village and features several horror-themed enemies. The [[Zombie Wario]] transformation is introduced. A [[Ghost (Wario Land 4)|ghost]] attempts to steal [[coin]]s and the [[Keyzer]] from Wario. | ||
|align="center"rowspan=4 style="background:#C8D0F8"|[[File:WL4 Catbat Level Icon.png]]<br>[[Catbat]] | |||
|- | |- | ||
|align="center" |[[File:WL4 | |align="center"style="background:#C8D0F8"|[[File:WL4 Arabian Night Level Icon.png]]<br>[[Arabian Night]] | ||
| | |style="background:#C8D0F8"|Arabian Night features [[magic carpet|flying carpet]]s used to reach high areas. The level transitions between indoor and outdoor locations, as well as an underground body of water on the way back to the [[vortex]]. [[Mayubird]]s also feature prominently. | ||
| | |||
|- | |- | ||
|align="center" |[[File:WL4 | |align="center"style="background:#C8D0F8"|[[File:WL4 Fiery Cavern Level Icon.png]]<br>[[Fiery Cavern]] | ||
| | |style="background:#C8D0F8"|An underground area with many pools of lava that rise like geysers. Uniquely, hitting the [[Switch (Wario Land 4)|switch]] here freezes over the remainder of the level. | ||
|- | |- | ||
|align="center" |[[File:WL4 | |align="center"style="background:#C8D0F8"|[[File:WL4 Hotel Horror Level Icon.png]]<br>[[Hotel Horror]] | ||
| | |style="background:#C8D0F8"|Hotel Horror features long corridors with many rooms across four floors. There is also a staircase on the outside of the building. Certain rooms in the hotel are locked until the player hits the [[Switch (Wario Land 4)|switch]]. | ||
|- | |- | ||
|align="center" |[[File:WL4- | |align="center"style="background:#F8F8C0"|[[File:WL4-Golden Diva Symbol Artwork.png|70px]]<br>'''[[Golden Pyramid]]''' | ||
|align="center" | | |align="center"style="background:#F8F8C0"|[[File:WL4 Golden Passage Level Icon.png]]<br>[[Golden Passage]] | ||
| | |style="background:#F8F8C0"|The final level, and the only one where the player presses the [[Switch (Wario Land 4)|switch]] upon entering the level in every [[#Game mode|game mode]]. It consists of an overworld and an underground area where a water current pulls Wario back to the beginning. | ||
|align="center"style="background:#F8F8C0"|[[File:WL4 Golden Diva Level Icon.png]]<br>[[Golden Diva]] | |||
|} | |} | ||
== | ==Other locations== | ||
===Pink areas=== | |||
[[File:WL4-Puzzle Room.png|frame|The first [[pink area]], seen in [[Palm Tree Paradise]].]] | |||
There are two [[pink area]]s in each level (excluding the [[Entry Passage]] and [[Golden Passage]]). Each one is found in a [[Warp Pipe]], and contains either a [[diamond]] worth 1,000 points, or an amount of [[Coin (Wario Land 4)|coin]]s that are worth roughly 1,000 points when combined. Wario must solve some sort of puzzle to obtain these points, usually using [[Mad Scienstein|Arewo Shitain-hakase]] as an object to throw. Completing these rooms is optional and not necessary to complete the level or the game, but they provide an opportunity for the player to earn a few extra points. Likewise, the player never sees a jewel piece or a Keyzer in a pink area, but [[Full Health Item]]s can be seen in some rooms. | |||
===Sound Room=== | |||
| | {{quote2|When you find the [[CD]]s thrown around the stages, you'll be able to hear some weird music! Collect 'em all and maybe people will like you!|[[Wario]]|[[Wario Land 4]] instruction booklet}} | ||
! | In every level, except for the Entry Passage and the Golden Pyramid, there is a hidden [[CD]] that can be collected and played in the [[Sound Room]], each containing a different soundtrack. There is a total of sixteen CDs to collect. A [[Karaoke (Medamayaki)|Karaoke]] can also be unlocked, which is a full song with Japanese vocals. It can be unlocked by getting a gold crown (10,000 points or more) in each of the eighteen levels. The Karaoke may also be temporarily unlocked by pressing Start, Select, Up, L, and R together at the same time, while in the Sound Room. | ||
[[File:Soundroom.png|frame|right|The completed [[Sound Room]].]] | |||
! | |||
| | |||
|The | |||
===[[ | ===Mini-Game Shop=== | ||
{{quote2|Have some fun, why don’t cha! Play [[Minigame|mini-games]]!|Wario|[[Wario Land 4]] instruction booklet}} | |||
Prior to the boss room of each passage, there is a [[Mini-Game Shop]] where Wario can play one of three [[Minigame|Mini-Game]]s. If Wario receives a certain amount of points in each of the Mini-Games, he can earn [[medal (Wario Land 4)|medal]]s which can be spent at the [[#Item Shop|Item Shop]] for items to assist him in defeating the boss of that passage. Three different colored [[Game Bot]]s run the shop, each hosting a different game. Each Mini-Game costs 5,000 points to play (discounted to 2,000 points until Wario completes the [[Entry Passage]]). | |||
The three Mini-Games are: | |||
*[[The Wario Hop]] | |||
*[[Wario's Homerun Derby]] | |||
*[[Wario's Roulette]] | |||
Purchasing items from the Item Shop costs more [[medal (Wario Land 4)|medal]]s on more difficult modes. On S-Hard mode, [[Wario's Homerun Derby]] uses a cheerleader who throws very difficult pitches, compared to the lower level modes. | |||
===[[ | ===Item Shop=== | ||
{{quote2|You thought you could just FIND items? The world doesn't work that way, kid!!|Wario|[[Wario Land 4]] instruction booklet}} | |||
[[File:WL4 Item Shop Logo.png|frame]] | |||
The [[Item Shop (Wario Land 4)|Item Shop]] is a place where Wario can spend his [[medal (Wario Land 4)|medal]]s, in exchange for items which assist him in defeating a [[#Bosses|boss]] by dealing damage before the start of the battle. The [[shop owner]] is a form of the [[Kuro Neko|black cat]]. | |||
{|width=100% | A table of the nine items and their descriptions is shown below. | ||
{|width=100% class="wikitable" | |||
!Image | !Image | ||
!Name | !Name | ||
!Description | !Description | ||
|- | |- | ||
|align="center" |[[File: | |align="center"|[[File:Apple Bomb.png]] | ||
|align="center" |[[ | |align="center"|[[Apple Bomb]] | ||
| | |An apple with colored stripes which disguises a [[bomb]]. When purchased, the shop owner drags the apple to the boss room, raises it to reveal the bomb, and throws it at the boss to inflict a small amount of damage. | ||
|- | |- | ||
|align="center" |[[File:WL4- | |align="center"|[[File:WL4-Blast Cannon.png]] | ||
|align="center" |[[ | |align="center"|[[Blast Cannon]] | ||
| | |When purchased, this is wheeled to the boss room by the shop owner who then snaps their fingers. A bomb is blasted as a projectile out of the cannon, hitting the boss to inflict a small amount of damage. | ||
|- | |- | ||
|align="center" |[[File: | |align="center"|[[File:Vizorman.png]] | ||
|align="center" |[[ | |align="center"|[[Vizorman]] | ||
| | |A seemingly inanimate being, the Vizorman is dragged by the shop owner to the boss room. A laser is then projected from the vizor and hits the boss, dealing a small amount of damage. | ||
|- | |- | ||
|align="center" |[[File:WL4- | |align="center"|[[File:WL4-Bugle.png]] | ||
|align="center" |[[ | |align="center"|[[Bugle]] | ||
| | |This is carried to the boss room by the shop owner, who then uses it to play a tune. Flying music notes form, hitting the boss and inflicting an average amount of damage. | ||
|- | |- | ||
|align="center" |[[File: | |align="center"|[[File:Black Dog.png]] | ||
|align="center" |[[ | |align="center"|[[Black Dog]] | ||
| | |When purchased, the shop owner follows Wario to the boss room, where they transform into the Black Dog. The dog bites the boss several times, inflicting a large amount of damage. | ||
|- | |- | ||
|align="center"|[[File:WL4-LargeLipsSprite.png]] | |||
|align="center"|[[Large Lips]] | |||
|When purchased, the shop owner follows Wario to the boss room. They then transforms into the Large Lips, which violently kisses the boss and deals a large amount of damage. | |||
|- | |- | ||
|align="center" |[[File:WL4- | |align="center"|[[File:WL4-BigFistSprite.png]] | ||
|align="center" |[[ | |align="center"|[[Big Fist]] | ||
| | |When purchased, the shop owner follows Wario to the boss room. They then transform into the Big Fist which throws a powerful punch at the boss, dealing a large amount of damage. | ||
|- | |- | ||
|align="center" |[[File:WL4- | |align="center"|[[File:WL4-BlackDragon.png]] | ||
|align="center" |[[ | |align="center"|[[Black Dragon]] | ||
| | |When purchased, the shop owner follows Wario to the boss room. There, they transform into the Black Dragon, which breathes fire on the boss to deal a large amount of damage. | ||
|- | |- | ||
|align="center" |[[File:WL4- | |align="center"|[[File:WL4-Smile.png]] | ||
|align="center" |[[ | |align="center"|[[Smile]] | ||
|The | |The Smile is the only item that is free. However, selecting it only causes the shop owner to smile and make a sound effect. This may be a reference to the Japanese McDonald's menu which includes a "Smile" for free.<ref>https://blogs.wsj.com/japanrealtime/2015/05/21/despite-hard-times-mcdonalds-japan-plans-to-smile-again/</ref> | ||
|} | |} | ||
The more expensive the item, the more damage inflicted on the boss. The price of the items also varies on the [[#Game mode|game mode]], e.g. an item in Hard mode is more expensive than the same item in Normal mode. | |||
== | ==Allies== | ||
Within the [[Golden Pyramid]], there are a few characters who assist Wario. | |||
{|width=100% class="wikitable" | |||
{|width=100% | |||
!Image | !Image | ||
!Name | !width="100px"|Name | ||
!Description | !Description | ||
|- | |- | ||
|align="center" |[[File: | |align="center"|[[File:Wario Pose.jpg|100px]] | ||
|align="center"|[[Wario]] | |||
|The game's protagonist and the only playable character in the game. [[Wario]] finds out about the pyramid while reading a newspaper article. He drives off across the desert and through a jungle to reach the pyramid, soon falling down a precipice and getting trapped inside. | |||
|align="center" |[[ | |||
|The | |||
|- | |- | ||
|align="center" |[[File: | |align="center"|[[File:Black Cat Artwork Wario Land 4.png|90px]] | ||
|align="center" |[[ | |align="center"|[[Kuro Neko]] | ||
| | |After seeing a newspaper article, Kuro Neko decides to take a trip to the pyramid herself. The cat seems to already know her way around the pyramid, as she leads Wario to the main room. | ||
|- | |- | ||
|align="center" |[[File:WL4 | |align="center"|[[File:Keyzer WL4 artwork.jpg|100px]] | ||
|align="center" |[[ | |align="center"|[[Keyzer]] | ||
| | |[[Keyzer]]s unlock the door to the next level in a passage and disappear as soon as they do so. Eighteen Keyzers are found in the game, one for every level. The [[Ghost (Wario Land 4)|ghost]] tries to steal Keyzer off Wario in the level [[Crescent Moon Village]]. | ||
|- | |- | ||
|align="center"|[[File:Dr Arewo Stein Artwork Wario Land 4.png|90px]] | |||
|align="center"|[[Mad Scienstein|Arewo Shitain-hakase]] | |||
|[[Mad Scienstein|Arewo Shitain-hakase]] is the archaeologist that was exploring the pyramid before Wario came and raided it. He also appears in a newspaper in the opening cutscene. Wario is able to use him as an object to throw in a [[pink area]]. | |||
|- | |- | ||
|align="center" |[[File:WL4- | |align="center"|[[File:WL4-Item Shopkeeper Box Cover.png|100px]] | ||
|align="center" |[[ | |align="center"|[[Shop owner]] | ||
|The | |The shop owner of the [[Item Shop (Wario Land 4)|Item Shop]] is found in the corridor before the boss. They sell Wario items that assist in defeating the boss of that passage. [[Medal (Wario Land 4)|Medal]]s are used as currency, which are earned by achieving a good score in the [[Mini-Game Shop]]. The shop owner is actually a form of the black cat, as they transform in the final battle against the Golden Diva. | ||
|- | |- | ||
|align="center" |[[File: | |align="center"|[[File:Princess Shokora Artwork - Wario Land 4.png|90px]] | ||
|align="center" |[[ | |align="center"|[[Princess Shokora]] | ||
| | |After the [[Golden Diva]] is defeated, Wario and [[Kuro Neko]] escape the pyramid before it crumbles on top of them. Outside, the treasures that Wario collected are suddenly drawn to the cat, causing her to transform into [[Princess Shokora]]. She kisses Wario to show her thanks, and is lifted into the sky by four angels. | ||
|} | |} | ||
== | ==Bosses== | ||
Each of the six bosses guard a different passage in the pyramid. [[Item Shop (Wario Land 4)|Items]] can be purchased with [[medal (Wario Land 4)|medal]]s to weaken bosses at the battle's beginning. Defeating Spoiled Rotten unlocks the four main passages, and clearing a main passage boss stores its [[legendary treasure]] and collected [[treasure chest]]s into the Golden Pyramid. | |||
{|width=100% class="wikitable" | |||
{|width=100% | |||
!Image | !Image | ||
!Name | !Name | ||
!Treasure | |||
!Description | !Description | ||
|- | |- | ||
|align="center" |[[File: | |align="center"|[[File:Spoiled Rotten Wario Land 4.png]] | ||
|align="center" |[[ | |align="center"|[[Spoiled Rotten]] | ||
|The | |align="center"|''None'' | ||
|The boss of the [[Entry Passage]] is a purple, eggplant-like creature. Accompanying it are two [[Eggplant Warrior]]s who behave identically to [[Totsumen]] and can be defeated the same way. After Spoiled Rotten is damaged a few times, it bears teeth that harm Wario on contact. Defeating Spoiled Rotten grants access to the four main passages. | |||
|- | |- | ||
|align="center" |[[File: | |align="center"|[[File:Cractus Wario Land 4.png]] | ||
|align="center" |[[ | |align="center"|[[Cractus]] | ||
| | |align="center"|[[File:WL4-The Crown.png]] | ||
|The boss of the [[Emerald Passage]] is a venus flytrap which can transform Wario into [[Zombie Wario]] with its drool. After taking a certain amount of damage, Cractus stands upright, making it necessary for Wario to climb a vine to deal further damage. Defeating Cractus restores the crown to the pyramid. | |||
|- | |- | ||
|align="center" |[[File:WL4 | |align="center"|[[File:WL4 Cuckoo Condor Sprites.png]] | ||
|align="center" |[[ | |align="center"|[[Cuckoo Condor]] | ||
|[[ | |align="center"|[[File:WL4-The Earrings.png]] | ||
|The boss of the [[Ruby Passage]] is a large cuckoo clock who uses a claw to grab Wario. It can attack with cogs and electricity. After taking several hits, the cuckoo clock falls apart and reveals a vulture underneath. It lays [[Egg (Wario Land 4)|egg]]s that can be thrown to deal damage. Defeating Cuckoo Condor restores the earrings to the pyramid. | |||
|- | |- | ||
|align="center" |[[File: | |align="center"|[[File:Aerodent WL4.png]] | ||
|align="center" |[[ | |align="center"|[[Aerodent]] | ||
|[[ | |align="center"|[[File:WL4-The Necklace.png]] | ||
|The boss of the [[Topaz Passage]] is a rat within a large inflatable teddy bear. It throws down [[Pin enemy|pin enemies]] which Wario can throw to deflate the bear. This exposes the rodent, giving Wario a chance to damage it. After taking several hits, the teddy drops flames which transform him into [[Flaming Wario]]. Defeating Aerodent restores the necklace to the pyramid. | |||
|- | |- | ||
|align="center" |[[File:WL4 | |align="center"|[[File:Catbat WL4.png]] | ||
|align="center" |[[ | |align="center"|[[Catbat]] | ||
|The | |align="center"|[[File:WL4-The Bracelets.png]] | ||
|The boss of the [[Sapphire Passage]] is a large ghost-like cat with a bat on his head. There is a pool of water below the flooring where a [[mechanical fish]] swims back and forth. Catbat creates waves which must be jumped over, and spits out orange and purple [[Mine (enemy)|mines]] which either damage Wario or turn him into [[Puffy Wario]], respectively. Defeating Catbat restores the bracelets to the pyramid. | |||
|- | |- | ||
|align="center" |[[File: | |align="center"|[[File:GoldenDivaWL4.png]] | ||
|align="center" |[[ | |align="center"|[[Golden Diva]] | ||
| | |align="center"|''All'' | ||
|The game's final boss and the ruler of the [[Golden Pyramid]]. She wears all four pieces of the [[legendary treasure]] collected from previous bosses. The Golden Diva wears many kabuki masks which fall off each time she takes damage. She casts several different enemies into the battle. Wario can use these enemies to inflict damage on the Golden Diva. They are the [[green enemy]], the [[Teddy Bear]], the [[black egg]], and the [[Hammer (Wario Land 4)|hammer]]. When Diva's true face is revealed, she starts destroying the ground. On the last point of health, only her [[lips]] remain. | |||
|} | |} | ||
== | ==Enemies and other characters== | ||
{{quote2|Taking care of most of my enemies is easier than taking candy from babies – which I highly recommend, by the way!!|[[Wario]]|[[Wario Land 4]] instruction booklet}} | |||
{|width=100% | While some enemies can be found in more than one passage, many are only unique to a certain passage and their characteristics usually go by the passage theme. Many enemies drop an assigned value of [[Coin (Wario Land 4)|coin]]s as well as a [[little heart]] when defeated. If both Wario's Heart Meter and Heart Gauge are full, then little hearts will be replaced by Silver Coins worth 100 points. The quantity and type of enemies depend on the [[#Game mode|game mode]], as harder difficulties will generally have more enemies, and easier enemies will be replaced by more difficult ones. Most enemies can be defeated using some of [[#Wario's moves|Wario's moves]], such as a regular "Attack" or "Smash Attack". | ||
| | *An asterisk (*) next to the enemy name signifies that they transform Wario in some way, and don't cause Wario to lose health. | ||
*''N/A'' under "Coins dropped" signifies that the enemy cannot be defeated. | |||
!Name | ===Common enemies=== | ||
! | The following enemies may be found in multiple passages. No enemy appears in all six passages. | ||
{|width=100% class="wikitable" | |||
!width="71"|Image | |||
!width="85px"|Name | |||
!width="60px"|Coins dropped | |||
!Description | !Description | ||
!colspan="6"|Passages<br>(across all game modes) | |||
|- | |- | ||
|align="center" |[[File: | |align="center"|[[File:WL4 Purple Marumen Sprite.png]] | ||
|align="center" |[[ | |align="center"rowspan="2"|[[Marumen]] | ||
|align="center" | | |align="center"|[[File:WL4 Sprite - Small Coin.png|link=Coin (Wario Land 4)]] [[File:WL4 Sprite - Small Coin.png|link=Coin (Wario Land 4)]]<br>20 points | ||
| | |rowspan="2"|A harmless walking enemy which can be found in most passages. Marumen change from purple to red and back again whenever Wario Smash Attacks near one. A single Marumen can be found in [[Hotel Horror]] only on Hard and S-Hard modes. | ||
|rowspan="2"|[[File:WL4-Entry Passage Symbol Artwork.png|28px|link=Entry Passage]] | |||
|rowspan="2"|[[File:WL4-Emerald Passage Symbol Artwork.png|28px|link=Emerald Passage]] | |||
|rowspan="2"|[[File:WL4-Ruby Passage Symbol Artwork.png|28px|link=Ruby Passage]] | |||
|rowspan="2"| | |||
|rowspan="2"|[[File:Wl4-Sapphire Passage Symbol Artwork.png|28px|link=Sapphire Passage]] | |||
|rowspan="2"| | |||
|- | |- | ||
|align="center" |[[File: | |align="center"|[[File:WL4 Sprite - Marumen Red.png]] | ||
|align="center"|[[File:WL4 Sprite - Bronze Coin.png|link=Coin (Wario Land 4)]]<br>50 points | |||
|align="center" |[[File:WL4- | |||
| | |||
|- | |- | ||
|align="center" |[[File: | |align="center"|[[File:SpearMashWarioLand4.png]] | ||
|align="center" |[[ | |align="center"rowspan="3"|[[Spear-Mask]] | ||
|align="center" |[[File:WL4- | |align="center"|[[File:WL4 Sprite - Small Coin.png|link=Coin (Wario Land 4)]]<br>10 points | ||
| | |rowspan="3"|A common enemy wielding a spear as a weapon. They are found as yellow, blue, or red varieties, and change between these colors whenever Wario Smash Attacks nearby. The yellow Spear-Masks are slow moving, the blue Spear-Masks spin their spear before they start to walk or when they change direction, and the red Spear-Masks charge at Wario whenever they catch sight of him. | ||
|rowspan="3"|[[File:WL4-Entry Passage Symbol Artwork.png|28px|link=Entry Passage]] | |||
|rowspan="3"|[[File:WL4-Emerald Passage Symbol Artwork.png|28px|link=Emerald Passage]] | |||
|rowspan="3"|[[File:WL4-Ruby Passage Symbol Artwork.png|28px|link=Ruby Passage]] | |||
|rowspan="3"| | |||
|rowspan="3"| | |||
|rowspan="3"| | |||
|- | |- | ||
|align="center" |[[File: | |align="center"|[[File:TornadoMaskWarioLand4.png]] | ||
|align="center"|[[File:WL4 Sprite - Bronze Coin.png|link=Coin (Wario Land 4)]]<br>50 points | |||
|align="center" |[[File:WL4- | |||
| | |||
|- | |- | ||
|align="center" |[[File: | |align="center"|[[File:AngrySpearMaskManWarioLand4.png]] | ||
|align="center"|[[File:WL4 Sprite - Silver Coin.png|link=Coin (Wario Land 4)]]<br>100 points | |||
|align="center" |[[File:WL4- | |||
| | |||
|- | |- | ||
|align="center" |[[File: | |align="center"|[[File:SpearHeadWarioLand4.png]] | ||
|align="center" |[[ | |align="center"|[[Totsumen]] | ||
|align="center" | | |align="center"|[[File:WL4 Sprite - Bronze Coin.png|link=Coin (Wario Land 4)]]<br>50 points | ||
|Totsumen charges at Wario at high speed when he comes near it. If its attack misses and it hits a wall or object, it flips over and can be easily defeated. Totsumen behave identically to [[Eggplant Warrior]]s. | |||
| | | | ||
|[[File:WL4-Emerald Passage Symbol Artwork.png|28px|link=Emerald Passage]] | |||
|[[File:WL4-Ruby Passage Symbol Artwork.png|28px|link=Ruby Passage]] | |||
|[[File:Wl4-Topaz Passage Symbol Artwork.png|28px|link=Topaz Passage]] | |||
|[[File:Wl4-Sapphire Passage Symbol Artwork.png|28px|link=Sapphire Passage]] | |||
| | |||
|- | |- | ||
|align="center"|[[File:Harimen WL4.png]] | |||
|align="center"|[[Spiky]] | |||
|align="center"|[[File:WL4 Sprite - Silver Coin.png|link=Coin (Wario Land 4)]]<br>100 points | |||
|An enemy that is protected by a pink spiked shell. A Smash Attack causes it to flip over, exposing its vulnerable underside. | |||
| | |||
|[[File:WL4-Emerald Passage Symbol Artwork.png|28px|link=Emerald Passage]] | |||
|[[File:WL4-Ruby Passage Symbol Artwork.png|28px|link=Ruby Passage]] | |||
|[[File:Wl4-Topaz Passage Symbol Artwork.png|28px|link=Topaz Passage]] | |||
|[[File:Wl4-Sapphire Passage Symbol Artwork.png|28px|link=Sapphire Passage]] | |||
| | |||
|- | |- | ||
|align="center" |[[File: | |align="center"|[[File:Harimenzetto WL4.png]] | ||
|align="center" |[[ | |align="center"|[[Harimen Zetto]] | ||
|[[ | |align="center"|[[File:WL4 Sprite - Silver Coin.png|link=Coin (Wario Land 4)]] [[File:WL4 Sprite - Silver Coin.png|link=Coin (Wario Land 4)]] [[File:WL4 Sprite - Silver Coin.png|link=Coin (Wario Land 4)]]<br>300 points | ||
| | |A stronger version of a Spiky with a black shell. A Super Smash Attack or jumping while [[Fat Wario]] is required to flip it over. | ||
| | |||
|[[File:WL4-Emerald Passage Symbol Artwork.png|28px|link=Emerald Passage]] | |||
|[[File:WL4-Ruby Passage Symbol Artwork.png|28px|link=Ruby Passage]] | |||
|[[File:Wl4-Topaz Passage Symbol Artwork.png|28px|link=Topaz Passage]] | |||
|[[File:Wl4-Sapphire Passage Symbol Artwork.png|28px|link=Sapphire Passage]] | |||
| | |||
|- | |- | ||
|align="center" |[[File: | |align="center"|[[File:Goggley Blade Wario Land 4.png]] | ||
|align="center" |[[ | |align="center"|[[Goggley-Blade]] | ||
|align="center"|[[File:WL4 Sprite - Small Coin.png|link=Coin (Wario Land 4)]]<br>10 points | |||
|A common aquatic enemy which charges at Wario when it catches sight of him. Goggley-Blade's underside can be attacked. | |||
| | | | ||
| | |[[File:WL4-Emerald Passage Symbol Artwork.png|28px|link=Emerald Passage]] | ||
|[[File:WL4-Ruby Passage Symbol Artwork.png|28px|link=Ruby Passage]] | |||
|[[File:Wl4-Topaz Passage Symbol Artwork.png|28px|link=Topaz Passage]] | |||
|[[File:Wl4-Sapphire Passage Symbol Artwork.png|28px|link=Sapphire Passage]] | |||
|[[File:WL4-Golden Diva Symbol Artwork.png|28px|link=Golden Passage]] | |||
|- | |- | ||
|align="center" |[[File: | |align="center"|[[File:Spiked Head WL4.png]] | ||
|align="center" |[[ | |align="center"|[[Togemasuku]] | ||
|align="center"|''None'' | |||
|An immobile spiked creature that is seen more often in difficult game modes. They can be defeated if Wario uses certain [[#Wario's forms|forms]], or throws another enemy or a rock at them. On Normal mode, they only appear in [[Arabian Night]] where they transform into either [[Beezley]]s or [[Minicula]]s. | |||
| | |||
| | |||
|[[File:WL4-Ruby Passage Symbol Artwork.png|28px|link=Ruby Passage]] | |||
| | |||
|[[File:Wl4-Sapphire Passage Symbol Artwork.png|28px|link=Sapphire Passage]] | |||
| | | | ||
|- | |- | ||
|align="center" |[[File: | |align="center"|[[File:WL4-Shieragucchi Sprite.png]] | ||
|align="center" |[[ | |align="center"|[[Shieragucchi]] | ||
|align="center"|[[File:WL4 Sprite - Small Coin.png|link=Coin (Wario Land 4)]]<br>10 points | |||
|A spiked clam found in bodies of water. It quickly moves upwards when Wario comes near. Shieragucchi can be defeated with a hit from below. | |||
| | |||
|[[File:WL4-Emerald Passage Symbol Artwork.png|28px|link=Emerald Passage]] | |||
|[[File:WL4-Ruby Passage Symbol Artwork.png|28px|link=Ruby Passage]] | |||
|[[File:Wl4-Topaz Passage Symbol Artwork.png|28px|link=Topaz Passage]] | |||
| | |||
| | | | ||
|- | |- | ||
|align="center" |[[File: | |align="center"|[[File:AppleApe Wario Land 4.png]] | ||
|align="center" |[[ | |align="center"|[[Ringosukī]]* | ||
|align="center"|''None'' | |||
|A monkey that throws [[apple]]s, which transform Wario into [[Fat Wario]] upon contact. | |||
| | | | ||
| | |[[File:WL4-Emerald Passage Symbol Artwork.png|28px|link=Emerald Passage]] | ||
|[[File:WL4-Ruby Passage Symbol Artwork.png|28px|link=Ruby Passage]] | |||
|[[File:Wl4-Topaz Passage Symbol Artwork.png|28px|link=Topaz Passage]] | |||
|[[File:Wl4-Sapphire Passage Symbol Artwork.png|28px|link=Sapphire Passage]] | |||
|[[File:WL4-Golden Diva Symbol Artwork.png|28px|link=Golden Passage]] | |||
|- | |- | ||
|align="center" |[[File: | |align="center"|[[File:Beezley Wario Land 4.png]] | ||
|align="center" |[[ | |align="center"|[[Beezley]]* | ||
|align="center"|''None'' | |||
|A [[bee]] which flies down and stings Wario, causing his head to swell and transforming him into [[Puffy Wario]]. They also pollinate [[Flower (environmental object)|flowers]]. They only appear in [[Wildflower Fields]] and [[Arabian Night]]. | |||
| | |||
|[[File:WL4-Emerald Passage Symbol Artwork.png|28px|link=Emerald Passage]] | |||
| | |||
| | |||
|[[File:Wl4-Sapphire Passage Symbol Artwork.png|28px|link=Sapphire Passage]] | |||
| | | | ||
|- | |- | ||
|align="center" |[[File: | |align="center"|[[File:Archer.png]] | ||
|align="center" |[[ | |align="center"|[[Bow Balloon]]* | ||
|align="center"|''None'' | |||
|An archer that shoots arrows at Wario, which transforms him into [[Puffy Wario]]. | |||
| | |||
|[[File:WL4-Emerald Passage Symbol Artwork.png|28px|link=Emerald Passage]] | |||
|[[File:WL4-Ruby Passage Symbol Artwork.png|28px|link=Ruby Passage]] | |||
| | |||
| | |||
| | | | ||
|- | |- | ||
|align="center" |[[File: | |align="center"|[[File:Malletape Wario Land 4.png]] | ||
|align="center" |[[ | |align="center"|[[Menhanmā]]* | ||
|align="center"|''None'' | |||
|A [[hammer]]-wielding creature that tries to flatten Wario, transforming him into [[Bouncy Wario]]. | |||
| | | | ||
| | |[[File:WL4-Emerald Passage Symbol Artwork.png|28px|link=Emerald Passage]] | ||
|[[File:WL4-Ruby Passage Symbol Artwork.png|28px|link=Ruby Passage]] | |||
|[[File:Wl4-Topaz Passage Symbol Artwork.png|28px|link=Topaz Passage]] | |||
|[[File:Wl4-Sapphire Passage Symbol Artwork.png|28px|link=Sapphire Passage]] | |||
|[[File:WL4-Golden Diva Symbol Artwork.png|28px|link=Golden Passage]] | |||
|- | |- | ||
|align="center" |[[File: | |align="center"|[[File:Yukiotoko WL4.png]] | ||
|align="center" |[[ | |align="center"|[[Yeti]]* | ||
|align="center"|[[File:WL4 Sprite - Bronze Coin.png|link=Coin (Wario Land 4)]]<br>50 points | |||
|A snow creature that tries to freeze Wario with its icy sneeze, turning him into [[Frozen Wario]]. | |||
| | |||
| | |||
|[[File:WL4-Ruby Passage Symbol Artwork.png|28px|link=Ruby Passage]] | |||
| | | | ||
| | |[[File:Wl4-Sapphire Passage Symbol Artwork.png|28px|link=Sapphire Passage]] | ||
|[[File:WL4-Golden Diva Symbol Artwork.png|28px|link=Golden Passage]] | |||
|- | |- | ||
|align="center" |[[File: | |align="center"|[[File:WalkingTorch Wario Land 4.png]] | ||
|align="center" |[[ | |align="center"|[[Kaentsubo]]* | ||
|align="center"|''None'' | |||
|A walking flame jar that tips over when Wario approaches, spreading flames which transform him into [[Flaming Wario]]. | |||
| | |||
| | |||
|[[File:WL4-Ruby Passage Symbol Artwork.png|28px|link=Ruby Passage]] | |||
| | |||
|[[File:Wl4-Sapphire Passage Symbol Artwork.png|28px|link=Sapphire Passage]] | |||
| | | | ||
|- | |- | ||
|align="center" |[[File: | |align="center"|[[File:WL4-PigHead.png]] | ||
|align="center" |[[ | |align="center"|[[Pig Head Statue]]* | ||
|align="center"|''N/A'' | |||
|A statue embedded into the walls that appears in the level [[Toy Block Tower]], as well as some [[pink area]]s. It drops flames out of its mouth, which transform Wario into [[Flaming Wario]]. They otherwise cannot be interacted with. | |||
| | |||
| | |||
|[[File:WL4-Ruby Passage Symbol Artwork.png|28px|link=Ruby Passage]] | |||
|[[File:Wl4-Topaz Passage Symbol Artwork.png|28px|link=Topaz Passage]] | |||
| | |||
| | | | ||
|- | |- | ||
|align="center" |[[File: | |align="center"|[[File:Skeleton Bird WL4.png]] | ||
|align="center" |[[ | |align="center"|[[Skeleton Bird]]* | ||
|align="center"|''None'' | |||
|A ghost-like bird that drops green goo that turns Wario into [[Zombie Wario]]. They are common in the Sapphire Passage. Wario can only harm the Skeleton Bird by touching it in his zombie form. | |||
| | |||
| | | | ||
| | | | ||
| | |||
|[[File:Wl4-Sapphire Passage Symbol Artwork.png|28px|link=Sapphire Passage]] | |||
|[[File:WL4-Golden Diva Symbol Artwork.png|28px|link=Golden Passage]] | |||
|- | |- | ||
|align="center" |[[File: | |align="center"|[[File:Vampire Bat.png]] | ||
|align="center" |[[ | |align="center"|[[Minicula]]* | ||
|align="center"|''N/A'' | |||
|A bat that transforms Wario into [[Bat Wario]] upon contact. They are common in the Sapphire Passage, and cannot be defeated. | |||
| | |||
| | |||
| | | | ||
| | | | ||
|[[File:Wl4-Sapphire Passage Symbol Artwork.png|28px|link=Sapphire Passage]] | |||
|[[File:WL4-Golden Diva Symbol Artwork.png|28px|link=Golden Passage]] | |||
|- | |- | ||
|align="center" |[[File: | |align="center"|[[File:Menono WL4.png]] | ||
|align="center" |[[ | |align="center"|[[Men'ono]] | ||
|align="center"|[[File:WL4 Sprite - Bronze Coin.png|link=Coin (Wario Land 4)]]<br>50 points | |||
|A hooded creature who charges at Wario while swinging its axe. It can be defeated by a regular Attack or Smash Attack, as long as Wario does not touch the axe's hitbox. Like the Skeleton Bird and the Minicula, they are common in Sapphire Passage. | |||
| | |||
| | |||
| | |||
| | | | ||
| | |[[File:Wl4-Sapphire Passage Symbol Artwork.png|28px|link=Sapphire Passage]] | ||
|[[File:WL4-Golden Diva Symbol Artwork.png|28px|link=Golden Passage]] | |||
|- | |- | ||
|align="center" |[[File: | |align="center"|[[File:WL4-PearlBird.png]] | ||
|align="center" |[[ | |align="center"|[[Glass bird]] | ||
|align="center"|''N/A'' | |||
|A bird-like ally that is found in some [[pink area]]s. It spits out orbs on regular intervals which smash once they hit the ground. Wario can catch and throw the orbs at colored [[! Switch]]es to clear a path to a [[diamond]]. | |||
| | |||
| | |||
|[[File:WL4-Ruby Passage Symbol Artwork.png|28px|link=Ruby Passage]] | |||
| | | | ||
|[[File:Wl4-Sapphire Passage Symbol Artwork.png|28px|link=Sapphire Passage]] | |||
| | |||
| | | | ||
|} | |} | ||
===[[Entry Passage]] enemies=== | ===[[Entry Passage]] enemies=== | ||
{|width=100% | {|width=100% class="wikitable" | ||
| | !width="71"|Image | ||
! | !width="85px"|Name | ||
! | !width="60px"|Coins dropped | ||
!Description | !Description | ||
|- | |- | ||
|align="center" |[[File:Eggplant Warrior WL4.png]] | |align="center"|[[File:Eggplant Warrior WL4.png]] | ||
|align="center" |[[Eggplant Warrior]] | |align="center"|[[Eggplant Warrior]] | ||
|An eggplant-like creature wearing a headband with a knife. It assists the boss [[Spoiled Rotten]]. Eggplant Warriors | |align="center"|''None'' | ||
|An eggplant-like creature wearing a headband with a knife. It assists the boss [[Spoiled Rotten]]. Eggplant Warriors act in the same way as [[Totsumen]]. | |||
|} | |} | ||
===[[Emerald Passage]] | ===[[Emerald Passage]] enemies=== | ||
{|width=100% | {|width=100% class="wikitable" | ||
| | !width="71"|Image | ||
! | !width="85px"|Name | ||
! | !width="60px"|Coins dropped | ||
!Description | !Description | ||
|- | |- | ||
|align="center" |[[File:Imomushi WL4.png]] | |align="center"|[[File:Imomushi WL4.png]] | ||
|align="center" |[[Imomushi]] | |align="center"|[[Imomushi]] | ||
|A harmless, slow moving caterpillar. They mostly appear in [[Wildflower Fields]] | |align="center"|[[File:WL4 Sprite - Small Coin.png|link=Coin (Wario Land 4)]]<br>10 points | ||
|A harmless, slow moving caterpillar. They mostly appear in [[Wildflower Fields]]. | |||
|- | |- | ||
|align="center" |[[File:Moguramen WL4.png]] | |align="center"|[[File:Moguramen WL4.png]] | ||
|align="center" |[[Moguramen]] | |align="center"|[[Moguramen]] | ||
|A mole-like creature wearing a mask with a drill that harms Wario. Some of them | |align="center"|[[File:WL4 Sprite - Bronze Coin.png|link=Coin (Wario Land 4)]]<br>50 points | ||
|A mole-like creature wearing a mask with a drill that harms Wario. Some of them are seen digging under the ground, and a Smash Attack will bring them to the surface. They only appear in Wildflower Fields. | |||
|- | |- | ||
|align="center" |[[File:Utsuboanko WL4.png]] | |align="center"|[[File:Utsuboanko WL4.png]] | ||
|align="center" |[[Utsuboankō]] | |align="center"|[[Utsuboankō]] | ||
|A | |align="center"|''N/A'' | ||
|A sea monster that hides in a hole in the background. They emerge quickly when Wario comes near, damaging him on contact. They only appear in [[Mystic Lake]]. | |||
|- | |- | ||
|align="center" |[[File:Togenobi head WL4.png]] | |align="center"|[[File:Togenobi head WL4.png]] | ||
|align="center" |[[Togenobi]] | |align="center"|[[Togenobi]] | ||
|A large [[octopus]] with four rotating tentacles that hold maces. | |align="center"|''N/A'' | ||
|A large [[octopus]] with four rotating tentacles that hold maces. It guards the [[Keyzer]] of Mystic Lake. | |||
|- | |- | ||
|align="center" |[[File:Scuba Gator.png]] | |align="center"|[[File:Scuba Gator.png]] | ||
|align="center" |[[Tobawani]] | |align="center"|[[Tobawani]] | ||
|A crocodile | |align="center"|[[File:WL4 Sprite - Small Coin.png|link=Coin (Wario Land 4)]]<br>10 points | ||
|A crocodile that swims near the water's surface. They jump up to reach Wario, or chase him while in the water. They can be defeated by an Attack while they jump or a Super Smash Attack while they are swimming. They only appear in [[Monsoon Jungle]]. | |||
|- | |- | ||
|align="center" |[[File:WL4- | |align="center"|[[File:WL4-Hotaru Sprite.png]] | ||
|align="center" |[[Hotaru]]* | |align="center"|[[Hotaru]]* | ||
| | |align="center"|''N/A'' | ||
|A firefly that accompanies the boss [[Cractus]]. If Wario touches Cractus' drool, he transforms into [[Zombie Wario]] rendering him unable to attack. Hotaru then appears on the screen, and touching it reverts Wario to normal. | |||
|} | |} | ||
===[[Ruby Passage]] enemies=== | ===[[Ruby Passage]] enemies=== | ||
{|width=100% | {|width=100% class="wikitable" | ||
| | !width="71"|Image | ||
! | !width="85px"|Name | ||
! | !width="60px"|Coins dropped | ||
!Description | !Description | ||
|- | |- | ||
|align="center" |[[File:Togerobo WL4.png]] | |align="center"|[[File:Togerobo WL4.png]] | ||
|align="center" |[[Togerobo]] | |align="center"|[[Togerobo]] | ||
|A | |align="center"|[[File:WL4 Sprite - Silver Coin.png|link=Coin (Wario Land 4)]] [[File:WL4 Sprite - Silver Coin.png|link=Coin (Wario Land 4)]]<br>200 points | ||
|A robot with a spiked head that is dropped when they catch sight of Wario, damaging him on contact. Togerobo can then grow back a new head. An Attack from behind or a Smash Attack (before the head grows back) defeats it. They only appear in [[The Curious Factory]]. | |||
|- | |- | ||
|align="center" |[[File: | |align="center"|[[File:PET Bottom WL4.png]] | ||
|align="center" |[[ | |align="center"|[[Petbottom]] | ||
| | |align="center"|[[File:WL4 Sprite - Bronze Coin.png|link=Coin (Wario Land 4)]]<br>50 points | ||
|A bottle walking on four legs. It is armed with a needle on its front, which retracts if it is disturbed. It can be defeated by any attack from behind. They only appear in [[The Toxic Landfill]]. | |||
|- | |- | ||
|align="center" |[[File: | |align="center"|[[File:Drill Bat.png]] | ||
|align="center" |[[ | |align="center"|[[Robobird]] | ||
|A | |align="center"|''None'' | ||
|A robotic bird that attacks by flying at Wario in a straight line. It only appears in the Hard and S-Hard [[#Game mode|game modes]] in [[The Curious Factory]] and [[Pinball Zone]]. It can be defeated by a standard jump. | |||
|- | |- | ||
|align="center" |[[File: | |align="center"|[[File:WL4 Blue Spike Cannon Sprite.png]] | ||
|align="center" |[[ | |align="center"|[[Spike Cannon]] | ||
|A | |align="center"|''N/A'' | ||
|An enemy that only appears in the level [[Pinball Zone]], mostly around wire mesh that Wario must climb. They shoot out spikes from the top of their heads at regular intervals, harming Wario if they make contact. The top of its head acts as a platform. | |||
|- | |- | ||
|align="center" |[[File:WL4 | |align="center"|[[File:Hiyoko WL4 duck.png]] [[File:Hiyoko WL4 egg.png]] | ||
|align="center"|[[Egg (Wario Land 4)|Egg]] | |||
|align="center"|''None'' | |||
|An enemy that is produced by the condor form of the boss [[Cuckoo Condor]]. The boss lays eggs which hatch into yellow ducks as soon as they hit the ground. They start to flash before blowing up, harming Wario if he is nearby. Wario can catch the eggs before they break and throw them as a projectile. | |||
|align="center" |[[ | |||
|align="center" | | |||
|An enemy that is produced by the condor form of the boss [[Cuckoo Condor]]. The boss lays eggs which | |||
|} | |} | ||
===[[Topaz Passage]] enemies=== | ===[[Topaz Passage]] enemies=== | ||
{|width=100% | {|width=100% class="wikitable" | ||
| | !width="71"|Image | ||
! | !width="85px"|Name | ||
! | !width="60px"|Coins dropped | ||
!Description | !Description | ||
|- | |- | ||
|align="center" |[[File:Toy Car WL4.png]] | |align="center"|[[File:Toy Car WL4.png]] | ||
|align="center" |[[Toy Car]] | |align="center"|[[Toy Car]] | ||
|A tiny Wario driving a mini [[Wario Car]] with a spike on the front. They slowly drive along the ground, harming Wario if the spike touches him | |align="center"|[[File:WL4 Sprite - Small Coin.png|link=Coin (Wario Land 4)]]<br>10 points | ||
|A tiny Wario driving a mini [[Wario Car]] with a spike on the front. They slowly drive along the ground, harming Wario if the spike touches him. They appear in every stage of the passage. | |||
|- | |- | ||
|align="center" |[[File: | |align="center"|[[File:Dice WL4 enemy.png]] | ||
|align="center" |[[ | |align="center"|[[Dice]] | ||
|A | |align="center"|''None'' | ||
|A walking die wielding a spear. They emerge from a [[chance wheel]] in [[The Big Board]], when the appropriate space on the ribbon is struck. | |||
|- | |- | ||
|align="center" |[[File: | |align="center"|[[File:Doodle.png]] | ||
|align="center" |[[ | |align="center"|[[Hoggus]] | ||
|A pig | |align="center"|''N/A'' | ||
|A floating pig-like artist that does not harm Wario directly. He draws [[Denden]]s and [[Butatabi]]s, which come to life shortly after he draws them. Hoggus only appears in [[Doodle Woods]]. | |||
|- | |- | ||
|align="center" |[[File: | |align="center"|[[File:Denden WL4.png]] | ||
|align="center" |[[ | |align="center"|[[Denden]] | ||
|A pig | |align="center"|''None'' | ||
|A pig in a spiked shell created by Hoggus. It rolls along the ground when Wario comes near, similar to a [[Togerobo]]'s head. It can be defeated by attacking at its head or belly. | |||
|- | |- | ||
|align="center" |[[File: | |align="center"|[[File:Butatabi WL4 Sprite.png]] | ||
|align="center" |[[ | |align="center"|[[Butatabi]] | ||
|A | |align="center"|''None'' | ||
|A pig created by Hoggus, with a spike on its head. It glides from right to left. | |||
|- | |- | ||
|align="center" |[[File:WL4 | |align="center"|[[File:Deburina WL4.png]] | ||
|align="center" |[[ | |align="center"|[[Deburīna]] | ||
| | |align="center"|[[File:WL4 Sprite - Bronze Coin.png|link=Coin (Wario Land 4)]]<br>50 points | ||
|A drawing of a dancing [[pig]] that has come to life. Deburīna has a hula hoop around its body that rotates while it dances. The edge of the hoop harms Wario. Like other pig enemies, they only appear in [[Doodle Woods]]. | |||
|- | |- | ||
|align="center" |[[File:Tack | |align="center"|[[File:Tack Soldier Sprite.png]] | ||
|align="center" |[[Pin | |align="center"|[[Pin enemy]]* | ||
|A hopping creature with a spike on the bottom assisting the boss [[Aerodent]]. They | |align="center"|''None'' | ||
|A hopping creature with a spike on the bottom assisting the boss [[Aerodent]]. They must be thrown at Aerodent by Wario. | |||
|} | |} | ||
===[[Sapphire Passage]] enemies=== | ===[[Sapphire Passage]] enemies=== | ||
{|width=100% | {|width=100% class="wikitable" | ||
| | !width="71"|Image | ||
! | !width="85px"|Name | ||
! | !width="60px"|Coins dropped | ||
!Description | !Description | ||
|- | |- | ||
|align="center" |[[File: | |align="center"|[[File:CaptainCoin WL4.png]] | ||
|align="center" |[[ | |align="center"|[[Ghost (Wario Land 4)|Ghost]] | ||
|A | |align="center"|''N/A'' | ||
|A pirate-like ghost that does not harm Wario, but follows him and tries to collect every coin before Wario can do so. It also tries to steal the [[Keyzer]] from Wario. It only appears in [[Crescent Moon Village]]. | |||
|- | |- | ||
|align="center" |[[File: | |align="center"|[[File:Mayu Bird WL4.png]] | ||
|align="center" |[[ | |align="center"|[[Mayubird]] | ||
|A | |align="center"|''None'' | ||
|A bat-like creature that only flies within a small area, but can be found in large groups. They have fangs on their underside which harm Wario. They can be defeated by any attack. If they are tapped on the side, they will fly away. Mayubirds are only found in [[Arabian Night]]. | |||
|- | |- | ||
|align="center" |[[File: | |align="center"|[[File:Onomi WL4.png]] | ||
|align="center" |[[ | |align="center"|[[Onomī]] | ||
| | |align="center"|[[File:WL4 Sprite - Bronze Coin.png|link=Coin (Wario Land 4)]]<br>50 points | ||
|A mummified enemy wielding an axe. It uses the same attack as [[Men'ono]]s, and can be defeated in the same way. They only appear in Arabian Night. | |||
|- | |- | ||
|align="center" |[[File: | |align="center"|[[File:Iwao WL4.png]] | ||
|align="center" |[[ | |align="center"|[[Bowler]] | ||
| | |align="center"|[[File:WL4 Sprite - Silver Coin.png|link=Coin (Wario Land 4)]]<br>100 points | ||
|Bowlers throw rolling rocks at Wario. They turn into [[Yeti]]s when the [[Switch (Wario Land 4)|switch]] is hit in the level [[Fiery Cavern]], and they only appear in that level. It can only be defeated with a Smash Attack on the head. | |||
|- | |- | ||
|align="center" |[[File: | |align="center"|[[File:Drill Fish WL4.png]] | ||
|align="center" |[[ | |align="center"|[[Mechanical fish]] | ||
| | |align="center"|''None'' | ||
|A fish with a drill patrolling the pool of the boss [[Catbat]]. A Super Smash Attack is the only way to defeat it. | |||
|- | |- | ||
|align="center" |[[File: | |align="center"|[[File:WL4-Cough Virus.png]] | ||
|align="center" |[[ | |align="center"|[[Mine (enemy)|Mine]]* | ||
| | |align="center"|''None'' | ||
|An enemy that accompanies the boss Catbat. Whenever Catbat takes damage, he coughs out small spiked balls as projectiles. If Wario touches the purple ones, he transforms into [[Puffy Wario]]. After Catbat's HP gets down to a certain point, he will cough out red mines, which harm Wario. | |||
|} | |||
===[[Golden Pyramid]] enemies=== | |||
The last part of the game does not introduce new enemies, aside from the creatures created by the [[Golden Diva]]. Some enemies that are otherwise exclusive to the [[Sapphire Passage]] reappear in the [[Golden Passage]], the last level before the final boss. This includes [[Skeleton Bird]]s, [[Men'ono]]s, and [[Minicula]]s. | |||
{|width=100% class="wikitable" | |||
!width="71"|Image | |||
!width="85px"|Name | |||
!width="60px"|Coins dropped | |||
!Description | |||
|- | |||
|align="center"|[[File:WL4-SpikeRock.png]] | |||
|align="center"|[[Green enemy]] | |||
|align="center"|''None'' | |||
|A creature produced by the Golden Diva. It flies down from the sky, moving from side to side. When it hits the ground, or if Wario stuns it, he can pick it up and throw it at the Golden Diva to inflict damage. | |||
|- | |||
|align="center"|[[File:WL4-Big Ball.png]] | |||
|align="center"|[[Teddy Bear]] | |||
|align="center"|''None'' | |||
|A Teddy Ball in a blue ball dropped by the Golden Diva. Wario can attack it to send it flying, bouncing off the walls and possibly inflicting damage on the Golden Diva. The ball explodes by itself if left alone. | |||
|- | |- | ||
|align="center" |[[File: | |align="center"|[[File:WL4-DuckEgg.png]] | ||
|align="center" |[[ | |align="center"|[[Black egg]] | ||
|A | |align="center"|''None'' | ||
|A variation of an [[Egg (Wario Land 4)|egg]] which is thrown by the Golden Diva. They crack open to reveal a time-bombed duck. Wario can catch the eggs before they hit the ground, and throw it at the Golden Diva to inflict damage. | |||
|- | |- | ||
|align="center" |[[File: | |align="center"|[[File:WL4-SpikeHammer.png]] | ||
|align="center" |[[ | |align="center"|[[Hammer (Wario Land 4)|Hammer]]* | ||
|A | |align="center"|''N/A'' | ||
|A spiky [[hammer]] which is thrown by the Golden Diva. Shortly after hitting the ground, it loses its spikes. Wario can then [[#Wario's moves|throw]] it up in the air with the intention of it landing on him, transforming him into [[Bouncy Wario]]. He can then use this reaction to damage the Diva. | |||
|- | |- | ||
|align="center" |[[File:WL4- | |align="center"|[[File:WL4-Lips.png]] | ||
|align="center" |[[ | |align="center"|[[Lips]] | ||
| | |align="center"|''None'' | ||
|When the Golden Diva has been defeated, her lips remain on the stage. Wario must attack once to destroy them, freeing [[Kuro Neko]] and ending the game. | |||
|} | |} | ||
===[[ | ==Reception== | ||
The game received generally positive reviews. The <i>"portable masterpiece"</i> received praise and excellent review scores on [[List of Wario Land 4 media|its soundtrack]], collectibles throughout the game and its general thrill of satisfaction. One gaming website commented about even on its ten year anniversary, it <i>"still remains the best portable ''[[Super Mario (franchise)|Super Mario]]'' game to date"</i>.<ref>[http://www.1up.com/features/wario-land-4-remains-best-portable-mario Why ''Wario Land 4'' remains the best portable ''Super Mario'' game]</ref> {{wp|IGN}} gave ''Wario Land 4'' a nine out of ten, or "Outstanding", citing its well thought out level design and replayability, and how the game <i>"puts a lot more emphasis on action"</i> compared to [[Wario Land (series)|its predecessors]].<ref>[http://au.gameboy.ign.com/articles/165/165422p1.html IGN ''Wario Land 4'' review]</ref> Praise was also given to how much attention the developers paid to the sounds and music. It was not given a full ten because the game does not necessarily push the performance power of the [[Game Boy Advance]] in regards to animation design. The website quoted that <i>"it's a little disappointing to see that Wario isn't much of a step beyond his [[Game Boy Color|GBC]] adventure in terms of art and animation...other than the sprite effects, it could have been done on the 8-bit handheld"</i>. | |||
{| class="wikitable reviews" | |||
{| | !colspan="4"style="font-size:120%;text-align:center;background-color:silver"|Reviews | ||
|-style="background-color:#E6E6E6" | |||
|Release | |||
|Reviewer, Publication | |||
|Score | |||
|Comment | |||
|- | |- | ||
|Game Boy Advance | |||
|Jason D'Aprile, [https://web.archive.org/web/20031206134704/http://www.gamespy.com/reviews/december01/warioland4gba/ Gamespy] | |||
|88/100 | |||
|align="left"|"''Definitely the GBA side-scroller that Nintendo fans were waiting for, Warioland 4 is an incredibly entertaining, diverse, and humorous addition to the Mario/Wario legacy. It's challenging and creative, but not as outright frustrating as [[Wario Land 3|Warioland 3]]. Fans disappointed by [[Super Mario Advance|Mario Advance]] will especially appreciate this gem.''" | |||
|- | |- | ||
| | |Game Boy Advance | ||
|align=" | |Shane Satterfield, [https://www.gamespot.com/reviews/wario-land-4-review/1900-2831796/ GameSpot] | ||
|8.7/10 | |||
|align="left"|"''If you're looking for a quality 2D platformer for your Game Boy Advance, look no further than Wario Land 4. As Nintendo's first platforming game developed solely for the GBA, it shines in all the right places. The gameplay is tight and varied, the graphics are detailed and bright, and the sound is second to none. Wario Land 4 does have some confusing puzzles in its later stages that may be too difficult for younger players, but for everyone else, it comes highly recommended.''" | |||
|- | |- | ||
| | |Game Boy Advance | ||
|align=" | |Craig Harris, [https://www.ign.com/articles/2001/11/21/wario-land-4 IGN] | ||
|9/10 | |||
|align="left"|"''Wario rocks -- there's a lot of variety in the game design and is more challenging than the usual side-scrolling fare due to its focus on making players figure out how to get to certain locations in the level. It's slightly similar to Klonoa in that respect, but Wario Land 4 puts a lot more emphasis on action. The slight control glitch at ladders is a bit of a drag, and the mini-games are more silly than they are fun to play. Wario Land 4 is also the first Nintendo GBA product without any link support...but I'm willing to look the other way on this fact since the single player adventure is so good.''" | |||
|- | |- | ||
!colspan="4"style="background-color:silver;font-size:120%;text-align:center;"|Aggregators | |||
| | |-style="background-color:#E6E6E6" | ||
| | |colspan=2|Compiler | ||
|colspan=2|Platform / Score | |||
|- | |- | ||
| | |colspan=2|Metacritic | ||
| | |colspan=2 style="background-color:LimeGreen"|[https://www.metacritic.com/game/game-boy-advance/wario-land-4 88] | ||
|- | |- | ||
| | |colspan=2|GameRankings | ||
| | |colspan=2|[https://www.gamerankings.com/gba/524513-wario-land-4/index.html 85.34%] | ||
|} | |} | ||
== | ==Music and sound design== | ||
{{main-media|ingame=Sound Room}} | |||
''Wario Land 4'''s music composition and sound design was handled by [[Ryoji Yoshitomi]], and is unique in comparison to that of most other Nintendo games. Unlike most voice samples in video games generally, Wario's voice clips are broken down into single words or sounds which are randomly manipulated in real-time. In particular, his laughter consists of a single sound, repeated with the pitch sliding down. Occasionally, Wario's voice clips are contextually randomized - for instance, he may say "Yeah!" or laugh when he gets hurt, or grunt in pain when finding a treasure chest.<ref name="sound design">geno7 (December 20, 2022). [https://www.youtube.com/watch?v=G6ih-1kP6DE The Bizarre Music and Sound Design of Wario Land 4]. ''YouTube''. Retrieved August 26, 2023.</ref> | |||
Unlike the past two installments of the series, ''Wario Land 4'' uses modifications to the background music of levels, instead of entirely separate tracks, to underscore Wario's transformations. Such modifications range from pitch and speed changes to the oscillating pitch-warp effect previously used in the level [[Touch Fuzzy, Get Dizzy]] from ''[[Super Mario World 2: Yoshi's Island]]'', when [[Yoshi]] touches [[Fuzzy (Super Mario World 2: Yoshi's Island)|the titular enemies]]. The BGM speeds up whenever Wario rolls on a 45 degree slope, and slows down a bit whenever he crouches. In addition, some levels, such as [[Palm Tree Paradise]], have secondary music tracks that play only in certain sections of the level.<ref name="sound design"/> | |||
= | The music of ''Wario Land 4'' takes up a significant portion of the storage capacity. The music spans a wide variety of genres including {{wp|blues}}, {{wp|Soul music|soul}}, {{wp|Folk music|folk}}, {{wp|Country music|country}}, {{wp|funk}}, {{wp|jazz}}, {{wp|drum and bass}}, {{wp|Heavy metal music|heavy metal}}, {{wp|experimental music}}, {{wp|ambient music}}, {{wp|noise music}}, and ''{{wp|musique concrète}}''; as such, the soundtrack as a whole can be considered eclectic and uncategorizable.<ref name="sound design"/> The general instrumentation for the game's music comes from the {{wp|Roland SC-8850|Roland Sound Canvas SC-8850}}, part of {{wp|Roland Sound Canvas|a line of sound modules}} that, as a whole, was used in countless soundtracks associated with ''[[Super Mario (franchise)|Super Mario]]'' and its partner franchises, other Nintendo franchises, and video games in general throughout the mid- and late 1990s and early and mid-2000s. The game also uses a number of stock vocal samples, taken from CDs such as Spectrasonics' ''Vocal Planet'', volume 3; Midi Mark Productions' ''Vocal Bytes'', and Zero-G's ''Vocal XTC'' (the latter two of which lend some of their samples to the title screen theme, "Work It!")<ref>https://docs.google.com/spreadsheets/d/1JJBlHHDc65fhZmKUGLrDTLCm6rfUU83-kbuD8Y0zU0o/edit?pli=1#gid=717751203</ref> The vocals for the song "Medamayaki," heard in Palm Tree Paradise, were created by inserting audio samples of individual syllables into the backing music track.<ref name="sound design"/> | ||
{{ | {{Media table | ||
|file1=WL4 Title Screen Music.oga | |||
{{ | |title1=''Wario Land 4'' | ||
| | |||
| | |||
|description1=Main theme | |description1=Main theme | ||
|length1= | |length1=0:30 | ||
| | |file2=Wario Land 4 music- Hurry Up!.oga | ||
|title2=''Wario Land 4'' | |||
| | |||
|description2=Music heard when the [[switch (Wario Land 4)|switch]] is hit | |description2=Music heard when the [[switch (Wario Land 4)|switch]] is hit | ||
|length2= | |length2=0:30 | ||
|file3=WL4-Inside the Pyramid.oga | |||
|title3=''Wario Land 4'' | |||
| | |||
| | |||
|description3=Music heard when inside the [[Golden Pyramid]] | |description3=Music heard when inside the [[Golden Pyramid]] | ||
|length3= | |length3=0:30 | ||
}} | }} | ||
==References in later games== | |||
[[File:WL4-Densetsu no Starfy 3 Flaming Wario.png|frame|[[Flaming Wario]] in ''[[starfywiki:Densetsu no Starfy 3|Densetsu no Stafy 3]]''.]] | |||
| | *''[[metroidwiki:Metroid Fusion|Metroid Fusion]]''<nowiki>'</nowiki>s unused game data shows various assets from ''Wario Land 4'', including large blocks and crystals, which suggests that the game was based on the same engine as ''Wario Land 4''.<ref>[https://tcrf.net/Metroid_Fusion#Debug_Rooms The Cutting Room Floor's page for ''Metroid Fusion'']</ref> | ||
| | *''[[WarioWare, Inc.: Mega Microgame$!]]'': The game features multiple, reused voice clips and other sound effects which would also appear in the following ''WarioWare'' installments. The [[Wario Car]] appears in [[Produce Pandemonium]]. | ||
| | *''[[Mario Kart: Double Dash!!]]'': The Wario Car appears as one of the starter vehicles. | ||
| | *''[[Densetsu no Stafy 3]]'': Wario makes a guest appearance in where he helps [[Starfy|Stafy]] throughout the [[starfywiki:Undersea Ruins|Kaitei Iseki]] by using some of his reactions from ''Wario Land 4''. Wario and Stafy arrive at a [[vortex]], where they must enter to locate the [[Switch (Wario Land 4)|switch]] and four [[jewel piece]]s in order to unlock the boss's door. Wario can transform into [[Bubble Wario]], [[Flaming Wario]], and [[Puffy Wario]] respectively. | ||
*''[[Wario Land: Shake It!]]'': The Wario Car returns in this game. | |||
*''[[WarioWare: D.I.Y. Showcase]]'': The game has a [[microgame]] titled "[[Wario Land (WarioWare: D.I.Y. Showcase)|Wario Land]]", which features sprites and concepts taken from ''Wario Land 4''. In the microgame, Wario must use dash to break through a block and defeat a yellow [[Spear-Mask]]. The attack must be timed to successfully strike the Spear-Mask while its spear is facing away from Wario. | |||
*''[[WarioWare: Get It Together!]]'': The Wario Car is featured in one of [[18-Volt]]'s gallery illustrations. A photo of the Golden Pyramid can be seen in level 3 of the microgame [[Where Goes the Nose?]] | |||
*''[[WarioWare: Move It!]]'': The boss Cractus reappears in this game, serving as an obstacle for [[Kat and Ana]] in their stage. | |||
===''WarioWare, Inc.: Mega Party Game$!''=== | |||
''[[WarioWare, Inc.: Mega Party Game$!]]'' contains a seemingly complete set of instrumental sounds used for the soundtrack of ''Wario Land 4'' within the game's files, and may be assembled together manually to recreate each of the individual tracks.<ref>[http://warioforums.com/index.php?threads/high-quality-uncompressed-wario-land-4-music.2044/ Forum post by "Weario" at warioforums.com] (retrieved September 5, 2016)</ref> Various theme songs and sound effects from ''Wario Land 4'' are also heard during normal gameplay: | |||
*The theme of the [[Item Shop (Wario Land 4)|Item Shop]] is used as [[Mona]]'s theme melody. The music can also be heard in ''[[WarioWare, Inc.: Mega Microgame$!]]'' in a less modified form when the [[Gelateria]] is seen from the inside during Mona's story. | |||
*The song that plays whenever a character's story is cleared and all the other employees are shown at the Gelateria is a shortened version of "Mr. Ether & Planaria". | |||
*A slightly sped up version of [[Palm Tree Paradise]]'s theme can also be heard in the microgame [[Balancing Act (WarioWare, Inc.: Mega Microgame$!)|Balancing Act]]. | |||
*The whispering heard in the [[Sound Room]]'s "The Short Futon" was used for the microgame [[Right in the Eye]]. | |||
*One of the songs available for [[Jump Forever]] is the theme for [[Pinball Zone]]. | |||
*Additionally, part of [[Crescent Moon Village]]'s theme can be heard during the epilogue of Wario's second set of microgames in ''Mega Microgame$!''. | |||
==Official descriptions== | |||
*'''Nintendo of America website:<br>''Stash epic loot as you smash your way through a cursed pyramid.'''<br>Bask in the greedy glory of treasure-hoarding as you hop, roll, and zombify Wario™ through 20 huge, puzzle-packed levels. This critically praised platformer sees our stubby anti-hero in search of gold, jewels, and riches beyond imagining, but when his insatiable need for loot lands him in a twisted pyramid of traps, he’ll need your wits to get out!<br>There's lots of treasure in there for the taking, and Wario wants it all. There are plenty of punches, jumps, kicks, and tricks to master throughout the gameplay and various forms for Wario to take, like Flaming Wario, Vampire Bat Wario, or Zombie Wario that can be used to uncover some of the pyramid’s hidden hoard. Lots of bad guys and boss characters will try to make your escape more difficult, and there are plenty of unique challenges to stretch your reflexes and imagination. True to Wario style, there are even a handful of mini-games to keep you amused when you're not adventuring.''<ref>[https://www.nintendo.com/games/detail/wario-land-4-wii-u/ Wario Land 4]. ''nintendo.com''. Retrieved September 8, 2021. ([https://web.archive.org/web/20200728221614/https://www.nintendo.com/games/detail/wario-land-4-wii-u/ Archived] July 28, 2020, 22:16:14 UTC via Wayback Machine.)</ref> | |||
*'''Nintendo of UK website:'''<br>''Loot-loony Wario has discovered his biggest score yet: a fabulous golden pyramid filled with riches. Trouble is, its denizens don't want to give up the treasure easily – but that hasn't stopped Wario before!<br>In Wario Land 4, the greedy hero finds himself no longer invincible, as in his previous platform adventures. However he can undergo amazing transformations that aid him in his quest; now he can become Bat Wario, Bouncy Wario and even Zombie Wario!<br>Four guardians stand jealously over the four sections of the pyramid. Wario will either have to defeat each guardian, or activate a switch and escape before time runs out!''<ref>[https://www.nintendo.co.uk/Games/Game-Boy-Advance/Wario-Land-4-267596.html Wario Land 4]. ''nintendo.co.uk''. Retrieved September 8, 2021.</ref> | |||
*'''SuperMario_UK Twitter:'''<br>''A fabulous golden pyramid filled with riches, you say? Too tempting for Wario! In Wario Land 4 on Game Boy Advance our hero is tasked with nabbing its treasures, despite the risks!''<ref>SuperMario_UK (September 7, 2021). [https://twitter.com/supermario_uk/status/1435275048890294276?s=21 ''Twitter'']. Retrieved September 8, 2021. ([https://web.archive.org/web/20210908112608/https://twitter.com/supermario_uk/status/1435275048890294276?s=21 Archived] September 8, 2021, 11:26:08 UTC via Wayback Machine.)</ref> | |||
* | |||
* | |||
==Gallery== | ==Gallery== | ||
{{ | {{main-gallery|Wario Land 4}} | ||
<gallery> | |||
Wario Pose.jpg|[[Wario]] | |||
Black Cat Artwork Wario Land 4.png|[[Kuro Neko]] | |||
Princess Shokora Artwork - Wario Land 4.png|[[Princess Shokora]] | |||
Keyzer WL4 artwork 2.png|[[Keyzer]] | |||
Dr Arewo Stein Artwork Wario Land 4.png|[[Mad Scienstein]] | |||
</gallery> | |||
==Pre-release and unused content== | |||
{{main|List of Wario Land 4 pre-release and unused content}} | |||
File: | [[File:WL4-keyanim.gif|thumb]] | ||
File: | [[File:WL4 Unused Game Corner.png|thumb|left]] | ||
''Wario Land 4'' was first announced at {{wp|Electronic Entertainment Expo|E3}} 2001. The first released screenshots were very different from the final game. Wario had a darker, more orange skin tone, and a lot of the enemies were shown to have a different color scheme as well. A notable difference from the final game is how Wario originally had a [[garlic]] gauge, serving as a replacement for the Heart Gauge below the Heart Meter. The [[Mini-Game Shop]] was going to be called the Game Corner, and Wario originally needed a [[key]] to unlock a [[jewel piece]] box. | |||
{{br|right}} | |||
==Staff== | ==Staff== | ||
[[File:WL4-Credits. | [[File:WL4-Credits.png|frame|The credits show [[Wario]] driving his [[Wario Car]] back home through the desert, after stealing the treasure from the [[Golden Pyramid]].]] | ||
{{main|List of Wario Land 4 staff}} | {{main|List of Wario Land 4 staff}} | ||
[[Nintendo R&D1]] developed ''Wario Land 4'', with the executive producer being [[Hiroshi Yamauchi]]. Wario | [[Nintendo R&D1]] developed ''Wario Land 4'', with the executive producer being [[Hiroshi Yamauchi]]. [[Hirofumi Matsuoka]] (who had previously co-directed ''[[Virtual Boy Wario Land]]'') directed the game. The game was among the first Nintendo projects for [[Goro Abe]] and [[Ko Takeuchi]], who later become key figures of the ''[[WarioWare (series)|WarioWare]]'' series. | ||
''Wario Land 4'' is the last active development credit of Wario's creator, [[Hiroji Kiyotake]]. Following the release of the game, Kiyotake assumed a supervisor role inside [[Nintendo SPD]]. | |||
==Glitches== | ==Glitches== | ||
{{main|List of | {{main|List of Wario Land 4 glitches}} | ||
There are currently three known glitches in ''Wario Land 4''. The player is able to fly vertically, hold an invisible object and walk through walls. All of these can be encountered during normal gameplay. | There are currently three known glitches in ''Wario Land 4''. The player is able to fly vertically, hold an invisible object and walk through walls. All of these can be encountered during normal gameplay. | ||
==Quotes== | ==Quotes== | ||
{{main|List of | {{main|List of Wario Land 4 quotes}} | ||
In ''Wario Land 4'', there is not a large amount of quotes within the game itself. But there are many notable quotes within the game's instruction | In ''Wario Land 4'', there is not a large amount of quotes within the game itself. But there are many notable quotes within the game's instruction booklet, where Wario describes to the reader many aspects of gameplay and a few [[#Enemies and other characters|enemy]] descriptions. Some of the most notable are shown below. | ||
Quotes found in the game; | Quotes found in the game; | ||
*'' | *"''[[Golden Pyramid|LEGENDARY PYRAMID]] DISCOVERED DEEP IN JUNGLE!! [[Legendary treasure]] nearly found, but accidents hindered findings''" – [[:File:WL4-Newspaper.png|Newspaper article]] seen in the game's opening cutscene. | ||
*'' | *"''Welcome to the [[Item Shop (Wario Land 4)|Item Shop]].''" – The [[shop owner]] welcoming Wario to the Item Shop. | ||
*'' | *"''Oh no, no! Hurry up!''" – Wario, when he hits the [[Switch (Wario Land 4)|switch]] in a [[#Passages|level]]. | ||
Quotes found in the game's manual; | Quotes found in the game's manual; | ||
*'' | *"''I ain't normal! And I don't mean that I'm stupid! I can do aaalllll kinds o' stuff that normal humans can't, you know what I mean? How 'bout that? Amazing, huh?''" | ||
*'' | *"''Rumour has it that no one who's entered the [[Golden Passage]] have ever come out alive! Scary!''" | ||
*'' | *"''Yeahhhhh, that's ME!!! More gorgeous than any Hollywood star! Get a good look at me while you can!!''" – Wario describing himself. | ||
*'' | *"''I don't always speak so crudely, you know. I'm just worried about you because you play so badly!! Why do I care? Because I'm the one that feels it when you screw up, that’s why!!! So just try to get better at this game, OK?! I'm begging you!''" | ||
==Names in other languages== | ==Names in other languages== | ||
{{ | {{foreign names | ||
|Jap=ワリオランドアドバンス ヨーキのお宝 | |Jap=ワリオランドアドバンス ヨーキのお宝 | ||
|JapR=Wario Rando Adobansu: Yōki no Otakara | |JapR=Wario Rando Adobansu: Yōki no Otakara | ||
|JapM= | |JapM=Wario Land Advance: The Treasure of the Golden Diva | ||
|Chi=瓦力欧寻宝记 | |||
|ChiR=Wǎlìōu xúnbǎo jì | |||
|ChiM=Wario Treasure Finding | |||
}} | }} | ||
==Trivia== | |||
*Part of the vocals used in the game's title track were taken from the first track of {{wp|Zero-G Ltd|Zero-G}}'s ''Vocal XTC'' audio sample compilation. The specific vocal lines in question are ''"Your time is over, I've had enough! Here I come! Look out, here I come!"'', sung by British session singer Helen Binding.<ref>[http://www.zero-g.co.uk/store/vocal-xtc-wav-acid-p431.php Zero-G ''Vocal XTC'' product page] (accessed on September 24, 2016)</ref><ref>[http://www.zero-g.name/CD_Booklets/Vocal_XTC_CD_Booklet.pdf ''Vocal XTC'' CD booklet] (accessed on September 24, 2016)</ref> | |||
*Wario's in-game sprite shows that he is wearing gold buttons (similar to [[Mario]], [[Luigi]], and [[Waluigi]]'s) and purple shoes. However, in the official artwork, his buttons are white and his shoes are green. | |||
==References== | ==References== | ||
<references/> | <references/> | ||
==External links== | ==External links== | ||
*[http:// | *[https://web.archive.org/web/20011117141243/http://www.gameboy.com/wario/ North American website] (web archive) | ||
*[http://web.archive.org/web/20020204214517/http://www.nintendo.com/games/gamepage/gamepage_main.jsp?gameId=629 | *[http://web.archive.org/web/20020204214517/http://www.nintendo.com/games/gamepage/gamepage_main.jsp?gameId=629 North American gamepage] (web archive) | ||
*[http:// | *[https://web.archive.org/web/20140508062313/http://www.nintendo.com/games/detail/6-0fsNZ1OS90s5f0uDytvPesLE5qBoDY North American Virtual Console page] (web archive) | ||
*[http://www.nintendo.co.jp/n08/awaj/index.html | *[http://archive.is/2q7Ea European microsite] (web archive) | ||
*[https://www.nintendo.co.uk/Games/Game-Boy-Advance/Wario-Land-4-267596.html European Virtual Console page] | |||
*[http://www.nintendo.co.jp/n08/awaj/index.html Japanese website] | |||
*[https://www.nintendo.co.jp/titles/20010000005787 Japanese Virtual Console page] | |||
{{WL4}} | {{WL4}} | ||
{{ | {{Wario games}} | ||
{{GBA}} | {{GBA}} | ||
[[Category:Game Boy Advance games]] | |||
[[Category:Game Boy Advance | [[Category:Platforming games]] | ||
[[Category:Platforming | |||
[[Category:2001 games]] | [[Category:2001 games]] | ||
[[Category:2004 games]] | [[Category:2004 games]] | ||
[[Category:2011 games]] | [[Category:2011 games]] | ||
[[Category:3DS Ambassador games]] | [[Category:3DS Ambassador games]] | ||
[[Category:Virtual Console games]] | |||
[[Category:Wario Land series]] | |||
[[Category:Wario Land 4|*]] | [[Category:Wario Land 4|*]] | ||
[[ | [[de:Wario Land 4]] | ||
[[it:Wario Land 4]] | |||
Latest revision as of 12:32, April 1, 2024
- "Warioland 4" redirects here. For information about the book, see Warioland 4 (book).
| Wario Land 4 | |||||||||
|---|---|---|---|---|---|---|---|---|---|
 For alternate box art, see the game's gallery. | |||||||||
| Developer | Nintendo R&D 1 | ||||||||
| Publisher | Nintendo | ||||||||
| Platform(s) | Game Boy Advance Virtual Console (3DS Ambassadors, Wii U) | ||||||||
| Release date | Game Boy Advance: [1] Virtual Console (3DS) (Ambassador Program Release): [3] Virtual Console (Wii U): | ||||||||
| Language(s) | English (United States) 日本語 简体中文 | ||||||||
| Genre | 2D Platformer | ||||||||
| Rating(s) |
| ||||||||
| Mode(s) | Single-player | ||||||||
| Media | Wii U: Game Boy Advance: Nintendo 3DS: | ||||||||
| Input | Wii U: Game Boy Advance: Nintendo 3DS:
| ||||||||
Wario Land 4 is a platformer game released for the Game Boy Advance in 2001. It was later re-released for the Nintendo 3DS system on December 16, 2011 via the Nintendo 3DS Ambassadors program, just after its ten-year anniversary, as well as a downloadable Virtual Console game for the Wii U on May 8, 2014. It is the fourth game in the Wario Land series (fifth counting Virtual Boy Wario Land), which is a spin-off of the Super Mario series. It is also the final Wario Land game to be released on a handheld system and the last installment in the series for seven years until Wario Land: Shake It!
In the game, Wario travels to the Golden Pyramid after reading a newspaper article about a rumor of a legendary treasure hidden inside. His intention is to rob the pyramid, but he accidentally goes on a quest to save the legendary Princess Shokora from the money-crazed Golden Diva, evil ruler of the Golden Pyramid. The game features 2D graphics with linear transformations (similar to Super Mario World and Super Mario World 2: Yoshi's Island). Wario Land 4 has received very positive reviews from websites and game critics alike, enjoying praise for its soundtrack, collectibles throughout the game, and level design.
Story[edit]
Does Wario smell treasure again? Oh yes he does! Whilst reading his morning paper and picking his nose, he reads about the legendary Pyramid of Shokora! With no delay, and even forgetting to take his mid-morning nap, Wario hops into his fantastic car and heads off to find the Golden Pyramid.
– Story from the official European Wario Land 4 website

Sometime before the events of the game, the legendary Golden Pyramid was discovered deep within a jungle. Expeditions were mounted to find the pyramid's treasure, but a series of accidents prevented anything from being found. The game's story properly begins one morning with Wario reading the newspaper in his house. He reads an article about the Golden Pyramid and all the treasure within, and decides to go steal it for himself. He then hops in his car and heads towards the pyramid, almost running over a black cat on the road.

Upon arriving at the pyramid, Wario climbs the outer stairs and heads inside, where he finds the same black cat that he almost ran over earlier. The Cat leads Wario deeper into the pyramid and down a hole. Wario lands in a room near the center of the pyramid, and proceeds to complete the challenges of its five passages, thus opening the way to the inner pyramid, where the evil ruler of the Golden Pyramid, the Golden Diva, resides.
After exploring the Golden Passage, Wario comes face to face with the Golden Diva. The black cat then jumps in front of Wario and attacks the Golden Diva in vain. The Cat gets swallowed by the Diva, who proceeds to fight Wario and gradually uncovers her many kabuki masks.

After the Golden Diva's defeat, the pyramid begins to crumble. Grabbing his treasure, and with the black cat in tow, Wario hurries to escape the pyramid. They both make it out, and watch the pyramid crumble to the ground from a distance. The Golden Diva's jewelry then flies out of the treasure sack and toward the black cat. This causes the Cat to change form into Princess Shokora, the ancient ruler of the Golden Pyramid who was cursed by the Golden Diva. With the Diva's defeat, the curse is broken, and the princess thanks Wario by kissing him on the cheek. She is taken away by angels, and Wario takes his treasure to his car and heads home.
The ending cutscene shows Wario speeding through the city, almost running over a cat once more. A newspaper flies into the cat's face, with an article that reads: "STEAKS! EAT AS MUCH AS YOU CAN!!". The game ends with gold bars forming the words THE END.
Gameplay[edit]
Game mode[edit]

Upon creating a save file, the player is asked which game mode they prefer to play. The available game modes are as follows:


 (unlockable, by completing Hard mode)
The chosen game mode affects various aspects of gameplay, such as the location of the jewel pieces, the type and quantity of enemies, and the health the player begins with upon entering the level. For example, on S-Hard mode, Wario enters the level with only one heart instead of the full eight. The game mode also affects the time given to get back to the vortex after the player hits the switch. In a few levels on S-Hard mode, the switch even changes its location.
Less time is given to defeat the bosses on more difficult modes, and prices at the Item Shop are more expensive. When beating the game on Hard or S-Hard mode, extra parts of the credits sequence are shown which feature Wario picking up women in his car.
Objectives[edit]
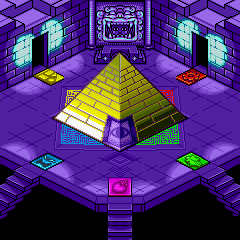

The game begins in the Entry Passage which includes one level and a boss, Spoiled Rotten. On completion, the next four areas of the game are revealed. This consists of four more passages, each with four levels relating to a different theme with a boss at the end. The four passages are the Emerald Passage, Ruby Passage, Topaz Passage, and Sapphire Passage. These can be completed in any order. Once each bosses of these four passages have been cleared, an inner pyramid is revealed on the main map. This includes one last level, the Golden Passage and the final boss, the Golden Diva.

Unlike previous installments in the series, Wario is given a Heart Meter, containing a total of eight hearts. Wario can collect additional hearts throughout the stages. Wario loses a heart by touching a threatening part of an enemy, such as spikes. He can fully replenish his meter by opening a Full Health Item box. Below the Heart Meter is a heart gauge. Most enemies drop a little heart when defeated, which fills the gauge by an eighth. Filling it gives Wario an extra heart, and the gauge is then emptied. Completely filling Wario's hearts and gauge will cause most enemies to drop an extra 100-point coin.
Each of the eighteen levels contains four jewel pieces, found within boxes, that need to be collected. When four jewel pieces in a level are joined, they form a jewel. The color of the Jewels varies on the passage they are collected in. The player must collect all jewel pieces in a passage to gain access to the boss. A Keyzer must be collected to unlock the next level. Without the Keyzer, the four jewel pieces in that level can still be collected, but the door to the next level remains locked.
Wario enters a level through a vortex which closes behind him. The only way to open it again is to find the switch somewhere in the level. This reopens the vortex and allows Wario to return to the map screen. A time limit is given to return to the vortex. The player should focus on finding the four jewel pieces and the Keyzer before hitting the switch if possible. However, there are some areas that can only be accessed by hitting the switch, due to the Kaeru Blocks. When the switch is hit, all transparent Kaeru Blocks become solid, while all solid blocks become transparent. This opens up new areas that can only be accessed when the switch is hit, so there may be some other jewel pieces or the Keyzer to find in that new area.

As soon as the switch is hit, a timer appears on screen. The amount of time given to reach the vortex varies on the level and the game mode the player has selected. If the timer runs out, the player's score quickly depletes and the level becomes black and white. When the score reaches zero, Wario is sent back to the main map and must start the level again.
The game records the player's best score according to their points collected in each level. The amount of points obtained in a level affects what icon appears on the map screen when standing at the entrance of that level, next to the best score. A score of above 10,000 shows a gold crown, 8,000 to 9,990 shows a silver crown, and a score of 6,000 to 7,990 shows a bronze crown. A score of below 6,000 shows no crown.
There are a total of twelve treasure chests in Wario Land 4. Each of the four main boss rooms contain three treasure chests which are embedded into the wall in the background, as well as a piece of jewellery kept by the boss. During the boss battle when the time starts to run low (usually under a minute), the treasure chests in the background begin to disappear one by one.
Once Wario defeats a boss in a main passage, the treasure chests that are left over are collected and stored in the Golden Pyramid, along with the jewellery retrieved from the boss. The amount of treasure chests collected does not affect the main game. However, it does affect the game's completion, as the more treasure chests Wario obtains, the more beautiful Princess Shokora appears in the game's ending cutscene.
Controls[edit]
- “So these are my basic controls! You got a problem with that?”
- —Wario, Wario Land 4 instruction booklet
| Controls | Purpose |
|---|---|
| Open pause menu, confirm | |
| Jump, swim upwards, confirm | |
| Attack, throw (hold to build power), swim forwards or in direction of | |
| Move ( | |
| Throw upwards | |
| Smash Attack (break blocks below or defeat enemies; ends when player releases the D-pad), roll on 45 degree slope, Super Smash Attack (break stronger blocks; hold D-pad down for more than one second while falling; does not end if the player releases the D-pad) | |
| Slide down ladder | |
| Crawl | |
| Dash Attack |
Wario's moves[edit]
- “How 'bout it? You can even do this stuff!”
- —Wario, Wario Land 4 instruction booklet
Wario has several different moves which are all required to make progress in the game.
| Image | Name | Description |
|---|---|---|
| Attack | Wario can shift his body weight to ram into objects. He can hit the weak spot of enemies to destroy them, or break blocks to make a path. | |
| Dash Attack | Just like the regular Attack, but with more power. Wario must run for a short distance to build up momentum, allowing him to break stronger, more solid blocks. | |
| Smash Attack | A version of the Ground Pound that is mainly used in the Super Mario franchise. Wario can use it to break blocks below, or defeat enemies. | |
| Super Smash Attack | Similar to the normal Smash Attack but with more strength. Triggered by continuously Smash Attacking for a certain amount of time without hitting the ground, Wario can break more solid blocks by performing this move. The move will not cancel until he hits the ground. | |
| Roll | On a 45 degree slope in the floor, Wario can begin to roll. He can jump while moving, destroy blocks, and defeat enemies by using this move. He stops rolling if he either hits something solid or falls into water. | |
| Swim | Wario is able to swim when he is in a body of water. He is unable to swim against water currents. | |
| Crawl | When Wario has a small space to squeeze through, he can crawl to pass through. He can also jump while crawling. | |
| Throw | If Wario picks up an enemy, rock or Chomp ball, he is able throw it upwards or sidewards. He can also break blocks from a long distance away. |
Wario's reactions[edit]
- “Even the powerful Wario gets into some embarrassing situations in this game! I eat too much and get all chubby, a bee stings my face and makes it swell like a balloon, my body catches fire, and all kinds of other bad things happen to me!!”
- —Wario, Wario Land 4 instruction booklet
All of Wario's reactions in Wario Land 4 return from the last two games. Wario has a total of ten different reactions in the game, all having a different purpose to assist Wario in progressing through the level. This can include turning into a bat to reach a high place or catching fire to break certain blocks.
| Image | Name | Description |
|---|---|---|
| Wario | Wario in his standard form. He can perform a Smash Attack, ram enemies or blocks, crawl to get through narrow spaces, and throw small objects like enemies or rocks. | |
| Puffy Wario | Wario after getting stung by a Beezley, or getting struck by the arrow of a Bow Balloon. His cheeks puff up in a supposed allergic reaction, and he is able to float continually upwards. When Wario hits a ceiling or gets hurt, he will turn back into his normal form. | |
| Flaming Wario | Wario after catching fire from a Kaentsubo or Pig Head Statue. He runs without stopping while the fire spreads, but the player can still make Wario jump by pressing | |
| Flat Wario | Wario after being crushed by a piston. His body becomes very flat and lightweight, and he is able to get into small spaces. If he leaves the ground or jumps, he falls down slowly while swaying from side to side. Wario can turn back into his normal form by entering a Decompressor or touching water. | |
| Fat Wario | Wario, only heavier and fatter. He can turn into this form by eating apples thrown by a Ringosukī. Wario is invulnerable to enemy attacks, and enemies are killed by only touching them. Wario returns to normal after walking a certain distance or jumping a number of times. | |
| Bubble Wario | Wario after touching an underwater bubble. He can float upwards until he reaches the surface. This allows him to bypass water currents, allowing the player to access certain areas. | |
| Snowman Wario | Wario after a mound of snow falls on him from a ceiling. If he touches a slope, Wario turns into a snowball and start rolling, breaking any Snowman Blocks that get in his way. | |
| Frozen Wario | Wario after getting hit by a Yeti's sneeze. He becomes immobile and start sliding backwards. He can pass through spikes in this form. The ice breaks once Wario hits a wall or object. | |
| Bouncy Wario | Wario when a Menhanmā strikes him with its hammer. He curls up into a spring and transforms into Bouncy Wario. The player is able to make Wario bounce up high by pressing | |
| Zombie Wario | Wario when a Skeleton Bird regurgitates on him. He moves slow, and jumping above a thin platform causes him to fall through the floor, reaching otherwise inaccessible places. Like Wario Land 3, he is still able to jump, but not as high as he would normally. Wario can transform back by either touching water or being exposed to bright light. | |
| Bat Wario | Wario after touching a Minicula. In this form, Wario takes on the appearance of a bat, and is able to fly by repeatedly pressing |
Objects and obstacles[edit]
| Image | Name | Description |
|---|---|---|
| Switch | Stepping on a switch opens a vortex, which transports Wario to and from levels. Switches found within levels reveal a bomb when pressed, initiating a time limit for Wario to find the vortex and return to the Golden Pyramid. If Wario runs out of time, he loses coins until he is kicked out of the level. | |

|
Vortex | A vortex opens whenever a switch is pressed. Entering it can transport Wario from the Golden Pyramid to a level, and vice versa. |
| Kaeru Block | Kaeru Blocks can be found either solid or transparent. The form of these blocks swap once Wario presses the switch, granting access to new areas or preventing the player from returning to previous ones. | |
| Brown block | Regular stone blocks which are found blocking paths or concealing Diamonds. They can be destroyed using any of Wario's attacks. | |
| Blue block | More solid blocks which can only be destroyed by using a Dash Attack or Super Smash Attack. | |

|
Jewel piece | Quarter pieces of a jewel which can be found in each level. Their color depends on the passage they are found in. Collecting them all is necessary for gaining access to the passage's boss. |

|
Full Health Item | An item which fully restores Wario's Heart Meter. One can be found in every level, with the exception of the Golden Passage. |

|
CD | A colored CD which can be played in the Sound Room once collected. A total of sixteen CDs can be found in each of the game's main levels, and they are often well-hidden. |
| Heart and little heart | Hearts restore Wario’s Heart Meter. Little hearts are small, red orbs which fill up a meter under Wario’s health. These red orbs can be found by killing enemies. If the meter is full then Wario will regain a heart. If Wario has full health and fills his meter to the max, then the meter will stay full and enemies will drop an additional 100 coin. | |
| Coins | The game's point system and currency, which can be spent at the Mini-Game Shop. The variants are Small Coins, Bronze Coins, Silver Coins and Gold Coins, which are progressively worth a higher amount of points. They are found after defeating enemies or by opening boxes. | |
| Red and Blue Crystals | Red and Blue Crystals are worth ten and one hundred points respectively. Unlike coins, they are found suspended in mid-air and don't disappear after an amount of time. | |
| Diamond | Diamonds are often hidden throughout levels, within pink areas and as a prize from a chance wheel. They are worth 1,000 points. | |
| Medal | Medals are the currency used in the Item Shop, and are collected by scoring high in the mini-games at the Mini-Game Shop. | |
| "!" Buttons | "!" Buttons can be pressed to fill transparent blocks and vice versa. Sloped varieties exist which allow Wario to roll. "!" Buttons are often found in pink areas as part of puzzle sections. | |
| Ladders | Wario can climb and descend ladders. Their design varies depending on the passage. | |
| Pipes | Warp Pipes take Wario to a different area. Purple warp pipes lead to pink areas. | |
| Rock | Wario can pick up and throw rocks to break brown blocks or defeat enemies. | |
| Flower | Only being seen in Wildflower Fields, flowers are pollinated by Beezleys to produce coins. The value of the coins depend on how ripe the flower's fruit is. | |
| Bubble | Wario can swim into a bubble to become Bubble Wario, allowing him to move through water currents. In some areas, bubbles should be avoided as they can divert Wario back to an unwanted area. | |
| Togetoge | Togetoge resemble a chestnut and are only seen in Mystic Lake. They fall out of trees and harm Wario on contact. | |
| Spikes | Spikes are immovable objects which can only be passed through by Frozen Wario and Zombie Wario. | |
| Piston | Pistons turn Wario into Flat Wario if they hit him. A decompressor reverses this effect. | |
| Bonfire Block | Bonfire Blocks are unbreakable unless Wario is fully engulfed in flames, which happens a short period of time after gaining the Flaming Wario reaction. | |
| Snowman Block | These are blocks which can only be broken by Snowman Wario, after he has fallen down a slope and gained some speed while rolling. | |
| Icicle | Icicles continually form and fall from the ceiling. They can be safely passed through while rolling as Snowman Wario or as Frozen Wario. | |
| Chomp ball and pinball tulip | In Pinball Zone, Wario must carry and throw each chomp ball into a pinball tulip to open the door to the next room. | |
| Pinball digital counter | This counts how many pinball tulips remain in a room. It disappears once it reaches zero, releasing a 500 coin and opening up the door to the next room. | |
| Electric spark | These continuously emit sparks which travel across the ground, harming Wario. | |
| Triangle block | An object in Toy Block Tower which must be carried to Toy Block Doors, filling a slot to open a door. | |
| Round red rock | Wario can use round red rocks to reach higher areas. They can be rolled in either direction using an attack. | |
| Chance wheel and Goal Block | In The Big Board, chance wheels spin and can cause certain events depending on the number hit. Such events include switching blocks, causing lightning to strike or making enemies appear. | |
| Buttons | These are found at the end of rows of dominos in Domino Row. If Wario hits the button before the dominos fall, it will break nearby domino blocks. | |
| Domino blocks | These conceal doors or alternate paths, and can only be broken if Wario hits the button before the row of dominos does. | |
| Flying carpet | Wario can ride flying carpets to gain height and descend slowly. | |
| Tube | Tubes are only seen in a single room in Arabian Night. Depending on which tube Wario enters, Beezleys or Miniculas will appear. | |
| Chandelier | In the Golden Passage, certain chandeliers will sway and fall when Wario approaches. They then burst into blue flames and transform Wario into Flaming Wario. |
Passages and levels[edit]
- “My game unfolds inside a pyramid made up of six passages!”
- —Wario, Wario Land 4 instruction booklet
Each of the four main passages have four levels, with a boss at the end of the passage. The Entry Passage and the Golden Pyramid have only one level before the boss.
| Passage | Level | Description | Boss |
|---|---|---|---|
 Entry Passage |
Hall of Hieroglyphs |
A tutorial level which shows hieroglyphs of the shop owner on the walls. They indicate actions and animated button commands for the player to learn, such entering a pipe and attacking to break blocks. | Spoiled Rotten |
 Emerald Passage |
Palm Tree Paradise |
A straightforward level with few alternate paths. It contains many blocks, basic enemies, and introduces the Fat Wario transformation. | Cractus |
Wildflower Fields |
Wildflower Fields often utilizes the Puffy Wario transformation, allowing the player to access high areas. There are some underground locations, water currents, and a sub-area where Wario climbs inside a hollow sunflower. | ||
Mystic Lake |
Much of the Mystic Lake takes place underwater. The Bouncy and Bubble Wario transformations are introduced. Togenobi is unique to this level, which the player must pass to reach the Keyzer. The remainder of the level takes place above ground. | ||
Monsoon Jungle |
The Monsoon Jungle contains many bodies of water and large areas with vines. On the way back to the vortex, the player progresses through an underground area with winding tree roots. | ||
 Ruby Passage |
The Curious Factory |
A level which takes place in an industrial setting, with moving machinery, conveyor belts and pistons which transform Wario into Flat Wario. The Flaming Wario transformation is also used. | Cuckoo Condor |
The Toxic Landfill |
A level abundant in murky water and blocks resembling rubbish. The Puffy Wario and Fat Wario transformations are used. | ||
40 Below Fridge |
An icy level which appears to take place both inside and outside of a fridge, with icicles and falling snow being a common obstacle. The Snowman Wario and Frozen Wario transformations are introduced. | ||
Pinball Zone |
Much of this level is stylized like a pinball machine, with flashing lights and slopes. There are several rooms where Chomp balls must be thrown into pinball tulips in order to progress. | ||
 Topaz Passage |
This level takes place in a toy castle. The player must fit triangle blocks in doors to make progress. The Flaming Wario transformation is also used. An underground area is seen on the way back to the vortex. | Aerodent | |
The Big Board |
The Big Board appears to take place in a toy village. It is the only level to feature the chance wheel, which manipulates the items and transformations used to make progress. The final chance wheel is a different color and releases the Keyzer. | ||
Doodle Woods |
Doodle Woods features references to drawing, such as pencil obstacles and Hoggus, whose sketches transform into enemies. Some drawings of enemies on the walls also come to life. The level transitions from indoors to outdoors. | ||
Domino Row |
This level features trails of dominoes which fall once Wario walks past. The player must then race the dominoes to a button, potentially opening up alternate paths. | ||
 Sapphire Passage |
Crescent Moon Village |
This level takes place in a moonlit village and features several horror-themed enemies. The Zombie Wario transformation is introduced. A ghost attempts to steal coins and the Keyzer from Wario. | Catbat |
Arabian Night |
Arabian Night features flying carpets used to reach high areas. The level transitions between indoor and outdoor locations, as well as an underground body of water on the way back to the vortex. Mayubirds also feature prominently. | ||
Fiery Cavern |
An underground area with many pools of lava that rise like geysers. Uniquely, hitting the switch here freezes over the remainder of the level. | ||
Hotel Horror |
Hotel Horror features long corridors with many rooms across four floors. There is also a staircase on the outside of the building. Certain rooms in the hotel are locked until the player hits the switch. | ||
 Golden Pyramid |
Golden Passage |
The final level, and the only one where the player presses the switch upon entering the level in every game mode. It consists of an overworld and an underground area where a water current pulls Wario back to the beginning. | Golden Diva |
Other locations[edit]
Pink areas[edit]

There are two pink areas in each level (excluding the Entry Passage and Golden Passage). Each one is found in a Warp Pipe, and contains either a diamond worth 1,000 points, or an amount of coins that are worth roughly 1,000 points when combined. Wario must solve some sort of puzzle to obtain these points, usually using Arewo Shitain-hakase as an object to throw. Completing these rooms is optional and not necessary to complete the level or the game, but they provide an opportunity for the player to earn a few extra points. Likewise, the player never sees a jewel piece or a Keyzer in a pink area, but Full Health Items can be seen in some rooms.
Sound Room[edit]
- “When you find the CDs thrown around the stages, you'll be able to hear some weird music! Collect 'em all and maybe people will like you!”
- —Wario, Wario Land 4 instruction booklet
In every level, except for the Entry Passage and the Golden Pyramid, there is a hidden CD that can be collected and played in the Sound Room, each containing a different soundtrack. There is a total of sixteen CDs to collect. A Karaoke can also be unlocked, which is a full song with Japanese vocals. It can be unlocked by getting a gold crown (10,000 points or more) in each of the eighteen levels. The Karaoke may also be temporarily unlocked by pressing Start, Select, Up, L, and R together at the same time, while in the Sound Room.

Mini-Game Shop[edit]
- “Have some fun, why don’t cha! Play mini-games!”
- —Wario, Wario Land 4 instruction booklet
Prior to the boss room of each passage, there is a Mini-Game Shop where Wario can play one of three Mini-Games. If Wario receives a certain amount of points in each of the Mini-Games, he can earn medals which can be spent at the Item Shop for items to assist him in defeating the boss of that passage. Three different colored Game Bots run the shop, each hosting a different game. Each Mini-Game costs 5,000 points to play (discounted to 2,000 points until Wario completes the Entry Passage).
The three Mini-Games are:
Purchasing items from the Item Shop costs more medals on more difficult modes. On S-Hard mode, Wario's Homerun Derby uses a cheerleader who throws very difficult pitches, compared to the lower level modes.
Item Shop[edit]
- “You thought you could just FIND items? The world doesn't work that way, kid!!”
- —Wario, Wario Land 4 instruction booklet
The Item Shop is a place where Wario can spend his medals, in exchange for items which assist him in defeating a boss by dealing damage before the start of the battle. The shop owner is a form of the black cat.
A table of the nine items and their descriptions is shown below.
| Image | Name | Description |
|---|---|---|
| Apple Bomb | An apple with colored stripes which disguises a bomb. When purchased, the shop owner drags the apple to the boss room, raises it to reveal the bomb, and throws it at the boss to inflict a small amount of damage. | |
| Blast Cannon | When purchased, this is wheeled to the boss room by the shop owner who then snaps their fingers. A bomb is blasted as a projectile out of the cannon, hitting the boss to inflict a small amount of damage. | |
| Vizorman | A seemingly inanimate being, the Vizorman is dragged by the shop owner to the boss room. A laser is then projected from the vizor and hits the boss, dealing a small amount of damage. | |
| Bugle | This is carried to the boss room by the shop owner, who then uses it to play a tune. Flying music notes form, hitting the boss and inflicting an average amount of damage. | |
| Black Dog | When purchased, the shop owner follows Wario to the boss room, where they transform into the Black Dog. The dog bites the boss several times, inflicting a large amount of damage. | |
| Large Lips | When purchased, the shop owner follows Wario to the boss room. They then transforms into the Large Lips, which violently kisses the boss and deals a large amount of damage. | |
| Big Fist | When purchased, the shop owner follows Wario to the boss room. They then transform into the Big Fist which throws a powerful punch at the boss, dealing a large amount of damage. | |
| Black Dragon | When purchased, the shop owner follows Wario to the boss room. There, they transform into the Black Dragon, which breathes fire on the boss to deal a large amount of damage. | |
| Smile | The Smile is the only item that is free. However, selecting it only causes the shop owner to smile and make a sound effect. This may be a reference to the Japanese McDonald's menu which includes a "Smile" for free.[4] |
The more expensive the item, the more damage inflicted on the boss. The price of the items also varies on the game mode, e.g. an item in Hard mode is more expensive than the same item in Normal mode.
Allies[edit]
Within the Golden Pyramid, there are a few characters who assist Wario.
| Image | Name | Description |
|---|---|---|

|
Wario | The game's protagonist and the only playable character in the game. Wario finds out about the pyramid while reading a newspaper article. He drives off across the desert and through a jungle to reach the pyramid, soon falling down a precipice and getting trapped inside. |

|
Kuro Neko | After seeing a newspaper article, Kuro Neko decides to take a trip to the pyramid herself. The cat seems to already know her way around the pyramid, as she leads Wario to the main room. |

|
Keyzer | Keyzers unlock the door to the next level in a passage and disappear as soon as they do so. Eighteen Keyzers are found in the game, one for every level. The ghost tries to steal Keyzer off Wario in the level Crescent Moon Village. |

|
Arewo Shitain-hakase | Arewo Shitain-hakase is the archaeologist that was exploring the pyramid before Wario came and raided it. He also appears in a newspaper in the opening cutscene. Wario is able to use him as an object to throw in a pink area. |

|
Shop owner | The shop owner of the Item Shop is found in the corridor before the boss. They sell Wario items that assist in defeating the boss of that passage. Medals are used as currency, which are earned by achieving a good score in the Mini-Game Shop. The shop owner is actually a form of the black cat, as they transform in the final battle against the Golden Diva. |

|
Princess Shokora | After the Golden Diva is defeated, Wario and Kuro Neko escape the pyramid before it crumbles on top of them. Outside, the treasures that Wario collected are suddenly drawn to the cat, causing her to transform into Princess Shokora. She kisses Wario to show her thanks, and is lifted into the sky by four angels. |
Bosses[edit]
Each of the six bosses guard a different passage in the pyramid. Items can be purchased with medals to weaken bosses at the battle's beginning. Defeating Spoiled Rotten unlocks the four main passages, and clearing a main passage boss stores its legendary treasure and collected treasure chests into the Golden Pyramid.
| Image | Name | Treasure | Description |
|---|---|---|---|

|
Spoiled Rotten | None | The boss of the Entry Passage is a purple, eggplant-like creature. Accompanying it are two Eggplant Warriors who behave identically to Totsumen and can be defeated the same way. After Spoiled Rotten is damaged a few times, it bears teeth that harm Wario on contact. Defeating Spoiled Rotten grants access to the four main passages. |

|
Cractus | The boss of the Emerald Passage is a venus flytrap which can transform Wario into Zombie Wario with its drool. After taking a certain amount of damage, Cractus stands upright, making it necessary for Wario to climb a vine to deal further damage. Defeating Cractus restores the crown to the pyramid. | |
| Cuckoo Condor | The boss of the Ruby Passage is a large cuckoo clock who uses a claw to grab Wario. It can attack with cogs and electricity. After taking several hits, the cuckoo clock falls apart and reveals a vulture underneath. It lays eggs that can be thrown to deal damage. Defeating Cuckoo Condor restores the earrings to the pyramid. | ||

|
Aerodent | The boss of the Topaz Passage is a rat within a large inflatable teddy bear. It throws down pin enemies which Wario can throw to deflate the bear. This exposes the rodent, giving Wario a chance to damage it. After taking several hits, the teddy drops flames which transform him into Flaming Wario. Defeating Aerodent restores the necklace to the pyramid. | |

|
Catbat | The boss of the Sapphire Passage is a large ghost-like cat with a bat on his head. There is a pool of water below the flooring where a mechanical fish swims back and forth. Catbat creates waves which must be jumped over, and spits out orange and purple mines which either damage Wario or turn him into Puffy Wario, respectively. Defeating Catbat restores the bracelets to the pyramid. | |

|
Golden Diva | All | The game's final boss and the ruler of the Golden Pyramid. She wears all four pieces of the legendary treasure collected from previous bosses. The Golden Diva wears many kabuki masks which fall off each time she takes damage. She casts several different enemies into the battle. Wario can use these enemies to inflict damage on the Golden Diva. They are the green enemy, the Teddy Bear, the black egg, and the hammer. When Diva's true face is revealed, she starts destroying the ground. On the last point of health, only her lips remain. |
Enemies and other characters[edit]
- “Taking care of most of my enemies is easier than taking candy from babies – which I highly recommend, by the way!!”
- —Wario, Wario Land 4 instruction booklet
While some enemies can be found in more than one passage, many are only unique to a certain passage and their characteristics usually go by the passage theme. Many enemies drop an assigned value of coins as well as a little heart when defeated. If both Wario's Heart Meter and Heart Gauge are full, then little hearts will be replaced by Silver Coins worth 100 points. The quantity and type of enemies depend on the game mode, as harder difficulties will generally have more enemies, and easier enemies will be replaced by more difficult ones. Most enemies can be defeated using some of Wario's moves, such as a regular "Attack" or "Smash Attack".
- An asterisk (*) next to the enemy name signifies that they transform Wario in some way, and don't cause Wario to lose health.
- N/A under "Coins dropped" signifies that the enemy cannot be defeated.
Common enemies[edit]
The following enemies may be found in multiple passages. No enemy appears in all six passages.
| Image | Name | Coins dropped | Description | Passages (across all game modes) | |||||
|---|---|---|---|---|---|---|---|---|---|
| Marumen | 20 points |
A harmless walking enemy which can be found in most passages. Marumen change from purple to red and back again whenever Wario Smash Attacks near one. A single Marumen can be found in Hotel Horror only on Hard and S-Hard modes. | |||||||
50 points | |||||||||
| Spear-Mask | 10 points |
A common enemy wielding a spear as a weapon. They are found as yellow, blue, or red varieties, and change between these colors whenever Wario Smash Attacks nearby. The yellow Spear-Masks are slow moving, the blue Spear-Masks spin their spear before they start to walk or when they change direction, and the red Spear-Masks charge at Wario whenever they catch sight of him. | |||||||
50 points | |||||||||
100 points | |||||||||
| Totsumen | 50 points |
Totsumen charges at Wario at high speed when he comes near it. If its attack misses and it hits a wall or object, it flips over and can be easily defeated. Totsumen behave identically to Eggplant Warriors. | |||||||
| Spiky | 100 points |
An enemy that is protected by a pink spiked shell. A Smash Attack causes it to flip over, exposing its vulnerable underside. | |||||||
| Harimen Zetto | 300 points |
A stronger version of a Spiky with a black shell. A Super Smash Attack or jumping while Fat Wario is required to flip it over. | |||||||
| Goggley-Blade | 10 points |
A common aquatic enemy which charges at Wario when it catches sight of him. Goggley-Blade's underside can be attacked. | |||||||
| Togemasuku | None | An immobile spiked creature that is seen more often in difficult game modes. They can be defeated if Wario uses certain forms, or throws another enemy or a rock at them. On Normal mode, they only appear in Arabian Night where they transform into either Beezleys or Miniculas. | |||||||
| Shieragucchi | 10 points |
A spiked clam found in bodies of water. It quickly moves upwards when Wario comes near. Shieragucchi can be defeated with a hit from below. | |||||||
| Ringosukī* | None | A monkey that throws apples, which transform Wario into Fat Wario upon contact. | |||||||
| Beezley* | None | A bee which flies down and stings Wario, causing his head to swell and transforming him into Puffy Wario. They also pollinate flowers. They only appear in Wildflower Fields and Arabian Night. | |||||||
| Bow Balloon* | None | An archer that shoots arrows at Wario, which transforms him into Puffy Wario. | |||||||
| Menhanmā* | None | A hammer-wielding creature that tries to flatten Wario, transforming him into Bouncy Wario. | |||||||
| Yeti* | 50 points |
A snow creature that tries to freeze Wario with its icy sneeze, turning him into Frozen Wario. | |||||||
| Kaentsubo* | None | A walking flame jar that tips over when Wario approaches, spreading flames which transform him into Flaming Wario. | |||||||
| Pig Head Statue* | N/A | A statue embedded into the walls that appears in the level Toy Block Tower, as well as some pink areas. It drops flames out of its mouth, which transform Wario into Flaming Wario. They otherwise cannot be interacted with. | |||||||
| Skeleton Bird* | None | A ghost-like bird that drops green goo that turns Wario into Zombie Wario. They are common in the Sapphire Passage. Wario can only harm the Skeleton Bird by touching it in his zombie form. | |||||||
| Minicula* | N/A | A bat that transforms Wario into Bat Wario upon contact. They are common in the Sapphire Passage, and cannot be defeated. | |||||||
| Men'ono | 50 points |
A hooded creature who charges at Wario while swinging its axe. It can be defeated by a regular Attack or Smash Attack, as long as Wario does not touch the axe's hitbox. Like the Skeleton Bird and the Minicula, they are common in Sapphire Passage. | |||||||
| Glass bird | N/A | A bird-like ally that is found in some pink areas. It spits out orbs on regular intervals which smash once they hit the ground. Wario can catch and throw the orbs at colored ! Switches to clear a path to a diamond. | |||||||
Entry Passage enemies[edit]
| Image | Name | Coins dropped | Description |
|---|---|---|---|
| Eggplant Warrior | None | An eggplant-like creature wearing a headband with a knife. It assists the boss Spoiled Rotten. Eggplant Warriors act in the same way as Totsumen. |
Emerald Passage enemies[edit]
| Image | Name | Coins dropped | Description |
|---|---|---|---|
| Imomushi | 10 points |
A harmless, slow moving caterpillar. They mostly appear in Wildflower Fields. | |
| Moguramen | 50 points |
A mole-like creature wearing a mask with a drill that harms Wario. Some of them are seen digging under the ground, and a Smash Attack will bring them to the surface. They only appear in Wildflower Fields. | |
| Utsuboankō | N/A | A sea monster that hides in a hole in the background. They emerge quickly when Wario comes near, damaging him on contact. They only appear in Mystic Lake. | |
| Togenobi | N/A | A large octopus with four rotating tentacles that hold maces. It guards the Keyzer of Mystic Lake. | |
| Tobawani | 10 points |
A crocodile that swims near the water's surface. They jump up to reach Wario, or chase him while in the water. They can be defeated by an Attack while they jump or a Super Smash Attack while they are swimming. They only appear in Monsoon Jungle. | |
| Hotaru* | N/A | A firefly that accompanies the boss Cractus. If Wario touches Cractus' drool, he transforms into Zombie Wario rendering him unable to attack. Hotaru then appears on the screen, and touching it reverts Wario to normal. |
Ruby Passage enemies[edit]
| Image | Name | Coins dropped | Description |
|---|---|---|---|
| Togerobo | 200 points |
A robot with a spiked head that is dropped when they catch sight of Wario, damaging him on contact. Togerobo can then grow back a new head. An Attack from behind or a Smash Attack (before the head grows back) defeats it. They only appear in The Curious Factory. | |
| Petbottom | 50 points |
A bottle walking on four legs. It is armed with a needle on its front, which retracts if it is disturbed. It can be defeated by any attack from behind. They only appear in The Toxic Landfill. | |
| Robobird | None | A robotic bird that attacks by flying at Wario in a straight line. It only appears in the Hard and S-Hard game modes in The Curious Factory and Pinball Zone. It can be defeated by a standard jump. | |
| Spike Cannon | N/A | An enemy that only appears in the level Pinball Zone, mostly around wire mesh that Wario must climb. They shoot out spikes from the top of their heads at regular intervals, harming Wario if they make contact. The top of its head acts as a platform. | |
| Egg | None | An enemy that is produced by the condor form of the boss Cuckoo Condor. The boss lays eggs which hatch into yellow ducks as soon as they hit the ground. They start to flash before blowing up, harming Wario if he is nearby. Wario can catch the eggs before they break and throw them as a projectile. |
Topaz Passage enemies[edit]
| Image | Name | Coins dropped | Description |
|---|---|---|---|
| Toy Car | 10 points |
A tiny Wario driving a mini Wario Car with a spike on the front. They slowly drive along the ground, harming Wario if the spike touches him. They appear in every stage of the passage. | |
| Dice | None | A walking die wielding a spear. They emerge from a chance wheel in The Big Board, when the appropriate space on the ribbon is struck. | |
| Hoggus | N/A | A floating pig-like artist that does not harm Wario directly. He draws Dendens and Butatabis, which come to life shortly after he draws them. Hoggus only appears in Doodle Woods. | |
| Denden | None | A pig in a spiked shell created by Hoggus. It rolls along the ground when Wario comes near, similar to a Togerobo's head. It can be defeated by attacking at its head or belly. | |
| Butatabi | None | A pig created by Hoggus, with a spike on its head. It glides from right to left. | |
| Deburīna | 50 points |
A drawing of a dancing pig that has come to life. Deburīna has a hula hoop around its body that rotates while it dances. The edge of the hoop harms Wario. Like other pig enemies, they only appear in Doodle Woods. | |
| Pin enemy* | None | A hopping creature with a spike on the bottom assisting the boss Aerodent. They must be thrown at Aerodent by Wario. |
Sapphire Passage enemies[edit]
| Image | Name | Coins dropped | Description |
|---|---|---|---|

|
Ghost | N/A | A pirate-like ghost that does not harm Wario, but follows him and tries to collect every coin before Wario can do so. It also tries to steal the Keyzer from Wario. It only appears in Crescent Moon Village. |
| Mayubird | None | A bat-like creature that only flies within a small area, but can be found in large groups. They have fangs on their underside which harm Wario. They can be defeated by any attack. If they are tapped on the side, they will fly away. Mayubirds are only found in Arabian Night. | |
| Onomī | 50 points |
A mummified enemy wielding an axe. It uses the same attack as Men'onos, and can be defeated in the same way. They only appear in Arabian Night. | |
| Bowler | 100 points |
Bowlers throw rolling rocks at Wario. They turn into Yetis when the switch is hit in the level Fiery Cavern, and they only appear in that level. It can only be defeated with a Smash Attack on the head. | |
| Mechanical fish | None | A fish with a drill patrolling the pool of the boss Catbat. A Super Smash Attack is the only way to defeat it. | |
| Mine* | None | An enemy that accompanies the boss Catbat. Whenever Catbat takes damage, he coughs out small spiked balls as projectiles. If Wario touches the purple ones, he transforms into Puffy Wario. After Catbat's HP gets down to a certain point, he will cough out red mines, which harm Wario. |
Golden Pyramid enemies[edit]
The last part of the game does not introduce new enemies, aside from the creatures created by the Golden Diva. Some enemies that are otherwise exclusive to the Sapphire Passage reappear in the Golden Passage, the last level before the final boss. This includes Skeleton Birds, Men'onos, and Miniculas.
| Image | Name | Coins dropped | Description |
|---|---|---|---|
| Green enemy | None | A creature produced by the Golden Diva. It flies down from the sky, moving from side to side. When it hits the ground, or if Wario stuns it, he can pick it up and throw it at the Golden Diva to inflict damage. | |
| Teddy Bear | None | A Teddy Ball in a blue ball dropped by the Golden Diva. Wario can attack it to send it flying, bouncing off the walls and possibly inflicting damage on the Golden Diva. The ball explodes by itself if left alone. | |
| Black egg | None | A variation of an egg which is thrown by the Golden Diva. They crack open to reveal a time-bombed duck. Wario can catch the eggs before they hit the ground, and throw it at the Golden Diva to inflict damage. | |
| Hammer* | N/A | A spiky hammer which is thrown by the Golden Diva. Shortly after hitting the ground, it loses its spikes. Wario can then throw it up in the air with the intention of it landing on him, transforming him into Bouncy Wario. He can then use this reaction to damage the Diva. | |
| Lips | None | When the Golden Diva has been defeated, her lips remain on the stage. Wario must attack once to destroy them, freeing Kuro Neko and ending the game. |
Reception[edit]
The game received generally positive reviews. The "portable masterpiece" received praise and excellent review scores on its soundtrack, collectibles throughout the game and its general thrill of satisfaction. One gaming website commented about even on its ten year anniversary, it "still remains the best portable Super Mario game to date".[5] IGN gave Wario Land 4 a nine out of ten, or "Outstanding", citing its well thought out level design and replayability, and how the game "puts a lot more emphasis on action" compared to its predecessors.[6] Praise was also given to how much attention the developers paid to the sounds and music. It was not given a full ten because the game does not necessarily push the performance power of the Game Boy Advance in regards to animation design. The website quoted that "it's a little disappointing to see that Wario isn't much of a step beyond his GBC adventure in terms of art and animation...other than the sprite effects, it could have been done on the 8-bit handheld".
| Reviews | |||
|---|---|---|---|
| Release | Reviewer, Publication | Score | Comment |
| Game Boy Advance | Jason D'Aprile, Gamespy | 88/100 | "Definitely the GBA side-scroller that Nintendo fans were waiting for, Warioland 4 is an incredibly entertaining, diverse, and humorous addition to the Mario/Wario legacy. It's challenging and creative, but not as outright frustrating as Warioland 3. Fans disappointed by Mario Advance will especially appreciate this gem." |
| Game Boy Advance | Shane Satterfield, GameSpot | 8.7/10 | "If you're looking for a quality 2D platformer for your Game Boy Advance, look no further than Wario Land 4. As Nintendo's first platforming game developed solely for the GBA, it shines in all the right places. The gameplay is tight and varied, the graphics are detailed and bright, and the sound is second to none. Wario Land 4 does have some confusing puzzles in its later stages that may be too difficult for younger players, but for everyone else, it comes highly recommended." |
| Game Boy Advance | Craig Harris, IGN | 9/10 | "Wario rocks -- there's a lot of variety in the game design and is more challenging than the usual side-scrolling fare due to its focus on making players figure out how to get to certain locations in the level. It's slightly similar to Klonoa in that respect, but Wario Land 4 puts a lot more emphasis on action. The slight control glitch at ladders is a bit of a drag, and the mini-games are more silly than they are fun to play. Wario Land 4 is also the first Nintendo GBA product without any link support...but I'm willing to look the other way on this fact since the single player adventure is so good." |
| Aggregators | |||
| Compiler | Platform / Score | ||
| Metacritic | 88 | ||
| GameRankings | 85.34% | ||
Music and sound design[edit]
- For a complete list of media for this subject, see List of Wario Land 4 media. For a list of in-game music, see Sound Room.
Wario Land 4's music composition and sound design was handled by Ryoji Yoshitomi, and is unique in comparison to that of most other Nintendo games. Unlike most voice samples in video games generally, Wario's voice clips are broken down into single words or sounds which are randomly manipulated in real-time. In particular, his laughter consists of a single sound, repeated with the pitch sliding down. Occasionally, Wario's voice clips are contextually randomized - for instance, he may say "Yeah!" or laugh when he gets hurt, or grunt in pain when finding a treasure chest.[7]
Unlike the past two installments of the series, Wario Land 4 uses modifications to the background music of levels, instead of entirely separate tracks, to underscore Wario's transformations. Such modifications range from pitch and speed changes to the oscillating pitch-warp effect previously used in the level Touch Fuzzy, Get Dizzy from Super Mario World 2: Yoshi's Island, when Yoshi touches the titular enemies. The BGM speeds up whenever Wario rolls on a 45 degree slope, and slows down a bit whenever he crouches. In addition, some levels, such as Palm Tree Paradise, have secondary music tracks that play only in certain sections of the level.[7]
The music of Wario Land 4 takes up a significant portion of the storage capacity. The music spans a wide variety of genres including blues, soul, folk, country, funk, jazz, drum and bass, heavy metal, experimental music, ambient music, noise music, and musique concrète; as such, the soundtrack as a whole can be considered eclectic and uncategorizable.[7] The general instrumentation for the game's music comes from the Roland Sound Canvas SC-8850, part of a line of sound modules that, as a whole, was used in countless soundtracks associated with Super Mario and its partner franchises, other Nintendo franchises, and video games in general throughout the mid- and late 1990s and early and mid-2000s. The game also uses a number of stock vocal samples, taken from CDs such as Spectrasonics' Vocal Planet, volume 3; Midi Mark Productions' Vocal Bytes, and Zero-G's Vocal XTC (the latter two of which lend some of their samples to the title screen theme, "Work It!")[8] The vocals for the song "Medamayaki," heard in Palm Tree Paradise, were created by inserting audio samples of individual syllables into the backing music track.[7]
| File info 0:30 |
| File info 0:30 |
| File info 0:30 |
References in later games[edit]

- Metroid Fusion's unused game data shows various assets from Wario Land 4, including large blocks and crystals, which suggests that the game was based on the same engine as Wario Land 4.[9]
- WarioWare, Inc.: Mega Microgame$!: The game features multiple, reused voice clips and other sound effects which would also appear in the following WarioWare installments. The Wario Car appears in Produce Pandemonium.
- Mario Kart: Double Dash!!: The Wario Car appears as one of the starter vehicles.
- Densetsu no Stafy 3: Wario makes a guest appearance in where he helps Stafy throughout the Kaitei Iseki by using some of his reactions from Wario Land 4. Wario and Stafy arrive at a vortex, where they must enter to locate the switch and four jewel pieces in order to unlock the boss's door. Wario can transform into Bubble Wario, Flaming Wario, and Puffy Wario respectively.
- Wario Land: Shake It!: The Wario Car returns in this game.
- WarioWare: D.I.Y. Showcase: The game has a microgame titled "Wario Land", which features sprites and concepts taken from Wario Land 4. In the microgame, Wario must use dash to break through a block and defeat a yellow Spear-Mask. The attack must be timed to successfully strike the Spear-Mask while its spear is facing away from Wario.
- WarioWare: Get It Together!: The Wario Car is featured in one of 18-Volt's gallery illustrations. A photo of the Golden Pyramid can be seen in level 3 of the microgame Where Goes the Nose?
- WarioWare: Move It!: The boss Cractus reappears in this game, serving as an obstacle for Kat and Ana in their stage.
WarioWare, Inc.: Mega Party Game$![edit]
WarioWare, Inc.: Mega Party Game$! contains a seemingly complete set of instrumental sounds used for the soundtrack of Wario Land 4 within the game's files, and may be assembled together manually to recreate each of the individual tracks.[10] Various theme songs and sound effects from Wario Land 4 are also heard during normal gameplay:
- The theme of the Item Shop is used as Mona's theme melody. The music can also be heard in WarioWare, Inc.: Mega Microgame$! in a less modified form when the Gelateria is seen from the inside during Mona's story.
- The song that plays whenever a character's story is cleared and all the other employees are shown at the Gelateria is a shortened version of "Mr. Ether & Planaria".
- A slightly sped up version of Palm Tree Paradise's theme can also be heard in the microgame Balancing Act.
- The whispering heard in the Sound Room's "The Short Futon" was used for the microgame Right in the Eye.
- One of the songs available for Jump Forever is the theme for Pinball Zone.
- Additionally, part of Crescent Moon Village's theme can be heard during the epilogue of Wario's second set of microgames in Mega Microgame$!.
Official descriptions[edit]
- Nintendo of America website:
Stash epic loot as you smash your way through a cursed pyramid.
Bask in the greedy glory of treasure-hoarding as you hop, roll, and zombify Wario™ through 20 huge, puzzle-packed levels. This critically praised platformer sees our stubby anti-hero in search of gold, jewels, and riches beyond imagining, but when his insatiable need for loot lands him in a twisted pyramid of traps, he’ll need your wits to get out!
There's lots of treasure in there for the taking, and Wario wants it all. There are plenty of punches, jumps, kicks, and tricks to master throughout the gameplay and various forms for Wario to take, like Flaming Wario, Vampire Bat Wario, or Zombie Wario that can be used to uncover some of the pyramid’s hidden hoard. Lots of bad guys and boss characters will try to make your escape more difficult, and there are plenty of unique challenges to stretch your reflexes and imagination. True to Wario style, there are even a handful of mini-games to keep you amused when you're not adventuring.[11] - Nintendo of UK website:
Loot-loony Wario has discovered his biggest score yet: a fabulous golden pyramid filled with riches. Trouble is, its denizens don't want to give up the treasure easily – but that hasn't stopped Wario before!
In Wario Land 4, the greedy hero finds himself no longer invincible, as in his previous platform adventures. However he can undergo amazing transformations that aid him in his quest; now he can become Bat Wario, Bouncy Wario and even Zombie Wario!
Four guardians stand jealously over the four sections of the pyramid. Wario will either have to defeat each guardian, or activate a switch and escape before time runs out![12] - SuperMario_UK Twitter:
A fabulous golden pyramid filled with riches, you say? Too tempting for Wario! In Wario Land 4 on Game Boy Advance our hero is tasked with nabbing its treasures, despite the risks![13]
Gallery[edit]
- For this subject's image gallery, see Gallery:Wario Land 4.

Pre-release and unused content[edit]
- Main article: List of Wario Land 4 pre-release and unused content

Wario Land 4 was first announced at E3 2001. The first released screenshots were very different from the final game. Wario had a darker, more orange skin tone, and a lot of the enemies were shown to have a different color scheme as well. A notable difference from the final game is how Wario originally had a garlic gauge, serving as a replacement for the Heart Gauge below the Heart Meter. The Mini-Game Shop was going to be called the Game Corner, and Wario originally needed a key to unlock a jewel piece box.
Staff[edit]

- Main article: List of Wario Land 4 staff
Nintendo R&D1 developed Wario Land 4, with the executive producer being Hiroshi Yamauchi. Hirofumi Matsuoka (who had previously co-directed Virtual Boy Wario Land) directed the game. The game was among the first Nintendo projects for Goro Abe and Ko Takeuchi, who later become key figures of the WarioWare series.
Wario Land 4 is the last active development credit of Wario's creator, Hiroji Kiyotake. Following the release of the game, Kiyotake assumed a supervisor role inside Nintendo SPD.
Glitches[edit]
- Main article: List of Wario Land 4 glitches
There are currently three known glitches in Wario Land 4. The player is able to fly vertically, hold an invisible object and walk through walls. All of these can be encountered during normal gameplay.
Quotes[edit]
- Main article: List of Wario Land 4 quotes
In Wario Land 4, there is not a large amount of quotes within the game itself. But there are many notable quotes within the game's instruction booklet, where Wario describes to the reader many aspects of gameplay and a few enemy descriptions. Some of the most notable are shown below.
Quotes found in the game;
- "LEGENDARY PYRAMID DISCOVERED DEEP IN JUNGLE!! Legendary treasure nearly found, but accidents hindered findings" – Newspaper article seen in the game's opening cutscene.
- "Welcome to the Item Shop." – The shop owner welcoming Wario to the Item Shop.
- "Oh no, no! Hurry up!" – Wario, when he hits the switch in a level.
Quotes found in the game's manual;
- "I ain't normal! And I don't mean that I'm stupid! I can do aaalllll kinds o' stuff that normal humans can't, you know what I mean? How 'bout that? Amazing, huh?"
- "Rumour has it that no one who's entered the Golden Passage have ever come out alive! Scary!"
- "Yeahhhhh, that's ME!!! More gorgeous than any Hollywood star! Get a good look at me while you can!!" – Wario describing himself.
- "I don't always speak so crudely, you know. I'm just worried about you because you play so badly!! Why do I care? Because I'm the one that feels it when you screw up, that’s why!!! So just try to get better at this game, OK?! I'm begging you!"
Names in other languages[edit]
| Language | Name | Meaning |
|---|---|---|
| Japanese | ワリオランドアドバンス ヨーキのお宝 Wario Rando Adobansu: Yōki no Otakara |
Wario Land Advance: The Treasure of the Golden Diva |
| Chinese | 瓦力欧寻宝记 Wǎlìōu xúnbǎo jì |
Wario Treasure Finding |
Trivia[edit]
- Part of the vocals used in the game's title track were taken from the first track of Zero-G's Vocal XTC audio sample compilation. The specific vocal lines in question are "Your time is over, I've had enough! Here I come! Look out, here I come!", sung by British session singer Helen Binding.[14][15]
- Wario's in-game sprite shows that he is wearing gold buttons (similar to Mario, Luigi, and Waluigi's) and purple shoes. However, in the official artwork, his buttons are white and his shoes are green.
References[edit]
- ^ GameFAQs - Wario land 4 Release Data
- ^ “2004年6月,神游推出小神游GBA,捆绑简体中文版《超级马力欧2》和《瓦力欧寻宝记》” (In June 2004, iQue released the iQue Game Boy Advance, with the Simplified Chinese versions of Super Mario Advance and Wario Land 4 bundled.) 大狗 (June 22, 2016). 《记录》第17期:神游中国(上). 触乐. Retrieved February 28, 2017.
- ^ Game Boy Advance 3DS Ambassador Program Begins on Friday
- ^ https://blogs.wsj.com/japanrealtime/2015/05/21/despite-hard-times-mcdonalds-japan-plans-to-smile-again/
- ^ Why Wario Land 4 remains the best portable Super Mario game
- ^ IGN Wario Land 4 review
- ^ a b c d geno7 (December 20, 2022). The Bizarre Music and Sound Design of Wario Land 4. YouTube. Retrieved August 26, 2023.
- ^ https://docs.google.com/spreadsheets/d/1JJBlHHDc65fhZmKUGLrDTLCm6rfUU83-kbuD8Y0zU0o/edit?pli=1#gid=717751203
- ^ The Cutting Room Floor's page for Metroid Fusion
- ^ Forum post by "Weario" at warioforums.com (retrieved September 5, 2016)
- ^ Wario Land 4. nintendo.com. Retrieved September 8, 2021. (Archived July 28, 2020, 22:16:14 UTC via Wayback Machine.)
- ^ Wario Land 4. nintendo.co.uk. Retrieved September 8, 2021.
- ^ SuperMario_UK (September 7, 2021). Twitter. Retrieved September 8, 2021. (Archived September 8, 2021, 11:26:08 UTC via Wayback Machine.)
- ^ Zero-G Vocal XTC product page (accessed on September 24, 2016)
- ^ Vocal XTC CD booklet (accessed on September 24, 2016)
External links[edit]
- North American website (web archive)
- North American gamepage (web archive)
- North American Virtual Console page (web archive)
- European microsite (web archive)
- European Virtual Console page
- Japanese website
- Japanese Virtual Console page