Builder Mario: Difference between revisions
MarioMan25 (talk | contribs) |
|||
| Line 52: | Line 52: | ||
{{MKT profile | {{MKT profile | ||
|collapse=y | |collapse=y | ||
|item=Hammer | |item=Hammer | ||
| Line 66: | Line 65: | ||
|I1.10=Los Angeles Laps RT|R1.10=[[Los Angeles Laps|Los Angeles Laps R/T]] | |I1.10=Los Angeles Laps RT|R1.10=[[Los Angeles Laps|Los Angeles Laps R/T]] | ||
|I1.11=Los Angeles Laps T|R1.11=[[Los Angeles Laps|Los Angeles Laps T]] | |I1.11=Los Angeles Laps T|R1.11=[[Los Angeles Laps|Los Angeles Laps T]] | ||
|I1.12=Tokyo Blur RT|R1.12=[[Tokyo Blur|Tokyo Blur R/T]] | |I1.12=Tokyo Blur RT|R1.12=[[Tour Tokyo Blur|Tokyo Blur R/T]] | ||
|I1.13=London Loop RT|R1.13=[[London Loop|London Loop R/T]] | |I1.13=London Loop RT|R1.13=[[Tour London Loop|London Loop R/T]] | ||
|I1.14=Sunset Wilds T|R1.14=[[GBA Sunset Wilds|GBA Sunset Wilds T]] | |I1.14=Sunset Wilds T|R1.14=[[GBA Sunset Wilds|GBA Sunset Wilds T]] | ||
|I1.15=Tokyo Blur 4RT|R1.15=[[Tokyo Blur | |I1.15=Tokyo Blur 4RT|R1.15=[[Tour Tokyo Blur|Tokyo Blur 4R/T]] | ||
|I1.16=Sydney Sprint RT|R1.16=[[Sydney Sprint|Sydney Sprint R/T]] | |I1.16=Sydney Sprint RT|R1.16=[[Tour Sydney Sprint|Sydney Sprint R/T]] | ||
|I1.17=Airship Fortress RT|R1.17=[[DS Airship Fortress|DS Airship Fortress R/T]] | |I1.17=Airship Fortress RT|R1.17=[[DS Airship Fortress|DS Airship Fortress R/T]] | ||
|I1.18=RMX Ghost Valley 1RT|R1.18=[[RMX Ghost Valley 1|RMX Ghost Valley 1R/T]] | |I1.18=RMX Ghost Valley 1RT|R1.18=[[RMX Ghost Valley 1|RMX Ghost Valley 1R/T]] | ||
| Line 77: | Line 76: | ||
|I1.21=Ghost Valley 2T|R1.21=[[SNES Ghost Valley 2|SNES Ghost Valley 2T]] | |I1.21=Ghost Valley 2T|R1.21=[[SNES Ghost Valley 2|SNES Ghost Valley 2T]] | ||
|I1.22=Riverside Park RT|R1.22=[[GBA Riverside Park|GBA Riverside Park R/T]] | |I1.22=Riverside Park RT|R1.22=[[GBA Riverside Park|GBA Riverside Park R/T]] | ||
|I1.23=GBA Bowser's Castle 3RT|R1.23=[[GBA Bowser's Castle 3|GBA Bowser's Castle 3R/T]] | |||
|I2.1=Mario Circuit 2RT|R2.1=[[SNES Mario Circuit 2|SNES Mario Circuit 2R/T]] | |I2.1=Mario Circuit 2RT|R2.1=[[SNES Mario Circuit 2|SNES Mario Circuit 2R/T]] | ||
| Line 89: | Line 88: | ||
|I2.9=Rock Rock Mountain T|R2.9=[[3DS Rock Rock Mountain|3DS Rock Rock Mountain T]] | |I2.9=Rock Rock Mountain T|R2.9=[[3DS Rock Rock Mountain|3DS Rock Rock Mountain T]] | ||
|I2.10=Choco Island 1T|R2.10=[[SNES Choco Island 1|SNES Choco Island 1T]]** | |I2.10=Choco Island 1T|R2.10=[[SNES Choco Island 1|SNES Choco Island 1T]]** | ||
|I2.11=Paris Promenade T|R2.11=[[Paris Promenade|Paris Promenade T]] | |I2.11=Paris Promenade T|R2.11=[[Tour Paris Promenade|Paris Promenade T]] | ||
|I2.12=Maple Treeway T|R2.12=[[Wii Maple Treeway|Wii Maple Treeway T]] | |I2.12=Maple Treeway T|R2.12=[[Wii Maple Treeway|Wii Maple Treeway T]] | ||
|I2.13=DK Summit T|R2.13=[[Wii DK Summit|Wii DK Summit T]] | |I2.13=DK Summit T|R2.13=[[Wii DK Summit|Wii DK Summit T]] | ||
|I2.14=RMX Choco Island 1RT|R2.14=[[RMX Choco Island 1|RMX Choco Island 1R/T]]*** | |I2.14=RMX Choco Island 1RT|R2.14=[[RMX Choco Island 1|RMX Choco Island 1R/T]]*** | ||
|I2.15=RMX Ghost Valley 1T|R2.15=[[RMX Ghost Valley 1|RMX Ghost Valley 1T]] | |I2.15=RMX Ghost Valley 1T|R2.15=[[RMX Ghost Valley 1|RMX Ghost Valley 1T]] | ||
|I2.16=Sydney Sprint 2RT|R2.16=[[Sydney Sprint | |I2.16=Sydney Sprint 2RT|R2.16=[[Tour Sydney Sprint|Sydney Sprint 2R/T]] | ||
|I2.17=Mushroom Gorge T|R2.17=[[Wii Mushroom Gorge|Wii Mushroom Gorge T]] | |I2.17=Mushroom Gorge T|R2.17=[[Wii Mushroom Gorge|Wii Mushroom Gorge T]] | ||
|I2.18=3DS Bowser's Castle RT|R2.18=[[3DS Bowser's Castle|3DS Bowser's Castle R/T]] | |I2.18=3DS Bowser's Castle RT|R2.18=[[3DS Bowser's Castle|3DS Bowser's Castle R/T]] | ||
| Line 100: | Line 99: | ||
|I2.20=Bangkok Rush T|R2.20=[[Bangkok Rush|Bangkok Rush T]] | |I2.20=Bangkok Rush T|R2.20=[[Bangkok Rush|Bangkok Rush T]] | ||
|I2.21=Piranha Plant Slide T|R2.21=[[3DS Piranha Plant Slide|3DS Piranha Plant Slide T]] | |I2.21=Piranha Plant Slide T|R2.21=[[3DS Piranha Plant Slide|3DS Piranha Plant Slide T]] | ||
|I2.22=Singapore Speedway 2RT|R2.22=[[Singapore Speedway | |I2.22=Singapore Speedway 2RT|R2.22=[[Singapore Speedway|Singapore Speedway 2R/T]] | ||
|I2.23=New York Minute B|R2.23=[[New York Minute B]] | |I2.23=New York Minute B|R2.23=[[Tour New York Minute|New York Minute B]] | ||
|I2.24=DK Mountain RT|R2.24=[[GCN DK Mountain|GCN DK Mountain R/T]] | |I2.24=DK Mountain RT|R2.24=[[GCN DK Mountain|GCN DK Mountain R/T]] | ||
}} | }} | ||
| Line 112: | Line 111: | ||
{{MKT profile | {{MKT profile | ||
|collapse=y | |collapse=y | ||
|item=Bob-omb Cannon | |item=Bob-omb Cannon | ||
| Line 123: | Line 121: | ||
|I1.7=Yoshi Circuit T|R1.7=[[GCN Yoshi Circuit|GCN Yoshi Circuit T]] | |I1.7=Yoshi Circuit T|R1.7=[[GCN Yoshi Circuit|GCN Yoshi Circuit T]] | ||
|I1.8=Ghost Valley 1T|R1.8=[[SNES Ghost Valley 1|SNES Ghost Valley 1T]] | |I1.8=Ghost Valley 1T|R1.8=[[SNES Ghost Valley 1|SNES Ghost Valley 1T]] | ||
|I1.9=Tokyo Blur 3T|R1.9=[[Tokyo Blur | |I1.9=Tokyo Blur 3T|R1.9=[[Tour Tokyo Blur|Tokyo Blur 3T]] | ||
|I1.10=RMX Rainbow Road 1T|R1.10=[[RMX Rainbow Road 1|RMX Rainbow Road 1T]] | |I1.10=RMX Rainbow Road 1T|R1.10=[[RMX Rainbow Road 1|RMX Rainbow Road 1T]] | ||
|I1.11=Vancouver Velocity T|R1.11=[[Vancouver Velocity|Vancouver Velocity T]] | |I1.11=Vancouver Velocity T|R1.11=[[Vancouver Velocity|Vancouver Velocity T]] | ||
|I1.12=New York Minute 3RT|R1.12=[[New York Minute | |I1.12=New York Minute 3RT|R1.12=[[Tour New York Minute|New York Minute 3R/T]] | ||
|I1.13=New York Minute 3T|R1.13=[[New York Minute | |I1.13=New York Minute 3T|R1.13=[[Tour New York Minute|New York Minute 3T]] | ||
|I1.14=RMX Rainbow Road 1RT|R1.14=[[RMX Rainbow Road 1|RMX Rainbow Road 1R/T]] | |I1.14=RMX Rainbow Road 1RT|R1.14=[[RMX Rainbow Road 1|RMX Rainbow Road 1R/T]] | ||
|I1.15=Merry Mountain T|R1.15=[[Merry Mountain|Merry Mountain T]] | |I1.15=Merry Mountain T|R1.15=[[Merry Mountain|Merry Mountain T]] | ||
|I1.16=DK Summit T|R1.16=[[Wii DK Summit|Wii DK Summit T]] | |I1.16=DK Summit T|R1.16=[[Wii DK Summit|Wii DK Summit T]] | ||
|I1.17=Tokyo Blur 4T|R1.17=[[Tokyo Blur | |I1.17=Tokyo Blur 4T|R1.17=[[Tour Tokyo Blur|Tokyo Blur 4T]] | ||
|I1.18=Royal Raceway RT|R1.18=[[N64 Royal Raceway|N64 Royal Raceway R/T]] | |I1.18=Royal Raceway RT|R1.18=[[N64 Royal Raceway|N64 Royal Raceway R/T]] | ||
|I1.19=Ninja Hideaway T|R1.19=[[Ninja Hideaway|Ninja Hideaway T]] | |I1.19=Ninja Hideaway T|R1.19=[[Ninja Hideaway|Ninja Hideaway T]] | ||
|I1.20=Sydney Sprint T|R1.20=[[Sydney Sprint|Sydney Sprint T]] | |I1.20=Sydney Sprint T|R1.20=[[Tour Sydney Sprint|Sydney Sprint T]] | ||
|I1.21=Choco Mountain RT|R1.21=[[N64 Choco Mountain|N64 Choco Mountain R/T]] | |I1.21=Choco Mountain RT|R1.21=[[N64 Choco Mountain|N64 Choco Mountain R/T]] | ||
|I1.22=London Loop 2RT|R1.22=[[London Loop | |I1.22=London Loop 2RT|R1.22=[[Tour London Loop|London Loop 2R/T]] | ||
|I1.23=Piranha Plant Slide T|R1.23=[[3DS Piranha Plant Slide|3DS Piranha Plant Slide T]] | |I1.23=Piranha Plant Slide T|R1.23=[[3DS Piranha Plant Slide|3DS Piranha Plant Slide T]] | ||
|I1.24=Amsterdam Drift 3RT|R1.24=[[Amsterdam Drift | |I1.24=Amsterdam Drift 3RT|R1.24=[[Amsterdam Drift|Amsterdam Drift 3R/T]] | ||
|I1.25=Sky Garden RT|R1.25=[[GBA Sky Garden|GBA Sky Garden R/T]] | |||
|I2.1=SNES Rainbow Road RT|R2.1=[[SNES Rainbow Road|SNES Rainbow Road R/T]] | |I2.1=SNES Rainbow Road RT|R2.1=[[SNES Rainbow Road|SNES Rainbow Road R/T]] | ||
| Line 151: | Line 150: | ||
|I2.10=Donut Plains 1T|R2.10=[[SNES Donut Plains 1|SNES Donut Plains 1T]] | |I2.10=Donut Plains 1T|R2.10=[[SNES Donut Plains 1|SNES Donut Plains 1T]] | ||
|I2.11=Choco Island 1T|R2.11=[[SNES Choco Island 1|SNES Choco Island 1T]] | |I2.11=Choco Island 1T|R2.11=[[SNES Choco Island 1|SNES Choco Island 1T]] | ||
|I2.12=Kalimari Desert 2T|R2.12=[[N64 Kalimari Desert | |I2.12=Kalimari Desert 2T|R2.12=[[N64 Kalimari Desert|N64 Kalimari Desert 2T]] | ||
|I2.13=Paris Promenade T|R2.13=[[Paris Promenade|Paris Promenade T]] | |I2.13=Paris Promenade T|R2.13=[[Tour Paris Promenade|Paris Promenade T]] | ||
|I2.14=Tokyo Blur 4RT|R2.14=[[Tokyo Blur | |I2.14=Tokyo Blur 4RT|R2.14=[[Tour Tokyo Blur|Tokyo Blur 4R/T]] | ||
|I2.15=RMX Rainbow Road 2RT|R2.15=[[RMX Rainbow Road 2|RMX Rainbow Road 2R/T]]*** | |I2.15=RMX Rainbow Road 2RT|R2.15=[[RMX Rainbow Road 2|RMX Rainbow Road 2R/T]]*** | ||
|I2.16=Singapore Speedway 2T|R2.16=[[Singapore Speedway | |I2.16=Singapore Speedway 2T|R2.16=[[Singapore Speedway|Singapore Speedway 2T]] | ||
|I2.17=Baby Park RT|R2.17=[[GCN Baby Park|GCN Baby Park R/T]] | |||
}} | }} | ||
*'''''Mario Kart Tour'' Twitter:''' ''Builder Toad shows up for part two of the Trick Tour! Whether it's constructing castles or rounding curves, safety always takes priority. With his yellow hard hat fastened on tight, he's ready to hit the track!''<ref>mariokarttourEN (April 29, 2020). [https://twitter.com/mariokarttourEN/status/1255376265839706112 ''Twitter'']. Retrieved April 29, 2020.</ref> | *'''''Mario Kart Tour'' Twitter:''' ''Builder Toad shows up for part two of the Trick Tour! Whether it's constructing castles or rounding curves, safety always takes priority. With his yellow hard hat fastened on tight, he's ready to hit the track!''<ref>mariokarttourEN (April 29, 2020). [https://twitter.com/mariokarttourEN/status/1255376265839706112 ''Twitter'']. Retrieved April 29, 2020.</ref> | ||
| Line 163: | Line 163: | ||
{{MKT profile | {{MKT profile | ||
|collapse=y | |collapse=y | ||
|item=Hammer | |item=Hammer | ||
| Line 179: | Line 178: | ||
|I1.12=DS Waluigi Pinball T|R1.12=[[DS Waluigi Pinball|DS Waluigi Pinball T]] | |I1.12=DS Waluigi Pinball T|R1.12=[[DS Waluigi Pinball|DS Waluigi Pinball T]] | ||
|I1.13=Airship Fortress T|R1.13=[[DS Airship Fortress|DS Airship Fortress T]] | |I1.13=Airship Fortress T|R1.13=[[DS Airship Fortress|DS Airship Fortress T]] | ||
|I1.14=Berlin Byways 2T|R1.14=[[Berlin Byways | |I1.14=Berlin Byways 2T|R1.14=[[Tour Berlin Byways|Berlin Byways 2T]] | ||
|I1.15=Paris Promenade 2T|R1.15=[[Paris Promenade | |I1.15=Paris Promenade 2T|R1.15=[[Tour Paris Promenade|Paris Promenade 2T]] | ||
|I1.16=Dino Dino Jungle T|R1.16=[[GCN Dino Dino Jungle|GCN Dino Dino Jungle T]] | |I1.16=Dino Dino Jungle T|R1.16=[[GCN Dino Dino Jungle|GCN Dino Dino Jungle T]] | ||
|I1.17=Tokyo Blur 4T|R1.17=[[Tokyo Blur | |I1.17=Tokyo Blur 4T|R1.17=[[Tour Tokyo Blur|Tokyo Blur 4T]] | ||
|I1.18=Koopa Troopa Beach T|R1.18=[[N64 Koopa Troopa Beach|N64 Koopa Troopa Beach T]] | |I1.18=Koopa Troopa Beach T|R1.18=[[N64 Koopa Troopa Beach|N64 Koopa Troopa Beach T]] | ||
|I1.19=Paris Promenade 3RT|R1.19=[[Paris Promenade | |I1.19=Paris Promenade 3RT|R1.19=[[Tour Paris Promenade|Paris Promenade 3R/T]] | ||
|I1.20=Tokyo Blur 2T|R1.20=[[Tokyo Blur | |I1.20=Tokyo Blur 2T|R1.20=[[Tour Tokyo Blur|Tokyo Blur 2T]] | ||
|I1.21=Vancouver Velocity RT|R1.21=[[Vancouver Velocity|Vancouver Velocity R/T]] | |I1.21=Vancouver Velocity RT|R1.21=[[Vancouver Velocity|Vancouver Velocity R/T]] | ||
|I1.22=New York Minute 4T|R1.22=[[New York Minute | |I1.22=New York Minute 4T|R1.22=[[Tour New York Minute|New York Minute 4T]] | ||
|I1.23=Singapore Speedway RT|R1.23=[[Singapore Speedway|Singapore Speedway R/T]] | |I1.23=Singapore Speedway RT|R1.23=[[Singapore Speedway|Singapore Speedway R/T]] | ||
|I1.24=Wario Shipyard T|R1.24=[[3DS Wario Shipyard|3DS Wario Shipyard T]] | |I1.24=Wario Shipyard T|R1.24=[[3DS Wario Shipyard|3DS Wario Shipyard T]] | ||
| Line 193: | Line 192: | ||
|I1.26=Luigi Raceway T|R1.26=[[N64 Luigi Raceway|N64 Luigi Raceway T]] | |I1.26=Luigi Raceway T|R1.26=[[N64 Luigi Raceway|N64 Luigi Raceway T]] | ||
|I1.27=Ghost Valley 2T|R1.27=[[SNES Ghost Valley 2|SNES Ghost Valley 2T]] | |I1.27=Ghost Valley 2T|R1.27=[[SNES Ghost Valley 2|SNES Ghost Valley 2T]] | ||
|I1.28=Cheep-Cheep Island RT|R1.28=[[GBA Cheep-Cheep Island|GBA Cheep-Cheep Island R/T]] | |||
|I2.1=DS Luigi's Mansion RT|R2.1=[[DS Luigi's Mansion|DS Luigi's Mansion R/T]]** | |I2.1=DS Luigi's Mansion RT|R2.1=[[DS Luigi's Mansion|DS Luigi's Mansion R/T]]** | ||
| Line 205: | Line 205: | ||
|I2.10=Kalimari Desert T|R2.10=[[N64 Kalimari Desert|N64 Kalimari Desert T]] | |I2.10=Kalimari Desert T|R2.10=[[N64 Kalimari Desert|N64 Kalimari Desert T]] | ||
|I2.11=Koopa Troopa Beach 2T|R2.11=[[SNES Koopa Troopa Beach 2|SNES Koopa Troopa Beach 2T]]*** | |I2.11=Koopa Troopa Beach 2T|R2.11=[[SNES Koopa Troopa Beach 2|SNES Koopa Troopa Beach 2T]]*** | ||
|I2.12=Berlin Byways 2RT|R2.12=[[Berlin Byways | |I2.12=Berlin Byways 2RT|R2.12=[[Tour Berlin Byways|Berlin Byways 2R/T]] | ||
|I2.13=Shy Guy Bazaar T|R2.13=[[3DS Shy Guy Bazaar|3DS Shy Guy Bazaar T]] | |I2.13=Shy Guy Bazaar T|R2.13=[[3DS Shy Guy Bazaar|3DS Shy Guy Bazaar T]] | ||
|I2.14=RMX Choco Island 2T|R2.14=[[RMX Choco Island 2|RMX Choco Island 2T]] | |I2.14=RMX Choco Island 2T|R2.14=[[RMX Choco Island 2|RMX Choco Island 2T]] | ||
|I2.15=DK Summit T|R2.15=[[Wii DK Summit|Wii DK Summit T]] | |I2.15=DK Summit T|R2.15=[[Wii DK Summit|Wii DK Summit T]] | ||
|I2.16=Paris Promenade 3T|R2.16=[[Paris Promenade | |I2.16=Paris Promenade 3T|R2.16=[[Tour Paris Promenade|Paris Promenade 3T]] | ||
|I2.17=Ninja Hideaway RT|R2.17=[[Ninja Hideaway|Ninja Hideaway R/T]] | |I2.17=Ninja Hideaway RT|R2.17=[[Ninja Hideaway|Ninja Hideaway R/T]] | ||
|I2.18=New York Minute 4RT|R2.18=[[New York Minute | |I2.18=New York Minute 4RT|R2.18=[[Tour New York Minute|New York Minute 4R/T]] | ||
|I2.19=Vancouver Velocity 2T|R2.19=[[Vancouver Velocity | |I2.19=Vancouver Velocity 2T|R2.19=[[Vancouver Velocity|Vancouver Velocity 2T]] | ||
|I2.20=Singapore Speedway T|R2.20=[[Singapore Speedway|Singapore Speedway T]] | |I2.20=Singapore Speedway T|R2.20=[[Singapore Speedway|Singapore Speedway T]] | ||
|I2.21=Wario Shipyard RT|R2.21=[[3DS Wario Shipyard|3DS Wario Shipyard R/T]] | |I2.21=Wario Shipyard RT|R2.21=[[3DS Wario Shipyard|3DS Wario Shipyard R/T]] | ||
|I2.22=Tokyo Blur RT|R2.22=[[Tokyo Blur|Tokyo Blur R/T]] | |I2.22=Tokyo Blur RT|R2.22=[[Tour Tokyo Blur|Tokyo Blur R/T]] | ||
|I2.23=Berlin Byways 3T|R2.23=[[Berlin Byways | |I2.23=Berlin Byways 3T|R2.23=[[Tour Berlin Byways|Berlin Byways 3T]] | ||
|I2.24=Amsterdam Drift 3RT|R2.24=[[Amsterdam Drift | |I2.24=Amsterdam Drift 3RT|R2.24=[[Amsterdam Drift|Amsterdam Drift 3R/T]] | ||
}} | }} | ||
*'''''Mario Kart Tour'' Twitter:''' | *'''''Mario Kart Tour'' Twitter:''' | ||
| Line 227: | Line 227: | ||
{{MKT profile | {{MKT profile | ||
|collapse=y | |collapse=y | ||
|item=Hammer | |item=Hammer | ||
| Line 239: | Line 238: | ||
|I1.8=Donut Plains 1T|R1.8=[[SNES Donut Plains 1|SNES Donut Plains 1T]] | |I1.8=Donut Plains 1T|R1.8=[[SNES Donut Plains 1|SNES Donut Plains 1T]] | ||
|I1.9=Rock Rock Mountain T|R1.9=[[3DS Rock Rock Mountain|3DS Rock Rock Mountain T]] | |I1.9=Rock Rock Mountain T|R1.9=[[3DS Rock Rock Mountain|3DS Rock Rock Mountain T]] | ||
|I1.10=Paris Promenade 3T|R1.10=[[Paris Promenade | |I1.10=Paris Promenade 3T|R1.10=[[Tour Paris Promenade|Paris Promenade 3T]] | ||
|I1.11=Daisy Hills T|R1.11=[[3DS Daisy Hills|3DS Daisy Hills T]] | |I1.11=Daisy Hills T|R1.11=[[3DS Daisy Hills|3DS Daisy Hills T]] | ||
|I1.12=Cheep-Cheep Island T|R1.12=[[GBA Cheep-Cheep Island|GBA Cheep-Cheep Island T]] | |I1.12=Cheep-Cheep Island T|R1.12=[[GBA Cheep-Cheep Island|GBA Cheep-Cheep Island T]] | ||
|I1.13=Los Angeles Laps 3RT|R1.13=[[Los Angeles Laps | |I1.13=Los Angeles Laps 3RT|R1.13=[[Los Angeles Laps|Los Angeles Laps 3R/T]] | ||
|I1.14=SNES Rainbow Road T|R1.14=[[SNES Rainbow Road|SNES Rainbow Road T]] | |I1.14=SNES Rainbow Road T|R1.14=[[SNES Rainbow Road|SNES Rainbow Road T]] | ||
|I1.15=Ninja Hideaway T|R1.15=[[Ninja Hideaway|Ninja Hideaway T]] | |I1.15=Ninja Hideaway T|R1.15=[[Ninja Hideaway|Ninja Hideaway T]] | ||
|I1.16=Tokyo Blur 2T|R1.16=[[Tokyo Blur | |I1.16=Tokyo Blur 2T|R1.16=[[Tour Tokyo Blur|Tokyo Blur 2T]] | ||
|I1.17=Ghost Valley 1T|R1.17=[[SNES Ghost Valley 1|SNES Ghost Valley 1T]] | |I1.17=Ghost Valley 1T|R1.17=[[SNES Ghost Valley 1|SNES Ghost Valley 1T]] | ||
|I1.18=Choco Island 2T|R1.18=[[SNES Choco Island 2|SNES Choco Island 2T]] | |I1.18=Choco Island 2T|R1.18=[[SNES Choco Island 2|SNES Choco Island 2T]] | ||
|I1.19=RMX Ghost Valley 1T|R1.19=[[RMX Ghost Valley 1|RMX Ghost Valley 1T]] | |I1.19=RMX Ghost Valley 1T|R1.19=[[RMX Ghost Valley 1|RMX Ghost Valley 1T]] | ||
|I1.20=Sydney Sprint T|R1.20=[[Sydney Sprint|Sydney Sprint T]] | |I1.20=Sydney Sprint T|R1.20=[[Tour Sydney Sprint|Sydney Sprint T]] | ||
|I1.21=Sydney Sprint 2RT|R1.21=[[Sydney Sprint | |I1.21=Sydney Sprint 2RT|R1.21=[[Tour Sydney Sprint|Sydney Sprint 2R/T]] | ||
|I1.22=Paris Promenade RT|R1.22=[[Paris Promenade|Paris Promenade R/T]] | |I1.22=Paris Promenade RT|R1.22=[[Tour Paris Promenade|Paris Promenade R/T]] | ||
|I1.23=New York Minute 4T|R1.23=[[New York Minute | |I1.23=New York Minute 4T|R1.23=[[Tour New York Minute|New York Minute 4T]] | ||
|I1.24=Maple Treeway RT|R1.24=[[Wii Maple Treeway|Wii Maple Treeway R/T]] | |I1.24=Maple Treeway RT|R1.24=[[Wii Maple Treeway|Wii Maple Treeway R/T]] | ||
|I1.25=London Loop 3T|R1.25=[[London Loop | |I1.25=London Loop 3T|R1.25=[[Tour London Loop|London Loop 3T]] | ||
|I1.26=RMX Ghost Valley 1RT|R1.26=[[RMX Ghost Valley 1|RMX Ghost Valley 1R/T]] | |I1.26=RMX Ghost Valley 1RT|R1.26=[[RMX Ghost Valley 1|RMX Ghost Valley 1R/T]] | ||
|I1.27=Merry Mountain RT|R1.27=[[Merry Mountain|Merry Mountain R/T]] | |I1.27=Merry Mountain RT|R1.27=[[Merry Mountain|Merry Mountain R/T]] | ||
|I1.28=Vancouver Velocity 2RT|R1.28=[[Vancouver Velocity | |I1.28=Vancouver Velocity 2RT|R1.28=[[Vancouver Velocity|Vancouver Velocity 2R/T]] | ||
|I1.29=Singapore Speedway 2RT|R1.29=[[Singapore Speedway | |I1.29=Singapore Speedway 2RT|R1.29=[[Singapore Speedway|Singapore Speedway 2R/T]] | ||
|I1.30=Riverside Park RT|R1.30=[[GBA Riverside Park|GBA Riverside Park R/T]] | |I1.30=Riverside Park RT|R1.30=[[GBA Riverside Park|GBA Riverside Park R/T]] | ||
|I1.31=Peach Gardens RT|R1.31=[[DS Peach Gardens|DS Peach Gardens R/T]] | |I1.31=Peach Gardens RT|R1.31=[[DS Peach Gardens|DS Peach Gardens R/T]] | ||
|I1.32=Baby Park RT|R1.32=[[GCN Baby Park|GCN Baby Park R/T]] | |||
|I2.1=Daisy Hills RT|R2.1=[[3DS Daisy Hills|3DS Daisy Hills R/T]]* | |I2.1=Daisy Hills RT|R2.1=[[3DS Daisy Hills|3DS Daisy Hills R/T]]* | ||
| Line 270: | Line 270: | ||
|I2.7=Royal Raceway T|R2.7=[[N64 Royal Raceway|N64 Royal Raceway T]] | |I2.7=Royal Raceway T|R2.7=[[N64 Royal Raceway|N64 Royal Raceway T]] | ||
|I2.8=Choco Mountain RT|R2.8=[[N64 Choco Mountain|N64 Choco Mountain R/T]] | |I2.8=Choco Mountain RT|R2.8=[[N64 Choco Mountain|N64 Choco Mountain R/T]] | ||
|I2.9=Paris Promenade 3RT|R2.9=[[Paris Promenade | |I2.9=Paris Promenade 3RT|R2.9=[[Tour Paris Promenade|Paris Promenade 3R/T]] | ||
|I2.10=Donut Plains 2RT|R2.10=[[SNES Donut Plains 2|SNES Donut Plains 2R/T]] | |I2.10=Donut Plains 2RT|R2.10=[[SNES Donut Plains 2|SNES Donut Plains 2R/T]] | ||
|I2.11=Los Angeles Laps 3T|R2.11=[[Los Angeles Laps | |I2.11=Los Angeles Laps 3T|R2.11=[[Los Angeles Laps|Los Angeles Laps 3T]] | ||
|I2.12=Ninja Hideaway RT|R2.12=[[Ninja Hideaway|Ninja Hideaway R/T]] | |I2.12=Ninja Hideaway RT|R2.12=[[Ninja Hideaway|Ninja Hideaway R/T]] | ||
|I2.13=RMX Vanilla Lake 1T|R2.13=[[RMX Vanilla Lake 1|RMX Vanilla Lake 1T]]*** | |I2.13=RMX Vanilla Lake 1T|R2.13=[[RMX Vanilla Lake 1|RMX Vanilla Lake 1T]]*** | ||
|I2.14=New York Minute 4RT|R2.14=[[New York Minute | |I2.14=New York Minute 4RT|R2.14=[[Tour New York Minute|New York Minute 4R/T]] | ||
|I2.15=Koopa Cape T|R2.15=[[Wii Koopa Cape|Wii Koopa Cape T]] | |I2.15=Koopa Cape T|R2.15=[[Wii Koopa Cape|Wii Koopa Cape T]] | ||
|I2.16=Amsterdam Drift 2RT|R2.16=[[Amsterdam Drift | |I2.16=Amsterdam Drift 2RT|R2.16=[[Amsterdam Drift|Amsterdam Drift 2R/T]] | ||
|I2.17=DK Mountain RT|R2.17=[[GCN DK Mountain|GCN DK Mountain R/T]] | |I2.17=DK Mountain RT|R2.17=[[GCN DK Mountain|GCN DK Mountain R/T]] | ||
|I2.18=Amsterdam Drift 3RT|R2.18=[[Amsterdam Drift | |I2.18=Amsterdam Drift 3RT|R2.18=[[Amsterdam Drift|Amsterdam Drift 3R/T]] | ||
}} | }} | ||
*'''''Mario Kart Tour'' Twitter:''' ''The size of her hammer makes up for her small stature... Builder Toadette debuts in the Trick Tour in {{color|#MarioKartTour|blue}}! Also debuting is the cute and powerful Pink Dozer!''<ref>mariokarttourEN (May 19, 2021). [https://twitter.com/mariokarttourEN/status/1394910699445309444 ''Twitter'']. Retrieved May 19, 2021.</ref> | *'''''Mario Kart Tour'' Twitter:''' ''The size of her hammer makes up for her small stature... Builder Toadette debuts in the Trick Tour in {{color|#MarioKartTour|blue}}! Also debuting is the cute and powerful Pink Dozer!''<ref>mariokarttourEN (May 19, 2021). [https://twitter.com/mariokarttourEN/status/1394910699445309444 ''Twitter'']. Retrieved May 19, 2021.</ref> | ||
Revision as of 20:08, December 28, 2022
- This article is about the form. For the official Super Mario Maker 2 level created by Nintendo of Japan, see Builder Mario (level).
| Builder Mario | |
|---|---|

| |
| Applies to | Mario, Luigi, Toad, Toadette |
| Item needed | Super Hammer |
| Power(s) given | Swing a hammer; create and use Builder Boxes as platforms. |
| First appearance | Super Mario Maker (2015) |
| Latest appearance | Mario Kart Live: Home Circuit (costume) (2020) |
- “Time to build it!”
- —Builder Mario, Mario Kart Tour
Builder Mario is the identity Mario assumes in Super Mario Maker to reflect the game's level-building mechanic. The Builder outfit itself later appears in games like Super Smash Bros. Ultimate and the Mario Kart series where it serves as a cosmetic variant of Mario and other characters, while Super Mario Maker 2 introduces it as a powered-up form of Mario as well as Luigi, Toad and Toadette.
History
Super Mario series
Super Mario Maker / Super Mario Maker for Nintendo 3DS
Builder Mario first appears in Super Mario Maker and Super Mario Maker for Nintendo 3DS, most prominently in related artwork and promotional material. In Super Mario Maker only, Builder Mario is one of the many unlockable Mystery Mushroom costumes, unlocked after clearing Gnat Attack for the first time. Upon transforming into Builder Mario, the title shout before the title screen can be heard; if the player clears the course as Builder Mario, the music heard when starting up the game plays. If the player loses a life as Builder Mario, the Game Over theme from Gnat Attack plays. When the player presses ![]() , Builder Mario raises his hammer for his pose.
, Builder Mario raises his hammer for his pose.
Super Mario Odyssey
In Super Mario Odyssey, a cap and outfit based on Builder Mario's attire (named the Builder Helmet and the Builder Outfit respectively) can be purchased from the Crazy Cap store in the Metro Kingdom using regional coins.
Super Mario Maker 2
In Super Mario Maker 2, Mario, Luigi, Toad or Toadette can take a Builder form by collecting a Super Hammer, a power-up found exclusively in the Super Mario 3D World style. It adds a tool belt and a hardhat, and, in Mario and Luigi's case, changes their attire to yellow shirts and colored overalls. Builder Toadette also resembles her appearance as the Chief in Story Mode, albeit with a yellow helmet instead of pink. It grants Mario and co. the ability to swing a large hammer to slam the environment and enemies alike. Unlike Hammer Mario, where the hammers are arched projectiles, Builder Mario uses them as a melee weapon, similar to the hammer attacks in the Paper Mario series and the Mario & Luigi series. Builder Mario can also create a maximum of five Builder Boxes at a time to be used as platforms.
Mario & Luigi: Superstar Saga + Bowser's Minions
In Mario & Luigi: Superstar Saga + Bowser's Minions, Builder Mario's helmet can be seen inside the Mario Bros.' House.
Super Smash Bros. Ultimate
In Super Smash Bros. Ultimate, Builder Mario appears as an alternate costume of Mario. Additionally, he appears as a fighter spirit that can be purchased from the Vault Shop.
Mario Kart series
Mario Kart Tour

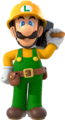
Builder Mario, Builder Toad, Builder Luigi, and Builder Toadette appear in Mario Kart Tour as drivers. Builder Mario and Builder Toad debuted in the 2020 Trick Tour, to coincide with the release of the final major update for Super Mario Maker 2, Builder Luigi debuted in the Mario vs. Luigi Tour, and Builder Toadette debuted in the 2021 Trick Tour. Builder Mario, Builder Luigi, and Builder Toadette's special skill is the Hammer, while Builder Toad's is the Bob-omb Cannon.
Builder Toadette is the only Builder form to not have a unique emblem, as well as the only one with brand new artwork instead of reused artwork from Super Mario Maker 2. Builder Mario and Luigi have yellow backgrounds instead of white and Builder Toad has blue spots on his cap instead of red spots.
For a list of ways in which these drivers have been obtainable throughout the game's history, see List of availabilities for Builder drivers in Mario Kart Tour.
Mario Kart Live: Home Circuit
The Builder Outfit appears in Mario Kart Live: Home Circuit as an unlockable costume for both Mario and Luigi.
Abilities
Using the Dash button will make Mario execute a melee attack with his hammer, having a range of about 1 block in front of him and 2 blocks high. This attack is able to destroy Hard Blocks and Thwomps, and can even defeat Boos and Peepas; 7 hits with this attack will defeat Meowser, compared to 20 with Fire Mario's fireballs and Cat Mario's scratch attack. However, the attack is ineffective against Big Ant Troopers. If the attack is too close to an unbreakable object, such as ground, Mario will bounce back once the attack hits it.
When the player holds up, Mario will appear to hold his breath, signalling that he is now able to create a Builder Box. Using the Dash button while holding up will create a Builder Box. Up to 5 Builder Boxes can be made at a time, after which the boxes will disappear as new boxes are created. Builder Boxes are similar to Crates, but they have the player character's emblem on it.
In multiplayer mode, the hammer can be used to knock back other players and steal Keys or a Clear Condition. The boxes can also be used to block pipes from being exited.
Profiles and statistics
Mario Kart Tour
Builder Mario
- Mario Kart Tour Twitter:
- Hey! Look at that familiar getup! It's Builder Mario, fresh from the newest update in Super Mario Maker 2. His special item is the trusty hammer, of course. He may be used to knocking in nails, but his opponents will make fine targets too![1]
- All courses in this tour are Trick courses! Could these two have had something to do with it? Builder Mario is here with his brother, Builder Luigi, who makes his debut in #MarioKartTour! The main characters of the Team Rally make an appearance in builder gear![2]
Builder Toad
| Special skill | ||||||||||||||||||||||||||
| Favorite courses (Three items per Item Box) |
| |||||||||||||||||||||||||
|---|---|---|---|---|---|---|---|---|---|---|---|---|---|---|---|---|---|---|---|---|---|---|---|---|---|---|
| Favored courses (Two items per Item Box) |
| |||||||||||||||||||||||||
|
* indicates a favored course upgraded to a favorite course after reaching level 3. ** indicates a favored course upgraded to a favorite course after reaching level 6. | ||||||||||||||||||||||||||
- Mario Kart Tour Twitter: Builder Toad shows up for part two of the Trick Tour! Whether it's constructing castles or rounding curves, safety always takes priority. With his yellow hard hat fastened on tight, he's ready to hit the track![3]
Builder Luigi
| Special skill | |||||||||||||||||||||||||||||
| Favorite courses (Three items per Item Box) |
| ||||||||||||||||||||||||||||
|---|---|---|---|---|---|---|---|---|---|---|---|---|---|---|---|---|---|---|---|---|---|---|---|---|---|---|---|---|---|
| Favored courses (Two items per Item Box) |
| ||||||||||||||||||||||||||||
|
* indicates a favored course upgraded to a favorite course after reaching level 3. ** indicates a favored course upgraded to a favorite course after reaching level 6. | |||||||||||||||||||||||||||||
- Mario Kart Tour Twitter:
- All courses in this tour are Trick courses! Could these two have had something to do with it? Builder Mario is here with his brother, Builder Luigi, who makes his debut in #MarioKartTour! The main characters of the Team Rally make an appearance in builder gear![4]
- Guess who's taking center stage in the second half of the Berlin Tour? It's Luigi again! Penguin Luigi, Builder Luigi, and other variants of Luigi are here in #MarioKartTour![5]
Builder Toadette
| Special skill | |||||||||||||||||||||||||||||||||
| Favorite courses (Three items per Item Box) |
| ||||||||||||||||||||||||||||||||
|---|---|---|---|---|---|---|---|---|---|---|---|---|---|---|---|---|---|---|---|---|---|---|---|---|---|---|---|---|---|---|---|---|---|
| Favored courses (Two items per Item Box) |
| ||||||||||||||||||||||||||||||||
|
* indicates a favored course upgraded to a favorite course after reaching level 3. ** indicates a favored course upgraded to a favorite course after reaching level 6. | |||||||||||||||||||||||||||||||||
- Mario Kart Tour Twitter: The size of her hammer makes up for her small stature... Builder Toadette debuts in the Trick Tour in #MarioKartTour! Also debuting is the cute and powerful Pink Dozer![6]
Gallery
- For this subject's image gallery, see Gallery:Builder Mario.

Super Mario Maker
Builder Luigi from Super Mario Maker 2


_SSBU.png)

Names in other languages
| Language | Name | Meaning |
|---|---|---|
| Japanese | ビルダーマリオ Birudā Mario |
Builder Mario |
| Chinese (simplified) | 建筑工马力欧 Jiànzhùgōng Mǎlì'ōu |
Builder Mario |
| Chinese (traditional) | 建築工人瑪利歐 Jiànzhù gōngrén Mǎlì'ōu |
Builder Mario |
| Dutch | Bouw-Mario |
Construction Mario |
| German | Baumeister-Mario |
Master Builder Mario |
| Italian | Mario costruttore |
Builder Mario |
| Korean | 빌더마리오 Bildeo Mario |
Builder Mario |
| Portuguese (NOA) | Mario construtor |
Constructor Mario |
| Russian | Марио-строитель Mario-stroitel' |
Mario builder |
| Spanish (NOA) | Mario constructor |
Builder Mario |
| Spanish (NOE) | Mario Constructor |
Builder Mario |
Trivia
- Builder Mario's design comes from the Wrecking Crew series, where Mario also wears a helmet and attacks with a hammer. The helmet's appearance is similar to the one in Wrecking Crew '98.
References
- ^ mariokarttourEN (April 22, 2020). Twitter. Retrieved April 22, 2020.
- ^ mariokarttourEN (November 18, 2020). Twitter. Retrieved November 22, 2020.
- ^ mariokarttourEN (April 29, 2020). Twitter. Retrieved April 29, 2020.
- ^ mariokarttourEN (November 18, 2020). Twitter. Retrieved November 22, 2020.
- ^ mariokarttourEN (January 19, 2021). Twitter. Retrieved January 20, 2021.
- ^ mariokarttourEN (May 19, 2021). Twitter. Retrieved May 19, 2021.
| Mario forms | ||
|---|---|---|
| Regular | Balloon Mario • Bee Mario • Big Mario • Biyon Mario • Boo Mario • Boomerang Mario • Bubble Mario • Builder Mario • Bunny Mario • Cape Mario • Cat Mario • Cloud Mario • Costume Mario • Drill Mario • Elephant Mario • Fire Mario • Flying Squirrel Mario • Frog Mario • Goomba Mario • Hammer Mario • Hoppycat Mario • Ice Mario • Mini Mario • Penguin Mario • Propeller Mario • Puffy Lift Mario • Raccoon Mario • Rock Mario • Shell Mario • Small Mario • SMB2 Mario • Spike-Ball Mario • Spring Mario • Super Mario • Superball Mario • Tanooki Mario • Weird Mario • Wubba Mario | |
| Temporary | Balloon Mario • Double Mario • Fire Mario • Flying Mario • Giga Mario • Giga Cat Mario • Gold Mario • Ice Mario (Super Mario Galaxy) • Invincible Mario • Lucky Cat Mario • Mega Mario • Metal Mario • P Flying Squirrel Mario • Rainbow Mario • Small Giga Mario • Statue Mario • Superstar Mario • Vanish Mario • Vanish Metal Mario • White Cat Mario • White Raccoon Mario • White Tanooki Mario • Wing Mario | |
| Other | 3UP Mario / Moon Mario • 5UP Mario • Ball • Bitsize Candy (form) • Block Mario • Bloway Candy (form) • Boat Mode • Bomb Mario • Bowlo Candy (form) • Bowser Candy (form) • Bullet Candy (form) • Capture • Cashzap Candy (form) • Coin Mario • Dr. Mario • Dangan Mario • Duelo Candy (form) • Ghost • Giant Mario • Hata Mario • Hinotama Mario • Jumping Mario • Koopa Zombie • Link • Mari Mario • Mario ×99 • Mega Fire (Mega Strike ability) • Micro Mario • Miracle Mario • Mogura Mario • Mushroom (status effect) • Mushroom Mario • Nikoniko Mario • Pata Mario • Plane Mode • Pump Mario • Scarecrow • Shiba Inu Mario • Skeleton Mario • Springo Candy (form) • Stone • Super-Duper Mario Bros. • Super Mario Great • Super Power-Up Mario • Thwomp Candy (form) • Tube Mode • Vampire Candy (form) • Water Stream Mario • Weeglee Candy (form) | |
| Super Mario Maker 2 | ||
|---|---|---|
| Characters | Playable characters | Mario • Luigi • Toad • Toadette |
| Supporting characters | Coursebot • Worldbotb • Mr. Eraser • Nina • Princess Peach • Undodog • Yamamura • Partrick • Soundfrog • Toads • Yoshi/Red Yoshi | |
| Course elements | Game styles | Super Mario Bros. • Super Mario Bros. 3 • Super Mario World • New Super Mario Bros. U • Super Mario 3D World |
| Themes | Ground • Underground • Underwater • Ghost House • Airship • Castle • Desert • Snow • Forest • Sky | |
| Terrain | ? Block • Brick Block/Rotating Block • Bridge • Clear Pipe • Cloud Block • Crystal Block • Donut Block • Frozen Coina • Ground • Hard Block • Hidden Block • Ice Block • Mushroom Platform • Note Block/Music Block • P Blocka • Warp Pipe • Rock Block • Semisolid Platform • Slope • Spike Block • Spike Trap | |
| Items | 1-Up Mushroom/Rotten Mushroom • 10-Coin/30-Coin/50-Coin • Big Mushroom • Boomerang Flowerb • Bullet Bill Maskb • Cannon Boxb • Coin • Cape Feather • Fire Flower • Frog Suitb • Goomba Maskb • Goomba's Shoe/Stiletto • Master Sworda • Pink Coin • Power Balloonb • Propeller Boxb • Propeller Mushroom • Red POW Boxb • SMB2 Mushroomb • Super Acornb • Super Bell • Super Hammer • Super Leaf • Super Mushroom • Super Star • Superball Flower • Yoshi's Egg/Big Red Yoshi's Egg | |
| Enemies | Angry Sun/Moon • Ant Trooper/Big Ant Trooper • Unshelled Koopa Troopa • Blooper/Big Blooper/Blooper Nanny/Blooper Baby • Bob-omb/Mega Bob-omb/Parabomb • Boo/Big Boo/Boo Buddies/Stretch • Boom Boom • Bowser/Meowser • Bowser Jr. • Bully/Big Bully • Buzzy Beetle/Big Buzzy Beetle/Buzzy Beetle Tower/Para-Beetle/Heavy Para-Beetle/Buzzy Shell • Chain Chomp/Big Chain Chomp • Charvaargh • Cheep Cheep/Big Cheep Cheep/Blurp (SMW)/Deep Cheep/Big Deep Cheep • Dry Bones/Big Dry Bones/Parabones/Dry Bones Shell • Fire Bro/Heavy Fire Bro • Fire Piranha Plant/Big Fire Piranha • Fish Bone • Goomba/Big Goomba/Paragoomba/Big Paragoomba/Galoomba (SMW)/Big Galoomba (SMW)/Flying Goomba (SMW)/Para-Goomba (SMW)/ Goombrat/Kodeka Kakibō/Goombud (SMW)/Goomba Tower/Shoe Goomba/Stiletto Goomba • Hammer Bro/Sledge Bro • Hop-Chops • Horned Ant Trooper • Jelectro • Jumping Piranha Plant • Koopa Clown Car/Junior Clown Car/Fire Koopa Clown Car/Fire Junior Clown Car • Koopa Troopa/Big Koopa Troopa/Koopa Paratroopa/Big Koopa Paratroopa • Koopa Troopa Car • Koopalingsb (Larry · Morton · Wendy · Iggy · Roy · Lemmy · Ludwig) • Lakitu • Lava Bubble/Big Lava Bubble • Magikoopa/Big Magikoopa • Mechakoopab/Blasta Mechakoopab/Zappa Mechakoopab/Mega Mechakoopab • Monty Mole/Big Monty Mole • Muncher • Peepa • Piranha Creeper • Piranha Plant/Big Piranha Plant • Pokeya/Snow Pokeya • Pom Pom • Porcupuffer • Rocky Wrench • Skipsqueak • Spikea/Mega Spikea • Spike Balla/Giant Spiked Balla/Snowballa • Spike Top/Spiky Parabuzzy • Spiny/Big Spiny/Spiny Shell • Spiny Egg • Spiny Skipsqueak • Stingby • Thwomp/Big Thwomp • Wiggler/Big Wiggler | |
| Gizmos | ! Block • Arrow Sign • Banzai Bill • Bill Blaster/Bull's-Eye Blaster • Blinking Block • Bumper • Bull's-Eye Banzai/Cat Banzai Bill • Bull's-Eye Bill/Cat Bullet Bill • Bullet Bill • Burner • Cannon/Giant cannon • Conveyor Belt/ON/OFF Conveyor Belt • Checkpoint Flag • Crate • Dash Blocka • Fire Bar • Grinder • Icicle • Mushroom Trampoline/ON/OFF Trampolineb • Key/Cursed Keyb • Lava Lift • Lift/Flimsy Lift/Cloud Lift • ON/OFF Switch/Dotted-Line Block • One-Way Wall • P Switch • POW Block • Red POW Block • Seesaw • Skewer • Snake Block • Swinging Claw • Track • Track Block • Trampoline • Tree • Twister • Vine • Warp Box/Warp Box (With Key) • Warp Door/P Warp Door/Key Door | |
| Miscellaneous | Starting blocks • Stone (Story Mode) • Toad (Story Mode) • Wings | |
| Mario's moves | Charge jumpb (SMB) • Crawl (SM3DW) • Crouch • Crouch Jump (SM3DW) • Dash • Dive (SM3DW) • Double Jump (NSMBU) • Drill Spin (NSMBU & SM3DWb) • Ground Pound (NSMBU & SM3DW) • Jump • Long Jump (SM3DW) • Midair Spin (NSMBU) • Roll (SM3DW) • Slide (all except SMB) • Spin Jump (SMW, NSMBU, & SM3DW) • Swim • Triple Jump (NSMBU) • Wall Jump (NSMBU & SM3DW) | |
| Miscellaneous | Assist parts • Course Maker • Fan-made courses highlighted by Nintendo • Gallery • Glitches • Media • Mii outfits • Minigamesb (Catch & Win! • Match & Win! • Pop & Win!) • Ninji* • Peach's Castle • Phantob • Quotes • Sound effects • Staff • Yamamura's Dojo | |
| Mario Kart Tour | |||
|---|---|---|---|
| Drivers | |||
| Normal | Baby Mario • Baby Peach • Baby Daisy • Baby Rosalina • Baby Luigi • Koopa Troopa • Shy Guy • Dry Bones • Iggy • Larry • Lemmy • Ludwig • Morton • Roy • Wendy | ||
| Super | Mario • Peach • Yoshi • Daisy • Toad • Toadette • Rosalina • Luigi • Toad (Pit Crew) • Red Yoshi • Blue Yoshi • Pink Yoshi • Yellow Toad (Pit Crew) • Light-blue Toad (Pit Crew) • Red Toad (Pit Crew) • Orange Yoshi • Green Toad (Pit Crew) • Pink Toad (Pit Crew) • Light-blue Yoshi • Yellow Yoshi • Purple Toad (Pit Crew) • Bowser • Donkey Kong • Diddy Kong • Lakitu • Bowser Jr. • Wario • Waluigi • King Boo • Black Shy Guy • Red Koopa (Freerunning) • Birdo • Pink Shy Guy • Birdo (Light Blue) • Hammer Bro • Boomerang Bro • Ice Bro • Fire Bro • Birdo (Yellow) • Monty Mole • Green Shy Guy • Blue Koopa (Freerunning) • Birdo (Blue) • Purple Koopa (Freerunning) • Light-blue Shy Guy • Blue Shy Guy • Birdo (Orange) • White Shy Guy • Koopa (Freerunning) • Orange Shy Guy • Birdo (Red) • Yellow Shy Guy • Birdo (Green) | ||
| High-End | Metal Mario • Peachette • Pauline • Mario (Musician) • Peach (Kimono) • Mario (Hakama) • Rosalina (Halloween) • Peach (Vacation) • Mario (Santa) • Pink Gold Peach • Daisy (Holiday Cheer) • Yoshi (Reindeer) • Pauline (Party Time) • Mario (Happi) • Toad (Party Time) • Peach (Wintertime) • Penguin Luigi • Ice Mario • Baby Peach (Cherub) • Rosalina (Aurora) • Mario (Classic) • Luigi (Classic) • Baby Rosalina (Detective) • Yoshi (Egg Hunt) • Black Yoshi • Builder Mario • Builder Toad • Daisy (Fairy) • Mario (Chef) • Peach (Wedding) • Rosalina (Swimwear) • Mario (Swimwear) • Captain Toad • Toadette (Explorer) • Daisy (Yukata) • Mario (SNES) • Mario (Sunshine) • Mario (Halloween) • Peach (Halloween) • Peach (Explorer) • Builder Luigi • Fire Rosalina • Luigi (Lederhosen) • Cat Peach • Cat Toad • Pauline (Rose) • Penguin Toad • Mario (Racing) • White Yoshi • Baby Mario (Koala) • Builder Toadette • Mario (Tuxedo) • Luigi (Painter) • Daisy (Swimwear) • Mario (Baseball) • Peach (Happi) • Penguin Mario • Yoshi (Kangaroo) • Tanooki Mario • Tanooki Rosalina • Mario (Satellaview) • Penguin Toadette • Cat Rosalina • Luigi (Vacation) • Mario (Golf) • Luigi (Golf) • Mario (Aviator) • Mario (Samurai) • Peach (Yukata) • Yoshi (Gold Egg) • Rosalina (Volendam) • Daisy (Farmer) • Dr. Mario • Dr. Luigi • Dr. Peach • Cat Mario • Cat Luigi • Rosalina (Chef) • Daisy (Thai Dress) • Daisy (Sailor) • Toadette (Sailor) • White Tanooki Mario • Luigi (Knight) • Mario (King) • Luigi (Chef) • Kitsune Luigi • Toad (Astronaut) • Toadette (Astronaut) • Poochy • Toad (Tourist) • Luigi (Gold Knight) • Pauline (Cowgirl) • Mario (Black Suit) • Gold Mario • Dry Bowser • King Boo (Luigi's Mansion) • Shy Guy (Pastry Chef) • Waluigi (Bus Driver) • Gold Koopa (Freerunning) • Wario (Hiker) • Dry Bones (Gold) • Funky Kong • Dixie Kong • Dry Bowser (Gold) • Wario (Cowboy) • Nabbit • Bowser Jr. (Pirate) • King Bob-omb • Donkey Kong Jr. (SNES) • Shy Guy (Gold) • King Boo (Gold) • Bowser (Santa) • Lakitu (Party Time) • Birdo (Black) • Shy Guy (Ninja) • King Bob-omb (Gold) • Kamek • Waluigi (Vampire) • Meowser • Chargin' Chuck • Pink Shy Guy (Ninja) • Birdo (White) • Dr. Bowser • Petey Piranha • Chargin' Chuck (Gold) • Petey Piranha (Gold) • Larry (Wintertime) • Light-blue Shy Guy (Explorer) • Yellow Shy Guy (Explorer) • Donkey Kong (Gladiator) • Wiggler • Wiggler (Gold) • Mii Racing Suits | ||
| Vehicle parts | |||
| Karts | Normal | Pipe Frame • Birthday Girl • Mushmellow • Koopa Dasher • Biddybuggy • Blue Biddybuggy • Cheep Charger • Pink Mushmellow • Birthday Girl Rosalina • Green Kiddie Kart • Red Kiddie Kart • Bullet Blaster • Bull's-Eye Banzai • Landship • Pipe Buggy • Warship • Green Cheep Charger | |
| Super | Mach 8 • Daytripper • Turbo Yoshi • Soda Jet • Super Blooper • Gold Blooper • Royale • Cloud 9 • Poltergust 4000 • Streamliner • White Royale • Zucchini • Red Streamliner • Red Turbo Yoshi • Blue Seven • Super 1 • Dasher II • Tea Coupe • Yellow Turbo Birdo • Egg 1 • Birthday Girl Daisy • Red Standard 8 • Green Standard 8 • Cucumber • Blue Royale • Blue Turbo Yoshi • Orange Turbo Yoshi • Pink Turbo Yoshi • Light-blue Turbo Yoshi • Yellow Turbo Yoshi • Flame Flyer • Barrel Train • DK Jumbo • Chrome DK Jumbo • Koopa Clown • Dark Clown • Para-Wing • Turbo Birdo • Light-blue Turbo Birdo • Bolt Buggy • Rambi Rider • Blue Turbo Birdo • Orange Turbo Birdo • Red Turbo Birdo • Green Turbo Birdo | ||
| High-End | B Dasher • Black B Dasher • Yellow Taxi • Quickshaw • Kabuki Dasher • Circuit Special • Black Circuit • Bumble V • Queen Bee • Trickster • Ghost Ride • Macharon • Carrot Kart • Cheermellow • Wild Wing • Radish Rider • Wildfire Flyer • Ribbon Rider • Double-Decker • Swift Jack • Red B Dasher • Jingle Bells • Platinum Taxi • Glam Bruiser • Gilded Prancer • Ice-blue Poltergust • P-Wing • Apple Kart • Comet Tail • Bright Bunny • Dozer Dasher • Clanky Kart • Wild Black • Karp Kart • Prancer • Rose Queen • Green Apple Kart • Choco Macharon • Gold Egg • Sweet Daytripper • Red Taxi • Pink Wing • Happy Ride • Blue Soda • Clackety Kart • Gold Clanky Kart • Festival Girl • Black Kabuki Dasher • 8-Bit Pipe Frame • Gold Pipe Frame • Surf Sailer • Star-Spangled Flyer • Green Circuit • Sports Coupe • Pumpkin Kart • Dark Trickster • Sunset Cloud • Steel Driver • Holiday King • Gold Snow Skimmer • Dreamy Egg • Fast Frank • Iron Cucumber • Cat Cruiser • Wild Pink • Rose Taxi • B Dasher Mk. 2 • Decal Streamliner • Orange Streamliner • White Turbo Yoshi • Sakura Quickshaw • Jet Cruiser • Inferno Flyer • Rambi Runner • Pink Dozer • Grand Badwagon • Paintster • Lime Tea Coupe • Sunny Surf Sailer • Pinch Hitter • Cleanup Hitter • Ice Dozer • Green Double-Decker • Black Cat Cruiser • Red B Dasher Mk. 2 • Pink B Dasher Mk. 2 • Classic B Dasher Mk. 2 • Sky-Blue B Dasher Mk. 2 • Metal B Dasher Mk. 2 • Cream B Dasher Mk. 2 • Green B Dasher Mk. 2 • Tanooki Kart • Gold Pumpkin Kart • Lunar Cruiser • Sleigh Rider • White Snow Skimmer • Frosty Bells • Frost Wing • Gray Cat Cruiser • Sports Coupe 2022 • Roaring Racer • Jukebox Buggy • Sneeker • Green Lightning • Cupid's Arrow • Wild Slugger • Prop Kart • Magma Broom • Star Broom • Yellow 8-Bit Pipe Frame • Warrior Wagon • Armored Rider • Black Turbo Yoshi • Gold Bunny • Flower Kart • Dragonfly • Firefly • Daikon Rocket • Capsule Kart • Blue-Green Capsule Kart • White Bruiser • Coconut 1 • Pink Capsule Kart • Cream Cat Cruiser • Green Cat Cruiser • Goo-Goo Buggy • Goo-Goo Pink • Gold Kiddie Kart • Sweet Ride • White Fast Frank • Tuk-Tuk Kart • Tropical Truck • Gold Zucchini • Lightning Streamliner • Flowery Badwagon • Coral Jet Cruiser • Watermelon Kart • Ice-Cream Minibus • Chocolate Banana Minibus • Strawberry Soft Swerve • Shielded Speedster • Gold Standard • Gold Double-Decker • Black Carriage • Green Speeder • Flaming Speeder • Gold Sweet Ride • Streetle • Blue Speeder • Swift Talon • Gold Eagle • Blazing Eagle • Camo Tanooki Kart • Gold Rambi Rider • Moo Moo Offroader • Pink Speeder • Pink Sneeker • Gold Jingle Bell • Holiday Speeder • Wild Gold • Rainbow Taxi • Blooper Shuttle • Gold Lunar Cruiser • Gold Quickshaw • Pineapple 1 • Hot Pot Hot Rod • Rainbow Streetle • Gold Capsule Kart • Gold 8-Bit Pipe Frame • Taiko Drum Dasher • Sakura Sports Coupe • Bright Girl • Huffin Puffin Egg • Jumbo Jetter • Gold Paintster • Silver Flower Kart • Bronze Cucumber • Cream Classic • Red Comet • Pink Comet • Green Comet • Gold Comet • Mach 8-R • Gold Cupid's Arrow • Silver Cupid's Arrow • Silver Warrior Wagon • Gold Warrior Wagon • Black Shielded Speedster • Gold Shielded Speedster • Yeehaw Wagon • Desert Rose Wagon • Yellow Sub Scooter • Blue Sub Scooter • Gold Driver • Dolphin Drifter • Purple Rattle Buggy • Goo-Goo Gold • Gold Wild Slugger • Spicy Zucchini • Chocolate Mint Soft Swerve • Gold Soft Swerve • Monarch Kart • Gold Monarch Kart • Black B Dasher Mk. 2 • Gold B Dasher • Badwagon • Blue Badwagon • Gold Train • Bruiser • Snow Skimmer • Offroader • Banana Master • Poison Apple Kart • Cheep Snorkel • Gold Cheep Snorkel • Gold Cheep Charger • Dark Buggy • Koopa King • Brown Offroader • Cact-X • Pirate Sushi Racer • Silver Bullet Blaster • Head Honcho • DK Maximum • Sushi Racer • Gilded King • Crawly Kart • Black Dozer • Party-Wing • Penguin Slider • Black Penguin Slider • Cact-Ice • Black Turbo Birdo • Purple Bunny • Jade Hop Rod • Crimson Hop Rod • Dark Hop Rod • Kamek's Zoom Broom • Silver King • Vampire Flyer • Red Crawly Kart • Yellow Offroader • Cact-R • Cheership • Candy Clown • Tiger Bruiser • Combo Cruiser • Sakura Hop Rod • White Turbo Birdo • Green-Yellow Capsule Kart • Piranha Pipes • Red Offroader • Goo-Goo Black • Cact-B • Gold Bullet Blaster • Red Vampire Flyer • Gold Trickster • Gold Bruiser • Black Sneeker • Purple Dozer • Blue Crawly Kart • Rainbow Pipe Buggy • Gold Hop Rod • Black Jingle Bell • Gold Sushi Racer • Dry Bones Dasher • Waluigi Racer Mk. 2 • Chain Chomp Chariot • Fish Bone Ferry • Gold Fish Bone Ferry • Wiggler Egg • Boo Pipes • Gold Pipes • Wild Wiggler | ||
| Gliders | Normal | Super Glider • Parachute • Parafoil • Paper Glider • Droplet Glider • BBIA Parafoil • Minion Paper Glider • Piston Glider • Piranha Plant Parafoil | |
| Super | Peach Parasol • Flower Glider • Oilpaper Umbrella • Lightning Oilpaper • Pink Flower Glider • 8-Bit Jumping Mario • ? Block • Plaid Ribbon • Eggshell Glider • 8-Bit Jumping Luigi • Mushroom Glider • Bob-omb Parafoil • Shell Parachute • Wario Wing • Waluigi Wing • BaNaNa Parafoil • Blue Flower Glider | ||
| High-End | Gold Glider • Fare Flier • Purple Oilpaper Umbrella • Full Flight • Strawberry Crêpe • Le Tricolore • Starchute • Royal Parachute • Glitter Glider • Soaring Jack • Gift Glider • New Year's 2020 • New Year's Kite • Fireworks Parachute • Crimson Crane • Blizzard Parasol • Blizzard Balloons • Sweetheart Glider • Heart Balloons • Luma Parafoil • Rainbow Starchute • Bright Glider • Safety Glider • Daisy Glider • Pink Gold Paper Glider • Butterfly Sunset • Chocolate Donut • Gold Crane • Chocolate Banana Crêpe • Strawberry Donut • Silver Bells • Silver-and-Gold Hearts • Manta Glider • Treasure Map • Butterfly Wings • Great Sail • Festival Wings • 8-Bit Star • Super Mario Kart Glider • Star-Spangled Glider • Spider Glider • Sunset Balloons • Silver Starchute • Jolly Bells • Butterfly Prism • Planet Glider • New Year's 2021 • Gold New Year's Kite • Toe-Bean Balloons • Calico Parafoil • Black Great Sail • Silver Manta Glider • Rose Parasol • Snow Crystals • 8-Bit Fire Flower • Surf Master • Starry Great Sail • Black Toe-Bean Balloons • 8-Bit Bullet Bill • Glinting Glider • Flying Easel • Sunny Surf Master • Polka-Dot Manta Glider • Home-Field Glider • Gold Home-Field Glider • Springtime Crane • Yukata Ribbon • Silver Surf Master • Ship's Wheel • Tanooki Parafoil • Gold Tanooki Parafoil • Magic Parasol • 8-Bit Super Mushroom • Meteor Balloons • Pink Gold Meteors • Galaxy Glider • Candlelight Flight • Gold Penguin Wingtip • Aurora Balloons • New Year's 2022 • Black Cat Parafoil • Cat Parafoil • Gold Toe-Bean Balloons • Glittering Parasol • Luigi Parafoil • Sky-High Flyer • Record Setter • Mario's Mustache • Luigi's Mustache • Origami Glider • Sakura Origami Glider • Gold Eggshell Glider • Green Sprout • Magniflying Glass • Flybrary Book • Pink Magniflying Glass • Cream Toe-Bean Balloons • Green Cat Parafoil • Candlelight Flight Cake • Pretzel Glider • Tulip Corsage • Red and Gold Umbrella • 8-Bit 1-Up Mushroom • Tropical Balloons • Fire Manta Glider • Mint & Berry Balloons • Vanilla & Chocolate Balloons • Icy Mario's Mustache • Flying Flappers • Silver Luigi's Mustache • Mario's Hat Balloon • Luigi's Hat Balloon • Gold Cloud Balloons • White Waves Origami Glider • Chocolate Pretzel • Para-Panini • Silver Candlelight Flight • Autumn Leaves • Calico Toe-Bean Balloons • Wonderful Garnet • Festive Holly • Yellow Hard Hat Balloon • Fuzzy Kite • Gold Hard Hat Balloon • New Year's 2023 • Gold Meteors • Rainbow Fare Flier • Stealth Glider • Gold Umbrella • Wonderful Diamond • Gold Candlelight Flight • 8-Bit Super Glider • Gold 8-Bit Glider • 8-Bit Block Glider • 8-Bit Goomba • Bright Ribbon • Yoshi's Cookies • Smiley Flower Glider • Golden Glider • Gold Tulips • Gold Manta Glider • Red Checkered Glider • Pink Checkered Glider • Green Checkered Glider • Gold Checkered Glider • Gold Origami Glider • Gold Bells • Glittering Glider • Red Emblem • Green Emblem • Mario Bros. Parafoil • Mosaic Starchute • Jellychute • Wavy Great Sail • Dolphin Great Sail • Pink Bubble Balloon • Mario Golf Cap • Luigi Golf Cap • Gold Mario Golf Cap • Melon & Banana Balloons • Spooky Sprinkle Balloons • Gold Chocolate Balloons • Royal Flush • Rainbow Bells • Gold Mario's Hat Balloon • Swooper • Bullet Bill Parachute • Cloud Glider • Rainy Balloons • Wicked Wings • Gold Swooper • Banana Wingtip • Tropical Glider • Dragon Wings • Blooper Wingtip • Nabbit Oilpaper Umbrella • Cheep Cheep Masks • Dry Bowser Umbrella • Penguin Wingtip • Bright Balloons • Ninja Scroll • Dream Glider • Vampire Wings • Golden Wings • Wario's Mustache • Waluigi's Mustache • Wonderful Wings • Wicked Topaz • Piranha Plant Balloons • Secret Scroll • Lava Rocks • Black Starchute • Boo Masks • Nabbit Parachute • Gold Boo Masks • Roy Oilpaper • Rainbow Flappy Wings • Gold Flappy Wings • Wiggler Parachute • Gold Piranha Plant Balloons • Baby Mario Hanafuda • Yoshi's Egg Hanafuda • Peach Hanafuda • Barrel Hanafuda • Blooper Hanafuda • Cape Mario Hanafuda • Bullet Bill Hanafuda • Boo Hanafuda • Piranha Plant Hanafuda • Goomba Hanafuda • Jumping Mario Hanafuda • Bowser Hanafuda | ||
| Tires | Blue Standard • Cyber Slick • Gold Tires • Metal • Monster • Mushroom • Off-Road • Red Monster • Retro Off-Road • Roller • Slick • Slim • Sponge • Standard • Wood | ||
| Courses | |||
| New courses | City courses | New York Minute (R, T, R/T, 2, 2R, 2T, 2R/T, 3, 3R, 3T, 3R/T, 4, 4R, 4T, 4R/T) (tour appearances) • Tokyo Blur (R, T, R/T, 2, 2R, 2T, 2R/T, 3, 3R, 3T, 3R/T, 4, 4R, 4T, 4R/T) (tour appearances) • Paris Promenade (R, T, R/T, 2, 2R, 2T, 2R/T, 3, 3R, 3T, 3R/T) (tour appearances) • London Loop (R, T, R/T, 2, 2R, 2T, 2R/T, 3, 3R, 3T, 3R/T) (tour appearances) • Vancouver Velocity (R, T, R/T, 2, 2R, 2T, 2R/T, 3, 3R, 3T, 3R/T) (tour appearances) • Los Angeles Laps (R, T, R/T, 2, 2R, 2T, 2R/T, 3, 3R, 3T, 3R/T) (tour appearances) • Berlin Byways (R, T, R/T, 2, 2R, 2T, 2R/T, 3, 3R, 3T, 3R/T) (tour appearances) • Sydney Sprint (R, T, R/T, 2, 2R, 2T, 2R/T, 3, 3R, 3T, 3R/T) (tour appearances) • Singapore Speedway (R, T, R/T, 2, 2R, 2T, 2R/T, 3, 3R, 3T, 3R/T) (tour appearances) • Amsterdam Drift (R, T, R/T, 2, 2R, 2T, 2R/T, 3, 3R, 3T, 3R/T) (tour appearances) • Bangkok Rush (R, T, R/T, 2, 2R, 2T, 2R/T, 3, 3R, 3T, 3R/T) (tour appearances) • Athens Dash (R, T, R/T, 2, 2R, 2T, 2R/T, 3, 3R, 3T, 3R/T) (tour appearances) • Rome Avanti (R, T, R/T, 2, 2R, 2T, 2R/T, 3, 3R, 3T, 3R/T) (tour appearances) • Madrid Drive (R, T, R/T, 2, 2R, 2T, 2R/T, 3, 3R, 3T, 3R/T) (tour appearances) | |
| Other | Merry Mountain (R, T, R/T) (tour appearances) • Ninja Hideaway (R, T, R/T) (tour appearances) • Sky-High Sundae (R, T, R/T) (tour appearances) • Piranha Plant Cove (R, T, R/T, 2, 2R, 2T, 2R/T, 3, 3R, 3T, 3R/T) (tour appearances) • Yoshi's Island (R, T, R/T) (tour appearances) • Piranha Plant Pipeline (R, T, R/T) (tour appearances) • Squeaky Clean Sprint (R, T, R/T) (tour appearances) | ||
| Remix courses | RMX Mario Circuit 1 (R, T, R/T) (tour appearances) • RMX Choco Island 1 (R, T, R/T) (tour appearances) • RMX Rainbow Road 1 (R, T, R/T) (tour appearances) • RMX Rainbow Road 2 (R, T, R/T) (tour appearances) • RMX Choco Island 2 (R, T, R/T) (tour appearances) • RMX Vanilla Lake 1 (R, T, R/T) (tour appearances) • RMX Ghost Valley 1 (R, T, R/T) (tour appearances) • RMX Bowser's Castle 1 (R, T, R/T) (tour appearances) • RMX Donut Plains 1 (R, T, R/T) (tour appearances) • RMX Vanilla Lake 2 (R, T, R/T) (tour appearances) | ||
| Classic courses | SNES courses | Mario Circuit 1 (R, T, R/T) (tour appearances) • Donut Plains 1 (R, T, R/T) (tour appearances) • Ghost Valley 1 (R, T, R/T) (tour appearances) • Mario Circuit 2 (R, T, R/T) (tour appearances) • Choco Island 1 (R, T, R/T) (tour appearances) • Ghost Valley 2 (R, T, R/T) (tour appearances) • Donut Plains 2 (R, T, R/T) (tour appearances) • Mario Circuit 3 (R, T, R/T) (tour appearances) • Choco Island 2 (R, T, R/T) (tour appearances) • Vanilla Lake 1 (R, T, R/T) (tour appearances) • Bowser Castle 3 (R, T, R/T) (tour appearances) • Donut Plains 3 (R, T, R/T) (tour appearances) • Koopa Troopa Beach 2 (R, T, R/T) (tour appearances) • Vanilla Lake 2 (R, T, R/T) • (tour appearances) • Rainbow Road (R, T, R/T) (tour appearances) | |
| N64 courses | Luigi Raceway (R, T, R/T) (tour appearances) • Koopa Troopa Beach (R, T, R/T) (tour appearances) • Kalimari Desert (R, T, R/T, 2, 2R, 2T, 2R/T) (tour appearances) • Frappe Snowland (R, T, R/T) (tour appearances) • Choco Mountain (R, T, R/T) (tour appearances) • Mario Raceway (R, T, R/T) (tour appearances) • Royal Raceway (R, T, R/T) (tour appearances) • Yoshi Valley (R, T, R/T) (tour appearances) | ||
| GBA courses | Peach Circuit (R, T, R/T) (tour appearances) • Riverside Park (R, T, R/T) (tour appearances) • Bowser's Castle 1 (R, T, R/T) (tour appearances) • Boo Lake (R, T, R/T) (tour appearances) • Bowser's Castle 2 (R, T, R/T) (tour appearances) • Luigi Circuit (R, T, R/T) (tour appearances) • Sky Garden (R, T, R/T) (tour appearances) • Cheep-Cheep Island (R, T, R/T) (tour appearances) • Sunset Wilds (R, T, R/T) (tour appearances) • Snow Land (R, T, R/T) (tour appearances) • Yoshi Desert (R, T, R/T) (tour appearances) • Bowser's Castle 3 (R, T, R/T) (tour appearances) • Lakeside Park (R, T, R/T) (tour appearances) • Bowser's Castle 4 (R) (tour appearances) | ||
| GCN courses | Baby Park (R, T, R/T) (tour appearances) • Mushroom Bridge (R, T, R/T) (tour appearances) • Daisy Cruiser (R, T, R/T) (tour appearances) • Waluigi Stadium (R, T, R/T) (tour appearances) • Yoshi Circuit (R, T, R/T) (tour appearances) • DK Mountain (R, T, R/T) (tour appearances) • Dino Dino Jungle (R, T, R/T) (tour appearances) | ||
| DS courses | Luigi's Mansion (R, T, R/T) (tour appearances) • Waluigi Pinball (R, T, R/T) (tour appearances) • Shroom Ridge (R, T, R/T) (tour appearances) • DK Pass (R, T, R/T) (tour appearances) • Mario Circuit (R, T, R/T) (tour appearances) • Airship Fortress (R, T, R/T) (tour appearances) • Peach Gardens (R, T, R/T) (tour appearances) | ||
| Wii courses | Mushroom Gorge (R, T, R/T) (tour appearances) • Coconut Mall (R, T, R/T) (tour appearances) • DK Summit (R, T, R/T) (tour appearances) • Daisy Circuit (R, T, R/T) (tour appearances) • Koopa Cape (R, T, R/T) (tour appearances) • Maple Treeway (R, T, R/T) (tour appearances) • Dry Dry Ruins (R, T, R/T) (tour appearances) • Moonview Highway (R, T, R/T) (tour appearances) • Rainbow Road (R, T, R/T) (tour appearances) | ||
| 3DS courses | Toad Circuit (R, T, R/T) (tour appearances) • Daisy Hills (R, T, R/T) (tour appearances) • Cheep Cheep Lagoon (R, T, R/T) (tour appearances) • Shy Guy Bazaar (R, T, R/T) (tour appearances) • Mario Circuit (R, T, R/T) (tour appearances) • Rock Rock Mountain (R, T) (tour appearances) • Piranha Plant Slide (R, T, R/T) (tour appearances) • Wario Shipyard (R, T, R/T) (tour appearances) • Neo Bowser City (R, T, R/T) (tour appearances) • Rosalina's Ice World (R, T, R/T) (tour appearances) • Bowser's Castle (R, T, R/T) (tour appearances) • Rainbow Road (R, T, R/T) (tour appearances) | ||
| Battle courses | New courses | New York Minute B (tour appearances) • Paris Promenade B (tour appearances) | |
| Classic courses | GBA Battle Course 1 (tour appearances) • GCN Cookie Land (tour appearances) • DS Twilight House (tour appearances) | ||
| Other | |||
| Bonus challenges | Ready, Set, Rocket Start • Ring Race • Do Jump Boosts • Big Reverse Race • Goomba Takedown • Glider Challenge • Steer Clear of Obstacles • Vs. Mega • Smash Small Dry Bones • Break Item Boxes • Time Trial • Combo Attack • Take them out quick! • Snap a Photo • Precision Gliding • Big Reverse Race vs. 100 | ||
| Cups | Baby Daisy Cup • Baby Luigi Cup • Baby Mario Cup • Baby Peach Cup • Baby Rosalina Cup • Birdo Cup • Boomerang Bro Cup • Bowser Cup • Bowser Jr. Cup • Cat Peach Cup • Chargin' Chuck Cup • Daisy Cup • Diddy Kong Cup • Dixie Kong Cup • Donkey Kong Cup • Dry Bones Cup • Dry Bowser Cup • Fire Bro Cup • Fire Rosalina Cup • Funky Kong Cup • Gold Mario Cup • Hammer Bro Cup • Ice Bro Cup • Ice Mario Cup • Iggy Cup • Kamek Cup • King Bob-omb Cup • King Boo Cup • Koopa Troopa Cup • Lakitu Cup • Larry Cup • Lemmy Cup • Ludwig Cup • Luigi Cup • Mario Cup • Metal Mario Cup • Mii Cup • Monty Mole Cup • Morton Cup • Nabbit Cup • Pauline Cup • Peach Cup • Peachette Cup • Pink Gold Peach Cup • Poochy Cup • Rosalina Cup • Roy Cup • Shy Guy Cup • Tanooki Mario Cup • Toad Cup • Toadette Cup • Waluigi Cup • Wario Cup • Wendy Cup • Yoshi Cup | ||
| Tours | 2019 | New York Tour • Tokyo Tour • Halloween Tour • Paris Tour • Winter Tour • London Tour • Holiday Tour | |
| 2020 | New Year's Tour • Ice Tour • Valentine's Tour • Vancouver Tour • Mario Bros. Tour • Baby Rosalina Tour • Hammer Bro Tour • Yoshi Tour • Trick Tour • Flower Tour • Jungle Tour • Cooking Tour • Peach Tour • Marine Tour • Exploration Tour • Wild West Tour • Pirate Tour • Summer Festival Tour • Super Mario Kart Tour • Los Angeles Tour • 1st Anniversary Tour • Halloween Tour • Sunset Tour • Mario vs. Luigi Tour • Winter Tour • Rosalina Tour • New Year's 2021 Tour | ||
| 2021 | Berlin Tour • Cat Tour • Peach vs. Daisy Tour • Snow Tour • Mario Tour • Yoshi Tour • Ninja Tour • Sydney Tour (April–May) • Bowser vs. DK Tour • Trick Tour • Wedding Tour • Paris Tour • Summer Tour • Los Angeles Tour • Mario vs. Peach Tour • Frost Tour • Kamek Tour • Sydney Tour (September) • 2nd Anniversary Tour • Autumn Tour • Halloween Tour • Toad vs. Toadette Tour • Space Tour • Holiday Tour • Penguin Tour • New Year's 2022 Tour | ||
| 2022 | Singapore Tour • Wario vs. Waluigi Tour • Los Angeles Tour • Sky Tour • Mii Tour • Samurai Tour • Yoshi Tour • Amsterdam Tour • Doctor Tour • Peach vs. Bowser Tour (May) • Cat Tour • Metropolitan Tour • Bangkok Tour • Piranha Plant Tour • Ocean Tour • Sundae Tour • Bowser Tour • Mario vs. Luigi Tour • Anniversary Tour • Battle Tour • Halloween Tour • Autumn Tour • Animal Tour • Peach vs. Bowser Tour (November–December) • Holiday Tour • New Year's Tour | ||
| 2023 | Space Tour • Winter Tour • Exploration Tour • Doctor Tour • Mario Tour • Ninja Tour • Yoshi Tour • Spring Tour • Bowser Tour • Mii Tour • Princess Tour • Mario vs. Luigi Tour • Night Tour • Pipe Tour • Sunshine Tour • Vacation Tour • Summer Tour • Sundae Tour • Anniversary Tour | ||
| Items | Regular items | Banana • Green Shell • Red Shell • Spiny Shell • Bob-omb • Mushroom • Mega Mushroom • Bullet Bill • Blooper • Lightning • Super Horn • Coin • Star • Feathera | |
| Special items | Triple Bananas • Giant Banana • Triple Green Shells • Bowser's Shell • Double Bob-ombs • Triple Mushrooms • Fire Flower • Boomerang Flower • Ice Flower • Heart • Yoshi's Egg • Birdo's Egg • Bubble • Banana Barrels • Mushroom Cannon • Bob-omb Cannon • Lucky Seven • Dash Ring • Coin Box • Hammer • Giga Bob-omb • Super Bell • Super Leaf • Capsule | ||
| Inventory items | Coin • Coin Rush ticket • Event tokena • Grand Star • Item ticket • Level-boost ticket • Point-boost ticket • Points-cap ticketa • Ruby • Star ticket • Team tokena • Quick ticket | ||
| Course elements | Interactable | Banzai Bill • Barrel • Barrel Bomb • Bath Bomb • Barrel Cannon • Big egg • Blimp • Bob-omb Car • Bone Piranha Plant • Boulder • Burner • Bus • Cannon • Car • Ceiling Needle • Chain Chomp • Cheep Cheep • Clampy • Crate • Dash Panel • Dash panel ramp truck • Exploring Shy Guy • Falling Pillar • Festive tree • Fire Piranha Plant • Flipper • Floaty • Flying Shy Guy • Fuzzy • Glide Ramp • Goal Ring • Goat • Goomba • Goomba Tower • Half-pipe • Hot-air balloon • Inky Piranha Plant • Jack-o'-lantern • Jar • Jellybeam • Jump Boost field • Kadomatsu • Kanaami Road • Lava Bubble • Lava Geyser • Leaf pile • Maw-Ray • Mecha Cheep • Metal ball • Mud • Mushroom Platform • Mushroom Trampoline • Noshi • Oil slick • Penguin • Pipe • Piranha Plant • Pokey • Puddle • Ramp • Rocky Wrench • Rolling rock • Shoe • Sidestepper • Skating Shy Guy • Snow block • Snowball • Snowboarding Shy Guy • Snowperson • Soccer Ball • Spider Web • Spring egg • Star Ring • Star Thwomp • Stilt Guy • Swoop • Table • Thwomp • Traffic cone • Train • Truck • Walking Tree • Water Geyser • Wiggler • Wiggler Wagon • Whomp • Winged Cloud • Wooden cutout | |
| Non-interactable | Big Cheep Cheep • Boo • Boo Buddies • Bulber • Goonie • Huffin Puffin • Incoming Chomp • Nep-Enut • Note Block • Painting • Petal Guy • Shy Guy Tent • Star Bit • Vase | ||
| Techniques | Drift • Hop • Jump Boost • Mini-Turbo • Rocket Start • Slipstream | ||
| Favored and favorite courses | New (Amsterdam Drift · Athens Dash · Bangkok Rush · Berlin Byways · London Loop · Los Angeles Laps · New York Minute · Paris Promenade · Piranha Plant Cove · Rome Avanti · Singapore Speedway · Sydney Sprint · Tokyo Blur · Vancouver Velocity) • Remix • Super Mario Kart (SNES) • Mario Kart 64 (N64) • Mario Kart: Super Circuit (GBA) • Mario Kart: Double Dash!! (GCN) • Mario Kart DS (DS) • Mario Kart Wii (Wii) • Mario Kart 7 (3DS) • Battle | ||
| Notable areas, landmarks, and sightings | City courses | Amsterdam • Athens (Hadrian's Arch · Parthenon) • Bangkok • Berlin (Berlin Wall · Brandenburg Gate · Charlottenburg Palace) • London (Big Ben · Tower Bridge · Tower of London) • Madrid (Prado Museum · Ventas Bullring) • New York (Empire State Building · Statue of Liberty · Rockefeller Center) • Paris (Arc de Triomphe · Cathedral of Notre Dame · Eiffel Tower · Louvre) • Rome (Colosseum · Spanish Steps · Trevi Fountain) • Sydney • Tokyo • Vancouver | |
| Other | Boo Woods • Bowser's Castle • Daisy Cruiser • Hammer Bros. Sphinx • Luigi's Mansion • Peach's Castle | ||
| Miscellaneous | Action names in other languages • Badges (Common badges) • Challenge cards • Coin Rush • Emblem • Experience Point • Finish line • Frenzy • Gallery (Artwork · Badges · Course icons · Screenshots · Sprites and models) • "I Love Mario Kart Tour" • In-game statistics • Item probability distributions • Media • Mii Racing Suit profiles and statistics (Red–Yellow · Moo Moo–Koopa Clown) • MKT Report • Pipe • Pre-release and unused content • Race points system • Special pipe • Special skill • Sponsors • Trick animations • Underwater driving • Update history | ||