The 'Shroom:Issue 167/Strategy Wing
Director Notes
Written by: Hooded Pitohui (talk)
Welcome, all you readers of The 'Shroom, back to Strategy Wing! We have maps of Japan all around the office right now, as the rest of the team and I try to help Shoey figure out the best way to conquer Japan. Superchao and Yoshi876 continue to work on arranging the transportation, picking out the best vehicles and pilots for the job. Those pilots will take our Rabbid armies to the front lines, and Zelen and I have been reviewing Koops' battle strategies for months now to prepare for this. All the while, Ray Trace has been distributing 3D-printed figurines of everyone in the office to boost morale.
It may be best if I don't tell them that I secretly swapped out Shoey's maps with a map of the Fake News offices... Don't judge me harshly. That's where they keep all the good food in the 'Shroom HQ to use in Cooking Guide, and Doomhiker won't give it up. This is the only way to get it, at least until Anton joins me in alliance and the combined forces of Strategy Wing and Critic Corner seize the pantry for ourselves.
All of that aside, though, we have almost everything you've come to expect from Strategy Wing this month! Unfortunately, we'll have to make it one more month without Parallax, as computer failure stood in the way of the section's completion this month. It will return, though! In the meanwhile, we have plenty of high-quality sections for you to read! Go forth and enjoy!
As always, if you have any topic you'd like to write in detail about, take a look at our Sign-up page! We'd be happy to have you join us as a member of the Strategy Wing Team! Whether you want to follow Parallax's example and provide a guide on a topic you know well or you would like to make your own version of Mach Speed Mayhem to teach us everything about some obscure interest you have, we can find a place for you.
Section of the Month
Congratulations to ZelenPixel (talk)! With her section last month introducing us to two guys in green in Mario + Rabbids: Kindgom Battle, she took first place. Please continue to vote in SOTM as a show of support to all of our writers!
| STRATEGY WING SECTION OF THE MONTH | ||||
|---|---|---|---|---|
| Place | Section | Votes | % | Writer |
| 1st | Kingdom Battle Ramble | 9 | 37.50% | ZelenPixel |
| 2nd | Racing Like the Staff | 7 | 29.17% | Yoshi876 |
| 3rd | Mach Speed Mayhem | 4 | 16.67% | Superchao |
| 3rd | So You Want to Conquer Japan? | 4 | 16.67% | Chester Alan Arthur |
Kingdom Battle Ramble
Written by: ZelenPixel (talk)
Ya girl Zelen here! Welcome to February, my birth month (and this issue goes up shortly after my birthday)! Hope y'all are enjoying 3D World and Bowser's Fury, if you got it! Personally, I wanna get another pricey Wii U port first, though. It's a Donkey Kong game of course! Unrelated ramblings aside, this issue I'll be talking about Rabbid Mario and Peach. The former is actually my second favorite Rabbid! (You already know who my favorite is!)
Rabbid Mario
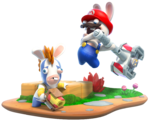
Rabbid Mario's whole thing is flexing and being really macho and a cool dude and stuff. But, with the squeaky voice clips (possibly more high-pitched than all the other Rabbids' voice clips might I add), and also him copying Mario which is really cute, I get the feeling he's actually a bit of a softie on the inside! He's a dork, and I mean this in a good way! Also, according to the official figurine description, he also thinks he's extremely hot??? As for story, he's seen in the intro a bit, but is first properly found halfway through Sherbet Desert, the second world, when Toadette asks Mario and team to go find Toad, who has gotten lost again. The team finds him soon after, and he has a perfect cube of ice with Rabbid Mario in it. After some Toad escort missions and defeating the duo of mid-bosses, Rabbid Mario's finally free from the perfect cube of ice and then he tries to impress Mario with... some string instrument. I'm not an expert on these. He plays the Super Mario Bros. ground theme!
Battle
| Health Points:* | 265-395 |
|---|---|
| Area of Movement: | 6-9 Cells |
| Pipe Exit Range: | 3-6 Cells |
| Boom Dash: | 20-100 DMG |
| Team Jump: | 6-7 Cells |
| Primary weapon: | Boomshot |
| Secondary weapon: | Melee |
| Bodyguard: | -0-30% WPN/-80-100% MOV Cooldown 2-1 Turns |
| Magnet Dance: | 6-9 Cells Cooldown 3-1 Turns |
| *Maximum HP doesn't account for global health upgrades throughout the game | |
The in-game description states: "A big league brawler with exceptional luck, a dependable defense, solid moves and massive case of imposter syndrome." Rabbid Mario is incredibly offense-oriented, specializing in staying close to enemies to dish out big damage. He generally has pretty average stats and exceptional offense. Due to the large amount of AOE (area of effect) attacks, however, you do have to make sure your allies don't get beat up too!
Rabbid Mario has an average Team Jump, but his Boom Dash is pretty strong! It can be used up to three times, and deals up to one hundred damage, which is pretty good on its own... But did you know his dash can be explosive? Dashing into any enemy will also damage other enemies (or allies) within a range of up to four cells, making it really good at clearing groups of enemies! As an additional note, four cells is also a lot, actually - it's something like a circle with a diameter of nine cells total, with the enemy in the center!
Rabbid Mario's primary weapon is the Boomshot. It fires in a triangle shape, apparently like a shotgun, with enemies (and allies!) receiving more damage the closer they are to him. Used correctly, it's an exceptionally strong weapon! The range is not very good, however. His Secondary weapon is Melee, which he shares with Mario - I go into more detail when discussing him in my first issue. Melee weapons are powerful, are only close-range, being only usable on enemies in the cell nearby, and also deal big damage to anyone nearby with a shockwave. On top of both types of weapons being mighty strong, they also come right out of the gate with some really good Super Effects as well - Vamp, which allows you to drain the enemy's Health, and Stone, which prevents them from doing anything for a turn! The maximum crit rate for both does stay at sixty percent, though, so if you just want to deal these statuses, you can use Rabbid Luigi.
Rabbid Mario's first technique is Bodyguard, the typical shield. It's not the best for defending against weapons, but very much is effective against movement damage like enemy Dashes, even negating it entirely when fully upgraded! The second technique is Magnet Dance, which will attract any enemy within range closer to him. Considering his big focus on close-range combat, it's immensely useful, and may even leave the enemies out of cover, and activate the other heroes' line-of-sight attacks!
Peach
Remember when the game leaked in spring 2017? Remember the specific image that leaked which called her "the badass princess"? It's true though! For personality, I think she acts like you'd expect? She's very polite, and one idle animation includes her clapping for no reason. Peach is first seen in the intro, but is also properly first met early in Ancient Gardens, once Beep-0 finds out how to teleport to her castle. She's glad to see Mario is fine, gets criticized by Rabbid Peach, and shows off what the other Rabbids have built around the castle. Notably, if you talk to her, she can also say "Why are you the one always having all the fun? I want to do my part, too!". Later, at the end of Sherbet Desert, the boss ambushes the team and freezes them completely, but, suddenly, Princess Peach casually glides in with her umbrella, rescues two of the heroes with explosions, and participates for the rest of the battle! Rabbid Peach, if she also got rescued, also acts rather upset about the whole arrangement, or rather that Mario and Peach were trying to hug. Peach also absolutely punts the boss' head after the battle! I also love how, in the story, she's in, like, no trouble ever for once!!! She's also the only member of the team to have dialogue at any point in the game, so that's cool.
Battle
| Health Points:* | 340-560 |
|---|---|
| Area of Movement: | 6-7 Cells |
| Pipe Exit Range: | 3-4 Cells |
| Dash: | 20-90 DMG |
| Heal Jump: | 6-8 Cells 5-20% HP 2-4 AOE Cells |
| Primary weapon: | Boomshot |
| Secondary weapon: | Grenaduck |
| Royal Gaze: | 80-100% DMG Cooldown 3-1 Turns |
| Protection: | 30-100% DMG Reduction Cooldown 2-1 Turns |
| *Maximum HP doesn't account for global health upgrades throughout the game | |
The in-game description states: "In her new role as a 'defender in a dress' vs. 'damsel in distress', Princess Peach strikes a nice balance between offense, defense and mobility." Her big focus is defense actually, having the highest HP of all the heroes, and having a technique that specifically helps her defend her allies! Otherwise she has weak-ish movement (with a surprisingly good Team Jump range!) and pretty good offense.
Peach has a singular Dash with average damage, but her Healing Jump offers a quick healing tool that can be used every turn! Wherever she lands, she will heal herself and allies within range of up to 4 cells (and remember, that's actually a lot), for up to twenty percent HP recovery, which may not seem like that much, but considering it has no cooldown, I think it's fair! Even with that it can still be a life-saver.
Peach's primary weapon is Boomshot as well, which Rabbid Mario also has - I cover it fully in his section. It's a powerful, close-range, AOE weapon. The secondary weapon is the Grenaduck, a kind of weak thrown explosive. Like the Rocket, it also explodes upon contact with any enemy within a certain range, and affects a similar amount of AOE cells. I honestly don't really know what advantages it even has over Rockets, considering it has worse range and damage but otherwise functions very similarly. Anyway, both weapons alternate between Burn and Freeze, an interesting contrast! As mentioned in previous issues, Burn causes the afflicted to run around and potentially inflict Burn on others, and Freeze prevents them from using their techniques.
As typical, Peach's first technique is the line-of-sight Royal Gaze, automatically attacking any enemy that comes into view. Her gaze may be a bit dangerous, considering she uses the Boomshot and you can't control whether it'll accidentally hit an ally or not. Be careful! However, that does also mean it may hit any enemies that happen to be in the blast radius! It can only fire once and deals good damage overall. The secondary technique is pretty interesting, being Protection. Once activated, any allies in range will be put under her protection, and any damage dealt to them will be minimized, with Peach receiving some of it instead. She does have a hefty HP stat and free healing as long as allies are nearby, and the damage she receives is ultimately small, so it's not a big drawback! With Protection and the Healing Jump, it's best Peach stays close to other allies, if possible.
Do you ever notice Rabbid Mario's design is, like, very accurate to a Super Mario Odyssey capture? He's got the hat, moustache, even blue eyes (coincidentally)! And he is also found in an icey-and-hot desert... I don't have a conclusion to the joke, but yeah!
Also, I'm genuinely so flattered y'all seem to like my section that much, considering it tied the top section in December (tied with the, IMO, excellent Mach Speed Mayhem even)!!! Not sure yet how that's gonna be for January, of course, but either way thank you all so much!!! Anyway, the focus in the March issue is gonna be the Yoshis!
Racing Like the Staff
Hello readers and welcome to Racing like the Staff, a section where I do 150cc on different Mario Kart games, but the twist is, I take on the Grand Prix by using the combination that a staff and expert staff member used in that Cup. If you're still a little confused, by this I mean if the track is in the Mushroom Cup, then that's the Cup that I race in. Unfortunately, I don't have copies of the Mario Kart games before Mario Kart 7, so it's only that, 8 and Deluxe that will be getting this treatment.
And once again we go back to the shorter version of this section. I was aiming to go back to the normal tracks rather than the DLC courses, but Super Mario 3D World + Bowser's Fury released, and it seemed like a fitting time to be Cat Peach, who might just be one of my least favourites in Mario Kart for the obvious reasons. It also means this is our first double dip course, as we did SNES Rainbow Road for Mario Kart 8 Deluxe! I did think it'd take longer to get to this point, but the overseers at Nintendo work in mysterious ways.
The combination for the staff for SNES Rainbow Road is Cat Peach with the Cat Cruiser, Retro Off-Road tyres and the Super Glider, and the stats are as follows:
- Speed – Just over three bars
- Acceleration – Four bars
- Weight – Three bars
- Handling – Just under four bars
- Grip – Four bars
Wario's Gold Mine
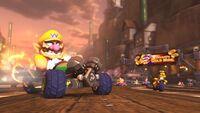
The start was almost perfect, with only Tanooki Mario ahead of me by the time we got to the first set of Item Boxes. I got a Mushroom from this, but I was in Tanooki Mario's slipstream, I didn't use it just yet, perhaps it would've been better if I had though, as this speed boost saw me fall off the course, and after getting hit by a Red Shell, I was down to fifth. Thankfully, Baby Peach took out Yoshi with a Green Shell as I passed, allowing me into third place, and then I got first after a bout of hits with Tanooki Mario and us going separate directions on the split path – I opted to take the right path. I thought I might have to fend some attacks off, but not even a Spiny Shell could bring anyone near me.
Rainbow Road
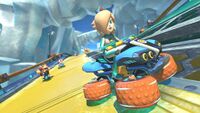
I was expecting to write a short section here, but Yoshi outdid me at the beginning, although he was soon displaced by my Red Shell. I made an error and got struck by the Star Thwomp, allowing him past, but my slipstream got me past him. He must've had a Mushroom, though, as he slipped past me again, but only just, and the Super Horn I got from the Item Boxes came in handy. I thought I'd handed the lead back after I went off the track, but I kept the lead, but on the final lap Yoshi came back with a vengeance. However, some skillful drifting on my part threw Yoshi into my Banana, and I was able to take a second win.
Ice Ice Outpost
The start of the race was mostly a repeat of last time, just with Tanooki Mario getting past me and being on the receiving end of my Red Shell. I was hoping for a relaxing race, and I thought I was in for it until the second lap, when Tanooki Mario ended up right on my tail, and no matter what I did, I wasn't catching up. I only got past after the paths split, with me on yellow and him on green, but got past I did, and I claimed another victory.
Hyrule Circuit
The start was a repeat of last time, with Tanooki Mario getting ahead of me, and then me hitting him with a Red Shell, although he got a lot further than I would've liked. Then, just like last time, it felt like he came from nowhere and I just couldn't catch him up until a Banana throw went awry for him. And then, even though I was hit with a Spiny Shell, I was able to take the final victory.
I didn't hate this combination, and I won all four races with it, but it's not a combination I intend to be using again – I just really wasn't feeling it. And it was particularly galling to see on tracks like Ice Ice Outpost and Hyrule Circuit, where there are such long straights, that I really struggled to gain on Tanooki Mario, and ultimately, I don't even know how I did.
So You Want to Conquer Japan?
Written by: Chester Alan Arthur (talk)
Welcome back Shoguns-in-training to another exciting edition of So You Want to Conquer Japan? Last month we began the process of building up our fief, improving the lives of our citizens, and building up an army. This month, now that we have it all put together it's time to go on the war front and begin the process of unifying japan!
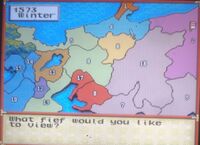
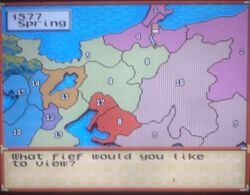
Now, you can see on the map that we have options to invade. We can either invade fief three, four, or sixteen. Now obviously in a game like this your decision is gonna be based on the geopolitical situation at the time. For example, fief three and fief sixteen might have the same ruler at the time, or you might have a non aggression pact with fief four making it impossible to invade them at this time. For your first conquest, I would avoid conquering fief sixteen solely because it is neighbored by sixteen different fiefs making it the hardest to defend. The benefit of conquering three is that it's right next to seven and that's my favorite defensive pact, not to mention that it has only two neighboring fiefs. But for this run we’re going to start by invading fief four because fief four neighbors fief one and fief one is the only fief in the game that only borders one other fief, making fief one the perfect feeder fief.
So before invading fief four we need to do a quick view of it:
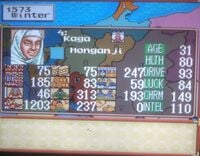
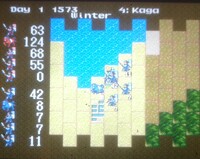
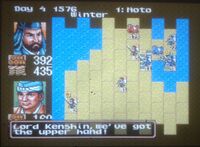
Entering the view menu will allow us to assess it's strength and see how many soldiers we're going to need to bring to battle. As you can see they have about 75,000 troops defending their land; a good rule of thumb is to have double the amount of troops that someone whose fief you want to invade has. You also need to make sure you have enough rice to supply your troops over the course of the war. A good rule of thumb is that you want to send in as much rice as you have soldiers while also making sure you have rice left in your own fief to supply your army just in case you get invaded. Each turn, you'll lose an amount of rice based on the amount of soldiers you have, and you'll lose the battle if you run out of rice. So it's off to war we go! We're going to be sending in about 230,000 soldiers giving us an army more than double the size of our opponent's in this battle while also allowing a little over 100,000 soldiers to stay in fief two for defensive purposes. An offensive war is a little different than a defensive war in the sense that you already know where the enemy is going to station itself, so you’ll be able to put the pieces in place immediately.When battling against an enemy in an offensive war the enemy's Daimyo is always going to be placed on the castle, because the castle gives it a large defensive advantage. Our goal is to get our cavalry and rifle units to the castle as fast as possible with as few losses as possible. So we're going to set the cavalry and rifle unit on the outside of the area we're given to place and move troops, as much as we possibly can, at least. You can also try to trick the enemy unit by moving your Daimyo around, because the enemy's units are programmed to attempt to get your Daimyo unless they're in direct trouble. If you surround the Daimyo and it has places to go it will begin to flee and you can place a unit on the castle; doing this will allow you to dramatically lower the enemy's morale, making it easier to bribe away their soldiers. The battle will end as soon as you take out the Daimyo, so your best bet is to just rush the Daimyo and ignore the other units if possible. Once the Daimyo has fled or died the battle is over. With that victory, we have slain Hongan Ji of Kaga and won possession of fief four!
With fief four in our possession we can now set our sites on fief one, but first we need to make sure the tax rate set for this fief is set at about fifty percent. There are other things we can focus on when it comes to managing an empire, but for right now we’re instead going to set our focus on fief one. It's going to take about two to three years to get in position to invade fief one, but now we can start sending troops from fief two directly into fief four. Now in terms of war fief one is a little interesting because it's the only fief where you'll always attack it the same way. See, other fiefs can be attacked from different angles, thus making where you can put your troops different. But since fief one only has one place to attack from, you're always going to have to put the troops in the same spot. So, we're going to follow the same rules as last time. First, we’re going to check how many soldiers they have (it was about 119,000), so we’re going to send in a little over 300,000 to compensate for that. The battle is going to go fairly smoothly, and, since there’s nowhere for Yoshitsuna of Noto, to run, victory is ours and fief one is ours.
I think this is a good place to stop for this month. We're establishing our empire and have shown the world that we are a force to be reckoned with.
Status of Japan
But before we go let’s a little run down of where things stand in Japan. As you can see:
- We (pink) Control three fiefs.
- Tokugawa (green) currently controls four fiefs.
- Nobunaga (red) has conquered two fiefs.
- Fiefs eleven (brown) and twleve (purple) are still independent.
- Tsutsu (blue) has established three fiefs on the western side.
- Imagawa (cream) has conquered three fiefs of the south.
Next month, I'll be going over methods to optimize the empire and the benefits of having multiple fiefs.
Mach Speed Mayhem
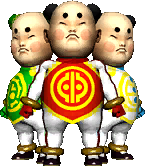
Hello, 'Shroom readers! I return to you once again for this month's reader-chosen unit. This time, we're looking at another of the F-Zero AX racers, but surprise! We're not actually looking at one, but at three, as #33: Dai San Gen is a three in one racer the way that Gomar and Shioh were. But since they're one racer, it's pretty clearly one article. So let's get to it, shall we?
Main Series
Like many others we discussed last year, Dai San Gen debuted in F-Zero GX and F-Zero AX together. And at this point, you know what that means! If you didn't transfer these three from AX... boy, you were in for a time. You see, Dai San Gen are unlocked by clearing Chapter 7 on Very Hard. This is the big race, featuring Captain Falcon against Black Shadow, Blood Falcon, and every single other character who appeared in F-Zero X, and they're not going to be a pushover. Chapter 7 is infamous enough on normal across the internet, but by the time you get to Very Hard, not only do you absolutely have to defeat Batman and Robin to stand a reasonable chance of winning, but you also have to survive a whopping FIVE laps on a deadly course that wants you RETIRED at several twists and turns. If you can survive this all, though, Dai San Gen and the Pink Spider are yours! ...Not that everyone does. I can think of several online guides that don't have the Pink Spider at all, not able to get through this. Alas.
Still, that doesn't stop some of us from getting Dai San Gen, and thus getting to see the information provided! Surprisingly, these three triplets from the planet Shinar are already in their 60s - though in their case, that's early middle aged rather than an old combo. They use telepathy to communicate mid-race, rather than the natural synchronization apparent in Gomar and Shioh, allowing for incredibly synchronized driving. Dai, in white, is the one who does the handling; San in green is their navigator; and red-clad Gen takes care of acceleration and the brakes. Together, they're practically unstoppable! Once again, there'd be a lot less to touch. They want to find a new home for their displaced race, which is apparently thirty thousand years old (not bad!), and even plan to share their prize money with them.
Not that they're entirely focused on altruism - if one thing's become apparent throughout all these profile interviews, you need some selfishness in your personality to have enough drive to win the F-Zero. They might want to donate most of their prize money, but the trophies? Nah. Rather than have one to share, they'd rather have three, one for each - and when asked to sign an autograph, they fight over who gets to sign, resulting in San getting to do it for all three of them. They're happy to brag about their victory, but really, who isn't? The three of them are also fun-loving in their spare time. They like to play mahjong, they travel the galaxy for parties, and they know how to do gymnastics. Really, you could have a good time hanging out with Dai, San, and Gen.
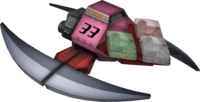
Their machine, the Pink Spider, was built by their uncle! The gambling-loving Professor Tsumo put together the Pink Spider with everything it could need for a race - a cockpit for each of them to use, ejection seats to get them out in case of a crash, and big ol' legs. But those big ol' legs aren't just for show, they're actually a stabilizing force on the machine, reflected in its stats of C body, C boost, and A grip... though unlike certain other bio-mentioned stats, this one plays out that way as well! The grip of the Pink Spider is surprisingly strong in gameplay, allowing for a machine that stays stable on nearly any track. Beyond that highlight, it's largely middle of the road. Top speed's okay, boost's okay, but... try not to get hit. It doesn't end well for this machine.
Other Information
So first off, if you think you see certain stereotypes in this design... yes, yes you do. F-Zero was never the most culturally neutral of franchises. But hey, it works for Punch-Out!! Anyhow, besides that, there's also a mahjong theming around the triplets. They're named after a specific big-points hand in mahjong, which requires collecting three each of green dragon tiles, red dragon tiles, and white dragon tiles, just like their color scheme. Professor Tsumo is named after a mahjong term, and his Japanese name is "Tsumo Riichi", which is two mahjong terms at once!
Interestingly, his name was actually translated differently in different locations; he was Professor Tsumo in the machine biographies, but called Dr. Reach (though it's pronounced the same way as "Riichi") in the interviews. This is likely a side effect of the voice acting being done in English from the beginning but the text in Japanese, so the translation team for the voice acting and for the text were different. This also shows up in their planet being named Shinar in the bios but Chinul in the interviews. Perhaps if we get another F-Zero game, we can get all these squared away into standardized English localizations? Until that glorious day, though, we'll just have to settle for voting for the next MSM writeup!
| The 'Shroom: Issue 167 | |
|---|---|
| Staff sections | Staff Notes • The 'Shroom Spotlight |
| Features | Fake News • Fun Stuff • Palette Swap • Pipe Plaza • Critic Corner • Strategy Wing |
| Specials | Feedback Survey • Super Mario 3D World + Bowser's Fury Photo Contest |


