Jumpy Jungle (Mario vs. Donkey Kong: Mini-Land Mayhem!): Difference between revisions
From the Super Mario Wiki, the Mario encyclopedia
Jump to navigationJump to search
7feetunder (talk | contribs) (→Levels: realized that listing the type of minis in this column is redundant since it's always all mini marios for all except for level 4 of each world) |
LinkTheLefty (talk | contribs) mNo edit summary |
||
| (7 intermediate revisions by 6 users not shown) | |||
| Line 6: | Line 6: | ||
|after=[[Teatime Twirl|>>]] | |after=[[Teatime Twirl|>>]] | ||
}} | }} | ||
'''Jumpy Jungle''' is the second attraction in ''[[Mario vs. Donkey Kong: Mini-Land Mayhem!]]''. Several trees, plants and vines can be seen in this level's background. Enemies here include [[ | '''Jumpy Jungle''' is the second attraction in ''[[Mario vs. Donkey Kong: Mini-Land Mayhem!]]''. Several trees, plants and vines can be seen in this level's background. Enemies here include [[Shy Guy]]s and [[Circus Kong]]s. This level introduces new objects, which are [[Spring]]s. The [[Mini Mario (toy)|Mini Mario]]s can use those to reach higher areas. | ||
In their second encounter with [[Donkey Kong]], the Mini Marios must avoid the totem heads thrown by him and reach a pebble near him, take it and throw it at him. After doing this three times, the player defeats Donkey Kong, who then takes [[Pauline]] and flee to the [[Teatime Twirl|third attraction]]. | In their second encounter with [[Donkey Kong]], the Mini Marios must avoid the totem heads thrown by him and reach a pebble near him, take it and throw it at him. After doing this three times, the player defeats Donkey Kong, who then takes [[Pauline]] and flee to the [[Teatime Twirl|third attraction]]. | ||
==Levels== | ==Levels== | ||
{| style="text-align: center; margin: 0 auto; border-collapse: collapse; font-family:Arial;" border="1" cellpadding="1" cellspacing="1" | {|style="text-align:center;margin:0 auto;border-collapse:collapse;font-family:Arial;"border="1"cellpadding="1"cellspacing="1" | ||
|-style="background: #ABC;" | |-style="background:#ABC;" | ||
!width="5%"|Level | !width="5%"|Level | ||
!width="1%"|Preview | !width="1%"|Preview | ||
!width=" | !width="3%"|Mini count | ||
!width="6%"| | !width="6%"|Inventory | ||
!width="30%"|Description | !width="30%"|Description | ||
!width="10%"|Enemies and obstacles encountered | !width="10%"|Enemies and obstacles encountered | ||
| Line 23: | Line 22: | ||
|[[File:MvsDK2-1.png]] | |[[File:MvsDK2-1.png]] | ||
|2 | |2 | ||
| | |[[Long Spring]]s | ||
|This level introduces [[ | |This level introduces [[Long Spring]]s. | ||
|[[Spike Trap|Spikes]] | |[[Spike Trap|Spikes]] | ||
|- | |- | ||
| Line 30: | Line 29: | ||
|[[File:MvsDK2-2.png]] | |[[File:MvsDK2-2.png]] | ||
|2 | |2 | ||
| | |[[Red Girder]]s, Long Springs | ||
|This level features [[Red Girder]]s and more Long Springs. | |This level features [[Red Girder]]s and more Long Springs. | ||
|None | |None | ||
| Line 37: | Line 36: | ||
|[[File:MvsDK2-3.png]] | |[[File:MvsDK2-3.png]] | ||
|2 | |2 | ||
| | |Red Girders, [[High Spring]]s | ||
|This level introduces [[ | |This level introduces [[High Spring]]s. | ||
|Spikes | |Spikes | ||
|- | |- | ||
| Line 44: | Line 43: | ||
|[[File:MvsDK2-4.png]] | |[[File:MvsDK2-4.png]] | ||
|2 | |2 | ||
| | |Red Girders, Long Springs | ||
|This level features more Long Springs and a [[Mini Mario (toy)|Mini Mario]] and [[Mini Toad]]. | |This level features more Long Springs and a [[Mini Mario (toy)|Mini Mario]] and [[Mini Toad]]. | ||
|Spikes | |Spikes | ||
| Line 51: | Line 50: | ||
|[[File:MvsDK2-5.png]] | |[[File:MvsDK2-5.png]] | ||
|3 | |3 | ||
| | |Red Girders, High Springs | ||
|This level features three Mini Marios and some more High Springs. | |This level features three Mini Marios and some more High Springs. | ||
|Spikes | |Spikes | ||
| Line 58: | Line 57: | ||
|[[File:MvsDK2-6.png]] | |[[File:MvsDK2-6.png]] | ||
|2 | |2 | ||
| | |Long Springs | ||
|This level features some [[Warp Pipe]]s and two Mini Marios. | |This level features some [[Warp Pipe]]s and two Mini Marios. | ||
|Spikes | |Spikes | ||
| Line 65: | Line 64: | ||
|[[File:MvsDK2-7.png]] | |[[File:MvsDK2-7.png]] | ||
|3 | |3 | ||
| | |Red Girders, Long Springs | ||
|This level features some [[Hammer]]s and Circus Kongs. | |This level features some [[Hammer]]s and Circus Kongs. | ||
|Spikes, [[Circus Kong]]s. | |Spikes, [[Circus Kong]]s. | ||
| Line 72: | Line 71: | ||
|[[File:MvsDK2-8.png]] | |[[File:MvsDK2-8.png]] | ||
|2 | |2 | ||
| | |Red Girders, Long Springs | ||
|This level features a [[key]] and a locked [[Goal Door (Mario vs. Donkey Kong)|door]]. | |This level features a [[key]] and a locked [[Goal Door (Mario vs. Donkey Kong)|door]]. | ||
|Spikes | |Spikes | ||
| Line 79: | Line 78: | ||
|[[File:MvsDK2-DK.png]] | |[[File:MvsDK2-DK.png]] | ||
|6 | |6 | ||
| | |Red Girders, High Springs | ||
|The second boss fight against Donkey Kong. | |The second boss fight against Donkey Kong. | ||
|[[Donkey Kong]] | |[[Donkey Kong]] | ||
| Line 92: | Line 91: | ||
|file3=MvDKMLM JumpyJungleC.oga | |file3=MvDKMLM JumpyJungleC.oga | ||
|title3=Third music | |title3=Third music | ||
|file4=MvDKMLM JumpyJungleIntro.oga | |file4=MvDKMLM JumpyJunglePreview.oga | ||
| | |title4=Preview | ||
| | |file5=MvDKMLM JumpyJungleLose.oga | ||
| | |title5=Losing | ||
| | |file6=MvDKMLM JumpyJungleWin.oga | ||
| | |title6=Winning | ||
| | |file7=MvDKMLM JumpyJungleIntro.oga | ||
| | |title7=Introductory cutscene music | ||
|file8=MvDKMLM JumpyJungleMenu.oga | |||
|title8=Stage select music | |||
|file9=MvDKMLM JumpyJungleBossHereWeGo.oga | |||
|title9=HERE WE GO! | |||
|file10=MvDKMLM JumpyJungleBossIntro.oga | |||
|title10=Countdown before boss | |||
|file11=MvDKMLM JumpyJungleBoss.oga | |||
|title11=Boss music | |||
|file12=MvDKMLM JumpyJungleBossLose.oga | |||
|title12=Lost against boss | |||
|file13=MvDKMLM JumpyJungleBossVictory.oga | |||
|title13=Defeated boss | |||
}} | }} | ||
==Names in other languages== | ==Names in other languages== | ||
{{foreign names| | {{foreign names| | ||
|Jap=ジャングルトレジャー | |||
|JapR=Janguru Torejā | |||
|JapM=Jungle Treasure | |||
|SpaA=Selva saltarina | |SpaA=Selva saltarina | ||
|SpaAM=Jumping jungle | |SpaAM=Jumping jungle | ||
| Line 109: | Line 123: | ||
|SpaEM=Stumbling jungle | |SpaEM=Stumbling jungle | ||
|Ita=Giungla salterina | |Ita=Giungla salterina | ||
|ItaM= | |ItaM=Jumpy jungle | ||
| | |FreE=Jungle des jongleurs | ||
| | |FreEM= | ||
|Ger=Dschungelhopserei | |Ger=Dschungelhopserei | ||
|GerM=Hopping jungle | |GerM=Hopping jungle | ||
}} | }} | ||
{{MVDKMLM}} | {{MVDKMLM}} | ||
[[Category:Jungles]] | [[Category:Jungles]] | ||
[[Category:Mario vs. Donkey Kong: Mini-Land Mayhem! worlds]] | [[Category:Mario vs. Donkey Kong: Mini-Land Mayhem! worlds]] | ||
Latest revision as of 13:11, March 8, 2024
| Jumpy Jungle | |
|---|---|
| |
| Game | Mario vs. Donkey Kong: Mini-Land Mayhem |
| << List of worlds >> | |
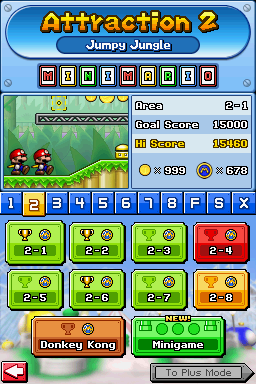
Jumpy Jungle is the second attraction in Mario vs. Donkey Kong: Mini-Land Mayhem!. Several trees, plants and vines can be seen in this level's background. Enemies here include Shy Guys and Circus Kongs. This level introduces new objects, which are Springs. The Mini Marios can use those to reach higher areas.
In their second encounter with Donkey Kong, the Mini Marios must avoid the totem heads thrown by him and reach a pebble near him, take it and throw it at him. After doing this three times, the player defeats Donkey Kong, who then takes Pauline and flee to the third attraction.
Levels[edit]
| Level | Preview | Mini count | Inventory | Description | Enemies and obstacles encountered |
|---|---|---|---|---|---|
| Area 2-1 | 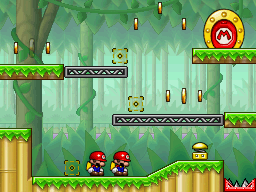
|
2 | Long Springs | This level introduces Long Springs. | Spikes |
| Area 2-2 | 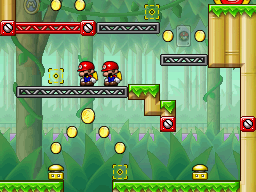
|
2 | Red Girders, Long Springs | This level features Red Girders and more Long Springs. | None |
| Area 2-3 | 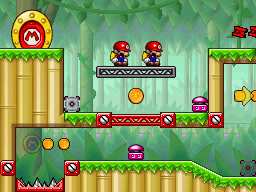
|
2 | Red Girders, High Springs | This level introduces High Springs. | Spikes |
| Area 2-4 | 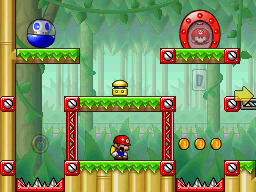
|
2 | Red Girders, Long Springs | This level features more Long Springs and a Mini Mario and Mini Toad. | Spikes |
| Area 2-5 | 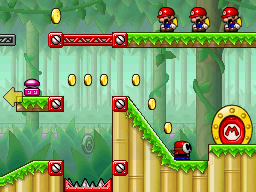
|
3 | Red Girders, High Springs | This level features three Mini Marios and some more High Springs. | Spikes |
| Area 2-6 | 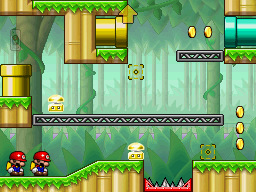
|
2 | Long Springs | This level features some Warp Pipes and two Mini Marios. | Spikes |
| Area 2-7 | 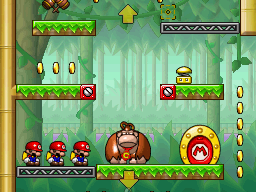
|
3 | Red Girders, Long Springs | This level features some Hammers and Circus Kongs. | Spikes, Circus Kongs. |
| Area 2-8 | 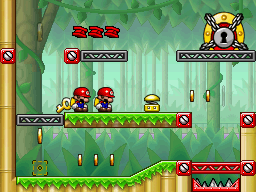
|
2 | Red Girders, Long Springs | This level features a key and a locked door. | Spikes |
| Area 2-DK | 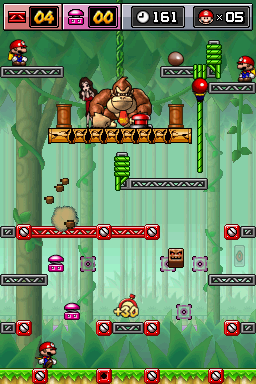
|
6 | Red Girders, High Springs | The second boss fight against Donkey Kong. | Donkey Kong |
Media[edit]
| File info |
| File info |
| File info |
| File info |
| File info |
| File info |
| File info |
| File info |
| File info |
| File info |
| File info |
| File info |
| File info |
Names in other languages[edit]
| Language | Name | Meaning |
|---|---|---|
| Japanese | ジャングルトレジャー Janguru Torejā |
Jungle Treasure |
| French (NOE) | Jungle des jongleurs |
|
| German | Dschungelhopserei |
Hopping jungle |
| Italian | Giungla salterina |
Jumpy jungle |
| Spanish (NOA) | Selva saltarina |
Jumping jungle |
| Spanish (NOE) | Jungla Trompicón |
Stumbling jungle |