The 'Shroom:Issue 174/Strategy Wing
Director Notes
Surprise! Welcome in, beautiful 'Shroom readers, to another edition of Strategy Wing! With Pitohui out of the office this weekend for his vacation, it's time for me to step up to the plate and lead this team. I have a success strategy written up right here, so nothing can go wrong! Here, take a look at what I've penned:
- Don't screw up
Good strategy, right?
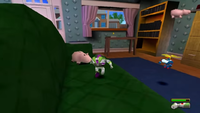
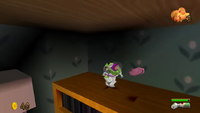
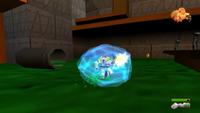
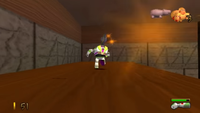
Onto the news! Local Waluigi and cereal enthusiast Waluigi Time (talk) has come into Strategy Wing's loving embrace with a walkthrough section for Toy Story 2 on PC, while local shoe Chester Alan Arthur (talk) has returned under a new moniker and with a section focused on Ogre Battle for the SNES! Make sure to check both of these new sections out!
Additionally, the user once known as RabbidYoshi2 has renounced their status as a Rabbid and as a Yoshi, and are now going by The Shamancer (talk). If you're confused on who the new face is writing I Choose You, don't fret, it's the same writer you know and love.
Finally, a little birdy told me that a little birdy has accompanied Koops for this month's adventure... Wait a second, you mean to say that Pitohui is using his 'Shroom salary to just casually play Fire Emblem with people?! Boy, he's getting a piece of my mind when he comes back...
That's the end of my announcements over here. Please enjoy the rest of this September Strategy Wing!
Section of the Month
Congratulations to Yoshi876 (talk) and ZelenPixel (talk) for their first place finishes in Section of the Month! Thank you to the rest of our writers for continuing to contribute, and readers, make sure you vote this month!
| STRATEGY WING SECTION OF THE MONTH | ||||
|---|---|---|---|---|
| Place | Section | Votes | % | Writer |
| 1st | Racing Like the Staff | 2 | 28.57% | Yoshi876 |
| 1st | On the Origin of Species | 2 | 28.57% | ZelenPixel |
An Ogre Battle Section
By: Generalissimo Shoe (talk)
Hello, 'Shroom readers, it is I, the brilliant military strategist, Generalissimo Shoe, here with another 'Shroom section for you. Many of you will remember that after my last glorious exploits in the Land of Japan, I promised you I would return with another section about another obscure SNES game. And I, Generalissimo Shoe, would never betray a promise or client, so here I am, back to offer my military expertise in the SNES cult classic, Ogre Battle: The March of the Black Queen. The game was developed by Enix and released in March of 1993.
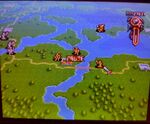
For a little context of our campaign, Ogre Battle: The March of the Black Queen is a tactical RPG about a group of freedom fighters attempting to overthrow the evil Empress Endora and to end her reign of tyranny of the continent of Zetegenia. One of the unique things about Ogre Battle is that combat takes place in a more freeform setting, where the enemy sends out a number of units (each consisting of three to five creatures) and you form your own units out of the resources you have in order to combat them. With that said, it is also important to know that you can explore previously seen maps looking around for treasure and wild creatures, because you have the chance to recruit any wild creatures that you find to your cause, thus allowing them to be put into a unit. In this section, we are going to look at the various pros and cons to different types of creatures, focusing on how useful they are, where they should be placed, and if they're worth messing with at all.
But in this first issue, we're actually going to go over some basics first (because, let's be real, none of you have ever played Ogre Battle before). Ogre Battle has a very simple mission structure: deploy your units and slaughter the enemies in your way until you get to the enemy's base, where you can wipe out the boss and win the level. Along the way, there will be towns for you to liberate and you'll want to liberate towns for a few reasons. Reason number one is that each town you take pays you a certain amount of money at the beginning of each day, and, hey, war ain't cheap. The other reason is that each town you capture allows you to pick a tarot card, but we'll get into those a little bit later. In addition, some towns have story events and recruitable characters in them, and you don't want to miss out on those by missing a town! One thing to note is, as long as you haven't slayed the boss, days will keep cycling, which means, in theory, you could just get paid forever. But do note this game has an alignment system, and, eventually, if you do this it starts to go down because the townsfolk think you're being a dick for extorting them for money.
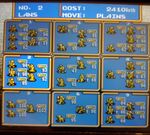
For your units, Ogre Battle has an interesting system where units are actually made on a 3x2 grid and, depending on where you place each component of a unit, that will determine what attacks they do and how many they do.
For example, a Knight will do two attacks in the front row but only one in the back, while an Archer will do two attacks in the back and only one in the front. Now a typical unit can be composed of up to five creatures, but there are some limitations to that. Each creature has a size, and that size can work to limit how much can go in each unit. For example, a full-grown dragon counts as two creatures for the purpose of unit count, so if you want a dragon, you'll only be able to throw three medium to small creatures with it, and if you want two dragons you'll only be able to throw one medium or small creature with it. This is an important thing to take into consideration, because, obviously, the more creatures in your unit, the more attacks you get, and the more attacks you pull off, the easier victory is.
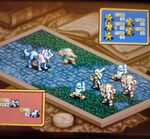
Ogre Battle runs kind of a weird battle system where each battle only lasts a maximum three turns before it ends and a winner and a loser is declared. The way victory is determined is based on total damage output, with the amount of kills also being weighed in. Now losing a fight doesn't mean you can't keep using that unit; it only sends them back, allowing the enemy to keep advancing. Now one other important thing to note is that each unit has to have a humanoid medium sized character as its leader. Basically, the leader is the most important part of the unit because, if the leader dies, the unit will break formation and retreat back to base.
Now, let's talk about combat in a little more detail, because even this is pretty different from most games. As stated earlier, when you make contact with a unit (which is achieved by simply running into them on the map), you start a battle, and, as stated, each battle consists of only three turns. That in mind, you need to maximize your damage output in each turn in order to achieve victory and destroy enemy units.
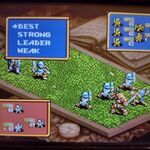
In a battle there are four ways you can set your men to attack, and those are:
- Best, where they attack the unit they can most easily attack
- Strong, which will cause them to attack the unit with the most heath
- Weak, which will cause them to attack the unit with the least amount of heath
- Leader, which means that they'll attack the leader if they can
The way you win battles is to constantly change the way you're attacking. For example, if a fighter in front of you is low on health, you'll want to wipe that one out. If you've got a wizard that can attack the back row of units, you might want to consider using your wizard to weaken up the back row for a future fight. The important thing to remember is you'll rarely be taking out full units in one battle, so you have to constantly be thinking of ways to do better in the next fight.
The most important thing I can tell you is, unless you've got another unit deployed that can flank the enemy, do not eliminate the leader before taking out the rest of the unit, because doing that causes the unit to retreat quickly back to their base and come back out fully restocked. While that's great for grinding, it's really annoying if you're just trying to finish the mission. The only exception to this rule is boss fights, where all you need to do is kill the leader and you'll win the fight.
Now let's talk about the Tarot card mechanic. In this game, every time you liberate a town (and sometimes you can find them on the map themselves), the game gives you a Tarot card. These Tarot card primarily function as special attacks, with each one doing something different in battle. For example, the Emperor card gives each character in a unit an extra attack, while a Chariot card summons a mighty warrior to strike your foes. Tarot cards are an extremely powerful part of this game and can quickly turn the tide of a losing battle or make a boss fight much easer. Now, some tarot cards don't do any damage, such as the Magician, which instead gives you a magic shield, which, while useful against wizards and magic users, is useless in any fights without them. This is important to note because you can only hold so many Tarot cards, and, if you surpass the amount that you can carry, you have to throw one away, so keeping track of what Tarot cards you want can really help you decide with ones you keep. With that, I believe we've covered the basics of Ogre Battle: The March of the Black Queen. Tune in next month when we begin to take a deep dive into things that you can craft your units out of.
Dr. Mario World Check-Up
In this issue's article, we'll be going through the versus mode for Dr. Mario World, which is tucked at the bottom-right corner where you can see the trophy icon. This mode is unlocked after beating stage 10 after an in-game download, so it isn't long before you can start playing it. While the gameplay for versus mode seems similar to stage mode, in practice it is played differently due to some differences, such as a smaller playing field and the fact that you are playing against a human opponent.
Overview of Versus
In versus mode, both players start out with the same opening layout. From there, they will need to work their way through them to clear the viruses, which allows them to attack their opponent. Even though both players have the same layout, they don't get the same capsules. The asymmetry can be a bit one-sided for either player, but managing the capsules smartly could go a long way. Once one of the players clear all the viruses in the stage (other objects are not necessary), three rows of viruses will appear on the side of the field while the opponent gets three rows of viruses in an unblockable attack.
If one of the players have an object or virus reach past the bottom line, they lose while their opponent wins. This includes any objects pushed down if the player clears their side of the field, so it's important to manage the stray objects closer to the bottom before that happens. If neither of the players have won for a while, the stage will eventually shrink. There will be a warning when it begins, and when it does, a row of gray Empty Blocks will push the stage down after every 10 seconds until there are only two rows left. Bonus viruses from clearing all viruses stop appearing when three lines are left, meaning that the only way to beat the opponent is to attack.
As mentioned, versus mode is a different beast compared to stage mode. This basically comes down the objective, because in versus the objective is simpler: players aim to clear viruses to overwhelm the opponent to force them into losing. Many of the doctors and assistants have different effects to better suit the frantic nature of versus, which is faster in general, due to not needing to worry about capsules running out. The playing field is also smaller and you can even the opponent's screen (which is much smaller than yours), which can be a good way to know what the opponent is up to.
Stats
Attacking
Every doctor has one out of four possible bomb types, which determines the amount of lines of viruses sent to the opponent. The number labeled on the bomb indicates the amount of lines, so a bomb with a "1" on it allows a doctor to send one line of viruses to the opponent. If you look at the doctor's versus stats, you will also notice a bar that is partially filled with a rainbow colour. That is basically the speed in which the attack metre fills. The more it is filled, the faster they attack. Generally, doctors with weaker bombs attack faster while doctors with stronger bombs attack slower.
In order for the attack metre to fill, the player must make capsule matches to do this. For every virus or capsule piece that you eliminate, the attack metre fills by one point. So for example, if you use a half-capsule piece to eliminate two viruses (forming three in a row), the attack metre will fill by 3 points. Note that the virus itself must be eliminated in order for the attack metre to fill by each point. That means that if a virus is hidden inside an object like ice or Brick Blocks, making a match that destroys the object while leave the virus intact will not count when filling the attack metre. Using the previous example, if a piece of half-capsule is used to eliminate two viruses inside ice, the ice will be broken and the attack metre will only fill by 1 point because the capsule still fills the attack metre but the viruses are not eliminated. The fact that viruses must be eliminated has some implications: the first is that if the stage has many viruses hidden in objects, the attacks won't come immediate; the second is that some doctors who specialise in hiding viruses in objects like Dr. Ludwig's ice skill will indirectly slow down the opponent's attacks. Dr. Iggy's floatie virus skill do in fact increase the attack metre like usual because floatie viruses still count as viruses.
There is another thing with the attack metre that you need to know: if you clear your playing area of viruses, the opponent's attack metre will become empty, which can really save your bacon especially if the opponent's attack metre is close to being full. This can mess up slower-attacking doctors like Dr. Rosalina or Dr. Wario, but it might not affect fast-attacking doctors like Dr. Lakitu or Dr. Toad too much.
Defence Percentages
Every doctor has four percentages corresponding to the bombs. Each percentage represents the chance the opponent's bombs are blocked, so for example, if a doctor has a 50% on 3-bombs, they have a 50% chance in nullifying attacks from doctors who use 3-bombs to attack, like Dr. Toadette or Dr. Lemmy. Of course, if the doctor has 0% defence, it is guaranteed that they will take the attack from that bomb type. Generally, doctors who attack fast proportionally to their bomb strength have lower defences, while doctors who attack slow proportionally to their bomb strength have higher defences.
The defence percentages generally determine the advantage in a match up between certain doctors. As an example, Dr. Waluigi (a 3-bomb attacker) has high 1-bomb and 4-bomb defences, which puts him at an advantage against 8-bit Dr. Mario (a 4-bomb attacker), as the latter has low 3-bomb defence. Of course, it is still up to the player to play well and to use the doctor's skill well, and also being lucky that the attacks don't land very often.
Skill Metre
The doctor's skill metre is not as obvious as the other two stats, because the only thing that the player can see is the skill's description. The description may mention keywords to the effect of "fills skill meter" followed by whether it's low, medium, or high, or it doesn't mention them at all. Obviously, if this is mentioned, the skill metre will fill faster than before, and it's generally advantageous that it does so.
The skill metre is filled different from the attack metre. While the attack metre only counts for viruses and capsules, the skill metre is filled for any object affected in a match. To simplify explanation, the following will help in filling the skill metre, where each object affected will fill by 1 point:
- Eliminating viruses and capsules
- Breaking objects that the viruses are hidden inside of (e.g. ice, barrels, bubbles)
- Breaking objects adjacent to the capsule match (Brick Blocks, crates, colourful crates).
- Any indestructible Empty Blocks (the blocks that push the stage up) next to the capsule match.
NOTE: If a skill immediately destroys a multi-layered object, every layer will fill the skill metre by 1 point.
The following will NOT count in filling the skill metre:
- Objects transformed through doctor skills, such as Dr. Baby Mario and Dr. Baby Luigi's skills. If the object is contained in another object like ice and bubbles, it will fill based on how many layers the transformed object is hidden inside of.
- Eliminating the skill charger itself, unlike in stage mode where it fills by 1 point by doing so. However, the skill metre will still fill by 60 points if it is collected.
- Breaking a crate but it is still intact. This is unlike stage mode where the skill metre still fills by 1 point even when it is not fully destroyed.
Doctor stats
Finally, here is the rundown for the doctor's stats in more detail:
| No. | Doctor | Bomb | AP | Defence% by Bomb Type | SP by Level | |||||||
|---|---|---|---|---|---|---|---|---|---|---|---|---|
| 1 | 2 | 3 | 4 | 1 | 2 | 3 | 4 | 5 | ||||
| 1 | Mario | 2 | 23 | 30 | 25 | 20 | 15 | 72 | 72 | 50 | 40 | 30 |
| 2 | Bowser | 4 | 53 | 45 | 40 | 15 | 10 | 81 | 81 | 81 | 60 | 45 |
| 3 | Peach | 1 | 17 | 60 | 60 | 70 | 75 | 40 | 40 | 30 | 20 | 20 |
| 4 | Luigi | 3 | 45 | 75 | 70 | 45 | 40 | 81 | 60 | 50 | 40 | 40 |
| 5 | Yoshi | 2 | 19 | 0 | 0 | 10 | 10 | 40 | 40 | 40 | 40 | 40 |
| 6 | Toad | 1 | 9 | 0 | 0 | 0 | 0 | 42 | 42 | 42 | 42 | 42 |
| 7 | Toadette | 3 | 25 | 0 | 0 | 0 | 0 | 40 | 40 | 40 | 40 | 40 |
| 8 | Bowser Jr | 3 | 36 | 30 | 30 | 30 | 20 | 60 | 60 | 60 | 60 | 60 |
| 9 | Ludwig | 2 | 31 | 35 | 70 | 45 | 35 | 58 | 58 | 58 | 58 | 50 |
| 10 | Wendy | 2 | 29 | 30 | 30 | 70 | 20 | 58 | 58 | 58 | 58 | 50 |
| 11 | Waluigi | 3 | 34 | 65 | 30 | 30 | 60 | 55 | 55 | 55 | 55 | 45 |
| 12 | Wario | 4 | 60 | 70 | 70 | 55 | 55 | 50 | 50 | 50 | 50 | 40 |
| 13 | Daisy | 2 | 32 | 70 | 70 | 60 | 55 | 35 | 35 | 35 | 35 | 35 |
| 14 | Baby Mario | 1 | 15 | 75 | 50 | 30 | 30 | 35 | 35 | 35 | 35 | 35 |
| 15 | Baby Luigi | 2 | 22 | 15 | 60 | 15 | 15 | 35 | 35 | 28 | 22 | 17 |
| 16 | Baby Peach | 3 | 31 | 10 | 10 | 60 | 10 | 62 | 62 | 50 | 40 | 30 |
| 17 | Baby Daisy | 4 | 29 | 0 | 0 | 0 | 0 | 62 | 62 | 50 | 40 | 30 |
| 18 | Rosalina | 4 | 57 | 75 | 75 | 40 | 40 | 58 | 58 | 58 | 58 | 50 |
| 19 | Luma | 1 | 16 | 20 | 80 | 40 | 15 | 49 | 49 | 40 | 30 | 20 |
| 20 | Donkey Kong | 3 | 31 | 10 | 10 | 10 | 10 | 81 | 60 | 81 | 60 | 46 |
| 21 | Diddy Kong | 2 | 14 | 0 | 0 | 0 | 0 | 62 | 62 | 45 | 35 | 25 |
| 22 | Baby Rosalina | 1 | 15 | 55 | 55 | 30 | 30 | 35 | 35 | 35 | 35 | 35 |
| 23 | Kamek | 3 | 33 | 40 | 30 | 20 | 10 | 50 | 50 | 50 | 40 | 30 |
| 24 | Dry Bowser | 4 | 39 | 20 | 20 | 15 | 10 | 89 | 89 | 89 | 66 | 50 |
| 25 | Fire Mario | 2 | 18 | 20 | 20 | 15 | 10 | 79 | 79 | 55 | 44 | 33 |
| 26 | Fire Peach | 1 | 15 | 50 | 50 | 55 | 60 | 50 | 50 | 32 | 24 | 24 |
| 27 | Roy | 3 | 40 | 50 | 50 | 15 | 15 | 58 | 58 | 58 | 58 | 44 |
| 28 | Larry | 1 | 14 | 15 | 15 | 50 | 50 | 58 | 58 | 58 | 58 | 44 |
| 29 | Fire Luigi | 3 | 40 | 60 | 50 | 20 | 10 | 82 | 58 | 44 | 58 | 44 |
| 30 | Fire Rosalina | 4 | 50 | 55 | 35 | 25 | 25 | 56 | 56 | 56 | 42 | 28 |
| 31 | Nabbit | 2 | 16 | 0 | 0 | 0 | 0 | 35 | 35 | 35 | 35 | 35 |
| 32 | Lakitu | 1 | 7 | 0 | 0 | 0 | 0 | 20 | 20 | 20 | 20 | 20 |
| 33 | Goomba Tower | 3 | 25 | 0 | 0 | 0 | 0 | 22 | 22 | 22 | 22 | 22 |
| 34 | Koopa Troopa | 1 | 13 | 20 | 50 | 20 | 20 | 32 | 32 | 32 | 32 | 23 |
| 35 | Dolphin | 4 | 37 | 15 | 15 | 10 | 10 | 32 | 32 | 32 | 32 | 32 |
| 36 | Baby Wario | 1 | 14 | 40 | 40 | 15 | 5 | 58 | 58 | 58 | 58 | 50 |
| 37 | 8-bit Dr Mario | 4 | 50 | 45 | 40 | 10 | 50 | 100 | 80 | 70 | 60 | 60 |
| 38 | Lemmy | 3 | 31 | 0 | 0 | 50 | 60 | 58 | 58 | 58 | 58 | 50 |
| 39 | Blooper | 2 | 18 | 10 | 20 | 20 | 30 | 28 | 28 | 28 | 24 | 20 |
| 40 | Boo | 1 | 11 | 30 | 40 | 10 | 5 | 28 | 28 | 28 | 22 | 17 |
| 41 | King Boo | 4 | 37 | 5 | 5 | 10 | 50 | 44 | 44 | 44 | 44 | 44 |
| 42 | Morton | 2 | 40 | 65 | 60 | 75 | 70 | 58 | 58 | 58 | 58 | 50 |
| 43 | Iggy | 3 | 26 | 0 | 5 | 5 | 0 | 50 | 50 | 50 | 50 | 40 |
| 44 | Piranha Plant | 1 | 15 | 10 | 60 | 50 | 60 | 20 | 20 | 20 | 20 | 20 |
| 45 | Petey Piranha | 4 | 47 | 20 | 40 | 60 | 0 | 66 | 66 | 58 | 50 | 40 |
Specialists
Usually lasting every seven days, four or five doctors will be chosen to receive certain advantages. There are five types of possible advantages, though you basically only see four of them. The possible bonuses are as follows:
- Skill level up: The most common of the boosts is to level up the doctor, so that you can use an upgraded skill. This practically gives the doctor a better advantage, especially if their skills are already good. For example, Dr. Fire Luigi is viable at a minimum at level 4, but if you have him at level 3 and this boost is active, this is the best time to use him. There is no downside for this perk, since level 5 doctors also get a bonus, where their skill metres are reduced by 20% (rounded up).
- Attack speed up: This reduces the AP metre of the doctor by 10%, rounded up. The advantage granted by this is minor, but this advantage can accumulate since this allow them to attack more often. Note that only Dr. Lakitu and Dr. Toad don't benefit from this perk as their attack metres are very low.
- Defence up: This increases the defences of the doctors by a flat 10% across the board, allowing them to more reliably defend against attacks. It's always good to be able to defend against more attacks, especially for doctors with little to no defences.
- Extra keys: If you win with this doctor, you get 2 keys instead of 1. Although not much of a perk in battle, the fact that it reduces the amount of battles required to open battle boxes meant that you can open your battle boxes in a shorter time.
- Battle points up: Although this boost never gets used for a long time, it is worth mentioning. This allows a doctor to win more points, which is especially significant in higher tiers where the amount of points gained and lost are equal. Because a certain group of people abused this perk to reach a point where they can no longer be battled against, this perk is unlikely to ever appear again.
Skill Chargers
In Season 6, skill chargers appear in the rainbow tier in not only the starting layouts, but also sometimes during attacks, where one may appear per attack. Before this, skill chargers may only appear by using one assistant (Honey Queen), but after this change, there are more chances to use skills thanks to these objects. Season 7 upped the availability of this perk by making it available during attacks in lower tiers (tier 4 to tier 10), meaning that lower tiers might be able to use skill chargers too.
One of the best applications with skill chargers is to chain skills with it. For example, if you use Dr. Mario and there is a skill charger in the lowest row after you skill metre is filled, you can use your skill to clear the lines and the skill charger, subsequently using the skill again. Dr. Daisy can also do this, where you can fill her skill metre, then tap the area with a skill charger to use it to clear a different area. Doctors that send or hide objects to the opponent can chain the skill by sending twice the amount of objects, by way of using it when the skill is filled, followed by using it again after using a skill charger.
It should be noted that since the skill charger can appear after each attack, doctors with weaker bombs have a higher chance of making more skill chargers appear, while doctors with stronger bombs wouldn't have as many skill chargers. This creates a sort of balance where you can use the higher amount of skill chargers against less-strong doctors who can attack often, while at the same time stronger doctors take a longer time to build their attacks but the rarity of skill chargers won't make them appear as often.
Do note that skill chargers can also appear after you clear all viruses, and if you happen to use some of the doctors that can take advantage of this, you are sure to be advantageous. As an example, Dr. Bowser and Dr. Dry Bowser can eliminate three random rows, and they can clear them all and possibly chain them until they overwhelm their opponent. Finally, Dr. Donkey Kong's virus attack skill won't have skill chargers.
Miscellaneous tips
- Add extra capsules to the play area: In versus mode, there is no danger in running out of capsules. Because of this, one thing a player could do is to add several capsules into the field if they so want to, especially if a specific capsule combination is wanted. The game will occasionally not give a specific colour, so the player could keep adding capsules to get the colour. You should still manage the existing capsules so that they don't clutter or overflow. In other words, this should be done if the player needs a specific colour but there isn't one.
- Pull capsules inside gaps sparingly: One of the possible things you can use capsules is to drag a capsule piece into a gap that is big enough for it, which can be helpful, but it is also a bit slow. Perhaps for lower tiers the games don't go by very fast, but if you are in a higher tier, it is better to muscle past viruses from the bottom. If a capsule match through dragging into a gap is more efficient, then go for it.
- Push capsules down with another capsule: Sometimes the player might mess up the capsule's alignment, which can be annoying if it got in the way of a match. One way to prevent this from happening is to place a capsule to line up with a match, and then use another capsule to push the first capsule down so that the alignment doesn't waver. If a valid capsule is made as a result of pushing capsules, the match will immediately be made, meaning that it is one way of speeding up a capsule match.
- Time skills properly: Most of the time, there is a time and place to use the skill as it's not always the best idea to use it immediately when you can. For example, Dr. Mario should hold off the skill button if there are stray capsules or easily-cleared rows at the bottom-most rows, and Dr. Ludwig should only use his skill if the opponent has several viruses that can be targetted. Certain doctors can stand to spam their skills as much as they can, such as Dr. Wario and Dr. Luigi, which pretty much make them exceptions.
Doctors
Instead of listing down every single doctor, I will organise them in a subjective tier list because this will allow me to organise my thoughts for each one better, specifically on their overall usefulness. The characters are not necessarily ordered by their usefulness within the specific tier.
Of note is the "Min. Viable Level" column, which lists the minimum level for the doctor at their most viable, and it's a level where I felt they reached the potential where they can prove their usefulness. Of course doctors are better at higher levels than that. If their level is lower than the listed viable level, that means they would've been ranked a bit lower than the designated tier.
Wonderful
| Doctor | Min. Viable Level | Explanation |
|---|---|---|
Dr. Mario |
2 | Dr. Mario in versus is best described as all-around. His defences are not spectacular but they get the job done, and his attack speed is average for 2-bomb attackers. Where Dr. Mario shines though, is his skill: their skill is to clear the lowest line(s) of objects, where it is one line at level 1 and two lines starting from level 2. The fact that this skill is not random makes it reliable, and clearing the lowest line(s) per use of this skill has a few key applications. For one, it can save the player from losing by clearing any objects that are dangerously close to the bottom of the field, and it can also clean up all the viruses if there is one line or two lines close to each other. He may be a slower attacker and has a less destructive skill compared to Dr. Fire Mario but is still solid and has a few advantages compared to him. |
Dr. Fire Mario |
2 | Dr. Fire Mario is a much more aggressive attacker, as while his defences are marginally lower than Dr. Mario's he makes up for it with a faster attacking speed. Dr. Fire Mario has the same skill as Dr. Mario and is just as versatile, except that it has the benefit of incinerating the objects, ensuring that those multi-hit ones are completely gone, unlike Dr. Mario who only hits them once. The only drawback is that is that its skill charge speed is slightly slower. Because of the high attack speed and great skill, this doctor is commonly-used by skilled players for a reason. |
Dr. Yoshi |
3 | A combination of the skill's high clearance and fast attacking speed is the reason Dr. Yoshi is one of the more common picks in versus, especially if the player has a high level Dr. Yoshi. Dr. Yoshi is best described as a glass cannon because he has practically little to no defences, but it is made up by a relatively fast attacking speed. The 10% defences against 3-bombs and 4-bombs aren't the worst thing to have, which might even be handy to have. His skill synergises with the glass cannon nature by being able to eliminate objects, allowing for quick clears.
The way this skill works is that random objects on the play area are targeted, but it will always prioritise viruses if there are any. Because of this, the best way to use Dr. Yoshi is to basically clear out any non-virus objects in order for Dr. Yoshi to do the rest, and the focus must be the ones nearer to the bottom. This should be done since if the opponent attacks through Dr. Yoshi's low defences, there will be new viruses and so the stray objects won't be considered a target anymore. Even if there are only viruses to clear, it is a good idea to eliminate any easy-to-clear viruses. |
Dr. Daisy |
4 | Basically, Dr. Daisy's wonderful skill and great defences makes up for her slower attack. Dr. Daisy' skill is to eliminate an object that you tap on the screen, which causes anything within the range to be eliminated. The range is 1x1 for level 1, and it is increased for every level, up to 5x5 in level 5. Also, any object that you tap will be instantly eliminated, making it a very good cleanup skill. Similar to Dr. Mario and his fiery counterpart, this skill is versatile for how reliable it is, as there are many things you can do. One way to use this skill is to clear any viruses or objects that are close to the bottom in order to prevent the player from losing, and another is to clean up the play area of viruses in order to reliably attack the opponent.
Of the characters, Dr. Daisy probably has a high skill ceiling by virtue of being the only character in versus to have a manual-targeting skill, which is an unusual trait that no other doctor has. Another unusual thing with this skill is that after you activate it, you can still move capsules around even though the skill meter is empty. As long as a finger shows on the screen, this skill hasn't been used, so you can fill up the meter to be able to use it a second time immediately. A delayed use of this skill can even come in handy depending on what happen in the battle, so for example if the opponent had a surprise attack you can save yourself from losing. The many ways this skill can be used is why Dr. Daisy is very good. |
Dr. Fire Luigi |
4 | Dr. Fire Luigi's stats are decent, as he has good defences against weaker bomb types, though he is a bit slow as a 3-bomb attacker. His skill makes up for some of the drawbacks for his stats. Dr. Fire Luigi functions similarly to Dr. Fire Mario in this his skill can clear the lowest row(s), but there is the addition of clearing the leftmost column(s). Between the two of them, Dr. Fire Mario's skill is more instantaneous compared to Dr. Fire Luigi, who has to wait for the column(s) to clear first before the row(s) are cleared. Dr. Fire Luigi do have overall better defences compared to Dr. Fire Mario, but his attack speed is on the slow side. |
Dr. Petey Piranha |
2 | While Dr. Petey Piranha is the last doctor to be added, it is a very solid one to boot. The attacking speed is somewhat average as a 4-bomb attacker, while the defences are an interesting mix, with the 3-bombs having the most defence while the 4-bomb having no defence at all. The biggest thing going for Dr. Petey Piranha is the skill, because it has better clearing potential compared to Dr. Fire Mario where every column will have two bottom-most objects (level 2+) cleared in each column. The only catch with it is that it takes a bit more time to finish executing. |
8-bit Dr. Mario |
3 | This doctor's defences are fairly good except for a weak 3-bomb defence, and he has a relatively slow attacking speed. What makes 8-bit Dr. Mario very good is his skill, because it renders all the half-capsules uncontrollable, where you can't even drag them down unless it's pushed by a full-sized capsule. This is even more disruptive than Dr. Luigi's skill in locking capsule rotations, mainly because it removes control from the flexible half-capsule pieces from the opponent and effectively slows them down.
Because of how great 8-bit Dr. Mario was, he is the only character to receive nerfs within this game's history. His skill and attack metre charge slower than from release, but the skill will still be very useful despite that. The only thing is that 8-bit Dr. Mario is hardly available, where he is mainly available through referrals or from free gifts last year in 2020. |
Dr. Larry |
2 | While Dr. Larry is a 1-bomb attacker with average speed, his colorful crates are what makes him a solid choice. These obstacles are trickier to clear because of a need of a specific colour, and the fact that it fills gaps make it quite deadly in the hands of a player that can use them successively. His defences are quite good for stronger bombs, therefore assistants that guard against weaker bomb types are recommended. |
Dr. Peach |
5 | Dr. Peach is more of a wall, because her defences are high on average, although her attack speed is on the slow side. Because of Dr. Peach's slower attack for 1-bomb attackers, the high defences are helpful for her. At the highest level, she clears 3 columns, which when combined with how fast this skill charges (no doubt making up for the skill's lower clear potential), is when the skill is at its most useful. This allows her to potentially chain the skill for another use.
To use this skill efficiently, it is a good idea to clear any columns with few viruses so that no viruses remain, in order to increase the chances of a desired column to be targeted by this skill. If there is a skill charger in that column with a virus, it's a good idea to leave it there so that the skill may target it, allowing her skill to be used again. |
Dr. Fire Peach |
5 | Dr. Fire Peach is similar to Dr. Peach in terms of stats and skill. The difference is that her defences are slightly weaker but has a slightly faster attack speed, and her skill chargers slightly slower but can immediately eliminate all the objects within it. Between the two of them, Dr. Fire Peach is a bit less useful but not significantly so, mainly because of the slower skill charging and the the slightly longer skill animation. |
Dr. Baby Mario |
3 | As a 1-bomb attacker, Dr. Baby Mario is a bit slow, but his defences are solid, especially against 1-bombs where he can more easily defend against. With a skill that converts many objects into exploders, Dr. Baby Mario can easily cause chain reactions by setting up exploders in close proximity to each other. These exploders can even be used to clear all viruses so that you can push the stage up, and you can trigger an explosion immediately before the stage moves up so that you can clear the new viruses with explosions. Note that if the opponent attacks while the explosion is triggered, it might not hit the intended target, which is why you should trigger the lower bombs instead of the higher bombs. |
Dr. Baby Rosalina |
3 | Simlar to Dr. Baby Mario, Dr. Baby Rosalina is a 1-bomb attacker that attacks a bit slow, but she comes with good defences. Her defences are a bit more balanced for weaker bombs. Her skill converts many objects into rainbow capsules, which can then be used to make even more matches to clear more objects. Due to this, it is very easy to clear the field. There is a bit of a delay before the viruses are transformed into rainbow capsules, so make sure you use it a bit ahead of time. |
Dr. Iggy |
4 | Dr. Iggy's defences are almost non-existent, but his attacks as a 3-bomber come quite fast. His skill also covers a lot of gaps, where you can put up to 15 viruses on the opponent's side of the field. With that quantity and a somewhat fast charge speed, you can chain the skills more quickly to more easily overwhelm the opponent. Do note that because Dr. Iggy adds viruses, the very same viruses can be used to fill the attack metre to target his very low defences. |
Dr. Donkey Kong |
3 | Dr. Donkey Kong is all about playing aggressively. His somewhat fast attacking speed is complemented with a skill that adds even more viruses to the opponent's side of the field. The strategy with using this doctor is pretty simple, but it can be effective if you play fast enough. Just be sure to remember that this doctor's defences are pretty low, even if it's there. |
Dr. Dry Bowser |
3 | Dr. Dry Bowser is overall one of the faster 4-bomb attacker, though unlike Dr. Bowser his defences are on the low side. Much like Dr. Bowser, his skill is where he shines. It can cover up to 3 rows, but is a bit slow in charging. If you are left with three topmost rows, this skill will target them all, but if one of the rows even has an object so that there are four or more rows, it can also target them. Also, if the topmost row has a gap even if there are multiple rows close to each other, not all of them may be targeted. Dr. Dry Bowser is overall superior compared to Dr. Bowser despite the former's slightly slower skill charging speed and lower defences, mainly because his skill is comparatively instantaneous, so you can clear those rows more quickly.
The biggest hurdle with Dr. Dry Bowser is the fact that you can only obtained him as rewards, referrals, or purchasable pack, so it is not very easy to obtain him at a high level. If you somehow end up with a high-levelled Dr. Dry Bowser, you have a powerhouse in your hands. |
Great
| Doctor | Min. Viable Level | Explanation |
|---|---|---|
Dr. Bowser |
3 | Dr. Bowser is basically a tank, for he has 4-bombs. It comes with a slower attacking speed, though he has good defences against 1-bombs and 2-bombs. Where Dr. Bowser shines is his skill, because it can cover up to three rows of viruses at level 3. The skill may be on the slower side in skill charge, but is made up by a higher potential to clear more objects, because viruses tend to be clumped in rows. If you are left with three topmost rows, this skill will target them all, but if one of the rows even has an object so that there are four or more rows, it can also target them. Also, if the topmost row has a gap even if there are multiple rows close to each other, not all of them may be targeted. Basically, this skill is most reliable when you are at an advantage of having less rows, but if you are overwhelmed, it can become unreliable.
What makes Dr. Bowser not as good as Dr. Dry Bowser is that not only does the skill not immediately clear everything it targets, his skill also has a bit of delay before the viruses are incinerated, making him a bit of a slower choice. |
Dr. Dolphin |
2 | While not having the best defences, Dr. Dolphin is one of the faster 4-bomb attackers. Its bubble skill is also quite disruptive due to the potential in messing up a row or by making viruses unable to be cleared due to floating, and it is helped by how often you can use them compared to Dr. Bowser Jr.'s skill. Because of the frequency of this skill's activation, you should spam them unless the opponent has next-to-no viruses left, and eventually it will cover the opponent's entire field if they can't keep up. |
Dr. Fire Rosalina |
3 | The range in which Dr. Fire Rosalina's skill can clear is enormous, especially at level 3 where it randomly targets a 5 x 5 area. The drawback is that it is a random targeting skill, so you can't control where it clears after you use it. It also prioritises viruses, so if a stray object is not near a virus, that stray object may not be cleared. That is why you still need to clear the non-virus objects, lest it will become too much of a problem. As far as stats go, her defences are decent to good (and notably lower than her regular counterpart), plus her attack speed is relatively slow. Even then, the skill makes up for the stats especially at higher levels due to the somewhat fast charge speed. |
Dr. King Boo |
3 | He can completely remove viruses which is very powerful against certain doctors, plus he attacks relatively fast for a 4-bomber, but it only targets viruses and he has not much defence outside 4-bombs. Due to this, it is important to clear non-virus objects before they get pushed up. However it is only available as rewards, referrals, or purchasable pack so not as many high-levelled Dr. King Boos. |
Dr. Ludwig |
2 | Dr. Ludwig's greatest asset is a high 2-bomb defence, because this is the type of bomb that is used by some of the best doctors, which might also include himself. Another thing he has is a disruptive skill that covers viruses in ice, making them more difficult to clear. Since the ice doesn't contribute to the attack metre, this also slows down the opponent. It is best to use this skill if there is a sufficient amount of viruses on the opponent's side to maximise potential. Although Dr. Ludwig was originally one of the better doctors in the early days, he didn't do so well nowadays due to a combination of other viable doctors existing to more easily combat his decent defences and slow attacking speed, as well as some of them having skills to easily clear viruses even when they are covered in ice. |
Dr. Roy |
2 | Dr. Roy has good defences against 1-bombs and 2-bombs, though his attacks are bit slow for a 3-bomb attacker. His skill is one of the best, as his crates each take two hits to remove, and there's also the fact that they can cover gaps so it can overwhelm the opponent if you use it enough times. The skill charges decently fast as the maximum level. The crates can also slow down the opponent's skill charging because the crates won't contribute to the skill gauge unless it is completely destroyed. |
Dr. Lemmy |
2 | Dr. Lemmy has great defences against 3-bombs and 4-bombs, while maintaining a somewhat fast attacking speed. The barrels that are created to cover viruses are also more difficult to get rid of, since they come in two layers. The drawback with this skill is that not as many viruses are covered by it, though it is made up for how well they can disrupt rows or columns of viruses as they can be more easily scattered. The biggest drawback with Dr. Lemmy is his non-existent 1-bomb and 2-bomb defences, which makes him overall more difficult to use against popular doctors that use those type of bombs. |
Dr. Kamek |
4 | Dr. Kamek eliminates viruses of the most common colour, and the amount of objects is a lot. He is a 3-bomb attacker with an alright attack speed. One of the main issues with Dr. Kamek is that his skill has the combination of only working with viruses and having a delay before it takes effect. Because of the effect delay, one can use the skill and then follow up with grabbing a skill charger to immediately fill it up to use it again. Even then, it is important to clear other objects since this skill can't target them. Because of this, Ant Trooper is a good assistant to ward off some opponent's skills that introduce non-virus objects. Porcupuffer or Scaredy Rat can also be used to make opponent's attacks the same colour, thereby synergising well with this skill's effect. |
Dr. Piranha Plant |
3 | It has high defences except for 1-bomb, and the ability to clear non-viruses are welcomed. Viruses are still prioritised so the player will need to set up in a way that the skill can screen-clear, unlike Dr. Yoshi who can clear more objects. The interesting thing with Dr. Piranha Plant is that if it is a specialist at level 5, it becomes broken when combined with a max leveled Boo. That is because this combinations will result in 9 SP, which is the same amount of objects it clears at that level. This allows it to spam the skill in a way that outpaces the opponent. |
Dr. Nabbit |
3 | While Dr. Nabbit has no defences, he attacks pretty fast as a 2-bomb attacker. Moreover, his skill does the heavy lifting because it can easily set off a chain reaction between the rainbow capsules, exploders, and shells. The rainbow capsules can be used to set off one of the two other types of objects, and if you clear fast enough you can chain it again. You should be mindful of where the exploders and shells end up, because if you don't pay attention and clear them, they could easily reach the bottom and put the user in danger, due to Nabbit's lack of defences. |
Dr. Toad |
3 | With no defences, Dr. Toad is vulnerable to attacks from the opponent. Fortunately for Dr. Toad, he is one of the fastest attackers, despite only having 1-bombs. Dr. Toad's skill is to target random objects, even if there is nothing in the spot. If you are worried that this skill might not hit anything: there's no need to worry as this skill will always eliminate at least one object per use. The skill also has another property that makes it deadly: it will never target objects that cannot be eliminated, so any empty blocks will not be targeted. What does this mean? That means if the stage shrinks, Dr. Toad can hit more of the field with his skill. At level 5 where it clears 50 objects, this skill can even target the entire play area when it shrinks to 7 rows (leaving 49 spaces left), and that would be enough to grant the player an advantage if they didn't already have it.
The huge potential of Dr. Toad's great skill is offset by his low defences, so it is important to keep the opponent's attacks at bay by clearing enough viruses or objects. If the player persevere, the stage will shrink and that would be when Dr. Toad's skill gets progressively more useful as time goes by. |
Solid
Decent
Assistants
Viable Assistants
- Sledge Bro & Monty Mole: These two a chance to make the player's attack metre fill by extra. This is by far one of the best effects you can ask for, because if they activate, the player can attack more often. The way this skill works is that, assuming that they activated at the start of the match, every elimination will fill the attack meter by an extra point, which basically means that making a lot of matches is encouraged because every match means an extra attack point filled.
- Penguin: Penguin's is to grant a chance to bypass the opponent's defences when attacking. As you can guess, this is especially useful for players who want to have better chances for their attacks to land, and is especially useful if attacking is the main strategy, such as when using Dr. Fire Mario or Dr. Toadette, since they have relatively small attack metres.
- King Boo: King Boo's effect is to grant a chance in giving two extra rows of viruses to the opponent. The chance is pretty small, where it's only 15% at maximum, but when it activates, the advantage granted is substantial that it's best used for faster attackers like every 1-bomb doctor or Dr. Yoshi.
- Bullet Bill: Bullet Bill's effect is to grant a chance the skill metre is fully filled in the beginning. While the chance of activation is not quite high, the advantage of a full skill metre at the beginning of the match can be enormous. This is best used with doctors whose skills offer a serious advantage at the beginning, such as those that sends obstacles to the opponent's field like Dr. Larry or Dr. Iggy.
- Bomb Boo: Bomb Boo's effect is to grant a chance half-fill the skill metre in the beginning. It's not as potent as Bullet Bill's effect, but it has the advantage of activating more often, where it's 90% at max level. having a bit more skill filled has its advantages, such as if the doctor has an skill that doesn't need to be used straight away, such as Dr. Daisy or Dr. Yoshi.
- Honey Queen: Honey Queen's effect is to grant a chance an object is changed into a skill charger. Having a bit more chance than Bullet Bill, this effect comes in handy because many doctors have a skill metre that fully fills when it is collected. It is the middle group between Bullet Bill's immediate skill fill and Bomb Boo's delayed usage of the skill. You can either use the skill charger to immediately use a skill, or you can use a skill and then follow up with collecting the skill charger to chain the use of skills, which can grant an advantage depending on what type of skill is used.
- Boo: Its effect is to reduce both players' skill gauges by a percentage. This is one of the several assistants with gambit effects, where you incur an advantage to yourself but the opponent gets the same advantage. What makes Boo useful is the fact that getting more uses of the skill is generally advantageous, especially if the doctor's skill is solid like Dr. Yoshi, Dr. Daisy or Dr. Larry.
- Porcupuffer & Scaredy Rat: These assistants grant a chance that the opponent's attacks will have the same colour of viruses. When that happens, it will be easy to eliminate them due to the simpler layouts produced. It's very good for making comebacks for that reason. Note that non-virus objects are not affected by this effect, so a skill charger produced from the attack may not be the same colour as the viruses.
- Dry Bones: This assistant's effect is to grant a chance to produce a rainbow capsule. Rainbow capsules are not normally available in versus, and what makes Dry Bones stand out is that the effect can activate after every capsule, so you can potentially have several of them to help in clearing viruses.
- Ant Trooper: This assistant's effect have a chance to block opponent's skill effect. If you find it annoying for the opponent to disrupt your playing field, Ant Trooper can reduce the amount of times the skill takes effect. It can also be helpful for doctors that are at a serious disadvantage if disrupted, such as Dr. Kamek or Dr. Blooper who cannot clear non-viruses (so skills that produces obstacles are not easily dealt with).
- Yellow Shy Guy, Sushi & Fish Bone: These assistants provide a significant percentage in block attacks of a specific number of rows. They are 1-line, 2-lines, and 4-lines respectively. While the effect may be useless if facing doctors that don't fall under the criteria, the usefulness is felt if facing a doctor that the assistant(s) can block. Of the three, Sushi is generally the best one because there are many useful 2-line doctors, though Yellow Shy Guy shouldn't be discounted as there are a few useful 1-line doctors. Fish Bone may seem like the least useful, but it provides protection against some powerful doctors, given how not many doctors have high defences against 4-line attackers.
- Banzai Bill & King Bob-omb: Both of these assistants have a chance to increase the amount of rows per attacks by one. Though their effects are the same, Banzai Bill's percentage chance is generally higher than King Bob-omb, so you should generally use Banzai Bill unless King Bob-omb's level is significantly higher as to eclipse the percentage effect. Of course, there's the option of using both of them. Note that the former is a battle box reward from tier 5 onwards, while the latter is a battle box reward from tier 3 onwards.
- Whomp King: His effect is to grant a chance to reduce the amount of rows sent by the opponent by one, so unlike the other three assistants available in versus, this is a defensive one. Since the effect works on any doctor's attacks (except virus clear attacks), it can be used as a sort of safety net. 1-row attacks can even be nullified by this effect, giving you a bit of advantage against them.
Niche Assistants
- Goomba & Koopa Troopa: Their effects are to fill the attack metre if the opponent attacks, effectively counterattacking the opponent. The best application for these assistants are on doctors with high bomb power (4-bombs preferably) and a lot of defences, such as Dr. Rosalina and Dr. Wario. Do note that the chances of counterattacking is pretty small, where it's 20% at max level.
- Cheep Cheep: Its effect is to reduce the attack metre by a percentage. The attack metre is rounded down so using this assistant reduces it by at least one point, which can be a bit helpful. Despite the guaranteed effect, the percentage reduction is miniscule, as it's 10% at max level.
- Spike & Pokey: Their effects are to reduce the attack metre by 20% (rounded down), which is substantial despite the fact that the chance of activation isn't great (50% at max level). Its effect is no doubt great, but it's a gamble to get the effect off.
- Bob-omb & Spiny: Their effects are the fully fill the skill metre if the opponent uses their skill. The percentage for activation is rather small (20% at max level), but getting a full skill gauge is always helpful.
- Shy Guy & Clampy: Their effects are to increase defence by a percentage. The increase is not very high (10% max each), so they are ideal for doctors with little to no defences as it affords a bit of overall insurance against attacks.
- Crowber & Thwomp: Their effects are to increase the attack metre by a percentage (rounded down) for both players. They are yet another type of assistant with gambit effects, where you can stall the opponent's attacks and is quite ideal for doctors who has good clearing skills but not much defences, such as Dr. Yoshi and Dr. Toad.
- Mechakoopa & Fly Guy: Their effects are the decrease the attack metre by a percentage (rounded down) for both players. Meaning that it's another gambit type effect, but it speeds up attacks. The best doctor to use with these type of assistants is undoubtedly Dr. Wario, since he is the slowest attacker and has a skill that prevents opponents from filling their attack metre.
- Wiggler: Its effect is to increase the skill metre gauge for both you and the opponent. Skills are generally useful for gaining an advantage, but there are some doctors who could afford to slow down the skill metres because their skills are either not quite essential or they generally fill up fast. A few examples of doctors that fit the bill for the former include Dr. Toadette, Dr. Waluigi, Dr. Diddy Kong, and Dr. Lakitu, while for the latter it's Dr. Luma and Dr. Baby Luigi (both at higher levels).
- Octoomba & Scuttlebug: Their effects are the reduce the amount of time the stage shrinks. It doesn't do much in faster games but for slower games it can pick up pressure early. Dr. Toad can synergise well with these type of assistants to increase his range the skill can hit.
- Star Bunny & Goombrat: Their effects are the produce a rainbow capsule whenever the opponent attacks. The chance of activation is reasonably high, and can be decent for faster-attacking doctors rather than slower-attacking ones since rainbow capsules are not normally available.
- Peepa & Dolphin: There are several assistants that turns a random virus(es) into objects after you clear all the viruses, but I felt that exploders are the best of them, which is why both of them are listed. They can work decently with doctors that can clear viruses quickly, and it works especially well with Dr. Baby Mario or Dr. Baby Rosalina.
Loadout Examples
In the following section, we'll explore some of the examples of what kind of characters are chosen and how they can be helpful.
- Sledge Bro/Monty Mole + Penguin: This is one of the more popular loadouts for doctors, especially for offence-oriented ones. With this combination, a doctor has a chance to attack more often, and if they do attack, the attack has a higher chance of bypassing an opponent's defences. Certain defence-oriented doctors can make use of it if their skills can be used offensively, such as Dr. Daisy and Dr. Fire Luigi.
- Banzai Bill + King Boo: Both of them grants a chance in increasing the amount of rows for each attack, and it's best used for fast-attacking doctors like all the 1-bombers and certain 2-bombers to take advantage of the added power. Even if their bombs can be defended against, if their attack lands there will be a chance it will hurt extra.
- Sledge Bro + Monty Mole: Both of them have the same effect in speeding up the attack metre, and by doing so there is a higher chance one of them activates. If both of them activates, the attacks will go even faster. This is best used on doctors that have a somewhat high attack metre like Dr. Toadette.
- Porcupuffer + Scaredy Rat: Both of them grants a chance in making each attack by the opponent mono-colour, and having both of them means that there is a greater chance in making a comeback by using the opponent's attacks against them. Alternatively, one of them can be used alongside a useful assistant such as Penguin or Ant Trooper since their activation rate is somewhat high.
- Bullet Bill + Honey Queen: Both of their skills relate to filling the skill metre, which is great for doctors whose skills give them an advantage in a headstart. For example, Dr. Larry and Dr. Iggy fills the gaps with objects and viruses respectively, which clogs up the opponent's play area early and gives the user and advantage. Note that Honey Queen's skill charger doesn't fill every doctor's skill metre to the max, specifically those with more than 60 SP.
- Boo + Thwomp/Crowber: With Boo, the players can fill the skill metre faster than usual, and with Thwomp the players' attacks are executed less frequently. This combination is best used for doctors who has great skills but low defences, such as Dr. Yoshi and Dr. Toad.
- Yellow Shy Guy/Sushi/Fish Bone + Yellow Shy Guy/Sushi/Fish Bone: By packing two of these assistants, the doctor can patch up their weaker areas that need to be covered. For example, Dr. Petey Piranha can use Yellow Shy Guy and Fish Bone since its 1-bomb and 4-bomb defences are low. Doctors with one vulnerable area may use one of them and a different assistant. There are unfortunately no assistant that can defend well against 3-bombs, so perhaps you can carry Whomp King if need be.
- Mechakoopa + Fly Guy: Both of them speeds up the attack metre for both players, so naturally this is best used for doctors with stronger bombs and high defences, like Dr. Rosalina and Dr. Wario. Dr. Wario especially fits well with them because his skill prevents the opponent's attack gauge from filling up. An alternative is to replace one of them with Penguin or Ant Trooper, the former to get attacks to land often and the latter to reduce the opponent's disruption.
And that's it for the coverage of versus mode. I could have covered more of it in-depth, but I hope you understand that there's not enough time to cover everything. I do hope that whatever that has been found in this article could be of some use.
In the next article, we will be going through some of the history of the game, as well as my history with it. Until then, see you next issue!
Thank you for reading.
I Choose You
Written by: The Shamancer (talk)
Hello readers! Today, I'm going with the Electric monster, Zeraora.
Overview
| Tier | S (data gathered from various sources) |
|---|---|
| Role | Speedster |
| Type | Melee |
| Difficulty | Expert |
| Offense | 3 ½ |
| Endurance | 1 ½ |
| Mobility | 4 |
| Scoring | 3 |
| Support | ½ |
Zeraora is an S-tier Speedster recommended for Expert. He has a max stat of 12 ½ and is a master at Melee attacks.
Zeraora is nearly identical to Pikachu, but can be a monster if you know how to use him right. That of course, if you know how to use him right, as he takes an incredible amount of strategy to use properly. He is recommended to be in the middle lane so he can constantly soak up XP and be ready to annihilate his opponents.
Attacks
Zeraora starts off with Agility and Slash. Agility is basically used to increase Zeraora's high speed, while Slash is another knockback attack.
Volt Switch and Wild Charge are where Zeraora get interesting, as Volt Switch allows Zeraora to attack, and if used again, lets him retreat back to where he used the move. Wild Charge is a quick combo attack, and the combo is only increased if he uses Volt Switch before Wild Charge.
His Unite move, Plasma Gale, is the same as Pikachu's Thunderstorm, but it still has its uses! (You know, wiping that one annoying Aipom, the one that's preventing you from scoring, off the FACE OF THE EARTH!)
| Lv 1-3 | Agility, Slash |
|---|---|
| Lv 6 | Volt Switch/Spark |
| Lv 8 | Discharge/Wild Charge |
| Lv 10 | Plasma Gale |
Best Pokémon to Use With and Best Pokémon to Counter
Zeraora is best when teaming up with more beefy Pokemon like Snorlax and Wigglytuff. Both Pokémon can act like a defensive wall which Zeraora can zap in and out of with Volt Switch. However, if you see a Machamp, RUN. Machamp can easily KO Zeraora with its overwhelming strength. Slowbro can also easily defeat Zeraora by immobilizing it with Telekinesis.
How to Get
Zeraora is no longer available. However, he could return sometime in the future!
Zeraora is a beast in the right hands. However you will need to be the ultimate strategist or be very lucky with button-mashing.
That's it for now. Click here if you want to see a certain Pokémon from the roster.
Catch you later,
-- The Shamancer (talk)
On the Origin of Species
Written by: ZelenPixel (talk)
Ya girl is back with more Spore! Happy Spore anniversary month! It has a few release dates a few days apart - September 4th, 5th and 7th, which is a bit confusing, but here ya go! Anyway, we'll continue the adventures on planet Blizac, as our species, Stabby, evolves. Last issue, we finished the Cell and Creature stages, and now we're starting Tribal and Civilization!
Tribal Stage
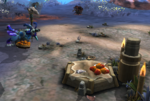
A lone Stabby finds a stick near their nest, repeatedly smacks it against the nest, tosses it into the air (the stick then lands on their head), and has a thought - and then they discover fire! This is how the Tribal Stage starts. A cutscene after a loading screen shows two Stabbies finishing building a hut. "With a roof over your head and fire at your fingertips, you enter the age of hand tools and drum beats! But beware, soon rival tribes will form across the globe. Be vigilant!"
This stage's genre is real-time strategy. You manage up to 12 tribe members, and to beat the stage, you have to impress or defeat all the other tribes on your continent. Not across the globe, as the game says. You also have to manage your tribe members' food, as they need to eat it, and it's also used as currency for building more buildings for tools, making babies, and also gifting other tribes or getting pets. As a kid I just feared this stage for some reason, but grew to love it in the past few years - it's weirdly enjoyable!
We start out with immediately making a baby, which costs 10 food, and sending out our tribe members to forage, and, meanwhile, I enter the Tribal Outfitter in the Tribal Planner. You can no longer change how your creature looks, aside from color, but you can now put clothes on it! Like in the previous two stages, the clothing parts you choose will affect your stats. I'm going for a little bit of everything for now - I'll need all Gathering, Combat, Social and Health. Side note, the baby's name happened to be Zankee and this delights me immensely. The tribe members have random names! The chieftain is Devet, and the other two tribe members I started the stage with are Skyli and Couchni! Ha ha. Couch.
Just like last stage, I'm going to be socializing and attacking tribes equally! Thankfully, I won't have to do anything like having to befriend 30 creatures in a row! Anyway, a few minutes after starting the stage, the first opposing tribe will appear. Here, the first opposing tribe ended up being a brown tribe (each tribe has their own main color), of some endermen from Minecraft I made back in 2014. I'm going to be befriending them a bit later - for now I wanna gather some more food first. I also made more babies, and their names are Reephir and Ticke.
Another note. The reason we had to add rogues to our pack last stage is because creatures that were in your pack, that weren't your own species, will get added to your tribe's animal pen! Otherwise you start the stage with none, and have to give wild animals some food to add them. You can have up to three creatures in your pen, and their primary purpose is laying eggs, which is actually a really good source of food. They can also help out, however, by attacking opposing raiding tribes! The ones here have also kept their high HP, I think they should be some help!
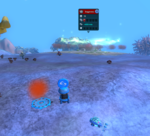
Turns out I do have a fishing spot near my village! You have multiple methods of gathering food - you can harvest food from trees, kill animals and pick up their meat, go fish, get eggs from your pen, and get food from other tribes (either via them gifting you, or you stealing from them). Fun fact about fishing is that, if your creature is herbivorous, it will fish up seaweed instead! I'm sending out my entire tribe of six people (the maximum for now) to fish, and I got some Wooden Horns in advance, for impressing tribes. Also some wild animals will go and steal your food periodically, but it shouldn't be a big issue, especially if you have a tribe member nearby to slay it.
I've gathered 78 food now, and it's time to ally our first tribe! A bunch of other tribes will appear after this, or after you've gathered 100 food. We gather the wooden horns and head towards the Brown Village. Socializing is kind of similar to the last stage - the opposing tribe will request you to play one of three instruments (we only have one unlocked at the moment), and you just play that instrument. Socializing is actually even easier here! You have to do two performances with a neutral tribe to get them to be your allies, which helps progress through the stage, and allied tribes will also give you gifts every once in a while.
Allying or destroying a tribe will also unlock some new tools, as well as outfitter parts to use. We unlocked Maracas and Fishing Spears this time. We also reached a certain point in the stage and unlocked three more tribe member spots! I'm gonna get the fishing spears, and get two tribe members that just do nothing but fish constantly! It makes for a decent constant source of food, and also ensures some tribe members are close to the village at all times, in case wild animals or rival tribes show up. Speaking of which - after allying the Brown Village, more opposing tribes indeed have spawned. I got the Green Village which have an angry red face (this is how the game shows how other creatures/etc think of you), which means they particularly hate me and will come to raid me every once in a while, and the Cyan and Pink villages with an orange face, which means they will just come to steal my food every once in a while. You can still befriend both of them if you give them gifts, though, unlike the red face creatures last stage!
I'm going to try to ally one of the new tribes right away. I create new babies, Jeris, Lucks and Lizbent, and gather some more food. Ticke and Skyli have been assigned to being the local two fishermen. Lucks got attacked by the wild animal coming to steal my food, right before growing up, which is unlucky I'll say that! The new three tribesmen shall also wield maracas, and now I'm going to befriend the Pink Tribe. Even though they don't like me right now, you can get them to neutral by giving them a gift, which costs 10 food, and then ally them. They will now request me to use the new maracas, as well!
And suddenly my tribe is getting raided!!! I don't have the time for that, Green Village, thank you!!!! I have to rush back immediately and defend myself now! Oh yeah, here's one of the reasons we stuck around so long in Creature Stage after being able to advance to this stage. Good offensive capabilities also help you in Tribal Stage if you don't have any weapons! And the only weapons I have unlocked right now are Throwing Spears, which I really don't like, so our tribe will have to use their natural abilities. Fortunately, it does work, even if our foes have axes! While they're low on members, I send out a counter-attack and take out their tribe, after a quick heal. And they've gained a few grown members while I was getting there... Anyway, you conquer other tribes by destroying their main hut. We've succeeded at conquering the Green Village and unlocked the Didgeridoo! Normally I'd take their food from the food stash too, but I really don't like the epic so close to the tribe, so I'm not gonna bother, thank you! The Cyan Village also hates us now, for some reason.
Oh yeah... I was allying the Pink Village! Thankfully, they still have a pretty good opinion of me, and I'll be able to just perform another orchestra for them to ally them properly. I also just realised that the one tribe member that was really low on health during my raid and was sent sent back to my own tribe to heal... was Lucks. This really became an ironic name, huh? And we have another raid. Fun. I won't be counter attacking them right now, though. We take out the three raiders, very easy, and go to finish allying the Pink Village - which actually just gave us a gift, too! How nice of them! We also now have all three instruments to use, which still doesn't make socializing any harder. I've allied them and unlocked a few more tribe member slots, as well as Gathering Canes and Healing Rods, which I won't be using. Oh, and Stone Axes! The best offensive tool!
We have... completely no food right now, so, alongside fishing, it's time to pick up some eggs. I'm pretty sure this resource is basically infinite, so you can leave them out for a while and just pick them up whenever you need, and get a ridiculous amount of food points. Case in point, we got 143 food points from eggs alone!!! There's also a new tribe, the Lavender Village, which also hate me. We also get new members - Lucer, Ostan and Volet. I think I'll need to befriend the remaining tribes even if they hate me, I don't want to end the stage with a red card!!! We send out the entire tribe, minus the fishermen, to ally the Lavender Village. We give them some food, and play them a whole orchestra of horns, maracas and didgeridoos, which is just enouh to make them go from hating me to loving me, apparently! And I get raided right after. At least it's not when I'm allying someone this time!
I'll save just in case, but I think it might be fine to destroy the Cyan Village and not end with a red card. We'll see. Apparently I HAD to get attacked by some wild animals on the way there. Epics also love being right on my way to opposing tribes, apparently. Anyway, after a quick test it turns out conquering this tribe is fine! I apparently forgot to mention it, but I did, indeed, conquer them! I'm going to pick up the Cyan Village's remaining food too, even though I don't need it anymore. I CAN just end the stage right away, unlike the previous stage! I'll just stick around for a very short bit, just for fun and not any gameplay purposes!
I'm glad all of my tribe members survived! Usually I do get a death or two, even on the easy difficulty. I also found Lucks being chased by an epic this time. But I'm glad they survived all this unlucky stuff that happened to them! We gather some eggs just to see how many I'll get this time (it was 151), then a Grox spaceship shows up I guess and steals two out of my pets (good thing it didn't happen before I finished the stage at least), and then I right click on the campfire so the whole tribe dances around it. It's purely fluff, but it's fun!
For an extra fun note, all our tribe members' names are Devet (they're the chieftain), Skyli, Couchni, Zankee, Reephir, Ticke, Jerris, Lucks, Lizbent, Lucer, Ostan, and Volet. We now end with having allied the Brown, Pink and Lavender villages, and having conquered the Green and Cyan villages. I'll also save beforehand, just in case, because I need it for something in the next stage. We get the Industrial card and move onto the next stage!
Civilization Stage
The Stabbies get the idea for a house, I guess. "Your tribe now dominates this continent, ready to advance from simple village life to civilized city living ahead of the rest!". I then get presented with a building editor. The tribe, now with the city hall, now discuss economic ideals. I feel like that's the stage transition cutscene I'm the least familiar with, actually!
This stage is also an RTS, just like Tribal Stage. There's some more complexities to it, though it's still really easy! You manage vehicles and take over other cities, now of your own species instead of different species, unlike the last stage. You now have the three different vehicle editors (Land, Sea, and Air vehicles), as well as a building editor which lets you make City Halls, Houses, Factories, and Entertainment buildings. You also get an upgraded Outfitter, but it's now purely cosmetic, as whatever parts you have on your creature will no longer affect your performance in the stage. What parts you put on your vehicles does, instead!
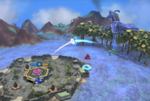
Your goal is to take over every city on the planet. You can use Military to take cities over violently, Religious to take them over a little less violently (using Music Beams (name conjectural)), and Economic to buy them out. I'm going with Religious this playthrough, as usual, because I find it the most fun, personally! And.. here's why I had to also save at the end of the previous stage. Getting cards is different here - it's not dependent on how many things you conquer or befriend or whatever. It's dependent on how much you've used either of these three factions. And ending Tribal will start you with one of them, in my case Economic, and if you want another one, you have to hope another city shows up with a faction you want so you can take it over and use it for the rest of the stage. Which, unfortunately, doesn't always happen, as the game doesn't ensure a planet generates all three types of nations. So, in that instance, make sure you save BEFORE starting this stage - if you save during it, and then don't get the faction you want, then you won't be able to get it on this save game at all!!! (You CAN use the same creature on another planet and start Civilization stage with it and keep the evolution progress, at least...)
Anyway. I usually just use the premade Maxis vehicles and buildings, but I might as well make my own for the purposes of this section. Here's our temporary economic land vehicle Horgeheg. I also asked the readers when the last issue went up on what style to make our buildings in! ...I only got one response, from BLOF. "Make the buildings look like them ala Clumpy" (Clumpy is a creature from the Prima strategy guide, which was also a sort of let's-play). So I guess we're making everything riidculously spikey! And have legs! I have no idea how Stabbies even use this architecture. I don't know! They just do! Anyway, we'll be making more vehicles as we go on, I wanna ensure I take over a religious nation first.
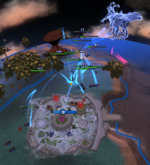
I started the stage proper, finally. I start taking over some Spice geysers with my vehicles - they will provide a constant source of money for your nation, and it's good to capture as many of them as you can before another nation shows up. Oh, and yeah! At the start of the stage the planet is littered with tribes, which you can drive over for a random result. Sometimes you get an extra car, sometimes your car blows up. Some of the tribes will also spontaneously turn into nations, and speaking of which, here comes the first nation, the Crimson Nation, and I'm overjoyed!!! It's religious!!! From experience, that's not a very frequent occurence! I now save. The goal right now is to befriend this nation, set up a trade route and get enough money to buy them out, so I can then get a religious city. The military Orange Nation also shows up, we don't care about them for now, too busy setting up a trade route here! Which is gonna help us with our money situation, too!
I'm going to make some buildings. Besides the city hall, which is installed by default in every city, we also have houses which increase the city population, vehicle cap and boost the income from factories and happiness from entertainment buildings; factories are there to make money but make your citizens unhappy, and entertainment buildings are there to make your citizens happy. Apparently it's optimal, money-wise, to make them only just happy enough to not cause riots, but I like to max out their happiness. It's a habit! Happy citizens will frequently have celebrate and increase income for a bit. I dont have the money to buy any of these buildings yet, but I should soon enough!
While we're in the City Planner, we have a few cosmetic fun little things here! The planner is a lot like the Tribal Planner, but you can set up your city's anthem and put in some decorations, if you so wish. I tend to ignore these, personally, especially the decorations, since each costs 25 sporebucks. You can still customize your city members' outfits, too! The outfitter now has new parts, and this time the clothes are purely cosmetic, so go ham with looks! The other nations will also share your exact outfit, too.I don't do this usually, but I did fool around a little with the city anthem, too!
A bunch of other nations have formed, but I have to note the reliigious Yellow Nation. Their founding city is called "Bedfort..."... something. It cuts off! Anyway, I can now purchase the city I set up a trade route with, but I doubt I have enough money, so I'm just gonna linger a bit and get some buildings first - I know I'm safe for now! After some time I've filled out all the building slots, and it turns out I need a lot more than 3,892 Sporebucks to get this city. Welp! Time to get more vehicles on the same trade route and just sit there!
For now there's the other nations to watch. They will actually battle each other too - mostly take over spice geysers for now, but they'll start trying, and succeeding, to take each other's cities too. I can't wait to see which nations get to be the ones taking over everything while I sit there! I also noticed a Yellow Village, still yet to be trampled over by any city... The NPC nations will, unfortunately, drive over every remaining tribe at some point! Well, usually. They don't remain when you end the stage anyways, but it's still sad. The tribe members, which, by the way, also have your nations' clothing, do have some unique behavior and can be fun to watch. On another save file, I recall recording a video of a tribe over the course of a whole in-game day!
We buy out the Crimson Nation's city, Dagenest!!! And now I can choose the city's specialty - in this case, either Religious which was the nation's type, or Economic, which is the type of the vehicles I took the city over with. Naturally, since that was my goal and all, I'm picking Religious and using those vehicles from now on!!! I'm also selling all these economic vehicles, I won't be needing 'em anymore. I'm also going to make a religious vehicle - meet Stabby Takin A Stroll! We're also going to sit here for a while and acquire more vehicles before we take over anyone else. I can only get 5 religious vehicles for now, unfortunately. I'll also have to wait before taking over another city anyway - the Orange Nation with their Grox spaceships for cars (which is a land vehicle recreation I made) is currently busy taking over the Forest (that's a color) Nation. And there's no one else to deal with! Actually, they're done now, being the first nation (besides me???) with two cities, and immediately decide they're at war with me. Well alright then!
I immediately send out my vehicles to the city they just captured. Since I built my vehicle for speed, I'm just gonna swap it out on the fly for a vehicle with stronger religious power when they get there. I feel like taking over this one is gonna take a while because of how frail my vehicles are, but I do have money to spare so I'll just get more! The Yellow Nation, meanwhile, also took over another city, and so did the Blue Nation, whose color is wayyy too close to mine. I cleared out the Orange Nation's cars and now I can go attack their city again with relatively more safety. It didn't actually take that long, and now we can make more religious vehicles!
I now have 10 religious vehicles and I'm sending out an attack to the remaining Orange Nation city. The Yellow Nation, meanwhile, acquired another city and it now has 3, and the Red Nation also took over their second city! What I'm doing right now is fairly easy. I'm just sitting there and sending out my cars to take over this city, and immediately replacing them when a slot frees up due to one of my units dying. And they're done! I've now taken over 4 cities and unlocked Air Vehicles! They can't capture spice geysers, but they can travel all over the planet with no land or water restrictions. Oh yeah - I've hardly done anything with the Sea Vehicles, have I? I did use two to capture water spice geysers, and then I just sold the vehicles. I didn't need any more.
I've made Stabby Flyin! Stabby Swimmin, the thrilling conclusion to the trilogy, IS going to happen at some point, I just don't need it now. I'm going to sell off (or, disband, actually?) of my land vehicles in order to get air vehicles. They're pricier, but worth it! Then the Blue Nation suddenly asks us to declare war on the Yellow Nation. I decided to decline them because their color is wayy too close to mine, and they declared war on me instead. I simply went for the remaining spice geysers that were left over from the nations that aren't around anymore.
The Yellow, Blue and Red nations are actually the only other nations that remain! The fact that it's those colors is funky. The Yellow Nation is at 1 city again, the Blue is at 3, and the Red is at 2. Yeah well the COOLER Blue Nation (me) has 4!!! The Red and Yellow nations are also neutral with me, and the Blue Nation somewhat dislike me. I'm gonna fill up more of my vehicle slots and get one of their cities! They're mean and hogging MY color! And, well, they now have 2 cities because the Red Nation took one of theirs. I'm converting one of their nearby cities now, and I also decided to tell them that their people are descended from limbless space slugs and that was enough to make them hate me, apparently. The Red Nation also joined in in capturing them, which is too late because I'm almost done with this myself, and I realise the Red Nation actually likes me now! And the Yellow Nation too. Well I can't imagine that'd last long?
Anyway, I successfully have converted this city, and now the Blue Nation has only one city left. The Red Nation vehicles just proceeded to go their way, and they're also neutral with me again, so I was right! And they demanded Sporebucks from me! Yeah I'm not giving them to you, I need that for planes! Oh, and I also realised all the remaining nations are also religious, so that's pretty cool! I decided I'm gonna deal with the remaining Blue Nation city, and if anyone else declares war on me, that's on them. Apparently the Yellow Nation got eliminated by the Red Nation??? And the Blue Nation captured another city, so I'm not done with them, then! I sent out a fleet in their direction, and they also decided to attack one of my cities back, but I can just spawn some religious vehicles and zap them. And I captured their city while I was busy fighting them off near my own, actually! And then the Blue Nation was also wiped out by the Red Nation. While I was in the middle of fighting them off.
There's only the Red Nation left now, and I decided to wait a little. I talked to them, and for some reason there's a prompt of "We have need of your forces. Will you fight on your behalf?", which then brings up no cities because we're the only other nations around anymore! And my city suddenly gets attacked by an epic... Nothing to do but to sit there and replenish my turrets, since my religious vehicles can't deal damage to it - they can only possess it, which would be useful for attacking other cities, but I don't need that now. If I had a military city, I'd be able to get their vehicles in there and help with the epic, but I don't, so. Anyway, that actually didn't take long!
While waiting, I found the Yellow Village on my starting continent again, which is surprising, since by the end of the stage all of the tribes will usually have been wiped out! Of course, they're safe now, as the continent only has my own cities on it. I watched them bring some fish to their food pile. And then a tribesman punched another one for no reason. You can tell this stage isn't particularly eventful right now. I got tired of waiting for the Red Nation to potentially merge with me, like what usually happens at the end of the stage, or declare more money from them so I can decline them and have an excuse to attack them. I decided to simply be mean to them first and tell them they're descended from limbless space slugs too. I told them that like, four times, just so they'd know, and now we're no longer neutral. Finally! Battling soon! They're at war with me because I called them a meanie head!!!
It looks like they're aiming for one of my cities. Well good thing the waiting let me stock up on a lot of money, so I could just spawn way too many planes near it! They don't know what's coming! They're going to be SO overwhelmed by 32 Flying Stabbies! Oh, and whatever I switched them to for higher religious power instead of speed. They don't stand a chance! When I right click on one of their vehicles, mine will all wait for a few seconds before unleashing a stream of Music Beams and obliterating their vehicle right then and there. It's so satisfying! Hey, I should take over the BedfortWhatever city, shouldn't I? I'm still curious about its full name! It's mine now. The mystery is revealed... It's Bedfortoni. Not bad, I suppose! With it, I also, apparently, reached the total vehicle cap, at 36 vehicles. Time to take over another neighboring city while I'm at it. And there it goes, mine now! I now have 8 cities and only need 2 more to finish the stage. I'm hoping I can take over at least another one before the game decides to just give them to me anyways... Which was a success! And, at last, the Red Nation surrenders their remaining city to me. Bye-bye!
It's time to clean up before we finish the stage. I'll need to get a bunch of vehicles to capture the left over spice geysers - the ones on the other continents, and the ones I also lost over the run because I didn't bother to capture any more after the start of the stage. Since some of the geysers are on water, I guess it's time to make Stabby Swimmin! I'm done, and apparently there are pigs on my planet? They're completely still for some reason. The pigs being there is funny because I'm into Angry Birds right now. Anyway, I decide to pause, spawn a bunch of vehicles in the cities closest to the geysers, and send them to capture the geysers, and then unpause, just to see them all do it simultaneously! After checking all my cities for anything else I could do, I'm ready to move on.
We end the stage with a Religious card, and start the Space Stage with a Bard archetype. The game prompted me to make a spaceship, so I'm making Stabby Spacefarin. I like the Spaceship Editor because you get every single part from all the other vehicle editors, and every part is also cosmetic now! "Lift off! You've successfully developed a ship capable of space flight! The heavens beckon, the cosmos awaits, the universe is at your fingertips... If you can learn to fly this thing..." I can! I already know, I've been playing this game all my life! Anyway, since I have the Galactic Adventures DLC, the game will also prompt me to name my captain, and I'm naming them in honor of the surprisingly hardy tribe member - Lucks! I think it's pretty nice how, even despite being in trouble so many times, they were able to persevere and survive. Anyway, we're technically already talking about the Space Stage, and the rest will come next month! I still honestly haven't really figured out what to do for the Space Stage in terms of my section, but I guess I'll figure it out along the way?
Racing Like the Staff
Hello readers and welcome to Racing like the Staff, a section where I do 150cc on different Mario Kart games, but the twist is, I take on the Grand Prix by using the combination that a staff and expert staff member used in that Cup. If you're still a little confused, by this I mean if the track is in the Mushroom Cup, then that's the Cup that I race in. Unfortunately, I don't have copies of the Mario Kart games before Mario Kart 7, so it's only that, 8 and Deluxe that will be getting this treatment.
Many of us are returning to school, and while I imagine this doesn't count for any of our readers, some are heading to school for the very first time. Gone are the days of just being able to sit at home all day every day, now is time for education, learning and development. And if we play nice, perhaps a trip to Baby Park.
The combination for the staff for Baby Park is Baby Mario with the Biddybuggy, Normal tyres and the Super Glider, and the stats are as follows:
- Speed – Just under two bars
- Acceleration – Five bars
- Weight – Just under two bars
- Handling – Five bars
- Grip – Just over four bars
Baby Park
Although Baby Park can often be chaotic, there sadly wasn't a whole lot to report from my outing here. A great start and some anti-gravity boosts easily got me into second, before I steered into Baby Peach with my Green Shell and took her out. A Spiny Shell, Lightning Strike and Villager flattening me attempted to derail the race, but all to no avail.
Cheese Land
I thought my start was great, but out of nowhere Lemmy was up into first place although I was able to pass him without needing to use the Red Shell in my arsenal. But, me driving off-road did allow Lemmy past, and I decided to take him out. The Koopaling just wouldn't stay down and got right back on my tail, even passing through the explosion of the Spiny Shell that hit me. We were neck-neck-neck approaching a Chain Chomp, but a Green Shell took him out, instead of me thankfully, allowing me to start building and sustaining my healthy lead.
Wild Woods
Lemmy had another stellar start, zooming right past me, but I caught him on the fork in the path, and the Mushroom I had from the Item Boxes only solidified that lead. I thought I was in for another easy cruise, but Lemmy had other ideas, not staying too far behind me, able to destroy one of my Bananas with his Fireball. A Red Shell bought me some leniency, but a Spiny Shell on the lilypads almost spelled disaster as he nipped on past and was headed for the victory, thankfully on the final corner, I boosted past him and stole victory from the jaws of defeat.
Animal Crossing
Nothing to report, a brief Lemmy interlude into the lead, before I caught him out and won easily.
I am quite partial to a Biddybuggy combination, so I am going to wax lyrical about this, because I loved every second. I would probably go with zanier tyres and glider choices, but perhaps that's why I'm not a staff member on a Mario Kart game. Beware of Lemmys though, they sneak up on you!
The combination for the expert staff for Baby Park is Baby Rosalina with the Teddy Buggy, Cyber Slick tyres and the Waddlewing, and the stats are as follows:
- Speed – Two and a half bars
- Acceleration – Just under four bars
- Weight – Just over two bars
- Handling – Just under five bars
- Grip – Two and a half bars
Baby Park
This outing of Baby Park was a little more chaotic, with Red Shells and Spiny Shells flying everywhere, I didn't notice I'd dropped down to third on the fifth lap, and I'm sure Items helped me bash my way back up to first. But on the final lap, I stupidly hit a Banana, allowing Toadette into the lead. I thought I might grab her on the inside of the final corner, but that wasn't to be, so millimetres from the line, I hit her with my own Banana and just claimed the top step.
Cheese Land
Inkling Boy briefly took the lead, but I was soon back ahead, but failing to get a good Item from the roulette left me vulnerable to a Red Shell by the Chain Chomp, and I fell down to fourth with Inkling Boy, Toadette and Iggy all taking advantage. As we got onto the second lap, Shells flew everywhere with one hitting Iggy just when I needed it, and I retook the lead. Things were looking good for a second victory, but Iggy got Mushrooms and glided past me to leave me in second place.
Wild Woods
Inkling Boy proved to be the king of starts, and left us in his dust, still being ahead by the end of the fork, and at that point Toadette had nabbed second, although Inkling Boy's Banana put her back where she was needed. This time, it was my turn to exploit a shortcut, and I used that to grab my lead, and while Inkling Boy attempted to cut back at me, a Banana trip down the ravine put him back where he should be, and I sailed on to victory.
Animal Crossing
I was expecting an assault from Inkling Boy, but it was actually Toadette who stole the lead from me this time, although she was back into second by the time we hit the beach. And despite my Mushroom landing me in a tree, it was a pretty easy victory.
I was confident that the Teddy Buggy could provide be with a clean sweep of victories, but obviously Iggy had different ideas. It was fun and unassuming to use, and I like Waddlewing as a glider, and the Cyber Slicks definitely looked cool, but there isn't anything drawing me back to this combination on the whole.
To Infinity and Beyond
Written by: Waluigi Time (talk)
Hello 'Shroom readers! Waluigi Time here, making my Strategy Wing debut with a 100% walkthrough and in-depth look at a game that's a bit of a blast from the past at this point, Toy Story 2. It's a 3D platformer that was released back in 1999 for PC, Mac, Nintendo 64, and PlayStation, followed up by a Dreamcast version in 2000. The console versions were titled Toy Story 2: Buzz Lightyear to the Rescue!, while the computer versions were given the much less interesting name of Toy Story 2 Action Game (though the title screen still says "Buzz Lightyear To The Rescue", interestingly enough). I'll be playing on PC, but as far as I'm aware, there aren't any differences to the gameplay itself. However, the Nintendo 64 version does replace the in-game clips from the movie with screenshots and text, and it also has a few soundtrack oddities which I'll be mentioning as we go along. There's also a Game Boy Color version, but we're not going to be talking about that one since it's a completely unrelated game with different developers.
The game consists of 15 levels, split up into 5 "zones" containing three levels each - two normal levels and one boss level. Each normal level has five different missions; collecting 50 coins and bringing them to Hamm, finding five objects scattered around the level and bringing them to a specific character, a timed challenge, a puzzle, and a boss fight. Completing a mission will award you with the game's main objective, a Pizza Planet Token. Collecting a Pizza Planet Token will give you the option to either continue playing or exit the level, but you can also exit at any time from the pause menu and the game will save the Tokens you've collected. The boss levels are pretty much what you'd expect, a fight against a boss. You won't be awarded a Pizza Planet Token for beating them, but they're necessary to progress in the game.
Now for Buzz's moveset. He can jump, and pressing the jump button again while in midair activates a double jump. He can fire his laser, which can be charged up for more damage by holding the button before firing. He can also perform a spin attack, which can deflect projectiles, and holding the button will charge up a more powerful version that causes Buzz to spin around while moving, though this briefly leaves him dizzy after it finishes. Pressing the spin attack button in the air will make him stomp the ground instead, which will be important for puzzle solving and can be used as an attack. Finally, there's a toggleable first person mode called visor view which can be used for more precise laser firing and to get a better view of things.
One quick disclaimer before we jump in. In this walkthrough, I'll be taking the most efficient routes around the levels as much as possible, which means we'll generally be completing goals before even encountering the characters who assign those tasks. If you're playing along, this means you will miss out on some unique dialogue. Most characters will have their dialogue reset if you come back to the level later, but Mr. Potato Head and Rex have dialogue that can't be seen again on that save file once the requirements have been met - we'll get to those two in a bit. The dialogue isn't really anything special, but if you care about seeing everything in the game, keep that in mind.
Anyway, with all that out of the way, it's time to get into the game!
The game starts in the same place that the movie does, Andy's House. Before we get into the level itself, I'd like to take a moment to highlight the game's soundtrack. I'm not going to do an analysis of each track or anything, since this isn't Palette Swap and frankly I'm not very good at that sort of thing anyway, so I'll just drop a link to the Andy's House theme on YouTube and call it a day. Personally, my suggestion is listening to it while you read the section. (Also, if you encounter any music links that don't work, please let me or a 'Shroom staff member know so it can be fixed)
Oh, and remember how I mentioned that the soundtrack for the Nintendo 64 version had a few oddities? This is one of those occasions. In the Nintendo 64 version, an instrumental version of You've Got a Friend in Me plays in Andy's House instead, and the Andy's House theme was pushed all the way back to the game's credits. The credits theme from the other versions doesn't play in the Nintendo 64 version at all because of this, but it remains in the game's files. All of the tracks for the Nintendo 64 version are unique arrangements too, I assume to save space on the cartridge, making the fact that they didn't use it even weirder.
Alright, finally into the level! We start out in Andy's bedroom, which is essentially just a tutorial room to familiarize players with some of the game mechanics. In fact, you don't even have to do anything in this room. None of the collectibles in here are required, so if you want to run straight out the door into the rest of the level, you can. But I did say that this was an in-depth look after all, so let's check it out.
Straight ahead, we encounter the first two types of enemies in the game. Unfortunately, there's no material that I'm aware of that gives the standard enemies official names, so I'll just be calling them Copter-Bots and Spring-Bots. Enemy behavior in this game is pretty simple. They patrol a specific area, and once you enter that area, they'll target you with their single attack pattern. These areas are pretty small horizontally (so small that you can be standing right next to them at times and they'll ignore you), but they seem to have no limits vertically. Flying enemies can go as high as they want to attack you, and even enemies that can't reach you will try to attack you. The first time you defeat an enemy, they'll drop a single coin. With the general stuff out of the way, let's get back to these specific enemies. Spring-Bots are simple enemies that attack by bouncing toward you. Copter-Bots hover around and will attack by firing energy blasts at you, which can be deflected with the spin attack. They can be defeated with any method of attack and both go down pretty easily. A single charged laser shot will take out a Spring-Bot, and Copter-Bots will go down in a single regular shot.
Past these enemies, climb onto Andy's desk and jump over to a shelf to the left where you will find a book with a green hand icon above it. Whenever you see an object with this icon, that means it can be pushed in a certain direction by walking into it. Pushing the book forward knocks it off the shelf and onto the floor, creating a makeshift ramp that can be used to get on Andy's bed, though you can also just double jump there from the shelf. (If you can't figure this out yourself, there's a floating dice block that explains it. These can be found in various areas around the game to explain various mechanics, but I won't be noting them since I'll be explaining them as necessary anyway.) After jumping on the nightstand next to the bed, you're supposed to double jump over to the dresser and land in the open drawer, which will automatically open the drawer below it, allowing you to easily get back up here from the floor. You'll probably have to intentionally land in the drawer to do this though, because Buzz gets enough height and distance to grab onto the dresser itself and pull himself on top of it. On top of the dresser is a pole leading to the ceiling, which Buzz can climb to reach a shelf above it. On this shelf is a battery that will restore some of Buzz's health, although unless you had serious trouble dealing with the Zurgbots, you probably won't need it on your first run through here. From here you can jump on a zipline, which Buzz will automatically slide down to the other end of the room and land in Molly's crib. Inside you can find a green disc with a picture of Buzz on it which can be collected for an extra life. Buzz can have a maximum of 9 lives, and they are retained when you shut the game off. The side of the crib is too high for Buzz to be able to jump out though, so you have to enter visor mode and shoot the latches with Buzz's laser to lower it so he can jump out.
At this point, we've done everything in Andy's room, so now we can go out into the hallway. We'll head to the right first, and at the end of the hallway we find Rex. If you talk to him by walking into him, he'll give you hints for all of the Pizza Planet Tokens in the level that you haven't collected yet on the current save file. If you've collected them all already, he'll just congratulate you for finding them. If you know how to get all the Tokens, there's really no need to talk to him, so I usually just ignore him. Moving on, there's a potted plant in the hallway that you can use to climb onto a table, which will let you jump onto a rope that lets you climb into the attic.
Once you get into the attic, you have two options. (It doesn't really matter which one you do first, in my opinion, just make sure you do both if you're going for 100%.) If you jump onto the boxes in the middle of the room, you'll activate a boss fight with the game's first boss, the Tin Robot, an original character created for this game like almost all of the other bosses. The bosses are similar to enemies in that they have a specific area that they will fight you in, and if you want to, you can just leave and they'll ignore you. Anyway, for the first boss of the game, the Tin Robot is surprisingly complex compared to the others. It is usually invincible and will chase Buzz around for a while, before it eventually stops to wind itself back up again. At this point, it can be damaged with any attack. The best way to take down the Tin Robot is to charge the laser while running from it, and it will be defeated after only three shots. Once it is defeated, it will explode, losing its head and left arm, and release a Pizza Planet Token. (Fun fact, the parts that explode don't actually disappear - if you toggle visor mode you can see they actually shrink down and lie on the floor.)
The other option is to push a box back near the attic entrance along the floor to allow Buzz to jump onto a seesaw. From here, jump onto a vertical pole that can be climbed up to a horizontal pole that Buzz will spin around on once before automatically jumping forward onto the rafters. (It's possible to double jump off of these poles, which is sometimes required.) The main thing you're going to want to get up here is the first of five sheep toward the opposite end of the room. Once you've collected one of them, an icon will appear in the top right corner displaying how many you currently found (this applies to all collectibles of this type). Aside from that, there's not much besides some coins, a battery, and a Spring-Bot. (If you activated the Tin Robot but haven't defeated it, you can watch it trying to attack you, though unfortunately you can't damage it with your laser from up here since you're not actually in the arena.) The only other area of note in the attic is some boxes toward the back of the room where you can collect some extra coins.
After leaving the attic, the only other way to go is downstairs. If you go down the railing instead of the actual stairs, there's another battery at the end. At the bottom, head left into a small hole that leads to the garage. Head to the back of the room and to the left where you'll meet RC, who will challenge you to a three lap race around the garage. It's pretty easy to win as long as you keep moving, and there's only two obstacles, a hose and a puddle of oil, which you'll want to jump over because they'll slow you down. (You may also want to take out the Zurgbots around the garage before you start the race, though they're pretty easy to dodge.) After completing the race, RC will give you a Pizza Planet Token. If you lose, RC will spin around to celebrate his victory and can't be interacted with. To start the race again, just leave the garage and come back and he'll be ready for another race.
Next, go back to the garage entrance and jump onto a box that will let you reach the workbenches along the edges of the room. Avoid the buzzsaws and drills, either by waiting for them to retract and let you pass, or just platforming around them, and hop over the gaps until reaching a shovel. Jumping onto the shovel will lower it, giving you a shortcut, and from here you'll want to jump onto the trash can, which also has a battery on it if you need it. Then, jump to the right onto the car. On top of the roof you'll find, for lack of a better description, some sort of green thing. Collecting it will temporarily upgrade Buzz's laser, giving it as much power as a charged shot at all times, allowing it to rapid fire by holding down the button, and most importantly, turning it green. The meter that normally displays how close the laser is to being fully charged will now show how much of the power-up you have left. From here, jump onto the light, where you can collect an extra life, and then to the shelves on the walls. Platform across these and eventually you'll come to the end where you'll find the second sheep. At this point you're done with the garage.
After leaving the garage, walk straight ahead into the living room. Hamm is here on the couch, and after collecting a few more coins in the room I had enough to turn in for another Pizza Planet Token. Once you have at least fifty coins, a flashing icon of Hamm will appear in the top right corner to indicate that you can go visit him. If you haven't collected enough coins yet, don't worry because there's still a little bit of the level to go through. Next, jump onto the red chair and stomp on it, which will catapult you to a shelf in the corner of the room. From here, drop down to a bookshelf where you'll find one of Mr. Potato Head's ears. He appears in the first level of each zone, and each time he is missing a different part. If you find it and bring it back to him, he'll permanently let you use special items in certain areas that are often necessary to obtain certain Pizza Planet Tokens. (We'll get into more detail once we actually find him.) Once you've found each part, a flashing icon of Mr. Potato Head will appear in the top right corner until you return it. After getting the ear, jump across the bookshelves for another battery and extra life, then climb onto a shelf where you can collect the third sheep.
Next, head through the door under the stairs, which leads down to the basement. The floor is covered in green sludge that will hurt Buzz if he touches it, so you'll want to hop across the clean spots on the floor to reach Mr. Potato Head on the other side of the room. After you return his ear to him, he'll give you the first power-up, the Cosmic Shield. Including Andy's House, the Cosmic Shield can be found in three levels in the game. Now to be honest, the Cosmic Shield is actually kind of terrible. It makes you completely invincible for a short time, but it severely hinders jumping and disables the ability to use any attacks or toggle visor view. It's not even required for any of the Pizza Planet Tokens, and generally you can just tank the damage in the areas you're supposed to use it in. Even if Buzz loses all of his health, he'll respawn exactly where he was a few seconds later as long as he has an extra life, so it's not a big deal. What you're supposed to do with it here is activate it and walk through the sludge until you reach a safe area that you can use to jump onto a raised platform after the Cosmic Shield wears off, but if you want to save time, it's possible, though a bit tricky, to double jump to the platform without taking any damage, and even if you land in the sludge, you'll still only take one point of damage.
Once you're on the platform, jump onto some boxes, then jump across to the other side of the room onto some more boxes so you can platform along the basement shelves. The second shelf has a zipline that you can use to reach the fourth sheep, but we'll actually be reaching that in a more efficient way, so we'll hold off for now. After reaching the top shelf, jump across the lightbulbs hanging from the ceiling and make your way to the shelf on the left (if you want to take a detour, to the right you can reach a box with a battery on top). There are three differently sized boxes on this shelf (one on a smaller shelf to the left which must be pushed off) that can be pushed around. What you'll want to do here is push them and make a staircase to the top shelf where you can collect a Pizza Planet Token. After you've done this, head back down to the boxes next to the platform. You can jump off and grab the zipline, or just jump straight to the shelf to the left to collect the fourth sheep.
After finishing up in the basement, go back upstairs and head to the right into the kitchen. Bo Peep is in here on the table, and she's looking for her sheep, but we haven't found the last one yet! There's a bucket on the floor that you'll need to push so you can jump into the high chair and reach the countertop. Make your way across here, avoiding the flames of death from the stove, then jump onto the fridge and over to the top of the cabinets. Platform across these, and eventually you'll find a weight that acts like a trampoline for some reason. Push it off the cabinet and down onto the countertop, and then you can use it to reach the final cabinet which also has the final sheep. Once you collect it, jump over to the kitchen table and talk to Bo Peep for the final Pizza Planet Token of the level.
That's it for the level walkthrough, but before I go I'd like to address an interesting bit of internet history regarding this game. There was once a prominent rumor on various cheat sites that if you collected 100 coins in this level and gave them to Hamm, he would let you access a secret area called Woody's Workshop where you could get hints about the game. (In hindsight, between Rex and the blocks that explain game mechanics, I don't even know what would be left to cover here.) But conveniently, there's no footage of this area online, or even screenshots. It's actually impossible to complete because there are only 97 coins in Andy's House, and even in levels that do have enough coins, the counter maxes out at 99 anyway. I've tested both of these personally.
So that's the first level of Toy Story 2, Andy's House. If you enjoyed this, come back next time when I cover the second level, Andy's Neighborhood. And if you've ever played this game before, let me know, I'm curious how many people here have actually played it.
Gameplay screenshots were taken from Nin's playthrough of this game on YouTube.
Mach Speed Mayhem
Hello, 'Shroom readers! I strike again, in the dead of the middle of the day, to provide you with... MORE F-ZERO INFO! Behold, my cackling evil laugh. Regardless, for that reason, today we will be reading about #27: Draq! One of the biggest fans of F-Zero out there, Draq's currently living the dream! Even if he might have to stop living it someday...
Main Series
Starting off, like so many others, in F-Zero X, Draq was introduced with a simple story: a fan living the dream! Yes, his X bio confirms that he's a lifelong fan of F-Zero and super happy to finally be here, and that he works with Roger Buster. Roger's bio gives us a bit more implication - apparently, they were meant to transport a machine to an unknown participant, but Draq convinced Roger to abandon that and race for himself! F-Zero GX goes on to clarify the whole situation in a lot more detail. Draq has always wanted to drive in F-Zero, and with being 136, that's a long time to want it! But for now, he and Roger Buster run an interplanetary transportation company. Shortly before the events of X, a strange delivery was made - two machines, very close in design, and with absolutely no indication as to whom they're supposed to go to. So Draq hit on an absolutely genius idea; they'd just race the machines in the F-Zero Grand Prix, the right owners would contact them, and the delivery could be complete!
Of course, Draq had a bit of an ulterior motive - that being, naturally, the desire to race. Finally living his lifelong dream, and not complaining that the machines were never claimed even now, Draq's gone right back to the circuit! He's fully aware that if anyone ever does show up asking for his machine, he'll have to hand it over - which is why he wants to win the prize money. If he gets rich, he can buy his own machine, and that'll take care of everything! Though he's happy to dodge around the origin of his machine in interviews. When asked about it, he just mentions it's got a beautiful form. And why he became an F-Zero racer? Well, Draq asks, is there anyone who wouldn't want it? And when he can speak to the fans, he just tells them to remember the name Draq!
Generally, he's pretty positive in his interviews! He chalks up his victory to his love for the sport, and he wants to sign autographs and give lectures - though when he does have an autograph to sign, he barely can out of nervous excitement. Living the dream is hard, after all! He also practices the F-Zero computer game, which contributes to his skills, and he likes the idea of racing full time. Though to give Draq some more credit, he says he has to discuss it with Roger Buster, rather than just leaping right into it - he wants to share his victory with Roger, too! His one regret, though? Not getting Captain Falcon's autograph. The F-Zero GX story mode sadly doesn't let him do much, though - he makes a cameo talking with Roger Buster before Chapter 3 starts, and he naturally joins the big race of Chapter 7, but that's all he does.
Onto his machine - though it's not really his, now is it? The Mighty Typhoon was originally created by the mysterious Team Shooting Star; they were apparently a well-known F-Zero team before the Huge Accident, but had to dissolve afterwards. How their machines got to Draq and Roger is a big mystery, though, considering that every single member of Team Shooting Star has gone missing since the Huge Accident - and thanks to another bio, it's implied Deathborn had a hand in it. Regardless, the machine is Draq's for now, and so are its listed stats of C Body, A Boost, and D Grip. In F-Zero X, that makes it... very average! It's one of those middle of the road machines, nothing special to talk about but still playable. That's the downside of this many machines - hard to make them distinct. In F-Zero GX, however, Draq's machine is completely contrary to expectations. The body and boost are both weaker than listed, but in exchange, the Mighty Typhoon has amazing grip and handling. I don't mind the altered stats, but you'd really think they'd have just listed them at some point!
GP Legend series
Draq makes two appearances in the series, and in befitting the anime's tradition of making every alien evil in some way, he's evil in the first episode! Though to be fair, he's forced into evil. His first appearance in the episode is getting beaten up by Miss Killer, making some sort of an ominous deal. During the race, we see what that is when Pico shows up and snipes the entire race with speed-activated bombs, thus turning the race into an episode of Speed... similar to GX chapter 6. Hmm. Regardless, Draq's car is (apparently? it's honestly unclear) the only one not rigged - outside of Captain Falcon, who drove off the track to avoid it - and he sets out to win. Roger Buster and Rick Wheeler are both trying to win as well, driven by a heroic motive to inspire a young boy who needs a lifesaving surgery, but Draq is driven by Roger; the deal is revealed to be that if he wins the prize money, Miss Killer will offer protection for Roger from Dark Million. Draq's ready to use his ability to go faster to win... but that doesn't stop Roger and Rick from pushing into the red, despite the danger!
Luckily for everyone, by the time the other two speed into the red, Captain Falcon has shut down the Dark Million bomb plan. Nobody explodes except for a random shmuck midway in the episode, and Rick wins, ensuring the kid is inspired and encouraged! Thanks, Rick. Roger and Draq reconcile and head off to keep making deliveries... and we actually see them one more time! In episode 45, aka Time Travel Trouble the episode, the two couriers get intercepted by Zoda, who wants to know about Black Shadow's mysterious deliveries. Yes, it turns out Black Shadow hired Roger and Draq - now that's what I call an endorsement! Draq accidentally lets it spill that they know the Mobile Task Force, and Zoda proceeds to use the two of them as hostages, though they get freed after Zoda's landed and started exploring the Mysterious Facility of the episode. Draq gets to show up in the everyone is cool group shot at the end of the episode, but that's about it. Unfortunately, F-Zero Climax doesn't even provide much for us to work with it, since it's one of those where the bio is basically just the GX bio all over again. Climax, why must your bios be so hit and miss?
Well, that all aside, it's good to be consistently back! So help me stay that way by going to tell me who I write about for October!
SIMulation
Written by: Baby Luigi (talk)
How To Set Yourself On Fire In Three Easy Steps
This is a simple and easy-to-follow guide[1] if you ever have the desire to simply combust yourself in the quickest fashion.
1.Get yourself and buy yourself a lot.[2] Doesn't matter what lot it is, you're going to bulldoze all the nonessential items such as toilets and beds anyway. Your cooking skill is optional, but having less experience and skill is better. I picked the Oasis Spring lot in the middle of summer, not that it has additional gameplay effects or anything, but the thought of burning yourself in hot desert conditions is a bit more palatable than if you did it to yourself in the middle of winter in Mt. Komorebi.
2.Construct a simple 4x4 building, undecorated and put a grill inside.[3][4] You need a place to live inside, of course, and everyone needs to eat. You don't need beds or bathrooms. Animals in nature use the restroom wherever they like, they can sleep on the floor fine, and a little dirt never killed anyone, but I'm not a complete monster to deny you having the opportunity to cook yourself something rather than needing to forage, plus at least having a roof over your head. Windows are technically optional but you need to entertain your audience should you capture one in your best efforts.
- THIS IS IMPORTANT: Set your lot trait[5] to "Cursed" before you exit out of Build/Buy mode.[6][7]
- It immensely helps to use tiling that has the "Low Fire Resistance" trait.[8]
- You also need a door in order to get inside your lovely new house to begin with![9] Unless of course, you're an experienced magical being[10] and you can just transportalate yourself inside at will, but I don't think the chances of you being able to do that are that high.
3.Get inside and try to cook something.[11] You need to turn on a fire to catch yourself on fire. Other methods to catch yourself on fire exist of course, such as being a vampire and staying out in the sun for too long but of course, not as efficient to get your quick fire fix as cooking.
- That's okay if you can't catch fire on yourself on the first try, not everyone will have beginner's luck.[12] Try a different recipe, such as hot dogs, and you'll get that fire on yourself in no time.
Congrats, now you know how to set yourself on fire!
Can summer please end already?
References
- ^ I mean, I personally think it's simple and easy to follow through. Show me a more simple guide than this and then you can sue me.
- ^ Well duh, you can't exactly have a lot if you don't have yourself to buy a lot with.
- ^ If you have the money, you can go bigger but it's unnecessary plus more open space means less opportunities to set yourself on fire, as the fire will spread more and be less concentrated on the vital target: yourself.
- ^ Just about any fiery device works such as cheap ovens but I find grills the funniest option because at least you can smoke some wieners with it.
- ^ Challenge in a very recent update, I can't get used to that.
- ^ Don't worry about the name, it's just a name of a trait, there's a lot of great gameplay quirks to come out of it.
- ^ You need the City Living expansion pack, but I hope that's the only expansion pack you need.
- ^ You can find out by hovering over your selected tile, and then seeing it below the description. Applies to both walls and floors.
- ^ Just an ordinary door, nothing too fancy like doors warping you to other parts of levels in 2D platforming games.
- ^ You likely don't own Realm of Magic or Vampires anyway.
- ^ Using the grill of course.
- ^ For some of you that DO have beginner's luck and managed to cook yourself on the first try, I envy you.
Koops, Your Emblem is on Fire
Written by: Koops (talk)
Contributions by: Hooded Pitohui (talk)
Hey there, Hello one, Hello all!
Hi.
Slight warning for next video: The quality starts waning towards the end and it significantly drags down the whole thing for the last few minutes, so we ended up cutting it off as soon as we started really noticing and set up another voice chat three days later to finish the job in another video. Enjoy!
What an episode it's been. We now have, yet again, two new units to look at!
Dart
One of Fargus' corsairs. Foulmouthed, but kind.
Level 8 Pirate.
HP: 34 (70%)
Str: 12 (65%)
Skl: 8 (20%)
Spd: 8 (60%)
Luck: 3 (35%)
Def: 6 (20%)
Res: 1 (15%)
Con: 10 (+3 Upon promotion)
Move: 5 (+1 Upon promotion)
Weapon Ranks: B Axes (+40 Axes Upon promotion)
Dart... Oh, Dart. So close, yet so far...
Dart is a unit who looks much better on the surface than he actually is. Sure, he's a unit with pretty decent bulk, access to axes and thus to 1-2 range, as well as having a lot of strength so he can deal a lot of damage in one hit, that and he has spectacular offensive growths of 65% in strength and 60% in speed! It's hard to believe it when you first see it but it's true.
And yet, Dart proves to us that those things are still not enough to be that good of a unit. For starters, while axes are the best weapon type, they still have the lowest hit you can get on a weapon. Dart's skill base is only just subpar for that at best, and, at worst, it can simply get him killed. Coupled with his relatively low con of 10, Dart is easy to inflict a speed penalty on and, in extreme cases, double, at which point his own bulk starts crumbling, and that is definitely not a situation where you want to have a risky hitrate. To add on top of all of this, Dart is a foot unit, meaning he still has problems keeping up with his horses-riding friends on open maps.
Now to be fair, Dart isn't a very bad unit. Enemies in FE7 are weak enough for him to receive some amounts of EXP and gain two levels, after which he will be able to promote, giving him a +3 Con boost and thus alleviating his speed issue by a little bit. What's even better is his class is the only one whose promotion requires an Ocean Seal, which only one of which can be found through the game by conventional means, with him being the only user for it. After the acquisition of said promotion, there's a few places where he can be used decently, but there still remains the one issue of Dart never really accomplishing anything that other units can't do already, sometimes even better than he can. That, and he immediately faces competition with another already pre-promoted Berserker who simply starts out much better. Sure, you might make the same argument for Raven, but Raven actually has very good combat and is much easier to train. It's going out of your way to do all these things for Dart only to obtain something you can find elsewhere that make him not as good.
Dart is an okay unit. He has a lot of issues, but also a number of good points, but it's generally not worth using him over most other people, unfortunately. He's fun though! Big numbers, yay! Just be aware that it will take some time to start having some fun with him if you do use him.
And now, for the moment we have all been waiting for, we will be talking about the one, the only...
Fiora
Commander of the 5th wing of Ilia's pegasus knights.
Level 7 Pegasus Knight.
HP: 21 (70%)
Str: 8 (35%)
Skl: 11 (60%)
Spd: 13 (50%)
Luck: 6 (30%)
Def: 6 (20%)
Res: 7 (50%)
Con: 5 (+1 Upon promotion)
Move: 7 (+1 Upon promotion)
Weapons Ranks: C Lances (+40 Lances, +E Swords Upon promotion)
God knows... you guys know I would gush about the love I hold for this woman all day every day had I just the time for it, but this isn't a character analysis, we're really just talking about Fiora the Fire Emblem unit. And well, she's a pretty good one, actually. Great, even.
Fiora's most obvious boon is her class. Being a Pegasus Knight makes her our second flier, not only granting her a decent 7 move, but also the ability to simply ignore most terrain types. Her low con also allows her to rescue and ferry a large variety of units, but she's also slightly more buff than her little sister, so she doesn't suffer as severe a penalty from wielding most lances. Hell, 10 AS with an iron lance is pretty nice to have right off the bat. She also has C lances, so she has quite a few cool lances she can use as soon as she gets her mitts on them.
Stat-wise, Fiora is built like your typical pegasus knight. She has a pretty modest but serviceable strength growth of 35%, and with her decent base of 8, she can make it work pretty fine. She also has actual base speed, unlike Florina, at 13, and while her bulk is nothing too noteworthy, 21 HP and 6 Def should serve her just fine, and in some cases might help her live through two iron bows. Of course, later on, said defense might get a little lacking, but never to the point where it becomes too dangerous to take on more than two enemies at once, and of course the sad case of effectiveness weapons in this game means that she shouldn't have to worry about bows as much as you may think. All you really need to know about her in any case is that, mostly, Fiora is a later Florina with higher base stats and slightly lower growths, barring skill and resistance. I would, however, easily consider Fiora a much better unit than Florina if Lyn mode isn't played, given that the two or three maps that the latter has before the former joins aren't exactly flying utility-heavy and Florina's stats without Lyn mode are so underwhelming that training her becomes more of a chore than anything else, whereas Fiora has a pretty okay enough time handling herself out there starting out already.
A unique characteristic that sets Fiora apart from the other fliers is her high resistance. With a good base of 7 and a consistent growth of 50%, Fiora's resistance has the potential to grow significantly, and with her having a somewhat sufficient defensive bulk, especially after promotion, she makes for a great mixed tank, being able to take both physical and magical attacks almost the same way Marcus does. Not only that, but it also makes her an excellent unit to deal with out-of-reach siege tome users and status staves, being able to sustain them better than most other people. This, combined with how valuable flying alone, as well as her relatively early jointime, gives Fiora plenty of opportunities to shine and earn her spot as one of your best units, if not the best unit, discounting Marcus unironically.
The only real issue she has is a somewhat slow start due to lances weighing her down a smidgeon, but she's easy enough to get going and is only three levels away from being able to promote, so really, nothing is holding this beauty back. All in all, Fiora is a great unit capable of doing many things, and she is bound to see a lot of action if you do end up using her as she flies around the place, successfully completing whatever tasks she sets out to accomplish, whether it be combat, transportation or otherwise miscellaneous utility.
...God, she's so awesome...
A big thank you to the big boss himself Hooded Pitohui for co-commentating this month, and a big thank you to you viewers for sticking with us through the trials and tribulations. I will be seeing you next month!
| The 'Shroom: Issue 174 | |
|---|---|
| Staff sections | Staff Notes • The 'Shroom Spotlight |
| Features | Fake News • Fun Stuff • Palette Swap • Pipe Plaza • Critic Corner • Strategy Wing |

