The 'Shroom:Issue 173/Strategy Wing
Director Notes
Written by: Hooded Pitohui (talk)
Hello, all of you readers of The 'Shroom, and welcome to August's edition of Strategy Wing! First off, thank you, those of you who cast your sixteen votes for us in the Community Awards XIV. I thank you deeply for supporting our Strategy Wing writers and acknowledging the hard work they put into their sections. Perhaps next year, we'll be able to snag first, considering all the good news I have for you this month.
Joining our regular sections, we also have three new sections!
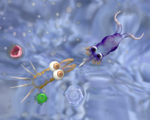
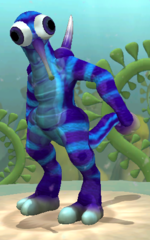
First off, in On the Origin of Species, our former Kingdom Battle Ramble writer, ZelenPixel (talk) provides us an account of her playthrough of Spore, starting us off with a single cell and detailing what happens from there.
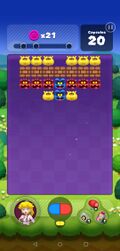
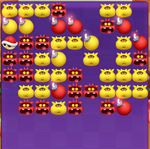
winstein (talk) joins us in Strategy Wing for the first time with a new section titled Dr. Mario World Check-Up. Over the next few months, he'll be giving you a near-comprehensive guide to Dr. Mario World. It's very thorough, so be sure to give it a read.
Finally, RabbidYoshi2 (talk) plays the role of a Pokémon professor and gives us the details of Pokémon in the recently released Pokémon Unite, starting this month off with no species lesser than the franchise's mascot Pikachu!
As much as there is for you to read this month, I won't keep you reading my words any longer, but let me remind you that we're always happy to welcome new writers on the Strategy Wing team. Whether you want to tell us everything about a subject you like with your own version of Mach Speed Mayhem or SIMulation or you'd like to give us a guide to something you enjoy doing, take a look at our Sign-up page! We'd be happy to have you join us as a member of the Strategy Wing Team!
Now, with that said, go on and read everything we have for you this month!
Section of the Month
Congratulations to Yoshi876 (talk) for cruising into first place while demonstrating the Tri-Speeder! Thank you, all of our Strategy Wing writers. Those of you reading this, be sure to share your thanks with our writers by voting in the poll at the bottom of the page!
| STRATEGY WING SECTION OF THE MONTH | ||||
|---|---|---|---|---|
| Place | Section | Votes | % | Writer |
| 1st | Racing Like the Staff | 5 | 55.56% | Yoshi876 |
| 2nd | So You Want to Conquer Japan? | 3 | 33.33% | Chester Alan Arthur |
| 3rd | SIMulation | 1 | 11.11% | Baby Luigi |
Dr. Mario World Check-Up
As you might have known, Dr. Mario World is within its final months, and so it's a good time to tackle a few articles related to this game. For this issue, we will be going in-depth on the stage mode side of the game. There are two modes that are still around: the main campaign of the game and Daily Booster. Skill Summit used to be available but it became unavailable not long ago, so there's no point talking about something that can't be played anymore. Without further ado, let's get on with this game, shall we? Ready, Go!
Stage Mode
Stage Overview
Introduced in version 1.4.0, players are able to see two types of information before starting the stage: the objects present in the stage and best doctors.
There are mini icons of objects present in the stage, and the only types of objects that aren't mentioned are regular viruses and beneficial objects. So for example, even if a stage has exploders, it won't be listed. Some of the information are helpful in preparing for it. For example, if there are Brick Blocks with something hidden inside it, there will be an icon of a block with a question mark. Likewise, if there are pink coins listed but no Brick Blocks, that means every block has coins. The information can be used to help in deciding a doctor to bring since some doctors specialise on eliminating certain objects. As an example, Brick Blocks mean that Dr. Wendy or Dr. Koopa Troopa would be useful. Do note that it will even list the mini icon even if the object is not essential to clearing the objective, so specialised doctors aren't always going to be useful for the job.
The Best Doctors section generally show the recommended doctors to best conquer the stage, and for the most part it does its job. One interesting to note is that the recommended doctors might be different between versions but by now they are all probably set in stone. With that said, there are some recommendations that are dubious so it's not a perfect system. This is especially so if the player wants to get 3 stars since a few choices weren't perfect. Take stage 1089 (World 28) for example: it recommended Dr. Toad or Dr. Waluigi, but neither are reliable because the stage is about collecting coins in order, which doesn't fit the strengths of either characters for getting 3 stars. A better approach would be to use either Dr. Nabbit or Dr. Baby Peach for that stage. At times, players might not even have the listed doctors, which would mean that they would need to use a different approach to conquer the stage. On some occasions, the listed doctor will have a "Shop" label, meaning that they are available for purchase in the shop either as a doctor pack or a referral. If that doesn't help, there are some doctors that are versatile as to be able to handle multiple types of stages well, so they could be considered if you ever need to use them.
Finally, some stages may be labeled as "Hard", which is a warning that the stage is no pushover. Once again it generally does its job, but I found some stages in later worlds that would have fit better with that descriptor.
Focus on the Objective
In most cases, the objective involves eliminating viruses, or at least one of the objectives involve eliminating viruses. However, there are times where you have more than one objective to meet, which is more common in the later stages. In fact, there can even be up to four of them! In some cases, the objective(s) does not even involve viruses despite the fact that they are present. In cases like this, it might be unnecessary to eliminate the viruses as it would be better to contribute to the objective, unless clearing viruses is needed to fulfil the objective such as if there's a virus coin and the viruses are covering it. This is due to how the game increases your score based on your excess time or capsules, and the amount rewarded is exponential so having as much leftover time/capsules is beneficial. Sometimes one might forget the objective when playing the stage, so it's important to keep this in mind.
There are some stages where the amount of viruses can increases because there are flasks that shoot out more of them, so basically when that happens it will take longer to meet the objective of eliminating viruses. However, if you managed to eliminate all the viruses which in turn puts a checkmark on the objective display, you don't need to do it again, meaning that when the flasks shoot out more viruses after that, they are not necessary to be eliminated as you completed the objective. In fact, it is advised to do so in cases like this so that you don't need to deal with the ever-increasing amount of viruses. A few of these stages have an excess of objects that you need to clear compared to the objective too, which you might not know if you didn't take a closer look. In this case, once the minimum is achieved you can slowly achieve the other objective(s).
Pill placements
The basic rule of this game is that if a line of viruses have a capsule in the same line, they will all be eliminated. What can be done with this rule can be surprisingly complex because much like the original game this game is based on, there are couple of factors to take account of: gravity and capsule types. In regards to the latter, basically if the capsule if full-sized, the two sides of it are attached and thus they form a building block until one of the halves disappeared from making a match. For the former, basically you can't make a capsule match if there is nothing for the capsule to land on since capsules are only active if it landed. This means that if a row of viruses is in mid-air, you may need to stack some capsules just to make that match (breaking the base of the stack allows you to use the capsules for something else).
Early in the game, it is made quite clear that you can drag capsules into gaps that can fit the capsule. Basically, when there is a gap the capsule can fit, you drag the capsule to the desired area as long as it's higher (an arrow will appear when the capsule can't move). This is unlike the original Dr. Mario where you have to wait for a capsule to move down to a desired spot, and even then you can't move it into gaps. With the way moving capsules work in this game, it allows the player to more easily move a capsule to where they want it to go. One can even rotate the capsule before moving it into the play area, so the player doesn't need to rotate it on the play area itself. This can reduce accidental misplacements, and as such is the preferred way to prepare the capsule.
Another thing that you can do with capsules is to make cross matches, which has the advantage of clearing a row and column at the same time. It is also slightly capsule-efficient. This is however more easily achieved when you have rainbow capsules, which the player automatically get if they have eliminated seven times, either though capsule matches or using a skill that eliminates objects. Speaking of rainbow capsules, because they come in single pieces, they can be used to slot in tight spots.
If the player wants, they can move multiple capsules on the stage itself and juggle them. Generally it's better to deal with them one at a time, but the player can utilise a new capsule if it has a different colour or shape. This is once again a departure from the original Dr. Mario where you can only manage one capsule at a time.
There are a few official videos on Youtube that has some useful advice on how to efficiently use capsules, which are the "How To Clear It!" series. Here's a video that provides helpful tips on how to use the capsules: How To Clear It! Stage 105.
Generally Useful Doctors
Some of the doctors have useful effects that can transcend the stages that they are specifically used for, and while there are many doctors that can technically do this, I will be focusing on ten different types of effects for simplicity, excluding the three main doctors (since they are all decent and every player starts with one of them).
Specialised Doctors
There is no actual term for it, but I call doctors who specifically target specific objects as "specialised" because they do one thing and the often do it quite well. In fact, if a stage has many objects that they can target, it's their time to shine. As an example, Dr. Ludwig can break many objects that are covered with ice, and if this is being done over and over, eventually there won't be any ice, which will make it easier to achieve the objective. It's even better if the objective involves clearing a specific object, so perhaps Dr. Ludwig is better if the stage has the objective of breaking all the ice.
With specialised doctors, there may come a time when the stage will no longer have the things they are made to deal with. When that time comes, you may be thinking that it's not worth using their skills. That's not the case. In fact, doctors like them have a failsafe effect that allows them to still be able to contribute: if you use their skill when their job is done, they will eliminate one object (mainly a virus), which comes in handy such as when you have the last virus that you need to eliminate to beat the stage.
Between Doctors with Similar Effects
As you might have gathered in the section above, there are some doctors who have similar effects but they have trade-offs between each other. As an example highlighted earlier, Dr. Toad targets more spots compared to Dr. Goomba Tower, but the Dr. Goomba Tower charges their skill faster.
The first type of doctors with similar effects are between the normal and stronger variants. There are only three pairs of doctors that fit this criteria: Dr. Mario/Dr. Fire Mario, Dr. Peach/Dr. Fire Peach and Dr. Bowser/Dr. Dry Bowser. All the stronger variants have the effect that they can eliminate any object that takes multiple hits to clear unlike their normal counterparts, but their skill metre charges slightly slower. Usually the stronger variants are better because of this, but if the stage doesn't feature anything that requires multiple hits to destroy, their normal counterparts are undoubtedly more suited for the job.
The second type of doctors with similar effects are between the ones that clear more and the ones that charges their skills faster. In terms of the ratio of the skill charge to the amount of objects they target, the ones that target or clear more are more efficient in their jobs, which would be why they would usually be preferred. However, there are some advantages in having the ability to use the skill often, so don't knock them off. For one, the game gradually increases the base score for every elimination made, so those that clear more can boost the score a bit faster. Of the counterparts, the only one where the lesser counterpart turned out to have a more favourable ratio is between Dr. Koopa Troopa and Dr. Wendy, where the former is slightly more efficient at equal levels. That doesn't mean that Dr. Wendy is inferior, since targeting more blocks have their uses. Perhaps you only have one or the other, so if you want to use a particular effect, you can use the alternative instead.
Assistants
The player can choose certain assistants before they start the stage. Some of the effects are shared between two assistants, allowing the player to stack the effect. Assistants can be separated into different categories based on what the player wants to achieve. For example, if they want to focus on score, they should consider one of the score-based assistants. If they want a bit more capsules or time they should pick one of the assistants that can increase them. Without further ado, assistants can be separated into the following categories:
- Score-based assistants: These type of assistants are helpful in increasing the player's score, and they have their unique ways of achieving this. As an example, Bob-omb and Thwomp increases the score by a set amount after completing the stage, while Koopa Troopa and Lakitu increase the score further based on the amount of capsules left. Generally they are quite useful because most stages rely on achieving a certain score to get three stars, and the most useful ones to do so are the ones that increase the base score for certain virus colours. Other examples of this type of assistants include Goomba/Swoop (increases score by a percentage), Koopa Paratroopa/Fly Guy (increases base score for red viruses) and Whomp King (increases score if a rainbow capsule is used for a capsule match).
- Object-transforming assistants: Some assistants specialise in turning viruses into something different, allowing the player to make use of the transformed object for different purposes. When the transformation effect activates, it simultaneous removes the virus and gives out a helpful object to use. Different object types can be useful for certain types of stages, so for example if viruses tend to be arranged in columns, Broozer or Galoomba can be helpful for transforming viruses into pop cannons (they clear objects within the column). Other examples of this type of assistants include Amp/Boom Boom/Parabomb (transform viruses into exploders) and Honey Queen/Wiggler (transform a virus into a skill charger).
- Virus-eliminating assistants: A few assistants specialise in eliminating viruses, and while not as useful as the ones that transform viruses into different objects, they tend to have an overall high chance at lower levels. One thing to note about Yellow Shy Guy and Sushi: within the same stage, their effects activate once even in a scrolling stage, so it cannot be reused. The other assistants that do this are Cheep Cheep/Pom Pom (eliminate 1 virus) and King Bob-omb/Piranha Plant (eliminate 2 viruses).
- Capsule/time-increasing assistants: These assistants help to increase the capsule amount or time either in the beginning or once certain conditions are met. All of the time-increasing assistants activate in the beginning of the stage, while only one of the capsule-increasing assistants (Crowber) increase the capsule count in the beginning of the stage. Of the capsule-increasing assistants, King Boo is the best because he give 5 extra capsules, but it also has the lowest chance to activate. One thing that they all share in common is that they can only activate once, so for the capsule-increasing ones, you can't keep accruing capsules by constantly meeting the conditions. The other assistants that increase capsules are Bomb Boo (+3 at 3 capsules left), Dry Bones (+3 at 0 capsules left) and Fish Bone (+2 at 0 capsules left).
- Skill-enhancing assistants: These assistants relate to the doctor's skill, where they either fill it up or to make it easier to fill. The former is good for getting a head start which is good for doctors who benefit from using the skill as early as possible, while the latter has better long-term benefits because it means more frequent uses of the skill. Examples for the former are Bullet Bill, Sledge Bro and Octoomba, while examples for the latter include Scuttlebug/Goombrat/Boo (increase skill charge by a percentage by clearing a specific virus colour) and Shy Guy/Banzai Bill (reduce the skill metre by 10%).
- Capsule-transforming assistants: There are only three assistants that can transform capsules, them being Blooper, Fuzzy, and Star Bunny. The former two may transform capsules into matching colour ones, while the latter may change rainbow capsules into full-sized ones. In my opinion, the former two have limited applications, while the latter is more useful for being able to activate multiple times throughout the stage.
- Miscellaneous assistants: Quite a number of assistants do not fit into any of the categories due to their unique effects. Chain Chomp and Clampy starts the stage with sections of the rainbow metre filled which allows the player to get a rainbow capsule earlier, Hammer Bro. slows down anything that floats which will give more time for the player to react, while Sumo Bro and Monty Mole simply give 5 coins each provided the player cleared the stage (even ones that are already cleared). Their unique effects aren't as useful as the others that are listed, and of the three types, Hammer Bro. can help to manage capsules more easily since they float slower, while Sumo Bro and Monty Mole can help players earn extra money to use for staffing.
Item Usage
At times, the player is tempted to use an item to beat the stage. There are five different items that the player can use before starting the stage, and four items that can be used within the stage. In general, it is not advisable to use items to beat a stage especially if there is no chance of beating it, because items are very much a commodity due to requiring diamonds to spend on them. The only two items that can be paid with coins are the Score+ and the Random! items when you start a stage. This extends to continues, which are more or less like items because they require payment of diamonds but there might also be free uses of them. If you are fortunate enough to have free items, there would be less of a hurdle to use them. Stage start items are a bit of a gamble, which is why they overall cost less compared to the in-stage items. Nevertheless, all the stage start items have their uses, even Random!, the cheapest one.
- Capsule+ allows you to gain five more capsules before the stage starts, giving you more room to finish the stage.
- Skill+ fills the skill metre, and is best used for doctors who benefit from using the skill in the beginning.
- Rainbow Start gives three full-sized rainbow capsules, allowing you to make easy capsule matches.
- Score+ increases the score by 10% at the end of the stage, useful if you feel you would barely get all the stars.
- Random! grants a random effect, where sometimes it's underwhelming but sometimes it's beneficial.
In-stage items are even more of a gamble, mainly because they are generally more difficult to come by. Boomerangs, for example, were only purchasable. Because of their rarity and the overall higher price, they shouldn't be used unnecessarily. The best time to use any one of them is when you are close to completing the stage but you can't do it with the current capsules, and you need a little push.
- Skill fillers allow you to have a full skill metre, no matter how much you need to fill it.
- Hammers allow you to clear an object on a tile, but it doesn't immediate clear them (in the case of a more durable virus or object).
- Boomerangs allow you to clear a row of object, and it goes through Empty Blocks, unlike every other object. It also doesn't immediate clear objects within the row.
- Capsule swappers allow you to manipulate the colour of the next capsule, which should be used if luck isn't on your side.
Power Boost Rally
Introduced in version 2.2.0, Power Boost Rally grants players the perks of using stage start items for free, as long they haven't cleared the stage and they have cleared multiple stages in a row without losing or restarting. A good thing is that if you beaten a previous stage, losing/restarting it doesn't break the chain. Of course, it's not all perfect. For one, the boost lasts for 48 hours, and once that time is up, you have to do it again even though you haven't lost or restarted a stage yet.
The items granted through the rally are Rainbow Start, Skill Up and Capsule+, which respectively are granted for 1+, 2+ and 3+ stages beaten in a row. The best item is clearly the Capsule+ because of the extra insurance more capsules will bring, though using a skill at the beginning of the stage is almost as good if the player needs it. This is a great way to catch up if you're behind, because who can't say no to free items to make the game easier?
Stage Types
Scrolling Stages
In every World, there are some stages where all is not it seems. In fact, there are actually more objects that are only revealed later in the stage. These are scrolling stages because when rows of objects are revealed, everything moves down one row. You will know that these stages are scrolling by the arrows pointing down, and if the stage is done with the scrolling, you will see a yellow-and-black striped stoppers at the end of it. In most stages, the scrolling will happen if the player adds a number of capsules to the stage, or if they managed to clear enough objects (likely based on how many rows are occupied) it will automatically scroll. Thankfully the player knows when the scrolling will happen, because when the arrows turn blue, it is about to scroll. When the arrows are shaking while it is blue, it will scroll after a few seconds, so if the player needs to make any moves, there's not much time to do it. Very rarely, the stages scroll by phases, where the player must clear the objects on the screen before everything scrolls up, and it will scroll by many rows at once. Because of this, the player must be careful not to stack too many capsules. These stages are only found in the challenge stages in World 26 and some of World 31's stage.
Scrolling stages are tricky mainly because the player must be careful not to stack too high, lest any objects close to the bottom line becomes too difficult to clear. Yes that's right: objects can potentially scroll past the line and when that happens, it's game over. This includes virus coins (background objects), where even though they don't occupy any space, it is still an object in the stage. These type of stages tend to be found at the end of each World, although some might be encountered in one of the middle areas.
Timed Stages
In World 1 to World 30, the player will unlock three challenge stages once they have beaten the fifth stage in the second area in each world. They are special timed stages where the player has to race against the clock to meet the objectives. Interestingly World 31's challenge stages are not timed, as they play like normal stages where players are given limited capsules to complete the stage, which is why this section is named as "timed stages". One of the more interesting things with these timed stages is the fact that unlike the normal stages, you have unlimited capsules. This effectively allows them to spam them as they please, but the player should still be mindful not to flood the stage. Another thing is that some of the timed stages are scrollable, and much like the standard stage mode stages, the stage can advance if enough capsules are brought into the stage.
Here are some tips that would be helpful for timed stages:
- You have to think and act fast! Timed stages are all about beating the clock, where excess time are converted into bonus points.
- You can tap one of the in-stage items to pause the timer and catch a glimpse of the stage.
- When the animation for a skill plays, the timer will freeze. Use this to catch your breath.
- Dr. Daisy, Dr. Donkey Kong and Dr. Baby Wario's skills will not stop the timer when their skill is active. The former can use the skill immediately, but it's not recommended to use the latter two for this reason.
- The assistants Pokey, Porcupuffer and Stingby can extend the timer by a few seconds each. Their activation rates are quite high, so don't hesitate to use them if you feel you need the extra time.
- Dragging capsules into gaps are generally more time-consuming, so it's better to make two quick matches instead of one match that is filled by the gap, unless it is more efficient to do so.
Special Stages
These stages can only be accessed if the player gets 3 stars in every stage in that world, including the challenge stages. This is not necessarily easy especially in the later worlds, but once they do so, they are able to tackle these stages. The reward for these stages are 1000 coins and a doctor. As you can see, it's worth completing them for doctors that the player might not even have them. However, special stages are generally more difficult, though thankfully they don't have score requirements to get 3 stars, as just completing it rewards the player with 3 stars. Because of the lack of score, any assistants or doctors (Dr. Nabbit only) that aid in scoring won't be of much use, so the player should use assistants that would be better suited for it.
Daily Booster
Introduced in version 1.3.0, Daily Booster is a way for players to grind for in-game currency to help in getting more doctors or assistants. Every day, players can attempt the daily booster twice: the first run is free, while the second run requires 10 diamonds to attempt but the rewards are greater so there is a bit of a risk but the rewards are more worth it. The Daily Booster in the initial version is much different compared to the what it became in version 1.4.0, so for the benefit of the readers, the newer type of Daily Booster is focused on. Before that, we'll get to how it changed.
The difference between then and now
The initial version of Daily Booster has a few key differences that made it simultaneously easier and more difficult than now. On one hand, the early Daily Booster gives players more capsules to start with, has less viruses and objects on screen and gives more capsules if all the viruses are cleared, but on the other hand you have three colours to work with. The newer type of Daily Booster that was introduced in version 1.4.0 provides more objects on screen, starts with less capsules and gives less capsules after all viruses are cleared, but it also has two colours. The fact that it has two colours and more objects made the newer version overall easier, in my opinion.
General Strategy
The objective of Daily Booster is to eliminate as many viruses as possible, since you start with an indicator that there are infinite viruses after all. Not only are viruses present in the stage, there are also exploders and shells to make accomplishing the task easier.
- Choose assistants wisely: As Daily Booster doesn't have scoring, bringing in assistants that provide extra points won't be useful. Skill-based assistants and capsule-based assistants will provide more benefits.
- Stage start items: In general, do not use these for Daily Booster unless you have free uses, and even then, use them sparingly. Of the stage start items, I felt that Capsule+ is the best for this mode given the limited amount of capsules you are given. It is more optimal if used with Daily Boosters that provide triple the reward to potentially get more rewards.
- Make efficient use of capsules: With two colours to work with, this won't be difficult to achieve, but you still have to use the capsules wisely to make the most matches for as little moves as possible. This may include making cross-shaped matches, slotting capsules in between gaps, using rainbow capsules to eliminate two different colours of matches, or adding the next-next capsule if the colour is favourable compared to the next capsule.
- Account for rows in mid-air: It is more efficient to make a capsule match in a row than to make two matches in columns, especially if it's mid-air. You must remember that you don't have many capsules, and you are given few capsules after you clear a phase, so it's important to make efficient use of capsules. You might even need to stack capsules to clear a row, and use the stack for other purposes when you remove the base of the stack.
- Take advantage of the exploders and shells: These two objects have the ability to make quick work with viruses for less capsules, so do use them if it helps. Sometimes it's better not to use them if they would get in the way of a more efficient match.
- Use skills wisely: It is important to understand what the doctor's skills can achieve and make the most of them, such as using them to clear a tricky spot on the map.
Best Doctors
Because of the limited variety of objects in Daily Booster, there aren't many doctors that are suited for this mode. For one, any doctor that eliminates a specific object won't be of much use because they will end up only eliminating one object, and given how even the starting doctors can clear more objects, they are obviously not ideal. Another type of doctor that won't be used much is the type that immediately eliminates because none of the objects takes more than one hit to remove, so for example, Dr. Mario is better than Dr. Fire Mario here since the latter tends to have a slower skill gauge unless the latter is of a significantly higher level than the former.
First off, we'll discuss the two doctors that are best suited for Daily Booster:
- Dr. Wario: Of all the doctors in stage mode, Dr. Wario is the best doctor because his skill can easily allow players to muscle through the stages, since extra capsules and time gives players more room to complete a stage. This is not much different from Daily Booster, where Dr. Wario can allow players to extend their boosting period. The drawback with Dr. Wario is that his skill is that his skill gauge is one of the slower ones, so the capsules don't come quite fast. That's why Dr. Wario would benefit from certain assistants in filling the skill gauge, which we'll get to in the appropriate section. Another drawback is that Dr. Wario is not a special stage reward, which means you have to be lucky to receive Dr. Wario from the random staffing. There is one thing for sure: Dr. Wario is the only doctor that can allow a player to eliminate thousands of viruses as long as the player can get lucky.
- Dr. Yoshi: With the drawbacks that Dr. Wario has, it's understandable why players don't always want to resort to him. That's where the next most viable doctor comes in. Dr.Yoshi's skill is a natural fit for this mode. Basically, his skill is to remove 5 objects, with viruses taking priority. With this skill, Dr. Yoshi can be quite helpful because clearing viruses is what you should be doing here, and in fact it's easier to use Dr. Yoshi. The best way to utilise this skill is to clear the stage until there are 5 viruses or less, then use this skill to finish them off. Perhaps Dr. Yoshi's greatest advantage over Dr. Wario is availability: just by beating World 2's special stage, Dr. Yoshi is yours.
That's not to say that other doctors aren't viable, but here are a few doctors that you could try, although they aren't nearly as effective as the two doctors I mentioned:
- Dr. Toad or Dr. Goomba Tower: Dr. Toad has 20 potential targets each time this skill is used, but don't expect them to all hit. Still, the fact that it can hit many objects on-screen might be handy if not inconsistent. Dr. Goomba Tower has 10 potential targets, though they can hit more often. Much like Dr. Toad, it is rather inconsistent.
- Dr. Luigi: Similar to Dr. Toad or Dr. Goomba Tower, Dr. Luigi's skill targets randomly. In fact, it is somewhat a combination of how Dr. Yoshi and Dr. Toad's skills work, in that like the former it prioritise viruses while like the latter it can randomly target. This skill is also one of the fastest-charging ones so you can use it pretty frequently, though keep in mind that the random factor meant that it's also inconsistent.
- Dr. Kamek: His skill clears four of the most common type of viruses which can be helpful, but it will clear less than four if the most common colour is less than four, meaning that you have to focus on a certain colour to make the most of this skill. His skill gauge also fills slower than Dr. Yoshi and clears less than him. Although Dr. Blooper has the same effect with the trade-off between less cleared viruses and faster skill metre charging, the quantity of cleared viruses make the skill not as effective.
- Dr. Toadette or Dr. Lakitu: These two doctors can create handy boxes, which simultaneously eliminate viruses and create them. These boxes can be used for the objects they contain, which might help to further eliminate more viruses.
- Dr. Baby Mario, Dr. Baby Luigi, or Dr. Baby Rosalina: All three have the ability to transform one virus into something helpful. Exploders can be used for chaining, shells can be used to more efficiently clear rows and rainbow capsules give free capsules which is very much helpful due to the limited capsule amount you're given.
- Dr. Donkey Kong: The ability to target a large area can be quite helpful, since you will probably have a stray area that may not be easy to handle without wasting too much capsules. Do note this this skill has a bit of a slow charge. Dr. Daisy is an alternative but she only clears one object at a time despite charging faster.
Viable Assistants
Much like the doctors, there aren't many assistants that would be useful in Daily Booster because there is a lack of score, which basically rules out any score-boosting assistants. That leaves us with two types of assistants: one that helps in filling the skill metre and one that increases capsules.
Skill-based assistants
- Spiny and Spiny Cheep Cheep: Of the skill-based assistants, they are the most useful ones. The drawback is that there is a percentage chance to activate, but when they do activate, you have a significant advantage since it lasts throughout the game. Essentially, they fill the skill metre if you making any sort of elimination, so for example, a match of three fills the metre by 4 points instead of 3 points (if one activates). In Daily Booster, shells can appear, and because the shell can hit multiple objects, any objects destroyed by the shell fill the metre by one extra point each, effectively filling the skill quickly were it to happen. Dr. Wario relies on the skill metre to fill very often so these assistants synergise very well with him.
- Penguin and Ant Trooper: Their effects grant extra skill metre charge if you can eliminate four or more viruses in a single move, and the percentage is rather significant. It doesn't have to be four-in-a-row, and it can be as easy as matching two different colours as long as it's four or more simultaneous eliminations. Given how close viruses are in this mode, this can easily be achieved. They also work well with doctors whose skills can eliminate four or more viruses, such as Dr. Yoshi or Dr. Kamek.
- Scuttlebug, Goombrat, and Boo: Their effects grant extra skill metre charge for eliminating a specific colour of viruses, where it's red, blue, and yellow respectively. The percentage gain isn't significant but extra skill filling is nice, as long as you are lucky with the two colours that you are working with.
- Shy Guy and Banzai Bill: These assistants can reduce the skill metre by 10% (rounded down) if they activate, making it easier to fill the metre. One thing to note is that they previously reduced the skill metre by 10 points, which is actually much more broken because certain doctors have low skill metres, easily filling the metre and possibility launching an infinite where you can use the skill over and over. An example is Dr. Luigi, who can use the skill indefinitely at level 5 if both assistants' effects activate.
Capsule-based assistants
- King Boo: With an effect that gives 5 extra capsules, this is the best assistant in terms of capsules. This effect will attempt to trigger if you meet the condition of having 5 capsules left, but the fact that it can attempt to trigger again if you meet the condition again (but didn't activate the first time) means that eventually you get the effect to trigger. King Boo is only available in versus mode starting from tier 7, so it's not exactly the easiest assistant to obtain.
- Bomb Boo: Much like King Boo, Bomb Boo's effect grants extra capsules but less than King Boo, but there is a slightly higher chance it will activate. It triggers at 3 capsules left, and much like King Boo, it can potentially activate more than once if it didn't already go off.
- Other assistants: There are three other assistants that grant capsules: Crowber, Fish Bone and Dry Bones. Crowber only gives 1 capsule in the beginning but has the highest chance, Fish Bone grants 2 extra capsules if you have none left and has a decent chance to activate, while Dry Bones grants 3 capsules if you have none left but also the same chance as Bomb Boo. The latter two can't easily attempt to trigger more than once because the trigger is when the player has no more capsules and they can't make another move.
Tips
Stage restart
The Daily Booster is only considered complete if either the following happens: (1) you can't make any more moves while reaching zero capsules, (2) get a game over by putting a capsule past the bottom line or (3) quit the Daily Booster through the in-game menu. This will tally the results that you have achieved so far, and you will receive the rewards based on the amount of viruses cleared. However, if you force-close the app or the app abruptly closes, the Daily Booster is not considered complete, so you can retry it. In some cases you could try again after restarting the app if there is an error. There are two reasons you would probably want to do this purposefully: the first is to get specific colours to show up since the two colours are random and certain assistants only work with certain colours, and the second is to hopefully trigger certain assistants' effects since some of them active on a percentage chance (though this might take a lot of tries so it's not generally recommended).
Consistent layouts
There are several starting layouts in the Daily Booster, and you might even encounter the same layout more than once if you play it often. One quirk with the layout changes is that if you make identical moves in the first phase even in different play sessions, the next phase will have the same layout. It is mainly based on what your next capsules are, and the presence of rainbow capsules as one of the next capsules can result in a different layout. If a doctor's skill is non-random like Dr. Wario, this knowledge would prove to be useful. It could be used to your advantage if you ever want to dedicate yourself to a maximised score, but for a casual player it probably doesn't matter.
Using skills during mid-chain reaction
When shells and exploders are clearing viruses while the skill metre is full, you can activate it to empty it, and because the objects are still having a chain reaction during the animation, it will fill the skill metre while the animation plays. This is especially useful for Dr. Wario because he is one of the two doctors that provides maximum benefit the more often you can use his skill (the other is Dr. Nabbit, but he's not useful in Daily Booster). Certain doctors could also stand to benefit from using this skill during the middle of the chain reaction, like Dr. Toad or Dr. Baby Mario.
And that's it for the coverage of stage mode. I could have covered more of it in-depth, but I hope you understand that there's not enough time to cover everything. I do hope that whatever that has been found in this article could be of some use.
In the next article, we will be talking about this game's versus mode, as it is an entirely different topic from stage mode. Some of the things that will be discussed are how some of the stats work and the viability of the doctors. Until then, see you next issue!
Thank you for reading.
I Choose You
Written by: RabbidYoshi2 (talk)
Hello readers! You all probably have heard of Pokémon Unite right? It's a MOBA-type of game, but with Pokemon! (A little obvious, actually). I'm here to talk about each of the characters various stats, and how they can affect the battle. Today, we're starting off with Pikachu.
Overview
| Tier | S (data gathered from various sources) |
|---|---|
| Role | Attacker |
| Type | Ranged |
| Difficulty | Novice |
| Offense | 4 ½ |
| Endurance | 1 ½ |
| Mobility | 2 ½ |
| Scoring | 2 |
| Support | 1 ½ |
Pikachu is an S-tier Attacker recommended for Novices. He has a max stat of 12 and is a master at Ranged attacks.
Pikachu is essentially a glass cannon, due to its high Offense but low Endurance. He can easily weave around the battlefield, attacking opponents and wild Pokémon and lining up a shot to score. That being said, he may have a hard time with Pokémon like Zeraora, Gardevoir, and Gengar which can easily use moves to instantly get closer to him, and Pokémon like Slowbro that can use moves to disable him for a little bit. It's probably for the best to keep Pikachu in the middle lane where there’s less likely to be any intense fights.
Attacks
Pikachu's main attacks are Thunder Shock and Electro Web. Electro Web can be used to block opponents' advance as it roots down any enemies in place. Thunder Shock is an area move that can also be used to slow down enemies, but it's better to use it as a regular attack.
Pikachu's attacks can also be upgraded into stronger moves like Volt Tackle and Electro Ball. Volt tackle is an all-purpose move that can knock back enemies, and Electro Ball is a more powerful version of Thunder Shock.
Pikachu's Unite Move is Thunderstorm, which is basically a giant area attack, but it doesn't really have any other powers. It still could be useful in defeating a bunch of Pokémon at once.
| Lv 1-3 | Electro Web, Thunder Shock |
|---|---|
| Lv 4 | Electro Ball/Thunder |
| Lv 6 | Volt Tackle/Thunderbolt |
| Lv 9 | Thunderstorm |
Best Pokemon to Use With and Best Pokemon to Counter
Pikachu is pretty OP when used with Eldegoss (Other Supporters like Mr. Mime and Wigglytuff are more geared to other roles). Pikachu can also be used with Snorlax, comfortably launching Electro Ball after Electro Ball behind Snorlax’s Block. Again, Pikachu can be outclassed by Pokémon like Zeraora that can quickly close the distance between them, or Pokémon like Slowbro that can disable Pikachu for a little.
How to Get
Pikachu can be bought from the UBC for 6,000 Aeos Coins/345 Aeos Gems. He can also be alternatively chosen out of 5 starters.
Basically, Pikachu is best for those who are still learning the basics to Pokémon Unite, or for those who want to sit behind the Tanks and strike from the mid-lines.
That’s it for now. Click here if you want to see a certain Pokémon from the roster.
"Catch you later," -RabbidYoshi2 (talk)
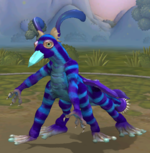
On the Origin of Species
Written by: ZelenPixel (talk)
Hellooooooo! I'm back! I have no idea why I haven't thought of this section before, but Shoey suggested the idea to me a few months ago, and I just couldn't get the idea out of my head! You all know Spore is my favorite game and it had a HUGE effect on who I am today! Today it shows in my utter enthusiasm for biology and creature design. It's also a great creative outlet, so in my art thread, you'll see that Spore creations are around in it pretty much every week! Also yes, the game is flawed and very buggy, but I still love it so much and it means so much to me!
What is Spore, exactly?
Spore is a PC game developed by Maxis, published by EA (yes, that EA unfortunately), and designed by Will Wright of SimCity and The Sims fame. It released on September 2008, and I'd describe it as a simulator of life, focusing on evolution of a species, from a mere cell to a space empire. Each stage actually has its own genre! Spore has an incredibly interesting development history too, but that's quite the rabbit hole! It promised too many things it couldn't really deliver on, but I love the game for what it is, and so do many other people! The Spore community is still thriving to this day, too! Even as EA have seemingly abandoned us...
Anyway, the main draw of the game are the editors - you can truly make pretty much anything you want, and even moreso with mods! You can make creatures, buildings, vehicles, even entire adventures if you have the Galactic Adventures DLC!
For some basic stuff on the editors (and the rest of the game too), don't forget to check out the ingame manual, accessible by any time by pressing the H key. If you really wanna get into making creations, you can make use of glitches and more obscure techniques; I'm sure there tons of tutorials out there on Youtube and other places!
Of course, there's the gameplay side of things too. You can pick a planet and play through its evolution journey. I don't do this nearly as often as just making whatever in the editors, but honestly, I think this is a lot of fun too!
Enough of the basic coverage of the game, now for the main point of the section. This here is basically a let's play, where we will be following the journey of a species through all five stages of the game: Cell, Creature, Tribal, Civilization and Space, with some basic description of the gameplay of each! I won't be going super in depth on the intricacies here as well (for that you've got the Prima strategy guide, which is a fun read too, or the in-game Spore Guide), but I hope this makes for a fun read! Let's go!
We start our journey by selecting a solar system on the title screen that doesn't yet have a save game. Once you've played through every stage, you can start from any of them, but Cell is still probably the best to start from, as otherwise you'll be missing out on a number of Space Stage archetypes and abilities. This is where we'll start, naturally. I've already determined the archetype I will get by Space Stage, and also we will be playing on the Normal or Medium difficulty!
I've picked this rather blue planet, and I'll be naming it Blizac, in honor of the planet from the E3 2006 Spore showcase (the one with Screebles), and we will also pick a carnivorous cell to start with.
Cell Stage
This stage has the simplest gameplay of the five, and is also the shortest, but it already introduces some stuff for the later stages. Here you control a cell in a top-down view (unlike the rest of the game, which is 3D), and your main focus is to eat things in order to progress through the stage. However, there are many cells around, some of which may be your predators, or just passerby cells, or your prey!
Unlike the later stages, which heavily feature user-generated content, all the NPC cells you will encounter in this stage have been made by the developers themselves. Each level will also have its own set of cells every time, making the stage quite predictable. It's weird! It does work, though!
I will also be referring to cells by name a lot, so see the list of cells on the Spore Wikia, if needed!
After picking the planet and our starting cell, the Cell Stage starts out by showing a cutscene of life arriving on the planet via a meteorite flying through space, and turning into many smaller meteorites in the planet's atmosphere. Many of the chunks land in water, and we follow one of them, which then hatches into our cell!
We start gameplay for the first time. The game asks you to pick up 5 food points before progressing onto the next level; as I've picked a carnivorous cell, our little fella has to eat meat. We already encounter some cells, called Minno, which are herbivorous and thus shouldn't cause any issues. I ate two of them. Our cell then grows and progresses onto the next level, featuring a bunch more cells, including a big one, a Chomper, that chomped off half of my health. After a short bit, the game shows a cutscene of a Pokey (not to be confused with the cactus) being eaten by a Chomper, introducing the player to cells dropping parts the player hasn't unlocked yet. You can also skip ever encountering this cutscene if you kill a Pokey on your own, which will also drop a part, before that! Anyway, it dropped a Spike part, and now I enter the Cell Editor by calling for a mate and making my cell lay an egg.
The Cell Editor is also very simple; unlike the Creature Editor, it's 2D, you can only choose one body color, and you can't modify the length of the spine, though you can change the shape of the cell still. An entirely unique thing about the editor, and this stage, is that where you choose to place a few specific parts will actually affect the gameplay! For example, you can put a spike on the front to directly stab other cells, or on the back to defend yourself from other cells easier. I modified the cell's shape a little and put a spike at its very tip, with two mouths by each side. For now, I chose the call our species Stabby!
We're back to the game, and now on the next level again. The gameplay is fairly straight-forward at this point; eat food, get parts, edit your cell with new parts. The parts you unlock give you the ability to experiment a little, and the cells changing level to level will offer some variety for the playthrough! Another level, I violently poke a Booster and it drops a Jet part. It speeds your cell up a notable amount, but it's kinda jumpy and the cell will end up moving in bursts of speed, so I don't tend to use it that often. I just added additional Flagella to my cell for slightly more speed instead.
Some hectic stuff happened! I found and repeatedly poked a big Squirty, though it didn't drop anything upon death, sadly. I was hoping for the Poison part! I ate some more meat and went to the next level, where, after finding and chasing a now normal-sized Squirty, I find a Pinky eaten by a big Stabber, and the Pinky dropped a Cilia part which I wanted to get, but I had to fend off the Stabber by poking it repeatedly, and then after it dies, I come back and the part that dropped isn't even here anymore! Anyway, I get these parts I need from a Punky and another Squirty and almost die in the process. After, I struggled a little for a while to find meat, because it looks like I had to attack actual cells for those, and chasing them is a little difficult while being kinda slow like that!
I got to the next level and got eaten by a Ducky soon after. Soon after that, died to a Stabber for some reason. Then I get lucky and manage to catch and stab a Nosey - which are very, very fast and thus very hard to properly catch! It dropped a Proboscis part, an omnivorous mouth part, which lets you eat both cells (though not floating meat chunks; you drink cells instead) and plants. It's also cheaper than equipping separate carnivorous and herbivorous mouths at the same time! Though it still IS a little pricey. It might be my favorite part!
I progress to the next level again, encounter a bunch of Buzzies and immediately stab one, unlocking the last part - Electric! I hardly use it, because, unlike Poison which leaves a poisonous cloud trailing behind your cell constantly, Electric only zaps a ceratin nearby cell (or cells) once every few seconds. I was thinking of possibly using it this time, but I forgot about it until I got to the very last level anyway, so whoops! I finally got enough DNA to put a Cilia part on my cell, and I also considered switching the mouths and spike to just a proboscis, but realised how often I rely on the spike to stab bigger cells so they leave me alone. You can't do that with a proboscis! Anyway, the Cilia part has a speed boost and lets your cell turn basically instantly.
Another level, another death by being stabbed, ironically. Whoops! Thankfully, there's basically no death penalty, unless you're going for a deathless run. I progress again and encounter an egg, which will hatch into a Junior - an annoying little bugger! My cell's spike saves it a lot, actually, because it can poke cells directly through their mouths, without my cell taking damage, so it's not hard to deal with the annoying little buggers. There's also a Maa, a big cell that will lay some Junior eggs (unless you're on the easy difficulty) every once in a while, but is harmless otherwise.
You may be wondering if there's a Paa too - and there is, on the next and last level of the stage, which I just got to! Paas are basically big Juniors, and they fight off you and the Megamouths, but interact peacefully with Maas and Juniors. Some cells in this stage are pretty clearly related to each other, and they won't attack each other! Very nice! On the last level you are actually big enough to eat the Juniors and the eggs with one chomp. You can even eat the eggs as a herbivore for some reason. This was also really uneventful - we ate enough meat for our cell to randomly grow a very tiny brain, signifying the end of the stage. We're on the path to sapience, the game says!
I progress to the next stage immediately after randomly eating an egg. I end the stage with a Carnivore card, which I would have even if I did switch the cell's mouth to the proboscis - the card you get depends on how many cells or plants you kill or eat, instead of its actual diet. Let's move on to the Creature Stage!
Creature Stage
Before the stage properly starts, we get our first taste of the Creature Editor, though this specific one is called the Early Creature Editor. The parts are all the same as the parts you've unlocked throughout the Cell stage (which will actually be unavailable in the proper Creature Editor without mods), with an addition of some simple legs, and the full pattern selection.
Stabby now has fancier patterns and a Proboscis mouth! That means this is now an omnivorous creature, even despite ending the Cell stage with a Carnivore card. Using some usual Creature Editor tricks, I also give them digitigrade legs, and arms (without hands) for advance. The Cell parts now have new abilities in the Creature Stage, so spikes let the creature charge, poison lets them spit, and electric is purely just for socializing. I was running low on DNA for new parts, so I didn't get a lot of those. I'll be unlocking way more parts throughout the stage, anyway!
The creature I just made surfaced, called out for others of its kind, and then all of them crawled onto land. We start the gameplay in a nest. This is my favorite stage! It's now 3D, and you get to play as a sort of animal of your making. You can choose to befriend or attack other creatures (I will do both here), which is actually how you progress through this stage, instead of just eating a lot. There is now a whole specific continent to explore, user-made creatures to find, skeletons to pick up for parts, epics, other stuff!!!
I find another creature nest and immediately befriend them. You befriend other creatures by watching their action, and then repeating their action. For now, I just spam Sing because I know all they know is just Sing. But it gets a little more complex later on! I have sing-offs with three creatures of the species and become their allies, which lets me rest at their nest (nice rhyme), and also helps me progress through the stage a little. I befriend another species, and Stabby's brain grows, and now I can get a pack member. The pack will follow your creature around, and will assist you in attacking or befriending other creatures. If you're allied with a creature species, you can befriend a specific creature another time and make them join your pack. And you can do this with your own species, which I did, as I usually do!
We waddle around and pick up some skeletons for more parts, and befriend another species along the way. I spotted a creature which will be aggressive towards me! And I will use that to showcase the combat too. You can choose to attack a creature, which is more fun in my opinion, even if you mostly just spam your attack abilities over and over. Two abilities, Bite and Strike, let you attack at close range (Bite is more spammable and the only one available for every creature), and the other two, Charge and Spit, are only available at long range (though Spit has a certain window where you can be far enough from a creature to use it, yet close enough to use Bite or Strike); one just charges towards the creature, and the other spits poison at them, which slowly depletes their health for a few seconds. Anyway, we fought off the species with the Bite, Charge and Spit we already had, which actually.. causes the species to go extinct after killing a few of them. I'm iffy on that - I'm strictly against deliberately making species go extinct in real life! But I guess it works for gameplay purposes here...
Called a mate to get my creature to lay an egg and enter the editor. We can finally get hands and other better parts! Stabby can now jump and fly, Dance and Pose and Charm, grab things, use Strike, and has also improved Spit and Bite. That sounds like a lot, actually! They look a bit messy aesthetically, but that should be cleared once I get to the end of the stage.
Our species now migrates to a different nest. You follow the path outlined on the map and also on the ground, and just approach the new nest, which will also give you some progress and DNA points. Along the way, I encounter actual clubs as creatures, which is something I made years ago and forgot to put a gaprop tag (which prevents a creation from appearing in the actual stages) on. We proceeded to defeat the clubs somehow.
I encountered another species which are completely aggressive to me and can't be befriended at all - but they seem a bit too strong to deal with for now. We reach the nest and actually encounter a rogue! Rogues are singular creatures, found roaming the land, and they are quite strong - but you can choose to befriend them and even add them to your pack, or attack them! I'll be replacing my pack with Rogues eventually. I got surprisingly close to befriending this one, actually!
I fought another species and almost died in the process. Went back to my nest, healed, and then attacked them again. Stabby's brain grew a little again, and now I can get another pack member. I also updated them in the editor, and now I jump way higher. Befriending creatures is a little different at this point; the creatures you befriend will now call members of its own species nearby to assist them, which will make befriending them harder.
This is very easy to avoid, though: you can click on a creature (so it lets you push it) and push it far enough away from others of its own species, to the point where it won't attempt to call for others! Using this, you can even befriend creatures with higher social abilities than yours, as your pack will boost yours too! As I would discover later, this strategy doesn't really work on babies, though, as they prefer to follow mature creatures instead of being pushed around. I was just about to befriend this species, but then a Typical Creature Stage Event That Happens Once Every Playthrough And Is Kind Of Annoying happens - some meteorites decide to fall from the sky and scare off every creature, except for ours. Thank Spode that wasn't a spaceship, at least, so this ended quickly! In the event of either of these, you can't socialize, but it does make combat easier because creatures won't fight back due to panicking.
We attacked some species, we befriended some species. One I just made extinct left a floating egg behind. Eggs aren't supposed to float, but they will often do because this game is very buggy. Using my jump abilities I pushed it off the sky and ate it for some free DNA points. We also had another brain growth moment, meaning we can add a third pack member - but no more after that!
Fought off another species, a pack member almost died but we healed again and defeated them, as well as another mean species that just showed up. Then a spaceship showed up... I used the opportunity to just fight other creatures, as the spaceship will follow you and scare off nearby creatures. Spaceships are also highly inconvenient, and this one abducted a creature I was fighting and just disappeared right after! Rude! Didn't cause that much trouble, thankfully.
I forgot to screenshot this, but, after befriending a creature, Stabby's brain grows for the final time, and now the species has actually reached sapience. That means we can progress onto Tribal stage... but we won't do that for now! We're far from finished! I still need to upgrade my creature to its fullest and make it look pretty most importantly, replace my pack with rogues, and also find a better nest to move to!
Nothing much eventful happened after this. We befriended and fought some creatures. For some reason one of my pack members is a baby? There were some sleppy creatures (actual name) I intended to befriend, but I accidentally attacked one of them, and then one of my pack mates killed it while I was in the middle of befriending another one... I did still befriend the species, though! The baby in my pack is not having much trouble fighting, either, surprisingly, despite having half the health!
And sweet! I accidentally found another nest of my species that was close to the shore. This is going to be important for the later stages, so I'm going to select it as my main nest. I also got to fly over a volcano, which is very fun - it poses no threat to you, and will instead propel you very high upwards! For some reason, I even got to fly around with a BIG speed boost! I also found a rogue, which was a creature from another of my save games, and added it to my pack! Soon, I found another rogue as well, with maxed out social and offensive stats - even despite that, it was really easy to befriend, because you're four or three creatures socializing against one. The baby is still part of my pack, by the way! Still a baby!
I don't know why it took this late into the stage to encounter them, but I've found my first epic. Epics are giant, monstrous creatures, which are very hard to kill, impossible to socialize with, and they're also quite dangerous. Luckily, their spawning place always has a pile of some really rare bones, which is a big help! I'm not gonna bother killing the epic, as it's mostly just for bragging (it does give you an achievement though), but just know it's quite possible, and it's something I've done before. I found another epic soon after, too. I found another rogue as well, and now, unfortunately, the baby has to go. But they've done well, surviving thus far!
I found the location of the starting nest. Near the starting nest, in every save game, there will be a few shells on the beach, which you can pick up. I did that and went back to my nest. If you're holding something, you can click on a nest and your creature will automatically gently put that item near the nest - it serves no purpose, but it's a cute little thing!
I realised our Stabbies don't look all that weird for an alien creature, and I felt they had to get a big makeover. Which meant turning them into centaurs. Stabby can now jump VERY high, has improved social and attack capabilities, improved Glide, and at this point, is pretty much ready for Tribal stage. Or, well, so I thought.
As it turns out, due to the fact that I've been befriending about as many creatures as I've been making extinct, it wasn't enough to end the stage on Adaptable instead of Predator. I won't take it - I entirely just restarted the game and started befriending as many creatures as I could! Admittedly, it started to get really annoying. It looks like I unlocked all parts I could, at least, so I could start befriending only babies and normal creatures, instead of going for the alphas like I usually did since defeating or befriending an alpha will give you a part.
After. Way too much pain. I finally scraped by and ended with Adaptable, ending with 14 creatures made extinct and a whole 44 befriended. I had to befriend 29 whole creatures in a row! Gosh! Overall, though! This stage was fun, and this stage was always my favorite! I love getting to play as a silly little critter of my own making. Now, Stabby has achieved true sapience finally, and can now develop tools and huts! Time for Tribal Stage, next issue!
Racing Like the Staff
Hello readers and welcome to Racing like the Staff, a section where I do 150cc on different Mario Kart games, but the twist is, I take on the Grand Prix by using the combination that a staff and expert staff member used in that Cup. If you're still a little confused, by this I mean if the track is in the Mushroom Cup, then that's the Cup that I race in. Unfortunately, I don't have copies of the Mario Kart games before Mario Kart 7, so it's only that, 8 and Deluxe that will be getting this treatment.
Summer continues to treat us to lukewarm weathers, despite some instances of sun, but for many people associate summer with holidays. This isn't always entirely possible this year, but I still found a way to get us back onto a cruise ship, as we go onto Daisy Cruiser in Mario Kart 7, a game which we haven't featured for several months, but I thought we'd do it anyway.
The combination for the staff for Daisy Cruiser is Daisy with the Pipe Frame, Sponge tyres and the Peach Parasol, and the stats are as follows:
- Speed – Just under three bars
- Acceleration – Four and a half bars
- Weight – One and a half bars
- Handling – Three bars
- Off-road – Four bars
Kalimari Desert
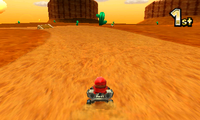
We didn't get off to a roaring start, only climbing up the order to sixth place, but this was a blessing in disguise, as the item I picked up was a Star and while everyone was wating for the train to pass, I just shot straight through. Low speed or rubberbanding soon brought Princess Peach back into contention, but when the Spiny Shell came, I had to be waiting for the train to pass, so she was caught up in the explosion as well. Rosalina and Shy Guy got through, but I quickly passed Shy Guy and Rosalina took herself out on a Banana. We then sailed to victory, with a string of Bananas protecting me from Peach's red shells.
DK Pass
I thought I started fine, but then Shy Guy and Princess Peach were past, shortly followed by Wario. An inopportune slipstream threw me into a wall, and nearly off the track, but a sign bounced me back on and I was able to get past Wario and Peach. Shy Guy proved a bit tricky, but a Red Shell sorted him out. I hoped to glide onto victory, but some poor driving had me fall of the track, amusingly the Spiny Shell that had locked onto me then had nowhere to go, so it ended up doing a full circle of the track, before hitting Peach, and catching me and Shy Guy in the explosion. The acceleration paid off, and I was able to claim victory again.
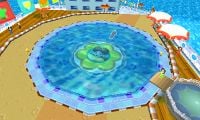
Daisy Cruiser
My start quickly fell apart, as I found myself down in fifth by the time we got to the dining section, and running into a table didn't much help matters. Meanwhile, a lack of Items and Coins hindered my progress as things just happened all around me. I thought a Triple Red Shell might be my ticket, but Bananas proved otherwise, and try as I might, I just couldn't catch Peach or Shy Guy resulting in a third place finish.
Maple Treeway
I had a solid start, getting myself up to second, and Wario running into the back of my Shell as we landed, but then things quickly went pear-shaped. Princess Peach got a Star from a leaf pile, hitting into me and a slipstreaming Rosalina knocked me off the track, leaving me plum-last. This continued until Mii fell off, allowing me into seventh and using the tree shortcut with a Golden Mushroom, I was back into fifth. A slow lap resulted in nothing, but another Mushroom at the end of the lap allowed me to use the shortcut again and get myself into contention for first with Peach and Shy Guy around. I was helped by a Lightning Bolt and that got me into first, where I held the lead.
I didn't class this as a slow combination from first look, but apparently it is as I failed to really catch up to people. Holding them off with items seemed fine, but catching was nigh-on impossible for some reason. Sponge tyres and Peach Parasol are my go-toes for Mario Kart 7, but pairing them with the Pipe Frame may not be the way forward.
The combination for the expert staff for Daisy Cruiser is Daisy with the Tiny Tug, Sponge tyres and the Peach Parasol, and the stats are as follows:
- Speed – Two and a half bars
- Acceleration – Just over four bars
- Weight – Two bars
- Handling – Three bars
- Grip – Four bars
Kalimari Desert
Last time I used the Tiny Tug, it was one of the most diabolical combination I've had to sit through, this time it was like a dream come true. We were only up to fifth by first set of Item Boxes, but the Triple Mushrooms got me onto the Glide Pad and straight into the lead. Then, I only had to worry about Princess Peach when we stopped for the train on the second lap and randomly at the end.
DK Pass
A dominating start saw me go from first to seventh, and miss out on Items, but as everyone took themselves out, I was soon up into fourth and drifting past Yoshi. Wario and Shy Guy put up a fight, but they soon fell to me, before a Spiny Shell allowed them both back past, and I then drove off the track in the uphill section. Thankfully, Blooper ink and giant snowballs saved the day and despite being down in fifth, I drifted past them all before the track turned to pure snow, and then avalanched my way to a victory.
Daisy Cruiser
And I thought last time was a disaster, my Bob-omb decided to go millimetres in front of me when I chucked it, meaning I was the only casualty and quickly down to seventh, a star helped out a little, but Rosalina's Tanooki Tail and Wario's Green Shell put me back into my place, and a lack of Items wasn't helping. A Green Shell on Metal Mario and Golden Mushroom brought me into third, and I passed Shy Guy underwater, but Princess Peach was too far ahead to catch.
Maple Treeway
Things looked hopeful at the start, as I got into second and quickly first, but on out of nowhere Metal Mario and Lakitu Bob-omb put an end to that dream. I clawed my way back to the top spot, and thought after a Mushroom and Star from the leaf piles, I'd be in good stead, but the Spiny Shell had other ideas and blew me up as I glided, allowing Peach, Shy Guy and Metal Mario past. Rosalina was also there, but I did get past her to get fourth place.
The Tiny Tug was better than what I remembered it being, but still suffered from the same issues that the Pipe Frame did, in that it wasn't fast enough to catch anything without the use of Items, and big leads amounted to nothing as everyone else on the map was able to get into your wingmirrors easily. Maybe avoid both of these combos in the long run.
Mach Speed Mayhem
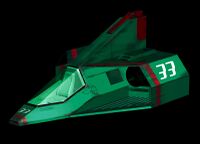
Hello, 'Shroom readers! As you can tell, I needed a bit of an impromptu break last month. I hope you weren't all too disappointed! But don't worry, I'm back this time and here to stay. For this month, I bring you what you chose two months ago - #33: Lisa Brilliant! Another anime original, she's the wife of Samurai Goroh, and the leader of her own bandit gang. Naturally, this causes quite a few marital disagreements!
GP Legend series
Created for the anime, Lisa makes her first appearance in episode 5 - and contrary to what you might expect, we'll be going through her appearances individually, because she was a much more minor character than you'd think! In her debut, Lisa shows exactly why she's a space bandit captain, as she starts by meeting with Jack Levin and promptly winning him over with flirty charms and booze. Once he collapses, she happily lifts his key, swipes some treasure, and sabotages all the Mobile Task Force's machines! Jack and Rick Wheeler do some digging around those parts, and when they drop Lisa's name, they find a bunch of thugs telling them to piss off. Good thing they quickly learn just what she wanted it for - a repainted Astro Robin is her ride of choice for the upcoming High-Jump course! With Jack out of the race, he can't just sit by and watch... and he doesn't have to, as Rick refits the Dragon Bird to have a second seat! Thanks to their teamwork and a useful assist from Dr. Stewart, they're able to corner her, but before they can catch her? Lisa gets a lift from Samurai Goroh, and it's dramatically revealed... they're married! Still, at least the Astro Robin is returned. That's something, alright!
Lisa makes a couple less-significant appearances over the next span of episodes. In episode 13, the Antonio Guster one, she shows up long enough to tell off Goroh for keeping Guster in his team despite the latter's wild and dangerous ways, an then to give him a ride out after his confrontation with Guster at the end of the episode. Episode 21 features the Ladies-Only Race, so naturally, Lisa gets to be relevant! By getting kidnapped in order to help Miss Killer's evil plot to win by default, and then when getting to the actual ladies race, getting in a catfight with Kate Alen and blowing her off the race course with a spaceship attack. Unfortunately for her, it turns out that's enough to disqualify her. Oh well.
In her next appearance, episode 25, Lisa gets a pretty major role! She swipes the legendary Reactor Might, the never-before-mentioned object of unparalleled power, outplaying an old rival gang of hers and Goroh's. Said gang, led by the leader Bibirichi, has been getting foiled left and right by Lisa... so when Zoda offers them a chance to act, they take it! Bibirichi is able to lure Lisa and her gang into a trap, Zoda boarding to take the Reactor Might for himself! When Goroh and Rick arrive, they confront Zoda... and are soon joined by Lisa, who tricked Bibirichi's foolish goons into letting her out and promptly had them take her place in a cell. At least she got to accomplish something! Unfortunately, Zoda strikes Goroh down, keeping Lisa busy and resulting in Rick unable to recover the Reactor Might. At least our trio of heroes made it all out!
Aaand... then Lisa disappears until the very end of the anime. Seriously, she makes her next appearances - and last - in the final trio of episodes, 49 through 51. And she barely appears! She only shows up to back up Goroh with some extra manpower during his Cool Anime Moments, and cameo at the very end. For a character who felt like she could have had a lot of focus, she really got buried...
Lisa's machine is the Panzer Emerald, which is probably the most unique looking of the anime-original machines... not that that's saying much, unfortunately. The Panzer Emerald is painted green because it's Goroh's favorite color, with Lisa painting her husband's Fire Stingray in her choice of pink. It's got an A Body, a D Boost, and a B Grip, and unfortunately nobody's really written much about it, either. The perils of being an anime-only character are many!
Speaking of the games, Lisa gets more focus than the anime ever gives her in the first one! In F-Zero: GP Legend on the GBA, Lisa appears in the story mode as one of the eight playable characters. Her arc is about being defeated and mind-wiped by Black Shadow, and then going on an amnesic journey to regain her memory, battling with Goroh, Guster, and Zoda on her way to find the one who started it all - Black Shadow! Luckily, she regains her memory by defeating him, so all is well. She also appears in a couple other stories, mostly as parallel missions - for example, we see Goroh and Black Shadow's confrontations with her from their side of things. Though for them, it does play out a little differently, so what is the truth? F-Zero Climax shares a little extra about her - Goroh's got a bunch of bandits who joined up solely to follow Lisa around like a bunch of dolts, but they don't have a chance. She's got one man in her life!
I don't have anything heavy in the way of trivia, so this is one of those one-section sections. Head on over to the thread, because it really WILL be next month this time!
SIMulation
Written by: Baby Luigi (talk)
Yello! With August kicking in, summer isn't quite over yet; however, that doesn't mean the end of the heat for some areas. My area specifically doesn't have hot weather ending until October, since we get hot weather later in the year; September and August are our summer months. While you chill out, hopefully with air conditioning or perhaps taking a swim somewhere, it's a great time for me to release a new section. This month has been quite super busy with the Awards and stuff, and with me recently becoming the new Poll Committee chairperson, there's lots of excitement going on! But that doesn't mean I'll skimp out this month writing about The Sims, still packed with plenty and plenty of things to talk about, still having a strong Summer of Sims !
This month, we'll still be going over some CAS traits. Some new ones got added since the Cottage Living update, and that won't be the last DLC the game will receive.
Aspirations
What are aspirations? They're essentially a dream wish of your Sims, though completion of them is entirely optional, and your Sim is free to choose another aspiration in any time. However, once you completed them, you get rewarded certain traits, such as never getting tense or always being funny to others.
Aspirations are categorized by what type they are, and the type they are gives them certain advantages. For example, someone who has an aspiration under the "nature" category will be better at finding rare collectibles. The bonus trait that comes with them does not go away if a Sim changes aspirations.
Note that children come with their own aspirations, and there is a hidden one that you can get only if you fulfill a specific criteria, though I will cover children in more detail in a later issue as well as discuss the hidden aspiration. Also note that three traits that come with the Eco Lifestyle pack cannot be assigned in CAS and appear only as a trait in Manage Worlds.
Additionally, there are Star Wars-themed aspirations from the Journey to Batuu game pack but I'll cover them in-depth when I write a section specifically talking about it.
If you're playing in the tutorial level, you get three unique aspirations you can complete while you are learning the game. If your Sim finishes the tutorial, they earn the Over-Achiever reward trait, where they earn a career boost, earn promotions more quickly, and improve their skills more quickly. While all goals are the same, these aspirations come with locked traits that help your Sim reach their goal.
Koops, Your Emblem is on Fire
Hi.
It is that time of the month again, you know what to do. (You have nothing to do. Just watch the video).
PS: Bit of a warning but I only noticed after recording that the audio is a little early in parts after pausing and resuming recording, so you'll have to deal with that for this issue... Consider it this month's gimmick! (We don't usually have gimmicks, but I will feed you whatever.)
We got a new recruit, and he carries with him a sharp edge, in more ways than one. Meet Raven!
Raven
A troubled mercenary with a grudge against House Ostia.
Level 5 Mercenary.
HP: 25~30 (85%)
Str: 8~11 (55%)
Skl: 11~14 (40%)
Spd: 13~15 (45%)
Luck: 2~4 (35%)
Def: 5~7 (25%)
Res: 1~3 (15%)
Con: 8 (+1 Upon promotion)
Move: 5 (+1 Upon promotion)
Weapons Ranks: C Swords (+40 Sword, +E Axes Upon promotion)
Just like how Priscilla is better Serra, Raven is pretty much better Guy, but not just better Guy... he is a MUCH better Guy.
Raven joins with pretty good base stats for his level and join time and also has an existent strength stat/growth, unlike his myrmidon friend, and his stats only get better on Hector Hard mode, given that he receives Hard Mode Bonuses for being an enemy recruitable. His bulk isn't very good, but he can still take more of a beating than some of your other units. He has very low luck, so expect to potentially see some deceptively high hitrates on him, but it's still nothing he should really be worried about. Stat-wise, Raven is a unit who has the luxury of having both his strength and speed reach high places.
It's easy to look at Raven's stats to understand what kind of unit he is, but Raven does have the one downside of starting out as a level 5 Mercenary. This means that he is five levels away from promotion, and until then, he's sword-locked. However, with stats as good as he has, he'll have little trouble getting there, especially with the next few maps actually being relatively nice to foot units, and getting to level 10 will allow him to promote into the Hero class, giving him access to axes, and thus, to hand axes, fixing his issue of not having 1-2 range in a game that heavily favors it.
I haven't used Raven a lot but it's easy to see why he's a good unit, and a huge step above easily any other sword infantry unit in the game. Needless to say Hector will have to be careful around him...
And for our second and final unit for today...
Canas
A scholar, and a novice student of ancient magics.
Level 8 Shaman.
HP: 21 (70%)
Mag: 10 (45%)
Skl: 9 (40%)
Spd: 8 (35%)
Luck: 7 (25%)
Def: 5 (25%)
Res: 8 (45%)
Con: 7 (+1 Upon promotion)
Move: 5 (+1 Upon promotion)
Weapons Ranks: B Dark (+40 Dark, +E Staves Upon promotion)
We had Erk for Anima magic, Lucius for Light magic, it was about time we got a Dark magic user, and Canas is right here to fill that spot. And no one is competing for said spot given that he will be our only Dark magic user for essentially the entire game barring Endgame. Canas comes with a high magic base, decent skill and speed, low defense but not too bad considering he has 21 HP, and good resistance.
His constitution, unfortunately, doesn't allow him to wield the lightest Dark tome (Flux) without a speed penalty of 1, so his speed is actually perpetually lower than it seems, and it will look like Canas will have major trouble doubling anything that isn't a fellow Shaman or an armor knight. However, such is far from the case. Canas starts out at level 8, a measly two levels away from promotion, and he can get both right in his join map as well. His promotion to the Druid class not only grants him that +1 Con that he needs to efficiently wield Flux, but it also showers him with a whopping +3 speed boost, putting him at 11 speed at the very least, allowing him to double any enemy he needs to. That amount of speed combined with the high attack power of Dark tomes quickly make Canas a force to be reckoned with.
Upon promotion, Canas also gains access to staves, just like the other mages. He starts off with E rank, so he'll only be using Heal for a while, so if you're looking for good staff rank you're better off giving the first Guiding Ring to Lucius instead... is what I would say if Priscilla didn't exist. The fact is, Canas is pretty much ready for the whole game the moment he adds that ring to his infinity gauntlet, so there is no reason to hold off promoting him. As the one man meant to represent Dark Magic in this game, he sure gives a good impression and doesn't disappoint in the slightest.
And that does it for this month. Tune in next time... as we tread through another two chapters and meet some other people to conscript into our army... as well as witnessing Florina's single most valuable contribution to our cause, if you know what I'm sayin'.
| The 'Shroom: Issue 173 | |
|---|---|
| Staff sections | Staff Notes • The 'Shroom Spotlight |
| Features | Fake News • Fun Stuff • Palette Swap • Pipe Plaza • Critic Corner • Strategy Wing |


