Donkey Kong Land 2: Difference between revisions
m (→Levels) |
LinkTheLefty (talk | contribs) mNo edit summary |
||
| (169 intermediate revisions by 53 users not shown) | |||
| Line 1: | Line 1: | ||
{{italic title}} | {{italic title}} | ||
{{ | {{game infobox | ||
|image=[[ | |image=[[File:Donkey Kong Land 2 Box Art.jpg|250px]] | ||
|developer=[[Rare | |developer=[[Rare Ltd.|Rareware]] | ||
|publisher=[[Nintendo]] | |publisher=[[Nintendo]] | ||
| | |release='''Game Boy:'''<br>{{release|USA|September 23, 1996<ref>[http://web.archive.org/web/19970606094724/http://www.nintendo.com/newsroom/articles/mysteryframe1.html Nintendo.com (Wayback Machine)]</ref><br> or September 30, 1996<ref>[http://web.archive.org/web/20190725200347/https://i.ebayimg.com/images/g/CrcAAOSwwrFdBeNl/s-l1600.jpg Nintendo Press Release sheet]</ref>|Australia|October 1996<ref>''Nintendo Magazine System'' (AU) Issue #44, page 38.</ref>|Europe|November 1996<ref>''Nintendo Magazine System'' (UK) Issue #50, page 52.</ref>|Japan|November 23, 1996}} '''Virtual Console (3DS):'''<br>{{release|Japan|April 16, 2014|Europe|October 23, 2014|Australia|October 24, 2014|USA|February 26, 2015}} | ||
|genre=Platformer | |genre=[[Genre#Platform games|Platformer]] | ||
|modes=Single player | |modes=Single player | ||
|ratings={{ratings|esrb=K-A|cero=A}} | |ratings={{ratings|esrb=K-A|cero=A|pegi=3}} | ||
|platforms=[[Game Boy]] | |platforms=[[Game Boy]], [[Virtual Console]] ([[Nintendo 3DS]]) | ||
|media={{ | |media={{media|gb=1|3dsdl=1}} | ||
|input={{input|gb=1|3ds=1}} | |input={{input|gb=1|3ds=1}} | ||
}} | }} | ||
'''''Donkey Kong Land 2''''' is a | '''''Donkey Kong Land 2''''' is a [[Genre#Platform games|platform game]] developed by [[Rare Ltd.|Rareware]] and published by [[Nintendo]] for the [[Game Boy]] in 1996. It is a sequel to ''[[Donkey Kong Land]]'' and a predecessor to ''[[Donkey Kong Land III]]''. Like its predecessor, the game features a yellow cartridge and special features for the [[Super Game Boy]]. The game has a special banana border when played on a Super Game Boy. | ||
''Donkey Kong Land 2'' is very similar to its counterpart [[Super Nintendo Entertainment System|SNES]] title, ''[[Donkey Kong Country 2: Diddy's Kong Quest]]''. While it has the same storyline, areas, and setting, each [[level]] received a new layout. The game also stars [[Diddy Kong]] and [[Dixie Kong]]. | |||
== | The game was eventually rereleased on the [[Nintendo 3DS]]'s [[Virtual Console#Nintendo 3DS|Virtual Console]] in Europe in April 2014, in Japan and Australia in October 2014, and later in February 2015 for North America. | ||
[[File:Crocodile Isle | ==Story== | ||
The | [[File:DKL2 Crocodile Isle.png|200px|left|thumb|The Kongs at the first world, Gangplank Galleon, from the Crocodile Isle map]] | ||
The story is essentially a retelling of the events in ''Donkey Kong Country 2: Diddy's Kong Quest''<ref>''Donkey Kong Land 2'' instruction booklet, [[Media:DKL2 Story manual.png|page 2–3]]</ref> and is the only ''Donkey Kong Land'' game with the same story as its ''Donkey Kong Country'' counterpart. [[Kaptain K. Rool]] and the [[Kremling Krew]] kidnap [[Donkey Kong]] and in exchange for Donkey Kong's safe return, the Kremlings demand the [[banana hoard]]. Diddy and Dixie decline and head on a journey on [[Crocodile Isle]] to rescue Donkey Kong. | |||
Diddy and Dixie travel through several worlds, including the [[Gangplank Galleon]], [[Krem Cauldron]], [[Krazy Kremland]], [[Gloomy Gulch]], and [[K. Rool's Keep]]. The [[Kong]]s eventually reach [[Stronghold Showdown]] at the peak of Crocodile Isle, where they find Donkey Kong tied up in ropes. Before they can rescue him, he is lifted into [[The Flying Krock]]. There, the Kongs encounter Kaptain K. Rool. They engage in battle, and the Kongs eventually defeat the Kremling leader, and Donkey Kong frees himself from his chains. Before Kaptain K. Rool can attack again, Donkey Kong knocks him out of his ship, sending him into the ocean. | |||
Even after freeing Donkey Kong, both Diddy and Dixie must pay 47 [[Kremkoin]]s to [[Klubba]] to enter the [[Lost World (Donkey Kong Country 2: Diddy's Kong Quest)|Lost World]]. After completing the world, the mouth of the stone crocodile head opens. Diddy and Dixie go inside and battle Kaptain K. Rool again. The Kongs eventually defeat Kaptain K. Rool another time and then flee from Crocodile Isle. From a distance, Diddy, Dixie, and Donkey Kong watch as Crocodile Isle sinks into the ocean. | |||
{{br|left}} | |||
== | ==Gameplay== | ||
{| border=" | [[File:Pirate Panic DKL2.png|thumb|160px|Dixie runs to a Neek]] | ||
! | Diddy and Dixie are the two playable characters, and the player can only control one Kong on screen at a time. Both Kongs share some basic abilities such running, jumping, and swimming, and they are both able to climb [[rope]]s and hang from hooks. Diddy is able to perform a [[Cartwheel Attack|cartwheel]] and is faster than Dixie, although he has trouble traveling across large abysses. The main difference with Dixie is her [[Helicopter Spin]], which allows her to whip enemies and slowly fall or glide in midair. Diddy holds a [[barrel]] in front whereas Dixie holds it above herself with her ponytail. If both Kongs are in play, and the leader is hit by an enemy or hazard, the game automatically switches to the other Kong. If either Kong is missing their partner and gets hit by an enemy or hazard, they lose a life. | ||
The game progression works the same as in other ''[[Donkey Kong Country (series)|Donkey Kong Country]]'' series. Each world has some levels (usually five or six) which the Kongs must complete in order until they reach a world boss at the end. After defeating the world boss, Diddy and Dixie can access the next world. Every world has a [[Kong Kollege]], where [[Wrinkly Kong]] can save the player's progress, and a [[Funky's Flights II|Funky's Flights]], where [[Funky Kong]] leases his [[Biplane Barrel]] for the Kongs to travel into another world. | |||
There are either one or two [[Bonus Barrel]]s in every level and one of [[DK Coin|Cranky's Video Game Hero Coin]]s. Each Bonus Barrel leads to a [[Bonus Level]], where the Kongs must complete an objective to obtain a [[Kremkoin]]. Some Bonus Levels can be accessed if the Kongs carry a [[Cannonball|kannonball]] into a [[Cannon|kannon]]. Once the Kongs have collected every Kremkoin, they can access the Lost World. Video Game Hero Coins help improve Diddy's rank in [[Cranky's Video Game Heroes|Video Game Heroes]]. Kremkoins and Video Game Hero Coins are both necessary for 100% [[completion]] of the game. | |||
Some levels have an [[Animal Barrel]], which transform the Kongs into the pictured [[Animal Friends|Animal Friend]]. Some Animal Barrels are required to enter while others are hidden from the main path and are optional to enter. As an Animal Friend, the Kongs can often defeat enemies more easily or reach hidden areas and items. In some levels, an Animal Friend is required to use its ability to progress, such as [[Squawks the Parrot|Squawks]], who can fly up vertical paths. When an Animal Friend crosses a [[No Animal Sign]], it turns back into the Kongs and an item is rewarded. | |||
==Characters== | |||
===Playable characters=== | |||
{|width=100% cellspacing=0 border=2 cellpadding=3 class="wikitable dk"style="border-collapse:collapse;background:white" | |||
|- | |||
!width=8%|Image | |||
!width=7%|Name | |||
!Description | |||
|- | |||
|align="center"|[[File:Diddy Kong DKL2.png]] | |||
|align="center"|[[Diddy Kong]] | |||
|Diddy is the main protagonist of the game. He goes on an adventure with Dixie to rescue Donkey Kong. | |||
|- | |||
|align="center"|[[File:Dixie Kong DKL2.png]] | |||
|align="center"|[[Dixie Kong]] | |||
|Dixie is the girlfriend and sidekick of Diddy. Her [[Helicopter Spin]] allows her to glide across pits. | |||
|} | |||
===Supporting characters=== | |||
{|width=100% cellspacing=0 border=2 cellpadding=3 class="wikitable dk"style="border-collapse:collapse;background:white" | |||
|- | |||
!width=8%|Image | |||
!width=7%|Name | |||
!Description | |||
|- | |||
|align="center"|[[File:Wrinkly Kong DKL2 sprite.png]] | |||
|align="center"|[[Wrinkly Kong]] | |||
|Just like in ''Donkey Kong Country 2'', Wrinkly runs the [[Kong Kollege]]. Unlike the previous game, Wrinkly no longer offers advice, but she still saves the player's game. In each world, Wrinkly at first saves the game at no cost, but subsequently prices it at two [[Banana Coin]]s. | |||
|- | |||
|align="center"|[[File:Funky Kong DKL2 sprite.png]] | |||
|align="center"|[[Funky Kong]] | |||
|Like Wrinkly, Funky returns with the same role as in ''Donkey Kong Country 2''. He operates [[Funky's Flights II|Funky's Flights]], where the Kongs can pay two Banana Coins to use the [[Funky Barrel]] and travel around the [[Crocodile Isle]] map to select a world which they have visited already. It is the only game of the ''Donkey Kong Land'' series that Funky appears in. | |||
|- | |||
|align="center"|[[File:Donkey Kong DKL2 sprite.png]] | |||
|align="center"|[[Donkey Kong]] | |||
|Donkey Kong was kidnapped by Kaptain K. Rool, who demands the Kongs give the banana hoard to him. Diddy and Dixie go on an adventure to rescue Donkey Kong. | |||
|} | |||
===Animal Friends=== | |||
{|width=100% cellspacing=0 border=2 cellpadding=3 class="wikitable dk"style="border-collapse:collapse;background:white" | |||
|- | |||
!width=8%|Image | |||
!width=7%|Name | |||
!Description | |||
|- | |||
|align="center"|[[File:Clapper DKL2 sprite.png]] | |||
|align="center"|[[Clapper]] | |||
|Depending on which level he is in, Clapper the seal has two different purposes. When Diddy or Dixie jump on Clapper, he can breathe into the lava to cool it into water, or in another level, Clapper can breathe on water to turn it into ice. The effects are temporary in both levels and wear off after a few seconds. | |||
|- | |||
|align="center"|[[File:Enguarde DKL2 sprite.png]] | |||
|align="center"|[[Enguarde]] | |||
|Enguarde the swordfish is the staple underwater Animal Friend. He can maneuver underwater easily, defeat aquatic enemies, and perform a [[super move|superstab]] to charge quickly underwater. | |||
|- | |||
|align="center"|[[File:Rambi DKL2 sprite.png]] | |||
|align="center"|[[Rambi]] | |||
|Returning from ''Donkey Kong Land'', Rambi the rhino retains his ability to charge through enemies and obstacles. He can no longer break open walls with his horn, but is able to perform a [[super move|supercharge]]. | |||
|- | |||
|align="center"|[[File:Rattly DKL2 sprite.png]] | |||
|align="center"|[[Rattly]] | |||
|Rattly the rattlesnake has the ability to jump high. He bounce off most enemies, including Zingers, and perform a [[super move|superjump]] if the player holds down {{button|gb|Select}} and releases it. | |||
|- | |||
|align="center"|[[File:Squawks DKL2 sprite.png]] | |||
|align="center"|[[Squawks]] | |||
|Squawks the parrot appears in large mines and deep wasp hives. He has the ability to fly around the area and spit nuts to attack enemies. [[Quawks|A relative of his]] is usable in a single level, [[Parrot Chute Panic (Donkey Kong Land 2)|Parrot Chute Panic]], and cannot fly up or attack foes, slowly descending when grabbed onto. Squawks and his relative have the same sprite because of the [[Game Boy]]'s monochrome graphics. | |||
|- | |||
|align="center"|[[File:Squitter DKL2 sprite.png]] | |||
|align="center"|[[Squitter]] | |||
|Squitter the spider is a companion who can defeat enemies with his web projectiles and can create web platforms to jump on. | |||
|} | |||
==Enemies== | |||
===Kremlings=== | |||
{|width=100% cellspacing=0 border=2 cellpadding=3 class="wikitable dk"style="border-collapse:collapse;background:white" | |||
|- | |||
!width=8%|Image | |||
!width=7%|Name | |||
!Description | |||
!width=7%|First level appearance | |||
!width=7%|Last level appearance | |||
|- | |||
|align="center"|[[File:Kaboing DKL2 sprite.png]] | |||
|align="center"|[[Kaboing]] | |||
|These enemies have two peg legs, making them repeatedly hop up and down as they move around. The Kongs can defeat a Kaboing by either jumping on it or cartwheeling into it. | |||
|align="center"|[[Gangplank Galley (Donkey Kong Land 2)|Gangplank Galley]] | |||
|align="center"|[[Animal Antics (Donkey Kong Land 2)|Animal Antics]] | |||
|- | |||
|align="center"|[[File:Kannon DKL2 sprite.png]] | |||
|align="center"|[[Kannon]] | |||
|These large, cannon-wielding enemies shoot [[Cannonball|kannonball]]s and barrels to attack the Kongs. Kannons can be defeated by either a jump attack or a roll attack. | |||
|align="center"|[[Kannon's Klaim (Donkey Kong Land 2)|Kannon's Klaim]] | |||
|align="center"|[[Chain Link Chamber (Donkey Kong Land 2)|Chain Link Chamber]] | |||
|- | |||
|align="center"|[[File:Klampon DKL2 sprite.png]] | |||
|align="center"|[[Klampon]] | |||
|Similar to [[Klaptrap]]s, Klampons repeatedly move their jaws up and down, attempting to bite the Kongs. Diddy or Dixie can defeat a Klampon with a jump attack but rolling into them results in the Klampton biting the Kong and thus hitting them. | |||
|align="center"|[[Hothead Hop]] | |||
|align="center"|[[Fiery Furnace (Donkey Kong Land 2)|Fiery Furnace]] | |||
|- | |||
|align="center"|[[File:Klank DKL2 sprite.png]] | |||
|align="center"|[[Klank]] | |||
|Klanks return in ''Donkey Kong Land 2'' even though a similar enemy, [[Kutlass]]es, do not. Klanks ride in a [[Roller Coaster]] and only appear in one level, where Diddy and Dixie must race by them to the finish. Klanks can be defeated by a jump attack, but if hit from behind, they get a small boost. | |||
|colspan=2, align="center"|[[Rickety Race (Donkey Kong Land 2)|Rickety Race]] | |||
|- | |||
|align="center"|[[File:Klinger DKL2 sprite.png]] | |||
|align="center"|[[Klinger]] | |||
|Klingers repeatedly climb either ropes or chains and then slide down. The Kongs can use a barrel to defeat a Klinger. | |||
|align="center"|[[Mainbrace Mayhem (Donkey Kong Land 2)|Mainbrace Mayhem]] | |||
|align="center"|[[Toxic Tower (Donkey Kong Land 2)|Toxic Tower]] | |||
|- | |||
|align="center"|[[File:Klobber DKL2 sprite.png]] | |||
|align="center"|[[Klobber]] | |||
|Klobbers are common enemies who hide in barrels to disguise themselves. When Diddy and Dixie approach a Klobber, it pops out of the barrel, attempting to push the Kongs into an enemy or a pit. Diddy or Dixie can jump on a Klobber to push it back inside its barrel. They can defeat a Klobber picking up the barrel it is inside and throwing it. | |||
|align="center"|[[Pirate Panic (Donkey Kong Land 2)|Pirate Panic]] | |||
|align="center"|[[Fiery Furnace (Donkey Kong Land 2)|Fiery Furnace]] | |||
|- | |- | ||
|align="center"|[[File:Klomp DKL2 sprite.png]] | |||
| | |align="center"|[[Klomp]] | ||
|Klomps are basic Kremling grunts who can be defeated by either a jump attack or a roll attack. | |||
|align="center"|[[Pirate Panic (Donkey Kong Land 2)|Pirate Panic]] | |||
|align="center"|[[Web Woods (Donkey Kong Land 2)|Web Woods]] | |||
|- | |- | ||
|align="center" | | |align="center"|[[File:Klubba DKL2 sprite.png]] | ||
|align="center"|[[Klubba]] | |||
|Klubba is an enormous musclebound Kremling who guards the [[Lost World (Donkey Kong Country 2: Diddy's Kong Quest)|Lost World]] until all 47 [[Kremkoin]]s are collected and paid to him. | |||
|colspan=2, align="center"|[[Klubba's Kiosk]] | |||
|- | |- | ||
|align="center" | | |align="center"|[[File:Krochead DKL2 sprite.png]] | ||
|align="center"|[[Krockhead]]s | |||
|Krockheads are, as their name suggests, crocodile heads that stick out of the [[lava]] or water. Diddy and Dixie can use them as platforms to get across. In some levels, Krockheads only appear above water briefly before sinking in the water. The Kongs are sometimes required to use Krockhead Barrels to make them rise to the surface. | |||
|align="center"|[[Hothead Hop]] | |||
|align="center"|[[Fiery Furnace (Donkey Kong Land 2)|Fiery Furnace]] (only in a [[Bonus Level]]) | |||
|- | |- | ||
|align="center" | | |align="center"|[[File:Krook DKL2 sprite.png]] | ||
|align="center"|[[Krook]] | |||
|When the Kongs encounter a Krook, it throws a hook on its hand. If the Kongs avoid being hit by the hook, it returns to Krook like a boomerang. The Kongs can defeat them by either jumping or rolling into it. | |||
|align="center"|[[Squawks's Shaft (Donkey Kong Land 2)|Squawks's Shaft]] | |||
|align="center"|[[Toxic Tower (Donkey Kong Land 2)|Toxic Tower]] | |||
|- | |- | ||
|align="center" | | |align="center"|[[File:Kruncha DKL2 sprite.png]] | ||
|align="center"|[[Kruncha]] | |||
|Krunchas are muscular Kremlings who move back and forth in area. If Diddy or Dixie jump on a Kruncha, it gets enraged and moves back and forth rapidly. It calms down after a few seconds. Krunchas can only be defeated by a barrel or an Animal Friend attacking it. | |||
|align="center"|[[Mainbrace Mayhem (Donkey Kong Land 2)|Mainbrace Mayhem]] | |||
|align="center"|[[Klobber Karnage (Donkey Kong Land 2)|Klobber Karnage]] | |||
|} | |||
===Other enemies=== | |||
{|width=100% cellspacing=0 border=2 cellpadding=3 class="wikitable dk"style="border-collapse:collapse;background:white" | |||
|- | |- | ||
!width=8%|Image | |||
!width=7%|Name | |||
!Description | |||
!width=7%|First level appearance | |||
!width=7%|Last level appearance | |||
|- | |- | ||
|align="center" | | |align="center"|[[File:Click-Clack DKL2.png]] | ||
|align="center"|[[Click-Clack]] | |||
|Click-Clacks are large beetles who move along the ground. Diddy or Dixie must jump on them twice to defeat them. When the Kongs first jump on a Click-Clack, it flips over. While the Click-Clack is flipped over, the Kongs can pick it up and throw it at other enemies. If the Kongs do not pick up the flipped over Click-Clack, it gets back up after a few seconds. | |||
|align="center"|[[Mainbrace Mayhem (Donkey Kong Land 2)|Mainbrace Mayhem]] | |||
|align="center"|[[Gusty Glade (Donkey Kong Land 2)|Gusty Glade]] | |||
|- | |- | ||
|align="center"|[[File:Flitter DKL2 sprite.png]] | |||
| | |align="center"|[[Flitter]] | ||
|Flitters are dragonflies who often fly above large pits, often in a group. The Kongs must jump from Flitters to get across a gap. When they jump on a Flitter, it gets defeated. | |||
|align="center"|[[Topsail Trouble (Donkey Kong Land 2)|Topsail Trouble]] | |||
|align="center"|[[Animal Antics (Donkey Kong Land 2)|Animal Antics]] | |||
|- | |- | ||
|align="center" | | |align="center"|[[File:Flotsam DKL2.png]] | ||
|align="center"|[[Flotsam]] | |||
|Flotsams are stingray enemies who swim in the water. They can only be defeated by Enguarde's stab attack. | |||
|align="center"|[[Lockjaw's Locker (Donkey Kong Land 2)|Lockjaw's Locker]] | |||
|align="center"|[[Arctic Abyss (Donkey Kong Land 2)|Arctic Abyss]] | |||
|- | |- | ||
|align="center" | | |align="center"|[[File:LockjawDKL2.png]] | ||
|align="center"|[[Lockjaw]] | |||
|Lockjaws are piranha enemies. Upon noticing the Kongs, Lockjaw lunges itself at them, attempting to bite them. They can be defeated by Enguarde. | |||
|align="center"|[[Lockjaw's Locker (Donkey Kong Land 2)|Lockjaw's Locker]] | |||
|align="center"|[[Arctic Abyss (Donkey Kong Land 2)|Arctic Abyss]] | |||
|- | |- | ||
|align="center" | | |align="center"|[[File:Mini-Necky DKL2 sprite.png]] | ||
|align="center"|[[Mini-Necky|Necky]] | |||
|These small bird enemies appear in the corner of the screen and swoop as the Kongs approach them. Diddy or Dixie can avoid Necky by jumping over it. The Kongs can defeat a Necky by jumping on it. | |||
|align="center"|[[Kannon's Klaim (Donkey Kong Land 2)|Kannon's Klaim]] | |||
|align="center"|[[Kreepy Krow (Donkey Kong Land 2 level)|Kreepy Krow]] | |||
|- | |- | ||
|align="center" | | |align="center"|[[File:Neek DKL2.png]] | ||
|align="center"|[[Neek]] | |||
|Neeks are rats that move back and forth on land. They are one of the most basic enemies aside from Klomps. The Kongs can defeat Neeks by either rolling into them or jumping on them. | |||
|align="center"|[[Pirate Panic (Donkey Kong Land 2)|Pirate Panic]] | |||
|align="center"|[[Animal Antics (Donkey Kong Land 2)|Animal Antics]] | |||
|- | |- | ||
|align="center" | | |align="center"|[[File:Puftup DKL2 sprite.png]] | ||
|align="center"|[[Puftup]] | |||
|Puftups are pufferfish who inflate when the Kongs approach them. Some explode, causing four of its spikes to shoot in each direction. The Kongs must avoid being hit by the spikes. Puftups can only be defeated by Enguarde. | |||
|align="center"|[[Lava Lagoon (Donkey Kong Land 2)|Lava Lagoon]] | |||
|align="center"|[[Arctic Abyss (Donkey Kong Land 2)|Arctic Abyss]] | |||
|- | |- | ||
|align="center" | | |align="center"|[[File:Screech DKL2 sprite.png]] | ||
|align="center"|[[Screech]] | |||
|Squawks gets in a race against Screech during the level, Screech's Sprint. Screech has no form of attacks unlike other enemies, and cannot be defeated. | |||
|colspan=2, align="center"|[[Screech's Sprint (Donkey Kong Land 2)|Screech's Sprint]] | |||
|- | |- | ||
|align="center" | | |align="center"|[[File:Shuri DKL2.png]] | ||
|align="center"|[[Shuri]] | |||
|Shuri are starfish enemies who spiral as they move toward the Kongs. If Diddy or Dixie get hit by a Shuri, they get injured. Like other underwater enemies, Shuris can only be defeated by Enguarde. | |||
|align="center"|[[Lockjaw's Locker (Donkey Kong Land 2)|Lockjaw's Locker]] | |||
|align="center"|[[Arctic Abyss (Donkey Kong Land 2)|Arctic Abyss]] | |||
|- | |- | ||
|align="center" | | |align="center"|[[File:Spiny DKL2 sprite.png]] | ||
|align="center"|[[Spiny (Donkey Kong Country 2: Diddy's Kong Quest)|Spiny]] | |||
|Spinys are porcupines that are invulnerable to most attacks due to the quills on their back. If Diddy or Dixie touch a Spiny's quills, they take damage. They can defeat Spiny by rolling into them from the front or by throwing an object at them. | |||
|align="center"|[[Hornet Hole (Donkey Kong Land 2)|Hornet Hole]] | |||
|align="center"|[[Animal Antics (Donkey Kong Land 2)|Animal Antics]] | |||
|- | |- | ||
|align="center" | | |align="center"|[[File:Zinger DKL2.png]] | ||
|align="center"|[[Zinger]] | |||
|These wasps are one of the most common enemies in the game. Zingers are often in midair but sometimes appear on the ground. The Kongs cannot defeat Zingers by themselves and always take damage if they get in contact with one. Zingers can only be defeated if the Kongs throw an object at them or by an Animal Friend. | |||
|align="center"|[[Hornet Hole (Donkey Kong Land 2)|Hornet Hole]] | |||
|align="center"|[[Animal Antics (Donkey Kong Land 2)|Animal Antics]] | |||
|} | |||
==Bosses== | |||
{|width=100% cellspacing=0 border=2 cellpadding=3 class="wikitable dk"style="border-collapse:collapse;background:white" | |||
|- | |- | ||
!width=8%|Image | |||
!width=7%|Name | |||
!Description | |||
!width=7%|First level appearance | |||
!width=7%|Last level appearance | |||
|- | |- | ||
|align="center" | | |align="center"|[[File:Krow DKL2.png]] | ||
|align="center"|[[Krow]] | |||
|Krow is a large Mini-Necky and the first boss of the game. He is located at the crow's nest of the Gangplank Galleon. Krow attacks by throwing eggs at the Kongs. Sometimes an egg lands on the mast below, and the Kongs can attack Krow by throwing the egg at him. After being hit a number of times, Krow is defeated. Later, the [[Kreepy Krow|ghost of Krow]] is encountered at the end of Gloomy Gulch, as the fourth boss. The boss battle is different than the first battle, but he is attacked the same way. Krow sends several Mini-Neckys after the Kongs until an egg falls to the ground. The Kongs must pick it up and throw it at Krow to attack him. After being hit, Krow travels up higher into the level, and the Kongs must chase him by jumping from hooks and climbing ropes. After four hits, Krow is defeated again. | |||
|align="center"|[[Krow's Nest (Donkey Kong Land 2)|Krow's Nest]] | |||
|align="center"|[[Kreepy Krow (Donkey Kong Land 2 level)|Kreepy Krow]] | |||
|- | |- | ||
|align="center"|[[File:Kleaver DKL2.png]] | |||
| | |align="center"|[[Kleaver]] | ||
|A large sword encountered at the end of Krem Cauldron, as the second boss of the game. He attacks by shoots fireballs at the Kongs. Sometimes, he shoots a barrel, which the Kongs can break to release a kannonball. The Kongs can attack Kleaver by throwing a kannonball at him. After this, Kleaver chases Diddy and Dixie over a large gap filled with lava. As the battle progresses, Kleaver's attacks become faster and more powerful. After taking enough hits from a kannonball, Kleaver is defeated. | |||
|align="center", colspan=2|[[Kleaver's Kiln]] | |||
|- | |- | ||
|align="center" | | |align="center"|[[File:King Zing DKL2.png]] | ||
|align="center"|[[King Zing]] | |||
|King Zing is the third boss, fought at the end of Krazy Kremland. He is a large Zinger who is fought within a beehive. During the boss battle, the Kongs transform into Squawks, who must spit nuts at King Zing's stinger to attack him. After a few hits, King Zing moves much faster and summons regular Zingers to attack Squawks. After being hit a few more times, King Zing is defeated. | |||
|align="center", colspan=2|[[King Zing Sting (Donkey Kong Land 2)|King Zing Sting]] | |||
|- | |- | ||
|align="center" | | |align="center"|[[File:Kaptain K. Rool DKL2.png]] | ||
|align="center"|[[King K. Rool#Donkey Kong Land 2|Kaptain K. Rool]] | |||
|Kaptain K. Rool is the leader of the [[Kremling]]s and the final boss of the game. He attacks by shooting kannonballs at the Kongs, some of which are spiked. He also slides between corners in an attempt to hit the Kongs. K. Rool sometimes shoots a barrel at the Kongs, and they must jump on the barrel to reveal another kannonball. The kannonball can then be thrown into Kaptain K. Rool's cannon, causing it to backfire. After enough times, K. Rool is defeated. Kaptain K. Rool is fought again in the Lost World, where his attacks are longer and faster. This time, Kaptain K. Rool is defeated from only kannonball being thrown into his blunderbuss. | |||
|align="center"|[[K. Rool Duel (Donkey Kong Land 2)|K. Rool Duel]] | |||
|align="center"|[[Krocodile Kore (Donkey Kong Land 2)|Krocodile Kore]] | |||
|} | |||
==Items and objects== | |||
{|width=100% cellspacing=0 border=2 cellpadding=3 class="wikitable dk"style="border-collapse:collapse;background:white" | |||
|- | |- | ||
!width=8%|Image | |||
!width=7%|Name | |||
!Description | |||
|- | |- | ||
|align="center" | | |align="center"|[[File:DKL2 GB Banana sprite.png]] | ||
|align="center"|[[Banana]] | |||
|Floating fruit found in every level. When 100 are collected, the player is granted one extra life. | |||
|- | |- | ||
|align="center" | | |align="center"|[[File:DKL2 GB Banana Bunch sprite.png]] | ||
|align="center"|[[Banana Bunch]] | |||
|A bunch of bananas which provide ten bananas to the Kongs when collected. They are less common than regular bananas. | |||
|- | |- | ||
|align="center" | | |align="center"|[[File:DKL2 GB Banana Coin sprite.png]] | ||
|align="center"|[[Banana Coin]]s | |||
|Currency that can be spent at the [[Kong Kollege]] or [[Funky's Flights II|Funky's Flights]]. | |||
|- | |- | ||
|align="center" | | |align="center"|[[File:DKL2 GB DK Coin sprite.png]] | ||
|align="center"|[[DK Coin|Cranky's Video Game Hero Coin]]s | |||
|These are large, golden coins with the "DK" logo on them. One of Cranky's Video Game Hero Coins is hidden in every level, and when the Kongs collect every one, Diddy comes in first in the [[Cranky's Video Game Heroes|Video Game Heroes]] contest. Video Game Hero Coins are required for 100% completion. | |||
|- | |- | ||
|align="center" | | |align="center"|[[File:DKL2 GB Crate sprite.png]] | ||
|align="center"|[[Crate]]s | |||
|These are objects that Diddy and Dixie can pick up and throw at enemies. | |||
|- | |- | ||
|align="center"|[[File:DKL2 GB Letter K sprite.png]][[File:DKL2 GB Letter O sprite.png]][[File:DKL2 GB Letter N sprite.png]][[File:DKL2 GB Letter G sprite.png]] | |||
| | |align="center"|[[KONG Letters]] | ||
|A set of four letters found in every level. They usually indicate how far the Kongs are into a level, with the 'K' representing the start and 'G' representing the end. If the Kongs collect all four letters, they earn an [[extra life]]. | |||
|- | |- | ||
|align="center" | | |align="center"|[[File:DKL2 GB No Animal Sign sprite.png]] | ||
|align="center"|[[No Animal Sign]] | |||
|A sign that appears in every level with an Animal Friend. When an Animal Friend crosses a No Animal Sign, it turns back into the Kongs and leaves an item behind. | |||
|- | |- | ||
|align="center" | | |align="center"|[[File:Treasure Chest DKL2.png]] | ||
|align="center"|[[Treasure chest]] | |||
|Treasure chests are similar to crates as they can be picked up and thrown. | |||
|- | |- | ||
|align="center" | | |align="center"|[[File:DKL2 GB Extra Life Balloon sprite.png]] | ||
|align="center"|[[Red Balloon|Extra Life Balloon]] | |||
|By collecting an Extra Life Balloon, Diddy and Dixie are rewarded an extra life. | |||
|} | |||
===Barrels=== | |||
{{more images|section=yes|Light Barrel}} | |||
{|width=100% cellspacing=0 border=2 cellpadding=3 class="wikitable dk"style="border-collapse:collapse;background:white" | |||
|- | |- | ||
!width=8%|Image | |||
!width=7%|Name | |||
!Description | |||
|- | |- | ||
|align="center" | | |align="center"|[[File:DKL2 GB Rambi Barrel sprite.png]][[File:DKL2 GB Rattly Barrel sprite.png]][[File:DKL2 GB Enguarde Barrel sprite.png]][[File:DKL2 GB Squawks Barrel sprite.png]][[File:DKL2 GB Squitter Barrel sprite.png]] | ||
|align="center"|[[Animal Barrel]]s | |||
|Barrels that transform the Kongs into the Animal Friend who is displayed on the barrel. For example, jumping into an Animal Barrel depicting Rambi's face transforms the Kongs into Rambi. | |||
|- | |- | ||
|align="center" | | |align="center"|[[File:DKL2 GB Barrel sprite.png]] | ||
|align="center"|[[Barrel]]s | |||
|Barrels can be picked up and thrown like crates, except barrels roll on the ground and defeat multiple enemies along the way. They break when hitting into a wall. | |||
|- | |- | ||
|align="center"|[[File:DKL2 GB Barrel Cannon sprite.png]] | |||
| | |align="center"|[[Barrel Cannon|Barrel Kannon]]s | ||
|A type of barrel with an opening on the top. The Kongs can jump into the opening and blast in the direction the Barrel Kannon is facing. | |||
|- | |- | ||
|align="center" | | |align="center"|[[File:DKL2 GB Bonus Barrel sprite.png]] | ||
|align="center"|[[Bonus Barrel]]s | |||
|Special barrels that will transport the Kongs to a [[Bonus Level]]. | |||
|- | |- | ||
|align="center" | | |align="center"|[[File:DKL2 GB DK Barrel sprite.png]] | ||
|align="center"|[[DK Barrel]]s | |||
|If a Kong touches a DK Barrel, the other Kong is returned into the game. Unlike the ''Donkey Kong Country'' games, all DK Barrels are found in midair. If both Kongs are present, the DK Barrel does nothing. Unlike ''Donkey Kong Land'', there is an icon in the bottom right corner to indicate which Kongs are available. | |||
|- | |- | ||
|align="center"|[[File:DKL2 GB ! Barrel sprite.png]] | |||
|align="center"|[[Invincibility Barrel|Exclamation Point Barrel]]s | |||
|Special barrels that make the Kongs invincible temporarily. | |||
|- | |- | ||
| | | | ||
|align="center"|[[Light Barrel]]s | |||
|Exclusive to Glimmer's Galleon are Light Barrels, which Diddy or Dixie can swim into to temporarily illuminate the entire level, allowing them to see the path forward. | |||
|- | |- | ||
|align="center" | | |align="center"|[[File:DKL2 GB Barrel Cannon sprite.png]] | ||
|align="center"|[[Spinner Barrel|Rotatable Barrel]]s | |||
|Similar to the Barrel Kannons, except the player can control the direction that it aims in. | |||
|- | |- | ||
|align="center" | | |align="center"|[[File:DKL2 GB Star Barrel sprite.png]] | ||
|align="center"|[[Star Barrel]]s | |||
|A Star Barrel appears in every level as a checkpoint. By activating it, if the Kongs lose a life, they can continue the level from where the Star Barrel was activated. | |||
|- | |- | ||
|align="center" | | |align="center"|[[File:DKL2 GB TNT Barrel sprite.png]] | ||
|align="center"|[[TNT Barrel]]s | |||
|Explosive barrels that detonate upon impact with an enemy or the ground. | |||
|} | |||
==Levels== | |||
''Donkey Kong Land 2'' features most of the same worlds from ''Donkey Kong Country 2: Diddy's Kong Quest'' except [[Krem Cauldron]], which is a fusion of [[Crocodile Cauldron]] and [[Krem Quay]]. Most of the levels have the same name but their layouts are different. Two levels from ''Donkey Kong Country 2'' were replaced with a loosely related counterpart: [[Haunted Hall]] with [[Krazy Koaster]], and [[Castle Crush]] with [[Dungeon Danger]]. There are 39 levels and 7 boss levels in the game. | |||
{|border="1"cellspacing=0 cellpadding=2 class="wikitable dk"align="center"style="background:whitesmoke"width=99% | |||
!colspan=5 style="background:saddlebrown;color:white"align=center|<big>Levels and Bonus Areas</big> | |||
|- | |- | ||
! colspan=5 style="background: | !colspan=5 style="background:saddlebrown;color:white"align=center|{{color-link|Gangplank Galleon (world)|white|Gangplank Galleon}} | ||
|- style=background:#D3D3D3 align=center | |-style=background:#D3D3D3 align=center | ||
!width=5%|# | !width=5%|# | ||
!width=35%|Level | !width=35%|Level | ||
| Line 152: | Line 391: | ||
!width=20%|Music theme | !width=20%|Music theme | ||
|- | |- | ||
|align="center" | | |align="center"|1||align="center"|[[Pirate Panic (Donkey Kong Land 2)|Pirate Panic]]||align="center"|1||align="center"|Ship deck||align="center"|Snakey Chantey | ||
|- | |||
|align="center"|2||align="center"|[[Mainbrace Mayhem (Donkey Kong Land 2)|Mainbrace Mayhem]]||align="center"|1||align="center"|Ship mast||align="center"|Lockjaw's Saga | |||
|- | |||
|align="center"|3||align="center"|[[Gangplank Galley (Donkey Kong Land 2)|Gangplank Galley]]||align="center"|1||align="center"|Ship deck||align="center"|Lockjaw's Saga | |||
|- | |||
|align="center"|4||align="center"|[[Lockjaw's Locker (Donkey Kong Land 2)|Lockjaw's Locker]]||align="center"|0||align="center"|Ship hold||align="center"|Lockjaw's Saga | |||
|- | |- | ||
|align="center" | | |align="center"|5||align="center"|[[Topsail Trouble (Donkey Kong Land 2)|Topsail Trouble]]||align="center"|1||align="center"|Ship mast||align="center"|Lockjaw's Saga | ||
|- | |- | ||
|align="center"|6||align="center"|'''Boss level:''' [[Krow's Nest (Donkey Kong Land 2)|Krow's Nest]]||align="center"|0||align="center"|Ship mast||align="center"|Crocodile Cacophony | |||
|- style=background:#D3D3D3 align=center | |- | ||
!colspan=5 style="background:saddlebrown;color:white"align=center|{{color-link|Krem Cauldron|white}} | |||
|-style=background:#D3D3D3 align=center | |||
!width=5%|# | !width=5%|# | ||
!width=35%|Level | !width=35%|Level | ||
| Line 164: | Line 411: | ||
!width=20%|Music theme | !width=20%|Music theme | ||
|- | |- | ||
|align="center" | | |align="center"|7||align="center"|[[Hothead Hop]]||align="center"|2||align="center"|Lava||align="center"|Hot Head Bop | ||
|- | |- | ||
|align="center" | | |align="center"|8||align="center"|[[Kannon's Klaim (Donkey Kong Land 2)|Kannon's Klaim]]||align="center"|1|| align="center"|Mines||align="center"|Hot Head Bop | ||
|- | |- | ||
|align="center" | | |align="center"|9||align="center"|[[Lava Lagoon (Donkey Kong Land 2)|Lava Lagoon]]||align="center"|2||align="center"|Ship hold||align="center"|Lockjaw's Saga | ||
|- | |- | ||
|align="center" | | |align="center"|10||align="center"|[[Redhot Ride]]||align="center"|1||align="center"|Lava||align="center"|Hot Head Bop | ||
|- | |- | ||
|align="center" | | |align="center"|11||align="center"|[[Squawks's Shaft (Donkey Kong Land 2)|Squawks's Shaft]]||align="center"|2||align="center"|Mines||align="center"|Hot Head Bop | ||
|- | |- | ||
|align="center" | | |align="center"|12||align="center"|[[Barrel Bayou (Donkey Kong Land 2)|Barrel Bayou]]||align="center"|2||align="center"|Swamp||align="center"|Bayou Boogie | ||
|- | |- | ||
| | |align="center"|13||align="center"|[[Glimmer's Galleon (Donkey Kong Land 2)|Glimmer's Galleon]]||align="center"|2||align="center"|Ship hold||align="center"|Lockjaw's Saga | ||
|- | |||
== | |align="center"|14||align="center"|[[Krockhead Klamber (Donkey Kong Land 2)|Krockhead Klamber]]||align="center"|1||align="center"|Swamp||align="center"|Bayou Boogie | ||
=== | |- | ||
|align="center"|15||align="center"|[[Rattle Battle (Donkey Kong Land 2)|Rattle Battle]]||align="center"|1||align="center"|Ship deck||align="center"|Lockjaw's Saga | |||
| | |||
|- | |- | ||
| align="center" |[[ | |align="center"|16||align="center"|[[Slime Climb (Donkey Kong Land 2)|Slime Climb]]||align="center"|1||align="center"|Ship mast||align="center"|Lockjaw's Saga | ||
| | |||
|- | |- | ||
| align="center" | | |align="center"|17||align="center"|'''Boss level:''' [[Kleaver's Kiln]]||align="center"|0||align="center"|Lava||align="center"|Crocodile Cacophony | ||
| | |||
= | |||
| | |||
|- | |- | ||
| align= | !colspan=5 style="background:saddlebrown;color:white"align=center|{{color-link|Krazy Kremland|white}} | ||
! | |-style=background:#D3D3D3 align=center | ||
| | !width=5%|# | ||
!width=35%|Level | |||
!width=10%|Bonus Areas | |||
!width=30%|Type of level | |||
!width=20%|Music theme | |||
|- | |- | ||
| align="center" |[[ | |align="center"|18||align="center"|[[Hornet Hole (Donkey Kong Land 2)|Hornet Hole]]||align="center"|1||align="center"|Hive||align="center"|Flight Of The Zinger | ||
|- | |- | ||
| align="center" | | |align="center"|19||align="center"|[[Target Terror (Donkey Kong Land 2)|Target Terror]]||align="center"|2||align="center"|Roller coaster||align="center"|Disco Train | ||
| | |||
| | |||
= | |||
| | |||
|- | |- | ||
| align="center" |[[ | |align="center"|20||align="center"|[[Bramble Blast (Donkey Kong Land 2)|Bramble Blast]]||align="center"|2||align="center"|Brambles||align="center"|Stickerbush Symphony | ||
| | |||
|- | |- | ||
| align="center" |[[ | |align="center"|21||align="center"|[[Rickety Race (Donkey Kong Land 2)|Rickety Race]]||align="center"|0||align="center"|Roller coaster||align="center"|Disco Train | ||
| | |||
|- | |- | ||
| align="center" |[[ | |align="center"|22||align="center"|[[Bramble Scramble (Donkey Kong Land 2)|Bramble Scramble]]||align="center"|1||align="center"|Brambles||align="center"|Stickerbush Symphony | ||
| | |||
|- | |- | ||
| align="center" |[[ | |align="center"|23||align="center"|[[Mudhole Marsh (Donkey Kong Land 2)|Mudhole Marsh]]||align="center"|2||align="center"|Swamp||align="center"|Bayou Boogie | ||
| | |||
|- | |- | ||
| align="center" |[[ | |align="center"|24||align="center"|[[Rambi Rumble (Donkey Kong Land 2)|Rambi Rumble]]||align="center"|2||align="center"|Hive||align="center"|Flight Of The Zinger | ||
|The | |||
|- | |- | ||
| align="center" | | |align="center"|25||align="center"|'''Boss level:''' [[King Zing Sting (Donkey Kong Land 2)|King Zing Sting]]||align="center"|0||align="center"|Hive||align="center"|Crocodile Cacophony | ||
| | |||
|- | |- | ||
!colspan=5 style="background:saddlebrown;color:white"align=center|{{color-link|Gloomy Gulch|white}} | |||
! | |-style=background:#D3D3D3 align=center | ||
| | !width=5%|# | ||
| | !width=35%|Level | ||
!width=10%|Bonus Areas | |||
!width=30%|Type of level | |||
!width=20%|Music theme | |||
|- | |- | ||
| align="center" |[[ | |align="center"|26||align="center"|[[Ghostly Grove (Donkey Kong Land 2)|Ghostly Grove]]||align="center"|1||align="center"|Forest||align="center"|Bayou Boogie | ||
| | |||
| align="center" | | |||
| align="center" | | |||
|- | |- | ||
| align="center" |[[ | |align="center"|27||align="center"|[[Krazy Koaster]]||align="center"|1||align="center"|Roller coaster||align="center"|Disco Train | ||
| | |||
| align="center" | | |||
| align="center" | | |||
|- | |- | ||
| align="center" | | |align="center"|28||align="center"|[[Gusty Glade (Donkey Kong Land 2)|Gusty Glade]]||align="center"|2||align="center"|Forest||align="center"|Bayou Boogie | ||
| | |||
| align="center" | | |||
| align="center" | | |||
|- | |- | ||
| align="center" |[[ | |align="center"|29||align="center"|[[Parrot Chute Panic (Donkey Kong Land 2)|Parrot Chute Panic]]||align="center"|2||align="center"|Hive||align="center"|Flight Of The Zinger | ||
| | |||
| align="center" | | |||
| align="center" | | |||
|- | |- | ||
| align="center" |[[ | |align="center"|30||align="center"|[[Web Woods (Donkey Kong Land 2)|Web Woods]]||align="center"|1||align="center"|Forest||align="center"|Bayou Boogie | ||
| | |||
| align="center" | | |||
| align="center" | | |||
|- | |- | ||
| align="center" | | |align="center"|31||align="Center"|'''Boss level:''' [[Kreepy Krow (Donkey Kong Land 2 level)|Kreepy Krow]]||align="center"|0||align="center"|Ship mast||align="center"|Crocodile Cacophony | ||
| | |||
| align="center" | | |||
| align="center" | | |||
|- | |- | ||
!colspan=5 style="background:saddlebrown;color:white"align=center|{{color-link|K. Rool's Keep|white}} | |||
|-style=background:#D3D3D3 align=center | |||
| | !width=5%|# | ||
!width=35%|Level | |||
| | !width=10%|Bonus Areas | ||
!width=30%|Type of level | |||
!width=20%|Music theme | |||
|- | |- | ||
| align="center" |[[ | |align="center"|32||align="center"|[[Arctic Abyss (Donkey Kong Land 2)|Arctic Abyss]]||align="center"|2||align="center"|Ice||align="center"|In a Snow-bound Land | ||
| | |||
| align="center" | | |||
| align="center" | | |||
|- | |- | ||
| align="center" | | |align="center"|33||align="center"|[[Windy Well (Donkey Kong Land 2)|Windy Well]]||align="center"|1||align="center"|Mines||align="center"|Hot Head Bop | ||
| | |||
| align="center" | | |||
| align="center" | | |||
| | |||
| | |||
|- | |- | ||
| align="center" |[[ | |align="center"|34||align="center"|[[Dungeon Danger]]||align="center"|2||align="center"|Castle||align="center"|Krook's March | ||
| | |||
| align="center" | | |||
| align="center" | | |||
|- | |- | ||
| align="center" |[[ | |align="center"|35||align="center"|[[Clapper's Cavern (Donkey Kong Land 2)|Clapper's Cavern]]||align="center"|1||align="center"|Ice||align="center"|In a Snow-bound Land | ||
| | |||
| align="center" | | |||
| align="center" | | |||
|- | |- | ||
| align="center" | | |align="center"|36||align="center"|[[Chain Link Chamber (Donkey Kong Land 2)|Chain Link Chamber]]||align="center"|2||align="center"|Castle||align="center"|Krook's March | ||
| | |||
| align="center" | | |||
| align="center" | | |||
|- | |- | ||
| align="center" |[[ | |align="center"|37||align="center"|[[Toxic Tower (Donkey Kong Land 2)|Toxic Tower]]||align="center"|1||align="center"|Castle||align="center"|Krook's March | ||
| | |||
| align="center" | | |||
| align="center" | | |||
|- | |- | ||
| align="center" | | |align="center"|38||align="center"|'''Boss level:''' [[Stronghold Showdown]]||align="center"|0||align="center"|Castle||align="center"|False Triumph? | ||
| | |||
''' | |||
| align="center" | | |||
| align="center" | | |||
|- | |- | ||
!colspan=5 style="background:saddlebrown;color:white"align=center|{{color-link|The Flying Krock|white}} | |||
! | |-style=background:#D3D3D3 align=center | ||
| | !width=5%|# | ||
| | !width=35%|Level | ||
!width=10%|Bonus Areas | |||
!width=30%|Type of level | |||
!width=20%|Music theme | |||
|- | |- | ||
| align="center" |[[ | |align="center"|39||align="center"|[[Screech's Sprint (Donkey Kong Land 2)|Screech's Sprint]]||align="center"|1||align="center"|Brambles||align="center"|Stickerbush Symphony<br>Run, Rambi! Run! | ||
| | |||
| align="center" | | |||
| align="center" | | |||
|- | |- | ||
| align="center" |[[ | |align="center"|40||align="center"|'''Boss level:''' [[K. Rool Duel (Donkey Kong Land 2)|K. Rool Duel]]||align="center"|0||align="center"|Castle||align="center"|Crocodile Cacophony | ||
| | |||
| align="center" | | |||
| align="center" | | |||
|- | |- | ||
!colspan=5 style="background:saddlebrown;color:white"align=center|{{color-link|Lost World (Donkey Kong Country 2: Diddy's Kong Quest)|white|Lost World}} | |||
! | |-style=background:#D3D3D3 align=center | ||
| | !width=5%|# | ||
| | !width=35%|Level | ||
!width=10%|Bonus Areas | |||
!width=30%|Type of level | |||
!width=20%|Music theme | |||
|- | |- | ||
| align="center" |[[ | |align="center"|41||align="center"|[[Jungle Jinx (Donkey Kong Land 2)|Jungle Jinx]]||align="center"|1||align="center"|Jungle||align="center"|Stickerbush Symphony | ||
| | |||
| align="center" | | |||
| align="center" | | |||
|- | |- | ||
| align="center" | | |align="center"|42||align="center"|[[Black Ice Battle (Donkey Kong Land 2)|Black Ice Battle]]||align="center"|1||align="center"|Ice||align="center"|In a Snow-bound Land | ||
| | |||
| align="center" |[[ | |||
| align="center" | | |||
| | |||
= | |||
|- | |||
|- | |- | ||
| align="center" |[[ | |align="center"|43||align="center"|[[Fiery Furnace (Donkey Kong Land 2)|Fiery Furnace]]||align="center"|1||align="center"|Lava||align="center"|Hot Head Bop | ||
| | |||
|- | |- | ||
| align="center" |[[ | |align="center"|44||align="center"|[[Klobber Karnage (Donkey Kong Land 2)|Klobber Karnage]]||align="center"|1||align="center"|Jungle||align="center"|Stickerbush Symphony | ||
| | |||
|- | |- | ||
| align="center" |[[ | |align="center"|45||align="center"|[[Animal Antics (Donkey Kong Land 2)|Animal Antics]]||align="center"|1||align="center"|Jungle||align="center"|Stickerbush Symphony | ||
| | |||
|- | |- | ||
| align="center" |[[ | |align="center"|46||align="center"|'''Boss level:''' [[Krocodile Kore (Donkey Kong Land 2)|Krocodile Kore]]||align="center"|0||align="center"|Lava||align="center"|Crocodile Cacophony | ||
|} | |||
| | |||
==Version differences== | |||
===Regional differences=== | |||
The Japanese version of the game has various changes from the English version: | |||
*The title was changed to ''Donkey Kong Land: Diddy's Kong Quest''. This is not to be confused with the English ''[[Donkey Kong Land]]'', which was also renamed in Japanese (to ''Super Donkey Kong GB''). | |||
*As with ''Donkey Kong Country 2'', various enemies have different names in Japanese: | |||
**[[Krow]] was renamed to Zocky. | |||
**[[Click-Clack]] was renamed to Beetle. | |||
**[[King Zing]] was renamed to King B. | |||
*While [[Krazy Koaster]] and [[Dungeon Danger]] were given new names in both languages (compared to ''Donkey Kong Country 2''{{'}}s [[Haunted Hall]] and [[Castle Crush]]), a few more levels were given new names in the Japanese version of ''Donkey Kong Land 2'' compared to ''Donkey Kong Country 2'': [[Krockhead Klamber (Donkey Kong Land 2)|Krockhead Klamber]], [[Screech's Sprint (Donkey Kong Land 2)|Screech's Sprint]], [[Klobber Karnage (Donkey Kong Land 2)|Klobber Karnage]], and [[Animal Antics (Donkey Kong Land 2)|Animal Antics]]. | |||
*Various levels underwent minor layout changes: | |||
**In [[Bramble Blast (Donkey Kong Land 2)|Bramble Blast]], the Zinger before the Star Barrel was removed in the Japanese version. | |||
**In [[Parrot Chute Panic (Donkey Kong Land 2)|Parrot Chute Panic]], in a section shortly after the Star Barrel, two Zingers in close proximity to a DK Barrel were removed in the Japanese version. This ends up fixing a sprite overload issue where the DK Barrel wouldn't appear in the English version if too many Zingers appeared on-screen at once. | |||
**In [[Kreepy Krow (Donkey Kong Land 2 level)|Kreepy Krow]], the rope climbing section was shortened slightly, making this part a bit easier. A hook was moved upwards to compensate. | |||
*In the English version, a glitch involving the bonus stage counter (for stars or enemies) would occur if the player would lose a bonus stage with stars or enemies remaining, and then defeat enemies or collect bananas afterwards; this would cause the Kremkoin chime to be heard once the counter reaches zero. The Japanese version fixes this by resetting the counter to zero when the player would lose a bonus stage. Oddly, this bug fix did not carry over to ''[[Donkey Kong Land III]]'', causing the bug to occur in all versions of that game (although only when defeating enemies). | |||
*[[#Cheat codes|Cheat codes]] do not work in the Japanese version of the game. | |||
===3DS Virtual Console differences=== | |||
*In the levels [[Lava Lagoon (Donkey Kong Land 2)|Lava Lagoon]], [[Glimmer's Galleon (Donkey Kong Land 2)|Glimmer's Galleon]], and [[Clapper's Cavern (Donkey Kong Land 2)|Clapper's Cavern]], any occurrence of the screen flashing (e.g. when the lava would begin to heat up in Lava Lagoon) was slowed down to half its rate on the 3DS, compared to the Game Boy. | |||
==Cheat codes== | |||
The game has three cheat codes the player can input from the title screen. The cheats do not work in the Japanese version. While on the title screen, the player must hold either left or right button on the D-Pad and enter a specific combination of buttons. Once they enter a cheat code, an extra life sound effect plays. | |||
*50 lives: {{button|GB|A}}, {{button|GB|A}}, {{button|GB|B}}, {{button|GB|B}} | |||
*40 Banana Coins: {{button|GB|B}}, {{button|GB|B}}, {{button|GB|A}}, {{button|GB|A}} | |||
*47 [[Kremkoin]]s: {{button|GB|A}}, {{button|GB|B}}, {{button|GB|A}}, {{button|GB|B}} (to get 100% completion, the standard Kremkoins must be collected) | |||
''' | ==Nintendo eShop description== | ||
<blockquote>''K. Rool has kidnapped Donkey Kong, and he's demanding the entire banana hoard as ransom! It's up to Diddy Kong and Dixie Kong to rescue their kidnapped pal. Play as either Kong and take advantage of their unique abilities. Diddy Kong's Cartwheel can take out the bulkiest of baddies, while Dixie Kong's Helicopter Spin will let you hover over some tricky spots. There's also a wild assortment of friendly animals ready to help out the two little Kongs. There are over 40 levels to complete—each filled with special traps, collectibles, dastardly Kremlings, and a boatload of barrels to blast out of!</blockquote> | |||
==Reception== | |||
{|class="wikitable reviews" | |||
!colspan="4"style="font-size:120%;text-align:center;background-color:silver"|Reviews | |||
|-style="background-color:#E6E6E6" | |||
|Release | |||
|Reviewer, Publication | |||
|Score | |||
|Comment | |||
|- | |- | ||
| | |[[Nintendo 3DS]] | ||
|Dave Frear, [http://www.nintendolife.com/reviews/3ds-eshop/donkey_kong_land_2_gameboy Nintendo Life] | |||
|7/10 | |||
|align="left"|"''With more levels to play through and extra items to collect Donkey Kong Land 2 is certainly a bigger game than its predecessor, however it's not quite as impressive due to being a bit too similar to Diddy's SNES outing. Luckily the varied bunch of levels and enemies ensure that the game is still fun to play through. There's some cracking music, too, and with the amount of content Rare managed to cram into the game there's enough here to keep players occupied for some time.''" | |||
|- | |||
!colspan="4"style="background-color:silver;font-size:120%;text-align:center;"|Aggregators | |||
|-style="background-color:#E6E6E6" | |||
|colspan=2|Compiler | |||
|colspan=2|Platform / Score | |||
|- | |||
|colspan=2|GameRankings | |||
|colspan=2|[https://www.gamerankings.com/gameboy/197138-donkey-kong-land-2/index.html 79.00%] | |||
|} | |} | ||
{{br}} | |||
==Gallery== | |||
{{main-gallery}} | |||
<gallery> | |||
Diddy Kong DKL2 art.png|[[Diddy Kong]] artwork | |||
Dixie walk DKC2 art.jpg|Dixie Kong|[[Dixie Kong]] artwork | |||
Diddy Kong DKL2.png|Diddy Kong sprite | |||
Dixie Kong DKL2.png|Dixie Kong sprite | |||
DKL2 Title Screen.png|Title screen | |||
Donkey Kong Land 2 Box Art.jpg|North American box art | |||
</gallery> | |||
==Pre-release and unused content== | |||
{{main|List of Donkey Kong Land 2 pre-release and unused content}} | |||
==Staff== | ==Staff== | ||
{{main|List of Donkey Kong Land 2 staff}} | {{main|List of Donkey Kong Land 2 staff}} | ||
== | ==Glitches== | ||
{{ | {{main|List of Donkey Kong Land 2 glitches}} | ||
== | ==Media== | ||
{{main| | {{more media|section=yes|At least one more track sample (preferably the main menu or title)}} | ||
{{media table | |||
|file1=DKL2 File Select.oga | |||
|title1=File Select | |||
|file2=DKL2 Token Tango.oga | |||
|title2={{conjectural|Token Tango}} | |||
}} | |||
== | ==Names in other languages== | ||
{{ | {{foreign names | ||
|Jap=ドンキーコングランド | |||
|JapR=Donkī Kongu Rando | |||
|JapM=Donkey Kong Land | |||
}} | |||
==Trivia== | ==Trivia== | ||
*The box art depicts [[Glimmer]], even though he does not appear in the game. Said box art was later used for the title screen in the European [[Game Boy Advance]] remake of ''Donkey Kong Country 2''. | |||
*The box art depicts [[Glimmer | |||
==References== | |||
{{NIWA| | {{NIWA|StrategyWiki=1}} | ||
<references/> | |||
{{DKL2}} | {{DKL2}} | ||
{{ | {{Donkey Kong games}} | ||
{{GB}} | {{GB}} | ||
[[Category:Game Boy | [[Category:Game Boy games]] | ||
[[Category:1996 games]] | [[Category:1996 games]] | ||
[[Category:Donkey Kong Land 2|*]] | [[Category:Donkey Kong Land 2|*]] | ||
[[Category:Games]] | [[Category:Games]] | ||
[[Category:Platforming | [[Category:Platforming games]] | ||
[[Category:Player's Choice]] | [[Category:Player's Choice]] | ||
[[de:Donkey Kong Land 2]] | |||
[[it:Donkey Kong Land 2]] | |||
Latest revision as of 18:26, April 18, 2024
| Donkey Kong Land 2 | |||||||
|---|---|---|---|---|---|---|---|
 For alternate box art, see the game's gallery. | |||||||
| Developer | Rareware | ||||||
| Publisher | Nintendo | ||||||
| Platform(s) | Game Boy, Virtual Console (Nintendo 3DS) | ||||||
| Release date | Game Boy: or September 30, 1996[2] Virtual Console (3DS): | ||||||
| Genre | Platformer | ||||||
| Rating(s) |
| ||||||
| Mode(s) | Single player | ||||||
| Media | Game Boy:
Nintendo 3DS: | ||||||
| Input | Game Boy:
Nintendo 3DS:
| ||||||
Donkey Kong Land 2 is a platform game developed by Rareware and published by Nintendo for the Game Boy in 1996. It is a sequel to Donkey Kong Land and a predecessor to Donkey Kong Land III. Like its predecessor, the game features a yellow cartridge and special features for the Super Game Boy. The game has a special banana border when played on a Super Game Boy.
Donkey Kong Land 2 is very similar to its counterpart SNES title, Donkey Kong Country 2: Diddy's Kong Quest. While it has the same storyline, areas, and setting, each level received a new layout. The game also stars Diddy Kong and Dixie Kong.
The game was eventually rereleased on the Nintendo 3DS's Virtual Console in Europe in April 2014, in Japan and Australia in October 2014, and later in February 2015 for North America.
Story[edit]

The story is essentially a retelling of the events in Donkey Kong Country 2: Diddy's Kong Quest[5] and is the only Donkey Kong Land game with the same story as its Donkey Kong Country counterpart. Kaptain K. Rool and the Kremling Krew kidnap Donkey Kong and in exchange for Donkey Kong's safe return, the Kremlings demand the banana hoard. Diddy and Dixie decline and head on a journey on Crocodile Isle to rescue Donkey Kong.
Diddy and Dixie travel through several worlds, including the Gangplank Galleon, Krem Cauldron, Krazy Kremland, Gloomy Gulch, and K. Rool's Keep. The Kongs eventually reach Stronghold Showdown at the peak of Crocodile Isle, where they find Donkey Kong tied up in ropes. Before they can rescue him, he is lifted into The Flying Krock. There, the Kongs encounter Kaptain K. Rool. They engage in battle, and the Kongs eventually defeat the Kremling leader, and Donkey Kong frees himself from his chains. Before Kaptain K. Rool can attack again, Donkey Kong knocks him out of his ship, sending him into the ocean.
Even after freeing Donkey Kong, both Diddy and Dixie must pay 47 Kremkoins to Klubba to enter the Lost World. After completing the world, the mouth of the stone crocodile head opens. Diddy and Dixie go inside and battle Kaptain K. Rool again. The Kongs eventually defeat Kaptain K. Rool another time and then flee from Crocodile Isle. From a distance, Diddy, Dixie, and Donkey Kong watch as Crocodile Isle sinks into the ocean.
Gameplay[edit]

Diddy and Dixie are the two playable characters, and the player can only control one Kong on screen at a time. Both Kongs share some basic abilities such running, jumping, and swimming, and they are both able to climb ropes and hang from hooks. Diddy is able to perform a cartwheel and is faster than Dixie, although he has trouble traveling across large abysses. The main difference with Dixie is her Helicopter Spin, which allows her to whip enemies and slowly fall or glide in midair. Diddy holds a barrel in front whereas Dixie holds it above herself with her ponytail. If both Kongs are in play, and the leader is hit by an enemy or hazard, the game automatically switches to the other Kong. If either Kong is missing their partner and gets hit by an enemy or hazard, they lose a life.
The game progression works the same as in other Donkey Kong Country series. Each world has some levels (usually five or six) which the Kongs must complete in order until they reach a world boss at the end. After defeating the world boss, Diddy and Dixie can access the next world. Every world has a Kong Kollege, where Wrinkly Kong can save the player's progress, and a Funky's Flights, where Funky Kong leases his Biplane Barrel for the Kongs to travel into another world.
There are either one or two Bonus Barrels in every level and one of Cranky's Video Game Hero Coins. Each Bonus Barrel leads to a Bonus Level, where the Kongs must complete an objective to obtain a Kremkoin. Some Bonus Levels can be accessed if the Kongs carry a kannonball into a kannon. Once the Kongs have collected every Kremkoin, they can access the Lost World. Video Game Hero Coins help improve Diddy's rank in Video Game Heroes. Kremkoins and Video Game Hero Coins are both necessary for 100% completion of the game.
Some levels have an Animal Barrel, which transform the Kongs into the pictured Animal Friend. Some Animal Barrels are required to enter while others are hidden from the main path and are optional to enter. As an Animal Friend, the Kongs can often defeat enemies more easily or reach hidden areas and items. In some levels, an Animal Friend is required to use its ability to progress, such as Squawks, who can fly up vertical paths. When an Animal Friend crosses a No Animal Sign, it turns back into the Kongs and an item is rewarded.
Characters[edit]
Playable characters[edit]
| Image | Name | Description |
|---|---|---|
| Diddy Kong | Diddy is the main protagonist of the game. He goes on an adventure with Dixie to rescue Donkey Kong. | |
| Dixie Kong | Dixie is the girlfriend and sidekick of Diddy. Her Helicopter Spin allows her to glide across pits. |
Supporting characters[edit]
| Image | Name | Description |
|---|---|---|
| Wrinkly Kong | Just like in Donkey Kong Country 2, Wrinkly runs the Kong Kollege. Unlike the previous game, Wrinkly no longer offers advice, but she still saves the player's game. In each world, Wrinkly at first saves the game at no cost, but subsequently prices it at two Banana Coins. | |
| Funky Kong | Like Wrinkly, Funky returns with the same role as in Donkey Kong Country 2. He operates Funky's Flights, where the Kongs can pay two Banana Coins to use the Funky Barrel and travel around the Crocodile Isle map to select a world which they have visited already. It is the only game of the Donkey Kong Land series that Funky appears in. | |
| Donkey Kong | Donkey Kong was kidnapped by Kaptain K. Rool, who demands the Kongs give the banana hoard to him. Diddy and Dixie go on an adventure to rescue Donkey Kong. |
Animal Friends[edit]
| Image | Name | Description |
|---|---|---|
| Clapper | Depending on which level he is in, Clapper the seal has two different purposes. When Diddy or Dixie jump on Clapper, he can breathe into the lava to cool it into water, or in another level, Clapper can breathe on water to turn it into ice. The effects are temporary in both levels and wear off after a few seconds. | |
| Enguarde | Enguarde the swordfish is the staple underwater Animal Friend. He can maneuver underwater easily, defeat aquatic enemies, and perform a superstab to charge quickly underwater. | |
| Rambi | Returning from Donkey Kong Land, Rambi the rhino retains his ability to charge through enemies and obstacles. He can no longer break open walls with his horn, but is able to perform a supercharge. | |
| Rattly | Rattly the rattlesnake has the ability to jump high. He bounce off most enemies, including Zingers, and perform a superjump if the player holds down | |
| Squawks | Squawks the parrot appears in large mines and deep wasp hives. He has the ability to fly around the area and spit nuts to attack enemies. A relative of his is usable in a single level, Parrot Chute Panic, and cannot fly up or attack foes, slowly descending when grabbed onto. Squawks and his relative have the same sprite because of the Game Boy's monochrome graphics. | |
| Squitter | Squitter the spider is a companion who can defeat enemies with his web projectiles and can create web platforms to jump on. |
Enemies[edit]
Kremlings[edit]
| Image | Name | Description | First level appearance | Last level appearance |
|---|---|---|---|---|
| Kaboing | These enemies have two peg legs, making them repeatedly hop up and down as they move around. The Kongs can defeat a Kaboing by either jumping on it or cartwheeling into it. | Gangplank Galley | Animal Antics | |
| Kannon | These large, cannon-wielding enemies shoot kannonballs and barrels to attack the Kongs. Kannons can be defeated by either a jump attack or a roll attack. | Kannon's Klaim | Chain Link Chamber | |
| Klampon | Similar to Klaptraps, Klampons repeatedly move their jaws up and down, attempting to bite the Kongs. Diddy or Dixie can defeat a Klampon with a jump attack but rolling into them results in the Klampton biting the Kong and thus hitting them. | Hothead Hop | Fiery Furnace | |
| Klank | Klanks return in Donkey Kong Land 2 even though a similar enemy, Kutlasses, do not. Klanks ride in a Roller Coaster and only appear in one level, where Diddy and Dixie must race by them to the finish. Klanks can be defeated by a jump attack, but if hit from behind, they get a small boost. | Rickety Race | ||
| Klinger | Klingers repeatedly climb either ropes or chains and then slide down. The Kongs can use a barrel to defeat a Klinger. | Mainbrace Mayhem | Toxic Tower | |
| Klobber | Klobbers are common enemies who hide in barrels to disguise themselves. When Diddy and Dixie approach a Klobber, it pops out of the barrel, attempting to push the Kongs into an enemy or a pit. Diddy or Dixie can jump on a Klobber to push it back inside its barrel. They can defeat a Klobber picking up the barrel it is inside and throwing it. | Pirate Panic | Fiery Furnace | |
| Klomp | Klomps are basic Kremling grunts who can be defeated by either a jump attack or a roll attack. | Pirate Panic | Web Woods | |
| Klubba | Klubba is an enormous musclebound Kremling who guards the Lost World until all 47 Kremkoins are collected and paid to him. | Klubba's Kiosk | ||
| Krockheads | Krockheads are, as their name suggests, crocodile heads that stick out of the lava or water. Diddy and Dixie can use them as platforms to get across. In some levels, Krockheads only appear above water briefly before sinking in the water. The Kongs are sometimes required to use Krockhead Barrels to make them rise to the surface. | Hothead Hop | Fiery Furnace (only in a Bonus Level) | |
| Krook | When the Kongs encounter a Krook, it throws a hook on its hand. If the Kongs avoid being hit by the hook, it returns to Krook like a boomerang. The Kongs can defeat them by either jumping or rolling into it. | Squawks's Shaft | Toxic Tower | |
| Kruncha | Krunchas are muscular Kremlings who move back and forth in area. If Diddy or Dixie jump on a Kruncha, it gets enraged and moves back and forth rapidly. It calms down after a few seconds. Krunchas can only be defeated by a barrel or an Animal Friend attacking it. | Mainbrace Mayhem | Klobber Karnage |
Other enemies[edit]
| Image | Name | Description | First level appearance | Last level appearance |
|---|---|---|---|---|
| Click-Clack | Click-Clacks are large beetles who move along the ground. Diddy or Dixie must jump on them twice to defeat them. When the Kongs first jump on a Click-Clack, it flips over. While the Click-Clack is flipped over, the Kongs can pick it up and throw it at other enemies. If the Kongs do not pick up the flipped over Click-Clack, it gets back up after a few seconds. | Mainbrace Mayhem | Gusty Glade | |
| Flitter | Flitters are dragonflies who often fly above large pits, often in a group. The Kongs must jump from Flitters to get across a gap. When they jump on a Flitter, it gets defeated. | Topsail Trouble | Animal Antics | |
| Flotsam | Flotsams are stingray enemies who swim in the water. They can only be defeated by Enguarde's stab attack. | Lockjaw's Locker | Arctic Abyss | |
| Lockjaw | Lockjaws are piranha enemies. Upon noticing the Kongs, Lockjaw lunges itself at them, attempting to bite them. They can be defeated by Enguarde. | Lockjaw's Locker | Arctic Abyss | |
| Necky | These small bird enemies appear in the corner of the screen and swoop as the Kongs approach them. Diddy or Dixie can avoid Necky by jumping over it. The Kongs can defeat a Necky by jumping on it. | Kannon's Klaim | Kreepy Krow | |
| Neek | Neeks are rats that move back and forth on land. They are one of the most basic enemies aside from Klomps. The Kongs can defeat Neeks by either rolling into them or jumping on them. | Pirate Panic | Animal Antics | |
| Puftup | Puftups are pufferfish who inflate when the Kongs approach them. Some explode, causing four of its spikes to shoot in each direction. The Kongs must avoid being hit by the spikes. Puftups can only be defeated by Enguarde. | Lava Lagoon | Arctic Abyss | |
| Screech | Squawks gets in a race against Screech during the level, Screech's Sprint. Screech has no form of attacks unlike other enemies, and cannot be defeated. | Screech's Sprint | ||
| Shuri | Shuri are starfish enemies who spiral as they move toward the Kongs. If Diddy or Dixie get hit by a Shuri, they get injured. Like other underwater enemies, Shuris can only be defeated by Enguarde. | Lockjaw's Locker | Arctic Abyss | |
| Spiny | Spinys are porcupines that are invulnerable to most attacks due to the quills on their back. If Diddy or Dixie touch a Spiny's quills, they take damage. They can defeat Spiny by rolling into them from the front or by throwing an object at them. | Hornet Hole | Animal Antics | |
| Zinger | These wasps are one of the most common enemies in the game. Zingers are often in midair but sometimes appear on the ground. The Kongs cannot defeat Zingers by themselves and always take damage if they get in contact with one. Zingers can only be defeated if the Kongs throw an object at them or by an Animal Friend. | Hornet Hole | Animal Antics |
Bosses[edit]
| Image | Name | Description | First level appearance | Last level appearance |
|---|---|---|---|---|

|
Krow | Krow is a large Mini-Necky and the first boss of the game. He is located at the crow's nest of the Gangplank Galleon. Krow attacks by throwing eggs at the Kongs. Sometimes an egg lands on the mast below, and the Kongs can attack Krow by throwing the egg at him. After being hit a number of times, Krow is defeated. Later, the ghost of Krow is encountered at the end of Gloomy Gulch, as the fourth boss. The boss battle is different than the first battle, but he is attacked the same way. Krow sends several Mini-Neckys after the Kongs until an egg falls to the ground. The Kongs must pick it up and throw it at Krow to attack him. After being hit, Krow travels up higher into the level, and the Kongs must chase him by jumping from hooks and climbing ropes. After four hits, Krow is defeated again. | Krow's Nest | Kreepy Krow |
| Kleaver | A large sword encountered at the end of Krem Cauldron, as the second boss of the game. He attacks by shoots fireballs at the Kongs. Sometimes, he shoots a barrel, which the Kongs can break to release a kannonball. The Kongs can attack Kleaver by throwing a kannonball at him. After this, Kleaver chases Diddy and Dixie over a large gap filled with lava. As the battle progresses, Kleaver's attacks become faster and more powerful. After taking enough hits from a kannonball, Kleaver is defeated. | Kleaver's Kiln | ||
| King Zing | King Zing is the third boss, fought at the end of Krazy Kremland. He is a large Zinger who is fought within a beehive. During the boss battle, the Kongs transform into Squawks, who must spit nuts at King Zing's stinger to attack him. After a few hits, King Zing moves much faster and summons regular Zingers to attack Squawks. After being hit a few more times, King Zing is defeated. | King Zing Sting | ||
| Kaptain K. Rool | Kaptain K. Rool is the leader of the Kremlings and the final boss of the game. He attacks by shooting kannonballs at the Kongs, some of which are spiked. He also slides between corners in an attempt to hit the Kongs. K. Rool sometimes shoots a barrel at the Kongs, and they must jump on the barrel to reveal another kannonball. The kannonball can then be thrown into Kaptain K. Rool's cannon, causing it to backfire. After enough times, K. Rool is defeated. Kaptain K. Rool is fought again in the Lost World, where his attacks are longer and faster. This time, Kaptain K. Rool is defeated from only kannonball being thrown into his blunderbuss. | K. Rool Duel | Krocodile Kore | |
Items and objects[edit]
| Image | Name | Description |
|---|---|---|
| Banana | Floating fruit found in every level. When 100 are collected, the player is granted one extra life. | |
| Banana Bunch | A bunch of bananas which provide ten bananas to the Kongs when collected. They are less common than regular bananas. | |
| Banana Coins | Currency that can be spent at the Kong Kollege or Funky's Flights. | |
| Cranky's Video Game Hero Coins | These are large, golden coins with the "DK" logo on them. One of Cranky's Video Game Hero Coins is hidden in every level, and when the Kongs collect every one, Diddy comes in first in the Video Game Heroes contest. Video Game Hero Coins are required for 100% completion. | |
| Crates | These are objects that Diddy and Dixie can pick up and throw at enemies. | |
| KONG Letters | A set of four letters found in every level. They usually indicate how far the Kongs are into a level, with the 'K' representing the start and 'G' representing the end. If the Kongs collect all four letters, they earn an extra life. | |
| No Animal Sign | A sign that appears in every level with an Animal Friend. When an Animal Friend crosses a No Animal Sign, it turns back into the Kongs and leaves an item behind. | |
| Treasure chest | Treasure chests are similar to crates as they can be picked up and thrown. | |
| Extra Life Balloon | By collecting an Extra Life Balloon, Diddy and Dixie are rewarded an extra life. |
Barrels[edit]
It has been requested that more images be uploaded for this section. Remove this notice only after the additional image(s) have been added. Reason: Light Barrel
| Image | Name | Description |
|---|---|---|
| Animal Barrels | Barrels that transform the Kongs into the Animal Friend who is displayed on the barrel. For example, jumping into an Animal Barrel depicting Rambi's face transforms the Kongs into Rambi. | |
| Barrels | Barrels can be picked up and thrown like crates, except barrels roll on the ground and defeat multiple enemies along the way. They break when hitting into a wall. | |
| Barrel Kannons | A type of barrel with an opening on the top. The Kongs can jump into the opening and blast in the direction the Barrel Kannon is facing. | |
| Bonus Barrels | Special barrels that will transport the Kongs to a Bonus Level. | |
| DK Barrels | If a Kong touches a DK Barrel, the other Kong is returned into the game. Unlike the Donkey Kong Country games, all DK Barrels are found in midair. If both Kongs are present, the DK Barrel does nothing. Unlike Donkey Kong Land, there is an icon in the bottom right corner to indicate which Kongs are available. | |
| Exclamation Point Barrels | Special barrels that make the Kongs invincible temporarily. | |
| Light Barrels | Exclusive to Glimmer's Galleon are Light Barrels, which Diddy or Dixie can swim into to temporarily illuminate the entire level, allowing them to see the path forward. | |
| Rotatable Barrels | Similar to the Barrel Kannons, except the player can control the direction that it aims in. | |
| Star Barrels | A Star Barrel appears in every level as a checkpoint. By activating it, if the Kongs lose a life, they can continue the level from where the Star Barrel was activated. | |
| TNT Barrels | Explosive barrels that detonate upon impact with an enemy or the ground. |
Levels[edit]
Donkey Kong Land 2 features most of the same worlds from Donkey Kong Country 2: Diddy's Kong Quest except Krem Cauldron, which is a fusion of Crocodile Cauldron and Krem Quay. Most of the levels have the same name but their layouts are different. Two levels from Donkey Kong Country 2 were replaced with a loosely related counterpart: Haunted Hall with Krazy Koaster, and Castle Crush with Dungeon Danger. There are 39 levels and 7 boss levels in the game.
| Levels and Bonus Areas | ||||
|---|---|---|---|---|
| Gangplank Galleon | ||||
| # | Level | Bonus Areas | Type of level | Music theme |
| 1 | Pirate Panic | 1 | Ship deck | Snakey Chantey |
| 2 | Mainbrace Mayhem | 1 | Ship mast | Lockjaw's Saga |
| 3 | Gangplank Galley | 1 | Ship deck | Lockjaw's Saga |
| 4 | Lockjaw's Locker | 0 | Ship hold | Lockjaw's Saga |
| 5 | Topsail Trouble | 1 | Ship mast | Lockjaw's Saga |
| 6 | Boss level: Krow's Nest | 0 | Ship mast | Crocodile Cacophony |
| Krem Cauldron | ||||
| # | Level | Bonus Areas | Type of level | Music theme |
| 7 | Hothead Hop | 2 | Lava | Hot Head Bop |
| 8 | Kannon's Klaim | 1 | Mines | Hot Head Bop |
| 9 | Lava Lagoon | 2 | Ship hold | Lockjaw's Saga |
| 10 | Redhot Ride | 1 | Lava | Hot Head Bop |
| 11 | Squawks's Shaft | 2 | Mines | Hot Head Bop |
| 12 | Barrel Bayou | 2 | Swamp | Bayou Boogie |
| 13 | Glimmer's Galleon | 2 | Ship hold | Lockjaw's Saga |
| 14 | Krockhead Klamber | 1 | Swamp | Bayou Boogie |
| 15 | Rattle Battle | 1 | Ship deck | Lockjaw's Saga |
| 16 | Slime Climb | 1 | Ship mast | Lockjaw's Saga |
| 17 | Boss level: Kleaver's Kiln | 0 | Lava | Crocodile Cacophony |
| Krazy Kremland | ||||
| # | Level | Bonus Areas | Type of level | Music theme |
| 18 | Hornet Hole | 1 | Hive | Flight Of The Zinger |
| 19 | Target Terror | 2 | Roller coaster | Disco Train |
| 20 | Bramble Blast | 2 | Brambles | Stickerbush Symphony |
| 21 | Rickety Race | 0 | Roller coaster | Disco Train |
| 22 | Bramble Scramble | 1 | Brambles | Stickerbush Symphony |
| 23 | Mudhole Marsh | 2 | Swamp | Bayou Boogie |
| 24 | Rambi Rumble | 2 | Hive | Flight Of The Zinger |
| 25 | Boss level: King Zing Sting | 0 | Hive | Crocodile Cacophony |
| Gloomy Gulch | ||||
| # | Level | Bonus Areas | Type of level | Music theme |
| 26 | Ghostly Grove | 1 | Forest | Bayou Boogie |
| 27 | Krazy Koaster | 1 | Roller coaster | Disco Train |
| 28 | Gusty Glade | 2 | Forest | Bayou Boogie |
| 29 | Parrot Chute Panic | 2 | Hive | Flight Of The Zinger |
| 30 | Web Woods | 1 | Forest | Bayou Boogie |
| 31 | Boss level: Kreepy Krow | 0 | Ship mast | Crocodile Cacophony |
| K. Rool's Keep | ||||
| # | Level | Bonus Areas | Type of level | Music theme |
| 32 | Arctic Abyss | 2 | Ice | In a Snow-bound Land |
| 33 | Windy Well | 1 | Mines | Hot Head Bop |
| 34 | Dungeon Danger | 2 | Castle | Krook's March |
| 35 | Clapper's Cavern | 1 | Ice | In a Snow-bound Land |
| 36 | Chain Link Chamber | 2 | Castle | Krook's March |
| 37 | Toxic Tower | 1 | Castle | Krook's March |
| 38 | Boss level: Stronghold Showdown | 0 | Castle | False Triumph? |
| The Flying Krock | ||||
| # | Level | Bonus Areas | Type of level | Music theme |
| 39 | Screech's Sprint | 1 | Brambles | Stickerbush Symphony Run, Rambi! Run! |
| 40 | Boss level: K. Rool Duel | 0 | Castle | Crocodile Cacophony |
| Lost World | ||||
| # | Level | Bonus Areas | Type of level | Music theme |
| 41 | Jungle Jinx | 1 | Jungle | Stickerbush Symphony |
| 42 | Black Ice Battle | 1 | Ice | In a Snow-bound Land |
| 43 | Fiery Furnace | 1 | Lava | Hot Head Bop |
| 44 | Klobber Karnage | 1 | Jungle | Stickerbush Symphony |
| 45 | Animal Antics | 1 | Jungle | Stickerbush Symphony |
| 46 | Boss level: Krocodile Kore | 0 | Lava | Crocodile Cacophony |
Version differences[edit]
Regional differences[edit]
The Japanese version of the game has various changes from the English version:
- The title was changed to Donkey Kong Land: Diddy's Kong Quest. This is not to be confused with the English Donkey Kong Land, which was also renamed in Japanese (to Super Donkey Kong GB).
- As with Donkey Kong Country 2, various enemies have different names in Japanese:
- Krow was renamed to Zocky.
- Click-Clack was renamed to Beetle.
- King Zing was renamed to King B.
- While Krazy Koaster and Dungeon Danger were given new names in both languages (compared to Donkey Kong Country 2's Haunted Hall and Castle Crush), a few more levels were given new names in the Japanese version of Donkey Kong Land 2 compared to Donkey Kong Country 2: Krockhead Klamber, Screech's Sprint, Klobber Karnage, and Animal Antics.
- Various levels underwent minor layout changes:
- In Bramble Blast, the Zinger before the Star Barrel was removed in the Japanese version.
- In Parrot Chute Panic, in a section shortly after the Star Barrel, two Zingers in close proximity to a DK Barrel were removed in the Japanese version. This ends up fixing a sprite overload issue where the DK Barrel wouldn't appear in the English version if too many Zingers appeared on-screen at once.
- In Kreepy Krow, the rope climbing section was shortened slightly, making this part a bit easier. A hook was moved upwards to compensate.
- In the English version, a glitch involving the bonus stage counter (for stars or enemies) would occur if the player would lose a bonus stage with stars or enemies remaining, and then defeat enemies or collect bananas afterwards; this would cause the Kremkoin chime to be heard once the counter reaches zero. The Japanese version fixes this by resetting the counter to zero when the player would lose a bonus stage. Oddly, this bug fix did not carry over to Donkey Kong Land III, causing the bug to occur in all versions of that game (although only when defeating enemies).
- Cheat codes do not work in the Japanese version of the game.
3DS Virtual Console differences[edit]
- In the levels Lava Lagoon, Glimmer's Galleon, and Clapper's Cavern, any occurrence of the screen flashing (e.g. when the lava would begin to heat up in Lava Lagoon) was slowed down to half its rate on the 3DS, compared to the Game Boy.
Cheat codes[edit]
The game has three cheat codes the player can input from the title screen. The cheats do not work in the Japanese version. While on the title screen, the player must hold either left or right button on the D-Pad and enter a specific combination of buttons. Once they enter a cheat code, an extra life sound effect plays.
- 50 lives:
 , ,
, ,  ,
, - 40 Banana Coins: , , ,
- 47 Kremkoins: , , , (to get 100% completion, the standard Kremkoins must be collected)
Nintendo eShop description[edit]
K. Rool has kidnapped Donkey Kong, and he's demanding the entire banana hoard as ransom! It's up to Diddy Kong and Dixie Kong to rescue their kidnapped pal. Play as either Kong and take advantage of their unique abilities. Diddy Kong's Cartwheel can take out the bulkiest of baddies, while Dixie Kong's Helicopter Spin will let you hover over some tricky spots. There's also a wild assortment of friendly animals ready to help out the two little Kongs. There are over 40 levels to complete—each filled with special traps, collectibles, dastardly Kremlings, and a boatload of barrels to blast out of!
Reception[edit]
| Reviews | |||
|---|---|---|---|
| Release | Reviewer, Publication | Score | Comment |
| Nintendo 3DS | Dave Frear, Nintendo Life | 7/10 | "With more levels to play through and extra items to collect Donkey Kong Land 2 is certainly a bigger game than its predecessor, however it's not quite as impressive due to being a bit too similar to Diddy's SNES outing. Luckily the varied bunch of levels and enemies ensure that the game is still fun to play through. There's some cracking music, too, and with the amount of content Rare managed to cram into the game there's enough here to keep players occupied for some time." |
| Aggregators | |||
| Compiler | Platform / Score | ||
| GameRankings | 79.00% | ||
Gallery[edit]
- For this subject's image gallery, see Gallery:Donkey Kong Land 2.
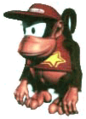
Diddy Kong artwork
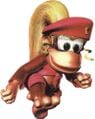
Dixie Kong artwork

Diddy Kong sprite

Dixie Kong sprite
Title screen

North American box art


Pre-release and unused content[edit]
Staff[edit]
- Main article: List of Donkey Kong Land 2 staff
Glitches[edit]
- Main article: List of Donkey Kong Land 2 glitches
Media[edit]
| It has been suggested that audio and/or video file(s) related to this section be uploaded. Reason: At least one more track sample (preferably the main menu or title) Please upload all related music, sound effects, voice clips, or any videos for this section. See the help page for information on how to get started. |
| File info |
| File info |
Names in other languages[edit]
| Language | Name | Meaning |
|---|---|---|
| Japanese | ドンキーコングランド Donkī Kongu Rando |
Donkey Kong Land |
Trivia[edit]
- The box art depicts Glimmer, even though he does not appear in the game. Said box art was later used for the title screen in the European Game Boy Advance remake of Donkey Kong Country 2.
References[edit]
- ^ Nintendo.com (Wayback Machine)
- ^ Nintendo Press Release sheet
- ^ Nintendo Magazine System (AU) Issue #44, page 38.
- ^ Nintendo Magazine System (UK) Issue #50, page 52.
- ^ Donkey Kong Land 2 instruction booklet, page 2–3
| Game Boy games | |
|---|---|
| Super Mario franchise | Alleyway (1989) • Baseball (1989) • Super Mario Land (1989) • Golf (1989) • Dr. Mario (1990) • Super Mario Land 2: 6 Golden Coins (1992) • Donkey Kong (1994) • Mario's Picross (1995) • Picross 2 (1996) |
| Donkey Kong franchise | Donkey Kong (1994) • Donkey Kong Land (1995) • Donkey Kong Land 2 (1996) • Donkey Kong Land III (1997) |
| Yoshi franchise | Yoshi (1991) • Yoshi's Cookie (1992) • Tetris Attack (1996) |
| Wario franchise | Wario Land: Super Mario Land 3 (1994) • Wario Blast: Featuring Bomberman! (1994) • Wario Land II (1998) |
| Miscellaneous | Tetris (1989) • The Legend of Zelda: Link's Awakening (1993) • Game & Watch Gallery (1997) • Game & Watch Gallery 2 (1997) |