World 4-2 (Super Mario Bros.)
| Level | |||||||
|---|---|---|---|---|---|---|---|
| World 4-2 | |||||||

| |||||||
| Level code | 4-2 | ||||||
| World | World 4 | ||||||
| Game | Super Mario Bros. | ||||||
| Time limit | 400 seconds | ||||||
| Music track | "Underground BGM" | ||||||
| |||||||
| |||||||
World 4-2 is the second level of World 4 in Super Mario Bros. and the fourteenth level overall in said game, taking place underground. If the player is not playing on Hard Mode, this level introduces the Buzzy Beetle enemy into the series. Because the Warp Zone after the main exit has only the middle pipe, the Minus World cannot be entered from this level's Warp Zone.
Layout[edit]
Like with other underground (and underwater) levels, the player starts at a cutscene with their character walking into a Warp Pipe, and then drops down into the level. Up ahead are large gaps and narrow platforms the player has to jump across, followed by a Brick Block structure with the final block containing a power-up. Over the ledge are a trio of Little Goombas, and a Coin Block can be found above the left Little Goomba. Beyond the Little Goombas are a collection of ? Blocks, with the middle one on the bottom-right row containing a power-up. After a downward moving lift are invisible blocks that the player can use to reach a beanstalk in the left Brick Block above, which leads to a Warp Zone with pipes leading to Worlds 6, 7, and 8. (In VS. Super Mario Bros., there is no pipe leading to Worlds 7 and 8.) Past the beanstalk are four pipes with Piranha Plants in them and a Koopa Troopa and Buzzy Beetles between them. One of the blocks after the second pipe contains a Starman, and the third pipe leads to an area with coins. After the fourth pipe are two Koopa Troopas, some stone platforms, and moving lifts with blocks between them, in one of which in the middle row contains a power-up. After the lifts is the exit pipe from the coin area, followed by two more pipes, a Buzzy Beetle walking down a set of stairs, and downward moving lifts. In the first Brick Block afterward is a power-up, and on top of the row of blocks are coins. Using a set of stairs to get over a pipe, the player can reach the Warp Pipe to the end of the level. If the player goes over the exit pipe, they can reach a Warp Zone to World 5.
Super Mario Bros. Deluxe challenges[edit]
In Super Mario Bros. Deluxe, the player can collect five Red Coins, find a hidden Yoshi Egg, and get a medal based on their score. The Yoshi Egg is found in a Hidden Block to the left of the pipe before the one leading to the end of the level, and the score to beat is 33000 (29000 in the Japanese version[1]). The Red Coin locations are:
- On the narrow platform at the start of the level
- In the Brick Block after the pipe leading to the secret area
- In the Brick Block directly below the power-up between the two lifts
- Above the downward moving lifts after the small stairs with the Buzzy Beetle
- To the right of the pipe before the one leading to the end of the level
The Warp Zones are also changed and contain Warp Pipes that lead directly to the end of the level.
Enemies[edit]
| Sprite | Name | Count |
|---|---|---|
| Little Goomba | 3 | |
| Koopa Troopa (green) | 6 | |
| Buzzy Beetle | 4 | |
| Piranha plant | 10 |
Items[edit]
| Sprite | Name | Count | Notes |
|---|---|---|---|
| Coin | 81 | 42 in open air (19 in the first Warp Zone area, 10 in secret area), 5 in ? Blocks, 4 in Hidden Blocks, up to 30 from 3 Coin Blocks. | |
| Magic Mushroom | 4 | Replaced by Fire Flowers if Mario is already Super Mario. | |
| Fire Flower | 4 | Replaces Magic Mushrooms if Mario is Super Mario. | |
| Starman | 1 | Hidden in a Brick Block. |
Gallery[edit]
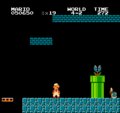
Mario near some Brick Blocks, one of which containing the hidden beanstalk.
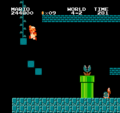
The hidden beanstalk.
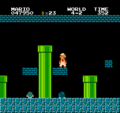
Between some Warp Pipes.
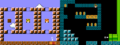
The Warp Zone areas in Super Mario Bros. Deluxe's Challenge Mode.


Level map[edit]


Profiles[edit]
Super Mario Bros. Encyclopedia[edit]
- Level description:
- English:
An underground course with a lot of hidden items! Can you find the Warp Zones? - Other languages:
- Japanese:
隠されたアイテムの多い地下コース。ワープゾーンもある。
(Translation: An underground course with many hidden items and a Warp Zone.) - Italian:
Un livello sotterraneo con molti oggetti nascosti. C'è anche una Zona Warp. (first edition)
Un livello sotterraneo con molti oggetti nascosti. C'è anche una Warp Zone. (second edition)
- Japanese:
- English:
Names in other languages[edit]
| Language | Name | Meaning | Note(s) | Ref. |
|---|---|---|---|---|
| Japanese | ワールド4/エリア2 Wārudo 4 / Eria 2 |
World 4 / Area 2 | [2] | |
| Dutch | Wereld 4-2 | World 4-2 | [3] | |
| French | Monde 4-2 | World 4-2 | [4] | |
| German | Welt 4-2 | World 4-2 | [5] | |
| Slovenian | Svet 4-2 | World 4-2 | [6] |
References[edit]
- ^ Super Mario Bros. Deluxe regional differences on The Cutting Room Floor
- ^ 【攻略本】2年連続売上1位を獲得した伝説的攻略本の秘密”スーパーマリオブラザーズ完全攻略本”
- ^ Club Nintendo Classic Magazine
- ^ Club Nintendo, editors (1990). "Super Mario Land" in Club Nintendo Classic. Großostheim: Nintendo of Europe GmbH (French). Page 22.
- ^ Super Mario Power - Offizieller Nintendo Spieleberater
- ^ Club Nintendo Yugosa 1993 09