Level E2-7: Difference between revisions
m (→Overview) |
(stating some things more clearly) |
||
| Line 20: | Line 20: | ||
The Key Mini Mario starts in the upper-left, facing the nearby goal door. However, a [[Cannon Kong]] prevents access to it and shoots the toy away in the opposite direction. The Mini will be shot through a long corridor to the other side of the stage, where it grabs onto a [[Ladder]] and climbs it to the upper platforms. Once at the top, it will head back, and the player should bridge the gaps that follow with several Pink Blocks, leading the Mini into a [[Cannon]] at the base of the area. With this Cannon, the Mini should blast diagonally to the left and continue marching on the higher platforms, using Pink Blocks and avoiding a [[Thwomp]]. After collecting a few Lift [[Pickup]]s, the toy will fall inside a red [[Warp Pipe#Mario vs. Donkey Kong series|Split Pipe]] that warps it to another section. | The Key Mini Mario starts in the upper-left, facing the nearby goal door. However, a [[Cannon Kong]] prevents access to it and shoots the toy away in the opposite direction. The Mini will be shot through a long corridor to the other side of the stage, where it grabs onto a [[Ladder]] and climbs it to the upper platforms. Once at the top, it will head back, and the player should bridge the gaps that follow with several Pink Blocks, leading the Mini into a [[Cannon]] at the base of the area. With this Cannon, the Mini should blast diagonally to the left and continue marching on the higher platforms, using Pink Blocks and avoiding a [[Thwomp]]. After collecting a few Lift [[Pickup]]s, the toy will fall inside a red [[Warp Pipe#Mario vs. Donkey Kong series|Split Pipe]] that warps it to another section. | ||
As the Mini comes out of the pipe, the player should immediately use the acquired Pickups to draw a Blue Lift between the Rivets lower down, preventing the toy from walking into the wall of [[Spike Trap|spikes]] ahead. | As the Mini comes out of the pipe, the player should immediately use the acquired Pickups to draw a Blue Lift between the Rivets lower down, preventing the toy from walking into the wall of [[Spike Trap|spikes]] ahead. With no current possibility to head left into the pair of [[Hammer]]s and save the other Mini Mario from the Shy Guy, the Key Mini Mario is constrained to follow the path on the right, where it will collect more Lift Pickups and enter a system of blue rivets. After navigating several Blue Lifts while avoiding spiked surfaces, the Mini should bump into a wall of Pink Block and change direction. Following the previous route backwards, the Mini eventually reaches the [[Hammer]]s and destroys the Shy Guy that keeps the other Mini Mario immobile. With the keyless Mini Mario leading the pair, they should head on to a yellow Split Pipe. | ||
The pipe leads them back to the starting area, though it grants them access to a secondary pair of Hammers that stuns the Cannon Kong, gaining passage to the door. However, as the keyless Mini Mario is in front of the group, it bumps into the locked door and forces the Key Mini Mario to turn away from it. Both eventually fall inside a tight gap and end up in a short tunnel with several Lift and Girder Pickups. From here, they drop into an area where the player has to quickly position Red Girders across the first two rivets to save the Minis from falling onto spikes. After going up a high Blue Lift, they march further to the right on some Pink Blocks and go down an opening in the ground that brings them inside the yellow Split Pipe from earlier. Returning to the starting area once again, the Key Mini Mario now picks the Hammers and stuns the Cannon Kong with them, then reaches and unlocks the door. Both Minis enter it and the level is cleared. | |||
===M Coin=== | ===M Coin=== | ||
The [[M-Token|M Coin]] is left from the yellow Split Pipe at the bottom of the stage. Before the final plunge into the pipe, the player should build a long Blue Lift to the coin. This will prevent the Minis coming from the left section to fall into the gap that directly leads to the pipe, and instead take the lift where they also have access to the coin. | The [[M-Token|M Coin]] is left from the yellow Split Pipe at the bottom of the stage. Before the final plunge into the pipe, the player should build a long Blue Lift to the coin. This will prevent the Minis coming from the left section to fall into the gap that directly leads to the pipe, and instead take the lift where they also have access to the coin. | ||
Revision as of 08:21, June 13, 2018
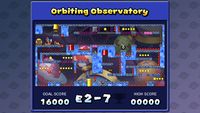
Template:Levelbox Level E2-7 is the fifteenth course of Orbiting Observatory in Mario vs. Donkey Kong: Tipping Stars.
The level features two Mini Marios, one of which carries a key that unlocks the goal door.
Overview
The Minis have to traverse a succession of challenges divided into sections, involving mostly Pink Blocks but also Blue Lifts and Red Girders. Only the Key Mini Mario is initially usable, as the keyless Mini Mario starts facing a Shy Guy with no means to destroy it. Throughout the stage, the Key Mini Mario and eventually both toys have to make use of limited resource items, carefully collecting any Pickups that they encounter.
The Key Mini Mario starts in the upper-left, facing the nearby goal door. However, a Cannon Kong prevents access to it and shoots the toy away in the opposite direction. The Mini will be shot through a long corridor to the other side of the stage, where it grabs onto a Ladder and climbs it to the upper platforms. Once at the top, it will head back, and the player should bridge the gaps that follow with several Pink Blocks, leading the Mini into a Cannon at the base of the area. With this Cannon, the Mini should blast diagonally to the left and continue marching on the higher platforms, using Pink Blocks and avoiding a Thwomp. After collecting a few Lift Pickups, the toy will fall inside a red Split Pipe that warps it to another section.
As the Mini comes out of the pipe, the player should immediately use the acquired Pickups to draw a Blue Lift between the Rivets lower down, preventing the toy from walking into the wall of spikes ahead. With no current possibility to head left into the pair of Hammers and save the other Mini Mario from the Shy Guy, the Key Mini Mario is constrained to follow the path on the right, where it will collect more Lift Pickups and enter a system of blue rivets. After navigating several Blue Lifts while avoiding spiked surfaces, the Mini should bump into a wall of Pink Block and change direction. Following the previous route backwards, the Mini eventually reaches the Hammers and destroys the Shy Guy that keeps the other Mini Mario immobile. With the keyless Mini Mario leading the pair, they should head on to a yellow Split Pipe.
The pipe leads them back to the starting area, though it grants them access to a secondary pair of Hammers that stuns the Cannon Kong, gaining passage to the door. However, as the keyless Mini Mario is in front of the group, it bumps into the locked door and forces the Key Mini Mario to turn away from it. Both eventually fall inside a tight gap and end up in a short tunnel with several Lift and Girder Pickups. From here, they drop into an area where the player has to quickly position Red Girders across the first two rivets to save the Minis from falling onto spikes. After going up a high Blue Lift, they march further to the right on some Pink Blocks and go down an opening in the ground that brings them inside the yellow Split Pipe from earlier. Returning to the starting area once again, the Key Mini Mario now picks the Hammers and stuns the Cannon Kong with them, then reaches and unlocks the door. Both Minis enter it and the level is cleared.
M Coin
The M Coin is left from the yellow Split Pipe at the bottom of the stage. Before the final plunge into the pipe, the player should build a long Blue Lift to the coin. This will prevent the Minis coming from the left section to fall into the gap that directly leads to the pipe, and instead take the lift where they also have access to the coin.
High scores
The following high scores apply in both the Nintendo 3DS and the Wii U versions of the game.
- Bronze trophy: 7000 points
- Silver trophy: 10000 points
- Gold trophy: 16000 points
Statistics
The following data applies in both the Nintendo 3DS and the Wii U versions of the game.
- Pink Blocks: 5
- Red Girder Rivets: 6
- Blue Lift Rivets: 16
- Pink Block outlines: 44
- Split Pipe pairs: 2
- Hammer pairs: 2
- Girder Pickups: 5
- Lift Pickups: 7
- Coins: 28
- Large Coins: 4
- Enemies:
- Shy Guys: 1
- Thwomps: 1
- Cannon Kongs: 1
| Mario vs. Donkey Kong: Tipping Stars | ||
|---|---|---|
| Characters | Donkey Kong • Mario • Pauline • Toads | |
| Minis | Cursed Mini Mario • Gold Mini Mario • Mini Donkey Kong • Mini Luigi • Mini Mario • Mini Pauline • Mini Peach • Mini Toad | |
| Enemies | Donkey Kong's robots (Cannon Kong · Capture Kong · Circus Kong) • Fire Piranha Plant • Piranha Plant • Pokey • Shy Guy • Thwomp | |
| Worlds | Rolling Hills • Jumpy Jungle • Runaway Warehouse • Crumbling Cavern • Dashing Desert • Twilight Valley • Orbiting Observatory • Bonus Levels (Bonus 1 · Bonus 2 · Bonus 3) | |
| Objects | Items | Coin (large) • Hammers • M Coin • Pickup |
| Resource items | Blue Lift • Movable Pipe • Pink Block • Purple Conveyor • Red Girder • Spring | |
| Fixed objects | Cannon • Color Switch • Conveyor Belt • Girder • Goal Door • Ladder • Magnet Ground • Rock • Spikes • Warp Pipe | |
| Further info | Gallery • Media • Official online levels • Slide • Staff (Nintendo 3DS version · Wii U version) • Stamps • Workshop Store | |

