User:Koopa con Carne/archive: Difference between revisions
(setting up a gallery of DMW worlds in my personal archive, so that i have the pictures stored somewhere before i move them in bulk on the mainspace) |
|||
| Line 1: | Line 1: | ||
==Dr. Mario World== | ==Dr. Mario World== | ||
<gallery> | <gallery> | ||
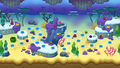
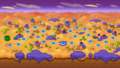
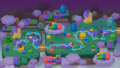
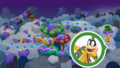
DMW World 6a.png|[[World 6 (Dr. Mario World)|World 6]] (first half) | |||
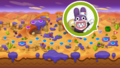
DMW World 6b.png|World 6 (second half) | |||
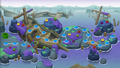
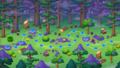
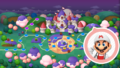
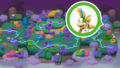
DMW World 7a.png|[[World 7 (Dr. Mario World)|World 7]] (first half) | |||
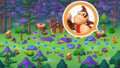
DMW World 7b.png|World 7 (second half) | |||
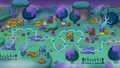
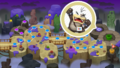
DMW World 8a.png|[[World 8 (Dr. Mario World)|World 8]] (first half) | |||
DMW World 8b.png|World (second half) | |||
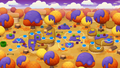
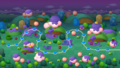
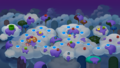
DMW World 9a.png|[[World 9 (Dr. Mario World)|World 9]] (first half) | |||
DMW World 9b.png|World 9 (second half) | |||
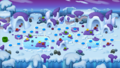
DMW World 10a.png|[[World 10 (Dr. Mario World)|World 10]] (first half) | |||
DMW World 10b.png|World 10 (second half) | |||
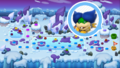
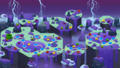
DMW World 11a.png|[[World 11 (Dr. Mario World)|World 11]] (first half) | |||
DMW World 11b.png|World 11 (second half) | |||
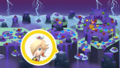
DMW World 12a.png|[[World 12 (Dr. Mario World)|World 12]] (first half) | DMW World 12a.png|[[World 12 (Dr. Mario World)|World 12]] (first half) | ||
DMW World 12b.png|World 12 (second half) | DMW World 12b.png|World 12 (second half) | ||
Revision as of 19:44, October 4, 2021
Dr. Mario World
- DMW World 6a.png
World 6 (first half)
- DMW World 6b.png
World 6 (second half)
- DMW World 7a.png
World 7 (first half)
- DMW World 7b.png
World 7 (second half)
- DMW World 8a.png
World 8 (first half)
- DMW World 8b.png
World (second half)
- DMW World 9a.png
World 9 (first half)
- DMW World 9b.png
World 9 (second half)
- DMW World 10a.png
World 10 (first half)
- DMW World 10b.png
World 10 (second half)
- DMW World 11a.png
World 11 (first half)
- DMW World 11b.png
World 11 (second half)
- DMW World 12a.png
World 12 (first half)
- DMW World 12b.png
World 12 (second half)
- DMW World 13a.png
World 13 (first half)
- DMW World 13b.png
World 13 (second half)
- DMW World 14a.png
World 14 (first half)
- DMW World 14b.png
World 14 (second half)
- DMW World 15a.png
World 15 (first half)
- DMW World 15b.png
World 15 (second half)
- DMW World 16a.png
World 16 (first half)
- DMW World 16b.png
World 16 (second half)
- DMW World 17a.png
World 17 (first half)
- DMW World 17b.png
World 17 (second half)
World 18 (first half)
- DMW World 18b.png
World 18 (second half)
World 19 (first half)
- DMW World 19b.png
World 19 (second half)
World 20 (first half)
- DMW World 20b.png
World 20 (second half)
World 21 (first half)
World 21 (second half)
World 22 (first half)
World 22 (second half)

World 23 (first half)
World 23 (second half)
World 24 (first half)
World 24 (second half)
World 25 (first half)
World 25 (second half)
World 26 (first half)
World 26 (second half)
World 27 (first half)
World 27 (second half)
World 28 (first half)
World 28 (second half)

World 29 (first half)
World 29 (second half)
World 30 (first half)
World 30 (second half)
World 31 (first half)
World 31 (second half)


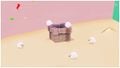
Super Mario Odyssey images
Wildlife
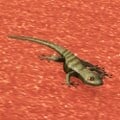
Gecko
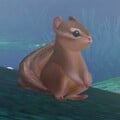
Chipmunks
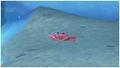
Magenta crab
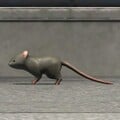
Rats

Orange crab
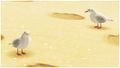
Seagulls
Salty birds


(Not taken by me)


Mario Kart Tour


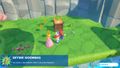
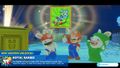
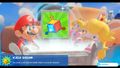
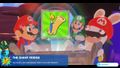
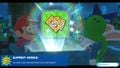
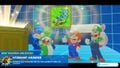
Mario + Rabbids Kingdom Battle images
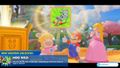
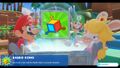
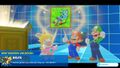
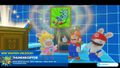
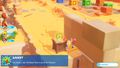
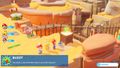
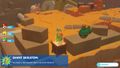
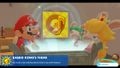
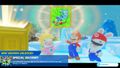
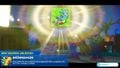
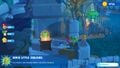
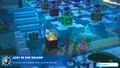
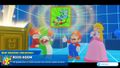
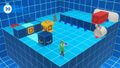
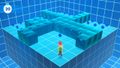
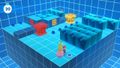
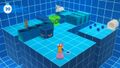
For anyone creating articles related to MRKB, feel free to use the screenshots below. I'll add more of them as I progress through the game.
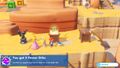
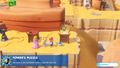
Chest locations
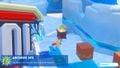
Peach's Castle
3
7
8
9
10


Ancient Gardens
31
32


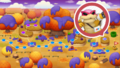
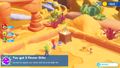
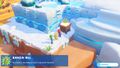
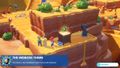
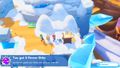
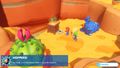
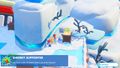
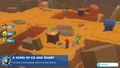
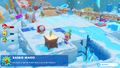
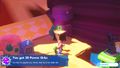
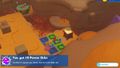
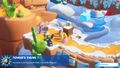
Sherbet Desert (COMPLETE)
1
2
3
4
5
6
7
8
9
10
11
12
13
14
15
16
17
18
19
20
21
22
23
24
25
26
27
28
29
30
31
32
33
34
35
36
37
38
39
40
41
42
43

44


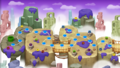
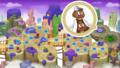
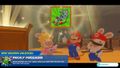
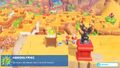
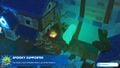
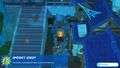
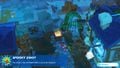
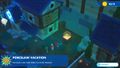
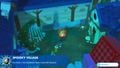
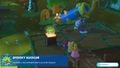
Spooky Trails
1
2
3
4
5
6
7
8
9
10
11
12
13
14

15
16
17
18
19

20
21
22
23
24
25
26
31
43
44
45
47
48
49

50
51
52


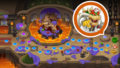
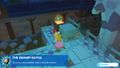
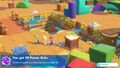
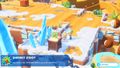
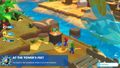
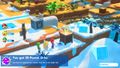
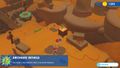
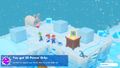
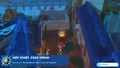
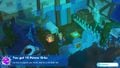
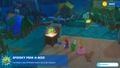
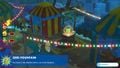
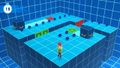
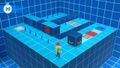
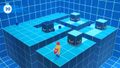
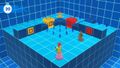
Lava Pit (COMPLETE)
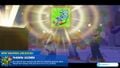
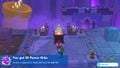
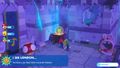
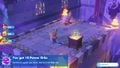
| Image | Location | Content |
|---|---|---|

|
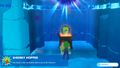
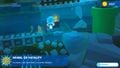
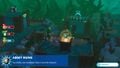
Lava Hopper | |

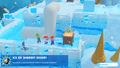
|
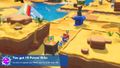
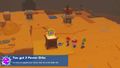
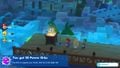
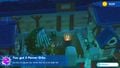
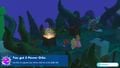
10 Power Orbs | |

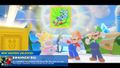
|
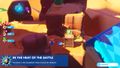
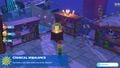
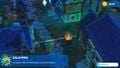
"Combat in the Cemetery" | |

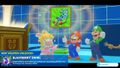
|
" | |

|
"A Stroll in the Cemetery" | |

|
"Blubbernaught" | |

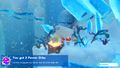
|
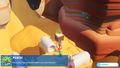
5 Power Orbs | |

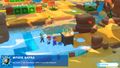
|
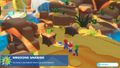
Lava Smasher | |

|
"Gymbecile" | |

|
"Phantom's Theme" | |

|
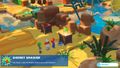
"Bwaaahr Machines" | |

|
Lava Valkyrie | |

|
Ballistic Mystic | |

|
Mushroom Marauder | |

|
The King | |

|
"The Mine" | |

|
"Interplanetary Outhouse" | |

|
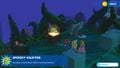
"Sombrero Vaquero" | |

|
Lava Buckler | |

|
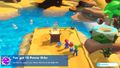
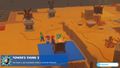
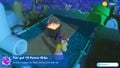
10 Power Orbs | |

|
||

|
||

|
||

|
||

|
||

|
||

|
||

|
||

|
||

|
||

|
||

|
||

|
||

|
||

|
||

|
||

|
||

|
||

|
||

|
||

|
||

|
||

|
||

|
||

|
||

|
||

|
||

|
||

|
||

|
||

|
||

|
||

|
||

|
||

|
||

|
||

|
||

|
||

|
||

|
||

|
||

|
Bonus Rooms
Sherbet Desert
1
2
3


Spooky Trails
1
2

3


Lava Pit
1
2
3


Miscellaneous screenshots
Open Blue Cannon
Closed Blue Cannon


Scans
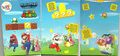
McDonald's Mario Happy Meal box (Romanian)

Kinder Surprise Maxi package cardboard (Hungarian/Romanian)


List of vehicles in Mario Party 9
[This is a page I made that I'm saving in my sandbox because I like how it looks. Since it has been decided through a proposal that it should be trimmed and merged with the Mario Party 9 page, do not attempt to re-create it.]
In Mario Party 9, characters collectively drive a vehicle to move through a board. There are three different exclusive vehicles for each stage: one is available by default, while the other two can be unlocked in the Museum for 200 Party Points each. All vehicles share a basic structure with a broad compartment for the characters to stay in, containing seats on the back side and a means of lighting on the frontal side. However, the type of a vehicle depends on the environment of the board in which it is used.
The following table lists all vehicles by board (and the corresponding vehicle type). A description is also presented along with each vehicle. Colored sections mark a starter vehicle.
| Toad Road Cars | ||
|---|---|---|
| Vehicle | Description | |
 Toad Mobile |
A round car with a vintage appearance, bearing metal bumpers and protruding lights, as well as red seats. Its coachwork is colored red, with white spots in several places, and has black tires. | |
 Rickety Ride |
A car whose components, including the bumpers, tires and coachwork, appear to be made out of wood. The car has a brown overall appearance and green seats. | |
 Wiggler Wagon |
A round car designed after a Wiggler, featuring flower tires as well as two beady eyes and a large nose on the front side. The car also has green seats and a metal bumper on its rear side. | |
| Bob-omb Factory Quadruped vehicles | ||
| Vehicle | Description | |
 Factory Walker |
A vehicle consisting of a round compartment with a black and yellow rim and two lights on the front side. Its feet are circular to reflect the overall shape of the vehicle. | |
 Gear Shifter |
A vehicle with a round compartment that displays gears and metallic patches on its body. The rim contains black and yellow portions on each side. The vehicle's feet are square to reflect its overall shape. | |
 King Bob-omb Bus |
A vehicle designed in the likeness of King Bob-omb. The face and crown are positioned in front of the vehicle. Despite the vehicle being circular overall, it has square feet. | |
| Boo's Horror Castle Floating carriers | ||
| Vehicle | Description | |
 Flying Carpet |
A generic magic carpet with purple and yellow coloration, as well as tassels hanging from each corner. | |
 Float Mattress |
A carrier that resembles a bed with white bedclothes and a golden frame. | |
 Boo Blanket |
A flying blanket inspired by King Boo, with his face imprinted on its surface and his crown serving as the characters' seats. Small crowns are hanging from each corner of the carpet. | |
| Blooper Beach Boats | ||
| Vehicle | Description | |
 Sub Baleen |
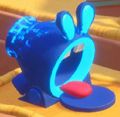
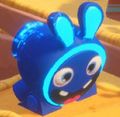
A boat that has the appearance of a blue whale, with headlights for eyes and paddles for fins. The name of the vehicle is a pun on the words "submarine" and "baleen". | |
 Coral Explorer |
A boat that resembles a submarine with an orange and white coloration. It has three portholes on each lateral side and a periscope on its frontal side. | |
 Blooper Boat |
A boat that resembles a Blooper lying backside down. Its lateral arms serve as paddles. | |
| Magma Mine Wagons | ||
| Vehicle | Description | |
 Shaky Mine Cart |
A generic mine cart with a wooden body and metal framework. It has two handles and a lantern on the front side, and red seats inside the compartment. | |
 Bone Barrow |
A wagon whose framework consists entirely of bones. There is also a skull figure on the front side, matching the cranial design of some dragons in the Mario franchise, such as Hooktail and Gobblegut. The inside of the wagon features blue seats. The name of the vehicle is a pun on "bone marrow". | |
 Chain Chomp Coupe |
A Chain Chomp-inspired wagon. It has metallic studs in each corner, bound by chains. The face of a Chain Chomp is mounted on the front side, while the inside of the wagon features red-colored seats. | |
| Bowser Station Space ships | ||
| Vehicle | Description | |
 Space Scuttle |
A yellow starship roughly shaped like a star. Two opposing points represent the engines of the ship, while those in-between represent exhaustion pipes. The inside of the Space Scuttle features cyan seats. | |
 Shiny Saucer |
A flying saucer-like vehicle with a lustrous silver appearance. It contains teal seats. | |
 Starship Bowser |
Another flying saucer-like vehicle inspired by Bowser's appearance. It has a green-colored plated exterior with spikes around it to resemble Bowser's shell. The rim of the cockpit resembles any of Bowser's collars, and the interior features red seats. | |
| DK's Jungle Ruins Four-wheel drive | ||
| Vehicle | Description | |
 Barrel Roller |
A vehicle whose body is designed after a barrel. It has wooden wheels and seats and a banana bunch emblem on its frontal side. There is also a large handle in the front. | |
 Jungle Junker |
A vehicle inspired by off-road safari jeeps, with tires for wheels. The coachwork is predominantly brown with a vertical red stripe on the frontal side, while the seats are light-gray. Like the Barrel Roller, the Jungle Junker has a banana bunch emblem on its cowling. There is a spare tire-like object on the back of the car. | |
 DK's Banana Slider |
A vehicle shaped like a banana bunch. The wheels and the inside of the vehicle, including the seats, appear to be wooden. | |
The Play Nintendo website has a section with Nintendo-themed printables, divided into three categories: "Cards", "Crafts" and "Print and Play". The printables come in the form of PDFs which can be downloaded from the website directly, and are usually accompanied by instructions on how to use them.