The 'Shroom:Issue 219/Strategy Wing
Director's Notes
Written by: Hooded Pitohui (talk)
So, you've finally arrived.
Don't act so surprised. Surmising you paged through the other teams first was a simple matter. Do step in.
As you can see, our infiltration has succeeded without issue. We now possess a vast facility stocked with premier instructional knowledge with which we will expand our reach yet further. Yes, welcome to Strategy Wing Laboratories, under new management and harmonized aesthetically with our villainy thanks to Ninja Squid (talk) and RHG1951 (talk).
As a result of our takeover, productivity has increased significantly. We've achieved a 57.14% increase in output compared to May, matching in size the largest operations to have occurred within this facility. Not only has the work of Operative Zange (talk), Operative, Sparks (talk), and Operative Shoey (talk) continued without interruption, but numerous guest contributions have expanded the scope of our research.
Operative Shoey, for instance, has delivered an extensive report on the once-feared Captain Syrup, leader of the Black Sugar Gang. Her public appearances have proven seldom over the past decade, and we may have ascertained the reason behind her withdrawal within the pages of Fading Into Obscurity. Elsewhere, Operative Waluigi Time (talk) has launched an investigation into the re-emergent Boom Boom. Preliminary conclusions suggest that the fearsome fortress-guarder's return poses no threat to our operation, but I suggest you refer to Rising From Obscurity for additional information.
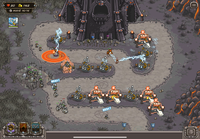
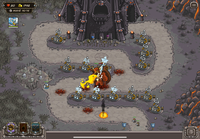
Additionally, Operative Sparks has produced a battle plan to be consulted in the event our control over The 'Shroom is challenged by Vez'nan. Those of you who have who have previously received a briefing on our Kingdom Rush operations will see Teslas vs. an Evil Wizard and make preparations immediately.
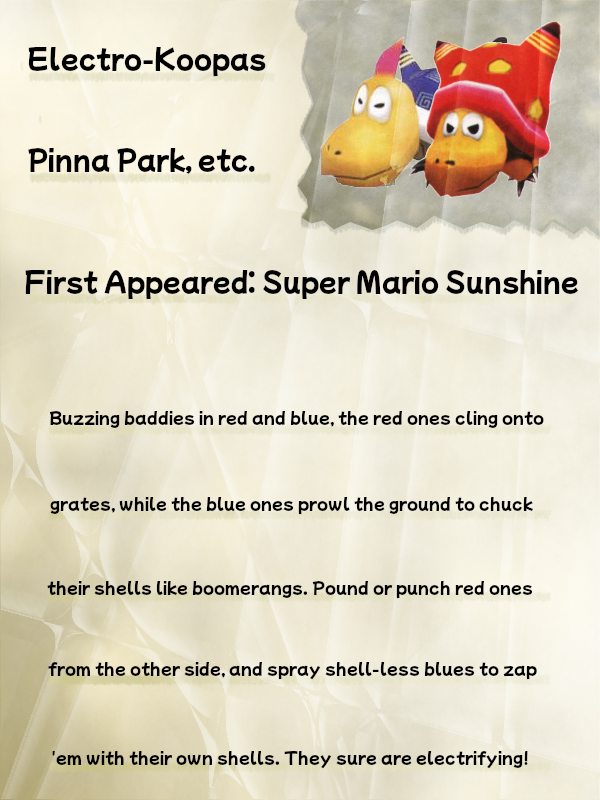
Beyond the work of our guests, we have managed to compile a repository of information on "enemies" from various realms. Yes, The Tattle Log will be an invaluable resource going forward, concisely providing our field agents with details on the behaviors of these enemies and methods of dispatching them.
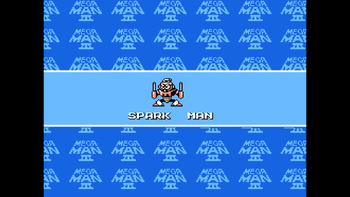
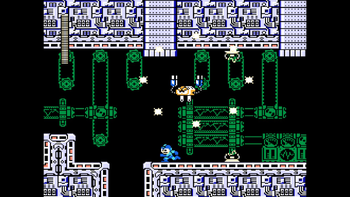
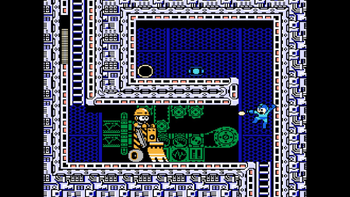
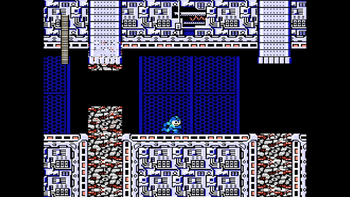
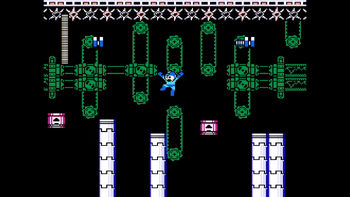
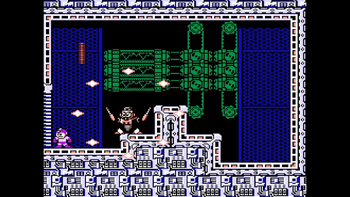
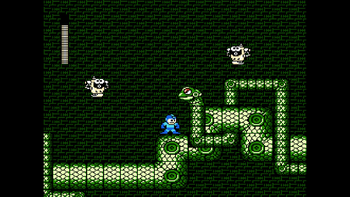
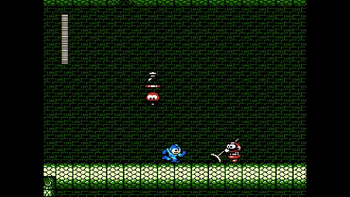
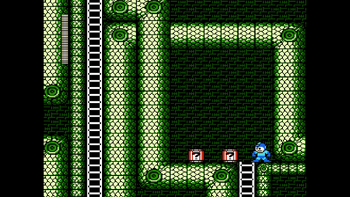
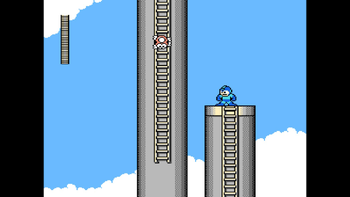
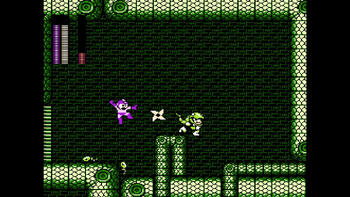
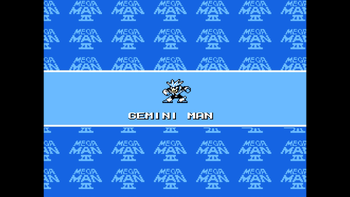
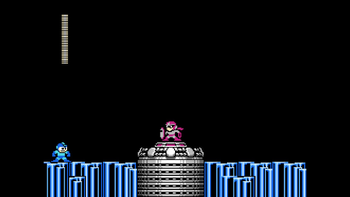
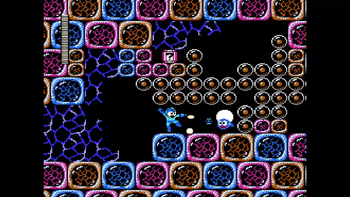
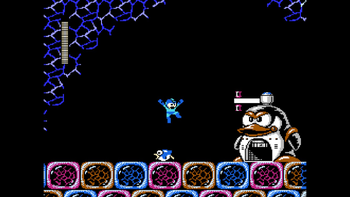
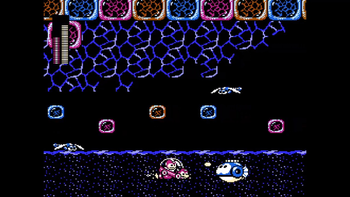
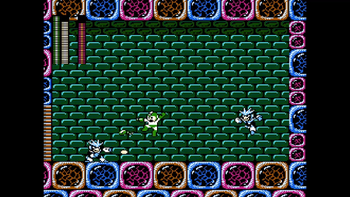
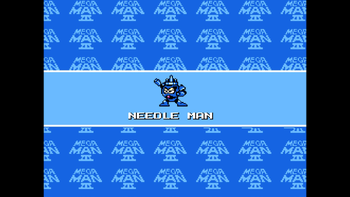
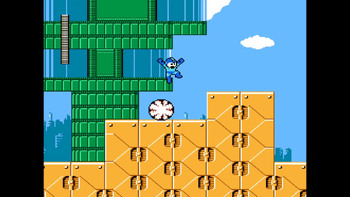
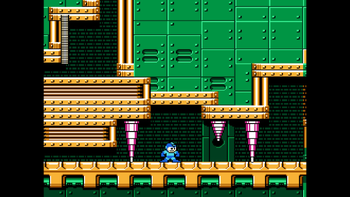
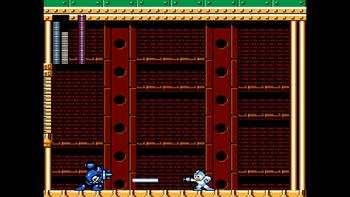
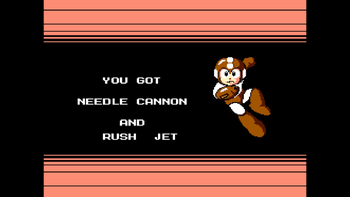
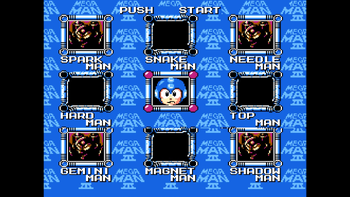
As regards our long-term research, you will find that Operative Zange has expanded our training programs in Rhythm Review. Our agents are now receiving training on slashing demons, targeting spirits, eradicating viruses, deterring theft, and, naturally, dancing. At our So You Want to Romance the Three Kingdoms operation, observations of Kong Rong by Operative Shoey have resulted in the development of new tactics for defending a base with an army of minimal size. Operative Sparks has tested new weapons systems such as Battle Plugs in Brothership Boss Battle Guide and the Shadow Blade in An Overly Detailed and Funny Walkthrough of Mega Man 3 against the robotic constructs of the Extension Corps and Doctor Wily.
Yes, as you now see, we are rather preoccupied with our work, so I cannot tarry in conversation with you any longer. Go now, and peruse the data and reports compiled within our laboratory. Should you have an opportunity, ensure you vote in the poll at the bottom of the page as you exit, and consider voting in the Community Awards. With every modicum of data you provide us, we draw nearer to reaching our ultimate goal...
Section of the Month
It would appear the results of May's evaluations have been tabulated. As to be expected, Sparks' (talk) consistently-amusing analysis of Dr. Wily's flawed creations exceeded expectations. But what are the secrets of such success? Perhaps the cute and helpful Rush with his Rush Coil technique? The impressive backing track to Top Man's stage? No... Perhaps the answer lies within Sparks' writing itself. With tips such as shooting the running grenade-esque enemies from a distance, perhaps that line of inquiry will yield the greatest results...
| STRATEGY WING SECTION OF THE MONTH | ||||
|---|---|---|---|---|
| Place | Section | Votes | % | Writer |
| 1st | An Overly Detailed and Funny Walkthrough of Mega Man 3 | 5 | 45.45% | Sparks (talk) |
| 2nd | Pitohui's Pokémon Academy | 2 | 18.18% | Hooded Pitohui (talk) |
| 2nd | So You Want to Romance the Three Kingdoms? | 2 | 18.18% | Shoey (talk) |
Brothership Boss Battle Guide
Aaaaaaaand welcome back to Brothership Boss Battle Guide, where I (Sparks) cover each and every boss in Mario & Luigi: Brothership, giving out very detailed guides too! Last month in May, We defeated Ten. He wasn't as exciting as Gorumbla and Gobblick before him, but his fight was still fun. And now, we have Battle Plugs, which not only help out in battles, but also improve this section!
For our next boss, it's Mega Snaptor, a very large bird found on the rooftops of the tall buildings of Lottacoins Island! After hearing that Ellow of IDLE was captured by the Extension Corps, the Mario Bros. and the other IDLE members rush to save him. Ellow manages to escape when the bad guys are distracted, but they have another trick up their sleeves, and that is the Mega Snaptor! One more obstacle to face before the Bros. can reconnect Lottacoins Island.
These are the stats of the Mega Snapptor!
Mega Snaptor's stats
| Image | Level | Location | HP | POW | DEF | SPD | Type | EXP | Coins | Item(s) |
|---|---|---|---|---|---|---|---|---|---|---|

|
16 | Lottacoins Island | 1700 | 60 | 38 | 200 | Flying, Normal | 1450 | 300 | Damage Shield Battle Plug (100%) |
Mega Snaptor's abilities
Due to flying in the air, The Mega Snaptor counts at a floating enemy, so some attacks will miss it. The boss initially has three attacks:
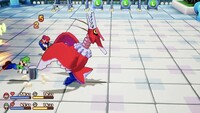
- Hammer Defense: The Mega Snaptor charges up before stretching its head out at Mario or Luigi, just like a normal Snaptor does. The boss turns towards the character it wishes to attack. If the Mega Snaptor shakes its head quickly (with audible noises heard) its head will turn towards the other brother mid-attack. The Bros. must counter the boss's head before it hits them. A successful counter will damage the Mega Snaptor!
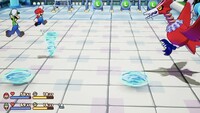
- Jump Defense: The Mega Snaptor floats in place and sends out several whirlwinds of various sizes by flapping its wings. If it uses its right wing, the whirlwind will be sent to Mario. The left wing means Luigi will be the target. Shorter whirlwinds move slower, while taller whirlwinds are quicker. There can be multiple whirlwinds on the screen at once. The Bros. must leap over the whirlwinds entirely to avoid them. Making any contact with them will result in damage taken. After this move is performed, the sent whirlwinds will turn around and fly right past the pipes in the background, causing them to rotate. This allows an opportunity for a Luigi Logic (more on that later).
- Jump Defense: The Mega Snaptor flies off-screen before snatching Mario or Luigi from behind, surprising the other character. The boss will then perform several flybies above the free brother, dropping various objects as it does so. Each flyby has one object. After the attack is done, the captured character will return and fight. This attack can cause the Trip status effect. The objects that can be dropped include:
- Rocks, which must be jumped over. Landing on them is OK, as they just break.
- Springs, which bounce over the character. Jumping into them will deal damage, so this is avoided by staying perfectly still.
- Mushrooms, which also bounce over Mario or Luigi. Collecting one will heal the character by 30 HP.
- The captured brother, who rolls towards the free character. He rolls at a slower speed than the rocks, and landing on him will deal damage to him. Don't let that happen!
If the Mega Snaptor is grounded from a successful Luigi Logic, it will use only one attack while in this state:
- Hammer Defense: The Mega Snaptor jumps in front of Mario or Luigi and leans back before pecking them. After the boss pecks or is countered, it will perform another one, with a limit of three pecks. The targeted character must use their hammer to counter the boss before they get pecked. Each counter will deal damage to the boss. Watch out - this attack can inflict the Dizzy status effect!
After a turn or two on the ground while conscious, the boss will fly again.
Luigi Logic
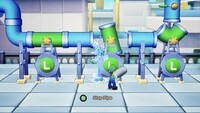
After the whirlwind attack, the background pipes will rotate. The Luigi Logic then becomes available! When selected, Luigi will run to the background and have his hammer in hand. The text Connect the pipes! appears on the screen. To successfully perform the Luigi Logic, Luigi must whack the "L" buttons with his hammer to stop the pipes so that the water can flow. This can be done by pressing . Good timing is needed however, as the pipes must be stooped at the right moment to connect them. If a pipe is stopped but isn't connected, the Luigi Logic is failed. Luigi will be disappointed before running back to the battle. The pipes will also stop rotating, so the player must wait for the Mega Snaptor to perform another whirlwind attack before they get to try again. There are three pipes to connect:
- A straight pipe that rotates slowly
- A straight pipe that rotates at a faster speed
- A curved pipe rotating at the same speed as the second pipe
After connecting the pipes, Luigi hops onto the lever on the last pipe. He must then release the water, and must be repeatedly tapped (AKA mashed) to do so. If successful, A massive torrent of water gushes out of the pipe and lands on the Mega Snaptor, sending it crashing to the ground and making it dizzy. The water also sends Luigi flying in the sky; he crash-lands at his usual battle spot, although it's just for comical effect, with no damage taken. While the Mega Snaptor is dizzy, all attacks dealt to it will deal critical damage. After a turn passes, the boss will stand up.
To summarize, use good timing to connect all three pipes, and then mash like crazy to release the water!
Tips and tricks
Recommended gear
Here is the best equipment the Lottacoins Island shop has:
- Boots: Antiair Boots and Lottacoins Boots
- Hammer: Steady Hammer and Blunt Hammer
- Wear: Bros. Wear
Antiair Boots are the best for this fight because they deal additional damage to flying enemies. Lottacoins Boots are slightly stronger than Accel Boots, with an 8-point boost to DEF. If you have completed the "Zokket's Schemes" side quest, then you have the Accel Boots! Compared to the previous boots, they have similar power, but they have a slight SPD increase of two points. The passive ability however (+30% SPD boost each time an enemy is defeated) cannot be utilized.
Hammers aren't really necessary for this fight, because the boss is flying! They can help with damage for counterattacks however, so any of the three hammers mentioned above are fine. Additionally, the Knockout Hammer from Desolatt Island is still good. If you've cleared the "Little Lost Toad" side quest, then you have access to the powerful (for now) Bros. Hammer! Keep in mind that you can't restore two BP from defeating an enemy with it.
Bros. Wear is still the best wear to have. It's slightly stronger than Sturdy Wear (by one point!), and has the bonus passive of restoring one BP every take you take damage.
If you chose to let Luigi be the decoy for the Snaptors, make sure you get right the strongest equipment after rescuing him! You don't want him to be underpowered in terms of gear.
Don't have enough coins? Battle those roaming Helmet Zok troopers! You'll gain coins (and EXP too!) so you can buy from the island's gear shop.
You can have whatever accessories and Gloves you want, as they support different playstyles. I'm not going to go into detail about those.
Recommended Battle Plugs
YAY!! We finally have access to Battle Plugs for the rest of these boss fights! Any Battle Plug is useful, especially if they fit your playstyle, so I'm choosing ones that especially help out during against the Mega Snaptor:
 Surefooted Guard: Prevents the Trip and Dizzy status effects from occurring. Also allows you to conserve your Refreshing Herbs!
 Anti-Flying Specialist: Allows the brothers' jump attacks to deal critical damage to the boss while it's flying! All counters are also criticals, as long as the Mega Snaptor is in its flying state.

 Auto Mushroom and Auto Syrup Jar: Allows you to to use an item when you're low on stats! As a bonus, you won't have to waste a turn doing so!
Other things
The Mega Snaptor is level 16, so match or surpass its level to ensure you're on equal strength or have an advantage. If you chose to have Luigi be the decoy, Make sure he's properly leveled before starting the battle! Grind EXP from the enemies found inside the Duplex Towers if you're not ready.
Because the boss is flying, Hammer Attacks and Green Shell won't reach the boss. Red Shell can however, so you can use it to deal high damage if you want to conserve BP.
Since the time between Ten and this fight, we have Hatch Me if You Can and Zapperator now! The former is a powerful two-hit attack, but requires 3 more BP than Red Shell. Zapperator on the other hand isn't worth to use, as the attack is tailored towards groups of enemies rather than one strong one. It's best to only use Jump attacks with Luigi instead. Only use Luigi's Bros. Attacks (preferably Green Shell) for when the boss is on the ground, especially if it's dizzy.
When the boss is on the ground, the Anti-Flying Specialist Battle Plug will have no effect. Swap it out for a more useful one instead.
The Auto Mushroom and Auto Syrup Jar Battle Plugs are great ways to recover and attack in the same turn. This especially helps when the Mega Snaptor is dizzy, because you don't want to waste a great opportunity for a strong attack.
The Surefooted Guard Battle Plug prevents Trip and Dizzy from happening. This also prevents the waste of turns by using Refreshing Herbs. Auto Herb is a good alternative if Surefooted Guard is recharging.
Make sure to bring enough items so you won't run out of them during the battle! They're also necessary for the above Battle Plugs to work.
I always say this, but you can use Emergency Guard if you just cannot nail the timing of the foe's attacks. It won't protect you from status effects, but Surefooted Guard will help with that.
During the Luigi Logic, try to create a rhythm in your mind so you won't miss the timing of the pipes.
When the Mega Snaptor flies by, be sure not to land on the snatched brother! Remember that he rolls slower than the rocks. Be sure to look at the right side of the screen during this attack to see what the boss will drop.
I don't know if it's just me, but the pecking attack seems to have later timing to counter than expected. Swing your hammers when you're right about to get pecked!
With the Mega Snaptor defeated, we can now get to a very exciting boss - Sharpcask! Unfortunately, you'll have to wait until July to see the guide. Writing these takes a while! Stay tuned until then for one heck of a showdown! Goodbye, now!
Fading Into Obscurity
So I was sitting there one night reading an advance copy of The 'Shroom, which I'm able to do because of certain privileges and a special website not accessible to you normies (I mean, what can I say? I'm better then you!), when I saw that Waluigi Time decided to break out an old favorite of his. That's right, he brought back Rising From Obscurity as part of his plan to dominate the special issue. Well, as I've said before many times, including during at least four different Awards Committee meetings, I will be in the ground before I let Waluigi Time defeat me! So as part of my everlasting mission to one-up Waluigi Time in the world of literature (not drawing – never drawing), here is a special issue of the original and superior Fading Into Obscurity. Now, because it's the special villains issue, we're going to be looking at Wario's archenemy in the adventuring world, the notorious Captain Syrup!
First appearing in Wario Land: Super Mario Land 3, Captain Syrup appears as a natural foil to the greedy scoundrel Wario. Fresh off of his defeat from Mario and his failure to solidify his conquering of that weird Mario Land that never comes up again and whose legal status is never fully elaborated on, Wario decided he was going to star in his own game! To find his own treasure! And get his own castle! His efforts bring him in conflict with Captain Syrup and her Brown Sugar Pirates on the far-off island of Kitchen Island. Here, Wario plans to raid the island and steal its treasures - most specifically, a giant statue of Princess Peach that the Brown Sugar Pirates have themselves stolen!
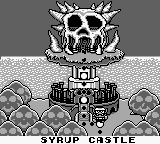
We actually see very little of Captain Syrup in Wario Land: Super Mario Land 3, but from what we can infer, she must be a terrifying and cruel captain. After all she commands absolute loyalty from the Brown Sugar Pirates and appears to rule Kitchen Island like a pirate queen, even erecting Syrup Castle, a royal castle that would put many of Bowser's own castles to shame.
She, along with her crew, also appear to be wildly successful beyond what any other Mario villain has accomplished. Not only has she stolen a castle-sized statue of Princess Peach, which alone might be one of the greatest capers ever pulled off in Mushroom Kingdom history, but she's also managed to steal fifteen grand treasures that have been hidden around the island with values ranging from as low as 2,000 coins and as high as 9,000 coins!!!
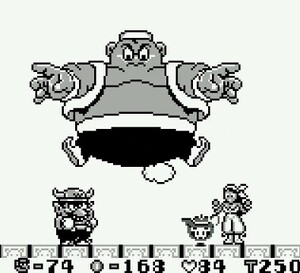
Then, when confronted by Wario in Syrup Castle, she reveals herself, in a shocking moment, to be a girl!!! She fights Wario using maybe her most powerful treasure, a real and living goddamn genie! And not just a stupid Mario Party genie that just takes you to the star but doesn't even give you the money to buy the star, rendering the whole thing pointless if you don't have enough coins. She has an actual seemingly all-powerful genie who can shoot fire and create planets! Although, the planets thing might be non-canonical…
Captain Syrup is kind of unique amongst Mario series villains in that she's not trying to, you know, conquer places and enslave races. She's a pirate! She and her crew steal stuff for money! What's kind of funny is she didn't do anything to Wario. Wario picks a fight with her. I don't even think Captain Syrup knew who Wario was before Wario barged into her island to steal her stuff!
Of course, if Captain Syrup didn't know who Wario was in Wario Land: Super Mario Land 3, she absolutely knew who Wario was by the end of the game. At the end of the Genie fight, with her strongest champion defeated, Captain Syrup attempted to murder Wario by blowing him up alongside her castle, which seemed short-sighted. This naturally failed, and not only did Wario not die, but it revealed the location of the giant golden statue of Princess Peach. Now, you could argue that Wario defeating her might have done her a favor. Because I think that stealing the statue might have been a case of flying too close to the sun, since it's revealed that Mario was on the case looking for the giant statue, and piloting a helicopter no less. And since Wario had already revealed the location of it, Mario just took the statue back with him without pursuing the remnants of the pirates. So realistically speaking, considering Mario was already on the case, Syrup was probably better off that Wario beat her over Mario, but that's just my opinion.
Now, despite being defeated, her crew's treasures stolen, and her personal fiefdom in ruins, Captain Syrup quickly managed to rebuild the Brown Sugar Pirates, now calling them the Black Sugar Gang, which I personally think shows how great of a leader she was! After all, she managed to take a broken gang of cutthroats at their lowest point and reform them for one purpose - revenge against the man that wronged them, Wario! The plan? As revealed in Wario Land II, thanks to her genius planning, the Black Sugar Gang successfully infiltrated Wario's castle, which as many of you remember he got from Captain Syrup's genie! They then proceeded to steal back their treasure and, in my headcanon the treasure Wario got from the Awazon River Basin in Virtual Boy: Wario Land. They then proceeded to flood the castle and put giant alarm clocks everywhere, you know, to annoy Wario. Captain Syrup even planned a genius way for her pirates to escape by distracting Wario, setting his prized pet chicken Hen free!
Of course, that's just the setup for one route in Wario Land II, but that's my favorite route and I'm not breaking down the others 'cause there are like five routes, each with their own cutscenes, and it's just not worth it. Unlike Wario Land: Super Mario Land 3, Captain Syrup appears quite a few times in Wario Land 2 and, also unlike in the former game, Captain Syrup is directly fought as the final boss in two of the routes, piloting an airship in one and controlling a giant mech spear guy in another.
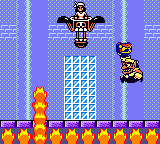
In two other routes, Wario's pursuit of her leads to those routes' final bosses, one being a weird thing that shoots bubbles and the other being a spooky ghost. She also serves as what's probably supposed to be the true final boss fought in the rebuilt Syrup Castle, where she pilots yet another airship. Of course, all these routes sadly end the same for Captain Syrup, with Wario sending her and her minions flying and stealing back his treasure. There's even a special level Steal the Syrup's treasure!! where Wario, after has found all fifty Hidden Treasures, beaten the Puzzle Palace, and gotten all five of the game's endings, gets to break into Syrup Castle's hidden vault, stealing all the remaining treasure from Captain Syrup and the Black Sugar Gang and once again bringing Captain Syrup to her lowest point. Although even here she still manages to command loyalty, with the recurring boss the Giant Spear Man, who I assume is Captain Syrup's first mate, pursing Wario back to his castle during the final cutscene. Now at one point the wiki decided that this meant he had joined Wario's side and was now an ally of Wario, but that's dumb! Don't listen to that nonsense! Noted Wario-ologists me and Doc have concluded that the Giant Spear Man is really planning to kick Wario's ass and take back the treasure!
Now, you might be thinking "wow we've really hammered home that Captain Syrup is Wario's main rival for treasure-getting. I'm sure with there being multiple Wario games made over the next ten years, she's gotta be in a ton, right?". Haha, NO! WRONG! SHE'S GONE! Yeah, for some reason, despite Captain Syrup being, you know, the main villain of the first two not-Virtual Boy Wario games, Captain Syrup just disappears! And instead Wario would go on to fight evil clowns from another world, a cursed diva from a Golden Pyramid, and whatever the hell was going on in Wario World.
Of course, you can't keep a good girl down, and after ten long years, Captain Syrup would finally return with a new updated, more anime-style design in the stylistically pleasing but fairly mediocre Wii platformer Wario Land: Shake It!. No longer sporting a pirate crew, maybe because you can only lose literally all your treasure twice before the whole crew decides this crime thing isn't working out, Captain Syrup once again sets the whole thing in motion.
Having learned of a legendary Bottomless Coin Sack located in a different world, Captain Syrup tracked down the Ancient Globe (the entrance to the different world) in a museum. Upon learning that the evil Shake King had successfully stolen the Bottomless Coin Sack and deciding that defeating him or stealing the sack from him would be too much work, she instead crafts herself another cunning plan! Stealing the Ancient Globe, she then ships it to Wario telling him it's a little gift and the real treasure is inside. Now, there are two ways you could take this. Either, A) It has been ten years and Wario and Captain Syrup are no longer mortal enemies and are now at the very least on the kind of terms where you could send somebody a package and have them not think it's a trap, or B) As soon as Wario hears mention of treasure, he becomes a blithering moron and losses sight of any logic and reason. Either way, Wario ends up inside the Shake Dimension on his own hunt to steal the Bottomless Coin Sack and I guess beat the Shake King or whatever.
Honestly this is a great plan by Captain Syrup, because not only is she secretly tricking Wario into doing all the work to get the Bottomless Coin Sack, but she's the one the selling him the various maps of the different Shake Dimension worlds and health potions. That's right, she's in a win-win situation, because as Wario collects loot and treasure, he's paying her for the chance to get a bigger payoff, not realizing that she's planning on stealing the Bottomless Coin Sack right out from under him. And even if, let's say, the plan doesn't work and she can't get her hands on the Bottomless Coin Sack, well the total value of the five maps she sells is 501,000 coins! So no matter what happens, she's making it out of this game with over half a million in coins, and that's not including any health items Wario may or may not have canonically bought! But here's the thing, the plan works perfectly! Wario defeats the Shake King, takes the Bottomless Coin Sack, and returns home, where Captain Syrup promptly steals it from Wario and successfully drives off. All the while, it's revealed that this whole goddamn thing was a setup, with Captain Syrup agreeing to provide the little wiener inhabitants of the Shake Dimension, the Merfle, with a hero to defeat the Shake King and free Queen Merelda in exchange for the Bottomless Coin Sack!
Wario doesn't even try to stop her, either! By the time Wario realizes what's happening, Captain Syrup has already made her getaway, leaving Wario to take his anger over being swindled out on the Merfle, making this one of the few times in the Mario franchise where the villain has like won!
This would sadly be the last time Captain Syrup has ever appeared in a game that wasn't like a cameo or something like that. And I guess if you think about it, it makes sense. After all, she successfully stole the Bottomless Coin Sack. She doesn't need to be a pirate anymore. She now has more treasure than anybody will ever have in the history of time. She doesn't need to steal anymore! She's set for life! And as for, Wario well I assume he had planned on going for revenge and might still contemplate it from time to time, but, you know, he's a businessman now, and with the success of WarioWare Inc., Wario is too busy attempting to compete with rival Pyoro for market share in the cutthroat videogames industry. So sadly, he doesn't have time for adventuring anymore.
Now, tongue-in-cheek explanation aside, the reality is that I think the real reason Captain Syrup hasn't returned is because the last few non-WarioWare solo Wario games didn't exactly set the world on fire sales-wise. So I don't think there's a lot of appetite for another Wario Land at Nintendo. But if they ever do make another Wario Land game, I really hope Captain Syrup returns, not only because she's the villain of my two favorite Wario games (…and Shake It!!), but also because she's the perfect antagonist for Wario. Wario isn't about saving people or liberating kingdoms! He's about stealing treasure! So when he battles it out with Captain Syrup, the fate of the world isn't in the balance; instead, it's two greedy pricks trying to rob each other!
I'd also love it if she started appearing in spin-offs like Mario Kart or Mario Party. Like, imagine her as the shopkeep in a Wario-themed Mario Party board! It writes itself, Nintendo! Unfortunately, since for some reason Nintendo refuses to let anything from any of the Wario games touch anything in the Mario series, I highly doubt Captain Syrup will ever return, sadly rendering her to the dustbin of history. But I guess at least for her, she's canonically richer than anybody in the series.
Four Steps for an Evil Lair
Written by: Lairry The Bandit (talk)
Fufufufu, welcome all you miscreants, ne'er-do-wells, ruffians, and other aspiring villains dreaming of your someday-conquests, to Four Steps for an Evil Lair with me, Lairry the Bandit! Now, I know, I know, all you upstarts these days like to focus on the flashy parts of villainy - the hi-tech weapons, the plots to put castles into orbit, maybe the occasional team-up with your nemeses against a threat that's somehow more destructive than you. But take it from an old-timer, you're never going to have the funding and notoriety for any of that if you don't start by sorting out the fundamentals - fundamentals like constructing your very own evil lair!
Think about it. What big-shot villain do you know without a sick and iconic base of operations? A castle, a moon fortress, an ominous tower jutting out from the sea, they're tried-and-true classics for a reason. You want your shot at big-time villainy? You're going to need a well-made evil lair to work out of. I can already hear you out there, chittering away about where you're going to work on a skull design and which wall you're going to take out for the Maw-Ray tank, and to that I say, no! Silence yourselves right now! You are not installing a lava moat until you understand the core framework of good lair design. I don't care that you were thinking about going with blue lava over the traditional red. Newsflash! It's been done! That is so 2013.
What you really need to know is how to give your do-gooder archenemies a memorable challenge. It's about striking a balance. You want to keep your traps and puzzles deadly, but not merciless. Ramp it up. Ease your enemies into the challenge, let a theme emerge. It's called having class, and since you're all obviously in need of class in more ways than one, today we're going to discuss the fundamentals of lair design through a case study.
So join me my little crop of foul fledglings, and let's see what that washout villain Boss Brolder got right - and got wrong - about lair design in his Lava Rock Lair.
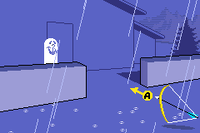
And that, my future henchmen-hirers, was what we call an unmitigated disaster. Ough, I just can't bear to even think about how poorly that went! No wonder Boss Brolder dropped off the face of the planet. Maybe it's not as bad as I'm making it out to be. It did have an okay start, after all, but... c'mon, c'mon, be honest here. The Lava Rock Lair gave us nothing. That's a prime example of a lair that's too short and too underbaked. There just wasn't enough runway to get the whole Brolder-throwing theme off the ground. It's so imprecise that you couldn't really take it anywhere. It was over as soon as the best idea the lair could pull out was "Goomba Tower but taller".
So- Hold on, what have we learned here? Number one, make sure your core lair concept has room to switch it up. Don't think you're finished because you came up with one or two puzzles that work in exactly the same way. Nooooo, give us something! Do something new with your core idea! Something that changes up how the heroes are going to interact with the main mechanisms of your lair! You don't do that and you're going to end up with nothing. Zilch! Nada! When the next big fancy 3D platformer comes along, nobody's going to remember who you are, because your lair didn't leave an impression.
You know who did better at this? This- Oh, god, this should be humiliating for Boss Brolder. Rollodillo did better than this! Rollodillo! And he didn't even have a proper lair! This is inexcusable. I can't anymore- No. I refuse to give this a platform any longer. Go and compare and contrast these approaches, and for the sake of all that is evil, don't pull a Boss Brolder! Give some kind of twist to your lair!
Rhythm Review
Hello and welcome back to Rhythm Review! This is Zange, and I love the Rhythm Heaven games! So much so that I started a whole section about them last month, wew… Anyways, last time we covered Stage 1 of Rhythm Tengoku for the Game Boy Advance, so now we’re moving right on to Stage 2!
As a reminder: In most Rhythm Heaven games, a stage consists of four rhythm minigames, followed by one remix, in which all the other minigames in the stage are put together in a new way to new music. However, Rhythm Tengoku is weird and has five minigames in each stage instead of four, and there is still a remix. Let’s jump in!
Sneaky Spirits
First up in Stage 2, we have Sneaky Spirits! Ghosts will pop up and try to slip past you, and you’ll use the A button to shoot an arrow at them on every 8th beat of music, trapping them in the house. It sounds easy at first, but there’s more to it than that. Make sure none of them escape you!!
Gimmicks
There are two major gimmicks involved in this rhythm minigame. The first one is a gimmick that appears many more times throughout the series: tempo changes. The music will go faster or slower throughout the minigame, though it will always stay consistent across a set of eight beats (or for one ghost, in other words). The second gimmick is crucial to the games: there are some beats where the ghosts will pop up lower than normal, or not pop up at all, causing the music to fade out or be replaced by wind blowing.
How to Get That Superb
As a reminder: On top of excellent performance , there are certain criteria on each rhythm minigame that must be met in order to earn a Superb result. Usually, this can be gleaned from some of the dialogue the game gives you after completing the minigame. Failing to meet all criteria can result in an OK result, or even a Try Again if played poorly enough.
For Sneaky Spirits, the criteria is pretty straightforward. First, you need to be able to hit the ghosts at times when the audio fades out near the end of a given eight beat set. Second, you need to have a good internal sense of rhythm. This basically just means you need to be able to count the beats to yourself in each set. Finally, you need to be able to hit ghosts even when the music is very slow. These are all pretty simple, so as long as you can adjust yourself to the different timings between sets you should be able to get this pretty easily.
Difficulty Rating
Considering that having a good sense of internal rhythm is crucial to doing well here, and that it’s a little more difficult for anyone who isn’t already a musician to develop that sense, I’m going to give this one a 1.6/5. This is one of those rhythm minigames where the gameplay is a bit trickier than it sounds and I was definitely feeling it while replaying this one.
Iai Giri
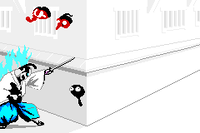
Oooooo we’ve hit the first rhythm minigame where we need to use the Japanese title because an official English one doesn’t exist, fun! Anyways, in Iai Giri, you play as a samurai who slices demons jumping off a ledge at you using the A button. If you’ve seen a Samurai Slice rhythm minigame in any other Rhythm Heaven game, this is the first one of those! How nice to see where it all began…
Gimmicks
Oh boy, another rhythm minigame with fun tempo shenanigans! The song will speed up after every two loops, before slowing way down before the end of the first half of this minigame, and this pattern will continue for the second half. In the second half, there are two demons coming at you at a time instead of just one, both of which must be hit in rhythm! Additionally, there are times where a cloud of darkness covers up most of your screen and you have to rely on audio cues and your internal rhythm to be able to hit the demons! This happens at the end of both halves (where it slows down, since those are larger than normal demons) and throughout the second half.
How to Get That Superb
Once again, the criteria for getting a Superb is pretty straightforward. First, you need to be able to accurately hit the demons when the fog rolls in. Second, you need to be able to accurately hit the demons when the tempo is very fast. Finally, you need to be able to hit the big, slow demons at the end of each half of the minigame. Most of this is just going to be having a good sense of the timing, so as long as you have that down this should be another easy one to get.
Difficulty Rating
I’m gonna give this one a 1.4/5. You don’t actually get a practice for this rhythm minigame, making it difficult to be able to figure out the timing at first. However, once you are able to get it figured out, it’s pretty smooth sailing from there, as the only thing that really changes is the speed.
Rat Race
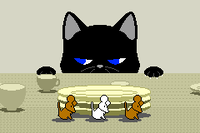
Next up in this stage we have Rat Race! You play a rat who has to hide behind plates when the cat is about to appear by holding the A button, and releasing A when the cat goes away. Get that big cheese heist, little rats!
Gimmicks
There’s actually not too much happening here gimmick-wise. It’s fairly straightforward. I will say, they give you a stoplight in the practice for timing help but it’s taken away once you play the actual minigame.
How to Get That Superb
Because of the lack of any kind of gimmick here, the criteria for getting a Superb result pretty much lines up with doing good in normal gameplay. As long as you have good timing on both your starts and stops, getting a Superb here is pretty simple.
Difficulty Rating
Is it just me or is the timing for starting and stopping really tricky to master? I swear it feels like I’m slightly off every time I play this one… Anyways I’m giving it a 1.6/5 for that reason. This is really one of those rhythm minigames where it’s easier on paper ^^;;
Sick Beats
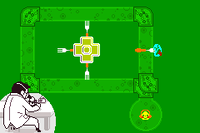
Next up is Sick Beats! You play a doctor trying to protect a little yellow microorganism from viruses traveling through a series of tubes. You’ll use the D-pad to shoot forks in the direction of your choice to stop these little buggers! Think of it like a tower defense type of rhythm minigame.
Gimmicks
This rhythm minigame is a bit unique in how it counts misses. As long as you hit a virus before it gets through the last tube, it counts as a hit. If any virus gets through the last tube, only then does it count as a miss. Meaning if you only have one virus on the screen, you could totally let it get to the last tube before you hit it and you would be more than okay to do so. Not that I recommend this approach… Also, there are times where multiple viruses will go through the tubes at once. You only have to hit one of them at a time!! I found this out the hard way when I was going for a Perfect, oops.
How to Get That Superb
So this is one of the weirder rhythm minigames in Tengoku in that there is only one line given for a Superb result. Basically, as long as you exterminate enough viruses with good timing, you will get a Superb, so this should be another pretty easy one as long as you have the timing down.
Difficulty Rating
There are a few moments in this rhythm minigame where viruses will make their way through the tubes one after the other, so there is a little bit of a challenge here, but otherwise this is a pretty easy one. I’ll give this a 1.5/5.
The☆Bon Odori
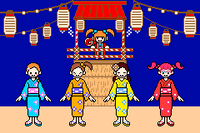
For the last normal rhythm minigame of this stage, we have The☆Bon Odori! You play as a girl performing a dance at a Bon Festival, where you must hit the A button to clap when the song says ‘pan’. It’s a festival, hurray! Let’s all sing and dance along~
Gimmicks
Once again there’s not really much in the way of gimmicks here, but there are lyrics for the song highlighted on the screen during gameplay! However, at least in my experience, they are only there to trick you because the timing of those and the timing of when you need to clap do NOT match up in the slightest. You have been warned ^^
How to Get That Superb
This is another unique case, as there are four possible lines of text that the game can give you for a Superb result. However, the game will only ever show you three of them at a time, meaning there are some instances where the game gives you three lines of text at the result screen but you will still only get an OK result. You still need to meet ALL of the criteria to get the Superb rating. First, you need to have consistent timing in both halves of the song. Second, you need to be able to nail the “Made in Japan” part in the second half - since you clap every time the song says ‘pan’, that includes this!. Finally, you need to be able to nail the “pan pan” at the very end of the song. It might take a few tries, but getting the Superb here is very doable!!
Difficulty Rating
Because the timing here is a little bit trickier to get a hold on, and the lyrics have a tendency to throw people off, I’m giving this a 1.8/5. Honestly this is probably my least favorite rhythm minigame in this whole stage…
Remix 2
Finally, we’re at the remix for this stage! This is probably one of my favorites from this game and it’s purely because the music is SO CATCHY! As always, I hope you remember the controls for everything you’ve already played in this stage!
Gimmicks
As long as a gimmick in a given rhythm minigame isn’t related to tempo or reducing vision, it returns for the remix. There are a few new bits, though. First, the stoplight makes a return for the Rat Race segments! Second, in the first Sneaky Spirits segment, you’re meant to shoot the arrow at the ghosts on the seventh beat and not the eighth, since it lines up more with the music. They thought they could throw us off but I’ve played this game too much for that trick to work…
How to Get That Superb
As with every remix in the Rhythm Heaven series, you will get the same lines of text depending on the result you get, so it’s a little harder to judge where the line is drawn between a Superb result and an OK result. The safest thing I can say is that if you can get a Superb in every other rhythm minigame in this stage, you should be able to get one here as well. Just be mindful of the transitions!!
Difficulty Rating
The remixes always feel harder to rate for difficulty because they’re so completely different from the normal rhythm minigames… However, comparing it directly to the last remix, I feel comfortable giving this one a 2.3/5, if only because this remix switches between different rhythm minigames much more frequently than the first one. The developers apparently love keeping us on our toes with this stage, don’t they?
Final Remarks
They definitely upped the ante in this stage, and it’s only gonna get harder from here! Even with the difficulty bump, a lot of these rhythm minigames were still really easy to pick up and get into, which is always a good thing I feel. Tune back in next month for Stage 3!
Rising From Obscurity
Written by: Waluigi Time (talk)
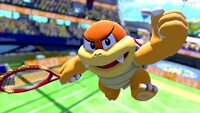
Hello there, 'Shroom readers! Welcome to Rising From Obscurity, a section where I take a look at a character from the Super Mario franchise who lost their once-prominent status for a while before eventually returning. Since it's villains month here at The 'Shroom, and I already covered the Koopalings when I first wrote this section in Issue 200, we're going to be doing the next best thing and covering Boom Boom!
As far as so-called "prominence" goes, Boom Boom is kind of an interesting one. He was introduced in Super Mario Bros. 3 in 1988, appearing as the fortress boss in every world with a few extra appearances in World 8. Since you fight him so many times, he changes up his battle strategy sometimes, at least. Because of how popular Super Mario Bros. 3 is, I think most people in the Mario fanbase probably knew who he was, but unlike the Koopalings, he didn't really do anything else! Super Mario Bros. 3 and its remakes were his only game appearances for a long time. He made a few other appearances in contemporary media such as The Adventures of Super Mario Bros. 3 and the Nintendo Adventure Books, and was also referenced by name in the original Super Mario Bros. film and Super Paper Mario. Essentially, Boom Boom was a one-off character being carried by having a prominent role in one of the franchise's most popular games.
But after being mostly neglected after the early 90s, Boom Boom finally got his big break in Super Mario 3D Land in 2011! This was just two years after the return of the Koopalings in New Super Mario Bros. Wii, so I guess Nintendo was in their bring back things from Super Mario Bros. 3 phase (except Buster Beetle, Hot Foot, and Hammer Mario). He even got a new companion, Pom Pom! She's done pretty well for herself too and even managed to beat Boom Boom out of a playable spot in Super Mario Party, but this section isn't really about her. Unlike Super Mario Bros. 3, Boom Boom is always fought in an airship instead of a fortress, and appears as the end boss of the world rather than the mid-boss (which there are none of). He also doesn't appear in every world to make room for Pom Pom and Tail Bowser. Finally, unlike the Koopalings, Boom Boom's design wasn't really changed that much besides tweaks to his proportions and color, with the biggest change being that he had spike removal surgery, a decision that Nintendo immediately waffled on.
His next appearance was New Super Mario Bros. U the following year, where he went back to the fortress mid-boss role more typical of his debut. But Nintendo already changed their mind and gave him his spikes back! Also, he had visible claws now, which he's kept in every game moving forward. Then in Super Mario 3D World, his spikes were gone again. Now that's not too weird, after all 3D World builds directly off of 3D Land and it's not the first time a sequel like that reverted a design (see also Super Mario Galaxy 2, which retained some of the non-standard designs from Galaxy despite New Super Mario Bros. Wii releasing between them). Nowadays, Boom Boom is depicted with spikes... usually. Super Mario Maker 2 maintains accuracy to the original games, giving him the spiked shell in all but the 3D World style, and he doesn't have them in the Bowser's Fury expansion either. His Super Smash Bros. Ultimate spirits are also an exception, since they use artwork from his smooth shell appearances.
But enough about the fluctuating state of the guy's shell. What else has he been up to? After 3D World, he finally broke out of the main platformers and appeared in... Puzzle & Dragons: Super Mario Bros. Edition. I wonder how many people actually remember that game. He was technically playable for the first time as a skin in the Minecraft Super Mario Mash-up Pack, then slightly more officially playable in Mario Sports Superstars as a goalie in soccer. A 2019 update for Mario Tennis Aces was the first time Boom Boom himself was a fully-fledged selectable playable character on the roster, which he proceeded to celebrate by never being playable again! There are Boom Boom goalies in Mario Strikers: Battle League, but they're entirely controlled by the CPU. I think some people thought he was going to be a driver in Mario Kart World based on blurry trailer footage, but looks like that's not the case. You sure can crash into him, though!
So yeah, that's the return of Boom Boom. Not much more to him than before I'd say, he's still mostly just filling that mid-boss lackey role, but now he's doing it in several games instead of just one game and its remakes. Other than that, he's just kind of around and hasn't really seemed to make his way into becoming a staple character. I can't really say I expect to see much more from him than we're already getting, popping up in spinoffs from time to time with the possibility of an occasional oddball playable appearance. Or maybe I'll be wrong and he'll get his own spinoff game on the Switch 2! (Probably not.)
Rocket's Pokémon Academy
Written by: Rocket Grunt (talk)
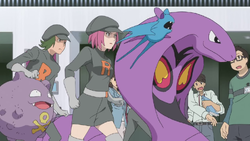
Hehehe, the Boss's plan went off without a hitch! Getting a couple agents on the inside in that Spotlight office was genius. Made it real easy to move in when they gave the signal. And with that egghead still tied up back in the warehouse, we got free rein! Running operations outta here's gonna makes us wads of cash. I can feel it!
Bet you rookies want a cut of the takings, don't you? Heh, take it from me, the boss is a generous man. You'll get your cut as long as you perform, and I'm here to show you the ropes. A top operative in Team Rocket gets in and out without any goodie-two-shoes spotting 'em, but who're we kidding here? You rookies aren't pulling that off anytime soon. So listen up! If a Team Rocket operative can't be invisible, the next best thing for them to be is feared!
You all got your signing bonus, didn't you? Those are grade-A primo Pokémon pilfered right from snot-nosed brats! Sic 'em on anyone who gets in your way, and you'll send them runnin' for a corner to cower in! You just gotta know when to use 'em. That's where I come in. I'll teach you how Rocket Grunts use their Pokémon as tools to strike fear in the population and take what we want! So listen and listen good, because I'm only saying this once!
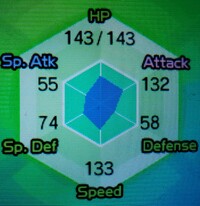
Base Stats: Base stats are the values associated with a particular Pokémon species, and are the same across every individual Pokémon of a given species. You have no influence on them. You can think of them as traits tied to a species. A chimp isn't ever going to be able to get as good as digging as a mole will be, and, likewise, an Abra is never going to have the defensive prowess a Shuckle has.
Individual Values (IVs): Individual values, as their name implies, are associated with individual Pokémon. They range from 0 to 31 in each stat, with 31 being considered a "perfect" IV and higher numbers corresponding to different stats. Magikarp A and Magikarp B will have the same base stats, but they may very well have different IVs. To stick with the animal analogy, one mole may be born with larger claws than another mole, and that first mole is probably going to have an easier time digging through dirt than the latter. Individual values are set in stone, strictly speaking, but you can use Hyper Training (from Generation VII onwards) to functionally get a perfect IV in a stat.
Effort Values (EVs): Effort values are the one thing you can easily change. A Pokémon can earn, primarily through battling, but also through means like the use of certain items or mechanics like Super Training, up to a total of 510 effort values, with up to 252 in any given stat. To finish off the animal analogy, no matter what kind of claws a mole is born with, moles who have more experience digging are probably going to be better at digging than moles which have never dug.
Nature: A Pokémon's nature is, more or a less, a stat modifier with a name meant to make it sound like a Pokémon has some personality. Natures will raise one stat by ten percent and lower another stat by ten percent. Some natures raise and lower the same stat, canceling out the effect and leaving stats unchanged. Natures can be functionally changed with the use of special mint items from Generation VIII onwards.
STAB: STAB stands for Same-Type Attack Bonus, and refers to the boosted power of moves that match the type of the move's user. To illustrate this, consider the case of a Lombre, a dual-type Pokémon which is both a Water-type and a Grass-type. Any Water-type moves Lombre uses will have their power boosted by 1.5x, and any Grass-type moves Lombre uses will, likewise, have their power boosted by 1.5x. (There are circumstances where this does not apply, and, while the 1.5x multiplier is typical, some games use other multipliers.)
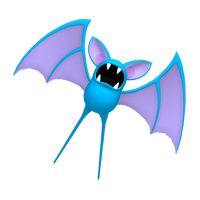
Let's see here... Says here you're a batch of Alola recruits, huh? Must've been real impressed by that Rainbow Rocket operation, weren't you? You're group G-VII, so you got Zubat to match. First thing you need to know about Zubat? The only thing they're good for is biting hard and biting fast! They never amount to more than that, so just get the fastest and toughest Zubat you can find! Some twerp comes waltzing out of a cave with one faster than yours? Then nab it! In this world, the man with the fastest Zubat takes what he wants!
So, look, once you get a Zubat that can zip around and that bites like a starved Sharpedo, take it on a few missions. We got some stolen doohickeys back at base you can use once you bring back some goodies. Some Power Bracer and Power Anklet or something. Go ahead, make your little fanged missile even faster. It'll pay off when you send a would-be hero running for the hills! Throw on a Power Weight if you can get your hands on it. Point is, your Zubat should be able to blast off at the speed of light coming from a dead stop, and it's gotta have fangs sharp enough to go for a knockout! You might hear something like "oh, make sure your Zubat has as high a natural defense and special defense as possible", but what do you care about that?
|
Name: | Zubat | Base HP: | 40 | |
| Category: | Bat | Base Attack: | 45 | ||
| Type: | Poison | Flying | Base Defense: | 35 | |
| Abilities: | Inner Focus | Base Special Attack: | 30 | ||
| Infiltrator | Base Special Defense: | 40 | |||
| Base Speed: | 55 | ||||
You got all that? Good! Now... Been a while since I did this, hang on... Swear I just saw some notes left around here... Right, uh, you're gonna want a Zubat with an "Adamant" nature... whatever that means. Point is, a Zubat is best when it's biting! Or maybe hitting something with its wings. Who needs some useless bat trying to attack from a distance? You need a tool that gets the job done up close and personal!
Now I've been doing this for a long time, so I'll let you in on a secret. There's two kinds of Zubat. Most of 'em? Worthless. They got some kind of Inner Focus or something that means they won't go freezing up when they're attacked. But you ask me, and they shouldn't be flinching anyway! The rest of our gear doesn't get cold feet, why should the bats? Naaaah, what you want are the Zubat that are natural-born Infiltrators. Even sounds cool, doesn't it? Those Zubat can get around walls and substitutes, and what a fit that is for Team Rocket! We go where we want, no matter what obstacles they put in our way!
You got all that? Good! Now we're gonna talk shop on the moves you'll want your Zubat to pull off. First up, you're gonna want this thing to deliver some venom, so make sure it knows how to chomp down with a Poison Fang. Yeah, just imagine it, watching some brat falling on their knees watching as their precious little rat staggers around with poison in its system. A Zubat's venom gets worse with time. After a couple of moves, their Pokémon will be knocked out on the ground in such bad shape they'll be practically begging you to take it! Only problem is that the bite's weak on its own, so you're gonna want a backup option for hitting hard.
That's where you pull out Acrobatics. What kinda fancy aerial tricks does the bat do? Pah, who cares!? Why even bother asking? It'll launch itself at anyone standing in your way with rocket force, that's all that matters! It's way more destructive than Poison Fang, you know, for when you need in and out in a hurry. Real great when the cops are breathing down your neck, I'll tell you that from experience. Just, uh, remember those Power whatevers I told you about earlier? Yeah, get rid of those before you use this one. Hits harder if the Zubat doesn't have some item weighing it down.
| Poison Fang | 
|
The user bites the target with toxic fangs. This may also leave the target badly poisoned. |
| Acrobatics | 
|
The user nimbly strikes the target. This attack does massive damage if the user isn't holding an item. |
| Leech Life | 
|
The user drains the target's blood. The user's HP is restored by half the damage taken by the target. |
| Confuse Ray | The target is exposed to a sinister ray that triggers confusion. |
Seeing as how you ain't Kantonian, I'm guessing you've never been to Mt. Moon. You know what the signs in Mt. Moon say? They say that Zubat is a bloodsucker, so you'd better believe your Zubat should be using Leech Life to suck some blood! All Pokémon exist for the glory of Team Rocket, and that includes their blood! Look, look, you let Zubat sink its fangs in and lap up a meal, and it's gonna have that much more fight in it! Might've been something about using it against a certain type of Pokémon, too, or whatever... Psychic or something?. Pah, point is, Leech Life is like having a hammer than fixes itself! Just let Zubat get a bite, and it'll keep on terrorizing whoever you need it to!
That all not enough for you? How about a Team Rocket special on top of it? That's right, I'm talking Confuse Ray! Send anyone in your way into a panic! It's hilariously easy to let them sit back and pound themselves! Best part is, it stacks with the poison! Confuse Ray right off the bat to give yourself an opening, then hit 'em with the Poison Fang, then use Acrobatics and Leech Life to KO 'em while they're weak and top yourself up! Hehehe, it's so devious it's beautiful, isn't it? And the best part is, it always works! Long as they actually hit themselves to start...
I'm thinking that's about everything you rookies need to know to get out there in the field. You follow my advice, and nobody's gonna stand in your way. Nobody, you hear me? You'll be unstoppable! You'll bring big bucks back to the boss and climb the ranks! Do what I tell you, and maybe you'll be the one infiltrating Spotlight in a few years, or get promoted over Petrel! And - and, here, 'cause I stood where you were once - one last tip. By some stroke of luck, some cheating twerp knocks out the ultra-powerful Zubat you stole fair and square?
You reach down to your waistband, you get a hand on your secret weapon, and you pull out a tool they aren't gonna be able to argue with. That's right, you hit 'em with... a second Zubat!
So You Want to Romance the Three Kingdoms?
Hello and welcome back to So You Want to Romance the Three Kingdoms?, a pseudo-strategy guide for one specific scenario in a strategy game you've never heard of! But since it's available on both the Switch and Switch 2 NSO SNES app, you should all go and play! I mean, it's only 20 dollars a year. Don't be a cheap ass! For the last few issues we've been going over some basics, and I was planning on going over a few more, but I'm afraid our lord Kong Rong is beginning to get impatient. So this month, it's time to throw caution to the wind and begin our quest to conquer China.
Step 1: Assessing the Situation
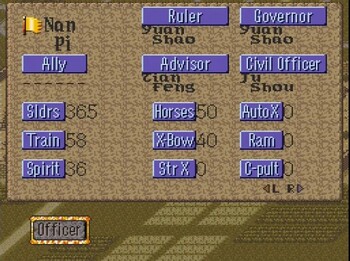
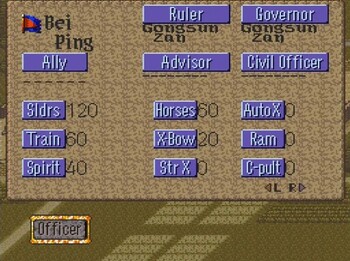
The game starts in December 189, and immediately we need to assess the situation. Unfortunately for us, the first few years are going to be quite rough! While our lord Kong Rong may be wise, I'm afraid the land which he rules is of poor quality. For starters, outside of Kong Rong, our city contains only two officers - Wu Anguo and Xin Pi, neither of whom are particularly good. They're especially middling at combat, with Wu Anguo having only 55 Lead and 69 Power and Xin Pi having an even worse 40 Lead and 51 Power. In addition, while lord Kong Rong may be wise, I'm afraid his martial prowess is quite lacking. While he has the highest Lead stat of our crew with 68, his Power is a very mediocre 51. What all this means is that, if we get invaded, we're going to have a tough time commanding the army and repelling the invaders. Even more unfortunately for us, one of the strongest starting units in the game lies just north of ours. In the city of Nan Pi, ruled by Yuan Shao, lies a terrifying force 365,000 strong.
Not only is Yuan Shao's army massive, but he also boasts an officer class of 17, each with varied skills, as opposed to our officer corp which is severely lacking in combat prowess. Not only that, but our own forces can barely be considered an army, consisting of only 92,000 half-trained peasants boasting only a 42 (out of 100) Train rating and an even worse 28 (out of 100) Spirit rating. Basically what that means is, not only do we have bad generals, but we've got bad troops to boot!
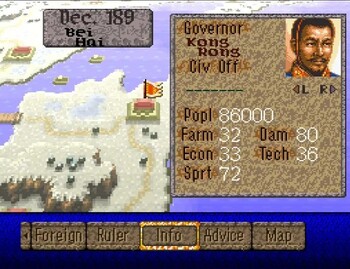
But you might be asking, "well sure the army might need some work, but surely our city should be good, right?". Nope. While beloved Bei Hai may be blessed by Lord Kong Rong's protection, I'm afraid its stats are terrible! While our Dam is currently a healthy 80 (out of 200, I believe) meaning we'll have decent protection from flooding, our most important variables - Farm and Economy - are a dismal 32 and 33 (both out of again 200).
This means that, come tax time and come harvest time, we're going to receive very small amounts of gold and provisions, making it fairly difficult to invest in the future. Now, we do have two things slightly going for us. For starters, the people of Bei Hai seem to be fairly happy with a 72 (out of 100) Spirit rate, meaning that they'll be happy to pay taxes and probably aren't planning on overthrowals and rebellions soon! And since we're not planning on going to war anytime soon if we can help it, having a low farm rate isn't really the worst thing in the world right now. You mostly need a high farm rate to produce provisions for war. We can instead focus our provisions on providing for the citizens through the "give" option in the staff menu or on selling it at the market under the market menu. Now, all of this leads to the next step in our master plan to survive.
Step 2: Don't Get Conquered
So obviously it's going to be very difficult for us if we get conquered, because, duh, obviously. And since there's a terrifying force 325,000 strong north to us, we're going to have to take some steps to protect ourselves. So the first thing we need to do is make Bei Hai a less inviting target. So we're going to the army menu and are going to click on "draft". We're going to have officer Xin Pi lead the draft, because he has the highest charm rating and that's important because the higher the charm, the less the soldier morale will be dropped when we recruit!
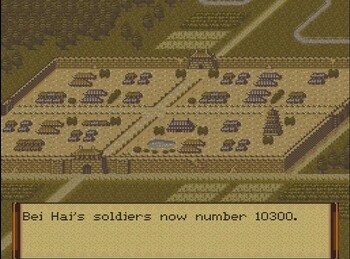
Plus, Lord Kong Rong is obviously above making personal appeals to peasants! I mean, could you imagine the dishonor? We're going to recruit as many soldiers as we can, which in this case is a paltry 11,000. How many soldiers you can recruit is based on both how many people live in your town (which in this case is only 86,000) and the amount of gold you have. So unfortunately because we live in such a small city, we're going to struggle with raising a proper army. So I'm going to be honest and tell you this is going to be very difficult to do. Because we have so few resources between having almost no officers and such a small population, it's going to very difficult to progress in this game and honestly there's a chance I'm either not going to be able to do it OR I'll have to try and conquer another city while leaving Bei Hai to die. I'm not really sure and we will cross that bridge when get there! So now, with a small amount of soldiers recruited, we're going to take a more active approach to running the city! So going to the city tab, we see we're got 4 things we can invest in.
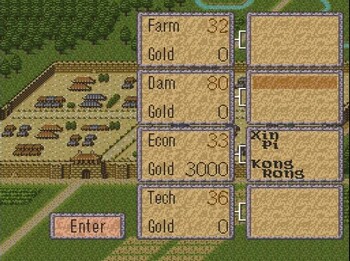
Now, usually with three officers you could split it where two officers take one and one officer takes another. You'd do this because, while it's less effective to have something being worked on with only one officer, it's still better than not working on it at all! But unfortunately for us, Wu Anguo is, how you say, blisteringly incompetent when it comes to administrative manners, having only an 18 (out of 100) in politics. Because of this, it's quite frankly not worth assigning any developmental task to him, so instead we're going to focus entirely on economy with Lord Kong Rong and Xin Pi taking the lead. We're going to invest 3,000 gold in the economy, leaving us a little less then 1,000 gold for incidentals such as trading or drafting more soldiers. That's going to take us through the first month of gameplay, and we can now move to the next month.
Step 3: Building a Scapegoat
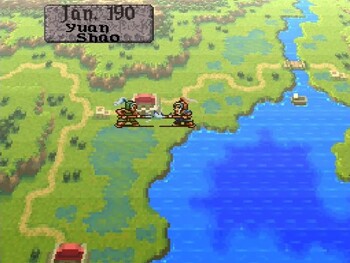
So with the first month out of the way, we enter January of 190, which luckily for us is tax time! Despite our low economy, we got about 3,000 gold in revenue! So immediately - and I mean immediately - we're going to commence with another draft! This time, we're able to recruit 29,000 soldiers to our army, bringing our total up to 132,000 soldiers. This is very important because at some point in time Yuan Shao is going to make a move and we basically just need to have more soldiers then Yuan Shao's neighbors in order to get him to invade them instead of us! More specifically, there's one specific neighbor we want him to invade, that being the city to his north, Bei Ping, ruled by Gongsun Zan.
The reason we want Yuan Shao to invade him is because Bei Ping doesn't border our city, unlike Liu Bei's city of Ping Yuan. This means that, if Yuan Shao splits his forces to conquer Bei Ping not only will his army be split, but he won't be able to recombine that force through Joint Attacks, giving us a much better chance at defending ourselves in case of invasion! So because of that, it's very important that we maintain a larger army than Gongsun Zan so that Yuan Shao sees him as an easier target over us. Oh, also, he could also take the unclaimed neutral city of Dei Xan, but he probably won't do that because that would involve splitting his forces with a potential enemy at his back, whereas if he conquers Bei Ping, his secondary force will only border unclaimed cities.
But we must also be cognizant of the possibility that Yuan Shao will attack us regardless, so for that reason we must turn our army into an effective fighting force. So it's time to train our army by going into the Army folder and clicking on "train". So the way training works is you can have up to eight officers train your army for up to twelve months, with the results being based on your officers' Power and Lead stats. The higher you are in those stats, the better results you will get. Training is also the only way to increase Soldier Spirit, but I do not understand how it works. It also has something to do with the officers' Lead and Power, but it feels like it takes forever for Soldier Spirit to go up and sometimes it seems like it doesn't raise at all after like eight months of training. And I've read like two different online guides and the official Romance of the Three Kingdoms Part IV: Wall of Fire Prima strategy guide, and none of them explain how it works. So as far as I'm concerned, it's a mystery, but training does seem to have some effect even if I can't fully explain how. But regardless, for this one, we're going to have Wu Anguo and Lord Kong Rong himself train the troops for six months. One thing to keep note of is that an officer who is training cannot do any other action. So if you only have one officer who can recruit other officers, do not have him train or you will be unable to recruit for the duration of that training. With that, we can end our turn and advance to the next month. But before the month is even out, Yuan Shao has fallen for our trap and laid siege to Bei Ping!!!
According to our spies' reports, while Gongsun's forces fought bravely, they were overrun by the might of Yuan Shao's forces. As of right now, however, they're not sure what became of Gongsun, with some saying he was executed by Yuan Shao, some saying he managed to evade capture and is wandering the countryside, and some claiming he took refuge in one of the unclaimed cities, declaring himself ruler and attempting to rally a force to reclaim Bei Ping. Whatever the case, Lord Kong Rong is ecstatic with joy over these developments and while I'd like to continue, I'm afraid Lord Kong Rong has insisted on throwing a celebratory feast to celebrate our good fortune! So that's going to be all for this month. Join me next month as I continue our efforts to unify China under the rulership of Lord Kong Rong!
Teslas vs. an Evil Wizard
Greetings, noble and heroic 'Shroom writers! My other Strategy Wing sections involve bad guys, but I wanted to write another one - a guest section - that has an epic showdown with a nefarious villain to fit with the Villain theme! What better way to do that with Teslas vs. an Evil Wizard, a guide about how to beat the final level of Kingdom Rush (The Dark Tower) without losing a life on the Veteran difficulty level. And I did it with only building Teslas!
This section is not meant to familiarize readers with Kingdom Rush. It was written with the assumption that the viewers already know what happens in the game. I wanted to focus on a strategy guide for this one level in the game, without it getting bogged down by unnecessary details, like how to play the game, what the enemies do, etc. Basically, it's for players struggling to beat The Dark Tower on Veteran and need a premium-free guide on how to do so.
So... I will provide a general strategy about where to build the Teslas, and give detailed instructions on the waves themselves in a play-by-play style.
Are you ready to defeat the evil Vez'nan with the power of electricity? Here we go!
General strategy
Before going into this stage, make sure you have fully upgraded the Artillery, Rain of Fire, and Reinforcements branches in the "upgrades" screen. If you have earned three stars on each campaign level up to this point, you'll have 33 stars. You need 38 stars if you wish to fully upgrade the necessities, so you'll have to clear five Heroic/Iron Challenges until you have enough. To have an easier time, try doing them in the early stages. You need these upgrades, trust me!
- Fully upgraded reinforcements have solid stalling potential, even stalling some of the stronger enemies (Dark Slayers, Magma Elementals) for a few seconds. What makes them worth fully upgrading are their incredible throwing spear attack; it turns solid blockers into powerful "archers" if you will. Each soldier will throw a spear at a rate of 1.4 seconds, dealing 24-40 physical damage to enemies in range. The spears basically deal four times the damage of their melee attack, so it's best to place Reinforcements at a distance where they'll attack the enemies safely. If emergency stalling is needed, they can be used to block enemies.
- A fully upgraded Rain of Fire calls down five meteors onto an area, which five additional ones raining at random places all over the map. Each meteor deals 150-180 true damage, with each one also scorching the impact point for ten seconds, dealing 20-30 physical damage per second to enemies standing on the harmful ground. While the additional meteors are entirely based on RNG due to the random locations on where they land, the guaranteed five are for taking out strong enemies, great opportunities or emergencies.
- Because Tesla x104s are part of the "Artillery" class, only the Artillery upgrades are only necessary tower upgrades. Do not purchase upgrades for Archers, Barracks and Mages as nothing will happen. As for the Artillery upgrades themselves, they increase the damage of the tower, range and reduce the building cost by 10%. The fourth upgrade reduces the cost of the Tesla's special abilities by 25%. The final upgrade is the best one though; it ensures no damage reduction of explosives and chain lightning strikes! It completely cuts out the RNG on damage potential while also effectively doubling the damage per second (dps) of the tower.
Because of that annoying graveyard at the southwestern side, Skeletons and Skeleton Knights will spawn from it every time a human (or human-like) enemy dies. Enemies with 300 HP or more will emerge from it as Skeleton Knights. Because we're playing on Veteran, Dark Knights and Demon Spawns are eligible to return as Knights. Thankfully, Tesla x104s have superior crowd control capabilities, shredding through all Skeletons and even whittling down the Skeleton Knights.
You'll want a strong melee hero to "guard" the graveyard, so you'll want either Sir Gerald Lightseeker, Malik Hammerfury or Ten'shí. I chose Gerald because he's the most durable of the free heroes, and rarely needs to retreat and recover. Malik can knock out groups of Skeletons, but his lower HP and armor makes him more... fragile if you will. Ten'shí is pretty awesome too, due to his AOE meteors and invincibility during his Ironrush transformation, but I think it's cheating to have him as the hero because of how OP he is. Have your melee hero stay near the graveyard so they can keep fighting the enemies and level up quickly. If they're low on HP, move them away so they can heal. Because of how many enemies are killed, the hero will endlessly fight Skeletons without rest. It doesn't help that Skeleton Knights will vastly outnumber normal ones later on.
Keep spamming Reinforcements at every chance you get! Their throwing spears are powerful and sometimes a few extra seconds of stalling helps out tremendously! Rain of Fire should only be saved for emergencies or great opportunities. I'll mention many instances of great Rain of Fire chances down below.
Call early waves as quickly as possible to get the most bonus gold and to reduce cooldowns of Reinforcements and Rain of Fire. This stage gives you plenty of time to kill all the enemies before the next wave arrives, so you can also take your time. If all the on-screen enemies are dead or if they're about to be, call the next wave!
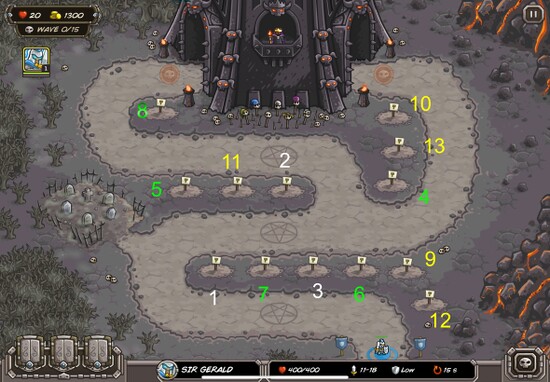
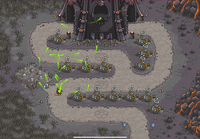
I have displayed the order for where to build the Teslas in a specific order. Ignore that shiny "8" as it's from an error I made by accident. White numbers indicate the most important locations and thus where Teslas should be built ASAP. Green numbers are somewhat important placements, and yellow ones should be covered later on.
As you can see, the Tesla x104 is best placed on corners to fully utilize its Overcharge ability, which I'll elaborate on later. Focus on building Teslas at spots where they'll be able to attack enemies when their paths merged into one. The first spot is the best placement because it's at a corner and can attack everything that comes by, including the Skeletons from the graveyard.
Tesla x104s have a solid attack rate for Artillery, about every 2.25 seconds (faster than the 500mm Big Bertha's attack rate of 3.5 seconds). They also deal 66-121 damage with each attack if all upgrades are purchased. The tower strikes an enemy with electricity, bouncing to two other targets if they're close enough. Being an Artillery tower, every attack ignores 50% of the armor rating of enemies, making it a great tower for any situation. Unlike the other Artilleries in the game, the Teslas are capable of directly attacking flying enemies. As for the tower's special abilities, only the broken Overcharge upgrade is necessary, because it gives the tower an insane crowd control tool by sending out an electrical wave around the Tesla with every normal attack, decimating hordes of weak enemies while heavily damaging the bulkier ones. A fully upgraded Overcharge deals 30-40 damage. The ability also serves to increase the dps of the tower because it also strikes enemies directly attacked by the Tesla x104. What's even better is that the ability shines on corners because of the wide reach it has. The other upgrade, Supercharged Bolt, is not necessary for this stage. While roughly the same cost to fully upgrade it as Overcharge, it only increases the amount of enemies that can be hit by the main attack (up to five), making it useless if no enemies are close to the initial target. I got through this stage without getting it.
In the middle of the stage are three summoning circles. From wave 6 onward, Vez'nan can activate the circles every so often, summoning Demons. Later on, he will summon from multiple circles at once. Each circle activates on specific waves, with details further on in the section. Demons killed do grant gold, so it's not all bad.
- The top circle can have four Demon Spawns, three Demon Hounds, five Demon Spawns, seven Demon Spawns or five Demon Spawns + a Demon Lord. Starts activating on wave 6.
- The middle circle can have three Demon Spawns, four Demon Spawns, five Demon Spawns or two Demon Hounds. Starts activating on wave 8.
- The bottom circle only summons three Demon Spawns. Starts activating on wave 13.
Starting from wave 9, Vez'nan will attempt to disable multiple towers at once. The player must click/tap repeatedly in disabled towers to free them. After a few seconds, they'll be locked and cannot be freed manually. They'll be released after about five seconds. Initially, two towers are disabled at a time, but as the stage goes on, more and more towers will be targeted at once. The limit is eight towers. If you're playing on mobile like me, it's easy to free the towers quickly. Console players will have the hardest time due to the weird selecting of tower spots. Prioritize rescuing towers closest to the exit and where the enemies are! If you aren't careful, you could let the hordes of Skeletons wander by without any trouble... always be vigilant!
Waves
Here are all of the waves and the enemies spawned! Thanks to the Kingdom Rush Wiki for providing all of the wave layouts!
| Wave | Tower (western side) | Tower (eastern side) |
|---|---|---|
| 1 | Demon Hound (2) Demon Spawn (4) |
Necromancer (1) Bandit (6) Brigand (6) |
| 2 | Demon Imp (1) Gargoyle (5) |
Demon Imp (1) Gargoyle (5) |
| 3 | Demon Lord (1) Demon Spawn (10) |
N/A |
| 4 | N/A | Dark Knight (6) Shadow Archer (4) |
| 5 | Bandit (16) Marauder (2) Brigand (4) |
Bandit (16) Marauder (2) Brigand (4) |
| 6 | Bandit (6) Brigand (3) Dark Knight (2) Shadow Archer (3) |
Bandit (6) Brigand (3) Dark Knight (2) Shadow Archer (3) |
| 7 | Rocket Rider (6) | Rocket Rider (6) |
| 8 | Worg (6) Necromancer (3) |
Worg (6) Necromancer (3) |
| 9 | Spider Matriarch (8) Giant Spider (25) |
Spider Matriarch (8) Giant Spider (25) |
| 10 | Demon Lord (1) Demon Hound (3) Demon Spawn (5) |
Dark Slayer (1) Dark Knight (3) Shadow Archer (5) |
| 11 | Demon Imp (8) | Demon Imp (8) |
| 12 | Magma Elemental (2) | Magma Elemental (2) |
| 13 | Demon Lord (2) Demon Hound (6) Demon Spawn (12) |
Dark Slayer (2) Dark Knight (6) Shadow Archer (12) |
| 14 | Demon Spawn (24) | Dark Knight (8) Shadow Archer (6) Necromancer (2) |
| 15 | Demon Lord (4) Demon Spawn (8) Magma Elemental (3) |
Dark Slayer (4) Dark Knight (4) Magma Elemental (3) |
After wave 15 is complete, Vez'nan leaves his tower and attacks. He emerges from the western side of his tower.
Preparation
The starting gold for the stage is 1300, so use it to build a Tesla x104 on the first building spot I marked (corner close to the graveyard) and get the first two upgrades of Overcharge, because you won't have enough for the third. Have your hero (in my case Sir Gerald Lightseeker) at the graveyard's entrance.
Wave 1
After starting the first wave, place Reinforcements near the graveyard so that they can block and attack the Demon Hounds while they're within the range of the Tesla. Use Rain of Fire on the Necromancer to prevent him from summoning Skeletons. It's not the end of the world if he does summon any though as he'll die from the Tesla once he reaches it. The other enemies (bandits, Demon Spawns) are not a threat, but beware of those Skeleton Knights from the Demon Spawns! Your hero should level up to level two from fighting the Skeletons from the graveyard. You'll obtain enough gold to max out the first tower's Overcharge upgrade, and have some left over to build a level one artillery on tower spot number 2. Call the next wave early.
Wave 2
This wave is even easier than the first one. The Tesla will wipe out the Gargoyles with ease thanks to Overcharge, but the Demon Imps may get by because of their solid HP. Use Reinforcements to throw spears at the Demon Imps to weaken them. There will probably be Skeleton Knights from the first wave still around, so the hero should level up to level three before wave two ends. Call the next wave once you get the chance!
Wave 3
When the Demon Lord emerges, stall him with Reinforcements and cast Rain of Fire on him and he will die before he gets the chance to protect the lesser Demon Spawns behind him. All enemies on this wave resurrect as Skeleton Knights, so focus your firepower near the graveyard after the Demon Lord is killed. The hero will level up to level four, which is great if you have Lightseeker because Shield of Retribution drastically increases his surviving potential. Call the next wave early, even if Demon Spawns remain.
Wave 4
This wave isn't so bad either. The Dark Knights will easily die to the first Tesla despite their high armor. The Shadow Archers are even weaker, and won't be a problem at all due to the lack of barracks. The second artillery should become a Tesla during this wave. Get its Overcharge upgrade as soon as you can! It'll help clear out enemies before they reach to where the graveyard is. Additionally, the hero should become level five during wave 4. You can call wave 5 early as the Dark Knights aren't troublesome.
Wave 5
I'd say wave 5 is the toughest wave yet. The second Tesla will easily kill the bandits and brigands, but the beefy Marauders will make it past. Keep putting Reinforcements where the first Tesla is so their spears can support your hero and stall the Skeleton Knights/Marauders. The hero will probably become level six during this wave, but it's OK if that doesn't happen. The gold earned during this wave will allow you to build at the third marked spot, although you won't have enough to get a Tesla. Yet! There will be a lot of normal Skeletons because if the bandits and brigands, but the Tesla's Overcharge will shock whittle them down. I'd wait before the Marauders die before starting wave 6.
Wave 6
Honestly, I'd say this wave's easier than the previous one. The strongest enemy here is the Dark Knight, who isn't strong at all. Keep in mind that this wave is when Vez'nan will start summoning Demons from the top circle, but they aren't too much of a problem. If a Demon Lord is summoned, use a Rain of Fire on him to kill him quickly before he shields the Demon Spawns. Heck, the Skeleton Knights from the graveyard are a bigger threat than the Demons! The hero may reach level seven by the end of this wave, and the third Artillery should become a Tesla x104, with a fully upgraded Overcharge. The next wave is a big problem without preparation, so wait until all of the enemies are killed first.
Also, place Reinforcements close to an entrance to the tower, call the next wave and immediately place Reinforcements on the other side of the tower as well! It'll make things so much easier.
Wave 7
Those placed Reinforcements will attack the Rocket Riders, causing them to activate their turbo boosts. When their speed boost ends, they'll be right in the range of the three Teslas! Unable to activate it a second time, they'll have no hopes of getting through the electricity. Summoned Demons won't matter thanks to the OP Overcharge ability, but use Rain of Fire if there just so happens to be a Demon Lord. From fighting the Skeletons, Sir Gerald Lightseeker leveled up to eight and nine! I don't know if that'll happen for you, so around seven or eight works fine. From the gold earned during this wave, use it to build another Artillery on spot number four. You may even get enough to afford a Tesla x104! Call the next wave early.
Wave 8
This wave is another easy one. Those Worgs won't get far, and the Necromancers may seem like an issue at first, but once they reach the Teslas, them and their Skeleton minions will be shredded in the blink of an eye! Unfortunately, Vez'nan will start summoning from the middle circle now, but only that one is activated during the wave; the top one remains inactive. Start building a new Artillery on spot number five! This was also the wave where Gerald reached level ten, so he's at his strongest! Woohoo! Call the next wave once the Necromancers are rid of.
Wave 9
Look out! Now Vez'nan will start to disable towers. Only two are disabled at a time though, so they can be restored easily. Also, only the top circle is active. As for the enemies, the spiders will be obliterated by the Teslas. There is nothing to fear on this wave! The fifth Tesla should be fully upgraded during this wave, and spot number six should have an Artillery too. Call the next wave early!
Wave 10
On this wave, both the top and middle circles will be active. As the summoned enemies are easily defeated now, you'll have to worry about the large amounts of Skeleton Knights coming your way. Keep spamming Reinforcements to stall them so the Teslas can destroy them. If Demon Hounds are summoned, you'll have less Skeletons to worry about! Additionally, Vez'nan disables three towers at once now.
We're also introduced to our first Dark Slayer in this stage. Because of his extremely high armor and overall high HP, use Rain of Fire to take care of him. The Demon Lord may be annoying because of his shielding ability, but with the amount of Teslas you have now he's just a pest at this point. Tesla number six should also be fully upgraded and Artillery number seven should be built before the wave ends! Once both the Dark Slayer and Demon Lord are pwned, call the next wave early!
Wave 11
The top and middle circles are active this wave, and Vez'nan now disables four towers at once. A wave with only Demon Imps? Not a problem at all! The spaced out Tesla x104s will dispatch them easily. Have Reinforcements for ranged support. Tesla number seven should be established by the end of this wave! Not much else to say about this one honestly. Call the next wave early.
Wave 12
Once again, the top and middle circles are activated during this wave. Also Vez'nan disables five towers at a time now. Yeah.
After this wave is called, there is a long delay before the Magma Elementals arrive. They're tanky, but they'll go down before they reach the graveyard. Tesla number eight should also be up and running by the end of this wave, perhaps dully upgraded with Overcharge too. I'm running out of things to say here! Call the next wave early.
Wave 13
Almost there! Now the bottom circle becomes active, but it's the only circle that's a problem, so that's nice. And how many towers are disabled now? Six!
There are two Dark Slayers this time, but with all the Teslas around and the power of spammable Reinforcements, Rain of Fire is not necessary. So much gold is earned this wave, so Tesla number nine will be built with a fully upgraded Overcharge! Aw yeah! Wait until all of the Skeleton Knights are defeated before moving on.
Wave 14
Now all three circles are active at the same time! Not only that, but seven towers are disabled at a time! Can we go to eight?!
Seriously though, this wave is not joking around. The enemies may seem easy, but with all the Demon Spawns (circles included) and Dark Knights, there will be a massive Skeleton Knight army from the graveyard. They'll make it pretty far, especially the ones furthest from the Tesla x104s, but with constant Reinforcements they'll be stopped. If things look really bad, use Rain of Fire. The Necromancers won't be an issue if you stick with the plan and build Tesla number ten! It'll take them out (or at least severely weaken them). Free the Teslas along the bottom path first and foremost to deal with the Skeleton Knights! You'll gain enough gold to build Tesla number eleven as well! Two Teslas in one wave... yay! Call the final wave once the Skeleton Knights are gone.
Wave 15
Like the previous wave, all three circles are active. Unlike the previous wave, eight towers are now disabled. My favorite number!
Being the final wave, it's definitely challenging. Get ready for an insane amount of Skeleton Knights and plenty of chaos in general. Keep placing Reinforcements to stall the Skeleton Knights within the Teslas' range and use Rain of Fire if you need to. The four Dark Slayers may get far, but they won't reach the end thanks to the crazy amounts of electricity. Again, be sure to prioritize freezing the towers on the bottom to deal with the Skeleton Knights. Those Magma Elementals also aren't a problem because the screen is now officially filled with Teslas with Overcharge fully upgraded.
After all enemies are dealt with, the boss fight begins...
Vez'nan
Vez'nan keeps his summoning and disabling abilities while he's on the path. He's also slow and has to stop when using an ability, but he's got 7999 HP and deals so much damage that no unit can survive against him for long. When he emerges from his tower, stall him with Reinforcements and use Rain of Fire to deal massive damage to him. Be sure to stall him on the Scorch marks for even more damage! When he disables towers, free the ones closest to Vez'nan and the Teslas on the bottom to deal with the summoned demons and the Skeleton Knights from the graveyard. All summoned Reinforcements from this point on should either be close to Vez'nan so they can throw spears at him, or on the bottom path if the Skeleton Knights become overwhelming. If done correctly, Vez'nan should lose all of his HP before he even reaches the first circle.
Now to deal with his giant demonic form! He's a little faster, but he also lacks his abilities. Use Reinforcements to stall him - it will only be for two seconds, but those two seconds go a long way thanks to how much additional damage the Teslas can deal to the boss. Rain of Fire will also become available again; use it on Vez'nan and stall him with Reinforcements for additional scorch damage! If he's almost at the exit, send in your hero for one last attempt to stall, but he should go down before he makes it.
WOOHOO! Vez'nan is defeated and the stage is complete! Phew... that was a lot to write. Hopefully you'll put this helpful information to good use so you can win this stage on Veteran as well! Thank you for reading, and take care!
An Overly Detailed and Funny Walkthrough of Mega Man 3
Played by Sparks through the Mega Man Legacy Collection for the Nintendo Switch.
Hi there! Welcome back to An Overly Detailed and Funny Walkthrough of Mega Man 3! In May, I took down Magnet Man, Hard Man, Top Man and Shadow Man. In this issue, I'm going to knock out the remaining four! I gotta say, I enjoyed playing the first four stages of this game. Perhaps I might've been just a wee bit too harsh on Mega Man 3? Then again, I haven't made it to the worst part yet.
Anyways, Spark Man is the next one to defeat!
Spark Man
Spark Man stage
Spark Man's stage takes place in a factory with many electrical components.
We start out in a room where we must climb two ladders upward. A walking eye blocks the path, but it is easily disposed of. After climbing to the next room, it is revealed to be a hallway leading eastward. Along the way are these orange electrical conductors on the ground and ceiling, appearing on both surfaces at the same time. Every few seconds, they create electricity between them, damaging Mega Man if he touches it. Touching the conductors themselves also hurts. What's annoying is that no weapon can get rid of them, at least that's what I assume. There is a "trick" to removing them however; get far away so that they're off-screen, and then run back to see the obstacle removed! This doesn't work on all of them however. This hallway also has these pipes on the ceiling. When approached, this floating plug enemy emerges and flies to the left side. If Mega Man is directly underneath the enemy, it will send out eight electric projectiles in the eight directions. Try getting rid of them before they attack. They're usually in range if you jump up and shoot them. Only one shot will destroy them! To get through this section, stop at the points where the conductors cannot move to, and jump through them with good timing. Dispatch any plug enemies that may appear. The end of the hallway has another ladder leading upward.
The next room is a small room with one of those hammer enemies. Jump up and shoot him when it's safe to do so. Another ladder leads to another hallway, although this one is more treacherous. First, we must jump on tiny platforms that quickly rise up to the ceiling when stepped on. Did I mention that the ceiling is composed of one-hit KO spikes? That's bad. You must quickly jump from platform to platform to reach solid ground. The second part of this room has two those electrical conductor pairs, both of which are on small platforms with pits. I will say this isn't a well-designed section because of how small the reaction time is. I took some damage, but thankfully after climbing another ladder, we enter a room with both a large health power-up and a big weapon capsule. There's also a bulldozer here, but it's not a problem. Use Rush Jet to get the goodies! There we go, back to full health.
Up next is a short hallway with a few walking eyes. There is a hole we must fall down, which brings us to another hallway. This hallway has three pipes that release blocks of garbage when Mega Man approaches. the blocks take many shots, and the pipe releases them somewhat quickly. Only two blocks can appear at a time from one pipe. Quickly get through by jumping on top of the first block before the second one drops. If you're too late, keep shooting until both blocks are gone, then proceed. This is a grinding spot, but it may not be rewarding if your fingers hurt from mashing the "shoot" button. I'm at full health anyway! We must then descend a ladder to reach one more hallway before the boss gate.
We must slide through a small gap with four small weapon capsules before jumping across more of those tiny rising platforms while avoiding the ceiling spikes.. Sounds easy, right? Well it isn't! Those annoying screw enemies from Top Man's stage return here, appearing in various places in the air. You may accidentally run into one if you're not paying attention, causing you to fall into a pit. Their placements are usually where you would jump to, so this isn't fair. Thankfully, there are some platforms of solid ground along the way, but they're very small. What I did was "bait" the screws into appearing by jumping far enough so they appear, and then quickly turn around and land on the platform I was on. Then, when the enemies are vulnerable (moving towards Mega Man) I shot them with the Mega Buster. Some of them appear in diagonals, so you have to jump to the side and shoot them while making sure to land where you jump from. This is very dangerous so I recommend using a safe weapon to get rid of tricky ones, like Magnet Missile or Shadow Blade. This is no doubt the hardest part of the stage.
After getting past that, it's time to battle Spark Man!
Spark Man fight
Spark Man's battlefield consists of uneven terrain. The middle is the highest, while the right side is the lowest. It's hard to describe, but that's what I have an image for! Spark Man has three moves, all performed right after each other:
- He jumps a few times towards Mega Man's position. His leaps are usually somewhat high.
- Afterwards, he'll send out eight electrical sparks in eight directions, similarly to how that plug enemy does.
- Spak Man will then toss a large spark towards Mega Man's direction.
What makes this fight a little tricky is the uneven terrain. If it was flat, then this would be a very easy fight. You may get cornered by the boss, who will take the opportunity to attack you while you're vulnerable. Taking no damage is difficult to achieve, so what I do is just throw Shadow Blades at him nonstop until he's down. You should probably do that too.
Defeating Spark Man gives us the Spark Shock! This weapon allows Mega Man to shoot us electrical sparks as projectiles. Not much to say about this one honestly. The letters for it are SP, and Mega Man is orangish-cream when it's equipped. I'm not so good with unique colors like this...
In May's issue, I asked if you noticed something about about the weaknesses of the Robot Masters. Well, about that...
Rather than having a complete loop like the other games, Mega Man 3 has two separate loops. Those five Robot Masters I defeated were part of one loop, so this would mean Spark Man's weapon is strong against Magnet Man. The other three Robot Masters (Snake Man, Gemini Man and Needle Man) have their own loop. Because of this, I will start with the one I believe is the easiest: Snake Man. I don't know why it's like this.
Snake Man
Snake Man stage
Snake Man is located in a very... green place. Also scaly.
The first part of the stage is a hallway leading to the right. Are there enemies along the way? Yes! There are two types: one of them is a white enemy that bounces along the ground, jumping high into the sky like Pinkie Pie every so often. They're hyper and difficult to hit, but one Mega Buster will do the trick. The second enemy type is this snake enemy that's part of the terrain. Their heads spit out bullets directly at Mega Man every few seconds. A few Mega Busters will get rid of the snakes. Only their head is harmful. At the end of the hallway is a ladder leading upwards.
This next room has a "staircase" of three snakes, all of which are itching for a fight! One of them dropped a 1-Up for me. How generous! After climbing once more a big snake blocks the way! The body of the snake moves up and down quickly, while the head spits out a few large bullets one after the other at Mega Man. They can be tough to dodge, so jump over the first two and because you'll be in midair, the other shots will be in the air as well, so you can go beneath them. You must constantly jump and shoot at the snake's head until it's done for - 10 Mega Buster shots will do the trick!
Past the giant snake is a section with more snakes, some of which are on the ceiling. There are also these flying enemies that only move left and right, but if Mega Man is above or below them, they'll stop and drop their face as an attack before their body continues moving. They only have one HP, but getting hit by their attack deals more damage than you'd think. After descending, there is another hallway with more of those flying enemies high in the air. This section introduces these bizarre pole-vaulting robots that quickly run towards Mega Man with a pole. When they get close to him, they use the pole to propel themselves high in the air, discarding their pole in the process. Upon landing, they run towards Mega Man's direction. While they have a pole, they deflect bullets. After vaulting, the pole remains where the robot vaulted for a second before it falls. Touching the pole hurts, but it can be discarded more quickly with a Mega Buster shot if you don't want to wait for it to go away on its own. What I do is stay still when they run to me. The robot will not run into Mega Man, but instead vault over him; afterwards I jump over them as they run and shoot at them after I land. Phew! That's a bug paragraph. A ladder at the end of this section leads to a new room.
After climbing, there is one of those hammer enemies guarding another ladder. You know what to do! Climbing this next ladder leads to another room with a hammer enemy, but there are two ladders to choose from! The right ladder leads to a dead-end with these two ? containers. Shooting them will make them drop a random item, and they do not respawn. What will you get? I got two large health powerups, even though I was at full health already. Aw... anyways, the left ladder leads to another big snake to get rid of! Past it is a short section consisting of two more pole vaulting robots followed by a large gap. If you're not confident, you can use Rush Coil to make it across - that's what I did! Past the gap are two more pole-vaulters. The sky is now visible in the background, indicating that we are high up in the sky. What exactly is this place? Now we have to climb upwards to get even higher! There's also a large health powerup atop another ladder if you need it. I didn't.
After climbing the tallest ladder, we must jump to another one, where a ladybug enemies inhabits. It crawls up and down on it, but one shot will defeat it. After climbing up even higher, we enter a large horizontal section with lots of platforming. There are these "cloud pipes" that, when stood on, cause a cloud platform to rise up. The cloud platform can be stood on. Watch out for a very dangerous bug that can occur: Sometimes when standing on a pipe right as the cloud emerges, it'll push Mega Man off the the pipe and cause him to fall, resulting in a lost life. To ensure this does not occur, jump right as the cloud exits the pipe. There is only one enemy type in this part, and it's a new one! There are these clouds with eyes that slowly float to the left side of the screen, swaying up and down. When attacked, their cloud cover disappears, revealing a Bullet Bill-like enemy that rushes in a straight path towards the left. A few shots will get rid of them for good. There are many along the way to the boss gate, so be cautious and make sure they don't knock you off-balance! They appear much more often near the end. Sometimes it's better to ignore them, but if the platforming is dangerous, try shooting them to make them ho in a straight horizontal line so you don't have to deal with the slow swaying of them. Just before the boss gate is a series of blocks in midair - take your time!
Now that we made it to him, time to battle Snake Man!
Snake Man fight
Like Spark Man, Snake Man is fought at uneven terrain. His battlefield is actually symmetrical, with the middle being the highest, while the ground close to it is the lowest. The left and right sides are normal. Snake Man himself runs back and forth across the stage, jumping if he comes across any of the uneven terrain. Seldom he will stop and shoot out two Search Snakes towards Mega Man's direction before he resumes his running. The Search Snakes travel across the ground and walls, but disappear upon making contact with the ceiling. He only did this attack once for me.
So, you don't have his weakness. At least not his main weakness. So what do you do? The Shadow Blade does two points of damage to him, so it's better than using the Mega Buster. What I did was stay on the middle platform and attack Snake Man whenever he was near, due to Shadow Blade's limited reach. If you want, you can use the Mega Buster due to it's infinite range, allowing for a safer but slower way of battling Snake Man. The hardest part of the fight is the beginning, because he's coming your way and you haven't gotten to where you need to be, so you may take some damage unless you've got the reflexes. The Search Snakes are easy to avoid - just jump over them. Overall, not really a bad fight, even if I didn't have his weakness.
We acquire the Search Snake upon defeating Snake Man! It allows Mega Man to shoot out snakes that travel along the ground and walls. I don't remember if they can move across ceilings too, but it's been a while since I last played, and seeing that they didn't during my fight against Snake Man, I'm guessing no. The letters for Search Snake are SN, and Mega Man turns green when the weapon is equipped.
Two to go! Gemini Man is next!
Gemini Man
Gemini Man stage
Gemini Man's stage appears to take place somewhere with lots of shiny crystals. Part of me says this is in the arctic, but it may not be correct. I do like the starry night sky background though!
The first section of this stage is a long area leading towards the right. The terrain is uneven with some gaps to leap across. Two enemies are commonly seen here: One of them is a flying blue enemy with one eye. If Mega Man is nearby, they will swoop down, drop three flames one at a time that rise upon hitting the ground, and then fly upwards off the screen. Sometimes waiting for them to swoop down is the best opportunity to attack them. One Mega Buster show will dispatch them. Be very careful and make sure they don't knock you into a pit. The second enemy is thankfully easier to deal with - a penguin. They're on the ground and make low hops towards Mega Man, sometimes shooting out bouncing eggs. The eggs can be destroyed with the Mega Buster, but the enemy itself takes more than a few hits to defeat. You want to take your time through this part, and make sure you defeat the enemies (or until the flying ones leave) before continuing.
Upon leaving that section, we enter a new area where Proto Man's whistle is heard. This time however, he's not fighting against us, but actually destroying an obstacle so we can proceed. Thank you, for once!
Down we go! Now we enter an underground area with these shiny blocks that change colors repeatedly. It's not s fast as you'd expect, thankfully. On two ledges while falling are a 1-UP to the left and a large health powerup to the right. After traveling forward, there are these "fish eggs" blocking the way. Upon shooting one, it will disappear and release a fish that slowly floats towards us. The fish can be destroyed with one shot. There are many eggs that must be destroyed if we are to proceed, so destroy as many as you can for the best chances to earn 1-Ups or other useful powerups! They respawn too, so these are fantastic for grinding. A ladder on the right side of the room leads us to the next section.
This next room has more fish eggs protecting a ladder. Easy Peasy, and one of them gave me a 1-Up! Afterwards is an area with more fish eggs in the way, and a large weapon capsule on a ledge to the left. One of the eggs is in a weird spot, which forces us to perform an "edge jump" to get around it. If you have no special weapons that can hit it, you'll have to perform said jump. Past the eggs is a hallway where dragonflies from Shadow Man's stage appear to attack as you make progress. There's also a new threat - two of them along the way! Large penguin robots that remain stationary, but send out sliding penguins along the ground at random intervals. The penguins it sends out can be destroyed in one shot. This enemy must be attacked in the eyes, as shooting elsewhere does nothing to it. The machine takes many shots, so I recommend constantly shooting on the ground to ensure penguins don't attack you after you land, and then after a penguin is released, jump up and shoot the large robot. At the end of this hallway is a hole to drop down.
We get a little break with a large health powerup on a ledge. Afterwards we descend even more to a water section! Thankfully I rush Rush Marine, so I can use it to get across more easily. If you didn't defeat Shadow Man before doing this stage, you'll have to jump across the small platforms above the water to reach the ladder on the other side. This section's a doozy if you don't have Rush Marine, more dragonflies appear as you progress, and these large fish enemies appear in the water! When they reach Mega Man's position on the Y-Axis (up and down), they will shoot a missile upwards, exploding when it hits a surface. The explosion can reach you if you stand on the block it hit, ao watch out! You have to be very cautious and take your time to avoid the angry dragonflies and fish missiles. If you have Rush Marine like me, you can just go in a straight path underwater. Keep shooting to get rid of the fish before they reach to you, and move up and down to avoid the dragonflies' attack. Yes they can go underwater. Weird right? You must also watch your remaining weapon energy to make sure you don't run out and sink. There are two large weapon capsules on reachable blocks that you can obtain to keep the transformation for longer. After grabbing one, just jump right back into the water and continue swimming. There's a 1-Up underwater, easily obtainable with Rush Marine, oh yeah! At the end, you'll have to jump to a block and then head towards the ladder normally. There's an E Tank right by it, making for an easy grab! I should also mention that you have one shot at getting through this part with Rush Marine! If you fail to make it through, your Rush Marine energy will not replenish. Additionally, the large weapon capsules will not respawn. You'll have to get through this normally, and you don't want to do that!
After climbing this next ladder, we enter a room where two low jumping enemies are, on top of stairs. Thankfully you can't fall here, so you'll be fine. After climbing one more ladder, we reach the boss gate! It's guarded by that large jumping enemy seen at the end of Hard Man's stage though, but thankfully you can attack it from the ladder you're hanging on to! Oh and look at this - it dropped a 1-Up for me! Wowie! This stage is so generous to me!
Gemini Man fight
Gemini Man is a unique opponent, as his battle has two "phases":
- In phase one, Gemini Man creates a duplicate of himself, and the two constantly run across the stage and jump to the other side upon reaching a wall. If Mega Man shoots, both Gemini Mans will freeze for a moment, no matter where they are, and one of them will shoot horizontally towards Mega Man's direction. Attacking any of the two Gemini Mans will damage Gemini Man himself, so there's no fake copy here.
- After Gemini Man loses half of his HP, the duplicate will disappear, and Gemini Man will slow down. He now runs across the battlefield at a slower pace, sometimes jumping. If the battle goes on for long enough, he will shoot a Gemini Laser horizontally. After hitting a wall, it will bounce off of it and then go in a diagonal path, making more bounces off of surfaces until it leaves the screen. I defeated him before he had the chance to do this attack.
Gemini Man is another one of those bosses where it's difficult to beat him without getting hit. So, I just spammed Search Snake until he was done for. I made sure to jump over the two Gemini Mans when they ran, although I got hit by their bullets. In the second phase, I just kept using Search Snake until he's vanquished. Good luck doing this fight if you don't have his weakness.
Now we have Gemini Laser! It allows Mega Man to shoot a laser that bounces across surfaces, just like Gemini Man's. However, only one laser can be on the screen at a time. The letters for the weapon are GE, and Mega Man turns light blue when it's equipped.
Only one left to defeat - Needle Man!
Needle Man
Needle Man stage
I'd say Needle Man's stage takes place in a city. Many buildings and skyscrapers can be seen in the background.
The first part of the stage has us moving to the right, like many other stages. The path ahead has uneven terrain however, and we have a few porcupines to deal with! Or are they hedgehogs? I can't tell the difference between the two. Once they're on the screen, they wait a second before sending out five needles twice in a spread formation. These needles are launched to the left, right, upward diagonals and straight up. These needles can be destroyed with Mega Buster shots. Afterwards, the enemy rolls towards Mega Man, rendering itself impervious to all attacks while in this state. It will then stop to fire more needles before resuming its rolling. The best way to deal with this enemy is to quickly shoot at it and defeat it before it starts rolling. If they're on higher elevations, keep jumping and shooting. If they start to roll, jump over them and just leave. A ladder takes us downward.
This next section has two levels of elevation. The bottom one has a Mettaur and a large weapon capsule, but ultimately leads to a dead end. The top elevation has a can on in the way. This cannon is protected by a hatch, making it invincible. If Mega Man approaches, then the barrel emerges. It shoots out two large red projectiles with a curved trajectory, disappearing if they are shot or if they hit a surface. The cannon itself will then hide again. The only time to attack this enemy is when its cannon is out. Only three shots will get rid of it, so it shouldn't be too much of an issue. Two more cannons are located farther down the path, followed by more Mettaurs accompanied by red dragonflies. Just get rid of the Mettaurs when they stand up, and dodge the dragonflies. Another ladder leading downward is at the end of this section.
Now, we must get through an underground section with needles that strike from the ceiling. These needles are impervious to all attacks, and cannot be destroyed. They can only be avoided. First, we must slide past a needle at the right time, and then get past a few more by walking through when it's safe. The last one is located above a small platform with a large pit below - jump when it's safe and don't let it know you down! A ladder at the end leads upwards this time.
After climbing upwards, there is a small room with a porcupine/hedgehog guarding a ladder. A high ledge to the right has an E Tank - use Rush Coil to grab it! Be sure to defeat the enemy first so that it won't annoy you. This pesky foe is more annoying than the others because it's place in such a location that it's very difficult to defeat before it starts rolling. You might take some damage, but it'll be worth it once you obtain the E Tank! You could also ignore the porcupine entirely and just dodge its needles.
Nearly there now! Atop this next ladder are two hammer enemies on different elevations, connected by a ladder. Due to the limited dodge space for the first one, Slide at the right time to dodge its attacks. The second hammer enemy's projectiles can be avoided by jumping because there is no ceiling. After climbing once more, another large jumping enemy guards the boss gate. Attack it when it's in the air, then proceed to battle Needle Man!
Needle Man fight
If you remain idle upon entering the room, Needle Man won't do anything. After waiting a while or if you attack,, he'll start to fight! He has three attacks:
- Needle Man jumps high up into the air and shoots needles straight Mega Man's position as he descends. The needles he fires are launched one at a time, with a maximum of four needles. Shorter jumps mean less needles are shot.
- He jumps towards Mega Man.
- After landing from any of the previous two attacks, Needle Man "headbutts", sending out the needles on his head horizontally towards Mega Man's direction. The attack covers a short range, but deals more damage than the needle projectiles.
Unlike Spark Man, Snake Man, and Gemini Man, you won't be getting out of this battle by mindlessly spamming your special weapon. You need to be accurate with the Gemini Laser - missing a shot is bad because you can't fire another one until the laser onscreen exits, or if you get lucky and a ricochet hits Needle Man. The best time to attack the boss is when he lands; he'll be vulnerable while headbutting. Thankfully, four shots from the weapon will defeat him. Avoiding the needles is difficult, but thankfully their damage isn't much. Prioritize dodging Needle Man himself.
Now we have the final special weapon - the Needle Cannon! It's basically the Mega Buster, but needles are fired instead of bullets. Maybe it's more powerful or something? I don't know. The letters for this weapon are NE, and Mega Man turns orange when the weapon is equipped.
In addition, we also acquire Rush Jet! It allows Rush to transform into a jet, allowing Mega Man to ride him. Rush can be freely steered by the player, and Mega Man has his Mega Buster too. The energy will constantly deplete as the player rides Rush, so you can't use it all the time. Basically it's the land and air variant of Rush Marine. The letters for it are RJ, and like the other Rush modes, Mega Man is red while it's equipped.
Alright! All eight Robot Masters are defeated, now we can - - oh no, what's this? Mysterious robots have taken over Spark Man, Needle Man, Gemini Man and Shadow Man's stages! Behold for the worst part of the game... which I'll cover in July's issue. See ya!
An Octet Gazette
Written by: Museful Traveler (talk)
Welcome back to An Octet Gazette, all you readers of The 'Shroom, a section in which we are currently going through the traveler-specific traits of the sixteen main characters in the Octopath duology (Champions of the Continent will not be recognized here). There's a primer here if you need it, and have a reminder that there will be some story beats hinted at through EX Skills. If you'd prefer to remain completely unspoiled, hop on down to the SOTM poll and cast some votes, hm?
Carrying on, let's get this month started with some of my personal favorites, the merchants.
| Tressa Colzione | Partitio Yellowil | |
|---|---|---|
| Artwork | ||
| Path Action(s) | Purchase | Purchase (Day), Hire (Night) |
| Talent | Eye for Money | Business Partners |
| EX Skills | N/A | Negotiate Schedule, Share SP |
| Latent Power | N/A | Hoot and Holler |
| Notes | N/A | N/A |
Purchase, the Path Action these two share, is fairly self-explanatory. You walk up to NPC, you use the Path Action, and you get a list of goods and prices. Each NPC has their own "inventory" of goods you can buy. You have the money, and you can buy whatever you want, though obviously the better the item, the higher the price. It's considered a noble Path Action, so there's no way to take reputational damage through it. Simple as can be, isn't it?
There is a slight difference in how it works between the two games, though. Tressa, unlike Partitio, has a set chance of getting a discount when she makes a purchase, with both the chance of proccing the discount and the size of the discount increasing with every ten levels she rises. Through other Path Actions, the party can also glean information that increases the chance of getting this discount in a given settlement. None of this random discount business carries over to Partitio in Octopath Traveler II, making for a rare case of a Path Action losing a feature between the games. Though don't worry, because it comes back around in another way for him.
Before we can get to that, though, let's touch on Partitio's new night-exclusive Path Action, Hire. Hire is another recruitment Path Action, working similarly to Allure, except, rather than taking a chance or needing to reach a certain level, success only depends on having enough cash to pay. Each NPC will demand a price for their services, and if you can pay it, they'll follow you around and you'll be able to summon them in battle. Hire interacts with Partitio's Talent, too, but we'll get to that in a moment.
Unlike the scholars or the dancers, the merchants don't overlap in their Talents. Tressa's Eye for Money allows her to scrounge up additional cash when moving between overworld locations. Just about anytime you hit a screen transition, she'll idly pick up money and add it to your wallet, earning more money in areas with stronger enemies and when you've been walking around a lot since the last transition between areas. Partitio gets no such free income, but instead can access various perks from his hired help. Any NPC who can be hired with Partitio's nighttime Path Action has a particular passive perk related to money. Some of these perks will trigger when selling items to shops, some will trigger when using Purchase, some will trigger at inns, and some will even trigger when using certain money-related skills in battle. The ones that trigger when using Purchase are the sequel's replacement for Tressa's random discounts, giving you a little more control over the discounts you get at the cost of having to hire someone and drag them around with you to receive them.
From here onward, there's nothing more to talk about with Tressa, so let's jump into Partitio's EX Skills:
Negotiate Schedule is pretty neat, and I appreciate that it substitutes cash for SP to accomplish what's genuinely a super useful feat. Turn order is everything in this game, so taking a turn slot you weren't otherwise going to get can turn the tide of a battle. The cost does go up with each use in a given battle, but it's well worth any price. Although... as I say that, I used it maybe once? Twice? And mostly for the novelty. Who needs negotiations when you have Leghold Trap!
Share SP, meanwhile, is super useful with no caveats. A weaker version was a standard thief skill in the first game, but I suppose the devs realized the true power behind it, because they made it exclusive to one character and locked it until you complete his story! I mean, honestly? That was the right call, especially since this version shares gives Partitio's SP to the whole party at once. I can't overstate how helpful it is to have Partitio be a well of SP who can replenish everyone else in a flash.
By the way, the game will try to tell you that Partitio's Share SP only gives SP to a selected ally. It's lying. I am fond of these games but boy do they have some confounding translation errors scattered throughout them. There are too many skills and weapons which work differently to what the game tells you.
Continuing the trend of "Partitio gets excellent abilities", Hoot and Holler just, straight-up fills Partitio's BP. Use his Latent Power, and, bam, five full points of BP, ready to go. Combine that with his basic merchant Share BP skill, and not only can he set himself up efficiently, but he can also quickly fill up on BP and spread it around the party so anyone can set up instantly. He's so good at utility work.
But that's enough about the merchants! We've covered all there is to cover with them, so let's look at their counterparts, the thieves!
| Therion | Throné Anguis | |
|---|---|---|
| Artwork | ||
| Path Action(s) | Steal | Steal (Day), Ambush (Night) |
| Talent | Pick Lock | Blessing of Darkness |
| EX Skills | N/A | Veil of Darkness, Disguise |
| Latent Power | N/A | Leave No Trace |
| Notes | N/A | N/A |
With the thieves, we have Therion, who lacks a known last name, and Throné Anguis, who comes with what is definitively the heaviest storyline between the two games. Both of them have the self-explanatory Steal Path Action, which is the rogue equivalent of Purchase. Don't want to pay for an NPC's item? Take the chance to steal it! The chance of success rises as the thief's level rises, and there are some nuggets of information that can be gleaned from NPCs to raise the odds of successful thievery in a given settlement. Of course, failure comes with the risk of reputational damage, so just bear that in mind! As far as I'm aware, there are no mechanical changes to Steal between the two games.
In the second game, Throné adds Ambush as a nighttime Path Action, and it's a convenient one. Ambush knocks out an NPC, which can be used to move them from a path they're blocking or to keep them in place until a certain time of day or the like. Unlike Path Actions with similar effects, it doesn't require the use of items or a lengthy battle, taking only seconds at no cost. But, of course, there is a catch. Throné must be at or above a certain level to successfully KO an NPC, with the required level specific to a given NPC. Not at the right level? Then you don't even get the option to KO them. For the most part, though, keeping up with the game's recommended levels will let you knock out NPCs to your hearts content, with only those few guarding valuable items out of your reach.
Now, when it comes to Talents... Oh boy. Therion has the most infamous talent across the two games. Pick Locks allows Therion exclusively to open purple chests scattered throughout the world. Do you see the problem? Picture it. You're deep in a dungeon and you find a purple chest, only to realize you don't have Therion in your party. You have three options before you. Either forget the chest and its contents entirely, haul yourself all the way back to a town's tavern and then back to this point in the dungeon, or just try and remember the chest's location and come sweep it up in a tedious quest to take Therion around the world sometime later. It's plain annoying design, and every Octopath one player I've spoken with has griped about it.
Luckily, the developers realized they had made an irritating system, so they dropped the purple chests entirely for the sequel, which necessitated coming up with a better Talent for Throné. Throné's new talent, Blessing of Darkness, serves to highlight the new day/night mechanics by granting the party buffs whenever Throné enters a battle at night. Specifically, for the first three turns of a nighttime battle, the party gets increased speed, increased elemental attack, and increased physical attack. The thieves went from having the worst Talent in the game to one that grants free buffs fifty percent of the time. I'd call that a win! Fitting for the villains special, eh?
But, as usual, we've already run out of things to discuss regarding Therion, so let's turn to what Throné alone has at her disposal.
I don't have too much to say about Veil of Darkness. It's a herd-hitting darkness attack with a great debuff as a bonus; that's solid even at an SP cost of 25 a pop. Hitting every foe with that debuff at once is nifty. Worthy of note, I believe that debuff is stackable, so you can hit foes with it multiple times and cause multiple physical attacks of theirs to miss.
Disguise is a bit more complicated, which isn't helped by the fact that its in-game description is a bit obtuse (an unfortunate number of skill and weapon descriptions in these games are straight-up mistranslated). Throné chooses an ally, and then gains access to all of their job skills (including sub-job) and weapons for two turns, or longer when boosted. Of course, she doesn't get the selected ally's Latent Power or EX Skills or the like, and it comes at the cost of replacing her own skills and weapons. I never found it that useful. I'm pretty sure I used it exactly once.
Throné's Latent Power, on the other hand, is quite useful. Leave No Trace grants her an extra action during a turn. Taking two moves gives Throné a chance to set up and then unleash, or lets her set up two other party members. It's hard to beat, as Latent Powers go.
On that note, we're done here! Before I go, I'd like to give a quick thanks to the Fandom Octopath wiki for their repository of character art. Join me next month and we'll go over the warriors and hunters, which will bring with it our first look at a more complicated character-specific system. See you then!
| The 'Shroom: Issue 219 | |
|---|---|
| Staff sections | Staff Notes • The 'Shroom Spotlight • Poochy's Picks • Credits |
| Features | Fake News • Fun Stuff • Palette Swap • Pipe Plaza • Critic Corner • Strategy Wing |
| Specials | Community Awards Dossier • Classifieds • My Switch 2 Unboxing |

