Mirror Mansion
- This article is about a level in Wario World. For the location between Flipside and Flopside in Super Paper Mario also referred to as Mirror Mansion, see Mirror Hall.
| Wario World level | |
|---|---|
| Mirror Mansion | |

| |
| World | Sparkle Land |
| Neighbor level | Pecan Sands |
| Red diamond requirement |
6 |
| Boss | Mean Emcee |
| << List of levels >> | |
The Mirror Mansion is the first level of Sparkle Land and the seventh level overall in Wario World. At many points in this level, the player will have to use the mirrors to determine Wario's position or see things that are otherwise hidden from view. It is inhabited by animated puppets and dolls, as well as magical enemies such as Witches and Terrible Portraits.
Level layout[edit]
The player starts off on a stone bridge with a Stuffed Ankiron on it in what appears to be a large cavern. The bridge leads to three stone structures on a narrow pathway. In between the structures are Rock Blocks that can be used as lifts to get on top of the structures, but will crush Wario if he stands underneath them. On top of the structures are the red treasure button, a trapdoor, and the red Spriteling. The trapdoor houses a Gold Statue part, as do all of the other trapdoors in the level save for the sixth and eighth ones. Up the following stairs is a large gate. There is an enemy generator nearby spawning Miitī, which can be used to turn the Swirly Spinner and open the gate. The next area is obscured by a wall, so the player has to tilt the camera and use the mirror in order to determine where Wario is. Ninja Crows will attack Wario here, but can also be used to enter the steel trapdoor in the area. On top of a small staircase is the red treasure chest's spawn point. Up a ladder and past two Wansuru is an area with large white mice inside wheels rolling by. On a wall in the middle of this section is the yellow treasure button. Afterward, the player will find a wooden chest and a globe-tailed lion. This mechanical lion puppet will carry Wario over the spikes when attacked. On the way is the yellow Spriteling and chartreuse treasure button. Once across, the player will enter a fight with a Terrible Portrait. The area afterward has three Masked Clubbers fall in and a chain-link fence for Wario to climb. After climbing past two spiked balls, Wario will reach the yellow treasure's spawn point and a hole leading downward.
Immediately after dropping down, there is a steel trapdoor. There are two columns and a Magician nearby, any of which can be used to open it. Up ahead is an area with a mirrored floor and several more Magicians. The green treasure button can be seen reflected in the floor. There's a chain-link fence that goes along the wall of the room and the player needs to use the mirrored floor to determine Wario's position and reach the next area, which also contains a mirrored floor and a chain path. On the floor here is the chartreuse treasure's spawn point, past a Garlic Dispenser, some Masked Clubbers, and some Ninja Crows. To get to the next room, Wario must jump across some Glue Globes to reach a catwalk with metal grating. Near a wooden chest is a gap in the catwalk that requires a Corkscrew Conk to clear. The room afterward contains a trapdoor, three Haipō, and a hole that drops Wario into the next area.
Upon dropping down the hole, Wario will immediately enter a Battle Ring. The arena then splits off into two paths; a left and a right. To the left is a globe-tailed lion that will carry Wario across some spikes. To the left of the Glue Globes leading upward is the blue treasure button. To the right of the Battle Ring is another globe-tailed lion that will carry Wario over spikes to reach the blue treasure's spawn point and a steel trapdoor, with the green Spriteling and cyan treasure button on the way. From here, there is a ladder leading up to a chain-link fence. By climbing the fence and dodging some spiked balls, Wario can reach a Gold Statue part. Back on the left side of the Battle Ring, the cyan treasure's spawn point can be found on the way to the Glue Globes.
The Glue Globes lead to an area with some Haipō. There are more Glue Globes up here, which lead to a wooden chest and the green treasure's spawn point. Up ahead is a mirrored area containing many Witches that are only visible in the mirror. Shortly after the first large pillar is a hole in the floor toward the front with a ladder leading down to a trapdoor, which contains the blue Spriteling. Further to the left is a pillar with a Swirly Spinner in it. Climbing on the Glue Globes on the back leads to a Gold Statue part. By using one of the Witches or a nearby statue to turn the Swirly Spinner, Wario can open the gate leading ahead, which requires climbing on a smaller pillar to reach. In the next room is an enemy generator and a Garlic Dispenser, as well as a hole in the floor.
The hole in the floor leads to a bridge where a blimp is firing many Wansuru at Wario. On the right is a steel trapdoor. To the left of the bridge is another fight with a Terrible Portrait. Beyond that is another broken-up bridge with the same blimp continuing to fire at Wario, but now with bombs. The pink treasure button is on the upper level of the bridge, while the purple treasure button is on the lower level next to a Magician and a wooden chest. To the left past a Masked Clubber are some Glue Globes reflected in the mirror leading up to the goal. From here, if the player needs to get back to the upper level of the bridge, it can be reached with a Corkscrew Conk. The pink treasure's spawn point is back by the steel trapdoor. To the left of the goal is a Garlic Dispenser, ByeBye Balloons, the purple treasure's spawn point, and the final trapdoor, which houses the purple Spriteling.
If Wario reenters the level after defeating the boss, there will be a set of ByeBye Balloons at the beginning that will take him to the Battle Ring.
Enemies[edit]
- Miitī
- Masked Clubbers
- Haipō
- Stuffed Ankirons
- Enemy generators
- Magicians
- Ninja Crows
- Witches
- Mice
- Terrible Portraits
- Mean Emcee (Boss)
Red diamond sub-levels[edit]
| # | Image | Location | Description |
|---|---|---|---|
| 1 | 
|
On top of one of the three stone towers at the beginning. | After hitting the lever, the Rock Blocks will flash in a random order. Wario must hit them in the order that they flash to make the red diamond and Gold Statue part appear. This is identical to a sub-level in Shivering Mountains, except there are ten blocks instead of five. It is not necessary to wait for all of the blocks to flash before destroying them. |
| 2 | 
|
In the area with Ninja Crows after the first Swirly Spinner gate. | The red diamond and Gold Statue part are at the end of a long stretch of ring-shaped platforms that alternate spinning clockwise and counterclockwise. The rings closer to the end spin faster, making it easier to fall off. |
| 3 | 
|
Right before the section with the mirrored floor. | This sub-level involves jumping across tiny platforms. After the first few jumps, there are two paths leading left and right respectively, but both paths are the same. Wario should cling to the side of the vertically-aligned platforms until he reaches the top, then drop down to where the red diamond is. From there, a series of moving platforms will take him to the Gold Statue part at the end. |
| 4 | 
|
Right before the hole in the floor that leads to the Battle Ring. | There is a staircase of small cubic platforms leading to the red diamond on the second floor, but they periodically rotate 90 degrees, making Wario fall off if he is standing on one when they do so. He must jump when they are about to rotate until he reaches the second floor. A Gold Statue part is on the opposite side of the red diamond, and can be reached with a Corkscrew Conk. |
| 5 | 
|
To the right of the Battle Ring, past the spikes. | In between the start of this sub-level and the red diamond at the end are multiple rings of platforms. The Drop Blocks will sink if Wario stands on them too long. On the right side, many spiked balls are spinning around. There is a moving platform that will take Wario to the center, where he will find a Gold Statue part. |
| 6 | 
|
Beneath a hole in the floor in the area with the Witches, right after the first big pillar. | A lever hangs from above. Hitting it with a Corkscrew Conk will making a second lever drop down, and hitting the second lever will make a third one drop down. Hitting the third lever will make the blue Spriteling and red diamond appear. |
| 7 | 
|
In the area where a blimp launches Wansuru at Wario. | Wario must jump off of three Glue Globes with good timing to fling himself forward. The second Glue Globe will launch him to the red diamond, while the third can be used to reach a Gold Statue part. |
| 8 | 
|
To the left of the goal. | The second floor where the purple Spriteling is can be reached by using the Glue Globe. The red diamond is on the other side, but there are three spinning rings of spiked balls in the way. Wario must Corkscrew Conk through one of the rings to get to the red diamond. |
Gold Statue parts[edit]
- The first five parts are inside the first five red-diamond sub-levels.
- To the right of the Battle Ring, hovering in front of a climbable fence.
- In the area with the Witches, on top of the pillar with two Glue Globes and a Swirly Spinner on it.
- Inside the seventh red diamond sub-level.
Treasures[edit]
| Chest color | Treasure | Image | Button location | Chest location |
|---|---|---|---|---|
| Red | Big Mirror | 
|
Next to the wooden trapdoor on top of the stone towers at the beginning. | On top of a small staircase in the area after the first Swirly Spinner gate. |
| Yellow | Antique Clock | 
|
On a wall in the middle of the area with the mice in wheels rolling around. | Right before the hole leading into the mirrored floor room. |
| Chartreuse | Gold Mirror | 
|
On a platform in the middle of the first spike pit with a globe-tailed lion. | On the far right end of the mirrored floor room. |
| Green | Stained Glass | 
|
On a wall in the mirrored floor room. | To the right of the area with the Witches, past some Glue Globes. |
| Cyan | Bronze Mirror | 
|
On a platform in the middle of the spike pit to the right of the Battle Ring. | On a platform in the middle of the spike pit to the left of the Battle Ring. |
| Blue | Gold Clock | 
|
On the far left of the spike pit to the left of the Battle Ring. | To the right of the Battle Ring, next to a steel trapdoor. |
| Purple | Gold Pocket Watch | To the right of the goal, next to a Magician. | To the left of the goal. | |
| Pink | Crazy Glasses | On a high platform to the right of the goal. | Next to the steel trapdoor in the first blimp area. |
Spritelings[edit]
| Color | Location | Dialogue |
|---|---|---|
| Red | On top of the leftmost of the three stone towers at the beginning. | "This is the Mirror Mansion! There are areas here where you have to advance using only your reflection in the mirrors! Use the C Stick and hang in there!" |
| Yellow | On a platform in the middle of the first spike pit. | "The Terrible Portraits hanging on the wall will extend their hands and try to attack you! You do remember how to attack monsters who are above you, right? Well?" |
| Green | On a platform in the middle of the spike pit to the right of the Battle Ring. | "Some monsters can be seen only in mirrors! View your surroundings in the mirror then attack! Remember that controls are reversed!" |
| Blue | Inside the sixth red diamond sub-level. | "You might find areas that appear to be dead ends up ahead... but just search around! You may not be able to see the way out at first, but there should be hints reflected in the mirrors!" |
| Purple | Inside the eighth red diamond sub-level. | "The Mean Emcee inside the goal is a coward! Even if you bang on the cup he's hiding in, he won't come out! Hey, but don't give up, Wario! He's definitely hiding inside that cup!" |
Gallery[edit]
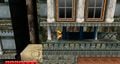
Wario in the start of the level.

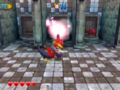
Wario encounters Terrible Portraits.
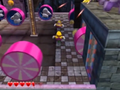
Wario near some mice.
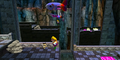
The Battle Ring.
Wario shot at by an airship.


Music[edit]
| File info |
| File info |
Names in other languages[edit]
| Language | Name | Meaning |
|---|---|---|
| Japanese | まじかるミラー Majikaru Mirā ミラーハウス Mirā Hausu |
Magical Mirror Mirror House |
| French | Manoir Miroir |
Mirror Mansion |
| German | Spiegel Hallen |
Mirror Halls |
| Italian | Casa degli Specchi |
House of Mirrors |
| Spanish | Casón de los Espejos |
Big House of Mirrors |
Trivia[edit]
- This is the only level aside from Greenhorn Forest with no Crystal Entities in it.