The 'Shroom:Issue 223/Strategy Wing
Director's Notes
Written by: Hooded Pitohui (talk)
Hello, all you readers of The 'Shroom! October arrives, and with it, spooks and specters. I trust you've already heard about that elsewhere in the paper, though. October also brings changing leaves and cooler weather, which I have greatly appreciated. Autumn arrives, and I start feeling more lively and more productive! The air chilling provides a free dose of energy, I tell you! If only it provided additional time to go with that energy, then we could write even more sections...
To the news over here in Strategy Wing, we have a special Halloween treat - and it's not candy! Status the Slinker has joined the five other ghostly writers submitting guest sections to our teams, helping Boo1268 to complete a full sweep of six teams this issue. A hearty congratulations goes out to him for joining the small handful of writers to pull off the feat. What's in store for you in Poltergeist Plays? A Google Doodle game from 2016 starring the plucky feline Momo taking on specters. Whether you're hearing of it for the first time or you've played all the installments, read on to find out about Magic Cat Academy!
In addition, we have a suite of our regular sections brought to you by our dedicated writers. "Tax time" might be a frightening phrase to hear for some, but for Lord Kong Rong, it may as well be sweet music! See what our noble ruler invests in this month in Shoey's (talk) So You Want to Romance the Three Kingdoms?. Elsewhere, Sparks (talk) continues a campaign against the Robot Masters that sees Mega Man bounding through a blackout and climbing out to space. Meanwhile, Zange (talk) brings us the iconic Tap Trial, ninjas, bouncing balls, and... oho? Is this... a romance? You'll have to see for yourself! To round out the spooktacular month, The Tattle Log and Pokémon Academy present information on some adorable spirits.
I don't do you any favors by keeping you long, and I have some hosting work to do and Z-A to (hopefully) get back to, so I'll end off the updates here. If you're feeling inspirited and wish to discuss your own favorite games after reading this month's edition, you needn't be haunted by the thought. Simply send in an application and join the team! We enjoy a great variety of games and approaches in Strategy Wing, covering all genres with walkthroughs, simple tips, analyses, and even profiles of videogame critters, so there's plenty of room for you!
Section of the Month
Mwahaha, for Halloween, we've a treat, not a trick, in the form of a three-way tie for first! The expanded offerings of Mega Man 4 and Sparks' (talk) ever-entertaining guide to battling the Blue Bomber's baddies tied with Roserade's (talk) thoughtful analysis of ARKG's secret player (including a possible re-working). Joining the detailed walkthrough and game design considerations was the mythical Pokémon Victini. Perhaps it brought this three-way victory...? Nah, it was the dedication of our writers combined with your votes that brought this about, so keep on casting 'em!
| STRATEGY WING SECTION OF THE MONTH | ||||
|---|---|---|---|---|
| Place | Section | Votes | % | Writer |
| 1st | An Overly Detailed and Funny Walkthrough of Mega Man 4 | 3 | 21.43% | Sparks (talk) |
| 1st | Pitohui's Pokémon Academy | 3 | 21.43% | Hooded Pitohui (talk) |
| 1st | Killing the Killing Game Roles | 3 | 21.43% | Roserade (talk) |
Brothership Boss Battle Guide
October has arrived, and so has another issue of Brothership Boss Battle Guide, AKA the best place to learn about every boss in the incredible Mario & Luigi: Brothership game! That includes the optional ones, and the next boss is one of the three that does not have to be fought to progress! We're gonna be looking at Glohm Gobblick!
After Burnadette and Chilliam's wedding, a resident Mario and Luigi previously encountered at the Lushgreen Sea, Great Lighthouse Island appears on Shipshape Island. His name is Dewey Fightem, and he informs the brothers about a stronger version of Gobblick inhabiting the Lushgreen Sea Great Lighthouse. This Gobblick is glohmified, making it Glohm Gobblick. The player then has the option to battle Glohm Gobblick, but I wouldn't recommend doing so until later on, as the boss is several levels above the foes you've been fighting in the Brrrning Sea!
Now that Bowser's been beaten, we're now strong enough to confidently take on Glohm Gobblick. So, let's get this started!
These are the stats of Glohm Gobblick!
Glohm Gobblick's stats
| Image | Level | Location | HP | POW | DEF | SPD | Type | EXP | Coins | Item(s) |
|---|---|---|---|---|---|---|---|---|---|---|

|
35 | Lushgreen Sea, Great Lighthouse Island | 8200 | 190 | 144 | 506 | Glohm | 3000 | 1100 | Gold Medallion |
Glohm Gobblick's abilities
Being a stronger version of Gobblick, Glohm Gobblick uses the same attacks as its normal counterpart. Because of this, I won't repeat the attacks it can do. For in-depth analyses of the attacks, check out my guide for the Gobblick Battle. However, Glohm Gobblick's attacks are more difficult to avoid! I will list the changes here:
 Jump Defense: During the attack where Glohm Gobblick spits out enemies, it spits out Glohm Capnaps and Glohm Spikelies instead of normal ones. There also aren't any coins, but instead Candies that get added to your inventory when you collect them! Additionally, the boss spits out all of these things at a faster rate.
 Hammer Defense: When Glohm Gobblick spins one of its arms to grab Mario or Luigi and spin them, it charges up and stretches out its arm faster.
 Hammer Defense: The attack where Glohm Gobblick sticks one of its arms in the group can be pretty fast, but could also be pretty slow.
Glohm Gobblick still gets angry when it has low HP remaining (about less than half). The boss gains its two other attacks as well:
 Hammer Defense: Glohm Gobblick's eating attack is faster, and it heals much more than its normal counterpart.
 Jump Defense: During the attack where Glohm Gobblick sweeps its arms along the ground, it charges up and swings faster. Remember that this attack will open up an opportunity for another Luigi Logic after the first successful Luigi Logic.
All of these attacks are much stronger than Gobblick's attacks. They can also cause the Glohm status effect! If Mario or Luigi get Glohmed, they cannot perform team attacks and Bros. Attacks with the other brother, and Luigi Logics can't be used. The effect only goes away when cured or if the character is defeated, so that's bad! Try to avoid getting hit from the boss's attacks.
 Luigi Logic
Glohm Gobblick's Luigi Logic is the exact same as the regular Gobblick's. Press at the right time to throw Glohm Gobblick into the tornado to stun it for a few turns, allowing you to do critical hits against the boss! The first Luigi Logic has simple timing due to the constant spin speed, but all Luigi Logics after that one are more difficult because the speed is inconsistent, making it easier to fail. Watch the speed carefully, and time your throw!
As a reminder, the first Luigi Logic chance occurs when the fans in the background activate. To get this to happen, Glohm Gobblick must take enough damage, which isn't very much.
Tips and tricks
Recommended gear
Because there aren't many new options for gear after defeating Bowser, you use the same gear you had equipped during the Bowser Battle. There is a new hammer though, which I'll describe in a bit. For right now, here's the best gear available from the Wayaway Island and Gulchrock Sea, Great Lighthouse peddlers:
- Boots: Masterpiece Boots and Double-Edged Boots
- Hammer: Masterpiece Hammer and Double-Edged Hammer
- Wear: Masterpiece Wear and Full-Belly Wear
I won't waste too much time repeating the effects of these gear pieces, but remember that Double-Edged gear are many points stronger than the Masterpiece gear, but remember that you take 5% of the damage you deal! Full-Belly Wear is two points stronger than Masterpiece Wear, and also has the nice bonus of reducing damage taken by 30% when at full HP!
But now for the unique gear not sold in shops!
- High-Heal Boots DX: Remember that this is three points stronger than Masterpiece Boots, and allows you to heal 10% of your max HP after defeating an enemy! It's found on a ? Block on Meeger Islet.
- Bros. Hammer DX: This is a hammer you can get from the "Feelings of Dread" side quest after defeating Bowser. It's three points stronger than the Masterpiece Hammer, and has the helpful ability of restoring four BP after defeating an enemy with it!
- Disclaimer: The abilities provided from these two gear won't help at all during the battle, as Glohm Gobblick isn't supported by other enemies, but at least they're stronger than the Masterpiece ones!
Once again, use whatever gloves and accessories you wish!
 Recommended Battle Plugs
Unlike Gobblick, you can actually bring Battle Plugs to battle Glohm Gobblick! You can use whichever ones you want, especially those that support your playstyle, but here are ones I recommend:
 Auto Ampberry: With the Glohm status effect now in play, this Battle Plug is made to counter it! Make sure you have some Ampberries on you for this to work.
 Boomerang Items: Ampberries are limited, and aren't sold in shops! The only ways to obtain them are from enemies, ? Blocks, and Dr. Vulko. With this Battle Plug, you'll be able to use Ampberries without using any from your inventory! Pairs well with the Auto Ampberry Battle Plug. Can also be used when using an item that fully restores your stats, like a Max Nut or Max Candy!

 Bros. Boost and Performance Bonus: This Battle Plug duo strikes again! Equip both of them when Glohm Gobblick is stunned and unleash your strongest attacks with increased power!
 Auto 1-Up: Oh man! Glohm Gobblick's surprisingly powerful attacks can easily wipe out Mario and Luigi if you aren't careful. It never hurts to have this Battle Plug as an emergency backup!
 Damage Shield: A reliable Battle Plug that will reduce all damage taken by 20%! Very effective against multi-hit attacks.
 Notdroppin: This is THE Battle Plug to save you from powerful, single-hit attacks, but keep in mind that you can still get KO'd from the boss's multi-hit attacks.
 Attack Boost: This Battle Plug helps to speed up the fight while conserving your BP. That way you'll save your big Bros. Attacks for the right opportunities!
Other things
Being the first boss we fight that's capable of inflicting the Glohm status effect, be sure to bring in Ampberries to cure yourself! If you run out, all is not lost! Refreshing Herbs have a 50% chance of curing the effect, but always keep in mind the possibility of failure.
The best Bros. Attacks to use are Clockout Blow and Jump Helmet! Use them to deal high damage to Glohm Gobblick, but be mindful of how much BP you have remaining! You'll definitely want to use these attacks when the boss is dizzy from a successful Luigi Logic.
Glohm Gobblick's attacks can cause the same status effects as the Normal Gobblick's versions of them (Dizzy for its grab and spin attack for example), in addition to Glohm. That means the Surefooted Guard Battle Plug and Refreshing Herbs still have some use, but to a lesser extent.
Mushrooms and Syrup Jars are still as important as ever! Bring plenty to the battle just to be safe.
If you can't beat this boss, you can always come back later. By then, you'll be much more powerful, so this guide would be outdated.
If you're feeling brave, you can try to fight Glohm Gobblick after starting the side quest in the Brrrning Sea! It will be a very tough battle, but the reward (Gobblick Boots DX) will absolutely be worth it! It is two points stronger than Double-Edged Boots (whoa that's powerful!) and also increases STACHE by five points. Additionally, you will heal by 10% of all the damage you deal! You will crush your foes in the Gulchrock Sea, including Bowser himself! If you wish to do this, you will have to use the best gear available before the Pipegunk battle, so refer to my guide on the Pipegunk Battle to see what you can use.
- Adding to the above note, you also won't have access to Clockout Blow and Ampberries. You'll have to rely on the inconsistent Refreshing Herbs to cure the Glohm status effect should you get afflicted with it. You still will have access to Jump Helmet, so that's good! Your Battle Plug access will be limited as well, because you'll have only three slots available and less Battle Plugs to choose from in general.
This was a shorter issue of Brothership Boss Battle Guide, and it wasn't as exciting due to it being a harder version of a boss already fought. The other two optional bosses will be similar to this one. Fortunately, the next story boss will be the most exciting one yet, as it will be about Glohm Bowser! Despite it being about Bowser being Glohmed, it is not a repeat fight but instead an entirely new experience. See you in November, and have a happy Halloween!
Rhythm Review
Hello and welcome back to Rhythm Review! This is Zange, and there is nothing more terrifying and spooky than a whole decade without a new Rhythm Heaven game! Thank goodness Groove comes out next year… Last time, we covered Stage 4 in Rhythm Tengoku for the Game Boy Advance, and this time we’re keeping it going with Stage 5!
As a reminder: In most Rhythm Heaven games, a stage consists of four rhythm minigames, followed by one remix, in which all the other minigames in the stage are put together in a new way to new music. However, Rhythm Tengoku is weird and has five minigames in each stage instead of four, and there is still a remix. Let’s jump in!
Bouncy Road
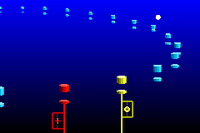
Starting off this stage is Bouncy Road! Balls will bounce down a path in rhythm, and you will need to hit the A button (yellow pole) and the D-pad (red pole) to raise poles and help the balls finish their journey. Don’t let them fall off the path!!
Gimmicks
There are two different speeds of balls that will come down the path: the rhythm minigame starts out with the faster ones, but around halfway through you will get a few medium speed ones. Near the end, you will also have balls come down the path in groups of two or three.
How to Get That Superb
Okay, pretty straightforward criteria for a Superb rating here: first, you need to be able to get most of the balls to the end of the path. Second, you need to be able to successfully get the balls to the end when they come down in the groups of two and three. As long as you can get a grasp on the rhythms at which the balls come down, this should be a slam dunk.
Difficulty Rating
I’ll give this a 1.5/5, due to the fact that the timing is a little on the trickier side and it’s really easy to drop the ball (pun not intended) if you’re not locked in.
Ninja Bodyguard
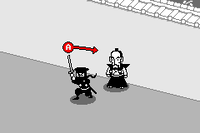
Next up, we have Ninja Bodyguard! You are a ninja, and your lord is under attack! You will slice arrows shot at him in half using either the A button or the D-pad (depending on what is displayed above you, it alternates). Protect your lord at all costs!!
Gimmicks
You will have to slice one, two, three, or four arrows at a time, at any given point of the rhythm minigame. Each one has a slightly different rhythm attached to it, with the four arrows being the trickiest. You will be able to see how many arrows you have to slice, as well as the rhythm for it, before you actually have to make any inputs, so pay attention!
How to Get That Superb
Another rhythm minigame with very straightforward criteria for a Superb. First, you need to be able to accurately slice a majority of the arrows shot at your lord. Second, you have to be able to perfectly nail the strike of four arrows near the end. It might take a few tries to get a Superb rating, because the rhythm on the four arrows is nooooot easy by any means.
Difficulty Rating
Based on the four arrow strike and the sense of internal rhythm needed to be able to do well in this rhythm minigame, I’m giving this a 2/5. Yep, it took us five sets but we finally have our first normal rhythm minigame to get out of the 1’s! Wild…
Toss Boys
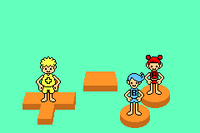
Moving on, we have Toss Boys! You control three kids tossing a ball back and forth. They’re color-coordinated and have their own button to press: Aka-chan / Red is the A button, Ao-kun / Blue is the B button, and Kii-yan / Yellow is the D-pad. After a character’s name is called out, you need to hit that character’s respective button after a specific amount of time, most commonly two beats. With enough practice, they can become the world’s best tossers, dang it!
Gimmicks
Occasionally, there are high tosses, usually to Kii-yan, where you must wait four beats before making your input. Additionally, each character has their own special toss technique that you will need to master, on top of the normal tosses. First, the AB Toss. Aka-chan will start this off, and the ball will be tossed between her and Ao-kun in one beat increments, until it gets passed off normally or with a high-toss. Second, the Self Blue. Ao-kun will start this off, and will bounce the ball up in the air. After two beats, he will continue to bounce it in the air on one beat increments for a while until passing it off to someone else. Finally, the Yellow Quick. Kii-yan will start this off, and will bounce the ball up into the air twice, in one beat increments, while calling out someone else’s name. After the second toss, you only have one beat to make the necessary input, as opposed to two. Do these special techniques seem overwhelming in writing? Fear not, you WILL have the opportunity to practice them before getting into the real thing!
How to Get That Superb
Pretty simple criteria here as well. First, you just need to have a good handle on the timing for the regular tosses. This includes not getting so many late / early hits. You also need to have a good handle on all of the special toss techniques. It might take a few tries if the exact timing is tripping you up, but this should be pretty easy to get otherwise.
Difficulty Rating
Once you’re familiar with all the techniques, it’s very easy to get into this rhythm minigame, so we’ll give it a 1.5/5.
Hanabi
Next in this stage is Hanabi! Ah, another case of no official English title… Anyways, fireworks will launch into the air, and you will need to hit the A button at the right time in order to make them properly go off. Make sure the fireworks show is a spectacular success!!
Gimmicks
There are three different types of fireworks. There’s the standard one, where you will make the input three beats after the cue. Next, there’s a quick one, where you will make the input one beat after the cue. Finally, there’s a taiko drum bomb, where you will make your input two beats after the cue. Additionally, there are moments in this rhythm minigame where you will get multiple types of cues in a given measure of music. However, these are all set up so that you only have to make one input to make them all go off!
How to Get That Superb
Pretty simple criteria here as well. You just need to make sure you’re making the fireworks go off with good timing, both individually and when there’s multiple types going off at once. Once again, if the exact timing is tripping you up this may take a few extra tries to get but it should otherwise be pretty easy.
Difficulty Rating
Once again, once you know how everything works, it’s very easy to get into the rhythm here, so we’ll give this a 1.5/5
Tap Trial
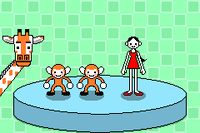
Capping out the normal rhythm minigames in the set is another iconic one, Tap Trial! You play as a girl tap dancing with some monkeys. Upon the monkeys’ cue, you will hit the A button to tap along with them. There’s also a giraffe here for some reason??? But he loves tap dancing, at least, so make him and the monkeys proud!
Gimmicks
There are four different types of taps, all accompanied by a unique cue. If there’s one ‘ook’, you will do a normal tap. If there’s two ‘eek’s, you will do a double tap. If you hear a short yell, the characters will jump up, and you will need to tap upon their landing. If you hear a longer yell, you will need to do a triple tap. There is also a slight tempo increase near the middle of the rhythm minigame, so stay sharp!
How to Get That Superb
Yet again, the Superb criteria is pretty simple: You just need to have a good handle on the timing for all of the different tap cues, even with the tempo change that happens. This should be another easy one to get.
Difficulty Rating
There’s quite a bit going on here, I’ll be honest. That combined with the fact that it is INCREDIBLY easy to get even slightly off-rhythm here means that I’ll be giving this one a 1.7/5.
Remix 5
We now arrive at the remix for this stage! This one is themed to be like a music video with a “bad boy protecting his girl”-type of love story. It’s very cool, and fits the original song that goes with it perfectly! This also happens to be my favorite remix in the game, so maybe I’m a little biased but it’s fineeee.
Gimmicks
There are no new gimmicks introduced in this remix, so as long as it was in one of the normal rhythm games in this set, it’s fair game to appear here!
How to Get That Superb
I’m gonna say the same thing I always say for these: This is a remix. Remixes always use the same lines of text depending on what rating you get, so it’s much harder to tell where the line is between a Superb rating and an OK rating. However, if you’ve gotten a Superb rating on all the normal rhythm minigames in this set, you should be able to get one here.
Difficulty Rating
Why is Tap Trial so prevalent here… Anyways, I’ll give this a 2.5/5 because there are a LOT of parts where it’s really easy to get thrown off-rhythm, and some of those transitions between rhythm minigames are snappy.
Final Remarks
What a thrilling stage we’ve gone over today! And we had more rhythm minigames with monkeys!! But it’s about to get MUCH harder from here… I’ll see you back here next month for Stage 6!
Pitohui's Pokémon Academy
Written by: Hooded Pitohui (talk)
Ah, yes, hello, hello. Do pardon if I appear lethargic today. I have lain awake for nights now, anticipating an important trip to Lumiose. There are so many considerations when traveling, I tell you, and I simply can't shake the feeling I have forgotten some important matter or another... Then, to make matters worse, that situation with the specters running rampant outside threatens to derail my whole itinerary!
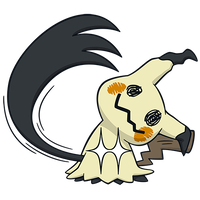
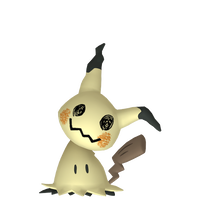
I suppose, however, that is neither here nor there. It pleases me to see you all have arrived in order despite the spirits. Ghosts can certainly be cute and charming, but they're also masterful tricksters and can pose significant dangers to those unfamiliar with their natures and methods! To this very point, I've brought with me a Pokémon to demonstrate the cute and dangerous duality of Ghost-type Pokémon. Yes, I wholly advise you not to peek under its shroud, for today, we examine a Mimikyu rounded up for us by a historian with interest in paranormal matters.
| The following information applies to Pokémon Scarlet and Pokémon Violet. |
The standard disclaimer and glossary follow below. If you are familiar with our aims and terminology, please do skip them and we will get on with the lecture promptly!
 First, a Smogon University course, this course is not. No, this academy's lessons are designed to get trainers of any stripe thinking about how they can raise their Pokémon, and, as a result, aren't designed to keep up with the widely-accepted metagame for the series. In rare cases, the way I've raised my Pokémon may even flies in the face of conventional wisdom. If you're looking for top-tier strategies, do check out Smogon, but if you merely want to get a little deeper into raising Pokémon while still doing things your own way, feel free to use this section as a reference.
Base Stats: Base stats are the values associated with a particular Pokémon species, and are the same across every individual Pokémon of a given species. You have no influence on them. You can think of them as traits tied to a species. A chimp isn't ever going to be able to get as good as digging as a mole will be, and, likewise, an Abra is never going to have the defensive prowess a Shuckle has.
Individual Values (IVs): Individual values, as their name implies, are associated with individual Pokémon. They range from 0 to 31 in each stat, with 31 being considered a "perfect" IV and higher numbers corresponding to different stats. Magikarp A and Magikarp B will have the same base stats, but they may very well have different IVs. To stick with the animal analogy, one mole may be born with larger claws than another mole, and that first mole is probably going to have an easier time digging through dirt than the latter. Individual values are set in stone, strictly speaking, but you can use Hyper Training (from Generation VII onwards) to functionally get a perfect IV in a stat.
Effort Values (EVs): Effort values are the one thing you can easily change. A Pokémon can earn, primarily through battling, but also through means like the use of certain items or mechanics like Super Training, up to a total of 510 effort values, with up to 252 in any given stat. To finish off the animal analogy, no matter what kind of claws a mole is born with, moles who have more experience digging are probably going to be better at digging than moles which have never dug.
Nature: A Pokémon's nature is, more or a less, a stat modifier with a name meant to make it sound like a Pokémon has some personality. Natures will raise one stat by ten percent and lower another stat by ten percent. Some natures raise and lower the same stat, canceling out the effect and leaving stats unchanged. Natures can be functionally changed with the use of special mint items from Generation VIII onwards.
STAB: STAB stands for Same-Type Attack Bonus, and refers to the boosted power of moves that match the type of the move's user. To illustrate this, consider the case of a Lombre, a dual-type Pokémon which is both a Water-type and a Grass-type. Any Water-type moves Lombre uses will have their power boosted by 1.5x, and any Grass-type moves Lombre uses will, likewise, have their power boosted by 1.5x. (There are circumstances where this does not apply, and, while the 1.5x multiplier is typical, some games use other multipliers.)
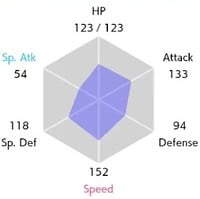
Bear that in mind for a moment, and let us discuss Mimikyu's base stats so we might determine what that strategy should be. Mimikyu's highest stat is its special defense at 105, so you might be inclined to paint Mimikyu as a defensively-oriented Pokémon. A middling defense is not an obstacle to this plan on its own... but terrible base HP calls the defensive approach into question. While Mimikyu can take a hit from a special attacker, it lacks the HP to take more than a couple of those hits.
Pivoting to the offensive stats, we can throw special attack right out. In fact, we'll consider it our dump stat, one we don't mind lowering when it comes to choosing a nature later. Attack and speed, however, are... respectable. They don't reach the high of Mimikyu's special defense, but they're serviceable. With a boost, they could be solidly reliable. Fortunately, Mimikyu does have moveset options for boosting these stats, so let's invest maximally in them and see how we can boost them later in the process. The leftover EVs, toss into special defense to bolster it.
|
Name: | Mimikyu | Base HP: | 55 | |
| Category: | Disguise | Base Attack: | 90 | ||
| Type: | Ghost | Fairy | Base Defense: | 80 | |
| Abilities: | Disguise | Base Special Attack: | 50 | ||
| Base Special Defense: | 105 | ||||
| Base Speed: | 96 | ||||
We nearly have stats settled, so let's conclude with selecting a nature. We know we want a nature that lowers special attack and raises either attack or speed. I suggest Jolly, which raises the latter, as it doesn't matter that much if Mimikyu can hit hard if it never has the chance to strike!
With stats settled, let's return to finding a one-turn strategy Mimikyu can set up to boost its two most important stats. Discounting unreliable options for stat boosting such as Copycat and Psych Up, Mimikyu can either raise its speed and deal damage with Trailblaze, raise its attack and accuracy with Hone Claws, or raise its attack by two stages with Swords Dance. Hone Claws is thoroughly outclassed by Swords Dance here, so the choice is truly between Swords Dance and Trailblaze. I could see an argument for Trailblaze doing a little bit of damage and ensuring Mimikyu can get a move off after its opponent busts its disguise. It might not be a terrible option. Conventional wisdom, however, holds that Swords Dance is preferable, and I'm inclined to agree. Two stat boosts at once with minimal risk (other than a faster opponent using Taunt) is hard to beat, and it sets Mimikyu up for at least one powerful strike - perhaps two against a weaker special attacker.
That does still leave open the possibility of a powerful faster foe striking before Mimikyu can leverage its attack boost. For that reason, I suggest adding the priority move Shadow Sneak, which will allow Mimikyu to act first (unless the opponent uses a priority move of their own). It's not very powerful, and probably won't KO an opponent even with the Swords Dance boost, but it will let Mimikyu put a major dent in their HP before it falters.
| Shadow Claw | 
|
The user attacks by slashing the target with a sharp claw made from shadows. This move has a heightened chance of landing a critical hit. |
| Play Rough | 
|
The user attacks by playing rough with the target. This may also lower the target's Attack stat. |
| Swords Dance | A frenetic dance to uplift the fighting spirit. This sharply boosts the user's Attack stat. | |
| Shadow Sneak | 
|
The user extends its shadow and attacks the target from behind. This move always goes first. |
We're going in an unusual order everywhere today, aren't we? Finally, we turn to selecting STAB moves. As goes a Fairy-type move, there is only one practicable physical option, and that is Play Rough. It, unfortunately, has only 90 accuracy, but we have no alternative. May luck favor you! So long as it hits, with 90 base power and a Swords Dance boost, it ought to be effective, at least!
Now, we do have a Ghost-type move in Shadow Sneak, but its low base power renders it less than ideal for a first-choice STAB move. You can complement it with Shadow Claw, a respectable 70 base power Ghost-type physical attack which comes with an added bonus of an increased critical hit chance. It's a bit like the opposite of Play Rough, hm? Luck favors us, here. I do recommend Shadow Claw so Mimikyu can more effectively damage Poison, Fire, and Steel Pokémon, but, if you would rather rely on Shadow Sneak and prefer a coverage option, you might consider Drain Punch. It can give Mimikyu a threat against bulky Steel-types which can withstand Shadow Claw and allows Mimikyu to replenish its HP. If you find yourself particularly pestered by metallic monsters, consider giving it a try!
Just, I remind you, keep some distance and tread cautiously if you encounter a Mimikyu while out and about today. If it can draw the life out of monsters with metallic hides, you can imagine what it is able to do to you! That is all we need discuss today. I've presented you with a fairly standard set of options for Mimikyu, so be cautious. With years of use, your opponents may anticipate your strategy and attempt to disrupt it with a move such as Taunt. That said, you are always welcome to take the principles we've discussed and experiment with alternatives, so perhaps you can construct your own moveset and use this Ghost-type to play a nasty trick on your opponents.
Myself, well, I must be off! I cannot risk arriving to the airport late when Kalos awaits! So until next month, merci, and au revoir!
Poltergeist Playthrough
Written by: Status the Slinker
Why, hello hello hello, mortal fools! My name is Status the Slinker, but everyone calls me Stat. I've been ordered By Our Lich Lord Boo1268 into taking over this section of The 'Shroom with my fellow ghosts. Apparently some nerd named Hooded Pitohui runs this place? Well, NOT ANYMORE! Anywho, today I'm gonna give you all a walkthrough on a VERY spooky game which you can play this Halloween that's SURE to fill you with frightful fun! So without further ado, let's begin, shall we?
The game we will be covering today is Magic Cat Academy, released ALL the way back on October 31, 2016. That's THREE YEARS before me and my fellow ghosts debuted. It is considered to be one of the more popular Google Doodle games, so much so that it would gain sequels in both in 2020 and 2024. Well, now that I've made you all feel old, let's get on with the story, shall we?
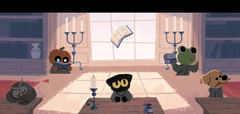
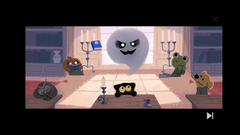
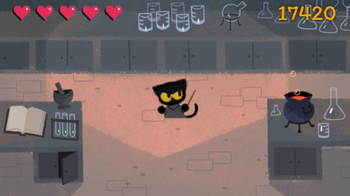
Our story begins in the Magic Cat Academy as Freshman Momo (the black cat) is studying, seemingly for a test, with her fellow classmates, one of which being the Google weather frog. Suddenly, the Master Spell Book Momo was reading starts to float, then Marshmallow (yes, that is his ACTUAL canon name) the big Boss Ghost appears. He calls upon his ghost buddies, destroying the school, stealing the Spell Book, and capturing Momo's friends! Now it's up to Momo to stop the ghosts with her magic symbols and save the day!
The story, while simple, does provide the conflict needed to get the game rolling. It also allows players to not need the characters' names to understand the story. In fact, both Momo's and Marshmallow's names are only found in the description of the games themselves! But back to the game, we have our wand in hand. It's time to go to….
Level 1: The Library
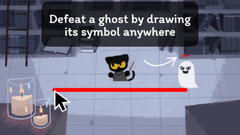
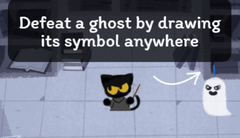
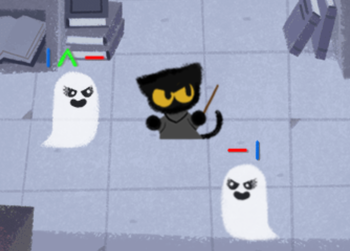
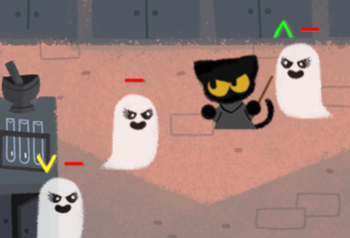
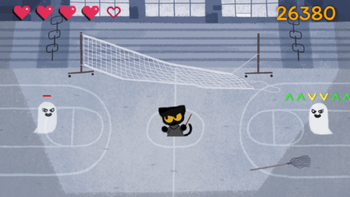
Level one begins in the library, where we first begin our adventure. It gives very OG New Super Mario Bros. vibes by starting in the first world the intro cutscene takes place in. The level introduces you to the main enemy of the game, the ghosts! Each ghost has a corresponding symbol drawn above their heads that you need to draw as they drift towards you at differing speeds. They can appear far or close to you whenever they spawn in, although usually it's far away.
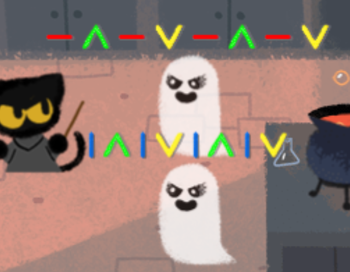
After a small tutorial, we're introduced to the first two symbols - the Side line and Up line, with each line being correlated with a color. In this case, it's Red for the Side line and Blue for the Up line (as such, we will be using line names and colors interchangeably). Afterwards, we proceed with simple single line ghosts moving towards you one at a time before becoming grouped together in smaller packs. These packs introduce you to combos that, while they don't do anything mechanically, are something fun to aim towards to see if you can get the highest score.
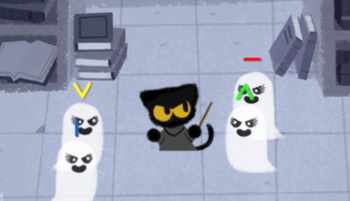
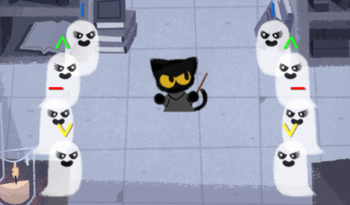
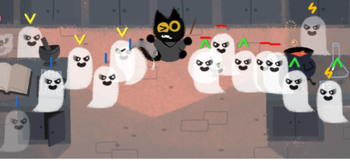
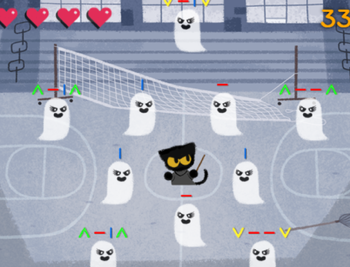
Midway through the level, we are introduced to the Up Green symbol and the Down Yellow symbol ghosts. They are first introduced in large-scale groups like the one picture above, and it's recommended you take care of Green and Yellow first before Red and Blue. Afterwards, the level gives you a difficulty curve with two ghosts with a string of symbols. Thankfully, they're not too hard to dispatch; this brief encounter quickly teaches you about long symbol strands and that certain ghosts with said strands can be comboed together.
Afterwards, you are attacked by multiple large groups of ghosts with single symbols on them, teaching the player that you can defeat multiple spirits at once if you draw the right symbol. This happens a few times before you're tested on your drawing skills and your ability to draw long strands of symbols with THE BOSS.
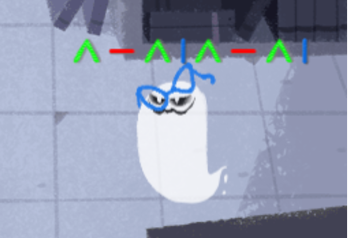
Finally, The Librarian arrives. The Librarian will first start with a complicated strand as she slowly floats towards you. This first strand can be fairly difficult, but thankfully since she moves so slowly you should be able to get it done easily. After her first hit, she will move slightly faster now but downgrade her strand difficulty. This part might trick you up due to her speed, but it's nothing you can't handle. After her second hit, she begins to move faster towards you, but this is complemented with a strand of only Blue and Red symbols, making beating her a breeze. Once the final hit is blown, she shatters to pieces, allowing you to progress to…..
Level 2: The Cafeteria
Level two takes you to the cafeteria. With all its pots and pans, the ghosts are sure to brew up some trouble here. Also, let's take a moment to talk about the artstyle; it has a very cute feel to it. Like, it has an old storybook feel to it, but not super old. It's more like those old books that had the Disney story retellings that you would find at the kindergarten library.
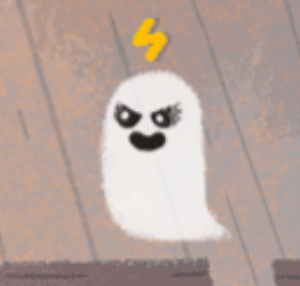
Anyways, back to the game. Immediately you are SWARMED by a group of ghosts with long strands and you have VERY little time to react. What do you do? Well, don't worry, 'cause the Lighting Ghost is here!
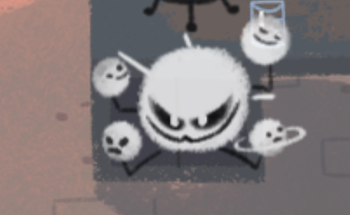
This helpful guy lurks in the background, usually spawning a bit after the other ghosts have spawned. This introduces you to the Thunder symbol, which damages ALL ghosts on screen at once. This also damages the ghosts with long strands SO MUCH it causes them to have only one symbol to draw, leading to some easy combo fodder! Thankfully though, if you DO get damaged, the Ghost Cat (as seen above) can heal you if you draw his difficult symbols. When a game like this requires fast-paced symbol drawing, this is a risk vs reward system that works well. In fact, many expert players can defeat the multi-symbol swarms without the Lightning Ghost for more combo score, rewarding skill and deeper knowledge of the game's mechanics!
Afterwards, the game teaches you about how you need to wait for just the right moment to use the Lightning Ghost. You need to time your drawing so that you're waiting for many ghosts to appear, but not SO long as to get damaged. You want just the right moment so that you can damage as many ghosts as you can.
After learning that mechanic, the game decides to throw a curveball and teach you something completely different from THE BOSS.
The Cauldron Conjurer finally reveals himself, ready to cook up some trouble, but this time he's not alone! For you see, throughout the bossfight, the Cauldron will summon ghostly minions to aid him in battle. These summons usually come with a short strand of symbols, so nothing you can't handle. After defeating them, he will slowly move towards you with a simple strand of symbols interrupted in the middle by a difficult one. Unlike The Librarian, who goes back to her starting position when hit, the Cauldron stays in place then summons another group of ghosts.
What makes this so tricky is that you aren't able to stop him fast enough to prevent him from progressing. He will be closer and more likely to hit you on the next go-round, but compared to the other bosses he's a cakewalk. Still, this is a VERY good intro to bosses summoning minions during a boss fight. Eventually, he cracks, being defeated and allowing you to progress to….
Level 3: The Classroom
Ah yes, the classroom, or in this case a laboratory filled to the brim with beakers, Bunsen burners, the works. Science is usually some people's favorite part of school, but these ghosts are here to give us the scientific breakdown on how to scare. Luckily, they're about to be schooled.
Level three begins with some smaller strand ghosts before quickly introducing long ghost strands which are ghost with VERY long strands of symbols that you need to micromanage by switching between the two and comboing when the upcoming symbol is the same. While these are the only two that are THIS LONG in the level, they will be showing up later.
This is then followed up by instances of ghost strands being combo'd getting interrupted by single-symbol ghosts attacking at high speeds, which makes you have to stop to take care of the problem before continuing your task, reinforcing the micro-managing aspect of this level.
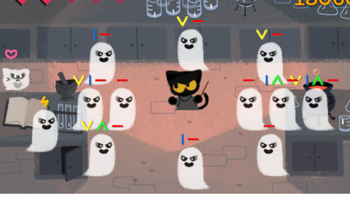
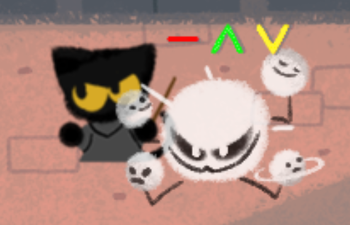
Then the level ALSO reinforces the Thunder power-up level design with large groups such as the one pictured above. Here, you need to use the Thunder to deal with the hordes in an easy manner. Eventually, after a few moments of this, the game suddenly sends out a HUGE ghost swarm, with small single-symbol ghosts attacking you in quick succession. You need to use the Thunder to handle them all before they swarm you and chip down your HP.
Thankfully, after this attack we come to face off against the third BOSS.
Appearing to test your speed, the Solar Screamstem attacks with simple symbol strands that are VERY hard to perform in a fast setting.
That helps him more than you, though, since he always moves quickly when attacking and only moves faster with each hit! And instead of the typical three hits, this guy has FIVE, leading to more panic as he quickly moves towards you and drains your health. As long as you keep a cool head, draw quickly, and are able to heal quickly, you will eventually win, leading you to…
Level 4: The Gym
Ah yes, the gym, where people's best and worst years of high school are made, but we're not here to play. We've got some ghosts to defend against! Unfortunately there is no "I" in team, or SCREAM for that matter, so teamwork for them is the name of the game and it looks like it's time to play ball!
Level four begins by going into the long strand mechanic more in-depthly, with this being the entire level's main gimmick. All through it, you'll be handling ghosts with long strands while smaller single-symbol ghosts attack.
The game takes some moments to stop this mechanic and dish out two group ghost attacks with single and strand symbol ghosts before then proceeding to the BOSS.
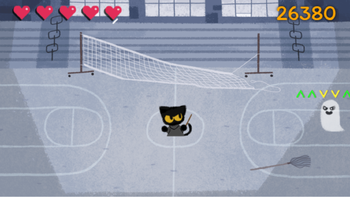
The Coachman attacks similarly to the Librarian except he's either slow or at medium speed while he moves; ghost minions will attack you from all angles, at first being only single-symbol enemies.
After the first hit, he switches it up, now sending ghost enemies with more than one symbol. Thankfully, due to the Coachman's speed, you can deal with the ghosts first - but focus on them for too long and he’ll damage ya! It's about practicing the mechanic of the level, and not getting overwhelmed with the ghosts while dealing with the main one. This is really a level about multitasking. If you're able to do that, then the coachman will LOSE HIS MUSTACHE and you can continue to…
Level 5: The Roof
Momo takes to the skies as the final boss battle is at hand! Marshmallow, you're going down!
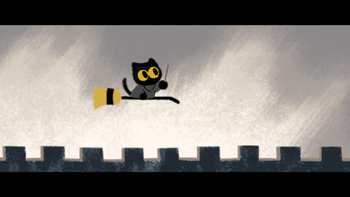
Level five is the final boss battle with Marshmallow. As Momo grabs a broom and flies up high, Marshmallow casts a spell from the Master Spell Book!
Which, as a result, turns him GIANT!
Now THIS is a TRUE final boss fight! Let the battle BEGIN!
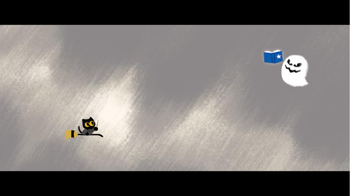
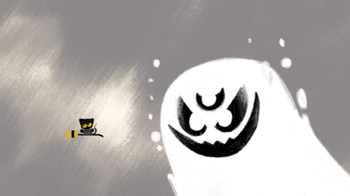
Marshmallow in their first phase sends out a small swarm of standard ghosts that move at a medium speed towards you. Nothing too hard to handle, but for his second phase he sends out ghosts with more than one symbol on them. On the plus side, they move very slowly, so they're nothing that can't be taken care of. Phase three has fast-moving single-symbol ghosts, but they move very quickly. Thankfully, a Thunder is provided to help out. After each phase, Marshmallow will always have a long strand that ends in a Thunder, which is how he's damaged. Meanwhile, if you take too long, he’ll slowly move towards you to attack by CHOMPING down on you. I will say the final phase has one of the HARDEST strands to do and you will get hit in this phase, but if you are able to act fast enough, you'll be able to defeat Marshmallow!
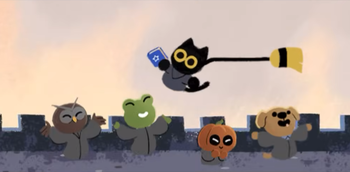
As Momo descends back to earth, Master Spell Book in hand, her friends cheer her on! She and by proxy YOU have saved Magic Cat Academy! Hooray!
Now it's time for the review. To say the Magic Cat Academy series is one of the most popular Google Doodle games is an understatement! The game's simple mechanics actually can become very advanced and complicated, but not SO complicated as to make it unfun. The differing ways the ghost patterns are presented are used in such unique ways to make each level engaging and NEVER boring. Alongside this, the game rewards you on a replay for understanding its deeper mechanics by allowing you to ZOOM through levels you never thought you could before. Finally, the game's art and character design is very cute and unique at the same time! All this combined makes for a very engaging game that's always fun to play around Halloween!
Well mortal fools, I hope you enjoyed this playthrough of Magic Cat Academy and, as such, I hope you foolish mortals enjoy this edition of The 'Shroom as well. I wish you all a very happy Halloween! And if you want us to take over and cover the sequel next year, just go to Lord Boo1268's suggestion thread! He’ll be happy you stopped by.
So You Want to Romance the Three Kingdoms?
Hello and welcome back to So You Want to Romance the Three Kingdoms, a strategy guide on the delightfully charming SNES strategy game Romance of the Three Kingdoms Part IV: Wall of Fire! Last month, we finished our first year (well technically our first 13 months since the game starts in December 189). This month, we begin the year of 191, and that means one thing!
Step 10: New Year Means Tax Revenue!
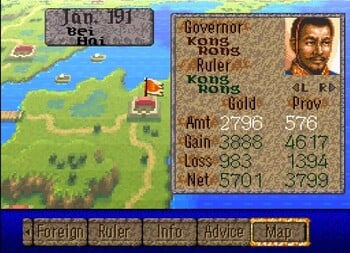
The most exciting thing about a new year is that precious, precious tax revenue comes in! Tax revenue is based on your city's population, economy stat, and population morale. The higher those three, the more money you will bring in. That means certain cities are better than other cities in terms of bringing in that sweet, sweet cheddar. For example, Bei Hai only has a starting population of 86,000, while China's capital Luoyang (currently under control of that cretin Dong Zhou) has a population of 725,000. So even if we have a better economy and population morale than Luoyang, Luoyang will still be bringing in 5,158 gold from tax revenue compared to our 3,888 in revenue.
Now, with tax revenue you're not going to get the full amount that you're projected to raise. For example, while we're going to raise 3,888 in revenue, we're going to lose 983 of it to loss. I'm not sure what this loss is, but based on my guess, it has something to do with how large your army is and population morale. But if I know anything about ancient China (and I do!), it's probably just good old-fashioned corruption but in video game form!
After all tax revenue is collected, we now have 2,796 gold to play with for the year! The first thing we're going to do, and something I recommend doing for a while is recruiting soldiers. You want to do this right away because how many soldiers you can recruit is based on a formula that factors in how much money you have and total city population.
Because we have such a small city, we can only recruit 28,000 soldiers. But don't worry! Soon we'll be unshackled from this prison! That cost us a little less than 200 gold. Next, we're going to increase funding on city infrastructure projects. As of right now, our agriculture budget under the purview of Xin Pi and Gongsun Du is 1,851 gold. We're going to go ahead and increase that to 2,500 gold for the whole year. As for economy, we currently have 514 allocated for market developments under the direct control of Lord Kong Rong and general Zhao Yun. We're going to go ahead and add 1,000 gold to that to bring that up to 1,500. So, one thing about the early game is money goes fast. Since you don't have high stats and most cities don't have a large number of highly skilled officers to work with, a lot of times you'll spend most of your budget in the first month. We started the year with 2,796 gold and we're already down to 881 gold!
Step 11: Some Creative Ways To Get Quick Cash!
Now that we basically don't have any money, what can we do for the rest of the year? Well, to be honest, not a whole lot! We're basically going to be playing the next six months (until June) on autopilot! In February, our troops have finished training, now at 60 Train with 40 Spirit. Once March comes along, we'll do another six-month training, now under the tutelage of Taishi Ci and Zhao Yun. And every month we'll give Taishi Ci and Zhao Yun 100 gold until we run out of money!
Now, one thing we can do for some quick cash is reallocating city investment funds. Each month, your city departments use a little of the gold you've given them to improve their assigned area. But the budget isn't a strict amount; it's a fluid amount. What I mean is, every month, we can either add or take away from that budget depending on our city's needs.
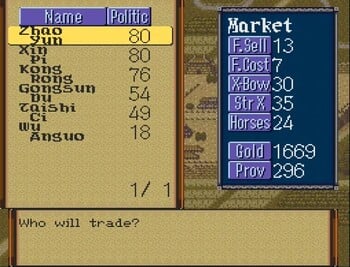
I did some quick math. The first month, Xin Pi and Gongsun Du spent 122 gold towards improving agriculture yields. That means over a twelve-month timespan, they'll spend about 1,464 gold. We currently allocated them 2,500 gold. That means we can take nearly 900 gold back from them, binging us up to 1,669 gold for the rest of the year!
The other way you can earn quick cash is by selling provisions at the market. The market is where all trading can be done. You can do various things at the market, from selling excess provisions to purchasing provisions, X-Bows, Strong Xs, and most importantly horses! The market conditions fluctuate from month to month, so some months you'll earn more from selling provisions whereas other months it'll cost more to buy provisions.
One thing that's a little weird is that, despite "F. Sell" being the option to sell provisions and "F. Cost" being the option to buy provisions, it seems the two are backwards on the market conditions menu. On that menu, F. Sell shows how much it will cost to buy provisions and F. Cost shows how much you will be paid for provisions. The rate is based off 100 barrels of provisions, so, for example, right now 100 barrels of provisions would net us 7 whole gold pieces!!! So yeah, selling provisions isn't a great way to make money until you get a few more cities under your control where you can resource farm by selling their excess provisions for profits.
The most important thing about the market is horses! Horses mean cavalry! Cavalry means stronger soldiers. Cavalry is primarily useful in defense of your city because they can be deployed either in field battles or deployed during sieges on enemy castles, but they are much harder to use because they can't climb ladders, meaning that if your opponents place their soldiers on top of the castle, then your cavalry is useless! But there is a workaround for that but we'll talk about that later. For now, we're going to buy 51,000 horses, bringing us to a total of 75,000 horses, but this will reduce us to only 465 gold.
Step 12: Dong Zhou Goes On The March As Enemy Schemes Plague Bei Hai
As February passes and March enters, a messenger alerts us that Dong Zhou has invaded the city of Jin Yang, apparently under the control of Gongsun Zan. Now, you may remember that last issue Yuan Shao conquered the city of Dai Xian, which was also under the control of Gongsun Zan. Unfortunately for Gongsun Zan, his bad luck would continue, with Dong Zhou easily swamping his forces and sacking his city. Although surprisingly Dong Zhou chose not to execute Gongsun Zan, instead letting him and his family escape, which is a nice change of pace from the atrocities Dong Zhou usually commits! Even more disturbing is that, according to reports, there have been rumors being spread around accusing Lord Kong Rong of acting dishonorably! Rumors no doubt spread by our enemies! It's probably that Yuan Shao futilely eying to cause dissent in our ranks.
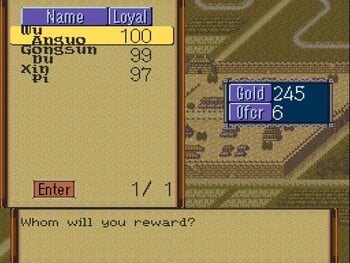
These rumors almost shake the confidence of Xin Pi and Gongsun Du, but luckily an appearance from Lord Kong Rong and a little gold as a reward quickly restores confidence in our lord! What happened here is a mechanic that comes into play when you start to get too powerful and make enemies. Basically, your opponents start to attempt to weaken you by activating a plot during their turns. There's a six different mechanics under the plot folder, all of which they'll try to use to hurt your city in some way.
Hide: Probably the one you'll see the least. They attempt to hide an enemy general under your ranks. Then, when you go to war, that general attempt to convince the soldiers under their command to defect. I've never seen the CPU use this one. I've been given the option to have one of my generals attempt it, but I don't remember how well it worked.
Bribe: The way this one works is you attempt to bribe an officer before an invasion. And if it works, they'll switch sides during the battle! You can also attempt to bribe an officer during a battle, but I've never seen it work. This one works better on officers with lower loyalty.
Rebel: If a city has a governor (AKA someone that controls the city when the ruler isn't there), you can attempt to get them to enter rebellion against their lord. This weakens the city and the rest of the ruler's army, making them easier to capture. Again, this one works better on governors with lower loyalty (although why somebody would give a disloyal officer an honor as high as governor is beyond me!)
Gossip: This is the one that was done to us. You send an officer into the city to spread rumors about either the ruler or governor. This has the rumors target either the officer class or the peasants. If it succeeds, it lowers the loyalty of either officers or peasants.
Arson: With this one, you sneak an officer into their city to attempt to burn down either their food storages (thus lowering provisions) or an armory (thus lowering weapons). You can also target both at once, although this does lower your chances of succeeding!
Snoop: Probably the one I care about the least. Snoop lets you send a spy into a city to investigate either their Farm, Dam, Economy, or Technology. Succeeding will increase your stats in whatever area you investigated.
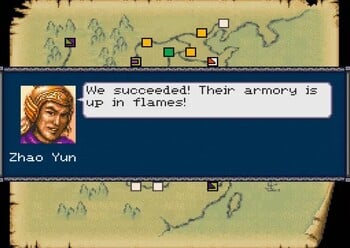
Each one of these plots costs a little bit of gold and each one requires the officer to have a proficiency in that skill to be able to use them. Righteously furious over the foul rumors that have spread against his honor, Lord Kong Rong orders an immediate retaliation, ordering Zhao Yun to infiltrate Nan Pi and set fire to one of his armories. Together, Lord Kong Rong works out a very intricate plot that will allow Zhao Yun to avoid detection while inflicting maximum damage to Yuan Shao to teach Yuan Shao a lesson for his insolence!
Sneaking off under the cover of night and following Lord Kong Rong's brilliant plan, Zhao Yun returns with good news! Lord Kong Rong's plan has worked! Under the skillful direction of Zhao Yun, the armory of Nan Pi is in flames and the army of Yuan Shao is in disarray! In his wisdom, Lord Kong Rong also instructed me to pull money from infrastructure programs to fund another round of conscription, wagering that, while this may upset the population, we must build a large enough army to ward off threats. He has also ordered that, in April, Taishi Ci and Zhao Yun begin a new six-month training regimen to whip the army into shape!
But for now, to celebrate our successful strike against Yuan Shao, Lord Kong Rong has called for a feast in General Zhao Yun's honor. So that will be all for this month. Join us next month as we continue our second year of warding off would-be conquerors.
An Overly Detailed and Funny Walkthrough of Mega Man 4
Played by Sparks through the Mega Man Legacy Collection for the Nintendo Switch.
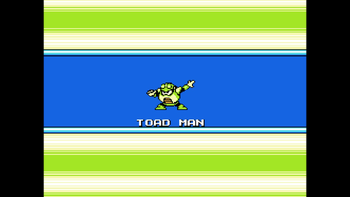
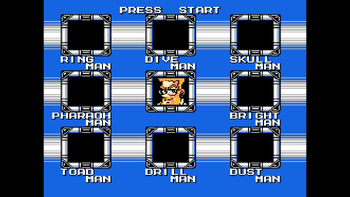
Welcome to the second part of An Overly Detailed and Funny Walkthrough of Mega Man 4! In this month's section, I'll be going over the remaining four Robot Masters (Toad Man, Bright Man, Pharaoh Man, and Ring Man)! It's the spooky month of October, but unfortunately we don't have any stages that fit the theme; I defeated Skull Man - the only one of the eight Robot Masters who is kinda scary - in last month's issue. Sorry! He just so happened to be the second one I went off against. Oh well, I still hope you enjoy reading!
The next Robot Master is weak to Drill Bomb, and that's Toad Man!
Toad Man
Toad Man stage
Toad Man's stage takes place in a sewer. That's... gross, but not as gross as you'd think.
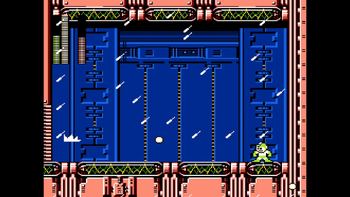
The first section of this stage is a long hallway. We also don't actually start inside the sewer, but we're outside because it's raining. The rain affects Mega Man's jumps, slightly pushing him to the left while he's in the air. That means jumps to the right won't go as far, while leaps to the left will go farther than usual.
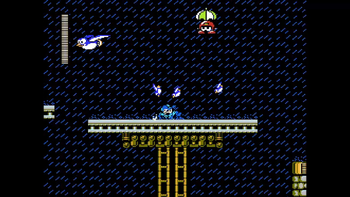
Anyways, this hallway has multiple gaps we must get across, which is made more difficult because of the rain. Two new enemies are encountered here: one of them is a large bird with three baby birds flying behind it. They all appear in the air and, after a second, fly away while the baby birds fly towards Mega Man. They can be destroyed in one shot with the Mega Buster. The other enemy is a red enemy that descends with an umbrella. When it lands on the ground, it will throw its umbrella left or right (depending on where Mega Man is) and begin walking in the same direction. There are many of these foes throughout this section, so make sure you don't get knocked into a pit by them! Take your time and avoid the birds before making the jumps. Also be sure to dispose of the descending umbrella enemies. If you've defeated Drill Man before doing this stage, then you can use Rush Jet to get across. Be alert of the birds if you choose to fly! The end of the hallway has a pit we can descend.
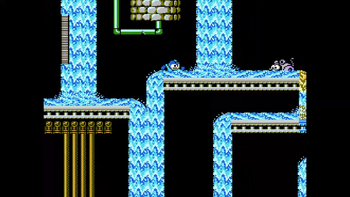
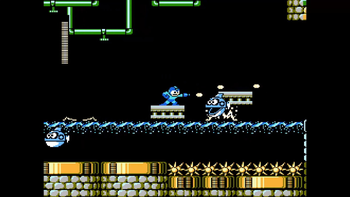
Now we're actually in the sewer, so the rain is no longer an issue! The next room is a short one with nothing it in. After falling down some more, we land in water moving to the right, pushing us in the same direction if we're on the ground. Here we have another hallway with plenty of gaps to get across, but the enemies here are completely different! The first one is a rat enemy that hops towards Mega Man. The other enemy (not pictured) is a white, blobby circle that sticks to the ground and ceiling. Both enemies are very easy to get rid of and should not pose a threat at all. The hard part is getting across the gaps due to the water, but even that isn't too bad. Additionally, there are streams of water falling down, limiting Mega Man's jump power if he jumps while under one. It's not as dangerous as it sounds... After reaching solid ground, we descend even further!
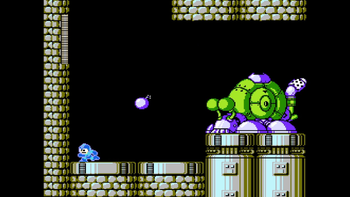
After another small room, we find ourselves in one with a large snail acting as a miniboss! The snail is atop a ledge and guarding the way forward. It has two attacks:
- The snail opens its eyes before firing a bomb from its shell that travels in an arc, exploding once it hits something.
- The snail launches out its eyes at Mega Man before they return to the enemy.
How do we defeat the snail? The answer is to attack its eyes! However, the snail can only be hurt when its eyes are open - attacking them when they're closed will do nothing as the projectiles will harmlessly bounce off. The snail always opens its eyes before attacking, so that's you time to strike! The best way to defeat it is by charging up the Mega Buster and unleashing fully-charged shots when the snail is vulnerable. After defeating it, we can move on!
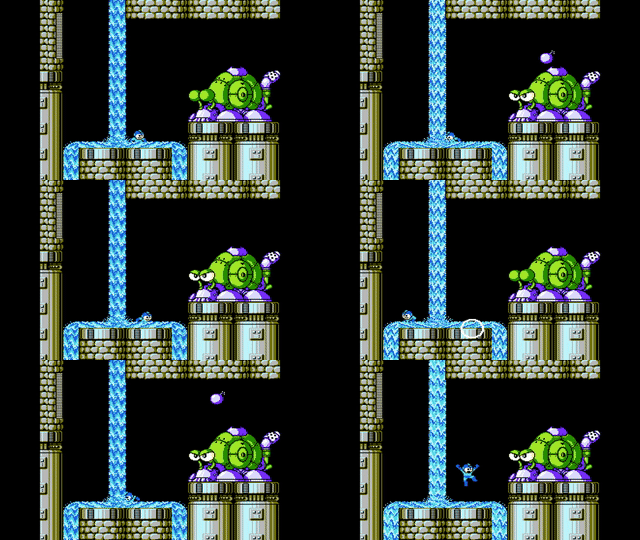
The next room is a short one (with rushing water this time though! So that's something), followed by another one with one of those jumping rat enemies. We can avoid the rat entirely by traveling on a floating platform above it. After falling some more, we enter a room with another snail miniboss that must be defeated. This one has the same attacks as the previous one, but it's more difficult to defeat because of the rushing water in the "battlefield". There's also the danger of falling this time!
I've created a strategy for dealing with this snail. The trick is to run away when the snail attacks and run closer and attack afterward! You must do this multiple times to defeat the snail. You may get hit by the eyes of the snail, but this will definitely help you with avoiding the bombs! I made a GIF to show the strategy in action as it's difficult to put into words. That, and GIFs are fun!
One more room before the boss! This one is a short hallway that has water we can actually swim in, like Dive Man's stage. It's sewer water, but it's harmless. There are more gaps to get across here; this time above one hit KO spikes instead of pits! We'll have to use floating platforms above the water to get us across, but we're still not safe! Remember those green fish enemies from Dive Man's stage? They're back here, although they're blue this time! They will leap out of the water when Mega Man is near, but one Mega Buster shot will get rid of them. If you've got Rush Jet energy left, you can use it to reach the boss gate. I won't blame you. If you're proceeding on foot, then take your time and don't jump when a fish is near!
Now it's time to take on Toad Man!
Toad Man fight
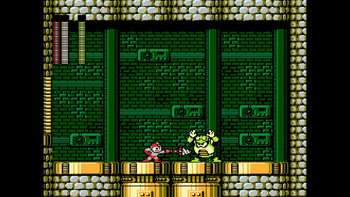
Toad Man is laughably easy. He only does two things:
- Toad Man jumps to Mega Man's location.
- Toad Man does a rain dance, which causes rain to fall upon the entire screen, making for an unavoidable attack. If Toad Man is attacked when charging up, the attack will be canceled.
Based on fighting him, Toad Man seems to jump when I fire a projectile. If I was close enough to him, he wouldn't be able to avoid it, and so he just stood there. So... I just stood a good distance away from him and fired Drill Bombs at him in a rhythm until he was defeated. Yeah... that was the boss. He is a joke even without his weakness! The only problems I can see from him is when players don't know how to stop/avoid the rain attack.
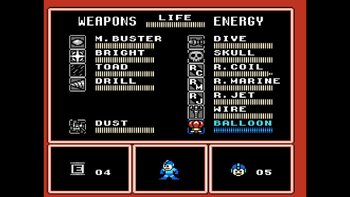
Defeating Toad Man gives us Rain Flush! This weapon uses a solid amount of weapon energy (about 4 of the 28 bars) to launch a satellite into the air, creating a rainstorm that covers the entire screen. It's a nice way to remove lots of weak enemies present on the screen! Just don't use it too much, or you'll find yourself out of weapon energy! Rain Flush is labeled "TOAD" in the pause menu, and Mega Man turns bright green when it's equipped.
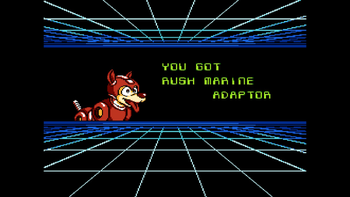
Ooh another Rush upgrade? Yes it is! Defeating Toad Man also gives us Rush Marine Adaptor, which allows Rush to transform into a submarine in underwater areas, allowing free control in the water for Mega Man! It functions the exact same way it did in Mega Man 3. Rush Marine is labeled "R. MARINE" in the pause menu.
With the power of rain now in our grasp, the next one to take on is Bright Man!
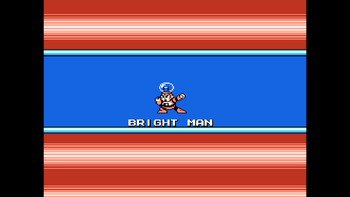
Bright Man
Bright Man stage
Bright Man's stage takes place in a high-tech facility with plenty of electrical currents.
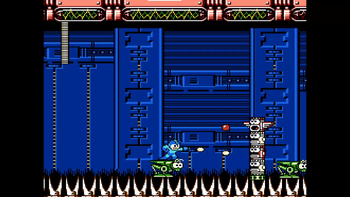
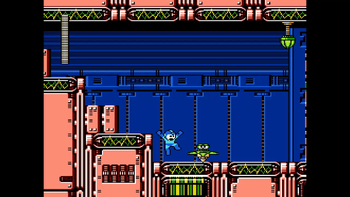
We start in a short hallway with - you guessed it - two new enemies! The first one is a green walking enemy on the ground. One shot will get rid of it, and it will launch harmless fireworks when defeated. The other enemy is a flying red lightbulb enemy that occasionally stops to launch out bombs that travel upwards and then quickly fall. These bombs will then explode at a random height, creating five projections in a spread formation, aiming downward. One Mega Buster shot will defeat this enemy too, but beware! When a red lightbulb enemy is vanquished, the lights will go out! The only things you'll be able to see are Mega Man and any enemies that also may be present. To turn the lights back on, defeat a walking green enemy, as its fireworks will restore the light. If you find both of these enemies at once, defeat the lightbulb before the fireworks one! Try not to fall in any of the two pits here...
The next room is one filled with spikes along the ground! Thankfully, there are friendly grasshoppers that allow us to safely ride on their backs as they leap across the spikes. The grasshoppers won't go all the way to the goal, and will eventually turn around and jump backwards. We'll have to jump to another grasshopper to reach the end! There are also two not-so-friendly totem poles that remain motionless, but shoot projectiles towards Mega Man. Look to see which face on the totems opens its mouth so you can easily avoid the attack. The second totem is past the first grasshopper, so we'll have to fight it while going for a ride! The second grasshopper will come across a pit, so we have to jump off of it while it's in mid-jump to reach solid ground! The poor grasshopper sacrificed itself so we can get across... Your loss won't be in vain. A ladder at the end of the section leads to the next room.
This next room contains that large, motionless red enemy from Dust Man's stage (the one that shoots two different bullets at Mega Man). There are two ladders we can take; the right one is high up, so it requires Wire or Rush Coil to access. It leads to a large health power-up, but it's also a dead end. The ladder guarded by the tall red enemy will lead us forward.
After climbing up some more, we enter a very spacious hallway filled with only one kind of enemy - one that's connected to the ceiling before falling to the ground when Mega Man approaches. The enemy will then spin towards Mega Man and bounce off any walls it hits. These enemies take two shots to defeat, and are pretty easy. The end of this very large room has a small gap we must slide through.
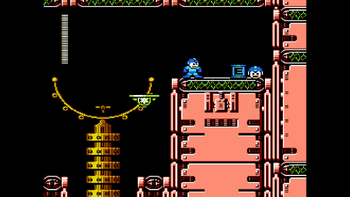
This next section has two choices for us to go, a ladder leading downwards continuing to the right. The ladder leads to a completely optional area containing a 1-Up and E Tank! To get them however, we must jump across unique red and green platforms! When one of these platforms is stepped on, it will travel in an arc. Be careful! Red platforms will fall off the screen after completing their arc, but green platforms will go back and forth, as they cannot fall. After retrieving our goodies, we have to go back the way we came, as this is a dead end. Because the ladder is atop a high ledge, we have to use Rush Coil, Rush Jet or Wire to get back. If you're out of energy for all three, then you have no choice but to fall down a pit here, resulting in the loss of a life. If you have plenty of lives and E Tanks, then you can skip over this room.
Moving on now! Continuing down the main path leads us to more spikes, grasshoppers and totems. This time there are six grasshoppers instead of two, and both Totems must be fought while on grasshoppers! Jumping from grasshopper to grasshopper can be tough due to the limited amount of time you have before they hop backwards, so try to be on the edges of them so you can make the jumps more easily! Unfortunately, the last grasshopper here also falls in a pit... not again! I should also mention that we must jump straight to a ladder this time instead of solid ground. After climbing up this ladder, we enter a small room with one of those spinning enemies ready to attack, so don't hesitate! Atop a huge ledge is a large weapon capsule if you need it.
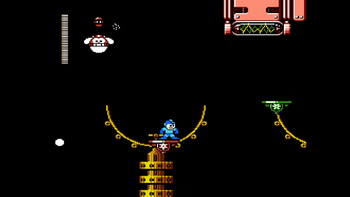
Now we're in the home stretch! The last part of this stage before Bright Man is a long section containing many of those arc platforms from the bonus area and flying red lightbulb enemies! This is very treacherous, as you must avoid those enemies while making the jumps from the red and green platforms, but you also don't want to get rid of the enemies because the lights will go out! Fortunately, you will still be able to see the platforms in the dark, but there is a small amount of solid ground during one of the jumps, so try to keep the lights on! After all those scary jumps is some solid ground before the boss gate, where more of those lightbulb enemies and green fireworks enemies are found. Now's your chance to restore the lights before fighting Bright Man!
Bright Man fight
Oh, Bright Man. How I had trouble with you when I was a kid. Not anymore! Bright Man has three moves at his disposal:
- He jumps at Mega Man's location, kinda like Toad Man.
- Bright Man shoots three bullets in a rhythm, one traveling slightly upward, one straight, and the other going slightly down. The order of the three projectiles is random.
- When Bright Man is at a specific amount of HP (I believe it's 16, 8, and 4) he will emit a bright (ha!) flash that freezes Mega Man no matter where he is. It does no damage, but it makes Mega Man vulnerable to Bright Man's next attack.
Making contact with Bright Man will deal a lot of damage to Mega Man, so stay away from him! If you don't know the trick to defeating Bright Man, he will be very difficult to take down. Rain Flush is his weakness, so you don't have to worry about aiming at all because the attack covers the screen! You'll have enough energy to defeat Bright Man, trust me.
Because Rain Flush deals four bars of damage per hit, Bright Man's HP will line up with 16, 8, and 4, allowing him to perform his freezing attack. If he jumps at you after freezing, then get ready to lose many bars of health. To prevent Bright Man from using his freeze ability, fire a Mega Buster shot at him when the battle starts. Afterwards, use Rain Flush to take down Bright Man! His health will never line up with 16, 8, and 4, but rather 15, 7, and 3, so you'll be spared from his bright freeze. If you're fighting him without Rain Flush, then you'll have to pay attention to how much health Bright Man has and mix up charged shots with normal shots to avoid the bright attack. Fully-charged Mega Buster shots do three points of damage.
So we beat Bright Man! Our reward is Flash Stopper, a great weapon that freezes everything with a bright flash for a few seconds! This is way better than Flash Man's weapon from Mega Man 2, because we don't use all of the weapon energy at once, and Mega Man can use his Mega Buster during the freeze duration! A few bars of weapon energy (I think 4?) are used at a time when the freeze effect occurs. This weapon is labeled "BRIGHT" in the pause menu, and Mega Man turns purple (yay purple!) when it's equipped.
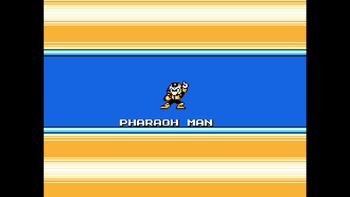
Two more left to go! Pharaoh Man is up next!
Pharaoh Man
Pharaoh Man stage
Pharaoh Man's stage takes place in a desert. Eventually, we enter an underground tomb or pyramid.
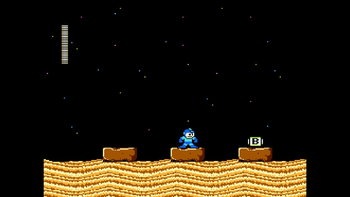
We start in the desert area, where we can observe the beautiful starry night sky! The road ahead has lots of sand, which slows down Mega Man and slowly drags him down. Keep jumping to avoid being dragged in the sand! Thankfully, there are points of solid ground as well. Once again we have two new enemies to deal with here: large green scorpions and flies that fly (ha again!) above the action. The scorpions will emerge from the sand before charging at Mega Man at a random speed - slow, fast or something in between - before burrowing back into the sand. They pop up randomly, and are invincible while they emerge and dig. Because of them, you'll have to take baby steps so you don't get attacked by a wild scorpion! They have a few health points, so you can either blast them before they reach you or jump over them. Now about the fly enemy; it appears at specific parts of this section, rather than randomly like the scorpions. When a fly is on the screen, it will zoom from the right side to the left before turning around and traveling to the right, before turning around again and leaving the screen. While it is on the screen, it will drop bullets! You can't reach them normally, so it's best to ignore them and focus on the scorpions instead.
At the end of the first area is a pit leading down, but don't jump in it! Use Rush Coil or Rush Jet to get across the large gap and enter a secret area! This area is more of the same: sand, scorpions, and flies, but at the end of it is another special power-up similar to the Wire one, but this one has a "B" on it. After we collect it, we're transported the the first checkpoint of the stage, so we actually get to skip ahead a little bit! Nice.
This powerup is called Balloon! It allows Mega Man to create balloon platforms in front of him that slowly float upwards before disappearing. More than one balloon can be on the screen at a time. It's very similar to Item 1 from Mega Man 2.
But now it's time to move on! The checkpoint is inside the pyramid/tomb. This room contains multiple of those bat enemies from Skull Man and Drill Man's stages, but also something completely new! There are sentient platforms atop of spikes here, occasionally waking up to shoot two bullets (one on each side of them) before going back to sleep. If Mega Man jumps on one, it will fully awaken and move towards the right. If a platform crashes into a wall, it will disappear. This means we'll have to be jumping from platform to platform to get across spikes, kinda like the grasshoppers from Bright Man's stage. The jumps here are pretty tricky though because you have to make sure the bats and platform bullets don't knock you off and into the spikes! I don't feel as bad for these platforms as I do for the grasshoppers - these ones can hurt us. Anyway, after multiple platform jumps, there is solid ground leading to a pit where we must descend.
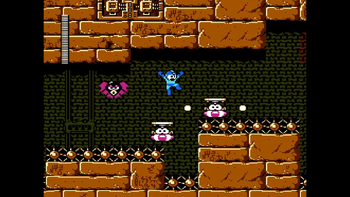
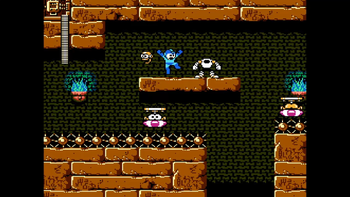
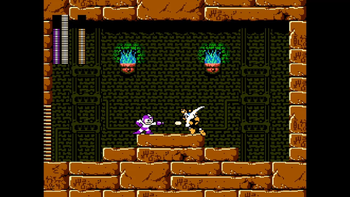
After falling, there's a small intermission room with cool torches with blue flames in the background. The room after this one is the last one before the boss gate! Fittingly, it's the toughest room in the stage! We'll have to use more of those platforms to get across more spikes, but there are points of solid ground with mummies! Yes, mummies. Hey, they kinda fit the Halloween theme after all! The mummies appear from a revolving door in the background. After a second, they will throw their head at Mega Man, although their aiming isn't pinpoint accurate - their angle adjusts depending on Mega Man's position, but the heads will be fired in Mega Man's general direction. The revolving door will then "hide" the mummy before bringing it back with a new head. These mummies are only vulnerable when they're not hiding. A few Mega Buster shots will do the trick!
One of the platform jumps here has a low ceiling, so you'll have to get to the next platform while the one you're standing on is falling. Good timing is needed, and you also don't want the mummies to knock you off course now, do ya? After getting through this room, Pharaoh Man can be fought!
Pharaoh Man fight
Pharaoh Man is arguably the toughest Robot Master in the game if you don't have his weakness. He has two attacks:
- He jumps twice and tosses two sand projectiles directly at Mega Man.
- Pharaoh Man charges up and sends a large sand wave in front of him as a projectile.
That doesn't sound too bad, but Pharaoh Man is very aggressive and not a pushover! I should also mention that the battlefield isn't flat, but with two symmetrical steps adding a small bit of elevation. If you have Flash Stopper (Bright Man's weapon), then this fight is a joke.
Flash Stopper allows you to freeze Pharaoh Man in place while you constantly bombard him with Mega Buster shots. He still has frames of invincibility, so don't hurt your thumbs by button-mashing too much. Be sure to still mash at a steady pace so you can freeze Pharaoh Man before he pulls off an attack. You'll also want to freeze him when he's on the ground or in a place where you can just stand in one location and shoot, so that you won't have to keep jumping and attacking.
Defeating Pharaoh Man gives us Pharaoh Shot! It allows Mega Man to shoot sandy projectiles straight ahead of him, but also diagonally upward or downward if is tilted in such directions! That's not all, as the weapon can also be charged up to unleash an extra-powerful projectile! While charging, there will also be a large sandy projectile above Mega Man that disappears if an enemy touches it or if Mega Man launches the charged-up sand projectile. If the projectile above Mega Man is gone, the charged one will not be lost. Charged-up shots cost more weapon energy than usual however. The weapon is labeled "PHARAOH" in the pause menu, and Mega Man turns tan when it's equipped.
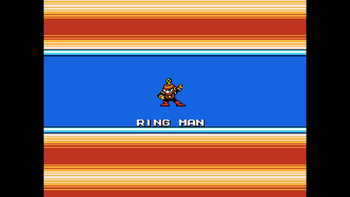
Only one left to go - Ring Man!
Ring Man
Ring Man stage
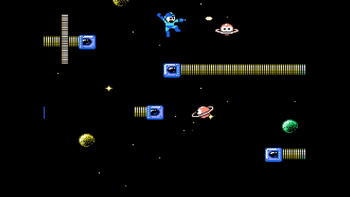
Ring Man's stage takes place in the sky. Eventually, we'll reach to Outer Space!
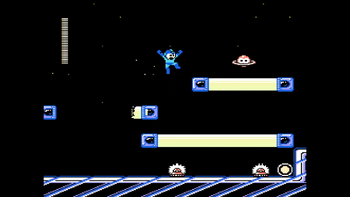
At the beginning of the stage, we must climb upwards several screens using ladders and rainbow lasers. I don't know if that's what they're actually called, but "rainbow lasers" seems like a good name. If Mega Man steps on one of these lasers, it will fade away in a fixed direction (usually from where Mega Man approaches from when climbing up). After the laser disappears entirely, it will fade back in. The lasers won't fade away while they're regenerating, so take advantage of that! Speed is necessary to move onward.
Check it out! We've got new enemies to deal with. One of them is a turret that remains in one place on a wall. It aims at Mega Man (though not precisely) and fires three bullets, one after the other. These turrets are in the first, second, and fourth rooms of climbing. In the second and fourth rooms, there are two of them present. The other enemy only appears in the third room - something that looks like a miniature Saturn, but with eyes. Two are present in the third room, and all they do is slowly home in on Mega Man's location. One Mega Buster shot will get rid of them. The more rooms you climb, the more complicated the rainbow laser layouts will be. Try not to fall, otherwise you'll have to climb back up!
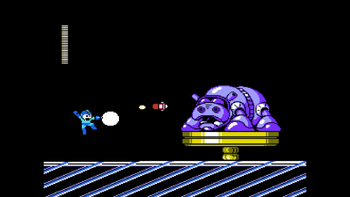
We eventually reach the peak of the climb, which is a small room with no enemies and one rainbow laser. We now progress to the right, where the background turns black, and we encounter an unexpected roadblock - a large hippo on top of a tall platform!
To attack the hippo with our Mega Buster, we must shoot at the segments on the platform to lower it, allowing us a chance to attack the hippo. The segments do grow back, so we need to constantly be on the offense. The hippo doesn't idly stand by; it fires homing missiles out of its mouth! Two missiles are fired at a time, and they never give up on pursuing Mega Man. Thankfully, they can be destroyed, but always be ready for more missiles. The hippo takes many shots to defeat, but when it's gone the missiles will disappear as well. Don't stop until you win! We can move on after the hippo is done for.
Now the background has stars, indicating that we're in outer space. The next section is a long hallway with more rainbow lasers and flying Saturn enemies, but also saw enemies from Dive Man's stage. The saws are only found on solid ground, and because we now have Dive Missile they can be defeated! A large health powerup is underneath one of the lasers, so you can grab it to replenish your life if you need it. Eventually, the lasers will be above spikes, so you can't afford to fall. Hopefully you understand how the lasers work before this part. There is then solid ground with a pit leading to the next room. One of the Saturns gave me a 1-Up! How generous!
After falling down, we encounter another mid-boss. This one is a pair of eyes surrounded by many rings, making it look like a spring. This enemy cannot be hurt normally. Every several seconds, it will quickly send out the rings in six directions (up, down, and the diagonals) before they return to it. While the rings are sent out, the enemy is vulnerable. Due to the short amount of time you have to attack, use charged-up Mega Buster shots to defeat it. Three will do the trick! You'll have to jump at just the right time to avoid the rings and fire at the eyes while you're in the air. It's tough to do, but I have faith that you'll win! When the ring mid-boss is gone, we can fall down some more into the next room.
What's in the next room, you may ask? Another hippo! This one's the exact same as the first one, so I don't need to explain the strategy again. Wow, Ring Man has quite the security! Afterwards, there's another long hallway, but there's a ladder leading upwards into an optional room. By using Rush Coil, Wire, or Balloon, we can reach the ladder. It leads to a small room containing Eddie! Haven't seen him in a while. He gave me an E Tank!
Now to move on. The first part of this hallway has steps leading upwards, as well as those spinning car enemies from Drill Man's stage. There are four of them here, and they're tan in color. Make sure you defeat them before they spin at you! Past the steps is the scariest part of the level so far! A very large gap stands between us and more solid ground, but fortunately there are lasers to help us get across. These ones aren't rainbow colored however, but brown instead. They look like the bars for health and weapon energy. If Mega Man steps on one of these lasers, it will fade away from the opposite side! Like the rainbow lasers, the best time to use them is when they're regenerating, as they won't fade away. You've also got to deal with flying Saturn enemies too! Scared? Rush Jet will get you across safely. Watch where you're going, and don't bump into Saturn enemies or lasers! A ladder at the end of this section leads downward.
The ladder takes us to a small room with a brown laser over spikes. The laser fades away from the right to the left, so just keep sliding to the left to move as fast as you can before you fall into the spikes! Another ladder at the bottom left leads to the final room before the boss gate, where another ring mid-boss is. This one is more difficult to avoid because it's closer to Mega Man, requiring more precise jumps. After defeating it, there's a small space to slide under, and then ta-da - we reached Ring Man!
Ring Man fight
Ring Man is another tough boss. Unlike Pharaoh Man, he's still a challenge even with his weakness. Ring Man attacks in a pattern:
- He throws a ring that travels quickly and far. After it passes Mega Man's position, it will return to Ring Man. It's kinda like a boomerang.
- Ring Man jumps up and throws a ring while in the air (that also returns to him). Upon landing, Ring Man will run towards Mega Man. If Mega Man is far enough away, Ring Man can throw a ring boomerang while he runs. After jumping over Ring Man as he runs, he will restart his attack pattern.
Ring Man isn't playing around. You'll need quick, precise jumps to dodge his rings, and you'll have to avoid the ring he throws in the air as well, because it will return to him in a diagonal path. Don't stand too far away when the boss runs at you, because you'll have another projectile to deal with.
To defeat Ring Man, charge up Pharaoh Shot and attack him with it when he lands from a jump. If you wanna end the fight quickly, then you can try to attack with charged Pharaoh Shots whenever possible, but this is risky because you may take some damage. If you need to use an E Tank, go right ahead! Keep at it, and you'll eventually beat Ring Man.
The weapon we acquire from Ring Man is Ring Boomerang! It also allows Mega Man to throw a ring that acts as a boomerang, traveling a short distance in front of Mega Man before returning to him. The ring pierces through enemies too! The weapon is labeled as "RING" in the pause menu, and Mega Man turns brown when it's equipped.
With the eight Robot Masters dealt with, the mastermind behind them all, Dr. Cossack shows himself! In November's issue, I'll be storming his fortress, so be sure to check that out when it releases - you don't wanna miss that! Goodbye now!
| The 'Shroom: Issue 223 | |
|---|---|
| Staff sections | Staff Notes • The 'Shroom Spotlight • Poochy's Picks • The 'Shroom Spooky Scavenger • Credits |
| Features | Fake News • Fun Stuff • Palette Swap • Pipe Plaza • Critic Corner • Strategy Wing |
