The 'Shroom:Issue 222/Strategy Wing
Director's Notes
Written by: Hooded Pitohui (talk)
Hello, all you readers of The 'Shroom, and welcome to an autumnal edition of Strategy Wing! I can't speak to the weather all of you are experiencing, but here the temperatures are finally taking a turn to the cooler side. Drizzle and overcast skies are returning, so while it remains a bit warm for my tastes, better days are ahead! With Legends Z-A and Octopath Zero on the horizon, autumn and winter are set to treat me well! I need only make it through hosting a KG to get there...
Enough prattling on about myself, though! We have eight sections for you to enjoy this month in Strategy Wing, including the return of Killing the Killing Game Roles and So You Want to Romance the Three Kingdoms?. That's right, Lord Kong Rong's late-summer banquets have drawn to a close. Under his wise guidance, we'll hunker down through the autumn and winter as we shore up the governance and defense of Bei Hai. As for what KG analysis awaits you this month, let's just say it's a secret for now. To round out the returns, Four Steps for a 3D World dissects a mission as retro as a it gets.
In addition, Sparks (talk) moves right along from Mega Man 3 to Mega Man 4 without missing a beat. If you left the last walkthrough wondering if the Blue Bomber had started to rust, this new entry promises to show that the classic Mega Man games aren't out of worthwhile experiences to deliver! On the other end of the spectrum, Rhythm Review has one of Rhythm Heaven's most infamous minigames queued up. I won't spoil it here or in the ToC, so see if you can guess what it is before you give it a read! Beyond that, we have our usual slate of sections. From clashes with the Koopa King to mythical 'mons, there's plenty for you to read!
If you feel so inclined after perusing this issue, send in an application and join the team! Just... perhaps don't bring any arachnids along with you. The stray Pikmin that have colonized the office are awfully skittish, and one incident was enough...
Section of the Month
It's a beautiful day outside. Penguins are jumping, flowers are blooming, and bunnies are hopping. On days like these, readers like you... should be taking a rest. Yes, having learned to time our rests to the rhythm and watching out for consecutive jumps, we can now congratulate Zange (talk) on taking their first win in Strategy Wing's section of the month with Rhythm Review! You'd best be paying attention to prepare for Groove! Thank you for supporting our writers, and be sure to keep those votes coming!
| STRATEGY WING SECTION OF THE MONTH | ||||
|---|---|---|---|---|
| Place | Section | Votes | % | Writer |
| 1st | Rhythm Review | 3 | 30.00% | Zange (talk) |
| 1st | Pitohui's Pokémon Academy | 2 | 20.00% | Hooded Pitohui (talk) |
| 2nd | An Overly Detailed and Funny Walkthrough of Mega Man 3 | 2 | 20.00% | Sparks (talk) |
| 2nd | The Tattle Log | 2 | 20.00% | Hooded Pitohui (talk) |
Brothership Boss Battle Guide
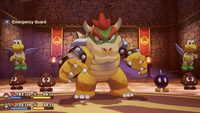
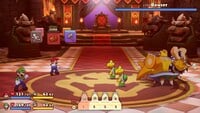
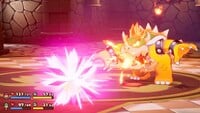
GWAHAHAHA! Welcome to a really special edition of Brothership Boss Battle Guide, the best place to get your info on the mighty bosses of Mario & Luigi: Brothership! Why's it so special? I'm going over the greatest villain in video game history, and he just so happens to be celebrating his 40th anniversary this September - The Koopa King himself - BOWSER!! He's also the first boss of the Gulchrock Sea!
Seeing how dangerous the effects of Glohm are, Mario and Luigi make it their mission to retrieve Ampberries so they can cure the affected residents of Concordia. They only grow on Wayaway Island, a far-off isle only reachable via pipe. Bowser and his minions have made the island a base for themselves, creating a large castle that is also heavily guarded. The Ampberries are stored near Bowser's throne room, so the Bros. battle their way through the castle to reach there. Unfortunately, Bowser refuses to share the fruit and starts a battle with them. The Ampberries will have to wait!
These are the stats of Bowser!
Bowser's stats
| Image | Level | Location | HP | POW | DEF | SPD | Type | EXP | Coins | Item(s) |
|---|---|---|---|---|---|---|---|---|---|---|

|
33 | Wayaway Island | 4800 | 156 | 176 | 271 | Bowser's Army | 11000 | 1000 | None |
Bowser's abilities
Bowser has four attacks at his disposal:
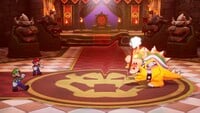
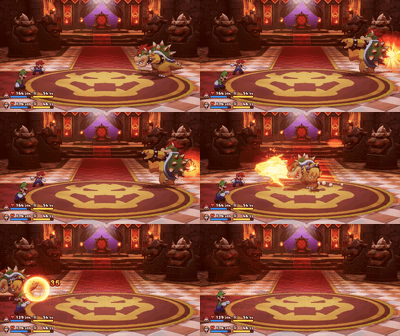
 Jump Defense: Bowser jumps in front of Mario or Luigi and can do one of three things:
- Bowser's eye glows before he swiftly strikes at his target with his tail. The tail swipe can cause the Trip status effect.
- Bowser prepares fire breath before expelling it out at whoever he's in front of. This can cause the Burn status effect.
- Bowser jumps up into the air, front-flips, and slams down on the ground (it's basically a ground pound). This deals no damage, but if Mario or Luigi is not in the air when Bowser lands on the ground, the impact will shake them, preventing them from doing anything. This essentially makes the target vulnerable to another move from Bowser. Speaking of, Bowser always follows up with a tail swipe or fire breath attack on the same character.
- Additionally, Bowser may change targets after performing a move, except for ground pounds. The attack ends after several moves from Bowser.
 Jump Defense: Bowser walks forward and charges up his fire breath. As he charges up, Shy Guys carrying iron balls walk up to Mario and Luigi, intending to toss them at the Bros. If only one Shy Guy carries an iron ball, it will take it a second to throw it. If a pair of Shy Guys carry one together, they'll throw it immediately at the target. Mario and Luigi will receive one iron ball each. Afterwards, Bowser will breathe fire and move his head to make the fire "sweep" the battlefield from left to right or vice versa. Both Bros. must jump over the fire breath to avoid taking damage. If Mario or Luigi land on an iron ball thrown by Shy Guys, it will stop rolling and become a stepping stone for the character, making it easier to avoid Bowser's fire breath. Bowser's fire clears away all iron balls. Sometimes, Bowser may greatly charge up his fire breath, as signaled by the glow in Bowser's mouth becoming larger and gaining visible fire. If this happens, there will be two additional iron balls thrown by Shy Guys, allowing for extra height for Mario and Luigi. The timing for landing on the second iron balls are stricter however, because they'll bounce off of the first ones if missed. Bowser's extra-charged up fire breath is more difficult to avoid than the normal version. It is possible to avoid the fire breath without iron balls, including the charged-up version.
- Bowser's fire can cause the Burn status effect, and 1-2 Shy Guys will join the battle after the attack ends.
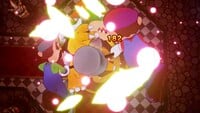
 Hammer Defense: Bowser retreats into his shell and spins off the screen to the right. Three Koopas, also spinning inside their shells then follow Bowser one at a time. After all three Koopas exit the screen, they'll launch themselves at Mario and Luigi before Bowser follows suit. The Bros. must counter the shells before they take damage. By watching the Koopas closely, you can see who they're targeting due to them exiting the screen at the same horizontal level as Mario or Luigi. Bowser however has no hint on who he's going for, but you'll still have plenty of time to prepare for him. If Bowser is countered, he will spin towards the other character. If the other character counters him, he will be launched backwards and land on his shell, making him vulnerable (more on that below)! If Mario or Luigi fail to counterattack Bowser, he will continue spinning behind them and begin a second phase of the attack:
- A row of Spiny shells fall in front of Bowser. He will spin at them to send them at Mario and Luigi, which also must be countered to avoid damage. Not all of them are sent directly at the brothers, as only the second and fifth Spinies can hurt the Bros. The others will simply miss them. Bowser can spin from left to right, right to left, or even start in the center and go either right or left. After two sets of Spinies, Bowser launches himself at Mario or Luigi, and countering him will make him spin towards the other character. Once again, if both characters successfully counter Bowser, he will be flipped on his back. If Bowser successfully strikes Mario or Luigi, he will spin back to his spot in the battle, and the attack will end with Bowser on his feet.
- This attack can cause the Trip status effect, and 1-2 Koopa Troopas join Bowser's side after the attack.
 Jump Defense: Bowser summons many of his minions before ordering them to charge at Mario and Luigi. He sends them out one at a time, but as the attack goes on, he sends them out at increasing speed. There are four minions Bowser sends out:
- Goombas, which simply charge forward at a normal speed. If they're stomped on, they'll be sent flying at Bowser, dealing damage to the boss. Goombas may cause the Trip status effect.
- Koopa Paratroopas, which fly above their target, so they're avoided by standing still. It is possible to stomp on them though! If you do, they will be sent flying at Bowser and damage him, like the Goombas.
- Spinies, which charge at a slower speed than Goombas and Koopa Paratroopas. Because they're spiky, stomping on them will hurt you. Don't land on them!
- Bob-ombs, which charge at a faster speed than Goombas and Paratroopas. Jumping on one is bad because the enemy will explode, dealing damage to Mario or Luigi. Bob-ombs may cause the Dizzy status effect.
- After sending out several minions, Bowser growls in frustration before jumping in front of Mario or Luigi. He then charges up a punch before sliding forwards, unleashing said punch. If the character gets hit by the punch and still has HP left, he will be knocked off the screen for a few turns. If the punch knocks them out, the character will move back to their position and faint. Stomping on Bowser as he punches will damage him and knock him back to his position. Regardless, the attack ends after Bowser's punch. 1-3 Goombas or 1-2 Koopa Paratroopas will enter the battle after the attack ends.
After performing an attack, enemies may join the battle to aid Bowser. Below are all the enemies that can appear!
| Image | Level | Location | HP | POW | DEF | SPD | Type | EXP | Coins | Item(s) |
|---|---|---|---|---|---|---|---|---|---|---|
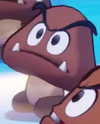
|
30 | Wayaway Island | A little higher than 208 | A little lower than 146 | A little lower than 117 | A little lower than 151 | Bowser's Army | 0 | 0 | None |
| Image | Level | Location | HP | POW | DEF | SPD | Type | EXP | Coins | Item(s) |
|---|---|---|---|---|---|---|---|---|---|---|

|
30 | Wayaway Island | 233 | 135 | 145 | 111 | Bowser's Army | 0 | 0 | None |
| Image | Level | Location | HP | POW | DEF | SPD | Type | EXP | Coins | Item(s) |
|---|---|---|---|---|---|---|---|---|---|---|

|
30 | Wayaway Island | 233 | 135 | 145 | 111 | Bowser's Army, Flying | 0 | 0 | None |
| Image | Level | Location | HP | POW | DEF | SPD | Type | EXP | Coins | Item(s) |
|---|---|---|---|---|---|---|---|---|---|---|
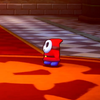
|
30 | Wayaway Island | 328 | 134 | 97 | 118 | Bowser's Army | 0 | 0 | None |
| Image | Level | Location | HP | POW | DEF | SPD | Type | EXP | Coins | Item(s) |
|---|---|---|---|---|---|---|---|---|---|---|

|
30 | Wayaway Island | 180 | 138 | 200 | 105 | Bowser's Army, Spiked | 0 | 0 | None |
As of writing this, the Goombas' stats for this battle are not on the wiki yet. Fear not, for I've noticed a trend when looking at the other enemies here! Compared to their level 32 counterparts wandering around Bowser's Castle, they have slightly higher HP, but lower POW, DEF, and SPEED. This means that the support Goombas fall under the same rules.
Goombas only perform the attack where they charge at both Bros. one at a time, Koopa Paratroopas only attack by flying high into the air before landing on a character, and Shy Guys only use their flag attack (the parody of Shy Guy Says). Koopa Troopas do not attack alone. They only do so when at least two are together, and this attack is the one where one Koopa kicks the other (who is inside their shell) at Mario or Luigi. The limited fighting space with Bowser only allows these attacks to be done from the enemies.
I have never seen any Spinies join Bowser's side during this battle. The wiki has Spiny stats that fit in with the rest of the enemies, so maybe there's potential they could also show up? I don't think Spinies actually appear as enemies here.
If you successfully counter Bowser's spinning attack, he will be knocked on his back, unable to get up on his feet. While he's like this, he can't attack, and all jump-based attacks become critical hits (including Jump Helmet but strangely not Yoshi's ground pound from Hatch Me if You Can)! After a few turns, Bowser will eventually get back up on his own. If there are enemies with Bowser, they can try to help Bowser by running into his back, which may or may not work. If the attempt fails, then another minion will do the same. If a minion runs into Bowser, it'll get knocked out of the battle. This continues until all minions are gone or if Bowser gets back on his feet. If Bowser was brought back up with the help of an enemy, then any minions who haven't attempted yet will return to the battle.
When Bowser gets to about 40-50% of his HP, he will become furious. He will roar in anger and get stronger. Some of his attacks are altered while he's like this:
 Bowser performs more moves during his one-on-one attack, and he can change targets more than once during the attack. The pace is also a little quicker.
 Bowser will always supercharge his fire breath attack.
 For Bowser's spinning attack, there will be 4-5 Koopa Troopas, and Bowser's speed is increased. There will also be three sets of Spinies instead of two.
 Bowser will send more minions during his army attack. His punch is also faster.
Like the fight against Ten, this battle doesn't have a Luigi Logic. Think of this as a normal battle - one against a strong foe!
Tips and tricks
Recommended gear
Here is the best equipment sold by the merchant outside Bowser's Castle on Wayaway Island:
- Boots: Masterpiece Boots and Double-Edged Boots
- Hammer: Masterpiece Hammer and Double-Edged Hammer
- Wear: Masterpiece Wear and Full-Belly Wear
Double-Edged Boots and Double-Edged hammer are stronger than the Masterpiece items by 28 points, but they come with a price - you'll take 5% of the damage you deal! You'll be very powerful, but you'll also get a taste of your own medicine at the same time. If you plan to use them, make sure you heal often! Full-Belly Wear thankfully has no drawbacks. It's two points stronger than Masterpiece Wear, and reduces the damage you take by 30% when at full HP! Nice.
There is only one piece gear of similar strength found while exploring the Gulchrock Sea:
- High-Heal Boots DX: Three points stronger than Masterpiece Boots, and found in a ? Block on Meeger Islet. Heals 10% of your max HP when defeating an enemy.
- These Boots are great because of the numerous enemies that appear with Bowser during the battle. You can heal from defeating enemies and not from items!
Yeah. The Masterpiece gear in general is no joke! Not many alternatives here.
Unlike previous locations, you're allowed to leave Wayaway Island at any time after arriving, so you can always go back and find these pieces of gear to help you out!
As always, you can use whatever gloves and accessories you wish! I'm only suggesting the best Boots, Hammers, and Wear for you. You're allowed to have freedom!
 Recommended Battle Plugs
You can use whatever Battle Plugs you like best for Bowser, especially those that fit your playstyle! I have selected this set of plugs because they help greatly against this boss:
 Anti-Army Specialist: Makes all Jump/Hammer attacks and counterattacks to Bowser and his minions critical hits. This is a really nice Battle Plug to have for this boss fight!
 Deluxe Auto: The Auto Mushroom and Auto Syrup Jar Battle Plugs by themselves won't cut it anymore due to their limited restoration capabilities. Deluxe Auto will make the aforementioned Battle Plugs give you just what you need to recover your HP and BP!

 Auto Mushroom and Auto Syrup Jar: Make sure you have at least one of these equipped alongside Deluxe Auto. Deluxe Auto by itself is a waste of a slot, but together you'll receive what you want when you need it! Using turns to heal will allow more enemies to fight alongside Bowser, and you don't want that.
 Auto 1-Up: This Battle Plug will allow you to revive KO'd characters without using a turn. You'll need all the turns you can get in this battle! Pair it with Deluxe Auto so you can use 1-Up DXs instead of regular ones!
 Notdroppin: Bowser's attacks are no joke! This Battle Plug will ensure you stay in the fight if you take more damage than you can handle. Less effective in multi-hit attacks, but if paired with the Deluxe Auto and Auto Mushroom Battle Plugs, you'll be able to survive and restore your HP to maximum or near maximum!
 Damage Shield: Taking less damage and increasing survivability is always nice! reduces the damage taken from enemy attacks by 20%.

 Attack Boost, Kaboom Attack and Surprise Iron Ball: By equipping all three of these Battle Plugs, you'll make standard Jump/Hammer attacks feel like mini Bros. Attacks! Deal high damage to Bowser while also attacking surrounding minions! Add in a second Surprise Iron Ball Battle Plug for even more mayhem!
 Easy-Peasy Counters: Bowser's attacks are tricky to dodge, especially when he sends all of his minions at you. Makes attacks easier to avoid!
 Bros. Boost and Performance Bonus: You'll want to constantly use powerful Bros. Attacks to end this fight quickly. Deal higher damage with your Bros. Attacks with the normal BP cost! Well, as long as you perform EXCELLENTS!
That's a lot of Battle Plugs to recommend! Goes to show there are many unique strategies you can do in this fight against Bowser!
Other things
Bowser is level 33, so make sure you match his level or surpass it. If you're underpowered, battle against the roaming minions inside Bowser's Castle on Wayaway Island to get EXP and coins. Use the earned coins to purchase more items and better gear.
WAHOO!! Two new Bros. Attacks are obtained before getting to Wayaway Island - Clockout Blow and Yoo Who Cannon! These attacks are sure to help against Bowser and his forces, so be sure to practice them until you master them!
Clockout Blow is very effective when Bowser is alone. The damage dealt will add up to a very high number if you get an EXCELLENT! Don't use this attack if enemies are with Bowser, as one of them may get knocked into the air instead, resulting in wasted damage on an already defeated enemy. Koopa Paratroopas won't be targeted during the attack because they're flying, so you don’t have to worry about them.
Bowser only has 300 more HP than Pipegunk, but don't let that fool you - he's the toughest boss so far! Bowser's attacks are powerful and usually involve multiple hits that add up to lots of damage. You may find yourself healing more often than usual, so look out!
Bowser will have support for pretty much the entire battle. While his minions aren't that strong, there will be lots of them if you don't get rid of them, resulting in more attacks to avoid. Because of this, you'll have to constantly perform Bros. Attacks that deal damage to multiple/all enemies, like Zapperator, Yoo Who Cannon, and Hatch Me if You Can to make sure you're not overwhelmed. If using the latter, make sure you aim for Bowser!
If Bowser has little support, you can also use the Kaboom Attack, Surprise Iron Ball, Attack Boost, and Anti-Army Specialist Battle Plugs to deal high damage to Bowser while also doing good damage to his minions. If the minions are too far away from Bowser, they may avoid the shockwave from the Kaboom Attack Battle Plug. If this happens, swap out a Battle Plug that isn't Kaboom Attack (either Attack Boost, Surprise Iron Ball or Anti-Army Specialist, your choice!) for another Kaboom Attack. The damage will be lower, but it's better than them avoiding damage entirely. I'd honestly choose to remove Anti-Army Specialist; I want two iron balls to fall on Bowser and the enemies for more damage! No BP required at all! Perfect if you want to conserve/don't have enough BP.
Keeping two Koopa Troopas around isn't a bad idea, as countering their team attack will allow you to send a shell at other enemies in the battle, including Bowser. If only one Koopa Troopa is here or not Dizzy/Tripped then it won't attack. If two Koopa Troopas attack together, you'll get an opportunity to keep kicking the shell (with properly timed inputs of course!) to land more hits. The Anti-Army Specialist Battle Plug will make all hits critical hits, and if Bowser is the only enemy around, you can deal incredible damage to him if you keep kicking that shell. I should also mention that this is from an enemy's turn, not your own! Cool, right?
One strategy you could do is just go for Bowser and ignore his minions. You'll have to put up with their attacks, but you could end the battle faster this way. Clockout Blow won't help in this strategy due to the amount of enemies, but Jump Helmet will become Luigi's most important attack as it focuses on Bowser only. Keep in mind that if Bowser is flipped on his back from successfully countering his shell attack, he's guaranteed to be brought back on his feet quickly due to his many minions. You could still defeat the supporting enemies by counterattacking their attacks.
Only Bowser has to be defeated to win the fight! Once he loses all of his HP, all enemies with him will instantly be KO'd.
Do not get hit by Bowser's punch! If Bowser punches Mario or Luigi, they will be knocked off the screen for a few turns, preventing you from using Bros. Attacks and allowing minions to gather around Bowser more easily. Additionally, if the remaining character is defeated while the other is offscreen, he won't come back, resulting in a game over right then and there. If you're not confident you can avoid the punch, equip the Easy-Peasy Counters Battle Plug for easier dodging.
When Bowser breathes fire during his one-on-one attack (where he either swipes with his tail, ground pounds or breathes fire), the hitbox for it is weird. You have to jump the instant Bowser breathes fire, not when the flames visibly reach you. This means you can land on the fire unharmed.
The most difficult attack to avoid is when Bowser sends a Spiny and then a Bob-omb at the same character during his army attack. You need to wait until the last possible moment to jump to avoid taking damage. Easy-Peasy Counters will allow you to easily avoid such an unfair combination of enemies.
Don't worry! If you miss an opportunity to flip Bowser on his back, you'll get another chance after the Spiny waves. Think of Bowser flipped as a successful Luigi Logic outcome! You'll want to attack him while he's helpless!
For the most powerful attack on Bowser, perform a Jump Helmet Bros. Attack (preferably with the Bros. Boost and Performance Bonus Battle Plugs equipped) when the boss is on his back! You will deal a ton of damage to him, possibly over a thousand if you're strong enough! That's over a fifth of Bowser's HP!
Make sure you bring in plenty of items to make sure you're prepared. Without 'em, your Auto Battle Plugs won't work, and you won't have ways to replenish your stats/remove bad status effects.
If you're annoyed by Bowser's status effects, equip the Temperature Guard and Surefooted Guard Battle Plugs. Auto Herb is another good Battle Plug to help you recover.
What a rousing battle against the Koopa King! Next month, I'll look at Glohm Gobblick, the first optional boss! We're now strong enough to take on this powered-up version of a previous boss. The reason why I didn't go over it yet is because it's level 35, which makes it too difficult to take on before Pipegunk. Bowser is level 33, and the next main boss is level 36, so it makes sense to cover Glohm Gobblick next. The Glohm will make it appear more evil too, which is perfect for Halloween! Goodbye for now!
Killing the Killing Game Roles
Welcome back, readers, to another edition of Killing the Killing Game Roles, the section where we analyze various player roles from past Mario Boards Killing Games in hope of answering the question, what makes for a good role? By analyzing what's come before, we can discover some tricks and tips that could even help you design your own roles!
Well, a new hand touches the beacon, and by that I mean, a new Randomizer KG is on the horizon, this time hosted by Pitohui. It's sure to be an exciting adventure as we all fumble our way through truly ludicrous role abilities and map arrangements. While waiting in the interim, why don't we return to the world of randomizer yet again, and see which Awards Randomizer Killing Game is on the docket for analysis?
Hmm... What else is a notable role from that game to talk about... Let's see here...
Oh
Oh no
ARKG - The Secret Player
- +Your existence in the game is a complete secret to the other players. You move around the map using a network of vents and secret passageways.
- +If another player roleplays as an Ace Attorney character at any time during the game, you will receive another good attribute. You can receive additional good attributes if multiple players do it, for one per player.
- -You hold an unusual slab which causes an entity known as "Mr. Blobby" to stalk you through the map and try to kill you.
Boy, if this isn't a notorious one. Though not as talked-about as the AKG3 Baba is You role, there's no denying that this role absolutely made a splash upon its reveal Day 2 of ARKG. Like with the Proposal Wizard, the Secret Player as a name is a Rose exclusive. Its meaning feels much more direct in this context, though.
The Secret Player was given to the user MoonAge, making this, by sheer coincidence, her second time in a row being named in this section. I suppose she can't stop ending up with all of the mysterious Mario Boards roles. There's a little extra behind this role's existence, though; when rolling the wheel to determine who would get what traits, the first positive trait rolled. With 14 player sign-ups and room for 13 players overall, the decision was made to let Moon into ARKG as its secret 14th player. How did this decision turn out? We'll chat about it.
General Overview
Right, so, there's clearly a centering attribute on display here. Now, there have certainly been secrets in KG before - a murder mystery with secrets, who could've guessed? There's been secret floors to maps, secret characters played by the host... but never before has a KG seen a fully secret player. In making this work contextually, MoonAge was provided with a vent network map at the top of the game, denoting which rooms and floors could be moved between, as well as a secret home-base room. Important to note is that not every room had an accessible vent or pathway, meaning that Moon couldn't live in the vents permanently; if she wanted to really do anything, she had to pop out into the main map. Still, this all means that at the top of the game, Moon was the only player privy to an entire traversal system in the map - as well as her own existence in the game. Hoo.
The second positive attribute is a fairly straightforward one, more of a comedic thing than anything else. Mario Boards users are renowned for repeatedly roleplaying as Ace Attorney characters in forum games, so this is just a way to poke fun at that trend that I am 100% guilty of propagating. Nobody actually roleplayed AA during the events of ARKG, though, so that went by the wayside. Thank goodness it did, because then Fun With Despair came along and passed the proposal where everyone got new role attributes every night anyway. Could you imagine if Moon was also getting the addition AA-roleplay-based attributes?
Lastly, there's the negative role aspect, and the malevolent Mr. Blobby. This aspect itself is a kind of fusion of past KG references. In KG8 on Minus World, there was a cursed mummy's slab that would cause its holder to always be chased by a killer mummy. This is fused with the time the user MCD played a truly demented version of "beloved" English children's television character, Mr. Blobby. You can see an absolutely lovely depiction of Mr. Blobby in his Scribble Circuit submission from this week!
Anyway, this is definitely a funny role aspect to pair with the vents system. Like, imagine crawling through the ventilation system while in the dark distance, Mr. Blobby is always slithering up after you. The aspect that I'd want clarification on is the nature of the slab - is it transferable, like its KG8 incarnation, or is it permanently affixed to its holder? For my money, I'd absolutely lean towards making it permanent. You need something that can consistently limit this role's capacity to use those vents.
Ability Application
What can the Secret Player do with the tools that are provided to them? On the surface, it might not seem like a lot. There isn't an inherent role ability at play, really. You're an average player with an extra traversal option that any other player can utilize, given that they learn about the ventilation.
I cannot stress enough, however, how incomparable being a secret player is in a game like this. It is staggering how much innate power this gives you. You have the opportunity to stockpile resources and discover secrets around the map essentially unbothered, because why would anyone aim for an attempt on you? We must consider the nature of Randomizer, too, and how basically anything can happen in its format. Even if by some chance, you end up being spotted by another player, how likely are they to think that you're secretly a player in the game? You could just as well be a role-induced delusion, planted into their head by somebody who is actually on the player list. There's nothing telling them that you're actually there, in the game.
Essentially, this role's most potent strength is the trust in the player list. In KGs, it's assumed that certain aspects of host-given information, such as the map and player list, are indisputable fact, resources that the players have to rely on. The host being able to lie in "objective" information like this would threaten the security of the entire game format. The Secret Player asks the playerbase to question that reliability - and why would anyone do that? This was already named by a number of players of ARKG. Yap notably mentioned that when the players eventually discovered the ventilation system and Moon's secret room, he thought the entire thing was just a role-inspired distraction from the case at hand. It was too bizarre and trust-breaking to be real.
This special kind of metagame shield makes this role, frankly, one of the strongest that's ever been in a Killing Game. It's one thing to have mechanical protection during the night. It's another to have protection afforded by the game format itself.
Environmental Functionality
Environmental functionality isn't a major area of focus for this role at its base, though you'll have to be certain that your map has the capacity to host a ventilation system. If this role rolled on a flat map set in the middle of the desert, you'd have a lot more explaining to do for why there are vents everywhere. Although the vent system becomes introduced by this role, I'd argue that plotting it out becomes a concern for the broader map once other players discover they can use it.
Drawbacks & Balances
So we've talked about the monstrous amount of innate potential the Secret Player has. What about it then provides the balancing factor needed to make the role reasonably functional?
I'll tell you now, not a lot. Mr. Blobby definitely limits the Secret Player's ability to scurry any- and everywhere they want to, but he is a map-based obstacle that can be overcome. Requires a careful hand for the player in night actions, but doesn't account for that metagame shield I thoroughly explained before. So then, what could act as a counter to the meta-ness of it all?
In the gameplay proper, it was decided that other players would be able to chart through the vents and find Moon's secret room, which did happen. Hindsight tells us what the next steps should've been. In the actual game, a sign labeled "14", to indicate that this was the secret 14th player, was outside the door. This was not enough information to convey to the players that MoonAge was, in fact, in the game.
Basically everyone involved in ARKG agrees with what should've happened next: the host should've made an official, 100% verified announcement that MoonAge was discovered as the 14th player, and that she was votable in trial.
Honestly, I think if this had happened, the role would've been several times better received than it was. It wouldn't have inherently solved a lot of the role's balancing issues, and it wouldn't have fixed the fact that Moon was a culprit they were trying to chase like a ghost; but if nothing else, it would've cleared up a lot of confusion, and likely left the Secret Player remembered as an odd experiment, over a detrimental gameplay moment. After all, it makes sense that being found out would unravel the nature of the Secret Player role. A secret isn't that secret when you find its bedroom!
It's tricky, because the balancing in the game itself was not conducted most appropriately, but nearly everyone can look back and go "this is probably how it should've happened." Sometimes, hard game creation lessons like that can only be learned through experience.
Player Responsibility
What all is your responsibility with the Secret Player role? You have to keep the constant force that is Mr. Blobby at bay, which can prove difficult while traversing a ventilation system. You're mechanically a full-sized person, and Mr. Blobby is a towering monster of a being, so the two of you will not fit through the vents side-by-side. In addition, your mobility, especially with your arms, is going to be limited. You'd be wise to have several back-up plans, in case you come face-to-face with the horror show himself.
What about maintaining the secret? This is pretty much as simple as putting conditionals in your submission to ensure you aren't spotted. You'd want to be conscious of the path you're leading back to your secret room, as well; if you're dripping water everywhere, for instance, you're going to be found sooner or later.
Host Responsibility
As for host responsibility... yeah, yikes. I'll say it straight-up: nobody should ever attempt to host the Secret Player exactly as it says on this tin again. The amount of responsible balancing required, especially when writing a murder case that involves this player, is just not realistic. Determining when to pull the curtain back would already require a careful hand. Managing everything else about this role in a healthy game environment would drive plenty of hosts mad. You'll notice I said "on this tin again". Is it possible for a host to ever adequate include a secret player in KG? I mean...
Overall Thoughts
The Secret Player is a role that perfectly demonstrates the extremes to which experimental roles can go, and what weaknesses are inherent to them. When designing KG roles, it's important to remember that too much power or deterrence from the expected formula can cause a collective headache for all of your players. Of course, the Secret Player was rolled, not intentionally crafted, but the point still stands. Really, really be wise if you're going to include something this bombastic.
That being said... should the Secret Player never come back? I... wouldn't say that. Don't put words in my mouth! The Secret Player should not return in this state, with all of the freedom that your standard player sees. But beyond that, I can see a world where a "secret player" could work. I would encourage any host to treat it more as a controlled npc, over another standard player in the game. Chat with a user you trust and enlist them to roleplay a secret character that's important to the plot or world of your game, and have their reveal be more of a narrative experience. Handing off an intrinsic host-created character to a player could create a really interesting story, since that player would be impacting the events very closely, independent of the host. Don't let that player commit a murder, or if they do, ensure that it feels like a "scripted" case that's meant to be solved. Allow them the opportunity to have their fun moment in the spotlight, before likely succumbing to the trial vote. You'd likely reserve this for a KG that's very plot-forward; a format like Randomizer is less conducive to this thought experiment.
I think the Secret Player shows us the potential that exists for unique, game-defining mechanics. These inclusions, I cannot caution enough, must be handled with delicate care. But if anyone wants to have a mystery surrounding the secret player in a future Killing Game... I can't say I would be utterly opposed.
That’s all for this month. Tune in next month for more Killing Game goodness!
Four Steps for a 3D World
Written by: Hooded Pitohui (talk)
Hello, all you readers of The 'Shroom, and welcome back to Four Steps for a 3D World, a section in which we look at levels from a selection of 3D Super Mario titles through the lens of a design philosophy Koichi Hayashida discussed in an interview.
In brief, 3D Mario game levels in certain titles are designed around an introduction that lets a player learn a mechanic in a safe environment, further development that builds on what the player is learning and introduces more complicated aspects of a mechanic, a twist that adds some kind of significant wrinkle or challenge to force players to consider the mechanic from a new angle, and a conclusion which gives players one final satisfying chance to show they've mastered the mechanic. We look at 3D Mario levels and see if they conform to this model while trying to get some insight on how a good level is constructed.
It has been a hot minute, hasn't it? I suppose with the summer special, it's been even longer since I've put together a normal edition. Well, that changes today! Er, or, it does for a given value of "normal". You see, today, the usual preamble up there won't be all that relevant, for we're turning our eyes to the distant past. Long before anyone articulated these four steps, long before Hayashida directed any games, and long before there was a 3D World, Mario first stepped out into a third dimension on Bob-omb Battlefield in Super Mario 64.
Today, we'll go back to the very first 3D world in which Mario ran and jumped. It won't follow our usual four steps, but that's understandable. After all, its opening mission had the taller task of getting the public comfortable with Mario moving out of the 2D plane of his previous platformers. Let's see what we can glean about how it approached this gargantuan goal!
Obviously, "Big Bob-omb on the Summit" does not follow the four steps which emerged years later as a strategy for developing more linear 3D Mario games. Though we've seen hints of the four steps in other Super Mario 64 missions, I am completely unsurprised this one fails to fit the mold. "Big Bob-omb on the Summit" simply had too much it needed to accomplish. I can envision a modern re-imagining of the mission which would hew to the four steps more closely, one in which the developers could assume players know how to move in a 3D environment and in which fewer technical limitations allow for more obstacle variety. Maybe in such a re-imagined level, a breakable rock would block the path to the mountain, requiring players to grab and throw a Bob-omb at it. You could start with throwing crates as the introduction, move on to throwing Bob-ombs away before they can explode as the development, have the breakable rock as the twist, and the boss fight as the conclusion. Sure, you could do that.
Mario 64 couldn't have done that, though, because it needed to drill in the fundamentals first. "Big Bob-omb on the Summit" couldn't take for granted that players (especially young players) could navigate a 3D space, nor did it have the benefit of Mario having an established track record in 3D. All at once, it needed to subtly teach and test players on very basic controls, prove that the Mario obstacle course formula could work in a 3D space, and give players a taste of the sandbox environments found in the rest of the game. It needed to do all of this without confusing or overwhelming players and leaving them stranded in the level without a sense of where to go. It needed to do all of this while adding cushioning rewards and safety nets so failure wouldn't cause young kids to immediately give up and stop playing out of frustration.
Remarkably, it does very well at that. You see a clear progression from "walk in a straight line" to "okay, now turn and follow a curve" to "now run and jump past these obstacles" to "now go on your own a bit" to "take the challenge of this obstacle course". All along the way, the game offers little moments of spectacle to showcase what the Z-axis adds and moments where players can intentionally or unintentionally find secrets and rewards off the beaten path. In this way, it sets up for the rest of the game without ever leaving players lost. Though its structure fails to resemble our four steps in the slightest, and though it leaves some of its own lessons about throwing objects hanging and underdeveloped, it's a remarkably well-designed mission which succeeds at its most important goal.
There are certainly finer details to this level's design I couldn't touch upon, but this analysis has given me more appreciation for the fundamentals of "Big Bob-omb on the Summit". It seems so simple a mission, but there was quite a bit of thought put into its design, and its design is effective at setting up the rest of Super Mario 64. With four Bob-ombs in the mission's latter half; three wooden bridges to cross throughout; two rolling iron balls in a pit; and one mission to kick off decades of hunting down Stars, Shines, and Moons; this has been Four Steps for a 3D World!
Rhythm Review
Hello and welcome back to Rhythm Review! This is Zange, and I’m still kinda recovering from Awards! No matter though, it’s a new month which means a new ‘Shroom with another stage from Rhythm Tengoku for Game Boy Advance! Last time we covered Stage 3, so this month we’re moving right to Stage 4!
As a reminder: In most Rhythm Heaven games, a stage consists of four rhythm minigames, followed by one remix, in which all the other minigames in the stage are put together in a new way to new music. However, Rhythm Tengoku is weird and has five minigames in each stage instead of four, and there is still a remix. Let’s jump in!
Quiz Show
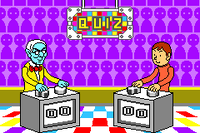
Starting off this stage is what is probably the most controversial rhythm minigame in the whole series, Quiz Show! You are a contestant on this quiz show trying to match the number and rhythm of button presses that the host gives you using the A button and the D-pad. Be careful though, being even one off will end your career as a contestant!
Gimmicks
This particular section is gonna be less about the gimmicks of this rhythm minigame and more so why the overall mechanics of it are bad. The way you are intended to play this is by matching the rhythm of the host when pressing the buttons. However, the number of presses each round is the same almost every time. The host may throw in one or two extra presses at the end to throw you off, but otherwise the answers are the same in every playthrough. The only thing that matters in this rhythm minigame is getting the exact number of button presses as the host each round. Theoretically, you could just mash the buttons until you have the number of presses and not even worry about following the rhythm the host gives you. It’s truly the most bizarre rhythm minigame in the whole series…
Interestingly, this is one of only a handful of rhythm minigames that can be prematurely ended, by getting even one answer wrong. This will result in a Try Again rating, unless you fail on the very last round, then you can nab an OK rating with a special line of text.
How to Get That Superb
At least getting a Superb rating here is extremely straightforward: as long as you get correct answers for each round, you’ll get the Superb.
Difficulty Rating
Not even a question, 0/5. Look, I know when I started writing this section that the difficulty scale would be 1-5 but this is the one and only rhythm minigame that truly deserves a 0. You don’t even need to have rhythm to play this one as long as you know the answers for each round!!!
Night Walk
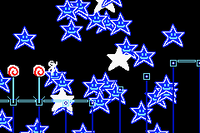
Next up, we have Night Walk! You play as a little dude taking a relaxing stroll while also jumping off of boxes. Hit the A button in time to the music to jump from these boxes and fill the night sky with stars!
Gimmicks
This is another rhythm minigame that can be ended prematurely. In this case, it is possible to fall off the stage if you miss a button press at certain times. This will automatically result in a Try Again rating. Otherwise, not too much happening here in terms of gimmicks.
How to Get That Superb
Okay, pretty simple criteria for getting a Superb here. First, you have to make it to the end of the rhythm minigame. So no falling in holes. Second, you need to be able to stay on the beat with your inputs. This is one of MANY rhythm minigames across the series where you constantly have to make inputs. Finally, you can’t miss any of the jumps on the stretches of flat platforms. You might think that just because you don’t have to jump to a new platform that you can just skip those jumps, but that’s not the case here. This one should be fairly easy to get a Superb on.
Difficulty Rating
Simply because this is a rhythm minigame where you have to constantly make inputs, I’ll go ahead and give this a 1.5/5
Power Calligraphy
We have another iconic rhythm minigame from Tengoku with Power Calligraphy! You control a hand writing out various Japanese characters. At the right time, you’ll hit the A button to really put some oomph into your brush strokes! Some people say calligraphy is all about grace, but here, it’s all about power!
Gimmicks
There are two different types of brush strokes you’ll make inputs for. I would describe these as a finishing swoop and a comma. Additionally, the tempo changes two times in the rhythm minigame: It will speed up in a section near the end, and will slow down considerably for the cluster of characters at the very end.
How to Get That Superb
The criteria for getting a Superb here is… not quite that clear, actually. For the most part, as long as you’re consistently hitting your inputs in time, you’ll get the Superb. However, you also need to be able to hit the inputs for the more complicated characters (the ones that have both types of brush strokes), as well as the input for the cluster of characters at the very end.
Difficulty Rating
I’ll go ahead and give this a 1.6/5, just because it is so easy to get thrown off by things like the tempo change and the characters where you have to make more than one input.
Polyrhythm
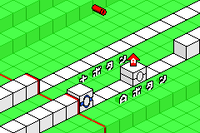
Not to be confused with a certain Perfume song, the next rhythm minigame in the set is Polyrhythm! A rhythm will be presented to you using one or both paths. Depending on the path, you will use either the D-pad (for the upper path) or the A button (for the lower path) to repeat the rhythm back as a rod rolls along the path. It’s the first foray into the world of building Widgets!
Gimmicks
This is one of the few non-sequel rhythm minigames in the series that builds on itself throughout - meaning it starts off fairly easy, but by the end it gets a little more tricky. It’s very cool to see a change of pace like that when most of the rhythm minigames stay fairly consistent from start to end!
How to Get The Superb
Thankfully, the criteria for getting a Superb rating is fairly clear here. First, you need to be able to hit your cues on time when the rods are travelling across just one path. Secondly, your hands need to be able to work independent of each other when the rods are travelling across both paths. It might take a couple of tries, but this should be another fairly easy one to get.
Difficulty Rating
I’ll give this a 1.6/5, as by the end you need to get used to pressing the different buttons at different times and it can get quite tricky if your brain isn’t used to multitasking like that.
Worth noting that this particular rhythm minigame has the same issues as Tram and Poline when playing on an emulator but it’s not nearly as bad just due to how differently the two work.
Rap Men
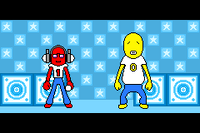
For the final regular rhythm minigame of the stage, we have Rap Men! You control one of two rappers, and you’ll use the A button to make your part of the rap stand out depending on the line your partner says. By the end of this, you’ll be the BEST!!
Gimmicks
There are three ‘endings’ to each line the red rapper will say which will determine the input(s) you as the yellow rapper will need to make. The first is “desuka” / “isn’t it”, for which you will only need to hit the A button once. The second is “kamone” / “could be”, for which you will need to hit the A button twice, with a beat in between the two. The final one is “saiko” / “the BEST”, for which you will need to hit the A button twice without waiting for a beat in between. These are also differentiated by the color of the text on screen for each line of the rap: blue, pink, and yellow, respectively.
How to Get That Superb
The criteria for getting a Superb here is fairly simple! You just need to be able to have good timing on your inputs for all three line endings. You do get a practice here, so this should be a slam dunk.
Difficulty Rating
I don’t know if I’m the only one who has this problem or not, but the timing for when you’re supposed to make inputs just feels… weird. So I’ll give it a 1.6/5 to reflect that
Remix 4
Finally, we arrive at the remix for this stage! And after the last one, we go back to a remix that is sad and themeless… Can’t wait to be done talking about this game so I can have actual interesting things to say about the theming of the remixes in every other game :’)
Gimmicks
There are two tempo changes in this remix: it will speed up near the middle, and near the end it will slow back down to the original tempo. Other than that, every gimmick from every other rhythm minigame is still fair game here! Yes, that also includes the rather silly mechanics of Quiz Show… Though it’s worth noting that in the Night Walk segments, jumping on the first flat stretch that shows up before having to jump to new platforms is optional here!
How to Get That Superb
As always, since this is a remix, it’s significantly harder to judge where the line lies between a Superb rating and an OK rating. I’ll say the same thing I always do: if you can get a Superb on every other rhythm minigame in this set, you should be able to get a Superb here as long as you’re mindful of the transitions.
Difficulty Rating
So I’m giving this a 2.2/5, mainly because all of the rhythm minigames in this set function in a way that transitions between them within the remix can’t really sneak up on you. Honestly the only thing that could really throw you off here is the tempo change, which is sad because I quite like this remix otherwise.
Final Remarks
Well, the in-game subtitle for this stage is “Weird Games”, and they certainly weren’t lying there… Anyways, tune back in next month for Stage 5!
Pitohui's Pokémon Academy
Written by: Hooded Pitohui (talk)
Hello, hello, and welcome back. I trust you've all kept well through the September hustle and bustle? Or are you merely treading water, clenching victories where you're able through sweat and effort? I hope the former more accurately describes your situation than the latter, but, for those of you who have struggled through the changing of the season, I bring remedy. You see, I recently encountered a colleague who bestowed upon me a rare Pokémon - nay, a Mythical Pokémon. Per my colleague's request, today we will discuss a Pokémon said to consistently bring victory with its infinite supply of energy. Let us turn our attention upon Victini, #000 in the Unova regional Pokédex!
| The following information applies specifically to Pokémon Sword and Pokémon Shield V 1.3.0+, the latest games in which Victini is available. |
Do mind the new disclaimer I have drawn on the board. From here onwards, rather than assuming by default that we discuss Pokémon raised in the Paldea region with exceptions mentioned in passing, I will explicitly draw your attention to the region in which the month's lecture applies.
First, a Smogon University course, this course is not. No, this academy's lessons are designed to get trainers of any stripe thinking about how they can raise their Pokémon, and, as a result, aren't designed to keep up with the widely-accepted metagame for the series. In rare cases, the way I've raised my Pokémon may even flies in the face of conventional wisdom. If you're looking for top-tier strategies, do check out Smogon, but if you merely want to get a little deeper into raising Pokémon while still doing things your own way, feel free to use this section as a reference.
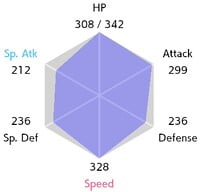
I'd like to give a word of thanks to the Bulbagarden Archives, the source of many images in this section.Base Stats: Base stats are the values associated with a particular Pokémon species, and are the same across every individual Pokémon of a given species. You have no influence on them. You can think of them as traits tied to a species. A chimp isn't ever going to be able to get as good as digging as a mole will be, and, likewise, an Abra is never going to have the defensive prowess a Shuckle has.
Individual Values (IVs): Individual values, as their name implies, are associated with individual Pokémon. They range from 0 to 31 in each stat, with 31 being considered a "perfect" IV and higher numbers corresponding to different stats. Magikarp A and Magikarp B will have the same base stats, but they may very well have different IVs. To stick with the animal analogy, one mole may be born with larger claws than another mole, and that first mole is probably going to have an easier time digging through dirt than the latter. Individual values are set in stone, strictly speaking, but you can use Hyper Training (from Generation VII onwards) to functionally get a perfect IV in a stat.
Effort Values (EVs): Effort values are the one thing you can easily change. A Pokémon can earn, primarily through battling, but also through means like the use of certain items or mechanics like Super Training, up to a total of 510 effort values, with up to 252 in any given stat. To finish off the animal analogy, no matter what kind of claws a mole is born with, moles who have more experience digging are probably going to be better at digging than moles which have never dug.
Nature: A Pokémon's nature is, more or a less, a stat modifier with a name meant to make it sound like a Pokémon has some personality. Natures will raise one stat by ten percent and lower another stat by ten percent. Some natures raise and lower the same stat, canceling out the effect and leaving stats unchanged. Natures can be functionally changed with the use of special mint items from Generation VIII onwards.
STAB: STAB stands for Same-Type Attack Bonus, and refers to the boosted power of moves that match the type of the move's user. To illustrate this, consider the case of a Lombre, a dual-type Pokémon which is both a Water-type and a Grass-type. Any Water-type moves Lombre uses will have their power boosted by 1.5x, and any Grass-type moves Lombre uses will, likewise, have their power boosted by 1.5x. (There are circumstances where this does not apply, and, while the 1.5x multiplier is typical, some games use other multipliers.)
At our disposal are V-Create, Searing Shot, Bolt Strike, Blue Flare, Glaciate, Fusion Bolt, and Fusion Flare, any of which we could mix-and-match into a whimsical and effective moveset. That said, let's set aside all but the first two moves in that list, limiting ourselves to moves which any and all Victini can obtain. I would prefer that the foundations we lay be as accessible as possible, especially when discussing a Pokémon so difficult to obtain!
We're left with a choice between V-Create and Searing Shot, the former being a physical attack with an incomparable 180 base power and 95% accuracy somewhat balanced out by a stat drop, and the latter being a special attack with a great 100 base power and a reliable 100% accuracy. Of the two... there is no contest. The slight hit to accuracy is well worth it for a move as powerful as V-Create (which will be empowered even further by STAB). Let's build around V-Create, investing maximally in attack so Victini can tear through most anything with it and investing maximally in speed so Victini can make like a bulldozer before its opponent can even move. The leftover EVs, dump into HP.
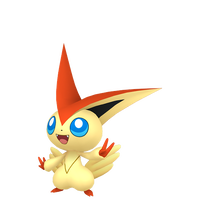
|
Name: | Victini | Base HP: | 100 | |
| Category: | Victory | Base Attack: | 100 | ||
| Type: | Psychic | Fire | Base Defense: | 100 | |
| Abilities: | Victory Star | Base Special Attack: | 100 | ||
| Base Special Defense: | 100 | ||||
| Base Speed: | 100 | ||||
Since we've elected to build around physical attack, we'll treat special attack as unimportant and complement our EV distribution with a Jolly nature. I suggest Jolly for a speed boost over Adamant's attack boost because Victini already has enough power in V-Create. It's more important to ensure it gets the chance to use that power than it is to further increase it!
Victini has only one ability, so we have no decisions to make. That said, we should touch upon Victory Star, because it mitigates one of V-Create's drawbacks and will inform our other move selections. Victory Star grants a ten percent boost to the accuracy of any moves used by Victini or (in Double Battles and the like) its allies. This is multiplicative, not additive, so a 90% accurate move becomes 99% accurate, not 100%, and an 80% accurate move becomes 88% accurate rather than 90%. It might be easier to think of it as a 1.1x multiplier. Regardless, this means we can functionally disregard any concerns about move accuracy, as long as we don't choose a move with utterly abysmal accuracy.
With all else established, we'll go right into crafting a moveset. Naturally, V-Create slots in at the top of the list, but it does have one drawback we have yet to address. While its defense and special defense drops aren't devastating to Victini, they're still a nuisance, and that speed drop is a considerably greater hurdle for a Pokémon that depends on outspeeding its opponents. Fortunately, we have a solution in the form of U-turn! Before its speed can drop too far, Victini can get out of battle (and deal damage) with a U-turn, resetting its stats and allowing it to return at a convenient moment. This is a second reason we opted for a Jolly nature; that little bit of extra speed will help Victini to flee the battle in a flash even after a V-Create drop. A cycle of V-Create, U-turn, and opportune switch-ins will keep Victini at full strength and keep it pestering opponents with minimal risk.
| V-Create | 
|
With a hot flame on its forehead, the user hurls itself at its target. This lowers the user's Defense, Sp. Def, and Speed stats. |
| U-Turn | 
|
After making its attack, the user rushes back to switch places with a party Pokémon in waiting. |
| Zen Headbutt | 
|
The user focuses its willpower to its head and attacks the target. This may also make the target flinch. |
| Wild Charge | 
|
The user shrouds itself in electricity and smashes into its target. This also damages the user a little. |
While the V-Create and U-turn combination is the core of Victini's moveset, there are Pokémon which resist Fire-type moves, so it's best to incorporate some other options and counters. While Victini lacks other options comparable to V-Create, it does have a reasonably solid STAB Psychic move in the form of Zen Headbutt. Its base power of 80 (before STAB) isn't great, but isn't poor either, its 90% accuracy is patched up by Victory Star, and a one-in-five chance of flinching is an appreciated-if-unreliable bonus. Zen Headbutt here isn't exceptional, but it gets the job done well enough and might even spare Victini an opponent's attack should luck be on its side.
For a final choice of move, we'll consider coverage. As physical moves go, aside from Fire and Psychic, Victini has access to the Fighting, Normal, Bug, Dark, Electric, and Flying types. We've already used Victini's sole Bug-type move, Flying covers none of Victini's weaknesses, and Normal can't cover any types, so let's consider only Fighting, Dark, and Electric. Dark could cover Ghost-types, but the only physical Dark-type move Victini can access is the gimmicky Fling, so that's out. For Fighting, Victini has access to Reversal, Final Gambit, and Brick Break. Final Gambit is another gimmicky move, KOing the user in return for dealing damage equivalent to the user's HP. In most circumstances, Victini can do better with straightforward attacks. Reversal gains power as the user loses HP, which isn't particularly useful for a Pokémon that can be taken out with a supereffective move or two. As for Brick Break, 75 base power is too low to mesh with Victini's hit-and-run strategy.
That leaves us with an Electric-type move, and our sole options are Thunder Punch or Wild Charge. Thunder Punch has the same lack of base power which plagued Brick Break, so, Wild Charge, with 90 base power and 100% accuracy, wins by default. Now, Wild Charge does deal recoil damage equivalent to 1/4th of the damage Victini deals. Normally, I'd advise against a move like this for a Pokémon which expects to hit as hard as Victini, as its HP will drop fast. However, since Victini isn't designed to take a hit regardless, it shouldn't matter all that much if it needs to use Wild Charge one time to break through a defensive Water-type. Using it against multiple Pokémon is another matter, but one Wild Charge should still allow Victini to return to its V-Create and U-turn combo!
| Fusion Bolt | 
|
The user throws down a giant lightning bolt. This move's power is increased when influenced by an enormous flame. |
| Bolt Strike | 
|
The user surrounds itself with a great amount of electricity and charges its target. This may also leave the target with paralysis. |
All of that said, if you are one of the lucky few who obtained a Victini with Bolt Strike or Fusion Bolt, swap Wild Charge out for whichever you have. Fusion Bolt is a stronger (100 base power) Wild Charge with no recoil damage, and Bolt Strike is an even stronger Fusion Bolt with an accuracy drop that Victory Star somewhat offsets and a chance of inflicting paralysis. You won't have them together, so there's no need to choose between them; go with whichever you have.
Following these steps, perhaps you'll receive your own taste of Victini's victory - or perhaps you'll find modifications to make! That's the process of learning, no? Experiment away, keeping in mind what we discuss, but forging your own path. You are at liberty to go beyond what we discuss, so make use of that freedom! Although, you are not completely free. I do have an assignment for you as we wrap up for the day. Victini has some associations with "liberty" itself. Before our next session, acquaint yourselves with Victini's connection to the Liberty Garden in Unova. It's the least we could do as thanks to that colleague who provided it for today's session, hm? Alright, you have your instructions. Go on, and I will see you again in a month.
So You Want to Romance the Three Kingdoms?
Hello and welcome back to So You Want to Romance the Three Kingdoms?, a strategy guide on Romance of the Three Kingdoms Part IV: Wall of Fire, one of the many, many, many Koei Tecmo strategy games on the Super Nintendo. After a month off for banquets, troop inspections, and horse counting, I return to teach you the most optimal way of conquering China!
Step 7: Reforming City Development for Greater Efficiency
We're officially halfway through the year and we've gotten our harvest, plus, last month, we successfully recruited a top-shelf general. So we're going to start off by working on continuing to up the loyalty of our officers. As of now, Gongsun Du is 100% loyal to our cause, while Xi Pi and Wu Anguo are 99% loyal (that 1% is the toughest to get). Newest general Taishi Ci lags behind at a paltry 66% loyal, which, I suppose, makes sense since a general of Taishi Ci's strength could have been accepted into the army of any ruler. We're going to give every one of them 100 gold, which will bring Xin Pi and Wu Anguo's loyalty up to 100% (we probably could have given them less than 100 gold, but we don't want to insult our loyal generals) while boosting Taishi Ci's loyalty up to 70.
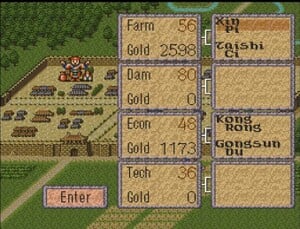
After that, we're going to be doing some reforming of our infrastructure rates. Before recruiting Taishi Ci, we had Kong Rong and Xin Pi in charge of boosting agriculture yields while Wu Anguo and Gongsun Du led the way in economic development. And that was fine when we had only four officers, but now that we've got five, we can actually be more strategic with who is in control of what. Before, we had our two strongest guys, Kong Rong (76 Politic) and Xin Pi (80 Politic), in control of one department and our two weakest, Gongsun Du (54 Politic) and Wu Anguo (18 Politic), in control of the other. This was because Wu Anguo's stat was just so low it wasn't worth trying a balanced approach; rather, it was better to try and just blitz one category while the other made slow progress (but still progressed). But now we've added Taishi Ci into the mix (49 Politic), so we're going to go for a more balanced development approach by putting Xin Pi and Taishi Ci in charge of farming while Kong Rong and Gongsun Du will be in charge of economic development. Now, if we had a better officer, I'd put them in charge of either dam construction or technological development, but the fact is Wu Anguo's paltry 18 stat is so low it wouldn't accomplish anything. It would just be throwing good coin at the efforts for almost no results. Instead, Wu Anguo will sit on the sidelines until we get a sixth officer. This is something you're going to want to do a lot in the early game when individual city development is so important. You're going to want to be constantly going back and forth, checking to see which officers are going to be better suited for what tasks and adjusting accordingly.
Step 8: War Rages in the East and a Wandering Ruler Looks to Rebuild
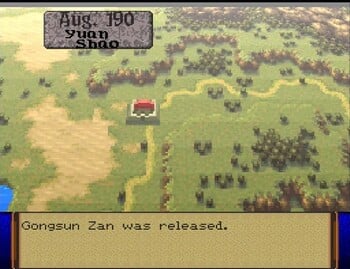
As August rolls around, we are alerted to messages that Yuan Shao has laid siege to the city of Dai Xian, currently ruled by Gongsun Zan. Our reports indicate that, after a bloody struggle, Yuan Shao's forces successfully conquered the city but that in his mercy Yuan Shao allowed Gongsun Zan and his family to leave the city unharmed.
Since Gongsun Zan wasn't executed or recruited by Yuan Shao, Gongsun Zan will now become a wandering ruler. What that means is that, on every turn, there's a chance Gongsun Zan and his followers will become ruler of any vacant city in the game, putting them back on the gameboard and giving them a chance to again compete for the imperial throne. Wandering rulers can also visit cities under your control, begging you for support like food or gold. I've never successfully aided one of them, but not for lack of trying! They just always seem to end up in a city I've already stripped for parts! So I don't exactly know what happens if we successfully help them! Honestly though, more than likely, Gongsun Zan will be completely removed from the game for the most part. Even if he takes up rulership of a vacant city, in my experience, he's going to have so few troops that, more than likely, he's going to just be immediately reconquered. That could prove problematic, because not every ruler will be as merciful as Yuan Shao. A different ruler might instead take Gongsun Zan's head!
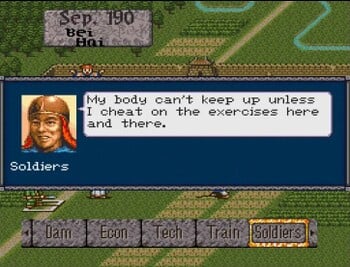
For our part, news of Yuan Shao's expansion can mean only one thing! We must continue our attempts to build up our army for defense purposes (for now). Right now, our army is still pretty weak. We've got 132,000 soldiers, which isn't actually a terrible number for defense purposes, but their Train stat is quite low at only 56,000. So the first thing we're going to do is start a new training regiment, this time under the tutelage of Taishi Ci, who has 92 Lead and 95 Power, and Gongsun Du, who has 78 Lead and 77 Power. We're going to go ahead and do this training for six months.
There's no real gameplay reason we can't do it for the full twelve months, but Lord Kong Rong feels that the men would be much better if they train for six months, get a month off, and then train for six months (what can I say? It makes me feel generous to what are basically just a bunch of numbers, lol). We're also going to sell 3,000 of our provisions (leaving us with 576 provisions) at the market, netting us 437 gold pieces. The reason we're going to do this is so that we can recruit 29,000 more soldiers in a draft, bringing our army to 161,000 soldiers. I'd like to purchase horses from the market because cavalry (horses) is great for defending yourself, but we can only afford 700 horses, which is barely anything at all. So until next tax time, there's going to be little we can do to benefit our forces outside of training.
Step 9: The Long Slog to the New Year
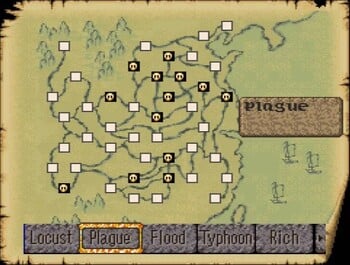
As October hits and the fall turns to winter, we hit one of the most inevitable parts of the game. We can't really do anything! But first, the plague hits the surrounding countryside. While it doesn't hit us thanks to the guidance of Lord Kong Rong, who closed down the borders after hearing rumors of the plague, it does hit a large number of cities in the surrounding area, including our direct neighbors the cities of Xia Pi (under the rulership of Tao Qian) and Ping Yuan (under the rulership or Liu Bei).
The plague is one of the many events in the game that happens between months. I don't really know how you prevent the plague from happening. My guess is, much like in Nobunaga's Ambition, the higher your City (or, I would assume, Economy) the lower chance you have of getting the plague. A plague infestation can be a real son of a bitch, because not only does it lower your overall city population (AKA my precious, precious taxpayers!) but it can also take out large portions of your army! It's very frustrating because I've had moments where I'm just about to strike but then the plague kills 30% of my army, leaving me needing to rebuild! But the plague can also work out in your favor. Like this time, if we were about to go to war, the plague hitting Xia Pi means that Tao Qian's army would be reduced by at least some amount. Plus, it also means that chances of Tao Qian attempting to invade us anytime soon is lower because of the men he's lost to the plague. We also got lucky that Ping Yuan has been affected because they directly neighbor the expansionist Yuan Shao, which hopefully means they lost enough soldiers for Yuan Shao to invade them and not us! The plague is a very double-edged sword; it can be good for you or it can be bad for you. And obviously, the more cities you have under your control, the better the chance you have of one of them getting the plague!
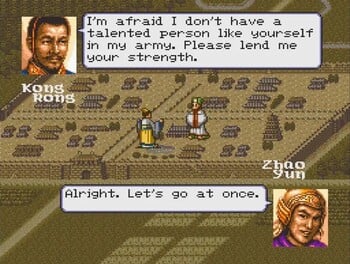
But to go back to what I was saying, for the next few months there's really not a lot we can do! We only have 73 gold left, which isn't anything! At best we can (and will) continue working on getting Taishi Ci's loyalty up by giving him all the remaining gold, but until January when taxes are collected, we're basically going to be skipping through months, only checking to see if there are any wild officers that can be recruited who visit during the winter months. We're also going to send Xin Pi to spy in the Yo territory to see how large of an army Nan Pi (ruled by Yuan Shao but under the direct control of Governor Gao Lan) has, because I feel that Yuan Shao is going to be our biggest threat. When you send a spy, it takes one month for you to get the results back, so we're going to go ahead and skip ahead to November. The results of our spying shows that Nan Pi has 159,000 soldiers with slightly better training than our own and twelve officers under Yuan Shao's command, while Ping Yuan under Liu Bei has 113,000 soldiers and four officers under Liu Bei's command. That should mean that, thanks to that clutch plague, Yuan Shao should invade Liu Bei before us because we have more soldiers than he does! Not only do the results of our spying show we're in a stronger position than once thought, but reports also show that the honorable Zhao Yun has been spotted in Bei Hai! Excited over the prospect of bringing such an honored warrior to his cause, Lord Kong Rong instructed us to immediately invite him to his palace to invite him to join our army.
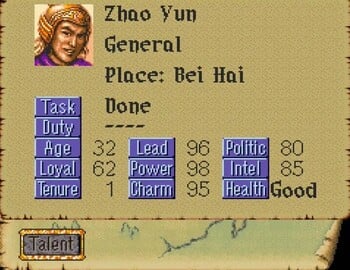
Luckily, nobody can resist the charm of Lord Kong Rong (and by that I mean it only took like ten save state reloads) and Zhao Yun happily joins our righteous cause. And, oh boy, did we recruit a good one! Zha Yun brings 96 Lead, 98 Power, 80 Politic, and 85 Intel, while being proficient in Infantry, Cavalry, Archery, and Recruitment. Oh, Lord Kong Rong, I might be in love!
While his loyalty is really low at only 62, we're going to be bumping that up with many, many, many bribes! We are cooking now! With Lord Kong Rong aided by Taishi Ci and Zhao Yuan, two of the finest generals in all of China, soon there won't be a force in all of China that will be able to stand up to us! November ended up a very good month! With Zhao Yun joining our cause, as December rolls around it's time for yet another city management reformation. Lord Kong Rong has decided that Taishi Ci will be in charge strictly of troop training from here on out, moving him off of agriculture development. At the same time, Lord Kong Rong has decided he wishes to work directly with Zhao Yun, a smart move if you ask me; after all, working directly with Lord Kong Rong will show Zhao Yun why Lord Kong Rong is the only man to unite China. So Gongsun Du has been moved to working on agriculture with Xin Pi. In addition, to build loyalty with both Tashi Ci and Zhao Yan, both have been given 70 gold bonuses.
That's all we're going to be doing in December and, as the new year begins, Lord Kong Rong has called for an end-of-the-year feast to celebrate the year's successes. Because I don't wish to upset Lord Kong Rong by being late, that will be all for this month. Join me next month as we begin the second year of our campaign!
An Overly Detailed and Funny Walkthrough of Mega Man 4
Played by Sparks through the Mega Man Legacy Collection for the Nintendo Switch.
Introduction
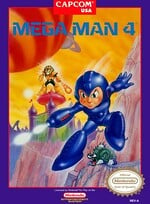
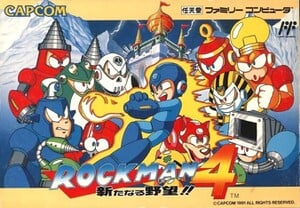
Greetings everyone, and welcome to An Overly Detailed and Funny Walkthrough of Mega Man 4! Mega Man 3 is all done, and so we are finally at my personal favorite of the NES Mega Man games - Mega Man 4! This awesome game was released in December 1991 in Japan, January 1992 in the United States, and August 1993 for Europe.
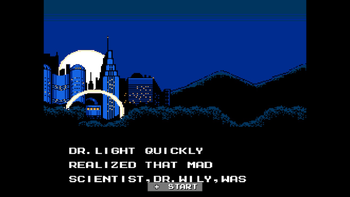
Mega Man 4 has an intro cutscene! We haven't seen one since the second game.
AD 200X
Household robots Rock and Roll were created by master robot designer, Dr. Light, and were enjoying their peaceful days.
Then one day, the industrial robots all over the world went on a rampage and the world fell into total chaos.
Dr. Light quickly realized that mad scientist, Dr. Wily, was behind the nefarious deed but he didn't know what to so.
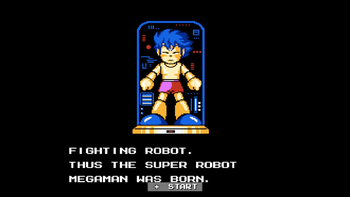
Rock, having a strong sense of justice, volunteered to be converted into a fighting robot. Thus the super robot Megaman was born.
Megaman shattered Dr. Wily's plans three times and world peace has been maintained so far.... but history repeats itself.
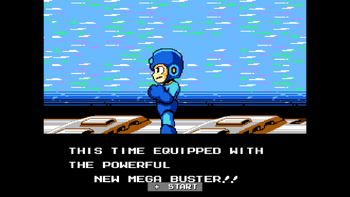
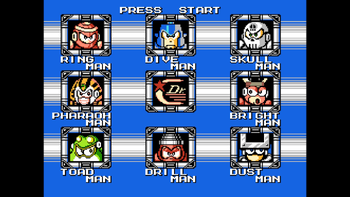
Dr. Cossack, a mysterious scientist, has invented eight powerful robots and sent them after Megaman. Megaman starts for the battle again, this time equipped with the powerful new Mega Buster!!
Wait a second - Wily isn't the villain?
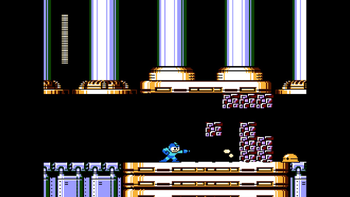
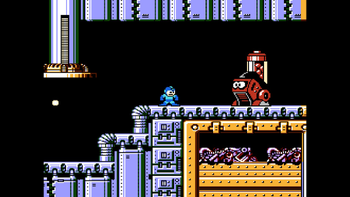
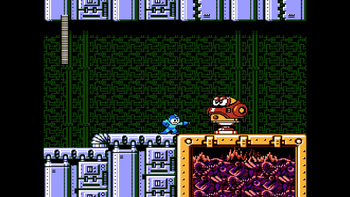
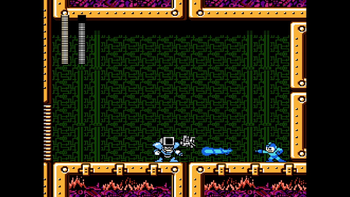
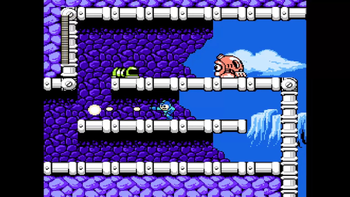
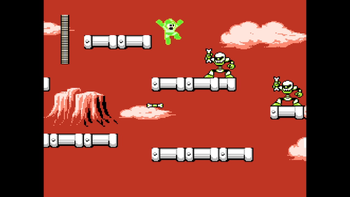
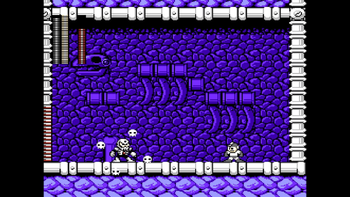
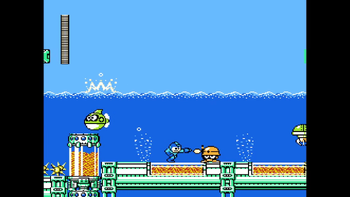
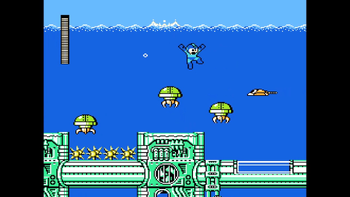
Mega Man 4 not only shows us the origins of the Blue Bomber, but he's now got an amazing new ability - the charged shot! By holding down the attack button, Mega Man will begin glowing with power. When the button is released, Mega Man will fire a very powerful energy blast that deals high damage and pierces through weak enemies! I find this a very nice way to defeat bosses and it also allows the conservation of weapon energy. This one ability opens up so many new possibilities when playing! The character Eddie also makes his debut in this game. Eddie appears in some stages, where he'll walk to Mega Man and give him a random item, ranging from useless to game-changing. He's like a lottery system meant to disappoint or please the player. A little help goes a long way, they say! Finally, there are two optional secret items to find... both of which are very helpful if you can grab 'em!
So why is this game the best classic game to me? My opinion may change when I play the later games, but Mega Man 4 is the most balanced and well-designed of the games, or at least of the NES ones. Unlike Mega Man 3, there are no cheap moments or ridiculous boss fights (Doc Robots, ugh!), and the weapons are varied and fun. Mega Man co-creator Keiji Inafune himself stated that the development team ran into very few issues when developing the game. That's nice to know! Lastly, if you compare Mega Man 4 to the first three games, you'll notice a large jump in quality!
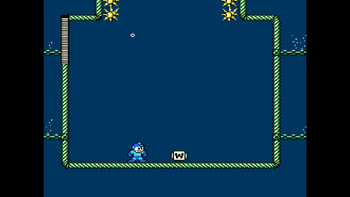
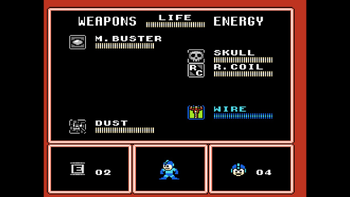
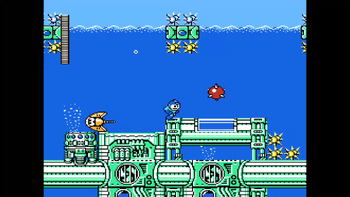
I think I had a good basis for my Mega Man 3 walkthrough! Five images per stage plus bullet points describing the attacks of bosses is a standard I'll set for the rest of the classic Mega Man games. I don't want your devices to lag when loading up Strategy Wing! Sometimes there might be more than five images... I want you all to see the new enemies!
The game keeps the password system, as saving progress is still unheard of. Now with all that out of the way, let's dive in!
As you'd expect, Mega Man 4 has eight new Robot Masters to take down! Their names are, from top to bottom, left to right: Ring Man, Dive Man, Skull Man, Pharaoh Man, Bright Man, Toad Man, Drill Man, and Dust Man. Each boss has a weakness, as shown below!
- Ring Man is weak to Pharaoh Man's weapon.
- Dive Man is weak to Skull Man's weapon.
- Skull Man is weak to Dust Man's weapon.
- Pharaoh Man is weak to Bright Man's weapon.
- Bright Man is weak to Toad Man's weapon.
- Toad Man is weak to Drill Man's weapon.
- Drill Man is weak to Dive Man's weapon.
- Dust Man is weak to Ring Man's weapon.
Two of these Robot Masters are very easy: Toad Man and Dust Man. Starting out with one of them is highly recommended. I'm going to go after Dust Man first!
Dust Man
Dust Man stage
Dust Man's stage takes place inside some sort of garbage plant.
As soon as we advance to the right, this fast shield enemy flies from the right, so look out! This enemy will appear in several games after this one, so you'll get used to them. When the enemy reaches a specific location, it will turn around and rush the other direction. It's invincible to all damage when attacked from the front, so you'll have to jump behind it and blast it repeatedly until it goes down. The path ahead has a few more shield enemies, as well as Mettaurs. These Mettaurs fire three bullets in a spread formation and jump forward when Mega Man gets close. Remember that attacking them while they're hiding does nothing!
Additionally, there are some gaps to leap across. When near a pit, annoying enemies will rise out and slowly float down. Here's another trend that gets started here - enemies that rise out of pits that are meant to catch you by surprise and cause you to fall and lose a life. Ugh! To deal with these ones, shoot them when they rise and then quickly jump across the gap before another one shows up. Be careful of rushing shield enemies after landing! At the end of this section is a pit we must fall down.. There is nothing to the right of it.
This area has a large health power-up if you need it! Perform a slide to easily get it, as the ceiling is too low for a jump. Now to proceed to the right! As we make progress, we encounter a large enemy that hops toward us, not continuously thankfully! It has high HP, so just keep shooting it to defeat it before it reaches you. To have an easier time, charge up the Mega Buster while approaching the enemy to get a headstart! After walking further, these small blocks emerge from the bottom of the screen and stop in front of Mega Man's path in groups of four, forming a large square platform that Mega Man can use. We'll have to use these interesting blocks to jump across a small pit and a long row of one hit KO spikes! While leaping across the blocks, these flying ladybug enemies fly in from the right side of the screen attached to propellers. When they are close enough to the Blue Bomber, they detach from their propellers (sending them upward) and spin, homing in on Mega Man's location. While these enemies are annoying if not dealt with quickly, they are dangerous here as they can knock you off course and into the spikes. Thankfully, their health is small, so destroy them before they reach you! Also, don't take too long when jumping, as the blocks will break apart and fall off-screen! You'll eventually come across solid ground, where you'll find a ladder leading upwards, guarded by two more ladybugs.
After climbing up, we enter a room with no enemies or obstacles. We also get to see Eddie for the first time! He gives me a large weapon powerup... it's the thought that counts right? There are steps leading upwards to another ladder. Let us move on!
At the top of the second ladder is a long hallway with crushing things on the ceiling (still don't know what they're called...) that move up and down slowly. They're not a problem yet, but later on they will be. This hallway has a few Mettaurs and some of the crushing things have columns of pink blocks stuck to them. They're blocking (ha!) our progress, so the only way to get through is to destroy them by shooting them! Charged up shots pierce through many of them, so you can do that method if you prefer to not button-mash. As we get further down the hall, we see that some of the crushing things are lower, so now we're in danger of being crushed. Time your movements so you can get by, but also get rid of any Mettaurs that are in the way! One crushing thing is located past two lower ones, so we have to shoot a few blocks before retreating to safety. Thankfully, the blocks do not respawn. We'll have to repeat this process several times before a path is cleared. Then, we'll have to rush our way through to get to the other side! Keep sliding to increase your movement speed. After exiting the hallway, the crushing things stop moving, and we're done with them.
The following room has a large red enemy that remains stationary but can attack in two ways: either by firing a bullet from its mouth that goes straight, or a quick red projectile from the top of it that curves downward and aims directly at Mega Man, but can only go so far. If I remember, the latter projectiles can be destroyed, but if something comes up later I'll tell you. Many shots are required to defeat this enemy. There is another ladder past the enemy, also leading upward. The room it leads to has two platforms floating above spikes, one of which has a unique Mettaur. This Mettaur acts differently than the others - it spins in place and fires three straight bullets one at a time when Mega Man approaches. It also has more than one HP, but it's still an easy foe. Jump to get the next ladder!
Now we only have one more hallway before the boss gate! Only one enemy guards it, and that's the large hopping enemy from earlier in the stage. Take it down, and you'll reach the boss room!
Dust Man fight
Here we have the first Robot Master - Dust Man! He has three attacks he at his disposal:
- Dust Man fires a cube of garbage (or is it dust?) from the vent in his head. It takes him a second to fire, but the projectile is fast. When it reaches Mega Man, it splits into four pieces that fly in the diagonals. To avoid this attack, simply jump in place at the right time.
- Dust Man vacuums Mega Man with the vent, similar to Magnet Man's attraction ability. Dust Man does this for several seconds, and he's invincible during the attack. Just walk/slide away when he vacuums.
- Dust Man can jump high up into the air. This is his only form of mobility, as he cannot walk.
He's pretty easy, which is why I chose him first! To easily avoid his attacks, stay as far away from him as possible. If he gets close, go under him when he jumps again or you'll likely take damage from his attacks. Because his vacuum ability lasts for a while, charge up the Mega Buster and attack when his guard is down! Charge shots in general are recommended for bosses because of the long invincibility frames they have.
After defeating Dust Man, we get our very first special weapon - the Dust Crusher! It allows Mega Man to fire a cube of garbage/dust like Dust Man. When it hits an enemy, it splits up, also like Dust Man's attack. Neat!
Weapons are no longer abbreviated to 1-2 letters, but now their first names! Dust Crusher is labeled "DUST" in the pause menu, and Mega Man turns gray while it's equipped.
Dust Man is down! Skull Man is weak to the Dust Crusher, so he's the next Robot Master to go after!
Skull Man
Skull Man stage
Skull Man's takes place at a location where bones and rocks make up the majority of the terrain. The background looks to have mesas?
The first area of this stage has a miniature maze section, with multiple green cannons placed within. These cannons fire a red projectile diagonally that bounces off of solid walls, picking up speed with each bounce. Before you know it, it'll become Rainbow Dash levels of quickness! Thankfully, a single Mega Buster shot will destroy the projectile. Just keep shooting to destroy both the projectiles and the cannons! There are also these green flying enemies that pass through all terrain. They're slow and move up and down a little, but mostly to the left as they appear from the right. One bullet destroys them. You need to navigate through the small maze and destroy the cannon projectiles before they reach you! One of the cannons gave me a 1-Up - how generous! After exiting the maze, the area becomes more open, but more cannons and green flying enemies will act as obstacles. At the end of the room is a ladder leading upward.
The ladder takes us to a small room containing a skeleton enemy who tosses bones that curve downward, passing through all terrain. If this enemy is attacked, it will fall apart before quickly reforming to its original state. We have to use a charge-shot to put this enemy to rest - permanently! Another ladder leads us to the next room.
This room is a hallway leading to the right. Along the way are purple variants of those rushing shield enemies from Dust Man's stage. It's not just them you have to worry about, as those bat enemies from Mega Man 2 return! The bats hang on ceilings when they're seen. While in this state, they cannot take any damage due to them protecting themselves with their wings. After a few seconds, they will "awaken" and slowly fly towards Mega Man's location. If one touches Mega Man, it will fly up and hang on a nearby ceiling for a few seconds (if there is one) before starting another flight. Their health is little, and I don't think they're bad at all.
This room is unique as it has multiple levels of elevation you can use to make it to the end. I stuck with the lowest level of elevation, which leads to a large health powerup if you need it! No matter what path you take, make sure you watch out for the two enemy types here. The shield enemies can appear at heights that allow you to slide under them, letting you avoid them entirely! Eventually, the paths all become one again, and a ladder at the end leads us to the next room, which is another small room. There are no enemies, but Eddie is here! He gives me a large health power-up this time, which is nice because I took some damage. By the end of this walkthrough, he'll give me a 1-Up or E Tank, you'll see! Another ladder brings us to the next room.
This next area is unique as you can either continue climbing the ladder or enter a completely optional area! This area has more shield enemies and also four levels of elevation. The limited space of each elevation means you have to watch out for sudden rushing enemies. If you see one, quickly retreat until the enemy turns away. Afterwards, follow it and shoot at it before it turns around again! The third elevation has our first E Tank, while the fourth has a large health power-up. The other elevations have nothing. Now let's continue on the main path!
Now, we're in an area similar to the first one in this stage. It begins with a maze, and ends in an open space, but the enemies here are brand new! First is the unique tan enemy with a skull on its back. It attacks by launching quick bullets that curve downward. They're sudden, so be on guard! The enemies themselves also cannot be harmed from behind, as the skull protects them. You have to attack from their front to defeat them. The other new enemy is a bright green caterpillar that descends from ceilings when Mega Man gets near. When on the floor, it crawls across the ground. The problem with the caterpillars is that you cannot see them until they descend from ceilings, so proceed with caution! You wouldn't want one to knock you off an edge. The middle portion of the room has an E Tank on a low platform. To get it, we have to go through a small passage that requires a tough jump to get inside. If you choose to go for the E Tank, watch out for a sudden caterpillar within! Because I already got an E Tank, I didn't feel the need to grab this one. After jumping across a large gap, we have to deal with two more caterpillars before descending a ladder at the end of the room. Beware of the first caterpillar that appears after landing!
One more section before the boss gate! Now the sky is red instead of blue, but that doesn't affect anything. The final challenge of this level involves Mega Man jumping across platforms floating above a pit while blue variants of those slow flying enemies appear. Additionally, there are several skeletons spread out on the platforms! Be sure to charge-shot every one you see so that they won't interrupt you. On a high ledge by the boss gate are six small health power-ups. You'll want them before battling Skull Man! I should also say that one of the skeletons gave me a 1-Up... such thoughtful enemies in this stage!
Skull Man fight
Skull Man is definitely tougher than Dust Man, but with the Dust Crusher he's easy. Skull Man has two things he can do:
- He stays still and shoots three bullets in quick succession in Mega Man's general direction. They're not fired at Mega Man's exact position. To easily avoid this attack, jump over the first two bullets as you'll be in the air when Skull Man shoots a third time, meaning that he will aim upwards, allowing you to land safely.
- Skull Man jumps forward, and puts up a Skull Barrier upon landing. The barrier protects him from all damage while it's up. After some time has passed, the Skull Barrier disappears, and the boss runs towards Mega Man. The Skull Barrier's duration ranges from less than a second to several seconds. Jump over Skull Man when he runs at you.
If you stand perfectly still when the fight starts, Skull Man will not do anything. As soon as you do something however, he will start attacking. This is more of an easter egg than a hint.
Like with Dust Man, it helps to stay as far away from Skull Man as possible. Dodging his bullets when you're right next to him is a difficult task and you're nearly guaranteed to take damage. Seven shots from the Dust Crusher are enough to defeat Skull Man.
The weapon acquired from Skull Man is Skull Barrier! It allows Mega Man to put up a barrier of rotating skulls around himself. Unlike Leaf Shield from Mega Man 2, this barrier cannot be sent at enemies, but it still damages those who make contact with it. I'll admit that I haven't used this weapon outside of boss fights, so I'm very familiar with the Skull Barrier. I don't think it's that good to be honest, but anything's better than Top Spin! This weapon is labeled "SKULL" in the pause menu, and Mega Man turns light blue when the weapon is equipped.
Up next is Dive Man!
Dive Man
Dive Man stage
Dive Man's stage takes place in the water. The area also looks to be a lab? I don't know what it is, but there's lots of water!
The first section of this stage is a long "hallway". We start on dry land, but we won't stay dry for long! There are floating platforms above the water's surface, which we can use to get to the end of the section. In the water are these saw enemies that move along the ground, similar to those ground enemies from the first two Mega Man games. They are impervious to Mega Buster shots, but certain special weapons can defeat them. Right now though, it's best to avoid them by staying in the air. Eventually, the solid ground is replaced with one hit KO spikes, so we have to use the platforms to get by. Sounds simple, but there are also green fish enemies that swim in from the right side of the screen. When near Mega Man's position, they will leap out of the water! That means we're not safe from them even if we avoid the water. One shot from the Mega Buster will stop them!
The platforms will then disappear completely, so we now need to go underwater. As a reminder, water makes Mega Man's jumps higher and more floaty! The saws and fish are now gone, but here we have a new threat - scuba Mettaurs! They're similar to their land relatives, but when they "wake up", they swim in the water and fire three projectiles in a spread formation, sometimes more than once. They can also "jump" multiple times while swimming. They're mild annoyances at best. We also have obstacles in the form of green clawed jellyfish, which descend upon the ground when Mega Man approaches. They can only go down, and only when they return to their normal location can they strike again. Simple jump over them or slide underneath depending on their maximum height, as attacks will do nothing to them. We have to slide through a low passage, but watch out for the jellyfish after the slide! To avoid damage, slide backwards and run while the obstacle repositions. The rest of the section has more Mettaurs and jellyfish, with some gaps and spikes thrown in.
The next room is a small one, but a large whale arrives and attacks! This is a miniboss with two attacks:
- The whale can fire a series of fast rockets that kinda home in on Mega Man, but quickly leave the screen. These are difficult to avoid and the best way to avoid them is by jumping high and descending.
- The whale launches a row of spaced-out spikes above it that descend on the solid ground Mega Man is at. At the same time, the whale "vacuums" in an attempt to pull Mega Man into the spikes below it. This attack is much simpler and allows for many shots against the whale.
Take down the whale quickly so you won't have to deal with the rockets! Only after defeating it can we move on.
The next section is also short, but it contains rows of spikes along the ground. Past the first row of spikes is a scuba Mettaur that's difficult to get by without taking damage. If you want to avoid damage, jump far to wake it up and quickly go back to where you were. Get rid of the enemy while it's awake! Past it are three jellyfish, with two of them close to each other. Make the first one go down and while it's going back up, make the second one drop. While both are down, jump over them! Past the third jellyfish is a ladder leading out of the water.
The ladder takes us to a small room with another appearance from Eddie! Unlike the other two encounters with him, you must reach him before he falls in a gap! Jump across said gap to reach Eddie so he can give you the item. This time he gave me an E Tank! I told you he'd give me one! Now we need to see him give me a 1-Up... another ladder takes us even higher. This area is a short hallway with a large red hopping enemy from Dust Man's stage. Defeat it and descend down a pit at the end of this section. Afterwards is another short room where we have to fall down again.
Now we're back in the water! From here on out, the water moves up and down, so always keep track of it so you can jump the highest. This room is another short hallway with a few spikes and more jellyfish. We also get to see a brand new stingray enemy! There are multiple of them here, and what they do is swim in from the right side of the screen, albeit slower than the fish from the beginning of the stage. Touching one deals somewhat high damage to Mega Man, so try not to touch them! They swim in a straight path, but if Mega Man is above or below them, they can rotate their fins to swim diagonally for a second or two. They're small too, so attacking them is a little difficult. Charged shots can make it a little easier to hit them.
The next room has another whale with the same layout as the first one. It's identical, so use the same tactics from the first whale to take down this one. The water also does not move in this room, but it will in the sections after it. Past the whale is a long hallway with a gap seen immediately. If we fall down this gap, we'll access a secret area! However, we must fall down several screens of spikes, but they're not hard at all to avoid. After four screens of spikes, we reach the bottom of the trench, where an item with the letter "W" lies! When we pick it up, we acquire the "Wire" power! Mega Man exits the screen and we start from a nearby checkpoint (the section with the start of the stingrays). We'll have to make it back to where the gap leading to the Wire was.
But first, let me explain what Wire does; it's a secret item that allows Mega Man to send out a wire above him to attack enemies and grab ceilings! To do this, hold "up" on the left stick and press the "attack" button. This uses Weapon Energy, so you can't use it all the time, like the other special weapons. It does serve as a great alternative to Rush Coil, and I'll show it off later, trust me! This weapon is labeled as "WIRE" on the menu, and Mega Man turns red when it's equipped.
Alright, now with that out of the way, let us press on!
Past the gap is a hallway, as I mentioned earlier. This hallway has more stingrays and spikes, but also spikes on the surface of the water that move with the water. Be sure to time your jumps and make sure you don't accidentally touch any spikes. We also see underwater mines for the first time - they deflect all bullets and explode when Mega Man is near! Run away when they're about to blow up!
One more room until the boss gate! This one has more mines and surface spikes, although the water now finally stops moving, making it easier to avoid them. There are a total of five mines in this section, spread out from each other. Oh, and there are three stingrays that'll attempt to hinder your progress. Carefully navigate your way through the enemies and mines and you'll reach the boss!
Dive Man fight
Dive Man is tricky to fight. He has two main attacks he can do:
- He spins towards Mega Man's location at a fast speed. He can only go left and right, so simply jump over him. He may do this attack multiple times in a row.
- Dive Man sends out 1-3 Dive Missiles that home in on Mega Man. The missiles can be destroyed by shooting at them. The missiles he fires are shot out one by one.
I said he's tricky (especially if you don't have Skull Barrier) because you can't predict what he will do until you see him attack. If you're fighting him without his weakness, distance is key once again. You'll want to get far away from Dive Man and use charged shots to defeat him. When he fires Dive Missiles, you can just stand far away and spam the Mega Buster to damage him and destroy the Dive Missiles he sends out.
But we're nit fighting him normally! There's a trick to beating him with ease; you'll want to stay as close as you can to him so you can hit him with the Skull Barrier. When he charges at you, jump and move right next to him and attack with the Skull Barrier. After attacking him, jump again to avoid the next attack and hit him again. If he sends out Dive Missiles, use the Skull Barrier to block one and immediately strike Dive Man again. Repeat this process until Dive Man is defeated. It's very difficult to put into words, so that's why I made a GIF image of the strategy. That's the opposite strategy of fighting him normally!
After defeating Dive Man, we get the Dive Missile! It allows Mega Man to shoot out Dive Missiles that home in on enemies. Awesome! The weapon is labeled "DIVE" in the menu, and Mega Man turns dark blue when it's equipped.
We got two awesome powers from one stage! Drill Man is next in line!
Drill Man
Drill Man stage
Drill Man's stage takes place in an underground tunnel. It's likely a mine.
The first room is small. A ladder is found above steps on the right side. There are also three Mettaurs and two ladybug enemies that will try to stop us. Get rid of them and climb that ladder! The next room is even shorter, only containing a large red hopping enemy guarding the next ladder. You can just stay on the right and spam the Mega Buster until it's gone. After climbing even more, we reach a short hallway protected by more Mettaurs and ladybugs - three of each. These are enemies we've seen before, so this isn't the most exciting stage... yet. Now we must descend a ladder at the end of the room.
We now enter another small room with rows of spikes we must jump over. Three sleeping bats also inhabit this area, and all of them will awaken and slowly chase you down at the same time. Defeat them before proceeding. There's a large health power-up on a ledge if you need it! I don't. After falling down a pit, we enter a similar room with more of the same. There's only two bats this time around, but the item to grab is now a 1-Up! The jump to get it is tricky due to the low ceiling; are you feeling brave? Considering I got two 1-Ups from Skull Man's stage, I'm good.
After falling some more, we enter a seemingly dangerous hallway. There are rows of spikes we must leap across, but the ceiling's decorated entirely in spikes too! If that wasn't enough, we must deal with ladybugs as well. Don't worry about the ceiling spikes; Mega Man's maximum jump height won't even reach them! That means you can use your full jumps to get across. They're only an issue if you decide to use something like Rush Coil, but who would use that here? At the end is another leading upwards.
We enter yet another small room, but we finally have a new enemy! Three of them, in fact. There are three identical cannons that are protected by a shield for most of the time, but they occasionally open up and fire a slow bullet before hiding again. They can only be taken out when they're not protected. The window to attack them is very small, so keep firing bullets to make it more likely to destroy them. Standing close to them is a bad idea because of their sudden attacks. Defeat them while avoiding their shots and climb up the ladder at the left!
This next room is a hallway, but look up there! It's an E Tank waiting to be picked up! This is the perfect opportunity to use the Wire power. Check out the GIF to see it in action! Now we can move on.
This hallway isn't abandoned! We encounter a new enemy that is very difficult to describe. It's blue, and rolls on one wheel. If it's close enough to Mega Man, it will become invincible and spin towards him at a fast speed. While spinning it stops moving but continues spinning (does that make sense?), before moving back to its original position and returning to normal. Because of their unique ability, we need to attack from afar. This hallway has stairs leading higher before we go back to lower ground. Thankfully, there's enough space on the steps ahead to deal with the car-like enemies.
Now we only have one more room before the boss gate! It's a long hallway this time, filled with danger! Exciting, right? Anyways, the path ahead has many pipes on the ceiling. If Mega Man approaches one, the pipe suddenly drops a large rock that breaks apart upon hitting the ground. Despite its size, one Mega Buster shot will get rid of it. To get by the pipes, stop and let them drop a rock, destroy it, and then proceed before another one falls. The pipes are white with several arrows pointing down on them.
But wait, that's not all! This hallway also contains a new enemy! This enemy spins in the air towards Mega Man, kinda like one of those ladybug enemies, only weaker. If Mega Man gets past one, it will drop to the ground and begin to shoot bullets that only travel horizontally (left and right). Try to defeat them before they drop down. There's many of them here, but they're all easy to deal with. There's more too! Four levers are located throughout this hallway. When Mega Man touches one, new terrain appears out of the shadows! You need to activate these levers to be able to move on, but make sure there are no rocks or flying enemies around first. Two levers require bravery as you'll have to jump across a gap and touch them so you'll land on solid ground! After all of that, we've finally reached Drill Man. Yeah!
Drill Man fight
Like Dive Man, Drill Man is tough without his weakness. He has three attacks:
- Drill Man drills into the ground. While he's drilling, he's impervious to all damage. After a few seconds, Drill Man rises up at Mega Man's position, so keep move to avoid the attack.
- Drill Man jumps into the air, similarly to Dust Man and Skull Man. Not much to say.
- Perhaps the most difficult attack to avoid, Drill Man walks forward, stops and fires a Drill Bomb, walks forward, stops to fire another drill, and so on. Drill Man stops this pattern once he reaches a wall. He can turn around and shoot a Drill Bomb if you're behind him, but he will still advance in the direction he was going. You'll need precision if you want to avoid both Drill Man and the Drill Bombs.
Most of the difficulty comes from the third move alone. If you're having trouble dodging the attack, try jumping over Drill Man when he shoots a Drill Bomb so you can land safely, but be on guard for more Drill Bombs if Drill Man is still walking. When he drills, try not to get trapped in a corner, because who knows what attack the boss will do next?
Dive Missiles homes in on the boss, so you don't have to worry about aiming at all. If Drill Man drills into the ground a lot in the battle, then the fight will last quite a while. After many Dive Missiles, Drill Man is defeated!
Defeating Drill Man gives us the Drill Bomb! It allows Mega Man to fire a drill that explodes upon hitting an enemy. It can also destroy some walls, but those won't come until later on. Drill Bomb is labeled "DRILL" in the menu, and Mega Man turns red when it's equipped.
But what's this? We get something else too! Good ol' Rush also gets an upgrade! In addition to Rush Coil, we now have Rush Jet Adaptor! It allows Mega Man to ride on Rush through the air, but it functions much differently than it did in Mega Man 3. We no longer have free control over Rush, as he now flies in a straight path once we jump on him. We can move up and down a little bit, so not all control is lost. Perhaps it was changed because it was broken? Probably. We can use this to ride over large gaps and such! Rush Jet is labeled as "R. JET" in the menu. Before I forget, Rush Coil is labeled "R. COIL" in the menu.
Only four Robot Masters in, and I'm already having much more fun than the third game. That's all for now, but check back in October, where I'll defeat the remaining four Robot Masters - Toad Man, Bright Man, Pharaoh Man, and Ring Man in that order - next month! Goodbye!
| The 'Shroom: Issue 222 | |
|---|---|
| Staff sections | Staff Notes • The 'Shroom Spotlight • Poochy's Picks • Credits |
| Features | Fake News • Fun Stuff • Palette Swap • Pipe Plaza • Critic Corner • Strategy Wing |
