The 'Shroom:Issue 221/Strategy Wing
Director's Notes
Written by: Hooded Pitohui (talk)
Hello there, all you readers of The 'Shroom! I'm going to hazard a guess that you've read about how spectacular the Awards ceremonies were a few times now. I'll spare you another remark to the same effect, but I do want to say thank you to all of our wonderful presenters, organizers, and even spectators who turned up to watch the show.
As usual, we're not getting too ambitious this month while we all unwind after awards, but we do have plenty of your usual reads here in Strategy Wing. This month, Sparks (talk) wraps up Mega Man 3, facing down foes old and new en route to that scheming Dr. Wily! The Brothership Boss Battle Guide has gained some fun visual flourishes which you can enjoy as you take charge of the thermostat and get some tips for battling the big boss of the Brrrning Sea. Shake out those fingers and open your ears, because Zange (talk) returns with a new Rhythm Review, bringing along some prominent primates. To round it all out, The Tattle Log goes retro this month with a bird, Pokémon Academy takes a look at a 'mon best kept away from said bird, and Octet Gazette returns with what's probably the most in-depth mechanical system specific to certain travelers.
Go enjoy it, put down some votes at the bottom of the page, write a Poochy's Pick if you see something you really like, and feel free to join the team if you're so inclined! Have fun!
Section of the Month
Well, well, well, it seems mechanical marvels were all the rage last month! Was it the mystery and unique lore connections behind the ? Block, the persistence of the Blue Bomber in the face of repetitive Doc Robots, or were you all just dazzled by the mirror-smooth sheen of a pivoting Magnezone? Whatever the case may be, thank you for showing your support to Sparks (talk), Roserade (talk), and myself! Don't miss out on this month's temperature-adapative and turtle-creating robots, and please do keep on voting!
| STRATEGY WING SECTION OF THE MONTH | ||||
|---|---|---|---|---|
| Place | Section | Votes | % | Writer |
| 1st | Pitohui's Pokémon Academy | 6 | 33.33% | Hooded Pitohui (talk) |
| 2nd | An Overly Detailed and Funny Walkthrough of Mega Man 3 | 5 | 27.78% | Sparks (talk) |
| 3rd | Killing the Killing Game Roles | 4 | 22.22% | Roserade (talk) |
Brothership Boss Battle Guide
The Awards season may be over, but Brothership Boss Battle Guide is not! This section's the perfect place to prepare yourself for the fearsome bosses of Mario & Luigi: Brothership. In July, we looked at Sharpcask and that was a good boss, but now it's time to move on to the only boss in the Brrrning Sea, unless you count an optional foe who I'll go over later...
After the wedding of Burnadette and Chilliam, our heroes venture inside the Brrrning Sea Great Lighthouse Island to bring back the shining light for its Great Lighthouse, but as you'd expect, it's not an easy task. Zokket and his goons are causing mischief as always. It's Shun's turn to take the spotlight, and he has the perfect weapon to take down Mario and Luigi for good - a large blob called Pipegunk!
These are the stats of Pipegunk!
Pipegunk's stats
| Image | Level | Location | HP | POW | DEF | SPD | Type | EXP | Coins | Item(s) |
|---|---|---|---|---|---|---|---|---|---|---|

|
27 | Brrrning Sea, Great Lighthouse Island | 4500 | 129 | 83 | 285 | Normal, spiked | 6600 | 900 | Pipegunk Boots (100%) |
Pipegunk's abilities
Pipegunk initially has two attacks at its disposal. From here on out, I'm including Jump and Hammer icons before the attacks for easier identification!
 Jump Defense: Pipegunk uses its cannons to shoot out several slime balls at the brothers, one projectile at a time. Each slime ball bounces three times on the ground, expanding with each impact and getting closer to the targeted character with each bounce. The first bounce won't reach Mario or Luigi, but the second and third ones will because of the projectile's expansion when it lands on the ground. After the third bounce, the slime ball will bounce over the targeted character. If a slime ball is jumped on, it will explode, removing it. If Pipegunk fires from its right cannon, then Mario is the target. The left cannon means Luigi will be attacked. After a few slime balls, Pipegunk forms into a giant slime ball and leaps high into the air before landing in front of Mario and Luigi, greatly expanding upon making contact with the floor. Both Bros. must jump to dodge Pipegunk, and landing on the boss will damage it. This attack can cause the Trip status effect.
 Hammer Defense: Pipegunk leans back and turns to either Mario or Luigi before charging at them quickly. Pipegunk may change its target before it propels itself. The targeted character must counter Pipegunk before it hits them; a successful counter will damage Pipegunk.
After Pipegunk takes enough damage, Shun will interrupt the battle. He informs the Bros. about the unique battlefield they're fighting in; it's made up of three different areas: normal, magma, and ice. The battle was taking place in the normal area, but Shun presses a button on a remote control he has and changes it to the magma area. The hot temperatures transform Pipegunk into a fiery version of itself, powering it up! Shun also confirms that icy temperatures make Pipegunk stronger as well, which we'll see later. Shun then jumps very high to exit and the battle resumes.
While Pipegunk is in its fiery form, it has three attacks:
 Hammer Defense: Pipegunk moves behind both Mario and Luigi (which surprises the brothers the first time this attack is performed) and fires several fireballs into the air. These fireballs are shot at a steady pace, and are either above Mario or Luigi. The direction of each of the fireballs is easily seen, as they'll fly above their target. After Pipegunk shoots the last fireball, it will look towards the brothers before the fireballs fall on the brothers in the same order they were shot in. To avoid taking damage, the Bros. must counter the fireballs before it's too late. When a fireball is countered, it will be sent back to Pipegunk, doing some damage. This attack can cause the Burn status effect.
 Jump Defense: Pipegunk aims at either Mario or Luigi and shoots a fireball directly at them. After firing, the boss will fire at the other character without much of a delay. If Pipegunk looks at Mario, he will be targeted first. That means if the boss looks at Luigi, then he will be targeted first. It's difficult to differentiate the two positions because they look similar. Each fireball leaves behind a puddle of lava on the ground. If a brother stands on the puddle for too long, they will take big damage. Mario and Luigi must dodge the fireballs shot at them, and then they must continuously jump to avoid taking damage from the lava puddles. After several seconds, the puddles disappear and the attack ends. This attack can cause the Burn status effect.
 Jump Defense: Pipegunk starts at either the top or bottom of the screen and moves towards the opposite direction while shooting out a stream of fireballs. After making it to the opposite side, Pipegunk may move closer or farther away from the Bros. before shooting out another stream of fireballs. The fireballs must be jumped over to avoid taking damage. This attack ends after a few rounds. This attack can decrease DEF by 20% for a few turns.
While Pipegunk is in its icy form, it has three attacks:
 Hammer Defense: Pipegunk moves behind Mario and Luigi and shoots out several icicles above the Bros. at a steady pace. This attack is very similar to the "fireball rain" attack from Pipegunk's fiery form, just with icicles instead of fireballs. The pace is a tiny bit slower however, and there will always be a Mushroom shot out during the attack. Mushrooms heal 30 HP instead of doing damage, and countering one will probably heal Pipegunk by 30 HP (I haven't seen it happen, but I'm sure this is the likely outcome). This attack can cause the Ice status effect.
 Hammer Defense: Pipegunk prepares to charge at Mario or Luigi before it does, albeit very slowly. As the boss makes its way towards a character, the screen ices up, heavily obstructing the view and making it difficult to focus. If Pipegunk reaches its target, it will deal big damage to the victim. If Pipegunk is successfully countered, the ice covering the screen will vanish and the boss takes damage, ending the attack. This attack can cause the Ice status effect.
 Jump Defense: Pipegunk moves towards the top or bottom of the screen and shoots out streams of icy projectiles, similar to Fiery Pipegunk's flame version. There are actually two types of icy projectiles that can be shot: fluffy ice or thin, narrow icicles. Fluffy ice is shot out quickly, but slows down when close to the Bros. Narrow icicles are slow when they're shot out, but they speed up after a moment. Each stream of projectiles can only be one type. Pipegunk may use both projectile types in the full attack. After a few rounds, the attack ends. This attack can drop POW by 20% for a few turns.
Additionally, while Pipegunk is fiery or icy, there will be winds (hot or cold, depending on the form of the boss) that heal Pipegunk by 68 HP before it attacks. Pipegunk is also stronger overall while under an element, and cannot be jumped on because of fire/an ice spike atop the boss.
After a few turns of Pipegunk being fiery or icy, Shun will appear in the background with the remote in hand - er, claw. Luigi will then get inspiration for a Luigi Logic! Unlike previous Luigi Logic opportunities however, you only have a limited amount of time to initiate it; if a turn goes by, Shun will use the remote to change the setting of the battlefield to the opposite temperature. For example: if the battlefield is currently taking place in the magma area, then Shun will switch it over to the ice area. Shun doesn't immediately switch over to the opposite temperature; instead he makes it normal first so Pipegunk can return to its initial form, and then Shun proceeds to finish his task so Pipegunk becomes the opposite temperature. "Why not just switch from hot to cold or vice versa", you ask? well... Pipegunk is very delicate and can't handle sudden temperature changes! If you miss a Luigi Logic chance, you'll have to wait a few more turns before the next one.
 Luigi Logic
Luigi will run and jump to the platform Shun is at and grab the remote. Shun however won't release it, resulting in a tug-of-war for the remote. The text Defeat Shun and steal the remote! then appears on the screen. For the first time during a Luigi Logic, a tutorial is shown, titled "Steal the Remote", separated into two pages:
- Page one:"Move Shun to the edge of the stage. Tilt
to the right to spin right. Tilt
to the left to spin left. Press
repeatedly to pull backward."
- Page two:"Try to pull Shun to the right or left edge of the stage. Once you do, press
repeatedly to throw Shun and steal the remote control."
That tutorial pretty much sums up what you have to do. Before the action begins, there is a countdown of "3, 2, 1, GO!" You must get Shun to either the left or right of the platform so you can steal the remote from him. only allows you to rotate to the left or right, while
moves you backwards. To get to an edge, you need to steer yourself while mashing
. Shun will try to fight back by rotating and pulling as well, so it makes for very awkward navigation. There are also coins present on the platform; running into them will add them to your coin counter. Those are low priority and collecting them should not be the main focus. I think taking too long will result in a failure, but I can't confirm that because I've never seen it happen myself. Don't wait to find out, alright? After reaching an edge, you must mash
to lift Shun off of the ground and throw him out of the platform. He will land in the magma/icy water, which will propel him up in the air before he lands on the platform, where he lays on the ground. It's possible to get Shun to pull back to an edge; if that happens, mashing
will not allow Luigi to throw Shun away. Instead, Luigi will pull Shun back to the center of the platform, and you'll have to start again. Because of this, make sure Luigi reaches an edge and not Shun!
Now Luigi has the remote! You will then have to choose which area to move: either the normal area or the area of the opposite temperature. After changing the area, Luigi discards the remote and joins back up with Mario. The battle then resumes.
If the normal area is chosen, Pipegunk will return to its normal form. Pipegunk will use its normal abilities here like at the start of the battle. After a few turns, Shun will get back up on his feet and use the remote to change to the magma/icy area.
If the opposite temperature is chosen, the hot/cold winds will be too much for Pipegunk to handle, because it can't handle sudden temperature changes from hot to cold and vice versa. The boss will take 300 damage, and it will become a deformed blob for several turns. While in this state, Pipegunk cannot attack, and it takes critical damage from all attacks. Shun will get back up after a turn or two, but he just exits the screen in frustration. After a few turns have passed, Pipegunk will reform and become either fiery or icy depending on the current area. It's recommended to choose the opposite temperature because Pipegunk takes high damage, becomes vulnerable for a few turns, and won't attack while deformed.
After the first successful Luigi Logic, Shun will fight back harder when stealing the remote, and the coin locations will be different. The coins are in arrow formations for the first Luigi Logic, which are meant to provide hints for the player on what to do.
Tips and tricks
Recommended gear
Here is the best equipment sold by the merchant outside the Brrrning Sea, Great Lighthouse:
- Boots: Singular Boots and Crowd-Control Boots
- Hammer: Singular Hammer and Whittledown Hammer
- Wear: Singular Wear and Repel Wear
Singular Boots, Whittledown Hammer are stronger by three points in POW than their Singular versions, and Repel Wear is one point stronger in DEF than Singular Wear. Crowd Control Boots and Repel Wear have abilities that increase POW/decrease damage taken the more enemies there are, but because Pipegunk is fought alone, they're not very effective against the boss. Whittledown Hammer however deals more damage the fewer enemies there are, so that's the best Hammer available for sale to use against Pipegunk.
There are also gear of similar strength found while exploring the Brrrning Sea! Below are many examples:
- Slowdown Boots DX: Same strength as Crowd Control Boots, and found in a hidden passageway inside the lab on Slippenglide Island. Lowers damaged enemies' SPEED by 30%.
- En Garde Boots: Same strength as Crowd Control Boots, and also adds two points to SPEED. It's found on Itsi Islet and rarely dropped by Curlups. When attacking an undamaged enemy, increases damage dealt by 30%.
- Soft Hammer DX: Same strength as Whittledown Hammer, and found on Compac Islet after completing all puzzles there. Decreases DEF of enemies struck by 30%.
- Blunt Hammer DX: Stronger than Whittledown Hammer by 15 points, and found on a ? Block in Allsand Island, but you need the upgraded Bro Ball to get it. Imcreases damage dealt by 30% against enemies with spikes.
- Cozy Wear DX: Same strength as Repel Wear, and found on Bitsi Islet after completing the third challenge there. Boosts DEF by 20% each time you take damage.
- Liberation Wear: Stronger than Repel Wear by one point, and increases POW by two points. This gear is rarely dropped by Palookas. Raises SPEED by 30% whenever you take damage.
Slowdown Boots has more use than En Garde Boots because the effect occurs on every attack, and not just the first. You could use the En Garde Boots to perform a one-and-done incredibly powerful jump attack too.
Both the Soft Hammer DX and Blunt Hammer DX are great against Pipegunk because one lowers DEF by 30% and the latter is more powerful in general and allows for more damage against Pipegunk in its fire and ice forms.
Cozy Wear DX is perfect for those defensive players out there, as DEF increases by 20% each time you take damage! Repel Wear helps for offensive playstyles due to the bonus POW included, and the SPEED increase allows for more actions.
Once you arrive at the Brrrning Sea, Great Lighthouse Island, you won't be able to leave until you restore the Great Lighthouse, so if you missed getting any of the special gear above, you'll have to use the best from the shop instead. The equipment is satisfactory though!
You can have whatever Accessories and Gloves you want, as they support different playstyles. After Burnadette and Chilliam's wedding, Connie gives Mario and Luigi Connie Mittens, which increases DEF and SPEED by ten points and also reduces the damage taken by 50% if the wearers are at 25% HP or lower. There's also the IDLE Scarf from before, and both make for fantastic defensive playstyles.
 Recommended Battle Plugs
You can use whatever Battle Plugs you like best for Pipegunk, especially those that fit your playstyle! I have selected this set of plugs because they help greatly against this boss:
 Temperature Guard: Pipegunk is capable of fire and ice attacks, so this Battle Plug will protect you from their hot and cold effects.
 Boomerang Items: Allows you to use the best items you have without losing them. Wanna heal both Bros. with a Max Nut without having to worry about buying a new one? This will help! It also synergizes well with the "Auto" Battle Plugs.
 Bros. Boost: Gotta make those Bros. Attacks count when the boss is temporarily vulnerable! While the attacks' BP cost is doubled, they'll be worth the extra damage.
 Performance Bonus: For those who like to constantly use Bros. Attacks and keep plenty of their BP. This Battle Plug also means less Syrup Jars/Candies will be used!
 Damage Shield: Reduces damage taken by 20% for ten attacks. Helps with staying in the fight and using less healing items. Pipegunk isn't holding back when powered up!
 Auto 1-Up: For those who just cannot avoid the attacks of the boss and therefore get knocked out. I've seen it happen to others, but if you're strong enough this isn't really needed. Pipegunk's attacks can be surprisingly strong sometimes, so I recommend new players to have this Battle Plug equipped just in case.
Other things
Pipegunk is level 27, so make sure you match its level or surpass it. If you're underpowered, battle against the roaming Zok Troopers inside the Brrrning Sea, Great Lighthouse Island to get EXP and coins. Use the earned coins to purchase more items and better gear.
Between the time from Sharpcask to Pipegunk, you got two new Bros. Attacks to use: Bomb Derby and Jump Helmet! Both make for powerful attacks on Pipegunk if performed correctly. Be sure to practice them both as they're the best attacks yet! Finally! Luigi now has an attack suited to dealing massive damage to one enemy!
Save your BP for when the boss melts by sudden temperature changes from successful Luigi Logics! You can use Bros. Attacks when Pipegunk is up and about, but they won't be as effective.
Strangely, Jump Helmet works against spiky/fiery enemies. Don't ask why, but that's so wrong to me.
When normal Pipegunk attacks with slime balls, try jumping on them after the first bounce to get rid of them ASAP! Try to limit how many bounces there are by using good timing.
Stock up on items and be sure to collect as many Sprite Bulbs as you can to make Battle Plugs! This boss causes many status effects, so having plenty of Refreshing Herbs on hand isn't a bad idea.
Burn damage isn't lethal, as it can only reduce you to one HP. If a character is frozen, they cannot perform any action, and the next hit dealt to them deals critical damage and unfreezes them.
The fluffy ice shot by Icy Pipegunk is difficult to avoid because it slows down the farther it travels. The thin icicles are easier to avoid. If you have trouble dodging in general, use the "Easy-Peasy Counters" Battle Plug.
Don't stop jumping until the lava puddles vanish from one of Fiery Pipegunk's attacks! Standing on one for too long will result in big pain!
Combining the "Performance Bonus" and "Bros. Boost" Battle Plugs will allow for extra-powerful Bros. Attacks for the normal BP cost!
Don't be afraid to constantly switch out your Battle Plugs for more suitable ones during the battle.
Make sure both Bros. are in healthy condition before Luigi Logic opportunities occur! Missing one will allow Pipegunk to change forms and perform more attacks.
In addition, always choose the opposite temperature after stealing the remote from Shun! It'll deform Pipegunk and allow you to deal massive damage to it for a few turns!
And that marks the only main boss in the Brrrning Sea, Pipegunk! That was the most detailed battle guide yet, but I'm not going to run out of breath anytime soon! Stay tuned for September, where we'll analyze the first boss of the Gulchrock Sea, the Koopa King himself - Bowser! See ya!
Pitohui's Pokémon Academy
Written by: Hooded Pitohui (talk)
Ah, welcome back to another session, class. Now, did I hear correctly there were some sort of large-scale celebrations occurring recently...? Ah, I kid! I was present for the festivities as well. While there, I just so happened to encounter an award-winning writer who suggested we examine an unorthodox favorite Pokémon of his. Considering his reputation, how could I turn him down?
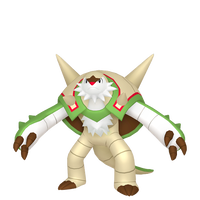
So, per Mr. Time's recommendation, this month we will examine one way in which you might raise Chesnaught, the final evolution of the Kalos' region's Grass-type Starter, Chespin.
As always, before we begin, you may read the boxes below for a better understanding of our course's objectives and some definition of the jargon we use.
First, a Smogon University course, this course is not. No, this academy's lessons are designed to get trainers of any stripe thinking about how they can raise their Pokémon, and, as a result, aren't designed to keep up with the widely-accepted metagame for the series. In rare cases, the way I've raised my Pokémon may even flies in the face of conventional wisdom. If you're looking for top-tier strategies, do check out Smogon, but if you merely want to get a little deeper into raising Pokémon while still doing things your own way, feel free to use this section as a reference.
I'd like to give a word of thanks to the Bulbagarden Archives, the source of many images in this section.Base Stats: Base stats are the values associated with a particular Pokémon species, and are the same across every individual Pokémon of a given species. You have no influence on them. You can think of them as traits tied to a species. A chimp isn't ever going to be able to get as good as digging as a mole will be, and, likewise, an Abra is never going to have the defensive prowess a Shuckle has.
Individual Values (IVs): Individual values, as their name implies, are associated with individual Pokémon. They range from 0 to 31 in each stat, with 31 being considered a "perfect" IV and higher numbers corresponding to different stats. Magikarp A and Magikarp B will have the same base stats, but they may very well have different IVs. To stick with the animal analogy, one mole may be born with larger claws than another mole, and that first mole is probably going to have an easier time digging through dirt than the latter. Individual values are set in stone, strictly speaking, but you can use Hyper Training (from Generation VII onwards) to functionally get a perfect IV in a stat.
Effort Values (EVs): Effort values are the one thing you can easily change. A Pokémon can earn, primarily through battling, but also through means like the use of certain items or mechanics like Super Training, up to a total of 510 effort values, with up to 252 in any given stat. To finish off the animal analogy, no matter what kind of claws a mole is born with, moles who have more experience digging are probably going to be better at digging than moles which have never dug.
Nature: A Pokémon's nature is, more or a less, a stat modifier with a name meant to make it sound like a Pokémon has some personality. Natures will raise one stat by ten percent and lower another stat by ten percent. Some natures raise and lower the same stat, canceling out the effect and leaving stats unchanged. Natures can be functionally changed with the use of special mint items from Generation VIII onwards.
STAB: STAB stands for Same-Type Attack Bonus, and refers to the boosted power of moves that match the type of the move's user. To illustrate this, consider the case of a Lombre, a dual-type Pokémon which is both a Water-type and a Grass-type. Any Water-type moves Lombre uses will have their power boosted by 1.5x, and any Grass-type moves Lombre uses will, likewise, have their power boosted by 1.5x. (There are circumstances where this does not apply, and, while the 1.5x multiplier is typical, some games use other multipliers.)
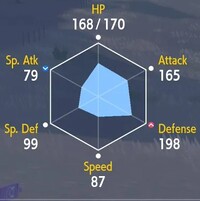
Beginning as always with an examination of Chesnaught's base stats, we find a Pokémon with a lopsided distribution leaning towards physicality. Chesnaught's physical defense is superb, befitting its knightly attributes, and its physical attack is considerable as well. Its speed is poor, so we won't be making any inroads trying to make it a swift physical attacker, and its special stats are low enough to be written off in our planning. Its HP is decent, though, which complements its defense well. All that considered, why don't we lean into that defense and turn Chesnaught into a formidable barrier to all physically-focused Pokémon that's capable of hunkering down and returning the blows?
To accomplish this, we'll invest maximally in defense with a full 31 IV, a full 252 EVs, and even a boosting nature. Specifically, since we have zero use for Special Attack, we'll choose an Impish nature. To give it as much strength to hit back with as possible, we'll go on to invest 252 EVs into attack, leaving the leftovers for HP.
Now, with that decided, do we have a Pokémon that can effectively hunker down as an immovable obstacle to frustrate physically-oriented opponents? Well... not quite. Grass is a not a type which lends itself well to defense, you see. With five weaknesses, it ties with Rock for being the worst type when it comes to defensive matchups. In Chesnaught's case, the addition of the Fighting-type eliminates one weakness, but adds two others and doubles a third, with most of these weaknesses being common offensive types. With so many weaknesses and poor speed, it's difficult to construct a moveset which allows Chesnaught to counter its weaknesses, so should it encounter one Pokémon with decent special attack and, say, Air Slash, Chesnaught will not fare well. This is not to say that Chesnaught is poorly-suited for its role; rather, it means Chesnaught's use requires you to be attentive to when it ought to be on the field and when it ought to withdraw. Keep its weaknesses in mind and keep it away from them whenever possible, and you can get a great deal of use out of a defensive Chesnaught.
That disclaimer aside, Chesnaught has a move with which it is highly associated - Spiky Shield. On occasion, even when it isn't necessarily the most strategic choice, it's more fun to build a Pokémon around using their signature move. Since we've already established a defensive direction, we may as well raise Chesnaught around Spiky Shield! I get ahead of myself, though. Before we turn to movesets, let's cover Chesnaught's abilities.
|
Name: | Chesnaught | Base HP: | 88 | |
| Category: | Spiny Armor | Base Attack: | 107 | ||
| Type: | Grass | Fighting | Base Defense: | 122 | |
| Abilities: | Overgrow | Base Special Attack: | 74 | ||
| Bulletproof | Base Special Defense: | 75 | |||
| Base Speed: | 64 | ||||
Chesnaught has access to only two abilities. Most Chesnaught have the traditional Grass Starter Pokémon ability Overgrow, which boosts the power of Grass-type moves when Chesnaught's health is low. If you absolutely cannot get access to its hidden ability, this will serve well enough so long as you incorporate a move such as Seed Bomb or Wood Hammer. However, far better suited to the defensive Chesnaught is Bulletproof, which grants immunity to a selection of moves which make use of balls (e.g., Mist Ball, Pyro Ball, Shadow Ball) or bombs (e.g., Seed Bomb, Sludge Bomb). Considering its bevy of weaknesses, every bit of immunity Chesnaught can get helps it! Do go with Bulletproof if you are able.
Now we can return to Spiky Shield. For better or worse, we'll use it as the core of our moveset. Ideally, Chesnaught can catch a physically-oriented opponent who only has contact-making moves and use this to dish out damage when they take their turn. Even if that doesn't pan out, however, well, Chesnaught still gets the benefit of defending itself for a turn. If nothing else, this can run down the PP on a low PP-move, frustrate an opponent trying to ensure a low-accuracy attack connects, or give Chesnaught a chance to passively heal with an item like Leftovers. Just do remember not to use the move consecutively, as each consecutive use greatly drops the odds of the move succeeding.
On the topic of healing (albeit actively, rather than passively), any defensive Pokémon benefits from the opportunity to top off its HP. Chesnaught is no exception, and, fortunately, it has multiple methods of healing available to it! Its best option, and the one we will incorporate first, is Synthesis. In neutral conditions, this move restores half of Chesnaught's HP, which is a massive boon. Should you happen to use Chesnaught on a sun-based team, you can get even more healing from it. On-demand access to restoration of half of its HP will extend Chesnaught's longevity considerably, although I encourage you to be liberal in using it. Don't let Chesnaught's HP get so low a swifter opponent knocks it out before it heals!
Do note, though, that Synthesis is an Egg Move, so you will need to breed a Chespin from a female Chesnaught/Quilladin/Chespin and a compatible male Pokémon which knows Synthesis. You can also free up one of its moveslots and give it a Mirror Herb before bringing it to a picnic with a compatible Pokémon. As for your choices, you can bring the Seedot line, Leafeon, or the Skiddo line.
| Drain Punch | 
|
The user attacks with an energy-draining punch. The user's HP is restored by up to half the damage taken by the target. |
| Synthesis | The user restores its own HP. The amount of HP regained varies with the weather. | |
| Spiky Shield | In addition to protecting the user from attacks, this move also damages any attacker that makes direct contact. | |
| Leech Seed | A seed is planted on the target. It steals some HP from the target every turn. |
So we have active healing, but Chesnaught's low speed makes that healing somewhat fraught with risk. We can mitigate some of that risk through passive healing methods, say by equipping Chesnaught with Leftovers or putting it on Grassy Terrain. We also, however, can give it a method of passive healing that doesn't benefit the opponent as well and that doesn't run the risk of being knocked away by Knock Off. By giving Chesnaught Leech Seed, we give it its own method of setting up for passive recovery. This complements Spiky Shield well, too. Chesnaught can hunker down behind its shield and chip away at the opponent's health while restoring its own. If it does come across a Pokémon it's poorly matched against, it can switch out and let its seeding restore the HP of its incoming teammate. It serves Chesnaught well no matter the situation it comes across. I do suggest Leftovers for Chesnaught, but if you can't use them for some reason (say, the ruleset restricts your team from using multiples of the same item) and you use Leech Seed, consider giving Chesnaught a Big Root to make Leech Seed that much more effective.
With three moves decided upon, we run into a slight problem. Typically, we aim to have a STAB move for both of a dual-typed Pokémon's types, but we only have one slot remaining. If you desire a Grass-type option, I suggest Seed Bomb. You could consider Wood Hammer as well, but its recoil damage runs counter to our defensive focus for Chesnaught. I, however, suggest that we look towards a Fighting-type move which will make Chesnaught even more resilient. We have a passive method of healing which deals damage, but why don't we include a more proactive move which can heal Chesnaught while wearing down its opponent? With Drain Punch, Chesnaught can use its considerable attack to smash through a large chunk of its opponent's health while restoring its own. It adds another method by which Chesnaught can keep itself healthy and in the fight that allows it to break through similarly-defensive opponents and gives it an option to turn to between uses of Spiky Shield. Between Synthesis, Leech Seed, and Drain Punch, Chesnaught has three different approaches to keeping its HP high and can choose whichever method is most useful in a given moment!
With so many methods of healing and sturdy defenses, you might say Chesnaught is... one tough nut to crack! No? No resp-? Ah, well, just do keep in mind that a specially-oriented Flying type or Psychic type will easily breach Chesnaught's defenses all the same. Keep it away from them, and, unless you alter the moveset we discussed, be wary of Pokémon like Ferrothorn, which resists Leech Seed and will damage Chesnaught if it uses Drain Punch. That's a Pokémon that handily matches Chesnaught defensively and leaves it with scarce few options of breaking through its opponent.
With that, we come to the end of our session - but not the end of your work! You may raise a Chesnaught as I've outlined. I do believe you'll find this approach fun and worthwhile. That said, there are other approaches. For example, with all this defensive focus, it may be better to invest 252 EVs in HP and the leftovers in attack. Higher HP means more recovery from the percentage-based Synthesis and Leech Seed, after all, even if Drain Punch will do less damage. In such a scenario, you could also consider swapping Drain Punch for Body Press so your STAB move of choice runs off Chesnaught's higher defense stat rather than its attack. If you feel confident in the healing provided by Synthesis and Leech Seed, consider it! Take what we have discussed as a base, and try your hands at tweaking this stat distribution and moveset! I expect a discussion of your results at our next meeting.
Rhythm Review
Hello and welcome back to Rhythm Review! This is Zange, and I’ve had a very busy and chaotic couple of months, but I’m glad to be back! Last time, we covered Stage 2 of Rhythm Tengoku for the Game Boy Advance, and we’re moving right along to Stage 3 today!
As a reminder: In most Rhythm Heaven games, a stage consists of four rhythm minigames, followed by one remix, in which all the other minigames in the stage are put together in a new way to new music. However, Rhythm Tengoku is weird and has five minigames in each stage instead of four, and there is still a remix. Let’s jump in!
Mahou Tsukai
First up in Stage 3 is Mahou Tsukai! Another one with no official English title… You play as a wizard floating in a circle around a little girl. Flowers will pop up in time to the music, and you’ll need to press the A button when you are above the flowers to make them bloom. Make lots and lots of flowers bloom so this girl won’t be lonely!
Gimmicks
This entire rhythm minigame is set to music that is in waltz time, or 3/4 time. For the musically uninitiated, this means that every measure has three beats, and one beat is equivalent to a quarter note. As far as I’m aware, this is the ONLY rhythm minigame in the entire series where this is the case! (sidenote: Rhythm Heaven Groove has the potential to change this, but it is unreleased as of issue 221’s publication, so…)
How to Get That Superb
As a reminder: On top of excellent performance , there are certain criteria on each rhythm minigame that must be met in order to earn a Superb result. Usually, this can be gleaned from some of the dialogue the game gives you after completing the minigame. Failing to meet all criteria can result in an OK result, or even a Try Again if played poorly enough.
For Mahou Tsukai, the criteria is fairly simple. You just need to be able to get into the rhythm of the waltz time, and you need to be able to keep count of the pauses between flowers. As long as the different time signature doesn’t throw you off too bad, this should be a slam dunk, since your internal sense of rhythm is surely developing by the time you reach this stage.
Difficulty Rating
This rhythm minigame is incredibly easy to pick up and play, even with the waltz time signature, so I’ll give it a 1.3/5.
Showtime
Next up, we have Showtime! You play as a monkey who hits a ball (using the A button) for penguins to catch as they jump. The catch? All three penguins jump in different rhythms! And this may not have been the intention, but this rhythm minigame is the start of monkeys appearing all over this series. It’s a little silly, but it somehow works…?
Gimmicks
As mentioned, the different penguins jump with different rhythms. The gray penguin will jump after three beats of appearing, the large black penguin will jump after five beats of appearing, and the white penguin will also jump after three beats of appearing, but it will be on the upbeats as opposed to the downbeats like the other two.
How to Get That Superb
This is another one of those weird rhythm minigames where it only gives you one line of text upon achieving a Superb rating. The safest thing I can say here is as long as your timing is consistent with all three penguins, you’ll most likely get a Superb. It might take a few tries, because each one is so different, but it’s extremely doable.
Difficulty Rating
This is another fairly easy one, but since the gimmick here is one that switches it up on you, I’ll give it a 1.5/5.
Bunny Hop
Moving on to Bunny Hop, you play as a bunny trying to get to the moon! But first, you have to hop across a sea of turtles and whales by pressing the A button to the rhythm! Silly? Yes. But come on, the bunny is super cute!! He just wants to go home guys…..
Gimmicks
Some of the whales you hop on will give you rests where you won’t need to hop. The small whale is two beats of rest, the small whale’s tail is four beats of rest, and the large whale’s tail is eight beats of rest. Additionally, this rhythm minigame doesn’t give you a practice, but it’s fairly easy to catch on after you start.
How to Get That Superb
The criteria for a Superb here is pretty straightforward. First, your rhythm needs to be consistent throughout. Second, you need to be able to get back into the rhythm after the rests. This should be another easy one to get, even if it takes an extra try or two because getting thrown right into the rhythm minigame threw you off too much. That’s perfectly fine and normal!
Difficulty Rating
There is quite a bit of hand-holding in this particular rhythm minigame when it comes to the rests (even going as far as the game counting with you for the first couple), but it’s justified since there’s not a practice. I feel comfortable giving this one a 1.5/5.
Tram to Poline
Now we go to the whimsical Tram to Poline! You control two performers, Tram and Poline, during their transformation show. When Tram bounces up into the air, you’ll press the D-pad to make him transform. When Poline bounces up into the air, you’ll press the A button to make her transform. Enjoy this fun little circus performance!
Gimmicks
Not much going on here gimmick wise, but it is worth noting that there are times in this rhythm minigame where Tram and Poline will bounce on consecutive beats. So on one beat, Tram might go up into the air, and on the next Poline will bounce up. Sometimes they’ll both even go up at the same time, so pay attention!
How to Get That Superb
Once again, the criteria for a Superb is fairly straightforward. As long as your timing is consistent for the individual jumps of both performers, as well as the simultaneous jumps, you’ll get it. Depending on how you’re playing Rhythm Tengoku, this may take a few extra tries for a reason I’m about to get into.
Difficulty Rating
This is about to be a lot of text for a difficulty rating but I promise I’m going somewhere with this.
So, as you can see from the image at the beginning of this section, Tram is on the left side of the screen and Poline is on the right. As I previously mentioned, Tram is controlled by the D-pad and Poline is controlled by the A button. If you’re playing this game on original hardware, this isn’t a problem, because the buttons correspond to what side of the screen each performer is on. However, if you’re playing this game using an emulator, this could be a different story. The default control setup for an emulator I have on my computer is that the Z key controls the A button, while the arrow keys control the D-pad. On most keyboards, the arrow keys are on the right side of the letter keys, while the Z key is one of the leftmost letter keys. You can see what the problem is if you play this game on an emulator: the keys to control each performer are opposite compared to what side of the screen they are on.
Because of this, this particular rhythm minigame has the potential to be more difficult if you’re emulating Rhythm Tengoku and your brain has a hard time translating the characters to the buttons. (I’m saying this because I was this person at first oof) With that in mind, I will give this a 1.7/5.
Space Dance
The last regular rhythm minigame of Stage 3 is perhaps one of the most iconic, it’s Space Dance! You control one of the Space Dancers, and will follow cues that are shouted out during the song to dance. Depending on the cue, you will either use the A button, down on the D-pad, or right on the D-pad to dance to the cosmos. P-p-p-punch!
Gimmicks
Once again, there’s not too much happening here in terms of gimmicks. Unless you count having to hit certain directions on the D-pad as a gimmick, but we already had a rhythm minigame in Tengoku do that… (thank you, Sick Beats) Once you know all the cues, nothing can throw you off!
How to Get That Superb
The criteria for getting a Superb here starts to get a little more specific. First, though, you just need to be able to have good timing on your inputs, so you’re in sync with the other dancers. Second, you need to be able to nail the portion of the rhythm minigame where Space Gramps starts to give cues. That second thing is a biiiit trickier if only because that’s a part of the song where the cues come in one right after another, but once you know what to expect then getting a Superb rating will be a slam dunk.
Difficulty Rating
I’ll give this one a 1.6/5, mainly because of how the cues and the timing for them are incorporated here. Thankfully, there is a practice here that allows you to get the hang of them, but even when you’re in the real thing, the sense of anticipation for the next cue is no joke…
Remix 3
We’re finally at the remix for this stage! This is the first remix in the entire series to retheme the different rhythm minigames to follow a common theme, and for this remix the theme is love! Themed remixes became a mainstay in the Rhythm Heaven series after Tengoku. For some reason, though, this remix is only one of two themed remixes in this game… Oh well, it’s still a good challenge!
Gimmicks
It’s worth noting that Mahou Tsukai does NOT operate on waltz time in this remix, since the song played here is not in a 3/4 time signature. Any gimmicks from other rhythm minigames in this stage are still fair game, per usual!
How to Get That Superb
Since this is a remix, I’m going to say the same thing I always say when it comes to getting Superb ratings in remixes: Be mindful of the transitions, and as long as you can get a Superb on every other rhythm minigame in this stage, you should be able to get one here.
Difficulty Rating
Once again, remixes are very difficult to rate compared to the regular rhythm minigames because they’re so different from each other. If we’re comparing directly to the last two remixes, however, I would probably give this one a 2.4/5. This is pretty on par with Remix 2 but I did forget how quick some of those transitions are here…
Final Remarks
While it may seem like we’re plateauing in the difficulty department for the time being, we will definitely have some trickier rhythm minigames coming up. Tune back in next month (for real this time) for Stage 4!
An Overly Detailed and Funny Walkthrough of Mega Man 3
Played by Sparks through the Mega Man Legacy Collection for the Nintendo Switch.
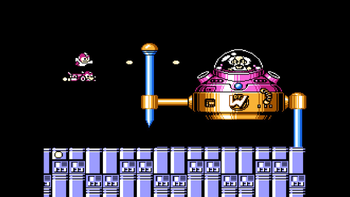
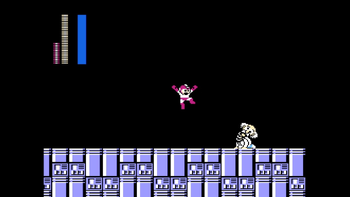
Welcome back to the Mega Man 3 walkthrough! After getting through those Doc Robot stages (and Break Man), it's finally time to go after Dr. Wily himself! His fortress may seem threatening, but the stages themselves are actually some of the shortest and easiest in the game. How is that possible? Trust me when I say you'll see the "rushed" development in these last levels.
Here we go!
Dr. Wily stage 1
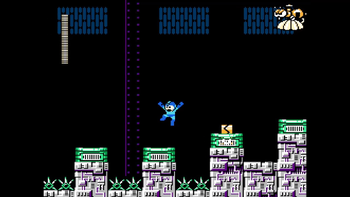
We start at an outdoor area. A 1-Up is located behind a tall wall behind Mega Man, but because I have ten lives, I don't need it. You might though! As we make progress, we encounter one of those top guys from Top Man's stage, found at the top of "stairs". He's not too difficult to deal with as long as you dodge/shoot his tops before they hit you. Past this enemy is another one on a similar location. At the end of this first segment is a ladder leading downwards, but there's also an E Tank just waiting for you to grab it! Use the ladder as a platform and jump to get it. Don't fail though, because you won't be able to try again.
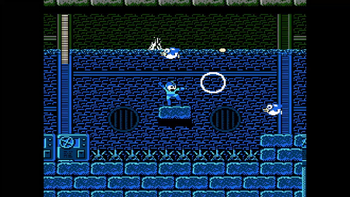
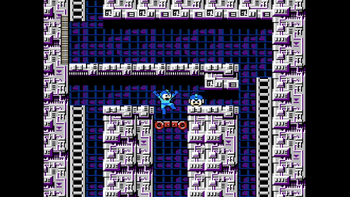
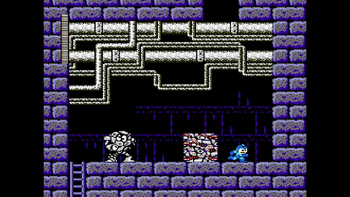
After going down the ladder, we're now underwater in what looks to be a sewer. This sewer has several sets of spikes on the ground, so we must jump well to get across safely. Unfortunately, random sewer penguins inhabit this place and they attempt to swim into Mega Man to attack. One shot will get rid of them, but you can also dodge them if they're too high or low. There's also a large Weapon Capsule along the way, so if you got that 1-Up from earlier, recharge your Rush Coil energy! At the end of the sewer is a ladder leading upwards, out of the water too.
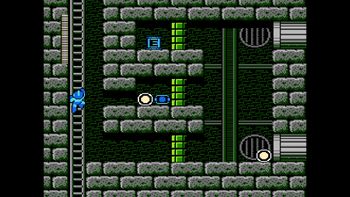
The next room has a 1-Up behind two strong walls. To break them, use the Hard Knuckle. Two lives already? It's like the game is sorry for what it had to put you through earlier and wants to make amends. Once again, I don't need this 1-Up! Going up another ladder, there's another room full of power-ups you can grab (also protected by destructible walls), one of them being an E Tank. I want to conserve my Hard Knuckle energy for now. I'll need it later!
Moving on! After this second bonus room is one that has us sliding through small gaps to reach solid ground. One of those hammer throwers attacks from afar, so make sure you don't get knocked into the spikes below by him. On the solid ground, there are a few more of those guys, with one of them atop a high ledge guarding the ladder to the next room. He's impossible to attack normally, so I'll have to use the Shadow Blade to defeat him. Don't attack him when his eye is closed! You'll waste ammo. Four well-aimed hits will do the trick. We can then use Rush Coil to get up to that ledge ourselves!
This next area has those disappearing platforms leading towards another ladder. Conveniently, one block stops right next to a small space containing two large health power-ups. You'll have to slide to get in there though, but that should be easy. We then arrive at the boss gate, but on a high ledge close to the gate are two large weapon energy capsules. I used them to recharge my Rush Coil and Shadow Blade energy. Back to full energy now!
Kamegoro Maker
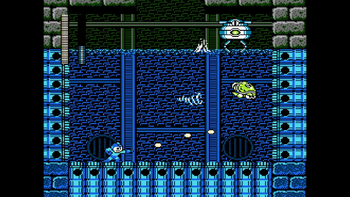
After entering the boss gate, there's a pit leading to an underwater room and - - what the heck is this? The first Wily stage boss is this machine located above the water. No attacks can hurt it, and it just moves across the rail it's on from left to right. After moving a little, it stops and spawns a turtle. The turtle can be destroyed (takes three shots to do so), and when it's gone the boss takes damage. It will then move some more before spawning another turtle. So, we have to attack turtles to defeat the boss? OK...
We must destroy five turtles to win. Each turtle is faster than the last, and the last one zooms around the battlefield incredibly quickly. Turtles only move diagonally and if one is present for long enough, its shell will detach and float in the water. This shell can be destroyed as well, creating an explosion once it's gotten rid of. Additionally, the ground and walls are composed of pipes that shoot out small tornadoes across the screen, acting as more obstacles for the Blue Bomber. When a pipe is about to release one, there's a white light visible on that pipe for a second.
So in summary, this boss is extremely easy and should not pose a threat at all. Please tell me nobody lost a life to this thing. PLEASE! What a short and easy stage. Now for stage 2!
Dr. Wily stage 2
Now we're inside the fortress! The first room of this level puts us in a pit where we need to use those unstable platforms from Doc Shadow Man's stage to escape it. Time your jumps well to get out! We also have two ladders to choose from: one on the left, and one on the right. I recommend you choose the left one. No matter which one you choose, you'll see what the next room looks like. If you went to the right ladder, you'll have access to two large weapon energy capsules that you'll probably not need unless you used up a lot of Rush Coil in the previous stage. The third room is where choosing the left ladder makes it all worth it - there's a 1-Up to grab! It's past an unstable platform, so have great timing if you wish to obtain it! Another ladder at the top leads to the next room.
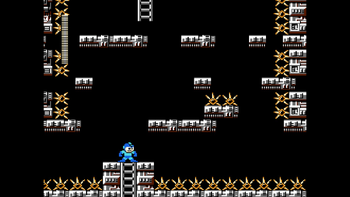
This is where the real action starts! Upon reaching the top of the ladder, we must slide through a low gap filled with floor traps from Hard Man's stage. Afterwards, we must make jumps across spikes while also avoiding more floor traps! Did I mention there's also a bee carrying a hive? If you don't want to deal with the bees it summons, then jump backwards when the enemy appears so it vanishes. It will be removed, and you won't have to worry about it! That's what I did. It's difficult to pull off without getting hurt, so maybe you should probably face the bees head on just to be safe from spikes? This trick also works with a second bee that spawns around solid ground, and it's also much easier to pull off!
Now, we have to use Rush Jet to fly across the spikes and into the boss room! The flight is short, and there are plenty of power-ups along the way (including two E Tanks!), but you can actually get through this flight in one go with Rush Jet, unlike the one in Doc Needle Man stage. That's nice!
Yellow Devil Mark 2
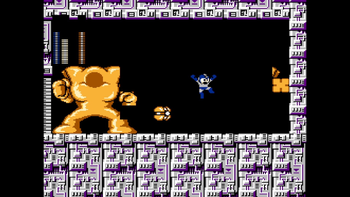
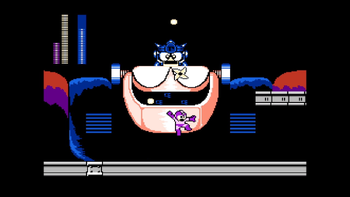
After entering the boss gate, we find ourselves in a familiar room, one that provided nightmares for players of the original Mega Man... the room of the Yellow Devil. I'm sorry, was one Yellow Devil hard enough? I hate to tell you this, but he's back... and he's also a little bit different!
Like in the original Mega Man, he flies in piece by piece from the left side of the screen. While this is happening, the boss cannot be attacked in any way. After all of his pieces are connected, his eye will shoot out three bullets at Mega Man. He will then repeat the teleportation process towards the left side of the screen. This pattern is not identical to the original Yellow Devil's. That pattern is the sequence of numbers below this paragraph, with numbers from one to five. One indicates a piece that's on ground level, while five is the highest height for a piece:
1, 5, 2, 1, 4, 3, 2, 5, 4, 2, 3, 4, 3, 1, 5, 3, 4, 5, 1, 3, 2, 2, 4, 5
Basically, just jump for the ones and twos! I recommend jumping instead of sliding. If it makes you feel any better, the teleportation is also slower than how it was in the first Mega Man.
Additionally, this Yellow Devil's eye is always at the exact same spot, and you can damage him more than once while it's there. Whenever the boss teleports from left to right after appearing in the room, he will split up into five pieces that bounce alongside the ground towards the right side! This is much more difficult to avoid than his usual teleportation, so slides will be necessary to avoid damage. Or, you can use Rush Jet to dodge, but I recommend keeping your Rush Jet energy. After a teleportation by this method, the eye appears for much longer than usual before attacking, allowing for more potential damage to the boss. When the boss is vulnerable, use Hard Knuckle to inflict as much damage as possible before he teleports again. The attacks are slow however, so if you can't hit him reliably, then just use the Mega Buster. This boss is not as nightmarish as he was in the first game. Thank goodness!
Whew! That was quite an explanation. Ready for stage 3?
Dr. Wily stage 3
Like the previous stage, we start in a weird location. We're directly under one of those angry enemies with lots of projectiles (found in Magnet Man and Shadow Man's stages for example). We can't reach the enemy normally, so use Shadow Blade to take it out. One shot is all that's needed! Now, we have to use Rush Coil to get up to where that enemy was. Then, we have to choose a ladder: either the left or right one. I'll choose right this time.
If you chose left, you have to traverse stairs while another one of those angry enemies tries to hinder you. If you choose the right ladder, you have the opportunities to get more weapon energy! The thing is, the large capsules are behind destructible walls. I used this chance to recharge my Hard Knuckle because man, that boss fight nearly drained its energy! Just be mindful of that angry enemy, because its horizontal shots pierce through walls. Don't get knocked down the ladder!
Going up once more, there's an E Tank you can get just by sliding! Easiest E Tank ever! We also have to use Rush Coil again to get up over the ledge. This next section is a hallway filled with those running grenade enemies. They're accompanied by those machines that make everything but Mega Man, power-ups and the enemies pitch black too! While traveling through this area, there's a 1-Up up in the air. To get it, you must jump up and then slide through a small gap. Near the end of the hallway is a small space with many small health power-ups and a large weapon capsule. You must slide from the left to fit through a gap that'll allow you to grab these goodies! I used the weapon capsule to fully recharge my Rush Coil. To move forward, we must fall through a pit at the end of the hallway, which leads to this unorthodox room with a hammer thrower guarding a dead end atop a high ledge? Just avoid him and fall down another hole.
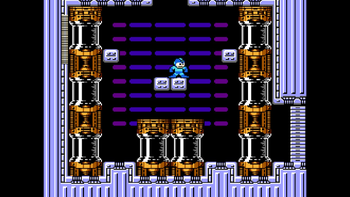
After descending, there is another horizontal section with two of those large armored jumping enemies separated by a low passage to slide through. Shoot at these enemies when they jump. After climbing another ladder, we enter a room with three rows of moving platforms and a ladder at the top. There are also spikes on the walls and most of the ground too. Carefully jump from platform to platform and reach the ladder. There is then another room of moving platforms, but there are spikes midway through the path that must also be avoided. The boss gate is found directly afterwards, but there are also two ? capsules past a destructible wall atop a high ledge. Do you feel lucky? I don't need them.
Holograph Mega Mans
The boss of this stage is a weird one. There are three machines across three levels of elevation that summon three copies of Mega Man! All three of them walk back and forth and shoot extremely-fast-and-nearly-impossible-to-dodge bullets towards Mega Man's location, no matter what direction they're facing. It's a good thing the bullets do low damage, because this would be another stupid fight if the damage was higher. After the copies walk for a few seconds, they all stop right under the machines and disappear before reappearing again.
Of these copies, one of them is the real one - the others are fakes. Shooting at a fake will do nothing. Only the real one takes damage. It's impossible to tell between the three, so you'll have to shoot and hope you attack the correct one. Whenever the three "disappear", they may swap places, so you'll have to stay active and persistent to end this battle. I recommend climbing to the highest elevation and shooting the top clone first before going for the others, because you can easily drop down from there and climbing up takes time. The boss has no invincibility frames, so just spam your Mega Buster on the correct copy until he's done. If you get lucky, the fight will be over in ten seconds flat! If it should go on for longer, just keep calm and keep at it until it's over.
Woohoo! We're getting there!
Dr. Wily stage 4 (Robot Master rematches)
If there's ever a time to recharge your weapon energy, now's the time! The first room has four small weapon energy capsules as well as a large one. I only needed to recharge my Hard Knuckle. After falling down a hole, there's this room with a garbage robot that falls from the ceiling. Its only method of attacking is to hurl large garbage blocks at Mega Man. Upon making contact with a surface, the blocks will split apart. It's a quick attack that is hard to avoid, but the robot goes down in a few shots. The best way to dodge the attack is to run away and jump at the right time.
After falling again, the next room has three floating platforms, each with different power-ups. The top one has three small health power-ups, the middle has a mystery capsule, and the bottom has a large weapon capsule. Another descent is needed, and another garbage robot inhabits the next area. This one is on higher ground, so it's more difficult to defeat. A ladder must be descended to advance, and this next room has two garbage robots instead of one! For the first one, wait until it tries to attack Mega Man before dropping down the ladder. Quickly blast it before it attacks again! The second one may surprise you because it drops down when you get close enough. The room afterwards has the boss gate, but instead of a boss, it's a teleporter.
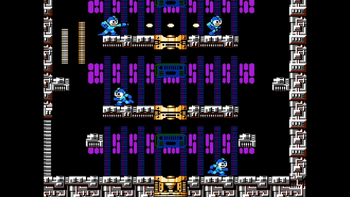
After entering the teleporter, we stumble upon a room with eight other teleporters, each leading to one of the eight Robot Masters in this game. All eight must be defeated before we can move on. Defeated Robot Masters drop a large health power-up, and you must go back to the teleporter on the left side of the battlefield to return to the main room. I won't go over their fights again, but I will provide the locations on where they are!
- Top left: Needle Man (use Gemini Laser)
- Middle left: Magnet Man (use Spark Shock)
- Bottom left: Gemini Man (use Search Snake)
- Center bottom left: Hard Man (use Magnet Missile)
- Center bottom right: Top Man (use Hard Knuckle)
- Bottom right: Shadow Man (use Top Spin. If you run out, use Shadow Blade. He's weak against his own weapon!)
- Middle right: Spark Man (use Spark Shock. He's also weak against his own weapon and it's easier to hit him with it than with Shadow Blade!)
- Top right: Snake Man (use Needle Cannon)
Spark Man and Snake Man have the same battlefields as they did in their first fights. After defeating all eight Robot Masters, head through the gate on the right. There is a room with another teleporter in it, as well as many small weapon capsules and a 1-Up leading to it. Prioritize on recharging Spark Shock, Rush Jet, Shadow Blade and Search Snake! You'll need those four recharged for what's to come. Entering the teleporter ends the stage.
Oh boy! We've arrived at the skull!
Dr. Wily stage 5 (Dr. Wily boss fight)
This is it - The final battle against Dr. Wily! Before the showdown is a room with two large weapon capsules and two mystery capsules. If you haven't recharged the four abilities already, please do so now. After dropping down the hole, we reach the battlefield we're we'll battle Wily!
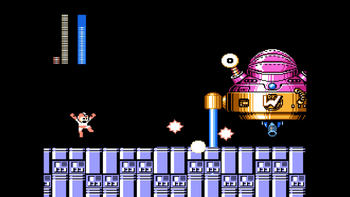
After his health bar fills up, a large machine moves in from the right side. It uses two stakes to get around, and touching any part of the machine will damage Mega Man. On the bottom of it is a turret that shoots slow, spiraling bullets towards Mega Man's general location. Use Spark Shock to dispose of it easily (it has no invincibility frames). After destroying the turret, the second phase of the battle begins.
The machine's shutter opens up to reveal Dr. Wily himself! There are two holes on the upper half of the machine. They now shoot out quick bullets that fall in a curve towards Mega Man. The machine also lowers itself before raising itself back to its usual position. It can only do the latter after it uses both stakes to move. Normally, you'd have to attack Wily when he lowers himself, but if we use Rush Jet, we can cheese the fight. Move upwards and be on the same elevation as Wily and just keep shooting at him until he's defeated! WAHOO!! We've done it!
Dr. Wily is defeated and he gets into his usual "begging for mercy" position. When Mega Man approaches, Dr. Wily has a spring neck like a bobblehead toy. This isn't the real Dr. Wily! Looks like we have more work to do.
Ah, the double skull trick. Just like in Mega Man 2! Bring it on!
Dr. Wily stage 6 (Gamma boss fight)
Like the previous stage, the first room is filled with power-ups, including a large health power-up. I don't know why anyone would need that... just another sign of the rushed development. There's an E Tank on the highest platform, but you'll need Rush Jet to get it. As of right now I have fourteen lives and nine E Tanks... yeah. I also discovered that the E Tank counter doesn't go past "09". Entering the boss gate on the right of the room will lead to the true final battle.
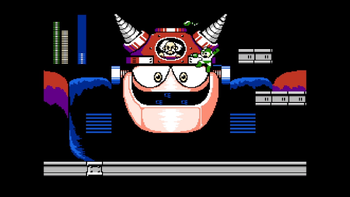
The final boss is Gamma, an unfinished creation by both Dr. Light and Dr. Wily meant to protect the world... until Wily stole it for his schemes. It's so huge that only the head and shoulders are seen. When the battle starts, there's an odd small robot on it that attacks by constantly lobbing curved projectiles. Our Mega Buster can't reach it, so use Shadow Blade to attack it. If you stand directly underneath it, it'll be easier to dodge the bullets. After dealing half of the boss's HP, the robot disappears, and the top half of Gamma's head falls down to connect with its lower half! Oh, and Wily is controlling it.
In this second phase of the battle, Gamma occasionally sends out quick bullets towards Mega Man, and every so often uses a giant spikes fist to punch from the right side of the arena. We must jump on this fist to reach platforms in the air. Be careful though - those spikes aren't just for show. Once you make it to the top, jump and shoot out as many Search Snakes as you can into the hole on top of Gamma. You'll deal damage to the boss, but it won't be enough to win. You'll have to repeat this process one or two more times. Make sure those bullets don't ruin your jumps. Make sure you can attack Wily without the danger of being attacked yourself. If you don't want to rely on the fist, then use Rush Jet to make it to the top.
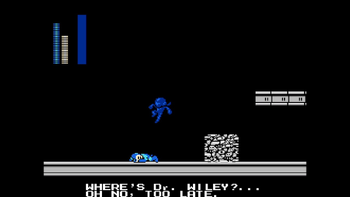
After the boss loses all of its HP, Gamma is destroyed and the real Dr. Wily surrenders. So now it's time for the "WAHOO!! We've done it!". The victory is cut short, as the fortress begins to fall apart. Large blocks fall on both Mega Man and Wily, but a blue character (Proto Man?) rescues Mega Man and brings him to safety. While this is happening, there is text at the bottom of the screen.
"Where's Dr. Wiley?... Oh no, too late."
Epilogue
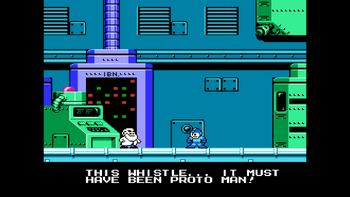
Mega Man is back in Dr. Light's lab. Light talks to Mega Man with more text:
"'Megaman, You've regained consciousness. I found you lying here when I arrived."
"I wonder who brought you here..."
As he is saying this, a whistle is heard.
"This whistle... it must have been Proto Man!"
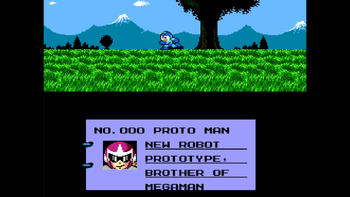
Mega Man then leaves the lab and walks in the grass. While he's doing so, bios of the Robot Masters from the original Mega Man are shown on the bottom of the screen, including Roll, Mega Man and Proto Man.
After the bios are done, Mega Man stops and looks up into the sky, where he sees Proto Man's face. Dr. Wily's UFO is also seen flying in the background, which indicates that he survived!
Sigh... Mega Man 3. If only there was more time to finish your development! It's sad to think about the amazing potential this game could've had if it wasn't rushed. Maybe if they cut out the unnecessary Doc Robot stages and focused on the Robot Master and Wily stages, everything would've been fine in the end.
Thankfully, Mega Man 4 is a massive improvement and also just so happens to be the best game of the NES ones. Oh boy! Join me back in September when I start to play through that! You won't wanna miss it!
But first...
An Octet Gazette
Written by: Hooded Pitohui (talk)
Welcome back to An Octet Gazette, all you readers of The 'Shroom, a section which has gained new relevance with Octopath Traveler Zero on the horizon! Oho, I'm excited to see how they handle adapting the content of the mobile game to a console/PC experience. Most of all, I'm glad this means there's a way to experience it without gacha mechanics in the way!
Anyhoo, we're still going through the traveler-specific traits of the sixteen main characters in the currently-released Octopath duology. There's a primer here if you need it, and have a reminder that there will be some story beats hinted at through EX Skills. If you'd prefer to remain completely unspoiled, hop on down to the SOTM poll and cast some votes, hm?
This month, we arrive at perhaps the most straightforward class of all as we look at the stalwart and sturdy warriors.
| Olberic Eisenberg | Hikari Ku | |
|---|---|---|
| Artwork | ||
| Path Action(s) | Challenge | Challenge (Day), Bribe (Night) |
| Talent | Bolster Defense | Learned Skills |
| EX Skills | N/A | Ultimate Stance, Shinjumonjigiri |
| Latent Power | N/A | Shadow's Hold (AKA Light's Radiance) |
| Notes | N/A | N/A |
Both Olberic and Hikari share the Challenge Path Action, a useful means of getting NPCs out of the way on the overworld. To challenge an NPC, they must be at or above a certain level determined on an NPC-by-NPC basis, though there are ways to lower the level requirements within a certain settlement through use of other Path Actions. Upon making a successful challenge, Olberic or Hikari enter a one-on-one duel with the NPC, with access to all items and equipment but no other party members. If victorious, the NPC falls unconscious on the overworld and can be bypassed. If defeated, Olberic or Hikari walk away with 1 HP and no reputation penalties. Different NPCs have different skills and strength levels, but the system is simple beyond that. There's not much depth to it, especially in the first game.
That's all Olberic gets, but Hikari, princely type that he is, gets to Bribe people at night! Bribery is merely an alternative method to acquiring information. Not equipped for an interrogation, not leveled up enough to Inquire, and not willing to risk the reputational hit of Scrutinize? Then break out your wallet and pay for the info! It's nothing groundbreaking but it's nice to have flexibility depending on what resources you're prioritizing in your playthrough.
Moving onto discussing talents, Olberic has another simple one. Bolster Defense allows Olberic, unlike all others, to Boost and spend BP when using the Defend command. On its own, this is... decent. It has its use for sparing squishier party members when you're setting up for a big attack, but you're probably going to want to save BP for going on the offensive, especially in light of Olberic's strength.
Only a little, though, which is probably why it gets replaced in the sequel. Hikari's talent, Learned Skills, adds a whole new system which ends up giving the Challenge Path Action some more depth and utility. With Learned Skills, after successfully defeating an opponent in a duel initiated through the Challenge Action, Hikari can choose to learn that opponent's special skill and use it for himself in future battles. Like regular skills, these have SP costs and a variety of effects, and you can see the full list of them on the FANDOM Octopath Traveler Wiki. Hikari can only know five of these skills at a time, but they're easily replaceable. It's Pokémon-style; Hikari isn't locked into one after acquiring it. This whole system makes dueling NPCs more worthwhile and provides incentive to go up against even those NPCs who aren't blocking any paths. It's a smart upgrade emblematic of the sequel's refinements.
There's nothing left for Olberic, so we're going to focus on Hikari for the rest of the section, starting with his EX Skills.
Ultimate Stance is not a skill I have much to say about. In the case a bunch of foes are on the field together with a shared weapon weakness and Hikari has BP to spare, sure, use it to whittle down some shield points quick. Otherwise, it tends to get outclassed by the numerous synergized strategies that open up in the mid-game. Shinjumonjigiri is still usable in the latter portions of the game and is straightforward in its function, but it's also costly and you'll have plenty of options for sword-based attacks by the time you have it.
Now, Hikari's Latent Power (initially named Shadow's Hold and renamed to Light's Radiance for story purposes) brings up a submenu which gives Hikari access to three skills with no SP cost:
The skills themselves are self-explanatory, so I'll just tell you that they're all pretty useful. Make use of 'em! That wraps up everything about the two warriors, so now we'll round up some information on the hunters. So far, there hasn't been much to cover with these character-specific editions, but the hunters do have some very unique systems attached to them.
| H'aanit | Ochette | |
|---|---|---|
| Artwork | ||
| Path Action(s) | Provoke | Provoke (Day), Befriend (Night) |
| Talent | Capture | Capture, Prepare |
| EX Skills | N/A | Indomitable Beast, Provoke Beasts |
| Latent Power | N/A | Animal Instincts |
| Notes | Linde the snow leopard is a constant animal companion. | Chooses between Mahina the owl or Akalā the jackal as a constant animal companion. |
For the hunters, we're actually going to eschew our usual order and begin by looking at their talents, because much of what we'll talk about here ties back to the Capture talent.
Capture allows H'aanit and Ochette to, well, capture monsters. Most random encounters across both games can be captured, and each kind of monster comes with its own skill it will used when summoned into a battle. Once again, I'm not going to go into the big list, but the Octopath Wiki does have a list for the first game and this spreadsheet on Reddit has a list for the second game.
Capturing Monsters: Or, I Guess We're Doing Pokémon Now
Capturing works... kind of like Pokémon, actually. Perhaps I should have saved the comparison for down here. In battle, H'aanit or Ochette can use their action on a given turn to attempt to capture a monster, which will remove it from battle and add it to their monster roster. The chance of success can be increased by whittling down the target's HP and inflicting them with status ailments. Being at a higher level, spending BP for the action, and revealing all of the target's weaknesses further increases the chance of success. This does count as defeating the monster, so you still get the associated rewards.
Once added to the roster, a monster can be summoned into battle. A summoning uses up an action for that turn, with the monster more or less using its skill on H'annit or Ochette's behalf. Every monster will have a certain number of times it can be summoned, after which you'll have to capture it again in order to summon it again. You can keep multiple copies of a monster on the roster, but you will have to capture each copy individually. The exceptions to this are Linde for H'annit, who will always be available in the roster, and either Mahina or Akalā and a handful of monsters encountered through the story for Ochette (she chooses one member of the former pair at the start of her story, with Mahina focusing on magic attacks and Akalā on physical strikes). Not counting these required monsters, both H'aanit and Ochette can have up to six monsters in their roster at a time.
All of this ties into the Path Action that H'aanit and Ochette share - Provoke. Provoke is the rogue counterpart to the warrior's Challenge. Like Challenge, it sets H'aanit or Ochette in a duel against the provoked NPC. Unlike Challenge, it doesn't require reaching any level thresholds and a loss or fleeing will damage the party's reputation in a given settlement. More interestingly, H'annit and Ochette are forbidden from attacking. Attacks must be made either with offensive items or (primarily) summoned monsters.
This all makes for a neat system conceptually, and could really set the huntresses apart from the other travelers. Unfortunately, in the first game specifically, my experience nudged me away from engaging with this system much. Oh, sure, certain monsters could be good for certain set-ups, but for the most part, taking time to weaken and capture monsters felt wasteful, especially with their limited number of summons. I was reluctant to use the good monsters I acquired in case I needed them later, and the rest were... there. The monsters tend to fall off quickly as the game progresses, so oftentimes I would find myself with a roster full of monsters that I just didn't have use for.
Now, admittedly, some of this may have been on me and my playstyle. I don't believe it all was, however, because the devs did endeavor to make some changes to this system for Octopath Traveler II. Firstly, while H'aanit always had to capture monsters manually, Ochette has a 25% chance of capturing any monster against which she deals the killing blow. This, I found to be a huge change. Just being able to acquire monsters passively while using Ochette's more useful skills and attacks made it much easier to engage with the capture system; I was no longer compelled to take my focus away from the overall battle just to make one capture. Secondly, while H'annit can only summon a given monster so many times before you have to go find and capture another specimen, once Ochette has a monster, she can summon it in as many battles as she would like. This makes it far easier to turn to a monster to, say, break a shield, since you won't need to worry about having to hunt it down again.
As a third point, Akalā and Mahina stay more consistently useful throughout the game than Linde. Where Linde only had two attacks (one a polearm and one a sword) that were fairly weak and only increased in power a bit over the course of the game, Mahina and Akalā will always target a magical or physical (respectively) weakness of a random foe, making them useful for whittling down shield points throughout the game even when their strength begins to drop off. They also both get a considerable boost in power and use at the end of Ochette's story, and Ochette gains access to additional permanently-held monsters with considerable strength. Between these three changes, the whole system has been made much more inviting and easier to engage with.
Now, with a passive method of capturing monsters, what do you do with all the weaker monsters that are incidentally captured? Well, enter Ochette's second talent - Prepare. Ochette can release a monster - including a newly-acquired one - at any time, doing so by making a meal out of it and turning it into an item. These items are mostly forms of meat and jerky, and they're basically all food items of some kind. She knows what she's about, what can one say? They can provide some healing, but their primary use is for trading with certain NPCs (Beastlings, other members of Ochette's species, accept jerky in place of money) and for her nighttime Path Action, Befriend. Befriend is to Guide and Allure what Bribe is to Scrutinize and Inquire, not dependent on a level threshold or reputational risk but costing some other resources. If Ochette can provide the food an NPC desires, they will follow her around and she can summon them in battle for their attacks or special abilities just like the dancers can summon NPCs. All put together, this makes for a nifty system that ensures every captured monster is rewarded in some way while ensuring regular cycling of your monster roster. Even if you immediately release a monster, you get some use of it by acquiring a resource for trading, befriending, or healing.
The monster-capturing system is far from the only place where Octopath Traveler II significantly improves on its predecessor, but it is a good demonstration of how much refinement the second game brings. In the first game, it's a neat concept with strong potential but an execution that makes it easy to ignore. In the second game, tweaks and additions make it easier and more rewarding to engage with, and even if you'll still primarily use Ochette for other tasks, you find the time to use her monster-summoning and use Provoke when they were easy to forget about with H'annit.
The Rest of the Hunt
Now, all of that out of the way, we still have Ochette's EX Skills and Latent Power to talk about. Unfortunately, H'aanit is finished, so let's just move right into the rest.
Indomitable Beast is a self-buffing move, and a serviceable one at that. It comes with a reasonable SP cost and lasts long enough to be worth using, even lasting longer if BP is spent on it. Considering Ochette's usefulness as a physical attacker, it serves her well. Provoke Beasts may seem prohibitively costly, but considering the strength of the monsters to which you have access by the time it is acquired, some of the abilities they possess which lend themselves well to setting up certain strategies, and that you get three monsters at a minimum (the number goes up by one for each BP spent), that SP cost is a reasonable balancing factor.
...unfortunately, due to a glitch, Provoke Beasts is also obscenely busted. The glitch is well-documented elsewhere, so search it up on your own if you're interested. Suffice to say, with a few sharks and the right party composition, Provoke Beasts can make any challenge in the game a breeze.
Not so broken is Ochette's Latent Power, Animal Instincts. This one works similarly to Hikari's, actually, opening up a sub-menu of three skills Ochette can use without any SP cost. The main difference is that Ochette's three moves aren't assigned weapon types.
All three options are useful. I used Beastly Howl less often than the other two because I usually had other travelers softening foes up, but it's handy if you have a lot of shields you need to knock down at once.
That wraps up this rather long edition. Before I go, I'd like to give a quick thanks to the Fandom Octopath wiki for their repository of character art. Next time, we get another long edition that focuses on an in-depth traveler-specific mechanic as we tackle the apothecaries! Oh, and clerics will be there too!
| The 'Shroom: Issue 221 | |
|---|---|
| Staff sections | Staff Notes • The 'Shroom Spotlight • Poochy's Picks • Credits |
| Features | Fake News • Fun Stuff • Palette Swap • Pipe Plaza • Critic Corner • Strategy Wing |
