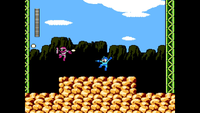
The 'Shroom:Issue 220/Strategy Wing
Director's Notes
Written by: Hooded Pitohui (talk)
Ah, dear, oh my... Pardon, readers of The 'Shroom, but it appears some villainous cretin has left the office in disarray! Ah, apologies, I don't mean that papers are strewn about or that the perpetrator left clutter. On the contrary, all of our supplies are bundled neatly and our files are sorted... but they've all been moved to different cabinets, drawers, closets, and whatnots. Ah... it will take days to reorganize this reorganization...
While I tend to the repercussions of villainy, why don't you all escape the drudgery of re-sorting and re-labeling by reading through the slate of sections our writers have put together for you this month? With our writers searching for their usual supplies after last month's incursion and handling the general business of the summer season, a few of our sections have taken the month off, but we still have plenty for you to enjoy! Barrel-bashing Bros., robot repeats, wandering warlords, and more await! See how Lord Kong Rong handles delicate negotiations with only the most modern of technological techniques, get your Thunder Stones out to raise a Magnezone, explore the unique considerations behind putting a lore-focused role in your Killing Games, and learn the best way through revisited stages in Mega Man 3!
Hey, and should you feel inspired to cover your favorite game, be it popular as Mega Man or Mario or a little more niche like Rhythm Heaven or Romance of the Three Kingdoms for the SNES, send in an application and join the team! Keep it short and sweet like The Tattle Log, offer up some tips and tricks like Brothership Boss Battle Guide, take a narrative approach and give your section a voice like So You Want to Romance The Three Kingdoms, or take just about any other approach you'd like to try! I'll be here to give you a hand if you'd like it!
That's enough from me, though. I need to find that missing bishop... You, though, need to go read, so go on!
Section of the Month
We've no need for Repels here in Strategy Wing, based upon your enthusiasm for Zubat! I'll get to work ordering a whole host from Mt. Moon posthaste! Thank you all for voting Pokémon Academy section of the month, and for showing your support to Sparks' battles with Mega Snaptor and Robot Masters once again! Do keep those votes coming this month - the poll's at the bottom of the page!
| STRATEGY WING SECTION OF THE MONTH | ||||
|---|---|---|---|---|
| Place | Section | Votes | % | Writer |
| 1st | Rocket's Pokémon Academy | 4 | 26.67% | Hooded Pitohui (talk) |
| 2nd | An Overly Detailed and Funny Walkthrough of Mega Man 3 | 2 | 13.33% | Sparks (talk) |
| 2nd | The Tattle Log | 2 | 13.33% | Hooded Pitohui (talk) |
| 2nd | Brothership Boss Battle Guide | 2 | 13.33% | Sparks (talk) |
Brothership Boss Battle Guide
It's time for another Brothership Boss Battle Guide, a currently-ongoing section in Strategy Wing where I (Sparks) provide strategies for every boss in Mario & Luigi: Brothership! Last month was all about the Mega Snaptor, as well as the introduction to Battle Plugs. It's great to have another boss with Luigi Logic involved.
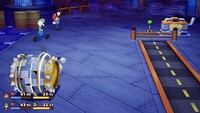
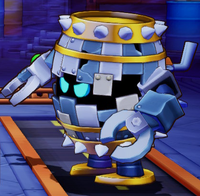
July marks the release of Donkey Kong Bananza! The boss I'll go over is something that could be thrown by Donkey Kong because he's a barrel - Sharpcask! While the Bros. (and Connie) explore the Color-Full Sea, Great Lighthouse Island, they run into Zokket and his Extension Corps again. Ecks then sends out Sharpcask to deal with Mario and Luigi. The only way to restore the lighthouse is to defeat him!
These are the stats of Sharpcask!
Sharpcask's stats
| Image | Level | Location | HP | POW | DEF | SPD | Type | EXP | Coins | Item(s) |
|---|---|---|---|---|---|---|---|---|---|---|
|
19 | Color-Full Sea, Great Lighthouse Island | 1600 | 73 | 88 | 214 | Normal | 2500 | 550 | Sharpcask Hammer (100%) |
Sharpcask's abilities
Sharpcask initially has three attacks at his disposal:
- Jump Defense: Sharpcask picks up and throws several smaller barrels at Mario and Luigi, one at a time. He can either roll barrels at a brother or slam them on the ground, causing them to bounce towards the targeted character. The boss targets whoever is in front of him. After each throw, Sharpcask may move up or down and target the opposite character. If Sharpcask holds his arm back and looks as if he's bowling, then he will roll a barrel that must be jumped over. If he raises his arm before tossing it, it will bounce harmlessly over Mario or Luigi. Jumping into the bouncing barrel will inflict damage to the Bro. If Mario or Luigi take damage from a barrel, Sharpcask will celebrate and end the attack. If the Bros. dodge several barrels, then Sharpcask will charge straight towards one of them. He must be jumped over to avoid taking damage. If timed well, he can be stomped on during the charge, countering Sharpcask and damaging him. After the charge, the attack ends. This attack can cause the Trip status effect.
- Jump Defense: Sharpcask retracts and rolls towards Mario and Luigi multiple times. The boss rolls towards both Bros., one after the other, several times, in either a clockwise or counterclockwise direction. If he rolls clockwise, then Luigi must jump before Mario. Counterclockwise means Mario jumps before Luigi. As the attack goes on, Sharpcask rolls slower and slower until he eventually returns to his normal form and ends the attack. Landing on Sharpcask while he is rolling will counter him and cause him to stumble back to his usual position, ending the attack early.
- Hammer Defense: Sharpcask moves in front of Mario or Luigi and jumps up high to grab a crate. He then runs to be right in front of a character while holding the crate in the air, occasionally losing his balance due to the crate's heavy weight. After several seconds, he will drop the crate on his target to inflict damage. If Sharpcask is countered while holding the crate without issue, he will take damage and fall forward, causing the crate to fall onto the targeted character. This happens so fast that there's no time to stop the crate from landing, resulting in unavoidable damage. If Sharpcask is attacked when he loses balance, he will fall backward and lose the crate, sparing the Bro from damage. This attack can inflict the Dizzy status effect.
Although not an ability from the boss, sometimes Ecks will show up and power up Sharpcask, increasing his POW and DEF by 20% for one turn.
After Sharpcask takes enough damage, he will initiate a defensive stance by hiding to look like a normal barrel. While he is like this, the damage he takes is greatly reduced, usually to the single digits. When it is his turn, he will heal himself 48 HP. After the Bros. perform an attack, Snoutlet informs them about his defensive stance and suggests to knock Sharpcask out of it. Two crates will then fall from the sky, one of them landing on a nearby machine, activating it. Luigi will then get inspiration from the drones carrying crates above the battlefield as well as the recently activated machine. This opens up an opportunity for a Luigi Logic! More on that later. Sharpcask will remain like this until a successful Luigi Logic is performed.
When low on HP, Sharpcask becomes angry and turns red, making him stronger. He also gains a new attack:
- Hammer Defense: Sharpcask jumps in front of Mario or Luigi, holds his arms out, and flips himself upside down. A bomb then rolls from off-screen and stops behind the boss. After a few moments, the bomb explodes and launches Sharpcask on top of the targeted character. Basically, Sharpcask slams down on Mario or Luigi with his entire weight. He must be countered before he slams on a Bro to avoid taking damage. If done right, Sharpcask will be repelled and take damage.
Luigi Logic
For this Luigi Logic, Luigi runs over to the machine and utilizes a lever to move a conveyor belt directly underneath Sharpcask. The text Pile up the boxes on Sharpcask! is shown, and the Luigi Logic itself begins. To successfully perform this Luigi Logic, six boxes must be piled up on Sharpcask all at once. Use to move the conveyor belt left and right and try to get Sharpcask underneath the falling boxes. If a box falls on the ground, it will disappear. These boxes fall slowly and one at a time. It's not as easy as it sounds however, because the conveyor belt cannot be stopped, so it will pretty much always be moving unless you change directions. After six boxes are stacked on Sharpcask, the boss will revert to his normal form and become dizzy from the weight of those heavy boxes. Luigi will then quickly move the conveyor belt to knock Sharpcask over a rail, causing him to tumble down multiple conveyor belts, dealing small, constant damage to him that adds up. When he reaches solid ground, he becomes dizzy. Mario and Luigi jump down to where the boss now is to continue the battle. Sharpcask will stay dizzy for a few turns, making him unable to do anything and causing him to take critical damage from all attacks. I haven't seen it happen, but I assume taking too long during the Luigi Logic will result in a fail. Don't let that happen!
All Luigi Logics after the first one are a little bit different. In addition to boxes falling, there are now bombs. The text Pile up the boxes on Sharpcask while avoiding bombs! will also be displayed. If a stacked box touches a bomb, it will break in the explosion. Don't touch them - bombs must be avoided! If a bomb touches Sharpcask, nothing will happen. Additionally, stacking six boxes will simply cause Sharpcask to be dizzy, as this is the bottom level of the battlefield. Sorry, he only tumbles once...
Tips and tricks
Recommended gear
Here is the best equipment the shop outside the Color-Full Sea, Great Lighthouse has:
- Boots: Super Boots and High-Heal Boots
- Hammer: Super Hammer and Bros. Hammer
- Wear: Super Wear and Dodgy Jump Wear
High-Heal Boots, Bros Hammer and Dodgy Jump Wear all have one higher point in POW/DEF compared to their Super variants, but the former two gear have abilities that activate when defeating enemies. They are still a tiny bit stronger however, so you can use them if you want. Dodgy Jump Wear does have use, because taken damage is reduced by 20% if you fail to dodge an attack.
If you have cleared the "Craft Some Groove Boots" side quest, you'll have access to Groove Boots (that is, if you purchased more of them). They're slightly weaker than the other Boots mentioned, but they increase SPEED by 18, so if you like SPEED, then they're for you.
On Teenytiny Islet is a Hidden Block containing Blocky Hammer Wear, which is just as strong as Dodgy Jump Wear, but this also gives two points to SPEED. Its ability also helps, as damage is reduced by 20% if you fail to counter an attack. This is also rarely dropped by Shower Fish on Allsand Island.
Once you arrive at the Color-Full Sea, Great Lighthouse Island, you won't be able to leave until you restore the Great Lighthouse, so if you missed getting any of the special gear above, you'll have to use the best from the shop instead. It's still great though, don't worry!
You can have whatever accessories and Gloves you want, as they support different playstyles. If you completed the "It's Dorrie!" side quest, you will have access to the IDLE Scarf, which increases HP and DEF. Very useful for defensive playstyles.
Recommended Battle Plugs
Once again, any Battle Plug is useful for all bosses, especially those that fit your playstyle. The ones listed below help out really well against Sharpcask:
 Surefooted Guard: Prevents the Trip and Dizzy status effects from occurring. Also allows you to conserve your Refreshing Herbs!

 Dizzifying Attack and Surprise Iron Ball both allow basic attacks to deal more damage to the boss. These are nice to use so you can save your Bros. Attacks for when the boss is dizzy after a successful Luigi Logic.
 Empower Counters: All of Sharpcask's attacks can be countered, so this is a very useful Battle Plug for those who love countering.
 Damage Shield: Reduces damage taken by 20% for ten attacks. Helps with staying in the fight and using less healing items.
 Auto Mushroom and Auto Syrup Jar: Allows you to to use an item when you're low on stats! As a bonus, you won't have to waste a turn doing so!
Other things
Sharpcask is level 19, so make sure you match his level or surpass it. If you're underpowered, battle against the roaming Zok Troopers inside the Color-Full Sea, Great Lighthouse Island to get EXP and coins.
When Sharpcask protects himself, you must attack him at least once for crates to fall to gain an opportunity for a Luigi Logic. Just do a basic attack, as it'd be a waste of BP if you use a Bros. Attack. You could also take the chance to recover your stats, but be aware of the boss healing, so this may not be worth it.
Poor Luigi. He still doesn't have a Bros. Attack that's ideal for one enemy. Green Shell is the best thing he's got, so use that over Zapperator. It's also cheaper!
One strategy is to have Mario constantly using Bros. Attacks (any of his two will do fine) and have Luigi just perform normal attacks. If Mario's BP is low, have Luigi use a Syrup Jar, or have the "Auto Syrup Jar" Battle Plug equipped.
When stacking boxes during the Luigi Logic, do your best to stack them straight up! Boxes on the edges will fall off.
All of Sharpcask's attacks can be countered, so if you want to deal extra damage to the boss, then master the timing! Use Boo Biscuits if you want to practice. You'll especially want to counter his rolling attack, as it goes on for a while and can really do a number on you if you repeatedly get hit.
I always say this, but bring plenty of items, especially Mushrooms, Syrup Jars and Refreshing Herbs! You'll need them if you want the "Auto" Battle Plugs to work. Nuts also work if both Bros. need to have their HP restored, but they don't have a Battle Plug.
Sharpcask rolls barrels quickly, so jump the instant you see him in a bowling position.
Ecks's support can put the boss at a strength that may surprise some players. Damage Shield helps counter the POW buff. Ecks isn't just limited to the first battleground too, so don't think he's gone after the first Luigi Logic!
Emergency Guard will not protect you against status effects, so if you plan to use it for the fight, make sure you have the "Surefooted Guard" Battle Plug equipped. If it's out of charges, "Auto Herb" works too.
The timing for Sharpcask's slam attack is pretty tight, so if you're not confident that you can counter it, you can use the "Easy-Peasy Counters" Battle Plug to make the timing easier.
And that marks the final boss of the Color-Full Sea! There isn't a new boss for quite a while, and that isn't until the Brrrning Sea, Great Lighthouse Island! I'll be going over Pipegunk in August. That's sure to be quite a fight! See you next month!
Killing the Killing Game Roles
Welcome back, readers, to another edition of Killing the Killing Game Roles, the section where we analyze various player roles from past Mario Boards Killing Games in hope of answering the question, what makes for a good role? By analyzing what's come before, we can discover some tricks and tips that could even help you design your own roles!
After a short break, we're returning to the Killing Game fold this month, and nabbing another role from the Awards Killing Game 4 player pool. In terms of experimenting with role concepts, I would argue that AKG4 is the Mario Boards golden goose. There are a plethora of ideas ripe for analysis and reiteration, and today's role is an example of an archetype that is due for more exploration.
You might be asking, what is this role called? And to that I answer, ???
AKG4 - ???
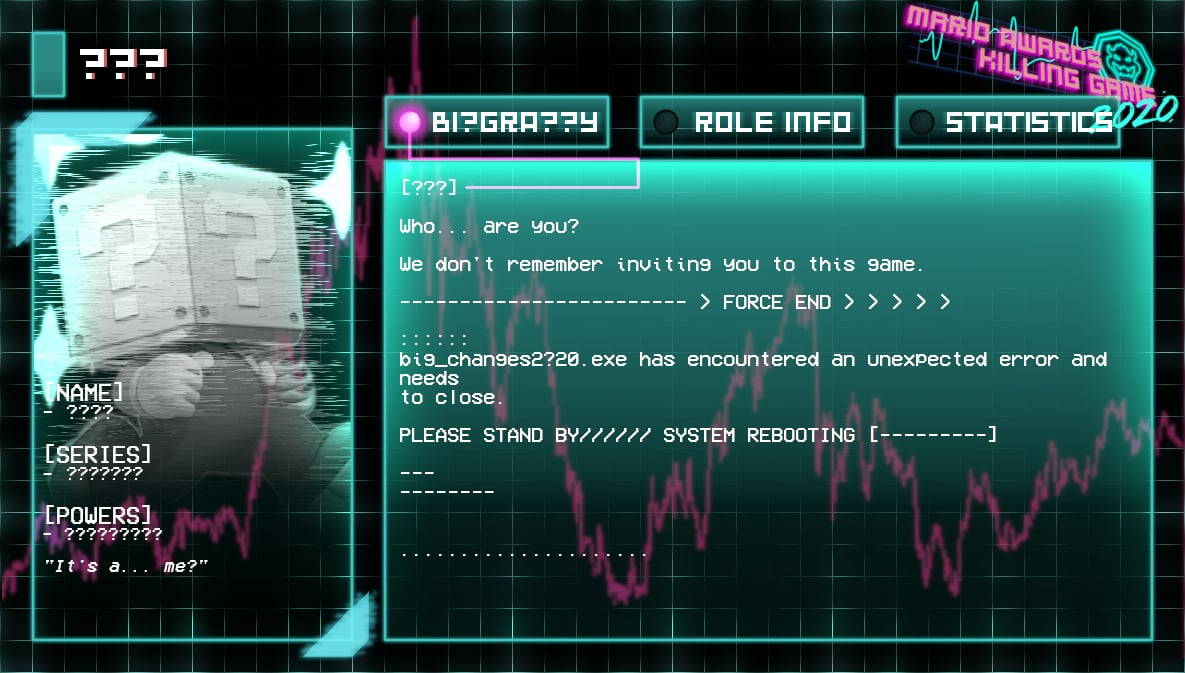
Card 1 - Bi?gra??y
- [NAME] ????
- [SERIES] ???????
- [POWERS] ?????????
- "It's a... me?"
Who... are you?
We don't remember inviting you to this game.
--------------------------> FORCE END > > > > >
big_changes2?20.exe has encountered an unexpected error and needs
to close.
PLEASE STAND BY/////// SYSTEM REBOOTING [---------]
---
--------
........................
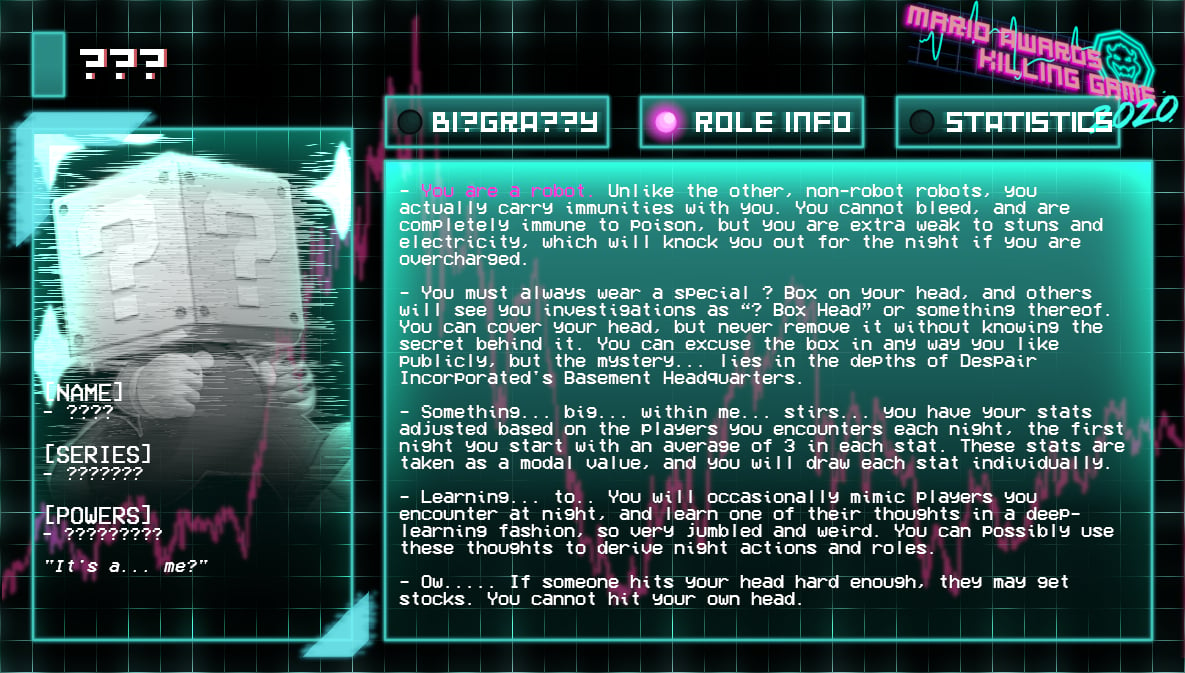
Card 2 - Role Info
- You are a robot. Unlike the other, non-robot robots, you actually carry immunities with you. You cannot bleed, and are completely immune to poison, but you are extra weak to stuns and electricity, which will knock you out for the night if you are overcharged.
- You must always wear a special ? Box on your head, and others will see your in investigations as "? Box Head" or something thereof. You can cover your head, but never remove it without knowing the secret behind it. You can excuse the box in any way you like publicly, but the mystery... lies in the depths of Despair Incorporated's Basement Headquarters.
- Something... big... within me... stirs... you have your stats adjusted based on the players you encounters each night, the first night you start with an average of 3 in each stat. These stats are taken as a modal value, and you will draw each stat individually.
- Learning... to... You will occasionally mimic players you encounter at night, and learn one of their thoughts in a deep-learning fashion, so very jumbled and weird. You can possibly use these thoughts to derive night actions and roles.
- You have excellent proficiency with riding horses, and can ride nearly anything with sheer skill.
- Ow..... If someone hits your head hard enough, they may get stocks. You cannot hit your own head.
Card 3 - Statistics
- STRENGTH: ?
- STEALTH: ?
- SPEED: ?
- STAMINA: ?
- SOCIAL: ?
[FORBIDDEN ACTION]
?????AAA????? ?? ? ? ? ??
You cannot tell people the contents of your rolecard. You may lie, but never tell the truth about what you've seen here. Your presence in this game is forbidden as it is, and if they find out, the timeline will change, forever.
Well, this is a bit of an oddball, isn't it? Certainly has a different... flavor, than some of the roles we've seen before. The user MoonAge carried this rolecard under her shoulder, while roleplaying as Stan Pines from Gravity Falls. His "more formal" name might be ? Block Stan? That was used at least once or twice. Point is, we've got a role tailored towards the mystery of its existence. But what does this mean for the overall game, and how does role function in the context of the game's mechanics as a whole?
General Overview
The ??? is what I would point to as the first "lore role" that Mario Boards KG's has ever had. Before explaining the ins and outs of that, though, we should start by discussing lore in a KG context.
When anyone refers to KG lore, what is commonly encompassed in that are the plot and narrative elements that contribute to the story and context of the game as a whole. This includes characters' histories before joining the game, the mastermind behind the game and their goals, any magic or power systems that might be in place, etc. Typically, lore starts as a backburner element, mini mysteries or threads for the players to explore, before opening out into big answers and confrontations in the latter half of the game. You'd be hard-pressed to find a modern day KG that doesn't hold the "lore experience" as a central tenet of the game. Even Awards Randomizer Killing Game, a game deliberately designed to be plot-light, ended up with its own lore through player collaboration and creation!
How do roles tend to interact with lore? Oftentimes, roles will contribute to the general lore of the game. Awards Killing Game Odyssey, for instance, had a magic system applied to its roles, which related back to the overall setting and story. Awards Killing Game 3 had two roles that intentionally called backwards to Awards Killing Game 2, implying a shared continuity between the two games. These elements of the role tend to also be on the backburner, however. They contribute to the overall feeling of the game, without necessarily being narratively significant. (Killing Game 9 over on Minus World is, I would argue, the first KG to truly contextualize all player roles in the premise of the game's narrative.)
The ??? stands separately from the rest. Although the role card doesn't state exactly how, it is inherently tied to the identity of the mastermind, Big Changes. The central hook of this role is to pursue this narrative mystery, and to eventually have narrative payoff for the pursuit. Of course, it helps to have a few other abilities along the way. The ??? did eventually have a role upgrade, but as per usual, we'll remain with where the game starts. What function does our fresh-faced ??? serve for player and host alike?
Ability Application
For the next few sections, we'll be looking mostly at the direct abilities of the role, rather than its implementation as a lore role. Although there are different expectations placed on the ??? compared to other roles, those thoughts are best reserved for our responsibility sections.
Firstly, we have the robot status and its immunities. A number of roles in AKG4 were marked as robotic, although it seems that the ??? is the only role who had that distinction implemented bodily. The main application of the ???'s robotic status is defense. No bleeding means serious wounds are not a concern, while poison immunity severely restricts what kind of traps you can be hit with. There are plenty of ways to still eliminate the ???, but it'll have to be a little more creative than "stab them in the stomach and let them bleed out for the night." I could also see how these aspects might be used in a trap-setting way - convince someone that the drink isn't poisoned by drinking it with immunity, Princess Bride style.
Next is the ? Block on the head, which acts much more as a restriction than a helpful ability. I mean, having your head covered completely negates the tea-drinking idea I had two sentences ago, so that can be tricky. Also, being identifiable only as the ? Box Head at the start of the game means that other players will very easily determine the identity of the person always running around as ? Box Head. That being said, you could probably build some fun confusion with disguising, like if you got another player to put a block on their head alongside yours, so two ? Box Heads are being spotted around the building. The good news is, despite having a block on their head, it doesn't seem like the ??? was ever limited in their range of sight or anything. Could you imagine what kind of gameplay experience that would be?
The stats mechanic is a pretty variable element of this role. The actual significance of stats in KG roles continues to be its own discussion that I tiptoe around like avoiding an animal's den, but they don't tend to have as much impact as the detailed abilities of each role. There's also no guarantee you'll grab a high stat from the people you're around, given that which stat you receive seems random; watch your stat loadout get boned by randomly nabbing 1's for three nights in a row. You're just as likely to get a higher stat, though, so the drawbacks aren't quite heavy enough to make this an overall deficit.
The mimicry is a pretty cute element of the role, adds to the flavor of the AI machine learning behavior. It also can give insights to other players, but I don't believe one of these thoughts were ever posted publicly post-game, so I'm not sure exactly what they looked like. They probably have use!
Lastly, there's someone gaining stocks from hitting your head. Stocks were the mechanic that determined how closely connected you were to a game's NPC. The more stocks in an NPC's company, the more likely they were to collaborate with you, and you could gain and trade around new stocks over the course of the game. The card itself doesn't detail how many stocks someone can get for bonking you. The later role upgrade mentions ten, so I'll guess it was probably five for this beginning phase? Anyway, not particularly useful for the ??? directly, but a really easy way to form a business alliance with another player. You're pretty likely to buddy up with someone who you can naturally offer better NPC connections to.
Quite the interesting loadout of options. I would say that the ??? doesn't really have a core sense of a gameplay identity. The abilities themselves don't fit into any conventional archetype, like strongman or trapper, and each ability sits in a different area of the KG gameplay experience. The main hook of this role is primarily its narrative intrigue. I believe there's more potential for this role's powers to be tailored towards that goal, but hey, a defensive buff from robot parts and a quick alliance maker never hurt anyone.
Environmental Functionality
Of the roles we've looked at for this section thus far, the ??? is the one least attached to the environmental function of the map. Even the Proposal Wizard's breath-holding ability could relate itself to bodies of water or underground areas. Here, the ??? could be transplanted to any map, no questions asked. Could it be translated to any game? Likely not; its theming is pretty contingent to AKG4's techno-apocalypse aesthetic, and the stock market is of course AKG4's mechanic alone. When it comes to the map design, though, the ??? is of little concern.
Drawbacks & Balances
What limiting factors are in place for this role? First up is the robot aspect, and getting knocked out for the night if hit with too much charge. That would probably the ??? more conscious of when they're interacting with electrically-charged equipment or areas, but I mean, an average person can get shocked to unconsciousness or death, so I don't know how much of a limiter this is overall. I don't know if I've ever seen a kill go off in KG that directly involved electricity? There were a few other roles in this game that harnessed electricity, though - the Ultimate RPG Hero had a lightning spell, for instance - so in this game's context, perhaps this is a little more of a concern.
If the card mentioned an inability to get wet, as robot parts are not wont to do, it would probably feel like a full balance against the current defenses. As it stands, the robot aspect of the ??? doesn't have too much of a drawback.
Then, there's the inability to remove the ? Block. Honestly, the phrasing on the card makes me uncertain if this is simply an action limiter, or if it functioned as essentially a secondary Forbidden Action. If the ??? wasn't able to remove the block themself, but it could come off if forced, that's not any harm. If somebody else removing the block would trigger a FA-like result, that would be much more of a weakness for this role. It's obviously on your head all the time, so it could become a blatant target when it's clear that thing isn't meant to come off.
There's the chance of copying a worse stat from someone else, but I mentioned that before. Not the worst weakness for this role to have when it's equally possible to get a better stat.
Which leads us to the actual Forbidden Action of this role, the inability to share the true nature of your role publicly. A few roles have had these FA's in KG, and they tend to emerge from narrative or thematic significance. In this case, revealing the role would result in Big Changes getting his way with the ???, which is bad bad bad! As for this FA being a limiting factor, it's really not all that bad. KG players are keen to keep role powers close to their chest for as long as possible, so you'd be in good company for remaining private.
Additionally, this role doesn't really have powers that need strict explaining. The main reason someone explains their role powers in KG is when they're suspecting for their kill attempt, and need to detail what they can or can't do. This is especially true of roles that have psychic powers, magic, etc. Here, there are no visible role powers that really need explaining. The ??? can't make a room explode remotely, and then need to explain it later. People might ask for clarification regarding why they're wearing the ? Block, but the lore justification for it being there wouldn't really be the important explanation, and would be easy to write away with a simple "I don't know, this role is quirky!"
The one major restriction this does give you is your ability to collaborate with someone else to figure out the truth of the role - but given how the game moved narratively, you'd soon figure out the "why" regardless.
Player Responsibility
Alright, here's the major consideration for the ???: what does it mean to give a player a strictly lore-focused role like this? Well, immediately, the ??? demands that the player have an interest in the plot of the game. After all, the whole aim is to get to the basement and uncover the truth of the ? Block. This might seem like something any player can handle, but what's worth remembering is that players approach KG's with plenty of different aims. Some players are loreheads who will attempt to solve every small mystery; some players are in it for the gameplay of solving daily murders with their friends; some players are around to try and get away with as many murders as possible. There's overlap between these interests, of course - KG functions as it currently does for a reason. Each player's going to naturally care more about some aspects of KG more than others, though, so it's critical that a role like this is granted to someone who will care about carrying it.
In terms of gameplay for the role, there isn't a lot for the player to keep track of or micromanage. As long as they keep their robotic weaknesses in mind and watch their tongue about their role, they'd be able to utilize its specific abilities with little trouble.
Host Responsibility
As for the host's responsibility in navigating this role, I would say there's a surprising amount of weight put onto the host's shoulders here. The gameplay abilities are fairly straightforward, although the host still needs to decide how stats will be snagged, and what thoughts will be shared with the ??? from who they mimic. That's not the most important part, though.
For the host coordinating around the ???, they need to make the mystery worth it. The host needs to have a vested interest in developing the narrative for the player to follow. They must lay out important clues or discoveries for them to uncover along the way, and the final reveal of the why needs to have the right amount of gravitas to it. In this case, the ???'s mystery led to the discovery of the mastermind character, and MoonAge the player was then given a choice that would permanently alter the narrative of the endgame. This was payoff developed correctly (it helps that Big Changes had one of the most theatrical reveals of a KG mastermind to date). Imagine the reality where there was not this kind of payoff, though. If the game's narrative hadn't carried on that mystery, or if Big Changes was the least interesting character ever concocted by a host. The impact matters, and if you're promising your player a certain impact for caring, you better make sure it lands.
This isn't said to scare anyone away from making a lore role. Really, the hope of landing the narrative is something every KG host strives for with every KG player; it's only that in the case of the ???, there's extra attention given to the player at the helm. It doesn't require a ton of extra consideration that wouldn't already be there... but it does require some. I do think there's a simple golden rule for KG plot writing: if you are invested, the players will be invested. Make sure your investment in their story experience is there, and then a lore role will fit right in.
There's one more element of a host's responsibility with a lore role that should be mentioned: what do you do if the player with it dies? The ??? is the entire key to defeating Big Changes, but what if MoonAge had died back on Night 2? Then that entire hook is gone! The host needs to be aware of how they want to navigate someone having a role that holds narrative importance to them. It might be tempting to then plot armor them through the game, aiming to get them to that big final confrontation. It's worth asking if you want that kind of weightiness put onto their shoulders. What if your role has a backup plan in case of death? In the instance of the ???, host GBA talked later about how the ? Block still could've been carried through the game, even if it wasn't Stan Pines wearing it. That kind of foresight allows you to instill a lore role with critical importance, while also allowing them to be a mortal character in a game of mortal characters.
Overall Thoughts
Overall, I believe as KG's continue to evolve as narrative experiences, roles akin to the ??? deserve to be more readily explored. There's nothing more exciting for a player than to have a special connection to the setting, the story, and especially the mastermind behind it all. In a larger player pool, not every role should strive to be this narratively important, but there might be more subtle ways to implement lore importance to the entire player pool. As for the ???, I'd love to see another stab at this niche archetype. With some more focused role powers to fit alongside the prescribed player goals, the lore role can provide some real investment and fun.
That’s all for this month. Tune in next month for more Killing Game goodness!
So You Want to Romance the Three Kingdoms?
Hello, and welcome back to So You Want to Romance the Three Kingdoms?, a section on one of the delightful Koei strategy games on the Super Nintendo, Romance of the Three Kingdoms Part IV: Wall of Fire. Last month, we successfully baited Yuan Shao into sacking the city of Bei Ping, overthrowing its ruler Gongsun Zan and establishing his control over the city. This month, we're going to make our way towards the first harvest as we try to keep our fledgling city under our control.
Step 4: A Famed General Enters the City
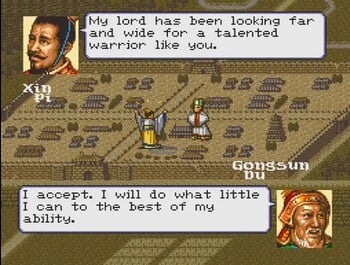
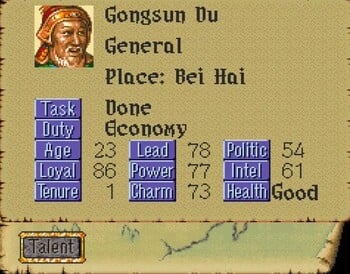
Starting in February of 190, the first thing we notice is that a wandering officer, Gongsun Du, has entered our city. According to the reports of our staff, Gongsun Du is a noted politician who once served as the Governor of Liaodong, as well as a famous general who served as commander of Dong Zhou's Korean Expedition, taking control of both the Lelang and Daifang divisions. Our intelligence hasn't quite figured out why he has entered the city. Perhaps he is on his way to investigate the conquering of Bei Ping by Yuan Shao? Perhaps he has heard of Lord Kong Rong's brilliant tactical mind and wishes to pledge his service to Kong Rong? Whatever the case, we cannot pass up the chance to bring such a renowned general into the fold. Because Lord Kong Rong is busy not only running the city but also working with Xin Pi to improve the farmlands of Bei Hai (thus providing the peasants with greater harvests) and working with General Wu Anguo to train our army into the finest fighting force of all of China, Xin Pi has offered to meet with General Gongsun Du and convince him to join Lord Kong Rong's service! A meeting is quickly set up using the "recruit" option, and Xin Pi is sent to General Gongsun Du.
Impressed by the tales of Lord Kong Rong's wisdom and agreeing that only he can unify China and bring an end to this era of chaos, General Gongsun Du graciously agrees to enter into Lord Kong Rong's service! Now, Gongsun Du's stats aren't anything to really write home about, if you ask me. In terms of skills, the only things Gongsun Du can do are launching boulders during sieges and setting fires during an open battle. As for his stats, they're a little better. His Politic and Intel skills are fairly low at 53 and 61, but his Lead, Power, and Charm stats are somewhat decent at 78, 77, and 73. This makes him easily our most effective general, so if war comes, for now, he will be leading the troops.
Also, according to his stats, he's only 23???? His portrait is of a middle-aged man! Also, important note: I probably won't be going over the stats of every officer we, mostly because you can end up getting like 30 officers at once after a war and it would just be, how you say, not fun to do that! Now that we have four officers, we can begin what I consider proper city management! Going back to the "city" tab, we now have the ability to put two officers in charge of development of the city and farm. This will help increase our tax revenue and harvest, both of which, as you can guess, are very important. Now, how efficient each officer will be at running their department is based on their Politic stat. So we're going to put Lord Kong Rong and Xin Pi, who have the two highest Politic stats, in charge of farm productivity. Meanwhile, generals Gongsun Du and Wu Anguo (who has an atrocious 18 in politics) will be in charge of the economy. For budgetary purposes, the farmland will be given 3,000 gold and the economy will be given 2,000 gold. That way we still have about 1,100 gold to play around with. Now, normally I'd never put somebody like Wu Anguo, with his super low stats, in charge of any department, but we only have foue officers and beggars can't be choosers. Even though the progress will be slow, some progress is better than no progress.
Step 5: The Importance of Loyalty
The next thing we're going to be working on is improving the loyalty in both our officers and peasant class. Loyalty is important for a couple of reasons. First, the higher their loyalty, the less risk of an officer being stolen away by a rival lord. Second, there are a few different traps, both in battle and as part of the "plot" tab, which are more or less effective based on loyalty. In battle, an enemy general can attempt a bribery trap on your generals, and if their loyalty is low enough, they can take that bribe and turn on you! In the overworld, during your rival lords' turns, they can use the "gossip" plot in the plot tap to turn your own officers against you, lowering their loyalty and making them suspicious of you, in turn making them less likely to truly fight for you! But that can't happen if they're loyal! So how do you make them loyal, you ask? Well, the answer is obvious! Presents!
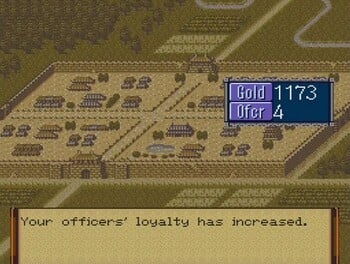
Like all humans, your officers love getting things! Now, there are two things we can give them, those being either special items or cold hard cash in the form of gold. At this point, we don't have any special items, so we'll have to give out cash. Go to the "staff" tab and select "reward". Then click on every officer you want to reward. Then, you can give them up to 100 gold each. Since we currently have over 1,100 gold, we're going to give them each 100 gold! This increases their loyalty to us. We can do this every month until we run out of money or they reach 100% loyalty.
Now, the next loyalty we're going to be looking into improving is the loyalty (called "Spirit" in this game) of the peasants. Much like in Nobunaga's Ambition, the way you increase loyalty is by giving the peasants gifts. And peasant loyalty essentially works the same way as officer loyalty. The higher their loyalty, the less likely they are to rebel or to fall for gossip from enemy cities. Plus, I think it makes tax revenue higher! Peasant loyalty rises and falls about the way you would expect. It drops when you conscript peasants into the army and rises when you provide them with food using the "gift" option in the "staff" tab. But the gifting system works a little differently in this game. In this game, you can't give cash money directly to the peasants. Instead, you can only provide life-giving provisions to them. You can give up to 1,000 barrels of provisions to the peasants.
Provisions can also be given by any officer who's not doing a task. But here's the thing! How effective they are at giving provisions is based on their Charm stat. So Xin Pi, whose charm stat is 82, will get you better results than Gongsun Du, who has a charm stat of 73. On the other end, hardass asshole General Wu Anguo would be almost worthless at this, because his charm stat is only 21 and he just will not stop calling them dirty, filthy peasants only fit as meat shields in the service of the empire! So, we're not going to be using him for this at all! We're going to have Xin Pi and Gongsun Du both give 1,000 provisions to the peasants, and you can see a big jump in Spirit, with the first 1,000 provisions sending their spirit from 58 to 69 and the second 1,000 sending it from 69 to 79! One last note on peasant morale: the highest you can get their Spirit level via giving provisions is 80! I know you can get it higher; I'm just not sure how you do it!
There's one final type of loyalty, that being a soldier's Spirit. Soldier's Spirit, to me, is the most confusing of all the loyalty/spirits. So the way it works is, the higher a soldier's Spirit, the better they'll do during war, and the less likely it'll be for them to run away like cowards during battle. Simple stuff, perfectly understandable. But here's the thing! Unlike officer loyalty and peasant Spirit, you can't directly raise the Spirit of soldiers. Unlike Nobunaga's Ambition, you can't simply bribe the soldiers into being more loyal. Instead, a soldier's Spirit can only be raised via training. The rate at which it rises is based on some sort of formula that factors in their current training level, combined with length of training, and the lead stat of the officers training them. But I don't really understand how it works, because a lot of times it feels like it's not rising at all. And considering how your army's Spirit will drop every time you recruit soldiers, it feels like a lot of times your army just gets stuck in a permanent state of low Spirit, making battles much more annoying than they should be!
Step 6: The First Harvest Brings Provisions and an Old Friend
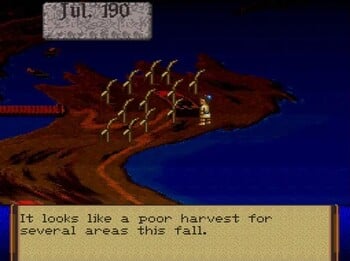
The next few months are going to be pretty boring. Since we're already training our soldiers and since both our officer and peasant loyalty are currently maxed out, we aren't going to do much of anything for the next few months. I tried to purchase horses from the merchant, but, sadly, he wasn't selling horses at the time. So we're going to skip ahead to July when the harvest happens! Now, the harvest (which always happens in July), can bring many things! For starters, it always brings in a fresh crop of provisions, but what provisions it brings depends on your Farm stat. There are three types of harvest you can get: Scarce, Regular, and Rich. A scare harvest means you'll bring in less than you expected (if you look at the screen with your gold and provisions, you'll see an estimate of what you'll bring in for both during tax and harvest season).
The lower your farm score, the higher chance of a dreadful scarce harvest, which can really mess up your plans since you need food for, well, everything! On the other side, there's a rich harvest where you'll get more provisions than you thought you were going to get. Obviously, the higher the farm stat, the better the chances of a rich harvest. We, on the other hand, got a regular harvest, meaning we harvested exactly what we thought we would get! The harvest doesn't just bring provisions, though! It can also bring the plague from all those filthy peasants interacting with each other. It can also bring a peasant revolt from the peasants getting angry over their lords stealing what they consider to be the fruits (or more likely rice) of their labor! Luckily for us, though, under the guidance of Lord Kong Rong, neither happened. Instead, we simply had a regular boring harvest.
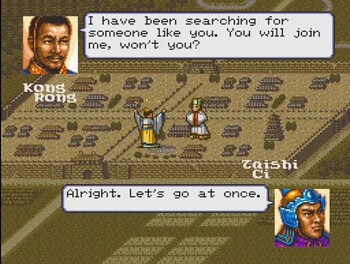
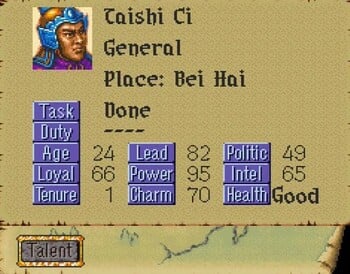
But our city's good fortune wasn't just limited to a successful harvest! Intelligence reports have confirmed that one of the fiercest warriors in all of China has come to our city - the legendary Taishi Ci! And we're in luck! Lord Kong Rong and Taishi Ci are old acquaintances, with Kong Rong befriending Taishi Ci's mother and Taishi Ci repaying that kindness by saving Kong Rong during the Siege of Duchang, singlehandedly breaking through the lines of the surrounded fortress before bringing reinforcements from Liu Bei to lift the siege!
Hearing this, Kong Rong eagerly decided to meet with Taishi Ci, knowing that bringing a warrior of such fame and renown would greatly increase our prestige! Now, the first few meetings didn't go so well, with Taishi Ci telling us to go to hell. And in fact, I actually had to load a save state from a few months back because I forgot to make a state before attempting to recruit the first time. But you know, that's what save states are for! I don't live in the 90s! But finally, after a few failed attempts, the gods smiled upon us and Taishi Ci agreed to join us!
And when we look at the stats, we immediately see that, for the first time, we've got a real general! An expert in Cavalry, Archery, and Naval combat, Taishi Ci combines that with 82 Lead and 95 Power, meaning that he's going to be the best at both training soldiers and leading them into war! With his patronage, our army is going to be the finest fighting force in all the land in short order!
While I'd love to continue, Lord Kong Rong, mad with joy over both the successful harvest and the recruitment of the fierce Taishi Ci, has ordered another feast to celebrate! And I mustn't anger him by being late. So that'll all for this month! Join me next month as we continue our first year!
Pitohui's Pokémon Academy
Written by: Hooded Pitohui (talk)
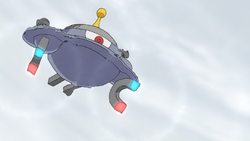
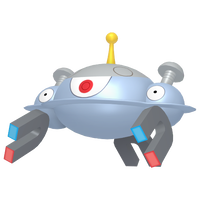
Ah, dear, I seem to be running a tad late. Apologies for my absence last month, and a protip for all of you - should you find yourself stuck within a warehouse, do request a fan. They get terribly hot, at this time of year. Anyhoo, now that I return, let's not tarry in resuming from where we left off. Recently, I received a message from one of you inquiring about strangely-shaped saucers in the sky with blinking lights. Well, not to be the slayer of all whimsy, but I doubt you spotted the ship of any rogue Clefairy! No, rather, you likely encountered a Magnezone hovering above a region rich in ferrous metals. So as to reduce any risk of future mis-identifications, I thought we might inspect a Magnezone up close and personally!
As always, before we begin, you may peruse the boxes below for our course aims and a glossary - or swipe past them quickly, if you join us from a mobile device!
First, a Smogon University course, this course is not. No, this academy's lessons are designed to get trainers of any stripe thinking about how they can raise their Pokémon, and, as a result, aren't designed to keep up with the widely-accepted metagame for the series. In rare cases, the way I've raised my Pokémon may even flies in the face of conventional wisdom. If you're looking for top-tier strategies, do check out Smogon, but if you merely want to get a little deeper into raising Pokémon while still doing things your own way, feel free to use this section as a reference.
I'd like to give a word of thanks to the Bulbagarden Archives, the source of many images in this section.Base Stats: Base stats are the values associated with a particular Pokémon species, and are the same across every individual Pokémon of a given species. You have no influence on them. You can think of them as traits tied to a species. A chimp isn't ever going to be able to get as good as digging as a mole will be, and, likewise, an Abra is never going to have the defensive prowess a Shuckle has.
Individual Values (IVs): Individual values, as their name implies, are associated with individual Pokémon. They range from 0 to 31 in each stat, with 31 being considered a "perfect" IV and higher numbers corresponding to different stats. Magikarp A and Magikarp B will have the same base stats, but they may very well have different IVs. To stick with the animal analogy, one mole may be born with larger claws than another mole, and that first mole is probably going to have an easier time digging through dirt than the latter. Individual values are set in stone, strictly speaking, but you can use Hyper Training (from Generation VII onwards) to functionally get a perfect IV in a stat.
Effort Values (EVs): Effort values are the one thing you can easily change. A Pokémon can earn, primarily through battling, but also through means like the use of certain items or mechanics like Super Training, up to a total of 510 effort values, with up to 252 in any given stat. To finish off the animal analogy, no matter what kind of claws a mole is born with, moles who have more experience digging are probably going to be better at digging than moles which have never dug.
Nature: A Pokémon's nature is, more or a less, a stat modifier with a name meant to make it sound like a Pokémon has some personality. Natures will raise one stat by ten percent and lower another stat by ten percent. Some natures raise and lower the same stat, canceling out the effect and leaving stats unchanged. Natures can be functionally changed with the use of special mint items from Generation VIII onwards.
STAB: STAB stands for Same-Type Attack Bonus, and refers to the boosted power of moves that match the type of the move's user. To illustrate this, consider the case of a Lombre, a dual-type Pokémon which is both a Water-type and a Grass-type. Any Water-type moves Lombre uses will have their power boosted by 1.5x, and any Grass-type moves Lombre uses will, likewise, have their power boosted by 1.5x. (There are circumstances where this does not apply, and, while the 1.5x multiplier is typical, some games use other multipliers.)
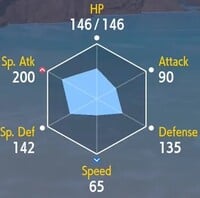
Looking at Magnezone's base stats, we find an unusual situation. While it does have great special attack, its poor speed precludes using that special attack to sweep through opponents (disregarding Trick Room). What Magnezone pairs with its high special attack is instead high defenses, with a very respectable defense and a decent special defense. Add on the defensive boons of its Steel-typing, and Magnezone finds itself in the enviable position of bundling power and sturdiness. Middling HP is somewhat offset by its defenses, so Magnezone's only great flaw (aside from a 4x weakness to Ground) is its slowness.
Can we turn that weakness into a strength? Well, join me in scouring Magnezone's moveset for a moment. We do have Gyro Ball, which is more effectively wielded by slow Pokémon, but it runs on Magnezone's middling attack stat, so let's discard that thought. It has no good priority moves of which we could take advantage, so that's out... but it does have a switch-out move, and those are often worth looking at on slow Pokémon. A switch-out move is valuable, offering a way to simultaneously deal damage and swap Pokémon, but they can especially shine on slow-but-bulky Pokémon. Unlike the act of switching out normally, switch-out moves don't take priority, meaning a slow Pokémon can exit battle at the end of a turn - after its opponents have already moved. This allows the outgoing Pokémon to tank the turn's hits so that the incoming Pokémon can emerge unscathed. The outgoing Pokémon is a "pivot", and Magnezone makes a stellar pivot.
In light of that, let's raise our Magnezone in such a way it can take advantage of Volt Switch. That means no investment in speed, and since we're committing to a special move, we can disregard attack entirely, too. We'll invest a full 252 EVs into special attack, and then we need only to decide how to divide our remaining EVs between the defensive stats. I'm personally going to put them all into special defense, save for the leftover six which will go into HP, because I'd like to shore up those weaker stats. You can and ought to play around with this, though. Remember, every four EVs translates to a one-point gain in the final stat, broadly speaking.
|
Name: | Magnezone | Base HP: | 70 | |
| Category: | Magnet Area | Base Attack: | 70 | ||
| Type: | Electric | Steel | Base Defense: | 115 | |
| Abilities: | Magnet Pull | Base Special Attack: | 130 | ||
| Sturdy | Base Special Defense: | 90 | |||
| Analytic | Base Speed: | 60 | |||
To briefly touch on a nature, you'll want one which raises special attack and has no effect on defense or special defense. This means you're choosing between Modest, which will lower attack, and Quiet, which will lower speed. Normally, I'd aim for the former, since you have absolutely no use for physical attacks, but since our Volt Switch approach relies on Magnezone being slow, I say we drop its speed further and go with a Quiet nature.
As for Abilities, Magnezone chooses its pick from a deluxe platter. Sturdy is a solid ability in isolation, great for Pokémon that need to ensure they can hang on to set up a condition for the rest of the party, but given our investment in Magnezone's defenses and that our goal here is for Magnezone to enter and exit battle many times, it doesn't benefit us much. Magnet Pull, on the other hand, can be great for Magnezone. Steel-types are plentiful in battles, so having a means to trap them and whittle them down with Magnezone is valuable... but it still depends on the opponent bringing Steel-types.
Analytic, on the other hand, we can influence. A Pokémon with Analytic deals increased damage if it moves after all other Pokémon on the field, and since we're working with a slow Magnezone, we can expect that to happen reasonably often. It complements our Volt Switch-focused approach, so we will take Analytic.
With our nature and Ability set, we turn to moves. Of our four moveslots, we've already determined Volt Switch will fill the first. This is the core of our approach to raising Magnezone, and will allow it to safely bring its teammates into battle.
Next, to take advantage of Magnezone's high special attack, we ought to find suitable STAB moves. I include Electric even though we already have Volt Switch, because it behooves Magnezone to have a STAB option that won't force it to switch out. At the least, by choosing another Electric move over Volt Switch, you may surprise an opponent expecting a switch. Beginning with Electric, we find our options are: Thundershock, Electro Ball, Discharge, Zap Cannon, Charge Beam, Thunderbolt, Thunder, and Electroweb.
Thundershock, Charge Beam, and Electroweb can be thrown out for having a base power less than 60, and Electro Ball is better suited to faster Pokémon, so we can discard it as well. Zap Cannon is far too inaccurate without Lock-On, and it's not worthwhile to take two turns to attack just for the increased power. Thunder has the same issue, unless you so happen to plan on using Magnezone with a rain-setting team. That leaves Discharge and Thunderbolt, with Thunderbolt (90) edging Discharge (80) out on power. Discharge may be worthwhile in double battles, if you're considering those, but we will go with Thunderbolt.
Moving on to Steel, our options are Flash Cannon and Steel Beam, and Steel Beam does recoil damage, so Flash Cannon it is!
| Volt Switch | After making its attack, the user rushes back to switch places with a party Pokémon in waiting. | |
| Thunderbolt | The user attacks the target with a strong electric blast. This may also leave the target with paralysis. | |
| Flash Cannon | The user gathers all its light energy and releases it at once. This may also lower the target's Sp. Def stat. | |
| Mirror Coat | A retaliatory attack that counters any special move, inflicting double the damage taken. |
Glossing over a handful more, I would say the viable options here are: Eerie Impulse, Iron Defense, Reflect, Light Screen, or Confuse Ray. I can see a case for Reflect or Light Screen. Personally, I'd go for either Light Screen or Reflect, maybe slightly favoring Reflect since we invested in Magnezone's special defense already.
All of this is, however, moot, if you choose to equip Magnezone with an Assault Vest - and you may want to! An Assault Vest will boost its special defense by 50% at the cost of preventing it from using status moves. In this case, your options are Tri Attack, Mirror Coat, and Tera Blast. Setting Tera Blast aside, I'd go with Mirror Coat over the unpredictable status conditions of Tri Attack, which is why you see it in the list above. If you don't equip an Assault Vest, any of these three special moves remain viable, but feel free to experiment with those status moves we went over, too.
I do believe we are out of time... or perhaps Magnezone's presence is interfering with the digital clock? Regardless, I hope that this has provided you some perspective on this not-so-mysterious Pokémon! See you at our next session!
An Overly Detailed and Funny Walkthrough of Mega Man 3
Played by Sparks through the Mega Man Legacy Collection for the Nintendo Switch.
Alright, time to play some more Mega Man 3. Normally this is when I invade Dr. Wily's fortress, but those plans have been put on hold at the moment. Bizarre robots have invaded the stages with Spark Man, Needle Man, Gemini Man and Shadow Man! This is when the game goes downhill for me, but I'll get through these out-of-nowhere challenges. I'm not afraid! We'll have to use everything we have to get past these stages.
There's really no bad order of doing these stages, but I'll just go from left to right, top to bottom. Let's start with Spark Man's stage.
? (Spark Man stage)
Unlike the first time we went through Spark Man's stage, this time it's a little different...
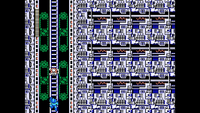
Starting out, we have to go up to reach a ladder above us, but we have to use Rush Coil to jump up this time as there is no supporting ladder! There's also a walking eye - just let it fall down and shoot it to get rid of it. Afterwards you can get up safely.
The next section just has us going up the ladder, but there's a ladybug enemy in the way! It's impossible to bypass it normally, so we're forced to use a special weapon to take it out. Use a well-aimed Shadow Blade or a ricocheting Gemini Laser to do the deed. I'd recommend a Shadow Blade because you'll need Gemini Laser later. Plus you won't use as much energy!
After climbing to the end of the ladder, there is a long horizontal section with gaps in the way. Early on is a large health power-up on a high ledge. If you need it, you can use Rush Coil or Rush Jet to obtain it. As for the enemies in this section... remember those flying plug enemies that send eight electricity projectiles when you stand underneath them? Yep, they're back. Still not much of a threat to me! I forgot to mention that there are small rotating wheels you can use as platforms to get across the hazards. Just don't stand on them too long; you don't want to fall of of them, do ya? A ladder takes us up to the next room.
This next room is a short one that has you jumping on three wheels to grab a ladder. Worried that you'll fall and lose a life? Use Rush Jet! Nobody will judge. Upon reaching the top of this ladder, there is one of those large spring enemies from Magnet Man's stage. Dispose of it, and proceed onwards. You must then slide through a low passage and battle another one of those large spring enemies after sliding. This one is on high ground, however, so be cautious. After getting past it and sliding again, you'll reach a boss room.
Doc Metal Man fight
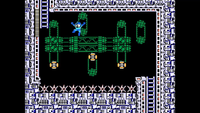
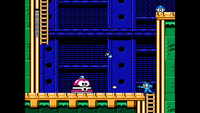
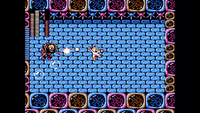
Upon entering the boss room, Metal Man descends from the sky and merges with a bizarre robot on the ground. This bizarre robot is called a Doc Robot, and once the merge concludes, the battle starts. This robot fights identically as Metal Man does (jumping in place and sending out Metal Blades at your location, with higher jumps resulting in more Metal Blades) and isn't too bad. It's weak to the Magnet Missile because, well, metal is attracted to magnets! Time your jumps to avoid his attacks, and strike at a pace that won't result in wasted shots due to the boss's invincibility frames. The Magnet Missile follows the boss when it's above or below him, so you don't need to be precise! When the boss is defeated, the stage doesn't end... That would be too short and easy a stage, hmm?
Past Metal Man
Past Metal Man's boss room is a large health power-up right before a long spike fall. For those who don't know, a spike fall is a section is Mega Man games where you have to avoid one-hit KO spikes while falling down several screens. They aren't very fun. This one however is more on the easier side, as you don't need to move much and it's short.
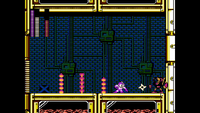
After the spike fall is a large hallway with those stupid electrical conductors and those screw enemies that appear out of nowhere. You'll probably take some damage here, but the good news is there are are no pits or spikes here! The tricky part is navigating past those electrical conductors on uneven terrain. You must then get through one more room to reach the last boss gate. This one has those ceiling pipes that release garbage blocks... with pits. Once again, this serves as a great grinding spot for health and weapon energy, because you aren't going to like the boss here! One of the pipes is above a small platform where the garbage completely covers it, so simply rushing through is the way to go. Quickly jump on the first garbage block and jump across the gap before the second one falls. Are you ready for the main boss?
Doc Quick Man fight
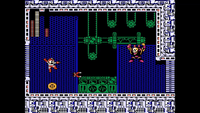
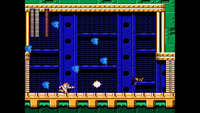
We have another Doc Robot to deal with, but this time the Mega Man 2 Robot Master is Quick Man instead of Metal Man. Quick Man jumps high up (sometimes several times in a row) and throws out Quick Boomerangs that home in on your location. After throwing them, Quick Man will run towards you before jumping again.
This fight is not an easy one. You have to be very careful of Quick Man, because he's constantly on the move. DO NOT touch him, because you'll take a lot of damage. The Quick Boomerangs do much less damage, so if you're trapped in a corner, try taking damage from the boomerangs before Quick Man attacks! When he's jumping, try to slide to give yourself a moment of faster movement. This'll help to avoid him. When he runs at you, jump over him.
Perhaps the worst part about this fight is his weakness - Gemini Laser. It sounds better than Top Spin, but if you miss a laser, you can't fire another one until it either leaves or somehow hits Quick Man. Now you must be precise with your shots, because you'll have to dodge a lot more each time you miss. The best opportunity to attack the boss is when he runs at you, as he makes himself an easy target. Overall, this battle is horrible and a contender for the worst one in the game. I didn't lose a life, but I did have to use an E Tank to get by. Good luck to those who don't have any of them.
Doc Robots don't give out any new weapons, as fun as that would sound. After defeating Doc Quick Man, the stage ends and we're brought to the password screen. Three more stages to go! Needle Man's is next.
? (Needle Man stage)
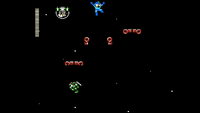
I should say right now that all four of these stages are different from their original ones. This stage takes place at night instead of the day. It's a very cool background with stars in the sky! Nice.
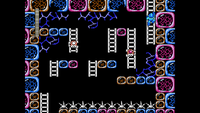
The first section of this stage is a "hallway" with uneven terrain. Three hedgehogs (or are they porcupines? Still haven't figured that out) try to hinder your progress, but they can all be defeated with the Mega Buster before they roll. The second one is on a higher ledge, but I still managed to take it out quickly. There is then a somewhat tricky jump to a higher ledge above spikes, followed by a ladder leading downwards.
This next room isn't very fun. It's an underground section where many needles poke out from the ceiling and ground, resulting in moments where avoiding damage is near-impossible thanks to the tight timing and spaces. Thankfully at the end is a large health power-up where you can restore your HP... but it's guarded by a needle. Of course. Getting it with Rush Jet is safer and more reliable than using Rush Coil. TRY TO KEEP AS MUCH RUSH JET ENERGY AS YOU CAN! Trust me.
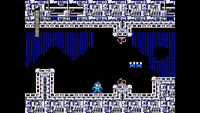
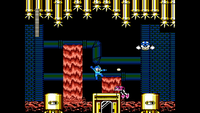
After climbing up a ladder, there's a large, open room with a large spring enemy in the way. As you can see in the image above, there's a 1-Up on top of a very high wall. There's a little trick to conserve Rush Jet energy! First, climb up the ladder (it's high up, so you'll need Rush Coil to grab it) to the next room. This next room has another high-up ladder and a small platform in the distance containing an E Tank. You'll have to use Rush Jet to reach it, but you won't use much energy. Drop down to the right of that platform and you'll land where the 1-Up was! Make sure to switch weapons after reaching the E Tank you you won't accidentally drain more of your precious Rush Jet energy.
Get back to where you were and climb up that second ladder to reach the first boss gate! There's a hedgehog guarding it, so blast it before it rolls!
Doc Air Man fight
The first boss of this stage is a Doc Robot with Air Man's powers. He's still ridiculous with his almost-unavoidable tornadoes, but now you have the ability to slide under some of them. After sending out three waves of tornadoes, the boss will jump to the other side of the room and repeat the attack the opposite direction. Keep in mind that when he blows the tornadoes across the room, you'll also be pushed. How do you beat him? Spam Spark Shock until he goes down. It's difficult to do so because the tornadoes block your shots. When I defeated him, I was left with very little health... wow that was rough.
Past Air Man
Upon exiting Air Man's room, we're greeted with a large weapon energy capsule. Make sure you use it to refill Rush Jet! I cannot stress that enough because you will need a fully-charged Rush Jet to make it through this next section. You will have to fly across a very, very, very, very wide gap while avoiding dragonflies and those parachuting enemies from Shadow Man's stage. Thankfully there are platforms with more weapon energy along the way, but use them wisely. The best place to fly is in the upper middle of the screen because you'll avoid the first flyby of those dragonflies and won't have to worry about running into parachuting enemies. After spending about five minutes grinding for health power-ups from dragonflies, I began my flight. I should also point out that it's impossible to get through this room in one go without collecting those weapon energy capsules. That means if you use them up and fail, they won't respawn until you get a game over. Do your best to ensure that doesn't happen.
You thought it was over? No it isn't! After climbing up a ladder, you'll have to use Rush Jet some more to reach a high-up one! There's a large weapon energy capsule, but this is not good level design. When you climb some more, you'll finally reach solid ground. You must be quick though because there's a pole-vaulting robot who'll send you to your demise if you don't get up in time. One final way to troll players, eh? Doesn't work against me! Oh, and he's also nice to give me a large health power-up upon defeat. Thanks!
This next room has a large Mettaur on jets blocking your way! It slowly moves up and down and stops to either shoot three big slow-moving projectiles in three directions or spit out three Mettaurs that charge forward. These summoned Mettaurs give power-ups upon defeat, so this is a good grinding spot. To damage the large Mettaur, you must damage the "+" on its helmet. It's not as strong as it looks.
The following section is another hallway, although this one is way better-designed. There are Mettaurs here, but unlike all the ones fought previously, these ones gain propellers upon waking up! They fly up and above Mega Man's position before shooting three bullets in a spread formation downwards before lowering themselves to Mega Man's location on the X-axis (horizontally) and flying at him. They're super easy to defeat and only have 1 hit point. Try to take the higher path because the lower one has spikes. At the end are two cannons from the normal version of Needle Man's stage. Only attack them when they're not guarding!
Past them is another large Mettaur, so I won't repeat myself. Now we have the last room before the main boss! A hedgehog stands atop higher ground, but this one can easily be avoided by jumping while it rolls. There's also a large health power-up before the boss gate. With another checkpoint, you don't have to worry about flying across that massive gap again!
Doc Crash Man fight
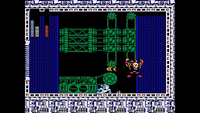
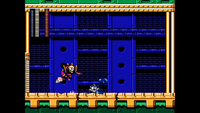
Here is a much better boss than Doc Quick Man, at least I think so - Doc Robot Crash Man. He walks back and forth on the ground, but whenever you shoot he jumps high and sends out a Crash Bomb towards Mega Man's location. Touching him also deals way less damage than Quick Man. This boss is weak to the Hard Knuckle, but because of its slow speed it can be difficult to get a hit in. What I did was jump in the air close to the boss' location and shoot it out. When he jumps, he's likely to get hit by it, resulting in lots of damage dealt. Oh yeah! He was way easier and better than Doc Quick Man, and even Air Man for that matter.
Halfway there now! Gemini Man's stage is the next one to do.
? (Gemini Man stage)
The beginning of this stage is similar to Gemini Man's original stage - a long hallway with multiple gaps across uneven terrain. Those flying fire enemies return as well, but they're colored orange instead of blue, and fittingly have blue fire instead of orange fire. There aren't any penguins however; instead are those ladybug enemies that usually climb ladders. There are no ladders in this section though, so instead they scurry along the ground at a fast speed. You must be very careful and make sure you don't get knocked into one of many pits by these enemies. Sometimes it's wise to wait at a ledge to bait an enemy before making your move. I got through this without using any special weapons, so it's not horrendous. If you're desperate, you can use Rush Jet to fly on by.
After falling down a hole in the next "room", we're now underground. Those flying enemies from Snake Man's stage return (the ones that drag their faces), as well as those eggs containing fish. Destroy the eggs strategically, as there are spikes below them! Create a safe path so you don't have to worry about them. There are also two mystery containers that may or may not give you something good - I just ignored them. The next room has many more eggs, making for a perfect grinding opportunity! This especially helps if you used Rush Jet earlier. There is one instance where Rush Coil is needed if you destroyed the eggs in a way where normal jumps won't get you over a wall, but it's not bad. Near the end of the room are more of those flying enemies guarding the first boss door. Who will it be this time? The answer is...
Doc Flash Man fight
...Flash Man! A Doc Robot of him at least. He's fought on uneven, symmetrical terrain where the middle is the highest. He moves kinda quickly towards Mega Man's location and often stops to freeze time for a moment before shooting one bullet at Mega Man. He will not leave you alone.
This is yet another poorly-designed fight where it's pretty much impossible to get by without taking damage. The boss is weak to Needle Cannon, so just stay in the corner and spam the weapon until he's down. If he reaches you, it's fine as long as you have lots of HP. Because of this, make sure you enter the fight with full HP. When I defeated him, I had around half HP remaining. Really, that's pretty much the best way to win without using Rush Jet. Don't use Rush Jet.
Past Flash Man
With that out of the way, it's time to continue pressing on! Upon exiting the room, we're greeted with a wall that can only be traversed by using Rush Coil or Rush Jet. If you're out of both of these, then too bad! Back to the start of the stage for you. After overcoming the wall, there is a broken ceiling block that drops ladybugs every several seconds. This is essentially another grinding spot after that ridiculous battle. Take the time to get back to full strength!
Past that short section is one featuring lots of water. We'll have to use the underrated Rush Marine Ability to make it through most efficiently. This section can be cleared with one full use of RM, so if you fail, simply grind weapon energy from the ladybugs in the previous area. There are large weapon energy capsules on high-up platforms, but you don't need them to get by. Watch out for large fish with missiles in the water! Also beware of more flying enemies above the water's surface. Just keep shooting to clear any fish that dare swim in your path. You must then slide through a low passage to reach a room with a ladder leading upwards. Three flying enemies will try to hinder your progress, so clear them out first before continuing.
Upon reaching the top of the ladder is a hallway with plenty of short ladders and more broken blocks that spawn ladybugs. These ladybugs can descend down ladders if they happen to reach one, so make sure you're not on one if they do so! Honestly, this is an easy room. A ladder at the end will take you downwards, where more broken blocks and ladders are. Oh, and a row of spikes inhabits most of the floor. Take your time and reach the next ladder (located on the bottom-left corner of the room). I've also noticed that spawned ladybugs only travel in one direction, making it easier to plan out their movements. The final room is an empty one taking place in water. It also contains the second boss gate!
Doc Bubble Man fight
This Doc Robot has Bubble Man's powers. The fight also takes place entirely underwater, with spikes covering the ceiling. Make sure not to jump too high! As for the boss himself, he's pathetic, way easier and better than Doc Flash Man too. He lobs bubbles that bounce towards the other side of the screen before leaping up to shoot many times before slowly descending, shooting more bullets as he does so. He then repeats the process.
His weakness? Spark Shock. Just keep shooting him with it and you'll be good to go. His projectiles do weak damage too, so this is a much-needed breather. I beat him in 10 seconds flat! What a joke.
Only one left to go! What does Shadow Man's stage have in store?
? (Shadow Man stage)
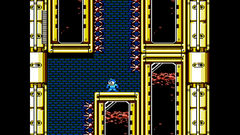
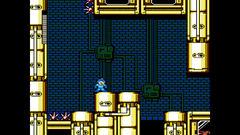
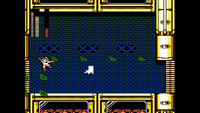
We start off on a small platform with visible spikes on its sides. The background also has no lava flowing. We jump down into the next section, where spikes are found close to the pit leading to the next room. Be careful not to touch them! Falling down once more, there are more spikes, this time found on the left side of the platform you're currently standing on. You must get by without touching them. Don't jump too high, or else those high-up spikes will destroy you. I recommend sliding instead. It's very difficult describing these rooms without images! The room below it has two spikes on the left side of the landing platform, making for a cheap death for players unfamiliar with the game. There's also a walking eye close by. Making more progress, there are two ladders that must be traversed, both surrounded by more spikes. Thankfully if you stick to the ladders you'll be safe. Another walking eye inhabits the platform past the first ladder. This is not a good start to a level.
Falling down a hole, we end up in a room that's similar to where Protoman was fought. A large jumping enemy is here guarding the way down, but it's easy to defeat. After falling more, we enter a large hallway with more walking eyes. There are also these unique platforms that almost instantly drop Mega Man when he stands on them. To be able to utilize these platforms, you must jump immediately upon landing on them! Thankfully those machines that darken everything don't make these platforms invisible; Imagine how awful that'd be! Walking grenades return here as well. There is then a large gap with many platforms plus another machine that darkens everything. Hoo boy. I don't blame ya if you use Rush Jet. After reaching more solid ground, there are two more walking grenades and then a ladder leading down. The next room has the first boss gate, and is also where two more walking eyes inhabit.
Doc Wood Man fight
This next Doc Robot is Wood Man, and if you remember him in Mega Man 2 his fight was kinda unfair. I'm sorry to say that the unfairness returns for here as well. The boss protects himself with a Leaf Shield and then causes four leaves to float downwards before sending the Leaf Shield at Mega Man's direction. After throwing it, he jumps forward. Like Doc Flash Man, he's weak to needles, so just stay in the left corner and spam, spam, spam until you get rid of him. Try to attack him when he isn't protecting himself. Get him before he reaches you!
Past Wood Man
I think the developers knew that fight was stupid, so they kindly left us a large health power-up in the next room. This room is a narrow hallway with "steps" along the way. There are several of those hammer-throwing enemies along the way. Because of the tight spaces here, slide to avoid the thrown hammers! The section afterwards is much more spacious, with many gaps and spikes covering the ceiling. Additionally, there are parachuting enemies and those low-hopping enemies, both of which can surprise the player and may send Mega Man plummeting to his doom. I advise you all to take your time and make sure you don't rush through. Good things come to those who wait, they say. The next room is the final one before the second boss gate, and it's also where a large spring enemy is. It's on a high ledge, so be wary of its missiles.
Doc Heat Man fight
And here is Doc Heat Man, the final Robot Master from Mega Man 2! He fights exactly like he did from said game as well, tossing three fire projectiles in three directions and performing a fiery teleport when attacked. His projectiles are troublesome, but other than that he's one of the better Doc Robots to deal with. He's weak to Shadow Blade, which means you have to be somewhat close to him to attack him with it, which is annoying. Could be way worse though.
Finally those stages are done! I don't know why Capcom thought adding in every Mega Man 2 Robot Master was a good idea, but I'm glad the worst part's over with. We are transported back to the stage select screen, where a new foe appears - Break Man.
Break Man
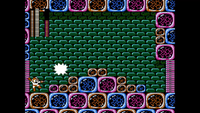
When selecting this stage, we immediately jump right into the level without an intro. The boss music also plays, and a familiar whistle is heard. Break Man then appears and fights like how Protoman did during those previous encounters with him. Wait, was that Break Man attacking us earlier or was that Protoman himself? I don't know, but Break Man here fights exactly like he did earlier, so he's very easy. In fact, this might be the easiest stage in Mega Man history. After defeating him, the stage is won. OK...
There is then a cutscene in Dr. Light's lab. Mega Man returns there to hear shocking news from him: "Oh no! Right after we received the last element... Wiley[sic] ran off with Gamma!"
"Dr. Wiley" has taken Gamma, a large robot created from the collaboration of both Dr. Light and Dr. Wily. What could plan to use it for?! Will Mega Man be able to stop Wily's plans yet again? Find out next month in An Overly Detailed and Funny Walkthrough of Mega Man 3! See you then!
| The 'Shroom: Issue 220 | |
|---|---|
| Staff sections | Staff Notes • The 'Shroom Spotlight • Poochy's Picks • Credits |
| Features | Fake News • Fun Stuff • Palette Swap • Pipe Plaza • Critic Corner • Strategy Wing |
| Specials | Welcome To Cosmo Kart |


