The 'Shroom:Issue 126/Strategy Wing
Director Notes
Written by: Meta Knight (talk)
Hello everyone and welcome to this month's Strategy Wing! This month I have a few announcements. Roserade (talk) has decided to switch to bimonthly for his Challenger Approaching! section. Isaac Synergies is also absent this month due to time constraints. However, I'm going to do my best to provide Galactic Expedition monthly. No guarantee I'll be able to do that but we're doing all we can to help this team flourish. Have a great rest of the summer and I'll see you next time when I'm sure there'll be some spooky sections.
Section of the Month
Congratulations to Roserade (talk)! Thanks to DragonFreak (talk) and Yoshi876 (talk) as well for submitting their high-quality sections!
| STRATEGY WING SECTION OF THE MONTH | ||||
|---|---|---|---|---|
| Place | Section | Votes | % | Writer |
| 1st | Challenger Approaching! | 15 | 48.39% | Roserade |
| 2nd | Isaac Synergies | 7 | 22.58% | DragonFreak |
| 3rd | Mario Kart: Wheel Tips Corner | 4 | 12.9% | Yoshi876 |
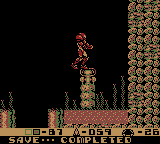
Metroid: Meta Knight Returns for the next part of the Metroid II walkthrough!
[read more]
Mario Kart: Wheel Tips Corner
Hello 'Shroom racers! And welcome to Mario Kart Wheel Tips Corner, here I plan to give you just some extra tips to help you with your racing, or just some changes in a track that might catch you off guard if you aren't prepared for them. Lights are out, let's start racing.
Kool Karts
You can't race if you don't have a Kart to do it in, so in this section I'll give you some facts about a Kart, Bike, ATV or even tires and gliders that you can use hopefully for racing success.
In this edition of Kool Karts, we're going to be looking at one of my favourite Bikes from the series, the Sneakster (or to be, the Nitrocycle). Honestly, this is my Mario Kart Wii choice as soon as I unlock it.
Despite it being my Bike of choice, it doesn't have the best stats with it. It's a very fast bike, it's fairly bulky for a medium bike, and it has got a decent drift stat. But other than that, everything is low. What you need to do with the Sneakster is use its speed to get ahead, although that may be difficult in the opening corners, and then drift around every corner. If you try to do it without, you will find it a lot more difficult.
What's Changed?
Retro tracks are now a huge portion of the Mario Kart games, typically amounting to half the courses in the game. But usually these courses change some things up, so in this section I'll help you find out "What's Changed" in the retro tracks.
Mario Circuit has been a staple of the Mario Kart series, and this rendition first appeared in Mario Kart: Super Circuit, before reappearing in Mario Kart 8. And with it being a Mario Kart 8 track, many things have changed...
So, we start with pointing out the nice graphics, and 3D plane, as opposed to the 2D background that the GBA had. Now we move onto the bigger changes, sort of. There is now a lot of scenery around including tyres, pit crews, and spectators, as opposed to the trees in the original. Oil slicks have been added as a track hazard, and there's also now a shortcut that incorporates a gliding pad, the track also banks into the corners now. There is obviously the elephant in the room, part of the track has now been raised up and acts as an anti-gravity section now. And, because you probably missed it, the music is also in a different key. It's amazing what they change!
Ace Shortcut
In this small section I give you a way to shave a few seconds off your time, whether you know about it or not. Be warned, most of these shortcuts will require a Mushroom.
This issue I bring you a shortcut from Delfino Square.
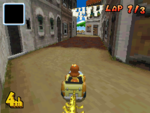
This shortcut can be used in both the DS and Wii version of the track. When you leave the plaza, and go over the bridge, near the crates is an alleyway. However, as there is quite a lot of mud in the alleyway, you'll get slowed down, but if you use a Mushroom, then you cut a fairly large portion of the track.
Galactic Expedition
Written By: Meta Knight (talk)
Metroid II Walkthrough
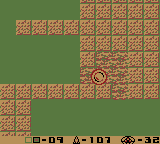
Current Inventory: 2 Energy Tanks, 140 Missiles, Morph Ball, Bombs, Spider Ball, Ice Beam or Wave Beam, High-Jump Boots, Spring Ball
Metroid Counter: 7 killed, 32 left
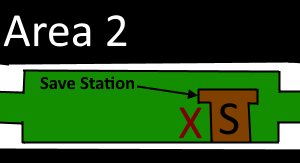
Greetings everyone and welcome to another Galactic Expedition! Man I am so hyped for the recently released Samus Returns and I will be playing it a lot this weekend. That being said this walkthrough will still be focusing on the original, so lets get started with Metroid II! This month we'll be finishing off Area 2 by killing the rest of the Metroids in the area. We might get a few upgrades as well. We're starting off back in Area 2 in a Save Station. Move left, and you'll come across another Save Station. Feel free to save here if you want, but move left out of this room.
You should be outside the temple. Move left a little and when and drop down when you can. Fall until you fall into some water, but be careful not to touch the thorns as this will harm you. The water will not harm you, so don't worry about falling into it. I know it can be hard to tell sometimes whether or not a liquid will harm you because of the very limited amount of color (or lack of color), but rest assured its safe. Strangely enough, water does not hinder your movement unlike most Metroid games. When you're on the floor in the water, head right and you'll enter another room.
You'll be in a large chamber filled with water that leads down. Before you do that though, briefly jump across and scale the right wall and you'll pick up another Missile Tank [150]. You don't even have to scale the wall even, you can just jump up and veer left to touch it. Fall down deeper into the water. You will fall onto some blocks and it seems like you're stuck, but just move right in Morph Ball mode and you will move through a wall and fall down. Move right into the next room.
In here there will be an Alpha Metroid. He shouldn't be a problem, just hit him with some missiles and he'll be done for. Jump up on the little ledge and before you head up into the next room, go into Morph Ball mode and move left. There's another wall that you can pass through here. You'll have to do some jumping around in Morph Ball mode but just keep moving left through this wall and you should find some breakable blocks. Bomb them and you can grab yourself another Missile Tank [160]. Go back to where you were before you went through the wall, and use the Spider Ball to climb up.
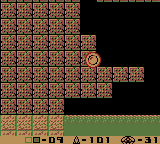
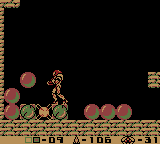
You should be scaling up a narrow pipe that travels quite a ways up. When you get to the top it curves left. Just follow the tunnel and continue left. You'll come across another red door that can be opened with 5 Missiles. You'll see a Chozo Statue but there's nothing in it. Bomb some of the blocks below it to the right for another passage. Go down there to move left, and when you get to the wall you can either scale it or jump up to get through and you'll be in another room with several orbs. You'll have to bomb them to get to the item you want. The orb you want cannot be bombed, and contains the item, you'll have to shoot it in order to grab it. What awaits you inside one of the orbs is the iconic Varia Suit! This will increase your defenses by 50%, making some of the stuff coming up easier to deal with.
Now you're gonna want to go back to where you were when you first dropped in the water. It's all just a straight path back so you shouldn't have to worry too much about getting lost, but just in case go out of this room, back down the pipe, left through where you defeated the Alpha Metroid, and up the chamber filled with water. Once you're back outside the temple, jump up out of the water and move left until you come across an open pathway. Take it into the next room.
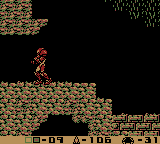
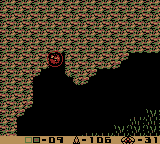
You should be in a tall chamber with several small creatures called Moheeks. Climb all the way up to the right and take the passage to the right. Jump up on the small ledge above you and scale the wall to your left. Climb up and when the wall curves so that its horizontal and you're on a celing instead of a wall, there's a very specific spot that can be bombed. It's right on the corner between where the wall is vertical and the ceiling. Be careful not to be next to a bomb because you'll fall, and if you fall you will have to climb the chamber again. You'll have to plant a few bombs in this spot, but eventually it will make a tunnel leading up to another Missile Tank [170].
Go back through the small tunnel but continue to scale the ceiling and move right. Eventually you'll see another passage on your left. Take it and fight the Alpha Metroid here. Before you leave this room, there is an Energy Station here you might want to use. Head left as much as possible, and bomb the block in the bottom left corner. It should be a breakable block and you'll be able to fall into the Energy Station. This room is done so we can exit. Jump back down, it is not a concern if you fall to the bottom. I will point out that you might want to save in the Save Station to the right before continuing just in case, we're going to take on a bunch of Metroids for now and if you die you'll have to start from the last point you saved. When you're ready, go back in the chamber with the Moheeks.
This time instead of going up, move down. Go into the room on the right and fall down again. Be careful not to land on thorns, but you should see an empty Metroid shell and a pathway that opens to both the left and right. It doesn't really matter which way you go first, but I like to go right first, so that's what I'll do for this walkthrough. When you're in the next room, jump across the platforms and be careful not to fall. Continue right and eventually you'll come across the next stage of the Metroid evolution. It's time to fight your first Gamma Metroid!
Boss Guide: Gamma Metroid
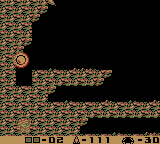
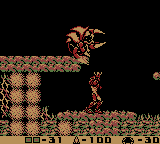
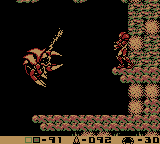
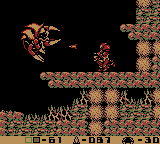
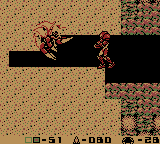
The Gamma Metroid seems scary at first as it is much larger than an Alpha Metroid, and it will try to attack you with a beam attack from its body. However, if you can get in the right spot you can unload a lot of your Missiles on them. They are most vulnerable in the front on their stomach and head. Try to get into a position where you can attack it. If you need to Morph Ball to get out of the way do so. 10 Missiles and the Gamma Metroid will be done for.
| Image Guide: Gamma Metroid |
|---|
Back to Path
When you defeat the Gamma Metroid, go back left so you're back where that empty Metroid shell is. This time you need to take the path to the left. There will be an Alpha Metroid almost immediately in the room so take it out. When you've gotten rid of it you will have to continue left. There will be another chamber that drops you down to a split path that leads either left or right. Once again it doesn't really matter which path you take, but I usually go left first so that's what I'll do here. There will be a lot of sand in this room that you'll have to shoot, but be very careful. There is a Gamma Metroid in this room that you have to kill and it can be difficult to deal with when there's a bunch of sand in the way. You can try to make a wider area open before triggering it to come after you if you want but just do the best you can to take it out. You can also move right a little, turn left, and just unload your Missiles on it. Doesn't matter how you get rid of it as long as the job is done.
Continue moving left through the sand and in the next room there will be a much welcomed Energy Station. Those Gamma Metroids are tough and that is why I go after them first on these paths. The first Gamma Metroid you were full health from the first Energy Station, and this one has another Energy Station right after it. You had better get used to fighting Gamma Metroids though, because there are a bunch of them throughout the game.
When you're back at full health move back right through the sandy area. When you're back at the split path with another Metroid shell move right. There will be another sandy room for you to shoot through, but this time when you get past it you only have to fight an Alpha Metroid. He shouldn't be too big of a deal. When he's destroyed, all of the Metroids in Area 2 will be defeated. That means it's time to head on over to the next area. Make your way back to the chamber with the Moheeks by climbing up out of the various pits with empty Metroid shells.
When you're back outside the temple, continue right. Go back through both Save Stations. Feel free to save if you want, that was a lot of fighting, but keep going right and follow the path until you're back in the main tunnel. You'll know you're back in the main tunnel because this amazing theme plays.
When you're back in the main tunnel, just keep moving right. You will be able to follow the tunnel that moves downward. This pathway is fairly linear so you should be fine just moving along it. When you get to the next room, you'll see another split path. On the left there is lava, and this will harm you so it's best to not go there yet. For now move right. You'll be in another corridor that doesn't have anything too special in it, so just make your way to the next room. The main tunnel theme will stop playing, and that means that you are in the next area.
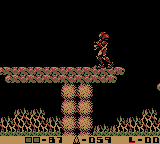
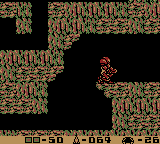
This room is fairly linear and you can just follow along the path, but you also have to be careful because there's a lot of spikes that you need to stay away from. This room is kind of like a maze in that it branches off slightly, but you need to be going down, so as long as you take the path that lets you drop down you should be fine. When you get to the bottom you can move right and into the next room.
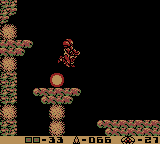
This room has lava that will hurt you so you'll have to jump across the platforms carefully to not get hurt. Make your way right into the next room. You will be in a large chamber that you will need to climb up. Don't get hit by the enemies here and when you get to the first passageway that leads right, take it. There will be a long corridor, but eventually another Save Station. Whatever you do don't fall down the pit! If you fall you can scale the wall, but you'll have to bomb the obstacles that are in the way because they'll harm you. Why would I tell you not to fall down the pit? Well because I'm going to leave you with a literal cliffhanger and call it a day! Next time we will tackle more of Area 3, but for now you'll have to wait for when Samus Returns! Or don't wait, the game is out now and I'm going to definitely play it as soon as possible. See you guys next time!
Party Trick!
Written By: ![]() Meta Knight (talk)
Meta Knight (talk)
![]() Hello and welcome everyone to this month's edition to Party Trick! Wow there was a Nintendo Direct the other day and they announced a new Mario Party game that's just minigames from all across the series. Well I havent quite reached 100 minigames here yet, but let's pick a few that are going to be represented in this upcoming installment since I don't have any requests for this month.
Hello and welcome everyone to this month's edition to Party Trick! Wow there was a Nintendo Direct the other day and they announced a new Mario Party game that's just minigames from all across the series. Well I havent quite reached 100 minigames here yet, but let's pick a few that are going to be represented in this upcoming installment since I don't have any requests for this month.
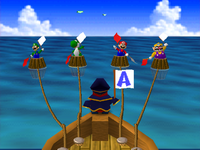
First up this month is a minigame featured in both Mario Party 1 and Mario Party 2, Shy Guy Says! The concept is simple, Shy Guy has two flags in his hand, a red and and a white flag. If he holds up the red flag, you have to press the B button. If he holds up the white flag you have to press the A button. If you take too long, press the wrong button, or do nothing, Shy Guy will cut off your barrel leaving you stranded in the ocean, or pop your balloon making you fall into an abyss depending on if you're playing Mario Party 1 or Mario Party 2. The last player standing wins. Watch the flag closely, and don't let yourself get caught in a pattern. For example, if Shy Guy holds Red -> White -> Red -> White, don't assume that the next flag will be red. Sometimes Shy Guy will fake you out too, where for example he'll start to show the red flag but then pull it away and put up the white flag instead. You just gotta watch him carefully and be careful to not have a trigger finger that accidentally pushes the wrong button too quickly.
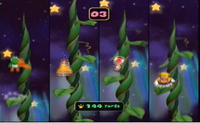
Next up is Leaf Leap from Mario Party 5. In this minigame you use the A button to jump and the analog to move on to leaves. The goal is to climb the beanstalk as much as possible and whoever gets the highest wins. This is also pretty straight forward. Pressing A as soon as you land consistently help you get height, but once again don't assume there will be a consistent pattern. For example, if the leaves start off Left -> Right -> Left -> Right, don't assume the next leaf will be to the left. Pay attention to what's above your character that way you can jump on the right leaf. If you accidentally fall you could end up costing quite a bit of distance. Keep a close watch on the leaves and time your jumps accordingly.
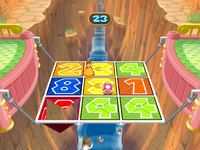
The last minigame for now is The Final Countdown from Mario Party 7. In this minigame, there are nine numbered tiles. Each one counts down. When a panel hits zero, it will drop and anyone on that panel will fall. The last player standing wins. For this minigame, stay to the higher numbers if you can. You can also jump and attack other players to try and knock them over the edge or onto a zero panel that is open. Try not to get hit yourself though because you'll be stunned, and that will be bad if you're on a panel that's reaching the lower numbers. As time goes on the pace gets faster and faster, so you'll have to keep on your toes and be careful.
![]() That's all for this month's Party Trick! Have a minigame or board you'd like me to do? Send me a message on my talk page or message me on the forums and you could be mentioned in next month's edition!
That's all for this month's Party Trick! Have a minigame or board you'd like me to do? Send me a message on my talk page or message me on the forums and you could be mentioned in next month's edition!
Pokédex Power
Hello everyone, it's me, Yoshi876 again with a new edition of Pokédex Power, the section written by the man who actually enjoyed Pokémon Ranger 2 Shadows of Almia, despite its difficulty being near non-existent. Seriously, I can complete half the game in manner of hours.
Now that Autumn (Fall for you Americans) is drawing, things are a changing. Weather's getting colder, nights are getting darker, and leaves are falling to the ground, which is what our Autumn-themed Pokémon will be. If you haven't noticed, which I doubt you have as I've only been doing this for a few months, but at the start of each season I try and theme it. Winter is Ice, Spring is Grass, Summer is Fire, and I've settled on Ground for Autumn.
The Ground type I have decided upon is Trapinch, a cute little Pokémon introduced in Generation III, and based off of the antlion larvae. Considering that's an insect, it is a bit annoying that it isn't dual-typed with Bug. Despite this, I really like Trapinch as a Pokémon, and I have trained one a few times, most recently on Pokémon Black 2. However, will my liking of Trapinch translate into a liking of its Pokédex entries? Let's find out.
Generation III
| Pokémon Ruby | Trapinch's nest is a sloped, bowl-like pit dug in sand. This Pokémon patiently waits for prey to tumble down the pit. Its giant jaws have enough strength to crush even boulders. |
| Pokémon Sapphire | Trapinch is a patient hunter. It digs an inescapable pit in a desert and waits for its prey to come tumbling down. This Pokémon can go a whole week without access to any water. |
| Pokémon Emerald | Its big jaws crunch through boulders. Because its head is so big, it has a hard time getting back upright if it tips over onto its back. |
| Pokémon FireRed | It lives in arid deserts. It makes a sloping pit trap in sand where it patiently awaits prey. |
| Pokémon LeafGreen | It lives in arid deserts. It makes a sloping pit trap in sand where it patiently awaits prey. |
Our introduction to Trapinch heavily focuses on its similarities to the antlion larvae, as both creatures dig conical-shaped pits in the sand, and wait for prey to tumble down them. Although FireRed and LeafGreen keep their entries pretty basic, the other three offer up some additional information alongside what I mentioned. Both Ruby and Emerald go on about the strength in Trapinch's jaw, and how it's able to destroy boulders, although this does seem to be a bit of an odd fact. A lot of desert is going to be just sand, rather than rock, so Trapinch shouldn't need this amount of power. If it lived in a cave, then I'd fully understand this, but as a desert Pokémon it does seem a bit misplaced. Sapphire mentions how the Pokémon can go a week without water, which seeing as it lives in a desert, must be very useful for it. And finally Emerald has Trapinch draw comparisons with turtles, as both creatures can struggle to right themselves if flipped on their backs. But, if those Trapinch don't right themselves quickly, they could get overcome by the desert heat.
Generation IV
| Pokémon Diamond | It makes a conical pit in desert sand and lies in wait at the bottom for prey to come tumbling down. |
| Pokémon Pearl | It makes a conical pit in desert sand and lies in wait at the bottom for prey to come tumbling down. |
| Pokémon Platinum | It makes a conical pit in desert sand and lies in wait at the bottom for prey to come tumbling down. |
| Pokémon HeartGold | Its nest is a sloped, bowl-like pit in the desert. Once something has fallen in, there is no escape. |
| Pokémon SoulSilver | Its nest is a sloped, bowl-like pit in the desert. Once something has fallen in, there is no escape. |
Sadly, Generation IV doesn't really add anything new. We know that Trapinch digs these bowl-shaped nests, and we know they're inescapable. It would have been nice to have gotten something new, perhaps on behaviour outside of the nest.
Generation V
| Pokémon Black | It makes a conical pit in desert sand and lies in wait at the bottom for prey to come tumbling down. |
| Pokémon White | It makes a conical pit in desert sand and lies in wait at the bottom for prey to come tumbling down. |
| Pokémon Black 2 | It makes an inescapable conical pit and lies in wait at the bottom for prey to come tumbling down. |
| Pokémon White 2 | It makes an inescapable conical pit and lies in wait at the bottom for prey to come tumbling down. |
Generation V doesn't add anything new either.
Generation VI
| Pokémon X | It lives in arid deserts. It makes a sloping pit trap in sand where it patiently awaits prey. |
| Pokémon Y | It makes an inescapable conical pit and lies in wait at the bottom for prey to come tumbling down. |
| Pokémon Omega Ruby | Trapinch's nest is a sloped, bowl-like pit dug in sand. This Pokémon patiently waits for prey to tumble down the pit. Its giant jaws have enough strength to crush even boulders. |
| Pokémon Alpha Sapphire | Trapinch is a patient hunter. It digs an inescapable pit in a desert and waits for its prey to come tumbling down. This Pokémon can go a whole week without access to any water. |
Again, nothing new from Generation VI.
Generation VII
| Pokémon Sun | It can live for a week without eating a thing. It waits patiently at the bottom of its nest for prey to appear. |
| Pokémon Moon | As it digs through the sand, its giant jaws crush any rocks that obstruct its path. It builds a funnel-shaped nest. |
This is where things get pretty disappointing. Generation VII usually offers up some new Pokédex entries, but here it's just rewording of information that we already know. The only thing that we learn from these entries are that Trapinch can go for a whole week without food, as well as water. But given how Generation III mentioned the water thing, it is a bit hard to believe that this wasn't just a copy and paste error.
Conclusion
Trapinch's Pokédex entries are actually pretty poor. Its introductory generation is the only one where we actually learn anything, but despite a one of them seeming a bit misplaced, a lot of the facts were fairly interesting. However, there's one thing that every generation missed out. What is Trapinch's prey? In all of the places where you can find it, none of the surrounding Pokémon seem like they'd fit the bill for its prey, so we're just left to assume that it eats something. I would have liked to have known more about Trapinch. As the desert rarely rains, it can be assumed that it leaves its nest to find water, so what is it like out of its nest? What happens when two Trapinch meet? How on earth does a Trapinch evolve into a Vibrava? For once, a Pokédex entry focuses too much on real-life comparisons, and not actually giving Trapinch a developed place in the Pokémon world.
| The 'Shroom: Issue 126 | |
|---|---|
| Staff sections | Staff Notes • 'Shroom Achievements • The 'Shroom Spotlight |
| Features | Fake News • Fun Stuff • Palette Swap • Pipe Plaza • Critic Corner • Strategy Wing |
| Specials | Meta Knight's Awards Reflections • Community Awards X • Awards Analysis • Killing Game: Closing Argument |
