The 'Shroom:Issue 180/Strategy Wing
Director Notes
Written by: Generalissimo Shoe (talk)
TEN-HUT! Welcome to Strategy Wing. I'm your new Unit Commander, Generalissimo Shoe. "Where's Hood," you ask? Well, let's just say he's "on assignment," and I, the great Generalissimo Shoe, am in charge now. For years I was held down writing minor section after minor section, left watching people taking my destiny, my calling, the position of Strategy Wing director! What they didn't realize is that what the Generalissimo wants, the Generalissimo gets, and there will be some changes now that I'm in command! But, first, you will listen to your new commander's briefing on this month's sections.
I am pleased to announce that Zelen, Baby Luigi, and Koops have returned from their one month leave of absence, with astronaut Zelen's On the Origin of Species continuing her galactic travels and Baby Luigi's SIMulation unveiling her new race of attack chickens. Koops, in addition, regales us his trek through the desert in Koops, Your Emblem is on Fire. In addition, I, Generalissimo Shoe, leading by example, have penned a new An Ogre Battle Section about recruiting new commanders for our army. Waluigi Time has a new edition of To Infinity and Beyond about Buzz Lightyear's adventures in a mid-level toy store. Why, even that impudent Blocky has turned in his Mach Speed Mayhem on time, this time covering Lily Flyer. Thus is the strength of my leadership. I'm also pleased to report that The Wandering Shoestrel has agreed to continue his patronage of our paper and will be writing The Greatest Quest, the epic tale of Sir Cucumber, full-time. We also have a new section, with Hooded Pitohui opening Pitohui's Pokémon Academy, a section about how to raise your Pokémon with love and care nonsense like that. All of our writers have put in a tremendous amount of work to create these sections and we hope you enjoy them!
Before we go, we have a special message. Are you bored? Do you have nothing to do? Are you longing for a purpose? You're in luck. Our unit is always looking for new members! You can write about a game you love, a game you're good at, or even a game you just like playing; Strategy Wing serves all kinds of kinds. Interested in signing up? Just send your application to 44 Avian Court, New Wikisburg (talk) (P.O. box changing soon). We'll see you report for basic training soon, recruit.
Section of the Month
This month's Medals of Valor go to Waluigi Time, with his report on how to defeat the Slime Monster, and The Wandering Shoestrel, who told us the tale of Sir Cucumber infiltrating Saldoria. Receiving the Bronze Medal of Honor is Blocky with his profile of pretty boy Jack Levin. Outstanding work by all of you. I offer you my most heartfelt congratulations.
| STRATEGY WING SECTION OF THE MONTH | ||||
|---|---|---|---|---|
| Place | Section | Votes | % | Writer |
| 1st | To Infinity and Beyond | 5 | 35.71% | Waluigi Time |
| 1st | The Greatest Quest | 5 | 35.71% | Mustard Machine |
| 2nd | Mach Speed Mayhem | 4 | 28.57% | Superchao |
An Ogre Battle Section
Written by: Generalissimo Shoe (talk)
Hello, 'Shroom readers and welcome to another edition of An Ogre Battle Section, hosted by yours truly, the Generalissimo. Usually we talk about creatures that form the units you build, but this month we're going to do things a little differently. This month, we are going to talk about recruitable unit commanders. Commanders are commanders of the unit, and, in the game, if the Commander of a unit dies, the unit's morale will crumble and they'll attempt to return to home base. The game also has 18 special recruitable Commanders who have higher stats than the people you can randomly assign to be Commanders. Many of these characters have complex recruitment requirements (because this is a Super Nintendo game, it assumes you're on summer break and this is the only game you've got). With just about all of these characters, you have to recruit them on the first playthrough of the level or they'll be lost forever!
The first one we're going to talk about is the Eagle Man, Canopus Wolph, who is located in the 3rd level of the game, the Sharom District.
A former subject of the Xenoblian Kingdom, Canopus, along with his best friend Gilbert O'Brien, originally fought against the invading Sacred Xytegenian Empire until Gilbert, who was governor of the Sharom District, surrendered. Bitter over his friend's betrayal, Canppous is quite the difficult person to convince to join the revolution. First, the player must liberate the trade city of Latingurue. There, the newly freed townsfolk will tell you of the warrior Canopous, the Wind Rider. Next, head northwest and liberate the town of Bah'Wahl. There, you will meet Canpous who will ask you three questions pertaining to the revolution, asking what you are fighting for and then listing three possibilities:
- Honor?
- Freedom?
- Justice?
Answering yes to one of these three questions will trigger special dialogue related to each answer and ends with Canopous refusing to fight (you have to answer yes to one of the three possibilities, as answering "no" to all of them will cost you the chance to recruit Canopous). Next, you must revisit Latingurue, where the townsfolk say that Canopous has a sister who might be able to help you get him back in fighting spirits. Now, his sister is in one of the game's many hidden temples/cities, which are hidden areas on the map that have no discernible difference from any other part of the map! This one is hidden in the west side of the map, just beyond the city of Parcival. At the hidden temple, you will meet Canpopous's sister, Yuria, who tells you the tragic tale of how Gilbert and Canopous were once best of friends and explain that Canopous wanted to fight the Empire until the end but that Gilbert wanted to surrender and spare his people. Since that day, they have not spoken. Believing that Gilbert actually wants to be defeated and that doing so may help mend the friendship between the two men, Yuria gives you the Wings of Victory, a sacred item given to the two by King Gram so someone could show it to Canopous and return the Wind Rider to his former glory. With the Wings of Victory in tow, you return to the city of Bah'Wahl and you speak to Canopous, who reveals that he doesn't blame Gilbert for his decision but that he can't let Gilbert throw his life away.
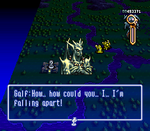
Desiring to repay Gilbert for once saving his life, he joins the revolution so that he can save Gilbert. It's important to note that all of this must be done in order and, if anything is done out of order, you cannot recruit Canopous. Recruiting Canopous is also completely required to recruit Gilbert, who is the boss of Sharom. Once you've recruited Canopous, recruiting Gilbert is actually quite easy; all you need to do is defeat him. One thing to note, though, is that you do not need to actually have Canopous in the unit that fights Gilbert. Doing so will create a special dialogue, but it is not required. After defeating Canopous, Gilbert bitterly reveals that he realizes bowing to the empire just created a false peace and he's willing to accept the consequences.
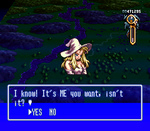
But Canopous interjects, begging you to hear Gilbert's side of the story. If you accept to hear Gilbert's side, he will join the revolution and your reputation meter will increase. If you refuse to listen, you'll instead execute Gilbert, and your reputation will drop, but, interestingly, Canopous will not leave the army.
The next person we're going to look at is the witch Deneb, master of Deneb's Garden. Deneb is an evil witch who has been doing mad experiments on people, luring the men of surrounding towns into her garden and turning them into horrible pumpkin-headed monsters. The boss of level 6 (Deneb's Garden), after you defeat her, she will ask you to spare her, which give you two options:
- Spare her.
- Execute her.
Now, obviously, if we execute her then we can't recruit her (although executing her does cause your reputation and alignment to go up, and the town of Baljib will give out unlimited Pumpkin Plus, which are needed to turn a Pumpkinhead into a Halloween). Disregarding the rewards from the town, we shall choose to spare the witch of her crime. After all, we may be just, but we are also merciful! (Sparing her does cause us to take a little bit of a hit on the old reputation meter and your alignment goes down five points). Sparing her starts off a little bit of a trading quest, because, revisiting Deneb's Garden (specifically the boss stage Valparine) will allow you to talk to the witch, who will ask you to get her a BOUGH, even giving you a PEARL to offset the cost a little bit (A BOUGH costs 50,000 goth and a PEARL can be sold for 41,000 goth.) Once you've accepted, you can go to the town of Raloshel in the level Diaspola to purchase a BOUGH.
Once purchased, you can return to Deneb, who will reward you with a Pumpkin Plus, and, if your reputation meter is lower than 35%, offer to join the revolution! Just note that allowing her to join will cause you to take a slight reputation hit, so if you want one of the good endings, then you better get to work!
The last character we're going to look at is probably one of the most interesting ones. This character is the only character that, if recruited, will permanently lock you out of the game's best ending (more on that later), that character being the demon lord Galf. Once a powerful demon lord who waged war against humanity, Galf was defeated by the legendary Three Knights: Slust the Red, Fenril the Ice, and Dragon Fang Fogel. Defeated but not killed, Galf was sealed away by the power of prayers from the monks in the mountains of Antanjyl. Unfortunately, using the Black Diamond, the evil sorcerer Rashidi contacted Galf, partially freeing him from his seal and promising to fully free him if he destroys the rebellion. Gathering an army of the undead in level 19, Antanjyl, Galf clashes with the rebellion before being defeated. Following this defeat, Galf's body completely breaks apart, sealing him in the underworld for all eternity. At least, that's what's supposed to happen, but you can actually recruit this world's Satan if the following conditions are met:
- Your reputation meter must be less then 2/5ths full
- Your Opinion Leader (AKA the main hero, Destin) must have an alignment below 31
- You must have acquired the Holy Sword Brunhild and it must be in the inventory but not equipped to anybody. (The Holy Sword can be found in the level Kastolatian Sea after liberating the holy temple west of Pittokyan with a reputation meter at least 1/3rd full)
If all of this is met after you defeat Galf, he will offer you a deal.
Professing that he has nothing against the revolution, Galf offers to join the revolution in exchange for you giving him the holy sword Brunhild. That's not a bad deal, so of course you accept. Galf destroys the sword, breaking the seal and joining your cause. Now, immediately after recruiting Galf, your reputation meter takes a huge hit, because the people don't like heroes who recruit Satan or whatever, I guess, but there's an even bigger hit you'll be taking that won't become apparent until much later. Remember how I said you couldn't get the best ending (called the "World Ending") if you recruit Galf? Well, the reason is because you need the Holy Sword Brunhild in order to get the World ending, and Galf destroys it to break the seal, rendering that ending inaccessible.
Now, you might think to yourself "So I can't get the best ending. I'll just get another ending!" And, yes, that is possible, but here's the thing... If you have a reputation meter lower then 1/3rd at the end of the game, you will automatically get what's called the Devil Ending. In the Devil Ending, after defeating your enemies and taking the throne, Galf will congratulate you before revealing his true plan, which is possessing you and ruling the kingdom as a kingdom of evil! It is possible to escape having this ending happen (where I guess Satan just, uh, mellows out or whatever) but it is very difficult, because, in order to get Galf, you already need to have a low Reputation Meter and recruiting Galf causes it to go even lower. So just remember that, if you do recruit Galf, short of a lot of hard work, you're probably going to get one of the "worst" endings in the game.
Those are three of the trickier recruitable characters in March of the Black Queen. There's still fifteen more to go, but those will have to be covered later. That's all for this month. Join us next month when we return to regularly scheduled programming!
Pitohui's Pokémon Academy
Written by: Hooded Pitohui (talk)
Hello, all of you trainers, breeders, and Pokémon collectors in general out there, and welcome to your first day of class in Professor Pitohui's Pokémon Academy, where you're going to learn about how I've raised my collection of Pokémon. I need to get a few disclaimers out of the way before we begin (in the future, I'll include these disclaimers on the handout for rookie trainers, so those of you returning to class can skip the disclaimers).
First, Smogon University, we are not. No, this academy's lessons are designed to get trainers of any stripe thinking about how they can raise their Pokémon, and, as a result, aren't designed to keep up with the widely-accepted metagame for the series. In some cases, the way I've raised my Pokémon may even fly in the face of conventional wisdom. If you're looking for top-tier strategies, do check out Smogon, but if you merely want to get a little deeper into raising Pokémon while still doing things your own way, feel free to use this section as a reference.
Secondly, know that, unless otherwise noted, these builds assume these Pokémon were raised in the seventh generation of Pokémon games (Sun, Moon, Ultra Sun, and Ultra Moon). Generation VIII cut some moves out of the games, and I'm not keen on changing the movesets for Pokémon I raised a few years ago.
Please note, also, that I'm having to guess at the effort value (EV) spreads of some of these Pokémon. Again, I raised these years ago, so I'm using stat calculators and working backwards to figure out their EVs in some cases.
Finally, since we all know the importance of citing our sources, I need to credit the design of some of the tables used in these lectures to Crocodile Dippy, author of the Pocket Handbook which can be found in early editions of Strategy Wing.
I'd like to get into the lesson now, but I understand that some rookie trainers in the class may not be familiar with all of the terms I'll be using. Those of you who need a primer, please take a look at this notes sheet and get acquainted with the terms you'll encounter.
Base Stats: Base stats are the values associated with a particular Pokémon species, and are the same across every individual Pokémon of a given species. You have no influence on them. You can think of them as traits tied to a species. A chimp isn't ever going to be able to get as good as digging as a mole will be, and, likewise, an Abra is never going to have the defensive prowess a Shuckle has.
Individual Values (IVs): Individual values, as their name implies, are associated with individual Pokémon. They range from 0 to 31 in each stat, with 31 being considered a "perfect" IV and higher numbers corresponding to different stats. Magikarp A and Magikarp B will have the same base stats, but they may very well have different IVs. To stick with the animal analogy, one mole may be born with larger claws than another mole, and that first mole is probably going to have an easier time digging through dirt than the latter. Individual values are set in stone, strictly speaking, but you can use Hyper Training (from Generation VII onwards) to functionally get a perfect IV in a stat.
Effort Values (EVs): Effort values are the one thing you can easily change. A Pokémon can earn, primarily through battling, but also through means like the use of certain items or mechanics like Super Training, up to a total of 510 effort values, with up to 252 in any given stat. To finish off the animal analogy, no matter what kind of claws a mole is born with, moles who have more experience digging are probably going to be better at digging than moles which have never dug.
Nature: A Pokémon's nature is, more or a less, a stat modifier with a name meant to make it sound like a Pokémon has some personality. Natures will raise one stat by ten percent and lower another stat by ten percent. Some natures raise and lower the same stat, canceling out the effect and leaving stats unchanged. Natures can be changed with the use of special mint items from Generation VIII onwards.
Are we all prepared? Very well, then we shall skip the icebreakers and begin by turning our attention to the evolution of my personal favorite Pokémon. Living in the sea and, according to the Pokédex, sinking ships that enter its territory, the Mock Kelp Pokémon, Dragalge, is not only cute, but a defensive powerhouse with a fortunate dual-typing that further bolsters its defenses.
Taking a look at Dragalge's overall profile and its base stats, you're almost bound to notice that high special defense almost immediately. Poison-types tend to be defensively-oriented, so that's not too surprising, and you might even jump right to its defense stat with the thought of making a defensive powerhouse in your head. It's where my mind jumped, to be certain. Unfortunately, that base defense of 90, while respectable, isn't outstanding. A base stat of less than 100 can be a little tricky to work with. To see if the idea can be salvaged, we look to its HP stat and see that it sits at an... abysmal 65. Now, that state of one high defensive stat coupled with low HP is par for the course for a number of poison-types, with Weezing coming to mind as another example. Believe it or not, that doesn't exactly sink the idea of a defensive specialist, and it continues to be an option worth considering here.
Keeping that in mind, we can look at Dragalge's offensive stats. Its base attack is 75, which is just a little too low to want to work with, but that's fine, because it frees us up to focus more on its special attack or its defenses. It's not always a bad thing to have one or two stats you can write off quickly, as it makes it easier to focus exclusively on a few strengths and raise those up as high as possible instead of having to spread EVs thin in four or five stats. Writing off one of the offensive stats is easier than any other stat, too, as you can simply avoid either physical moves or special moves as appropriate, and the wasted stat won't even matter (except, perhaps, in edge cases where the opponent has a move that runs on your stats, like Foul Play). In Dragalge's case, we can easily decide to avoid physical moves and write off attack altogether, whittling things down to five stats to focus on.
The last stat to look at is speed, and, well, Dragalge is rather slow. I see a speed that low, and I'm immediately thinking about putting Dragalge on a team with a Pokémon that can use Trick Room. Now, with speed that low, investment in speed probably isn't going to make a difference, and putting no investment into speed can actually be beneficial if Dragalge does get used in conjunction with Trick Room, so I'm going to say we can write off speed, too.
At this point, we're only looking at four stats, and, of the different routes we could take, two stand out. On one route, we embrace Dragalge's lean towards the special stats, and max out its special attack and special defense while knowing we'll need to be cautious around physical attackers. On the other route, we focus in on the two defensive stats and try to balance them on the same scale, so to speak, and pump up HP to make a defensive jack-of-all-trades who is a master of none. I could tell you that I put complex thought and analysis into this decision, but, honestly, I went with the latter route merely because I wanted to, so we'll take that route in this section.
Before we get into the EV spread I went with, we should talk about Dragalge's abilities. There's three options here, with two of them focusing on poisoning the target. Poison Point gives Dragalge a chance to poison foes that make contact with it, and Poison Touch gives Dragalge a chance to poison foes it makes contact with. Neither of these are particularly great options, as we're going to be using Toxic to take advantage of Dragalge's defense-oriented build and its Poison typing (Poison Pokémon get a 100% accurate Toxic). Toxic will let us actively "badly poison" foes, which will do more damage, over time, than the regular poisoning the abilities inflict will do. Since we're going to be actively poisoning foes, we can look at the last option, which is Adaptability. Adaptability adds even more power to the moves that match Dragalge's type (Pokémon normally get a power boost when using moves that match their types, but Adaptability cranks it up further). There's no reason not to use that ability, so Adaptability wins out by default.
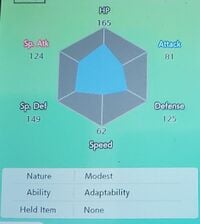
Here's the actual spread of EVs and IVs and all of that for my Dragalge. I was lucky enough to get 31 IVs in every single stat, though that's pretty rare, so it's important to note that you only need 31 IVs in HP, defense, special defense, and special attack for this build. It might be beneficial, even, to have lower IVs in attack (to, again, deter tactics like using Foul Play) or speed (if you're certain you're going to use Trick Room with Dragalge).
A modest nature, which I went with, is acceptable, but you don't have to exclusively go with a modest nature. The main priority is dumping attack. Since there's no situation in which Dragalge's attack stat will benefit you with this build, any nature that lowers attack and raises something other than speed will do fine for this build.
As far as EVs go, the highest priority with this build is bolstering that low HP stat. Honestly, I don't know why I didn't max out HP, since I'm only four EVs away from doing so, but you can see that I brought it close to its maximum. After that, I made the decision to focus on bolstering Dragalge's defenses over investing any EVs into special attack. Since I'm going for a jack-of-all-trades defense, it's worth it to pile EVs onto its defenses and let that base 97 special attack do the heavy lifting offensively. Since defense has a lower base stat, I invested more into defense than into special defense, to try and get them closer to even without totally relying on its base stats for special defense. You'll notice, however, that there's still a 24 point difference between the two stats. You might consider investing less into special defense and allocating that into defense instead, if you want to reduce that difference, but, in my case, I compensated for the difference through the moveset I selected.
| Scald | Special | The user shoots boiling hot water at its target. This may also leave the target with a burn. |
| Venoshock | Special | The user drenches the target in a special poisonous liquid. This move's power is doubled if the target is poisoned. |
| Shadow Ball | Special | The user hurls a shadowy blob at the target. This may also lower the target's Sp. Def stat. |
| Toxic | Status | A move that leaves the target badly poisoned. Its poison damage worsens every turn. |
Namely, I elected to include Scald in Dragalge's moveset. Now, Scald doesn't get a boost from Adaptability, and using a move with a good chance of burning the opponent means you might block yourself from getting Toxic in on your foe. However, I find the flexibility having access to both a poisoning move and a burning move adds to Dragalge too useful to pass up. Burning your foe reduces their attack stat (be careful of burning foes with Guts, though), which effectively adds on to Dragalge's defense. If you happen to encounter a physically-powerful foe who might bust Dragalge's defense and render stalling an ineffective tactic, you might consider burning your foe with Scald to make Dragalge's defense go further or to give yourself a chance to soften the blow for a Pokémon you switch in. That Scald is super effective against ground-types, who have a type advantage over Dragalge and tend to carry powerful physical moves, is a bonus.
Toxic is included for stalling. So long as you aren't going to burn your foe, use Toxic and get the accumulating damage going. Follow up with Venoshock, which runs off of Dragalge's high special attack stat, which has an effective base power of 130 when used against a poisoned opponent, and which gets boosted power for matching Dragalge's type and a further power boost from Adaptability, and you'll find that special attack stat that you invested no EVs into going much further than you may have expected.
There's room for one more move, and, honestly, you might consider a powerful dragon-type move to get further mileage out of Adaptability. Draco Meteor is not a bad choice as an attack to use in a pinch. I, however, chose Shadow Ball, partially for coverage and partially for the potential special defense drop it can cause. It lets Dragalge make quick work of hard-hitting, frail psychic-types and provides it with a secondary option for hitting steel-types. In the latter case, that rare special defense drop can be particularly helpful, letting Dragalge's special attack go just a bit further even with the Toxic and Venoshock combo taken out of play.
To go into further detail would get us lost among the weeds, and you know the essentials of how I've raised Dragalge now, so we'll wrap up there. I've had a mixed track record with this jack-of-all-trades defensive build, with more misses than successes, but it's still a set-up I like on Dragalge even if it might be beneficial to swap out Shadow Ball for Draco Meteor or to forget about Defense and to raise a special-oriented Dragalge. Hopefully you can see my rationale for raising Dragalge the way I did while also seeing some pitfalls in my approach, because your homework is to come up with your own approach to raising Dragalge.
That will do it for this month's class, so go off and appreciate this poisonous dragon and make sure you come to our next session.
The Greatest Quest
Written by: The Wandering Shoestrel (talk)
Come, gather, yon 'Shroom readers, as we continue the epic tale of Sir Cucumber and his quest to save Princess Tomato in Princess Tomato in the Salad Kingdom. Last month, brave and noble Sir Cucumber recruited a young squire named Percy before saving Prince Lettuce and the Melons from the evil farmies. He then tricked the guard of gates of Saldoria before entering the town of Saldoria to continue his quest.
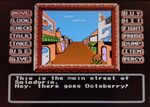
We enter the city in Orange Park, where selecting Move gives us three options. We can go to: Main St., Mountainside, and deli. There is also a vagabond sitting on the bench. For, now we're going to enter Main St. On Main St., hitting Move presents us with five options, with those options being:
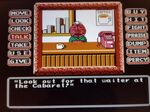
- Cof Shop: This is a coffee shop run by Mrs. Plum, who tells you how the town is no longer safe and is full of wanderers. After you hit Buy and purchase her only product - coffee - she tells you that she doesn't have any donuts and that the only donut shop was shut down by the farmies! She also warns you watch out for the nasty waiter at the cabaret.
- Elc Shop: This is an electronics store, which is great, because Percy is in the market for a new CD Player! Unfortunately, the shopkeeper, Chestnut, refuses to sell to anyone who isn't a resistance member and tells you to come back with the Crest of the Resistance or get out.
- Juice Sh: This is a juice shop run by the resistance member called Eggplant. The juices they sell here are clover juice and grape juice. Percy says you should get the grape juice, but, sadly, I spent all my money on coffee, so we'll have to come back later!
- Ant Shop: This is an antique shop run by Mr. Pear, who informs you that Princess Tomato has been kidnapped, as if the gallant Sir Cucumber didn't already know that!
- Go back: The last option is Go back, which takes us back to the beautiful Orange Park.
On the park bench, we check the wanderer, who is named Garlic. If you Talk to him, he'll tell you about an old scholar that lives on a mountainside who we should visit. Said mountainside is, conveniently enough, right next to this park, and clicking on Move allows you to visit it and meet the scholar.
The old scholar's name is Mr. Corn, and he's hard of hearing. You only get so many chances to talk to him, but. luckily, before he can no longer understand you, he tells you something very important. He tells you that the antique store will exchange our useless Gold for Saldorian currency!
With this information, our heroes quickly return to the antique store to exchange their gold for real money. Before he lets us do that, though, Mr. Pear asks us a favor. He asks us to give a letter to Ms. Peachy, who runs the deli. Being that Sir Cucumber is a true hero and true heroes would never turn down the chance to help an innocent, Sir Cumber gladly accepts this request by taking the letter. Going to the deli (accessing it from Orange Park), Sir Cucumber gives Ms. Peachy the letter, and, in return, she gratefully gives Sir Cucumber a sandwich. Mr. Pear thanks us for giving Ms. Peachy the letter and tells us that he will gladly exchange our three gold for Saldorina Currency, giving us three pieces of Saldorian currency!
Here's something that's kind of odd about Princess Tomato. A lot of times, the game doesn't give you the best hints at what you actually need to spend your money on. It is possible to spend all the money you have without buying what you actually need. To the game's credit, on maps where you need money, the game will spam a character named Octoberry who walks around the streets and drops currency in order to bail you out if you buy the wrong things.
Anyways, with our new money, we go to the juice shop and buy a glass of grape juice, which doesn't actually do anything yet. Don't worry; it will. Returning to Orange Park, if you Praise Garlic, he'll grow irritated and say he needs a cup of coffee. Then, Sir Cucumber gives him the cup of coffee he bought, so he thanks you and asks if you have a donut. Of course, the donut shop is shut down because of those farmies, and, after talking to Garlic a few times, he tells you to check the cabaret and promises he'll have news for you once you give him a donut.
Sir Cucumber has to find the cabaret, so he returns to Main St. and checks the strip, and Percy tells him how many shops are closed and that there is a cabaret down the street. Just remember, you cannot find the cabaret until Garlic wants a donut; checking before that will just result in Percy telling Sir Cucumber how many shops are closed. Now, though, if you hit move, you can access the cabaret. The Celery Cabaret is an exclusive club, and it costs one coin to get in (Note you need to enter with two coins, one to get in and one for a reason that you will find out soon. Also, every time you enter, you have to pay the one coin!).
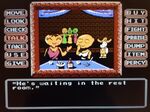
Inside the cabaret, you run into the waiter with a sinister look who we were previously warned about. He tells Sir Cucumber and Percy that someone is waiting for them in the restroom, and, while I know that we were warned, we go anyways because fortune favors the bold. Before leaving, the waiter demands a tip, so Percy gives him a one coin tip (you can’t access the restroom without giving him the tip). Inside the restroom, you find that there's nobody there, but the resourceful Sir Cucumber checks everything anyways.
Checking the trash twice, you find a donut in the trash. Needing a donut, you take the donut and Percy asks if he can take a bite, but this donut isn't for squires, it's for Garlic! Leaving the bathroom, you see that the waiter has run off with your tip, but that's not important right now.
Returning to Orange Park, you find not just the wanderer, but a child as well, with the child complaining of hunger. Remembering that he has a sandwich, the great and bold Sir Cucumber gladly gives the hungry child his sandwich, filling his belly. Talking to the wanderer causes the child to wake up his (apparent) dad, who thanks for you for helping his child. The wanderer reveals that he was once a government minister in Saldoria before Minster Pumpkin threw him out, causing him to become a depressed wanderer. He also reveals himself as a resistance member and tells you that the resistance is building a secret hideout in Parsley Forest.
After this, he returns to sleeping on the bench and tells you to return to the old man. When you return to the mountainside, Mr. Corn drops the "hard of hearing old man" act and reveals that he is also part of the resistance. He also reveals that the general of the resistance is suffering from a severe headache and that the pharmacy by the cabaret sells aspirin, which can help him. First, though, Sir Cucumber needs to find the pharmacy. The doorman at the cabaret knows where it is, but he has tight lips. Percy tells you that he looks vain, so Sir Cucumber praises his tie and the doorman immediately tells him that the pharmacy is behind the cabaret. The pharmacy is run by Mr. Fig, who will only sell to resistance members. Luckily, he believes that you need to the aspirin for the resistance general and gladly gives you the aspirin, telling you that this will probably get you into the resistance. Returning to Orange Park, there is now a girl selling flowers. If you buy flowers from her and then talk to her, she will reveal that there is a bookstore on the other side of the park that is a hot spot of resistance activity.
Interestingly enough, though, the owner of the bookstore, who is named Simon, doesn't seem too keen on helping our hero, attempting to keep the conversation on books and telling the hero he knows "noosing".
Smelling a rat, Sir Cucumber strikes (Hit) Simon, causing him to run out, still claiming he knows "noosing". Checking the counter, you find a Key which Sir Cucumber gladly takes.
Feeling that something strange is going on, Sir Cucumber and Percy attempt to leave the store, only to find that Simon has ratted them out and that they're surrounded by farmies. The farmies arrest our heroes, and that, my friends, is where we will end this chapter. Just to recap, however, the wandering Shoestrel will sing you the tale of the noble Sir Cucumber.
♪ They met the resistance, ♪
♪ But wound up in jail ♪
♪ But our brave vegetable heroes, ♪
♪ Are bound to prevail. ♪
To Infinity and Beyond
Written by: Waluigi Time (talk)
Waluigi Time mission log: As part of my ongoing quest to lead the masses through Toy Story 2, I can't believe that I have to come all the way to work on a Saturday. All the way to work!
Greetings space rangers! Welcome back to more Toy Story 2. Last month we covered the second boss level, Slime Time, and after an extended period of arguably following the movie but not really, we're firmly back in big screen territory. Buzz and the gang's search for Woody leads them to Al's Toy Barn, and that's exactly where we're headed today. It requires 10 Pizza Planet Tokens to unlock, so you'll immediately have access to it once you complete Slime Time. Here's the soundtrack for this level. Unfortunately, like Alleys and Gullies, we won't be able to complete this one on our first try due to certain items still being locked, though only one Token is out of our grasp this time. Luckily, this is the last level where this is an issue, so the rest of the game will be smooth sailing.
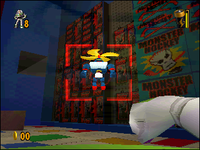
This is another level where we can get the green laser upgrade right off the bat, so head straight ahead to the first set of shelves to grab it. You'll probably encounter a Plane Box here as well - this is the only other level they appear in. Once you have the upgrade, turn around and jump onto a box to reach the first checkout counter, where you'll find Mr. Potato Head. He has the Rocket Boots (finally!) but he won't let you use them until you return his missing arm, which isn't too far from here actually, since it's on the third checkout counter. At the end of the checkout counters is a shopping cart, and Mr. Potato Head claims you can't reach it without the Rocket Boots, but that's actually false - you can reach each checkout counter and the shopping cart with some well-timed double jumps. For now, I'm just going to cheese it and jump across the counters to get Mr. Potato Head's arm. If that's a little too tricky, don't worry because I'll be showing the intended method in a bit.
From here, we can jump to the last counter and into the shopping cart. Inside the cart, stomp on a box that will catapult you on top of some gumball machines, where you can collect a battery and some coins. From here, you can swing across some poles to reach the hay bale ride. Now here's the thing - aside from getting a few extra collectibles, that entire sequence with the shopping cart was actually pointless. Down below, the hay bale ride has a switch that can be stomped on to temporarily activate it. While it's active, it'll fling Buzz across the room onto a second set of gumball machines where you can collect a Chick (there's no reason to collect them though because we can only get four of them for the time being). The intended way to do this is to activate the hay bale ride, use the Rocket Boots to get across the counters and into the shopping cart, and then do the platforming segment to reach the hay bale ride while it's still active and catapult over. But this can be completely cheesed, because if you stand on the base of the hay bale ride and jump towards the side of the sign on it, Buzz will automatically grab on and climb up, and you can easily jump onto the hay bale from there.
Anyway, it's time to return Mr. Potato Head's arm. Now we have the Rocket Boots, after first seeing them almost at the beginning of the game! The Rocket Boots are found in four levels of the game including Al's Toy Barn, and we've already been to two of the other levels where it appears - Andy's Neighborhood and Alleys and Gullies. Despite what Rex and Mr. Potato Head will tell you at various points in the game, they're actually only required in Alleys and Gullies (which Rex doesn't mention, thanks Rex). Seems like these are a lot less important than the developers thought. As for the item itself, Buzz will rocket forward at a much higher speed than usual for a short time, or until he takes damage (unfortunately, ramming into enemies at high speeds hurts you more than them). Additionally, Buzz can skim across the surface of water rather than sinking in. He can still jump while using the Rocket Boots, though it's not possible to attack until it wears off. Even if it's not truly required much, it's nice to have just to get around places faster (in fact, the last level it's in includes them solely for this purpose).
With that out of the way, head towards the back of the level. Along the way, you'll see a path to the left that leads to a different section of the level, but on our initial run through, you can actually ignore it completely, since anything required here is tied to the only Pizza Planet Token we can't get yet anyway. Other than that, there's an extra life and some batteries if you really want to go out of your way for them, as well as coins, but if you're diligent about collecting coins elsewhere (this is why I made a point to go through that "pointless" sequence earlier), you won't need to go here. So for now, I'm just going to ignore it, and I'll cover it when we come back later.
In the room towards the back, you'll encounter the Rooster, who is actually a pretty unique NPC because he's the only one in the game who has two separate objectives for you. The first time you talk to him, he'll give you 50 seconds to reach the hatching egg on the other side of the level to collect the Chick inside. Although we can't collect all of the Chicks yet, we do need this specific one. Once the timer is activated, jump onto the nearby skateboard to quickly get to the trampoline, jump up onto the shelf, then to the shopping cart to the left, and do a bit of platforming to reach a zipline that will take you straight to the egg where you can collect the Chick - just make sure to jump over to the shelf before you reach the end, or you'll smack into the wall instead. It's pretty easy, and there's a lot of room for error. By the way, this is the intended route to get Mr. Potato Head's arm - while on the zipline, jump off to the left onto the checkout counter and grab the arm.
Once you've collected the Chick, head back to the Rooster (since you're at the beginning of the level again anyway, consider grabbing the Rocket Boots for a faster return trip). He'll give you the same mission, but this time the prize is a Pizza Planet Token, and you only have 23 seconds. There's a lot less room for error, but as long as you don't mess up, it's still pretty easy.
Return to the back room yet again (thank you Rocket Boots), and this time, head to the storage room to the left. Use the boxes to reach the even bigger stack of boxes against the wall. Up here you'll find Rex if you want to talk to him. In the corner there's a small vent leading to the room where you'll fight the Dinosaur boss. I'm going to be honest, this is probably the single most pathetic boss in the entire game, and I can think of only one or two other bosses that even come close. The Dinosaur's entire combat strategy consists of slowly walking towards you and stopping to breathe fire. If you have the green laser, you can just hold down the button and absolutely destroy this guy. It'll only have enough time to breathe fire once before being defeated this way, and you can either jump over it or just tank the damage. Once you defeat it, it explodes, leaving its legs behind for some reason. The biggest "challenge" here is if you want to collect the coins and battery in the room, since there's toxic sludge on the floor that you'll have to jump over. Once you're done, use the rope to climb back up to the vent you came in through.
Head back into the room with the Rooster, and enter the other door to the office. Climb onto the chair and the table, where you'll find Hamm. Depending on how many coins you were able to collect, you should have enough at this point for a Pizza Planet Token after collecting the ones in this room. Next, hop over to the other table and grab the Disk Launcher. You don't need to fill up on them, you just need enough to shoot the three locks on the filing cabinets in the room. Once you destroy a lock, that drawer will periodically open and close. Once all of the drawers are unlocked, use them as platforms to reach the top of the filing cabinet, where you'll find the last Pizza Planet Token for now. As a fun fact, if you choose to exit the level from the menu that pops up after collecting this specific Token, Buzz will actually fly through the ceiling. To my knowledge, this is the only time this happens, and in any other case where the ceiling is close enough for Buzz to reach, he just collides with it in the flying away animation.
Also, in another installment of "weird things that happen only in one level and nowhere else", the texture on the Copter-Bot's waist is missing, leaving it completely white. This doesn't appear to be the case in all versions, but the PC version at least has this oddity. I have no idea why that would happen here and nowhere else, but it's not the only time that enemies have different textures based on the level.
So that's our first run through Al's Toy Barn finished! Although, if you remember the movie, there's a key part of this sequence that wasn't really touched on in the game, and that's not just because we skipped part of the level. Looks like we're not quite done going all the way to work on a Saturday. Drat. See you next time.
Gameplay images were taken from Nin's playthrough of this game on YouTube unless otherwise stated.
Mach Speed Mayhem
Hello, 'Shroom readers! Welcome to yet another edition of Mach Speed Mayhem, where the votes are made up and the results don't matter! Wait, did I use that one already? Well, either way, it's time for #37: Lily Flyer, as we finish up the AX racers after starting them two years ago!
Main Series
As you can guess from my intro, Lily debuted for F-Zero AX, and naturally F-Zero GX as well. In the former, like the other nine, she's just there from the start and ready to go! In the latter, meanwhile - well, if you remember the other AX articles, you can probably guess what chapter's left. Chapter 8, the showdown against Deathborn in the depths of the underworld, must be conquered on Very Hard. Pull that off, and Lily and her machine arrive, and you get to read her surprisingly dark bio! Despite being a teenager, Lily is already a central member of the Galactic Space Forces, an arm of the Galactic Federation - and has been since shortly after she was born! She's an excellent student of warfare, top marks all around, and has already been sent out to the battlefield in her career - after all, she's got superior officers commanding her every move. Even her current participation in F-Zero is nothing more than her practicing for future missions, thanks to the high pressure being a great way to train her decision-making skills. F-Zero: Where character bios can include being a child soldier!
Mr. Zero's interviews just underscore that Lily's got a surprisingly dark backstory... or, well, not that surprising with some of the other info F-Zero includes. For example, she mentions outright that she's not at all free like her TV fans are, with how rigid her life is. She doesn't have any rights to the space credits, as the organization is going to manage the funds for her. She considers a challenge to her a challenge to the federation. She spends her free time training. She considers the autograph signing a duty, and her racing entirely fighter training. In short, this is all her life is to her, through and through, every inch the perfect soldier.
Still, even with the many restrictions on her life, some individuality does get to shine through when Lily talks to Mr. Zero! For example, she plans to take a vacation after the race - presumably, winning gives her the right to demand some concessions for a change. She does have a favorite food in the form of fruit parfait, though thanks to eating a mess hall she doesn't get to have it often. She has a preference in guys, going for tall handsome ones. And most of all, she likes to collect frog knickknacks. Why? 'Cause she just likes to. Unfortunately, being an AX racer means no appearances in story or anything besides bio and interviews. Perhaps someday, in the next F-Zero game that will totally happen and it's not false hope.
On to her machine! The Bunny Flash is no mere F-Zero vehicle. It was designed from the ground up for direct participation in warfare! It's a land warship, designed to be driven directly into battle, with armor and full-blown weaponry! Though the armor's clearly been removed for the race, judging by how the listed stats have a body of D to go with a boost of B and a grip of A. It's meant to manage and corner other cavalry-type forces in combat, and with an effective pilot like Lily, will have an easy time doing so. The listed stats come pretty close to how it actually handles, too! Great acceleration, excellent handling, and a solid boost. If it wasn't weighed down by low body and low top speed, the Bunny Flash would be one of the toughest forces to be reckoned with.
Other Information
Interestingly, Lily's surname is only known through supplemental information - and the same is true of fellow AX lady Princia Ramode. In game, she's just "Lily". That's it. The music track is called that, her bio is labeled Lily, that's it. However, some official computer wallpapers were made for GX, for every single one of the 41 racers and their machines. In it, we get Lily labeled as Lily Flyer. Why this is only true with nongame material? Who knows. Maybe if she ever appears again, we'll get it in-game too. In the meantime, now that AX is finally done, we only have X and Anime racers left. Who's next? You tell me!
SIMulation
How To Get Killed By Chickens In Three Easy Steps
This guide is for people who desire to meet their end by feathered living poultry in the most efficient fashion. It is encouraged you try this at home.[1]
You require the Cottage Living expansion pack.
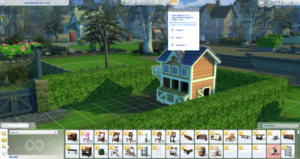
1.Buy yourself a Chicken Coop and a chicken.[2] Go to whatever lot you like. Personally, we recommend Henford-on-Bagley just because it has the word "hen" in it and being on the nose is what we are experts in. 5 Cobblebottom Street 5 is an empty lot that comes with a chicken coop. It additionally has a beautiful countryside backdrop to juxtapose your deadly style of living.
2.Piss off the chickens.[3][4] Insult their feathers. Or how they walk. Or their stupid little chicken brain. They are too chicken to attack you, right? Nah, you're wrong. Do it enough times, and they'll brawl you. This is quite similar to how Link would meet his demise from Cuccos, except you're attacking them with mean words.[5]
- Funnily enough, Sims cannot kill you even if you are a billion times meaner to them than you are to chickens. We suspect chickens to be far more powerful animals than humans.
3.Piss them off again and hope they kill you.[6] Sometimes you will survive the attack. This is not the outcome you want. If you don't get a particular moodlet (a dazed moodlet saying "When Chickens Attack"), try again until you barely escape death, then repeat step 2 until the chicken kills you and the Grim Reaper reaps your soul.[7]
And with that, you now know how to die a grisly death from a chicken.[8]
References
- ^ You still cannot sue us, however, in case the animals fail to kill you efficiently. We have a robust legal team that will defend anything you throw at us.
- ^ This is located in the Build/Buy mode, and you can buy chickens in Live mode by selecting the coop. You will have enough Simoleons for it as that is the only essential you need.
- ^ Read: Be annoying and stupid to them.
- ^ Yes chickens can understand your words here.
- ^ Link can't get killed by rabbits however. You can, in this game, but we prefer chickens over rabbits because we are able to make this analogy.
- ^ The chicken is the T-Rex's closest ancestor, not difficult to connect the dots on why they are dangerous.
- ^ Your body cannot be used for chicken feed, however.
- ^ And if you prefer dying by rabbits, same deal, as we stated. You can piss them off by finding them in the wild in Henford-on-Bagley.
On the Origin of Species
Written by: ZelenPixel (talk)
Ya girl is back again with Spore!!! Sorry for promising I'll have more "next month" in January and then skipping a month anyways. This is a bi-monthly section, now? Anyway, since my last issue, I played for the first(?) time and beat Spore Origins (or just Spore) on BlueStacks, and it's pretty interesting! It's somewhat like the Cell Stage, but it feels more arcade-y, I want to say, and also a lot harder. It's fun! I like the music! It's also probably not supposed to run at framerates like this and on a screen resolution like this, so it's actually wonky and probably harder than it should be, but it's functional enough, I think! It's also funny, because I got BlueStacks just for Angry Birds games, so that's all I have, besides the Spore smack dab in the middle of those. Anyway, back to regular Spore, the one that's on PC, not mobile! We're, once again, back to the Stabbies' spacefaring adventures. This issue we get a ton of badges, artifacts, and terraform a lot!
Space Stage (still going)
Last issue, I promised I would get to the center of the galaxy and, I guess, forgot to edit in to add I didn't even start going for it, or at least I didn't edit it to not suggest I was going to do that. Well, whoops! I'll try to be better about that. Spoiling you early, I'm not going to start going for it this time, either. Last issue, I also finished off the adventures, finished off my empire's rank, and did a bunch of nonsense that wasn't all that important, which will probably continue here! I'm bad at getting around to things (like that galaxy center).
Let's keep working on that Missionista 5 badge; I have to do 9 more missions and I'm done! I deny a mission to attack another empire, I receive and also discard a mission to go to an adventure I'm pretty sure I can't actually go to, I get another adventure I already earned points for and can still leave immediately, I get a mission to abduct a citizen from a planet that I have to abandon because one of my colonies had to get attacked and I'm not sure I could defend it in time before the timer for the mission ends, and I get another adventure that I can also beat by leaving immediately. Missions aren't going particularly well.
Finally, I get another mission to abduct a citizen, but then it shows me... "Find a citizen of the Stabby Empire". Y'know, like, MY empire. What? If you were going to investigate this specific empire for religious purposes, just talk to whoever you gave this mission to in the first place. What? What? Anyway, I got another adventure that I'm pretty sure I can't do, and it HAD to be in my system for some godforsaken reason... Can you tell I'm sick and tired of adventure missions? Maybe I'll just decline them all from now on, because I don't want more planets to be turned into this stuff irreversibly. Sighhhhhhh. I got another mission, finally a good one I thought, before I saw one of the destinations I had to go to to pick up a crown was in the system of the guys who hate me. Why am I having such bad luck with this? I also got one of my colonies attacked, as if all of that wasn't enough. I should note that the guys who attacked this specific colony are very far away from this colony, so, again, what?
This other mission briefing is hilarious: "We went on a joyride and glow-splotched some of the animals on planet Strer. How were we to know that glow-splotching infuriates this species? Can you aid us by turning the rampaging animals into aesthetically-pleasing cones of ash?", and also "Hoo heee! Wouldn't that be fun to glow! We do have to keep that in mind for the next Flortondian Reblix Day! Do you like Flortondian plorplie? I find it needs more salt... generally speaking." I also should note this species was the only animal species on the entire planet. I felt so bad for them that I gave them some friends (other animal species). "Splendid! The surface of Strer is much more interesting with all those little craters! Take these $25,000 Sporebucks!" This dialogue is hilarious, I really have to pay more attention to it!
I get a mission to scan every flora and fauna on a planet. That's easy! It happened to be a tribe planet, so I wondered if I'd have to scan them too. I guess I'll never know since I scanned some tribe members on accident anyways. This empire also asked me to pick up a singular animal from the planet, and they never specified why they need it, but they did call it awesome! I got a mission to pick up some scepters... And guess what? One of them still went into my enemy's system, just because last time wasn't enough, I guess. Well sure, I'll just go there, turn on my shield, pick the scepter up and leave right then and there, and also leave my enemy confused, hopefully. Oh hey, another scepter went into the same civilization I had to go to earlier for a mission I dropped! It turns out the artifact/thing it had is a "Sky Greeninator", which is an amazing name. I hope these civilized slugs are okay with their skies being greeninated. Somehow, the planet I had to deliver the scepters to also happened to have an ecodisaster right as I was going to get to it. How did that happen? I earned the Eco Hero 2 badge, though! With that, I unlocked and bought the Mega Laser! I delivered these guys the scepters too.
Got an adventure mission, and the option to deny it is very fitting, turns out. I took another mission from them (shark guys, by the way!) and they tell me to go zap some animals with a laser again or something. Sure, that's doable. I also picked up a Sky Orangizer along the way! For some reason, the shark guys suggest, hopefully jokingly, that they like the Grox actually. Grox are mean! You can't do that. I'm your mom, you shark guys, so you listen to me! Let's go through a wormhole and find more empires to get missions from. These guys are asking me to pick up the same creature I had to zap with lasers on another planet earlier, funnily enough. There have been lots of funny coincidences today! I got another adventure mission and declined it. Thankfully, I know now it definitely doesn't turn any planets into adventures!
The nearby save game empire asked me to retrieve a scepter, just one this time. I like how the center of this searching area is actually specified to be a proto-planetary star in the mission description (which it is). The empire scolds me for supposedly taking ages retrieving it, but, honestly, I don't care since I got the Missionista 5 badge! It unlocked the Hologram Scout and the Cloaking Device. Hologram Scout is really cool because it lets you kinda sorta travel on the planet's surface as a creature! It's very slow and you can't go near water (though I recall I managed to glitch my way into a body of water once anyways), but it's still super interesting - you can pick up artifacts right off the surface with your hologram, and also animals will bite you and you'll be fine! Unfortunately, I won't use it, since, with Galactic Adventures, using it makes your empire's outfit not work at all and just use your captain's outfit, which is annoying and not what I want. The Cloaking Device, which I also got, just makes your ship invisible temporarily.
Next badge completions...? I think I can work on Collector 4 (collecting unique artifacts), Explorer 5 (visiting systems for the first time), Zoologist 5 (filling out ecosystems), and Traveler 5 (contacting new empires), all at the same time. I'll just be finding unvisited systems; those have a higher chance to have artifacts which I'll be able to pick up; if there's any uncompleted ecosystems in there, I'll just fill 'em out; and, finally, I'll just talk to any new empires I see on my journey. I need to get 7 more artifacts, which isn't a lot, but it's kind of a lot considering it won't count repeats, but I also have 236 systems to explore, so there's a good chance I'll get Collector 4 before Explorer 5 (I do do that)! After a while of not finding anything, I finally got an artifact and it happened to be on a colony of these scientists I just met? Why there, and why not any earlier? It wasn't even an artifact, but just a planet terraforming tool, so at least they didn't get mad at me for picking it up! I still saw they had an ecosystem to fill out, though. I got an actual artifact not long after, but, unfortunately, it was a duplicate...
I had no luck with artifacts, but I found funny planet names! This is also the second time within the past few minutes I ended up accidentally killing a creature I was beaming down while populating ecosystems.. Fortunately, I can just fly around and pick up another one of the same creature if I've populated the planet with it properly (I keep two copies of every plant and creature just in case), but it still feels bad! Should I note that the way I do it is by beaming down a creature or plant and then just picking it back up immediately? It inexplicably still works to fill out the whole planet's ecosystem. I finally got an artifact I didn't get before, the Stone of Force Vol. 5, which I'll be able to give to this warrior empire nearby that randomly contacted me. I got a few more duplicate artifacts, and I also got ambushed by just one (1) pirate?
I got another unique artifact! Five artifacts to go, 196 systems to go. I'm not sure which one I'll get first with the luck I'm having. I accidentally had to replace the small plant I was populating ecosystems with, because I carelessly dropped the two I was using (in order to rearrange my cargo a bit) and there was already a small plant on this planet and these two burned instantly. Whoops. My luck got better, since I got not one, but TWO unique artifacts from ONE planet! Three artifacts to go, 183 systems to go! For some reason, an empire I didn't interact with beyond the first time declared war with me because I happened to fly nearby a bit too much. Okay? You and your one system have fun, I guess? I ended up having to replace a medium plant again, because I had only one for some reason and then I dropped it and, guess what, this planet also already had a medium plant. I may be stupid...
And here's the Collector 4 badge! Somehow, I got a unique artifact on one planet, and the next system I went to had two unique artifacts on just one planet again! I still have to explore 176 more systems. For the other stats, I also have fill out 8 more ecosystems and meet 43 more empires. Let's work on the ecosystems for now, then. I finally sold off most of the artifacts I got to one empire, including an artifact that same colony I was selling to also had. I got the Warmonger 2 badge because another empire decided to declare war on me for the exact same reason of just existing nearby. I suppose my ships have been automatically attacking THEIR ships (they just start going for me when I'm nearby for some reason), but, honestly, what else am I supposed to do? It's funny how I went on a planet and nonchalantly started placing animals down while they tried to zap me repeatedly, though! Or how I nonchalantly picked up a planet sculpting tool while hearing battle music.
I earned the Zoologist 5 badge! I have 159 systems left to explore and 43 empires left to contact still. Currently, I'm just looking at unexplored systems and picking up artifacts. I have to move further away to start finding empires again. I found a system with an alternating pattern of green and yellow spice! I also finally resumed contacting empires; this one was an empire of Zekrom ecologists. Their system also had a planet with two artifacts! The next I contacted was an empire of Toad (yes the mushroom guys) shamans. Me and them have both got Return Ticket! Yeah, baby!!! I also went back to the Zekroms to purchase a Create Creature from them, which I will use later. I found a few new rare galactic formations. That is, I found different combinations of stars in double-star systems! There's a lot of those around this cluster of the galaxy, for some reason.
This Warrior empire told me "State your case for continued existence." when I met them, which is funny. I found a save game of my other playthrough from a few months back! It's still in the Civilization stage, and at that point I've conquered every city on that save file, but one tribe village actually remained (they usually get destroyed by AI nations by the end of the stage, but this one got lucky) and so it shows on the map as the sole remaining non-blue little house icon. Neat! The cluster that system was in is pretty big, so it's easy to contact other empires there. I found scientists to sell these Books of Science to! And another one right after, which was the 69th empire I've contacted. And, oh, here's the third scientist empire in a row! And then I found these guys who I could finally sell that one Scroll of Order to!
I keep finding empires of Maxis creatures, which is fine I suppose, but a little boring. I think the pollinator just ran out of my own creatures to seed at this point and thus is just using Maxis ones. Evidently, I need to sit down in the Space Outfitter and make a bunch of my own outfits again! I found another Scroll of Order, conveniently not far from the empire I could sell it to! I wound up backtracking and found an empire of religious Mewtwos, then decided to go through a wormhole and look for empires there. I ended up on the opposite side of the galaxy, and found an empire that occupied not one, not two, but THREE planets in its home system. How cool is that? I've never seen this before! Empires occupying two planets in a system is rare enough, I didn't know they could occupy three!
I'm finally finding empires of creatures of my own making again! I'm also at 10 empires left to contact! And it took until now for me to have to rush back due to some emergency at my or my ally's empire, somehow! I saved my ally from an ecodisaster, and since I'm there, went and picked up some Spice from my empires then headed back out to look for empires. I'll just sell the Spice off to empires I encounter! I found another cluster I haven't gone to (without going through a wormhole!), found scientists with the deepest voice ever, and found a highly zoomed-out communication picture thing because of the fact that this is a creature I stacked bolts on (very fun in the test drive, as the stack of bolts waves a lot!), which you can see in the image.
I've decided to not have the final empire I needed to contact be yet another warrior or zealot, which, judging by the orange face, this was. Instead, I found an empire in a solar system where the star has a hilariously inappropriate name (if you want a hint, it's the same reason people find the name of seventh planet of our sun so funny). And thus, the 100th empire I contact is the Frug Empire, which are ecologists! Finally, I earn the Traveler 5 badge. I unlocked the Embassy tool, which is placed on another empire's planet and boosts my relationship with them. Let's see my progress in other badges! I have 84 solar systems to go to for Explorer 5 and I think that's it. Let's do it, then! I'm in a cluster with tons of systems anyway, so this shouldn't take long.
I got ambushed by pirates (as typical) whose ship looked... exactly like my own? Of course, that always has a chance of happening as long as your ship doesn't have the GAprop tag on it, but it's funny. The empire I didn't want to be my 100th contacted empire later contacted me on their own anyways with some aggressive messaging. Will they get angry if I ignore them, too? They will. They're now at war with me for existing in their general vicinity and I haven't spoken with them once. Of course, my ship's Mega Auto Blaster keeps defeating their ships that they keep sending out at me easily, so I'm even gonna deliberately fly near their solar system just because it's funny. I went on a planet and got ambushed by two pirate ships while also being attacked by one ship of that empire, which was funny!
I suddenly realized the (probably) best way to deal with pirate ambushes is to just leave the planet anyway and let my Mega Auto Blaster take care of them, instead of having to turn around on the planet and zap them manually. It works! They do very little damage, if any, at this point, so there isn't really a downside to this. I also got contacted by a nice empire for once, which is a trader empire of Bananaz. They are bananas. I sold to them the bunch of artifacts (mostly geodes for some reason) I acquired and kept looking. Oh, look, I got contacted by another warrior empire; let's get them angry at me for existing within their general vicinity too! And that is exactly what they do. I haven't even visited their system, let alone contacted them! This is hilarious. I'm doing this because it's funny, and they're so far away from my colonies I'm in no danger from getting them to be at war with me. And hey, that counts towards the Warmonger badge too! I just get it for free for being on the Medium difficulty and not introducing myself to warrior empires nicely (if at all)!
My allies are actually the ones taking most of the damage from other ship attacks, so I went back to the Frug empire (mostly on accident) and healed there. I sold off a bunch of artifacts to them, too. And look, here's the third warrior empire contacting me. It's time to ignore them so they also declare war on me for existing! Or not, as I've earned the Explorer 5 badge now and can leave! The only remaining badges I'm (at least somewhat) close to completing are Collector 5 (60/100 artifacts found), Jack Of All Trades 5 (105/200 tools purchased), and that's kind of about it. I guess I could work on Terra-Wrangler 4 (16/20 T-score raises) now? Let's terraform this T0 planet I have in my home system. It's at T1 now! Somehow, there were unexplored systems not far from my own home system. I explored them and got some artifacts along the way.
I also figured I need more colonies for each spice type (besides red spice), so I've gone ahead and finally purchased that blue spice colony from my allies. It's mine now, so let's get it to T3! It just needs a bit of cooling, and, so we do that, and there we go! It now has three cities, the Spice Storage and Uber Turret, as all of my colonies do. I also claimed a T0 purple spice planet to terraform later. Once I get it to T3, it'll actually be enough for the Terra-Wrangler 4 badge! For now though, let's deposit the creatures I had laying around in my cargo for a while to my sanctuary planet so I can swap them out for another set of flora and fauna to terraform with, and I will also use Create Creature to show how it works.
Once I click on Create Creature, it puts me in the Creature Editor, with a rather unique background appearance that's exclusive to the Create Creature and Creature Tweaker tools in this stage! The music is also from the Space Outfitter instead of the normal Creature Editor, and the creature is lit from underneath. There's also no Test Drive, sadly. You don't have access to all parts here - I believe it only gets you access to parts you've previously unlocked in the Creature Stage itself, and extra parts from creatures you've scanned, or something. Luckily, I've unlocked every part I could in the Creature Stage, so I'm only missing some mouth types! This version of the editor is very interesting and unusual, as someone who uses the normal Creature Editor constantly, but not the one in Space Stage!
I've made this creature called the Drilltail. "Created by the Stabbies out of boredom, more or less. These creatures are named for exactly what you think they're named for." Once I click Save and Exit, the game puts me back where I was, now with five of the new creature I just made in my cargo. I place them on the sanctuary planet and now they live here too! They're going to be one of the set of creatures I'm going to be using to terraform planets. I've picked up a bunch of wildlife and now I'm ready! This planet I'm terraforming is interestingly colored at the moment, being mostly grey with shades of green and purple and yellow. It's kind of colorful!
I've kind of written a lot. Probably too much! So there SHOULD be something next month with the rest of the terraforming quest and then whatever else I decide to do after. See you then!
Koops, Your Emblem is on Fire
Hello, free thinkers, and welcome back to "Koops' mental health slowly deteriorates".
Today, we have ourselves a funky and quirky adventure in the desert.
My favorite part of traversing the desert is when the big buff guy who can crush me like a soda can casually tags along the journey (happens every time I travel through the desert in real life :TM: ).
Hawkeye
The protector of Nabata. A mysterious air surrounds him.
Level 4 Berserker.
HP: 50 (50%)
Str: 18 (40%)
Skl: 14 (30%)
Spd: 11 (25%)
Luck: 13 (40%)
Def: 14 (20%)
Res: 10 (35%)
Con: 16
Move: 6
Weapon Ranks: A Axes.
So... imagine Marcus, except with better base stats in everything but speed, some extra crit and in a less good class (without a horse). That's basically what Hawkeye is. Much in the same way that Marcus is always relevant, the same can be said of Hawkeye. Also much like Marcus, his base speed is good enough to double most things in the game, typically around this point in the game due to enemies sticking to steel weapons like glue, though he will need some additional points if he wants to keep doubling until the end, which he can get with a speedwing or something. Don't count on that low growth kicking in if you're really desperate.
Hawkeye is just Marcus without the horse and locked to axes. That's all you need to know to gauge how good he is. Obviously he's around for much less time and you depend on him much less than you do on Marcus, but he's here, and he's good. Plus, he looks cool. Enjoy.
This one was a doozy. In any case, thank you for joining me once again and I hope you do so again next month (or the one after that) as we enter the almighty country of Bern. See you then.
| The 'Shroom: Issue 180 | |
|---|---|
| Staff sections | Staff Notes • The 'Shroom Spotlight |
| Features | Fake News • Fun Stuff • Palette Swap • Pipe Plaza • Critic Corner • Strategy Wing |
| Specials | The 'Shroom Mafia 4 |

