The 'Shroom:Issue 224/Strategy Wing
Director's Notes
Written by: Hooded Pitohui (talk)
Hello, all you readers of The 'Shroom, and welcome to this year's penultimate edition of Strategy Wing! Since last issue's release, much of my free time has gone towards various offline projects that piled up through the year and some community projects here. I have had a little bit of time to work my way through Legends Z-A though. I'm nearing the end of the main campaign, and I have had an excellent time with it so far. It is, at its core, a Switch-era Pokémon game, so doubtlessly it won't be everyone's cup of tea, but I'm finding it a worthy successor to Legends Arceus and enjoying the return to Kalos.
You're here to read about other games played by other people, though! Our dedicated team of writers have cooked up their usual slate of sections for you to feast upon. For the first course, Sparks has taken an enraged Bowser and marinated him in Glohm for four hours. With a sprig of mint to imbue his fiery breath with a chilly aftertaste, Glohm Bowser is served up with a saucer of Shy Guy Airtub which you can apply to taste - just mind any fiery indigestion. For your second course, we have sautéed Blooper straight from the cliffs of Noki Bay, which you can enjoy as you hear the throwback stylings of Zange and the Clappy- er, Snappy Trio in Rhythm Review. For the third course, please enjoy a slice of apple pie as Shoey regales you with a marvelous tale taken straight from the chronicles. Yes, as you dine on the light treat, please do take in the incomparable story of the Coup of Gao Lan.
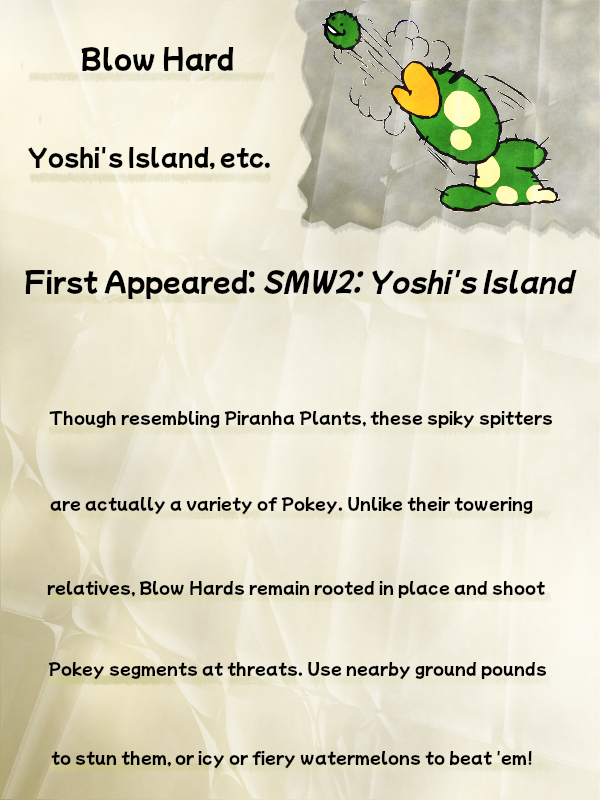
To end your meal, we have a selection of thinly-sliced succulents from Yoshi's Island prepared. I am assured they promote digestion. To please you while you rest after your meal, Sparks shall tell you of Mega Man's infiltration of Dr. Cossack's lair. Yes, do be sure to listen to the end of So You Want to Romance the Three Kingdoms? and An Overly Detailed and Funny Walkthrough of Mega Man 4, as big developments await within both!
Thank you for dining at Strategy Wing this month, and please do enjoy your meal. After you partake, should there be any recipes of your own you would like to add to our menu, do not hesitate to sign up. We take games of all kinds, here, and focused analyses or little tips and tricks are just as welcome as walkthroughs!
Section of the Month
Meee-WOW, the Poltergeist Playthrough of Status the- er, Boo1268 enchanted Strategy Wing last month. Momo's battle to defend the Magic Cat Academy against ghostly forces was a delightfully cute Halloween treat, so our thanks go to Boo1268 for the guest submission! Snagging silver is Shoey (talk) with last month's guide on what to do with the sweet, sweet gold we collected during tax season and his schemes against Yuan Shao (I wonder if that will lead to anything this month...). From Mi-me-kyu-to-you, thanks for continuing to support this team!
| STRATEGY WING SECTION OF THE MONTH | ||||
|---|---|---|---|---|
| Place | Section | Votes | % | Writer |
| 1st | Poltergeist Playthrough | 7 | 36.84% | Boo1268 |
| 2nd | So You Want to Romance the Three Kingdoms? | 4 | 21.05% | Shoey (talk) |
| 3rd | Pitohui's Pokémon Academy | 3 | 15.79% | Hooded Pitohui (talk) |
Brothership Boss Battle Guide
Oh my... has it already been one year since Mario & Luigi: Brothership was released? I feel like it came out only yesterday... Do I need to remove the spoiler warning? I'll let it stay. There could still be readers who haven't played the game yet but really want to.
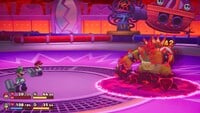
There's no better place to learn how to defeat the biggest and baddest bosses in Mario & Luigi: Brothership than Brothership Boss Battle Guide! Last month I went over Glohm Gobblick, one of three optional bosses in the game. Because it was simply a stronger version of Gobblick, it didn't make for an interesting section. I'm happy to tell you all that the next story boss after Bowser is the most exciting one yet. That boss is none other than... Glohm Bowser!
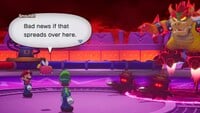
After Mario and Luigi restore the final Great Lighthouse, they infiltrate Fortress Zokket, the flying fortress of the main villain of the game - Zokket. As they explore, they find Bowser, who's here to save his son (Bowser Jr., but that should've been obvious) after the Extension Corps kidnapped him. Zokket orders to fire the Glohmatic Quad-Ray, which causes all four Great Lighthouses to glow with powerful Glohm energy before firing large Glohm lasers directly at Bowser, transforming him into the fearsome Glohm Bowser. He's not happy to see Mario and Luigi... guess they'll have to beat the Koopa King back to his senses!
These are the stats of Glohm Bowser!
Glohm Bowser's stats
| Image | Level | Location | HP | POW | DEF | SPD | Type | EXP | Coins | Item(s) |
|---|---|---|---|---|---|---|---|---|---|---|
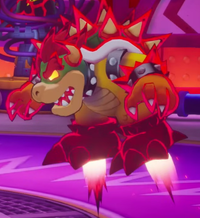
|
36 | Fortress Zokket | 8700 | 182 | 138 | 366 | Glohm, Bowser's Army, Flying | 14000 | 1500 | Ouch Charge Battle Plug |
Glohm Bowser's abilities
At the start of the battle, Glohm Bowser has two attacks at his disposal:
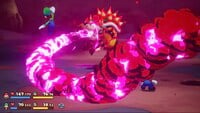
 Jump Defense: This attack is basically a more intense version of Bowser's one-on-one attack from his previous battle. He jumps in front of Mario or Luigi and either swipes with his tail, breathes Glohm-y fire, or jumps up and ground pounds. The pace of this attack is faster than the normal Bowser's version, and he performs more attacks. He also switches targets more often. The ground pound attack in particular is much different; after Glohm Bowser lands on the ground, four-to-five Glohm Shockwaves are sent out one at a time. Bowser's landing still "stuns" the target, but the Glohm shockwaves will deal damage. This entire attack can cause the Glohm status effect, and the flames can cause the Freeze status effect. Yeah that's right, fire freezes instead of burns! I'm also assuming that the tail swipe can Trip like in the previous fight, but I haven't seen it.
 Hammer Defense: Glohm Bowser hides in his shell and spins around Mario and Luigi multiple times. While spinning, Bowser will attempt to ram into Mario or Luigi. Sometimes he might jump up high and fall on a character. The Bros. must use their hammers to knock Bowser away before he injures them. After three total attacks, Glohm Bowser will return to his battle position and end the attack. This attack can cause the Glohm status effect. It can also reduce DEF by 15%.
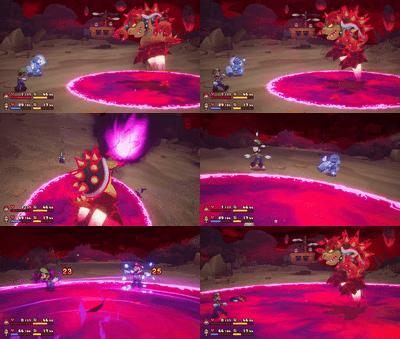
On his first turn, Glohm Bowser slams his hand onto the ground, generating a Glohm pool beneath him. It's small in size, and doesn't pose a threat... yet. Every turn afterward, Glohm Bowser expands the pool a little bit. Eventually, it will reach Mario and Luigi! The pool initially deals damage to them, and causes further damage on each turn afterward. Treat it as a permanent Burn status effect. There is no way to avoid the Glohm pool once it reaches its maximum size; you have to take damage. The only method of escaping it is from the Luigi Logics. More on them later.
During the battle, Zok Troopers (except Ring Zok Troopers) arrive to help out Glohm Bowser. If they make contact with the Glohm pool, they become Glohmed. Here are their stats with and without Glohm:
| Image | Level | Location | HP | POW | DEF | SPD | Type | EXP | Coins | Item(s) |
|---|---|---|---|---|---|---|---|---|---|---|

|
31 | Fortress Zokket | 107 | 136 | 126 | 108 | Zok Troop, Spiked | 0 | 0 | None |
| Image | Level | Location | HP | POW | DEF | SPD | Type | EXP | Coins | Item(s) |
|---|---|---|---|---|---|---|---|---|---|---|
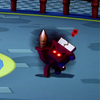
|
30 | Fortress Zokket | 100 | 131 | 150 | 126 | Glohm, Zok Troop, Spiked | 0 | 0 | None |
| Image | Level | Location | HP | POW | DEF | SPD | Type | EXP | Coins | Item(s) |
|---|---|---|---|---|---|---|---|---|---|---|
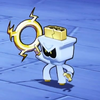
|
31 | Fortress Zokket | 107 | 136 | 105 | 135 | Zok Troop | 0 | 0 | None |
| Image | Level | Location | HP | POW | DEF | SPD | Type | EXP | Coins | Item(s) |
|---|---|---|---|---|---|---|---|---|---|---|
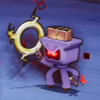
|
30 | Fortress Zokket | 100 | 115 | 100 | 152 | Glohm, Zok Troop | 0 | 0 | None |
| Image | Level | Location | HP | POW | DEF | SPD | Type | EXP | Coins | Item(s) |
|---|---|---|---|---|---|---|---|---|---|---|

|
31 | Fortress Zokket | 107 | 136 | 79 | 162 | Zok Troop, Flying | 0 | 0 | None |
| Image | Level | Location | HP | POW | DEF | SPD | Type | EXP | Coins | Item(s) |
|---|---|---|---|---|---|---|---|---|---|---|
|
30 | Fortress Zokket | 100 | 131 | 75 | 189 | Glohm, Zok Troop, Flying | 0 | 0 | None |
For now though, only Spike Zok Troopers and Zokkarang Troopers can show up.
After Glohm Bowser takes enough damage, he will become dazed and land on the ground, seemingly returning to his senses. A Shy Guy Airtub then arrives in the background, opening up an opportunity for a Luigi Logic! Apparently it has stats.
| Image | Level | Location | HP | POW | DEF | SPD | Type | EXP | Coins | Item(s) |
|---|---|---|---|---|---|---|---|---|---|---|

|
36 | Fortress Zokket | N/A | 173 | N/A | 133 | N/A | N/A | N/A | N/A |
While the Airtub is present, it has an attack:
 Hammer Defense: The Shy Guy Airtub levitates in front of Mario and Luigi. It moves up and down, occasionally stopping to fire a cannonball from its cannon. Some cannonballs will miss, but others are fired directly at Mario or Luigi, which must be countered with hammers. Sometimes the Airtub will tilt downwards before firing, resulting in a bouncing cannonball with a delayed impact. Each cannonball countered will be deflected at Glohm Bowser, damaging him. By looking at the wind beneath the Airtub, you'll be able to tell if it will attack the Bros. or miss. After several cannonballs, the Airtub returns to the background. This attack can cause the Trip status effect.
Now, we're going to focus on the Luigi Logic because it's very unique in this battle. It changes up the fight a little bit!
 Luigi Logic
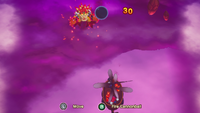
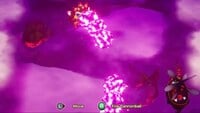
Luigi will run and jump onto the Shy Guy Airtub, knocking away the Shy Guys in the process. With assistance from Mario, both he and his big bro hijack the Airtub and fly away. Glohm Bowser will then snap out of it and realize the brothers are escaping. He then roars in anger and flies after them. Everyone is now in the skies above Fortress Zokket, and the text Shoot as much as you can while dodging attacks! appears on the screen. Afterwards a tutorial pops up:
- Page 1: "Dodge Glohm Bowser's attacks, and keep dealing damage with your attacks. Tilt
to the left and right to move. Press
to fire a cannonball to attack."
- Page 2: "If Glohm Bowser's attack hits you even once, you will fall and crash. Try to keep flying as long as possible, and deal more damage than your foe."
3, 2, 1, GO!
Check THIS out! We have the most interesting Luigi Logic so far. Mario and Luigi must keep firing cannonballs at Glohm Bowser while dodging his attacks. Have you ever played Galaga or Chicken Invaders? This Luigi Logic reminds me of those games. The Airtub can only move to the left and right. Each cannonball that hits Bowser will deal damage, but because of the length of the Luigi Logic there is insane damage potential to be had. Glohm Bowser has three attacks he can perform:
- Fire breath: Glohm Bowser spews out three Glohm fireballs that travel in a spread formation.
- Punch: Glohm Bowser charges up a punch before flying directly at the Airtub's location to release it. If Bowser is attacked while charging the punch, the attack is canceled.
- Barrier: Glohm Bowser puts up a spiky barrier that deflects all cannonballs fired at him. Deflected cannonballs become obstacles for Mario and Luigi to avoid. After several seconds, Bowser will lower the barrier. Glohm Bowser cannot directly attack while he has a barrier.
After a specific amount of time passes, the Airtub will malfunction and slowly lose altitude. Mario and Luigi will jump out of it before it crashes into the ground and explodes. If the Airtub gets hit by an attack, it will explode, causing Mario and Luigi to plummet to the ground. Regardless of what happens, Glohm Bowser will catch up and the battle resumes at a new location outside of Fortress Zokket. Try not to get hit during the Luigi Logic!
The fight continues!
Now at a new battlefield, the battle against Glohm Bowser resumes! The boss gains a new attack here:
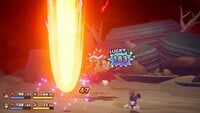
 Hammer Defense: Glohm Bowser grunts, causing large red Glohm pipes to rise up out of the ground and cover both Mario and Luigi, preventing them from being seen. The boss then circles around the pipes in the air for a short time before stopping on one side. He then breathes two Glohm fireballs - one for each pipe - with a short delay between them. Mario and Luigi must counterattack the fireballs before they get hit by them, otherwise they'll take big damage. If a fireball is countered, it will be sent back at Glohm Bowser, dealing a good amount of damage to him. The pipes will disappear when the attack ends. Memorization is needed because you have to remember which brother is in which pipe. This attack can cause the Glohm and Freeze status effects.
Glohm Bowser creates another Glohm pool here, although this one starts out bigger than the previous one did. Additionally, a Shy Guy Airtub arrives even before Glohm Bowser becomes dazed. This opens up another Luigi Logic opportunity, but watch out! If Glohm Bowser is not dazed when "Luigi Logic" is selected, Glohm Bowser will destroy the Airtub while Luigi grabs onto it! This is because the boss is alert and sees Luigi's plan as he tries to put it into action. Snoutlet will then tell you to make sure the boss is out of it before attempting another Luigi Logic. Another Shy Guy Airtub will arrive shortly afterward. Also, Jet Zok Troopers can now show up, and they are the only Zok Troopers who are able to appear. That may be because the fight doesn't take place at Fortress Zokket anymore.
 Second Luigi Logic
It's time for another Luigi Logic! It's pretty much the same as the previous one, but now Glohm Bowser gains a new attack:
- Stream of fire: Glohm Bowser charges up his fire breath before breathing a continuous stream of fire. While he spews out fire, he turns towards the direction of the Airtub. There will then be a slight pause before he continues the fire stream. Use this pause to move to the other side so you don't get trapped in a corner!
This is Glohm Bowser's most dangerous Luigi Logic-oriented attack, but I know you'll be able to dodge it! Once again, the Luigi Logic ends after a specific amount of time passes or if the Airtub takes damage. Remember to spam cannonballs and deal as much damage as you can!
The battle's end!
After that second Luigi Logic, the battle concludes at another battlefield. Glohm Bowser roars with fury, which means he's going to be fighting with everything he's got! Due to the raging winds occurring around this location, there will not be any more Luigi Logics from here on out, as pointed out by Snoutlet. Because of this, there's no escaping the Glohm pool this time around. Finish off the boss before things get bad!
Glohm Bowser gains another new attack here:
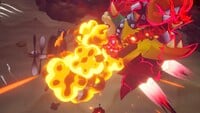
 Jump Defense: Glohm Bowser laughs before flying behind Mario and Luigi. He then charges up his fire breath before breathing out a continuous stream of Glohm-y fire. The boss turns side to side multiple times as he breathes this fire, so the Bros. must avoid it by jumping over it. Sometimes Bowser may raise or lower his head during the attack, causing the fire to travel above or directly at Mario or Luigi. Don't jump if the fire is aimed above the Bros. After a few turns, Glohm Bowser ceases breathing flames and attempts to zoom at Mario or Luigi. The attack ends afterwards, but if timed right, the boss can be stomped on during the charge, damaging him. If the Bros. get hit too many times from the fire, then Glohm Bowser will not charge. The flames from this attack can cause the Freeze status effect. I've watched many people fight this boss, and not once have I seen this attack cause the Glohm status effect. I don't think it can occur from this attack.
Additionally, Glohm Bowser's other attacks are also more difficult to avoid:
 Jump Defense: For the one-on-one attack, Glohm Bowser attacks at an even faster pace. The shockwaves also travel faster, making them much more difficult to dodge.
 Hammer Defense: When Glohm Bowser hides in his shell to attack, he spins around at a faster speed. He also does four total attacks instead of three.
 Hammer Defense: During Bowser's pipe attack, he circles around the pipes at a faster speed.
Focus on finishing off Glohm Bowser! No more enemies will appear too, so unleash everything you've got on Glohm Bowser and win this battle!
Tips and tricks
Recommended gear
Fortunately, there is a peddler trapped on Fortress Zokket, so you can purchase gear and items from him! His inventory is the same as the Wayaway Island peddler, so the gear remains unchanged from the Bowser and Glohm Gobblick fights.
- Boots: Masterpiece Boots and Double-Edged Boots
- Hammer: Masterpiece Hammer and Double-Edged Hammer
- Wear: Masterpiece Wear and Full-Belly Wear
Once again, the Double-Edged Boots and Hammers are many points stronger than the Masterpiece versions, but you'll take 5% of the damage you deal. Full-Belly Wear is two points stronger than the Masterpiece Wear, and also provides the bonus of reducing the damage taken by 30% when your HP is full.
Of course, there's other great gear to have that isn't sold in shops, one of which is completely new:
- High-Heal Boots DX: Three points stronger than Masterpiece Boots, and allows you to heal 10% of your max HP after defeating an enemy! It's found on a ? Block on Meeger Islet. These Boots allow you to heal from defeating the Glohm Zok Troopers.
- Gobblick Boots DX: These are obtained after clearing the "Glohm Gobblick" side quest, and they are so worth it! These incredible Boots are thirty points stronger than Masterpiece Boots (two points higher than Double-Edged Boots too!) and increase STACHE by five points. They also have the cool passive of restoring the attacker's HP by 10% of the damage dealt! If you haven't defeated Glohm Gobblick, you won't have access to these Boots.
- Bros. Hammer DX: This is a hammer you can get from the "Feelings of Dread" side quest after defeating Bowser. It's three points stronger than the Masterpiece Hammer, and has the helpful ability of restoring four BP after defeating an enemy with it! Replenish your BP from those Glohm Zok Troopers!
Use whatever gloves and accessories you wish! Bring ones that fit your playstyle.
 Recommended Battle Plugs
Glohm Bowser may look scary, but we have Battle Plugs on our side! These are the ones I recommend the most, but you can use ones that fit your playstyle if you wish:

 Anti-Army Specialist and Anti-Army Specialist: Both of these Battle Plugs allow normal attacks to deal critical hits to Glohm Bowser, including counterattacks and Luigi Logic hits! Put in both of them at the same time for strengthened critical hits!
 Auto Ampberry: Glohm-inflicting Attacks = not good whatsoever. This Battle Plug removes this dangerous status effect without using up a turn! This Battle Plug is a must because Bros. Attacks and Luigi Logics are essential to getting through this tough battle.
 Boomerang Items: This Battle Plug will ensure you won't lose any of your hard-earned Ampberries whenever you use one. When combined with Auto Ampberry, you'll recover without wasting a turn or using an Ampberry! This Battle Plug is also helpful when using a fully-replenishing item, as you'll have your stats restored while keeping your current item inventory. Nice!
 Temperature Guard: For those who can't stand Glohm Bowser's many freezing attacks.

 Auto Mushroom/Auto Syrup Jar with Deluxe Auto: You gotta constantly be on the offense, and these Battle Plugs will definitely help with that. Normal Mushrooms and Syrup Jars won't cut it here due to their limited replenishing properties, so that's why Deluxe Auto exists. You'll need all the turns to attack as you can get!
 Damage Shield: Glohm Bowser's attacks are damaging and usually involve multiple hits, so this Battle Plug will help increase your survivability.
 Bros. Boost and Performance Bonus: The classic Battle Plug duo! Deal more damage with your Bros. Attacks at the standard BP cost! Just... make sure you get EXCELLENTS to actually have some BP refunded.
Other things
With Glohm Bowser's Glohm and Freeze effects, very high HP and nonstop attacks, he's not kidding around. This is a battle that encourages offensive playstyles to end it quickly, otherwise you'll be in a world of pain.
The Glohm pool doesn't do much damage, but it'll add up as the turns go on. Try to prevent Glohm Bowser from growing it too much by dealing as much damage as possible. Use the Luigi Logics to "reset" the Glohm pool.
Clockout Blow and Jump Helmet are the best Bros. Attacks to use against Glohm Bowser because of their insane damage potential against single targets. Keep in mind that Clockout Blow cannot target flying enemies, so you'll have to stun Bowser before you can use it. If Glohm Bowser is flying, use Bomb Derby instead. If there are enemies accompanying the boss, use Bomb Derby and Yoo Who Cannon instead. Because the attacks do so many hits, some of them can be used to defeat the enemies while still dealing big damage to Glohm Bowser.
It's possible to defeat Glohm Bowser before reaching the third and final battlefield; I've done it the first time I fought him! Most of the damage comes from the Luigi Logic segments, which could add up to about a whopping 2500 or more damage if you don't get hit and specific Battle Plugs are in effect. You won't have to worry about harder-to-avoid attacks if you knock out Glohm Bowser before the third arena.
- Speaking of Battle Plugs, if Anti-Army Specialist or Anti-Glohm Specialist are equipped, then each cannonball will deal critical damage! Apply both for even stronger damage... devastating!
Only strike the Luigi Logic Block when Glohm Bowser is dizzy. If he's in his normal state, he will destroy the airship while Luigi attempts to hijack it, resulting in the waste of a turn.
Glohm Bowser only takes critical hits from the Specialist Battle Plugs. They don't occur normally otherwise.
Glohm Bowser doesn't stay dazed forever! After a few turns, he will snap out of it, so use the Luigi Logics when you have a chance!
When Glohm Bowser attacks by spinning, listen for "whoosh" sounds! If you hear one, it signifies that the boss is about to slam into Mario or Luigi.
During Glohm Bowser's pipe attack, you actually don't have to watch the pipes as Bowser flies. By paying attention to the Glohm pool and the positions of where Mario and Luigi stand, you'll easily be able to tell where the Bros. are. Furthermore, you can defend with both buttons at the same time because of the boss's delay between fireballs.
- If you use the Empower Counters Battle Plug, you'll be able to see the yellow lines when a character readies their hammer, completely removing the memorization part of the attack!
Watch the flames during Glohm Bowser's fire stream attack so you'll know where they will go.
During the Luigi Logics, don't attack Glohm Bowser while he has a shield up! He will deflect all cannonballs shot at him, creating more obstacles for you to avoid. Just wait him out until he's vulnerable again.
- Also be sure to always attack Bowser when he charges up a punch! You'll cancel it AND damage him at the same time!
The Anti-Flying Specialist Battle Plug has no effect when Glohm Bowser is on the ground. Prioritize using the Anti-Army Specialist and Anti-Glohm Specialist Battle Plugs as they will always work against the boss.
The Zok Troopers that show up during the battle are far less numerous and weaker than Bowser's minions in Bowser's previous battle. You can take them out with counterattacks, bombs from Bomb Derby or Yoo Who Cannon. They are pathetic, but can still cause status effects if you're not careful.
Ampberries are more important than ever here because of the Glohm-inflicting attacks from the boss. Because of how rare they are, I recommend equipping the Boomerang Items Battle Plug whenever you use one. Pair it with Auto Ampberry to cure the Glohm status effect without using up a turn or Ampberry!
At this point in the game, you should have plenty of "Ultra"-class items in your inventory. Stock up if you need to buy some! There's a peddle on Fortress Zokket.
The Auto Herb Battle Plug can remove any status effect, so it's nice to have, but remember that Refreshing Herbs only have a 50% chance to cure Glohm. Use Ampberries instead.
Now that was an awesome fight, right? Glohm Bowser was definitely the best boss so far, but we're not finished yet! There are still some bosses left to go over. December's issue will focus on the Great Conductor, who's a big, jolly fellow like Santa Claus! Unfortunately, it's also my least favorite boss in the game, and not really a boss fight. Oh well. He's the next one to cover. Goodbye!
Four Steps for a 3D World
Written by: Hooded Pitohui (talk)
Hello all you readers of The 'Shroom, and welcome back to Four Steps for a 3D World, a section which increasingly examines missions which do not conform to the four-step model! Here, we look at levels from a selection of 3D Super Mario titles through the lens of a design philosophy Koichi Hayashida discussed in an interview, either mapping out how they use it or contrasting them against it.
In brief, 3D Mario game levels in certain titles are designed around an introduction that lets a player learn a mechanic in a safe environment, further development that builds on what the player is learning and introduces more complicated aspects of a mechanic, a twist that adds some kind of significant wrinkle or challenge to force players to consider the mechanic from a new angle, and a conclusion which gives players one final satisfying chance to show they've mastered the mechanic. We look at 3D Mario levels and see if they conform to this model while trying to get some insight on how a good level is constructed.
Next month, to match the special issue theme, we'll be taking off into outer space. This month, though? We've got to start the long journey up by clambering up some cliffs! More seriously, we're turning our attention to the second mission of Noki Bay in Super Mario Sunshine, "The Boss of Tricky Ruins". Following up on the cliff-climbing focus of the first mission, Mario's second trip to Noki Bay finds him climbing the cliffs on the far shore of the bay while introducing a new mechanic in the form of wall paintings. I've always been fond of this mission, but does it hold up under scrutiny?
Stepping back, it's not surprising that a mission from Super Mario Sunshine, a game which released a full decade before the four-step design philosophy was publicly articulated, fails to conform to the four steps. No, what's surprising here is... how easily it could be tweaked to follow the four steps and how strongly this level starts. This level has a great start, both narratively and from a gameplay perspective, but it cuts both aspects short about halfway through.
In narrative terms (bearing in mind this is a Super Mario narrative, so, as simple as can be), the mission sets up an interesting bit of history for Noki Bay and weaves itself into the overarching story of the level well. The Noki Elder rewarding Mario for his efforts by filling him in on some secrets of the bay and pointing him to a Shine Sprite is a natural and cute follow-up to Mario assisting with uncorking the waterfall. The tomb and these secret mechanisms in the cliff lend to the idea that Noki Bay is the ancestral homeland of the Nokis, and offers more reason to want to see its waters cleansed. As a big plus, the narrative ties into the gameplay, with those mechanisms triggered by the wall paintings creating the passages and shafts that give the mission its core gameplay focus.
Then, in the middle of all of this, Gooper Blooper is suddenly dropped in with no explanation and minimal foreshadowing. In any other Super Mario game, I wouldn't question it. It's par for the course. Sunshine, though, puts more effort into making its world feel alive, and typically bosses and minibosses all get some sort of acknowledgement from friendly NPCs. Meanwhile, here, the Noki Elder doesn't even seem to register Gooper Blooper's presence. It all feels... rushed, as if someone realized the level didn't have a proper final challenge, and hurriedly added Gooper Blooper then put some Bloopers on the earlier ledge so the boss didn't completely appear from the blue. Considering Sunshine's development history and some speculation I've seen that Noki Bay barely squeaked into the game, it may well be the case this was slapped together in a hurry! It might have worked, narratively, to at least have some off-hand mention of new creatures moving in, attracted by the pollution of the bay. It would explain why Gooper Blooper has migrated here from Ricco Harbor, add another reason the pollution needs to be stopped, and it wouldn't tread on Eely-Mouth being the cause of the bay's pollution.
I digress, though. Ideally, Gooper Blooper wouldn't be here at all, because his presence also marks the point where the mission stumbles from a gameplay perspective. What you need to complete this mission is one final challenge related to wall jumping and navigating these pathways on a time limit that introduces some new twist. I doubt any boss battle could deliver on that. You need one more wall painting with a more complicated set of paths, and what's quite odd is... the level has that already.
This is neat as a secret to find off the beaten path. As-is, it leads to various Blue Coins and a hidden Shine Sprite. What strikes me, though, is that this could also be the Twist the mission needs! It's one last shaft open for a limited amount of time, but it adds tunnel entrances tucked in the shaft, adding the challenge of reaching the different entrances and finding out which one leads to progress. If you slapped a structure like this after the spiral path, it would perfectly complete the mission, adding a capstone challenge which requires precise wall jumps and navigating various branching paths before Mario gets pushed out. If you add exiting an alcove and jumping over to another ledge at some point, it even builds on the presence of the optional alcoves around the spiral section! They're there to show you may need to jump across some disconnected sections opened by the wall paintings!
That still leaves the tomb lacking any gameplay connection to the rest, but I find that an acceptable concession. The tomb leans into its environmental design to make players feel accomplished for reaching it. It doesn't need an extra little wall jumping alcove in which players can show mastery over the main mechanic if it means hiding the Shine Sprite and moving it off the dais.
The Boss of Tricky Ruins is an odd mission. The level as a whole has all of the components this mission needs to be great, and even has a nice story woven into it! Unfortunately, those components are not properly strung together. An area which could give the level its Twist and serve as a capstone challenge is tucked away as an optional secret path to explore, while the mission clumsily brings in Gooper Blooper to make up for the absence of a notable final challenge. The mission starts off strong, but loses its way halfway through, leading to its challenges abruptly ending by slamming face-first into Gooper Blooper.
Ultimately, this is a mission with a lot of potential that it fails to properly capitalize on. Perhaps that's part of why, even after this analysis, I remain fond of it. It's great in concept but flawed in execution, and I often find myself drawn to works which fit that mold. With four small pots in the Noki King's tomb, three Bloopers up on the highest cliff with Gooper Blooper, two wall paintings that must be sprayed to proceed, and one boss hastily shoehorned in, this has been Four Steps for a 3D World!
Rhythm Review
Hello and welcome back to Rhythm Review! This is Zange, and I currently am more caffeinated than is probably healthy! Blame my new job ^^;; Last month, we covered Stage 5 or Rhythm Tengoku for the Game Boy Advance, and this month we’re keeping right on with Stage 6! This is the first stage in the game (and the series!) with ‘sequels’ of rhythm minigames found in earlier stages. These sequels are considerably harder than their originals and are meant to provide players with a more advanced challenge. We’re about to see a looooot of higher scores in our difficulty ratings…
As a reminder: In most Rhythm Heaven games, a stage consists of four rhythm minigames, followed by one remix, in which all the other minigames in the stage are put together in a new way to new music. However, Rhythm Tengoku is weird and has five minigames in each stage instead of four, and there is still a remix. Let’s jump in!
The Snappy Trio
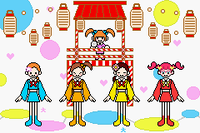
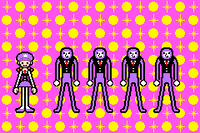
First up in this set is The Snappy Trio! The Clappy Trio returns, but this time they’ve swapped out their disco looks for snappy little suits and bowler hats! Once again, you’ll hit the A button to clap in time after the first two clappers, but the rhythms are a lot faster this time so you’ll want to stay on your toes!!
Gimmicks
For the most part, this is basically just The Clappy Trio except the claps are much more consistent. The trio will still make ‘sneaky’ faces when the rhythm of the claps is going to be something on the funky side. Most importantly, there is a segment of claps near the end where they are almost simultaneous. It WILL throw you off the first time you play this rhythm minigame, but that is absolutely okay! Mastering the timing on that particular bit will be tricky, but not impossible with enough plays.
How to Get That Superb
Full disclosure: You are nooooot going to get a Superb rating on this one first try, because one of the criteria is having perfect timing on the simultaneous clap near the end. Once again, that is more than okay. The other two criteria are having good timing on the inputs for the normal claps, and having good timing on the inputs for the slower claps.
Difficulty Rating
Whew, they really kicked up the speed with this one… We’ll give this a 2.8/5 because this is definitely harder than the remixes that we’ve seen so far.
Bon Dance
Up next in the set is Bon Dance! Just like in The☆Bon Odori, you’ll hit the A button to clap whenever you hear ‘pan’. With an updated, funky arrangement, and new outfits, it’s a bon dance for the modern age!
Gimmicks
I hope you’re paying good attention while playing this rhythm minigame, because there are sections where the ‘don’s and ‘pan’s switch spots! So instead of “don don pan pan” for example, it would be “pan pan don don”. Other sections will add in ‘pan’s where there weren’t any before. This makes it really difficult to master the timing here.
How to Get That Superb
So now we get to talk about a very annoying thing when it comes to certain sequels and getting a Superb rating, which is a Perfect Superb. Essentially what this means is that you HAVE to have all perfect inputs in order to get a Superb rating, you CANNOT have any late or early hits. I know from experience that Bon Dance is one of those rhythm minigames! You still get the lines of text upon getting a Superb, but with these they are mostly just for flavor. They do, however, give you some hints on what you need to work on in order to achieve a Superb. In this case, you need to be able to have perfect timing on both halves of the song, as well as have perfect timing on the “Made in Japan” segment and the ‘pan’ at the very end.
Difficulty Rating
Admittedly, Bon Dance isn’t that much harder than The☆Bon Odori, it’s just more annoying. (granted, I hate both of these rhythm minigames with a passion…) We’ll go with a 2.2/5 here.
Cosmic Dance
Moving on, we have Cosmic Dance! So long Space Dancers, the Cosmic Dancers are taking over now! Much like Space Dance, you will either use the A button, down on the D-pad, or right on the D-pad to dance depending on the cues given. Dance your little space heart out!
Gimmicks
Gameplay is mostly the same as the original Space Dance, however, the music in Cosmic Dance is in swing tempo. This means that the timing for your inputs is going to be a little different, and it’s a bit difficult to get the hang of at first. Much like everything else in this game, though, practice makes perfect!
How to Get That Superb
Thankfully, this is not a Perfect Superb like I thought it was… Anyways, pretty straightforward criteria here, it’s basically the same as Space Dance. You just need to have good timing on your inputs so that you’re in sync with the rest of the Cosmic Dancers, and nail the section where Space Gramps starts to give you cues. (which they kept despite Space Gramps not technically being present here…)
Difficulty Rating
Interestingly, this one isn’t much harder than its predecessor either… We’ll give it a 2.1/5 here
Rap Women
Going onto the next rhythm minigame, we have Rap Women! The rivals of the Rap Men have arrived, and they’re talking a big game! Much like in Rap Men, you’ll press the A button to make your part of the rap stand out depending on what your partner says. Come roll with the coolest ladies you’ll ever meet!
Gimmicks
Interestingly enough, Rap Women doesn’t introduce anything new to trip players up or throw them off in any way. However, the cues are more constant here than they are in Rap Men. The only other differences are the reskin and a new song playing in the back. The songs in Rap Men and Rap Women are both even the same tempo, so this is a very interesting definition of a ‘sequel’...
How to Get That Superb
Much like Rap Men, getting a Superb here is fairly straightforward. You just need to have good timing on your inputs with all three cues.
Difficulty Rating
Despite what I initially thought, Rap Women is just a bit harder than Rap Men. We’ll go with a 1.9/5 here.
Tap Trial 2
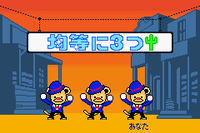
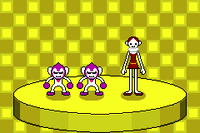
The final normal rhythm minigame in this set is Tap Trial 2! The tap dancing monkeys are back with a cool, new style! Much like in Tap Trial, you hit the A button after a cue is given to tap dance with your monkey friends. Pay attention, though, because this sequel takes the tapping up to 11!
Gimmicks
There are two major gameplay differences between Tap Trial and Tap Trial 2. First, the cues are a lot more consistent, with less space in between them. This is especially true after the tempo change that happens at the midway point. Second, the tempo of Tap Trial 2 is considerably faster. So not only are you having to make more inputs in this rhythm minigame, you are having to make them much quicker than you would have in the original.
How to Get That Superb
Okay, the criteria for getting a Superb here is fairly straightforward. You just need to have good timing on all the different ‘tap techniques’, as well as keep up with the speed of everything. It probably will take you multiple tries especially because trying to keep up with constant inputs through the increased tempo is much easier said than done…
Difficulty Rating
3/5, this one is noooooot easy.
Remix 6
At long last, we’ve come to the remix for this stage: the legendary Remix 6. This remix is different from the prior remixes in that it includes EVERY rhythm minigame (aside from remixes and sequels) present in the game! It actually began what fans of the series know today as a Rhythm Heaven tradition, however, future installments would have this type of remix be the final one of the game (there’s still two stages left of Rhythm Tengoku, so don’t celebrate just yet).
Gimmicks
It’s worth noting that every rhythm minigame in Tengoku appears just once in this remix, with the exception of Space Dance, as that one appears at the very beginning and the very end. Otherwise, if a gimmick was present in the original, it’s fair game to appear here. Stay on your toes, because anything could happen here!
How to Get That Superb
Alright, I’m gonna say the same thing that I always say for the remixes: Remixes always use the same lines of text depending on what rating you get, so it’s much harder to tell where the line is between a Superb rating and an OK rating. By this point, however, you should hopefully have gotten a Superb on a majority of the normal rhythm minigames. So as long as you stay on top of the transitions and don’t have too many early or late inputs, you should be able to get a Superb here within the first five or so attempts (I’m trying to be generous to those who have never seen this remix in their lives before).
Difficulty Rating
This is absolutely the hardest remix to score on a scale like this in the whole game. On one hand, it’s the remix with every single rhythm minigame, the transitions are extremely snappy at points, and the tempo feels like it’s all over the place. This remix isn’t afraid to hit you where it hurts if you’re not expecting it because of the sheer amount of remembering how to play these rhythm minigames you are required to do. On the other hand, it’s the most iconic remix in Tengoku, and once you’ve played it or watched someone play it enough times (guilty as charged on the former…), muscle memory takes over. Once you get over that initial feeling of “oh god oh god oh god how do I PLAY THE GAME”, it’s really hard to see this remix as an extreme challenge. With all of that being said, I feel like a 3.2/5 is the rating I have to go with here.
Final Remarks
I’m only slightly disappointed because I expected some of these sequels to be a little more difficult… Or I’m just misremembering how difficult they were to begin with. Maybe we’ll be pleasantly surprised by something in one of the last two sets. I’ll see you back here next month for Stage 7!
Pitohui's Pokémon Academy
Written by: Hooded Pitohui (talk)
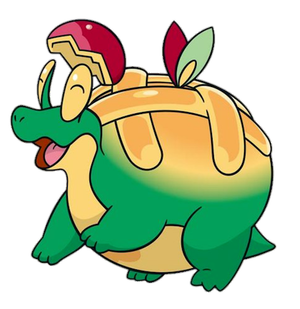
Salutations, class. Or perhaps I ought to say bonjour? I trust you all have showered any Mimikyu you encountered over October's end with attention and affection, yes? Er, well, I hope you have, for your own sakes. Regardless, in the course of my wanderings in Lumiose City, I happened upon a fellow traveler in the melancholic Café Triste, with whom I shared a slice of apple pie. By their account, they had baked the treat themself, using the Sweet Apples from their homeland. In commemoration of this meeting, I considered it appropriate that we use this month's lecture to discuss Appletun, a Pokémon which evolves from Applin when exposed to a Sweet Apple.
| The following information applies to Pokémon Scarlet and Pokémon Violet. |
The standard disclaimer and glossary follow below. If you are familiar with our aims and terminology, please do skip them and we will get on with the lecture promptly!
First, a Smogon University course, this course is not. No, this academy's lessons are designed to get trainers of any stripe thinking about how they can raise their Pokémon, and, as a result, aren't designed to keep up with the widely-accepted metagame for the series. In rare cases, the way I've raised my Pokémon may even flies in the face of conventional wisdom. If you're looking for top-tier strategies, do check out Smogon, but if you merely want to get a little deeper into raising Pokémon while still doing things your own way, feel free to use this section as a reference.
I'd like to give a word of thanks to the Bulbagarden Archives, the source of many images in this section.Base Stats: Base stats are the values associated with a particular Pokémon species, and are the same across every individual Pokémon of a given species. You have no influence on them. You can think of them as traits tied to a species. A chimp isn't ever going to be able to get as good as digging as a mole will be, and, likewise, an Abra is never going to have the defensive prowess a Shuckle has.
Individual Values (IVs): Individual values, as their name implies, are associated with individual Pokémon. They range from 0 to 31 in each stat, with 31 being considered a "perfect" IV and higher numbers corresponding to different stats. Magikarp A and Magikarp B will have the same base stats, but they may very well have different IVs. To stick with the animal analogy, one mole may be born with larger claws than another mole, and that first mole is probably going to have an easier time digging through dirt than the latter. Individual values are set in stone, strictly speaking, but you can use Hyper Training (from Generation VII onwards) to functionally get a perfect IV in a stat.
Effort Values (EVs): Effort values are the one thing you can easily change. A Pokémon can earn, primarily through battling, but also through means like the use of certain items or mechanics like Super Training, up to a total of 510 effort values, with up to 252 in any given stat. To finish off the animal analogy, no matter what kind of claws a mole is born with, moles who have more experience digging are probably going to be better at digging than moles which have never dug.
Nature: A Pokémon's nature is, more or a less, a stat modifier with a name meant to make it sound like a Pokémon has some personality. Natures will raise one stat by ten percent and lower another stat by ten percent. Some natures raise and lower the same stat, canceling out the effect and leaving stats unchanged. Natures can be functionally changed with the use of special mint items from Generation VIII onwards.
STAB: STAB stands for Same-Type Attack Bonus, and refers to the boosted power of moves that match the type of the move's user. To illustrate this, consider the case of a Lombre, a dual-type Pokémon which is both a Water-type and a Grass-type. Any Water-type moves Lombre uses will have their power boosted by 1.5x, and any Grass-type moves Lombre uses will, likewise, have their power boosted by 1.5x. (There are circumstances where this does not apply, and, while the 1.5x multiplier is typical, some games use other multipliers.)
Quite some time ago, Flapple, another of Applin's branched final evolutions, was the subject of one of these lectures. Appletun's base stats are completely unlike its alternate's, however, so we shall start our examination from the top. A differing base stat distribution, after all, necessitates a different approach to raising a Pokémon!
What we observe with Appletun is a Pokémon that is indisputably and emphatically slow. Including Mega Evolutions and regional forms as their own entries, only forty-one Pokémon are as slow as or slower than Appletun. This suggests that we ought to consider placing Appletun on a Trick Room team. For those unfamiliar, Trick Room is a move that causes slower Pokémon to move before faster Pokémon for a set number of turns. We will raise Appletun with the assumption that it will battle in a Trick Room environment, paired with teammates able to use the move. As such, we'll aim to lower Appletun's speed as much as possible. You may not want an IV of zero precisely, just in case you encounter an opponent using a Trick Room team of their own and would do better disabling the Trick Room, but aim for as low as IV as is practical.
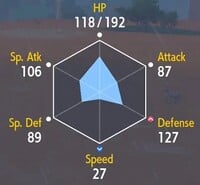
Expanding beyond speed, we see that Appletun has a high HP stat, a high special attack stat, and... decent defenses. Its 80 in defense and special defense is not great, but it isn't unusable, either. The question naturally follows, should we invest in Appletun's defenses to shore them up, or maximize its offense? To answer, we'll need to jump ahead slightly and look at Appletun's movepool. I will refrain from listing every move individually. Just know that there are exactly three types represented in Appletun's special movepool - Grass, Dragon, and Normal. Normal squeezes in entirely on account of Hyper Beam, which is, due to its recharging turn, not an ideal move, so we are limited to only Dragon and Grass. These are not great types offensively (particularly Grass), suggesting that we will reap minimal rewards by investing in special attack.
With that all said, we are going to aim to raise a bulky, defensive Appletun. To begin, we invest 252 EVs into HP to maximize Appletun's greatest strength. Then we need to decide whether to invest more EVs into defense or special defense. Which is the better option? Truthfully, I'm not certain there is an objective answer to that question. It depends on what opponents you expect to face, which will in turn depend upon what battles you plan to have! You will have a vastly different experience aiming to advance in the VGC as opposed to restricting yourself to a particular Smogon-developed tier as opposed to casually battling some friends. Assess your likely opponents for yourself, and decide from there! For now, I will invest a max 252 EVs into defense, I will invest the remaining 6 into special defense, and we will carry on. Assume you can swap these stats around and still follow the lecture, though!
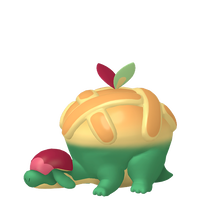
|
Name: | Appletun | Base HP: | 110 | |
| Category: | Apple Nectar | Base Attack: | 85 | ||
| Type: | Grass | Dragon | Base Defense: | 80 | |
| Abilities: | Ripen | Base Special Attack: | 100 | ||
| Gluttony | Base Special Defense: | 80 | |||
| Thick Fat | Base Speed: | 30 | |||
For Appletun's nature, choose a nature which lowers speed and raises either defense (Relaxed) or special defense (Sassy). This will add to Appletun's bulk and add to the effectiveness of Trick Room.
Moving to Abilities, Appletun presents us with three possibilities. Two of those abilities relate to held Berries, and, much as with Flapple, between the two, Ripen is far and away the better choice than Gluttony. Gluttony will only cause Appletun to consume berries sooner, while Ripen will double their effects, gaining you much more from a given berry. There are a number of unique and intriguing strategies you can use with Ripen, in fact. By pairing it with a Sitrus Berry and Recycle, you can equip Appletun with a replenishable held item which can restore half of its HP with each use. By giving Appletun a Starf Berry, it can get a four-stage boost in a random stat - potentially repeatable with Recycle and a recovery move to keep Appletun's health up!
Yes, Ripen can undergird a number of fun and interesting options! However... an opponent can disrupt any of those plans with Knock Off, a move which rids Appletun of its held item and which prevents Recycle from restoring it. While I encourage you to experiment with Ripen, especially should you find yourself lacking access to an Applin with its hidden ability, the safer option here is Thick Fat. Thick Fat halves the damage taken from Fire-type and Ice-type moves, adding another effective resistance to Appletun and dropping its 4x Ice-type weakness to a standard 2x weakness. This complements Appletun's defensive focus and has fewer moving parts, so to speak, which can be disrupted. There are other healing options available to Appletun, so we aren't losing too much choosing Thick Fat over Ripen, either!
On the topic of recovery moves, let's begin building a moveset for Appletun by first including... well, Recover! The rationale here is simple. An active recovery move is a gift for a defensively-oriented Pokémon. Recover allows Appletun to restore half of its health after taking a few hits in the process of wearing down its opponents. We complement this active method of recovery with Leech Seed, which will allow Appletun to deal chip damage to opposing Pokémon (excluding Grass-types) while passively shoring up its health. With these moves - and possibly a held item like Leftovers, though you may save those for a Pokémon without its own method of restoring health - Appletun can last on the field for quite some time.
| Recover | The user regenerates its cells, restoring its own HP by up to half its max HP. | |
| Leech Seed | A seed is planted on the target. It steals some HP from the target every turn. | |
| Apple Acid | The user attacks the target with an acidic liquid created from tart apples. This also lowers the target's Sp. Def stat. | |
| Iron Defense | The user hardens its body's surface like iron, sharply boosting its Defense stat. |
To round out this moveset, we'll reinforce Appletun's defense by including Iron Defense. That's a two-stage increase per use of the move, which will rapidly add up to a sturdy Pokémon. If you chose to invest in special defense over defense, simply swap this move out for Amnesia.
| Amnesia | The user temporarily empties its mind to forget its concerns. This sharply boosts the user's Sp. Def stat. |
With that, we have completed a moveset! However, there are some... difficulties which come with relying upon a single Grass-type move for offense. Aside from being resisted by seven types, already troubling on its own but not impossible to overcome with its second effect, Apple Acid can be rendered entirely ineffective by an opponent with the ability Sap Sipper. While no types are immune to Grass, Sap Sipper grants certain Pokémon an immunity. If you would prefer for Appletun to not be left entirely helpless against these opponents, you might consider swapping out Iron Defense/Amnesia for Dragon Pulse as a secondary STAB move (beware Sap Sipper Azumarill, rare though it may be) or, if you chose to invest in defense over special defense, Body Press. Body Press is a physical move, and normally would not be ideal, but since it runs off the user's defense, Appletun can make use of it.
| Dragon Pulse | The target is attacked with a shock wave generated by the user's gaping mouth. | |
| Body Press | 
|
The user attacks by slamming its body into the target. The higher the user's Defense stat, the greater the damage this move deals. |
With those alternatives noted, we reach the end of our discussion. Appletun is a charming Pokémon full of potential. Once again, I encourage you to experiment with Ripen, even if it may not be the most practical choice! Who knows what possibilities there may be with the right choice of Berry and a moveset and spread of stats built around it? While Appletun, as with a good apple pie, may be best served with little ornamentation and extras that distract from the core flavor and texture... one cannot deny the fun inherent in sampling a variation with an unexpected spice or other addition! What is life without a little travel and a little novelty? Without a slice of pie shared with a stranger in a distant land?
Ah, now I ramble needlessly. In truth, I am not even that fond of pie. Perhaps it's the experience of partaking in it with someone else which makes it enjoyable... Well, I shall leave that matter to your instructors in philosophy, hm? For now, enjoy the waning days of November - and do be sure to read the assigned text on extraterrestrial Pokémon before our next class!
So You Want to Romance the Three Kingdoms?
Hello and welcome back to So You Want to Romance the Three Kingdoms?, a strategy guide on my favorite strategy game, the SNES classic Romance of the Three Kingdoms Part IV: Wall of Fire. Last month… I'll be honest, not a lot happened. We got some tax revenue and that's good. We, uh, also burned down Yuan Shao's armory and that was neat, but other than that, not a whole lot. Well, this month it's the opposite! Quite a bit is going to happen!
Step 13: Preventing War with Yuan Shao
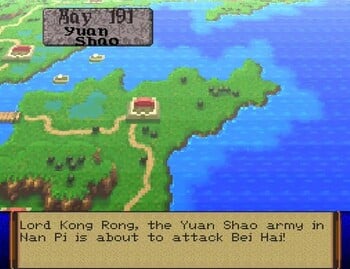
As you may remember, last month ended with us successfully burning down one of Yuan Shao's armories in retaliation for him attempting to spread gossip about Lord Kong Rong's honor. This action, while a completely justified retaliation to the disgraceful actions of Yuan Shao, the son of a common servant, would lead to some unfortunate blowback that forced me to engage in a number of strategies and save states to avert disaster. So first and foremost, let's cover the turn after we burned down the armory, a turn on which Yuan Shao invaded!
Now, could we have defeated Yuan Shao's army? Yes, I did successfully beat Yuan Shao's invading force the one time I played that battle. But here's the problem! Because our soldiers are so poorly trained at this point and because Yuan Shao has a number of good generals, we took heavy losses in that battle. We're talking losses that we just couldn't easily recover from since we can only recruit, at max, like 35k solders per recruitment. Plus, every time we recruited said soldiers, it would lower our Train stat. And Yuan Shao was still liable to invade us again while we were weak since he controlled three cities and we only controlled one. As you can guess, I didn't like that outcome.
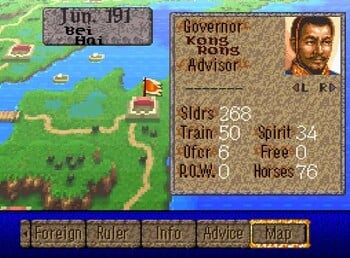
I reloaded my save state and retried the month of April 191 and recruited 24,000 more soldiers. From there, I tried skipping to May of 191, where one of two things would happen. Either Yuan Shao would invade or the peasants would revolt. A peasant revolt happens if your city morale (Spirit) is too low. Since we drafted our subjects' children into combat, they got upset and the city morale dropped low enough to where the peasants revolted. Now, here's the thing about a peasant revolt. I'm not sure if they can be successful! I've seen them happen in cities I only had one (AKA 1,000) soldiers in, and they did not take over the city. But what they can do is kill a bunch of your soldiers, with your soldiers in turn killing a bunch of your peasants. This naturally lowers your population, lowering both the amount of soldiers you can conscript and how much tax revenue you will earn. For a low-population city like ours, that can be a death sentence, so obviously we needed to load the save state again!
This time we still recruited the soldiers because we needed more men, but we also used some of the money we took from the infrastructure budget to buy provisions. Then we had Xin Pi and Gongsun Du give provisions to the people. Now, the reason we used them is because they have the highest Charm stat. The higher the Charm stat, the greater the morale increase when you give provisions to the people. So doing this allowed us to escape both Yuan Shao's invasion and the peasant revolt, so we have a success! Right?
NOPE! When I skipped to May, goddamn Yuan Shao invaded AGAIN. So once again we reload the save state. Returning to April again, we recruit men then buy and give provisions. Then, and this is very important, we recruit more soldiers! Every time Yuan Shao went before us in May, he would invade, but if we went before him in May and recruited another 24k soldiers, this would make our army large enough to where Yuan Shao would no longer invade! I also had Xin Pi and Gongsun Du give provisions to the peasants because, as a rule, I try to keep my town spirit as high as possible.
Step 14: Yuan Shao's Fatal Mistake
With all this maneuvering, we've done it; we've finally made it so that Yuan Shao will no longer threaten the borders of Bei Hai (for now, at least)! But through all this maneuvering, thanks to info from a well-placed spy, Lord Kong Rong learned that Yuan Shao has made a major strategic error. Yuan Shao has left Nan Pi to inspect his northern territories, taking with him almost the entire officer corps of Nan Pi and leaving behind only Gao Lan to run the city while he is gone. Yuan Shao, also perhaps hoping to prevent us from invading Nan Pi while he is gone, also decided to leave the bulk of his forces (197k soldiers) under the command of Gao Lan. Now, this happens a lot in the game. A lot of time rulers will leave the cities they aren't in completely barren of officers, so it's not uncommon to see one city have like fifteen officers and another only having, like, between one and three. I don't know why the game does it like that, because it doesn't make a lot of sense to me. You'd think the computer would emphasize making their cities stronger so they'd get more resources. Regardless, this is a thing that can happen. Hell, one time in a run I was doing in scenario 2 ("Turmoil Spreads in China") where I was playing as Li Ju (yes, I know it's supposed to be Li Jue, Blof and/or LGM, take that up with Koei, not me). During that rune, Cao Cao for some reason put every officer but himself in one city and just him in another. Then, when I invaded, he didn't try to flee, leading to any easy victory for my forces and the capture and eventual execution of Cao Cao. My point is that sometimes the game just does weird stuff, and in this case, Yuan Shao's decision to leave both the bulk of his forces and only one officer in command of them would prove to be a disastrous mistake!
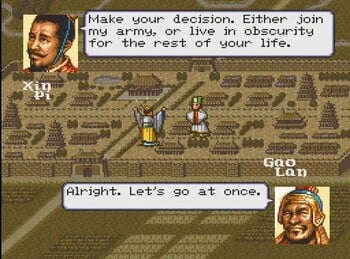
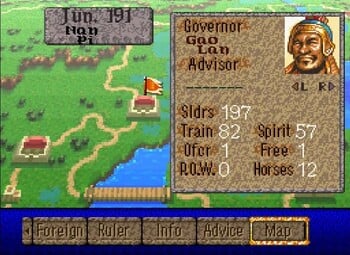
Like I said earlier, you can actually recruit officers in the service of other rulers. It just doesn't usually work, only benefitting you in the early game when officer loyalty tends to be lower. Eventually officer loyalty will get so high that there's no reason to even attempt it. But for some reason, Yuan Shao decided leave his least loyal officer, Gao Lan, who has a loyalty of only 70, as the governor of Nan Pi. This is opposed to any of his other officers, who mostly hovered in the mid-80s or low 90s of loyalty, with the lowest of them being Zhange He at 77. Taking advantage of this slip-up Lord Kong Rong hatched a genius plan, using the Recruit option to send Xin Pi under the cloak of darkness to sneak into Nan Pi with 1,000 gold to persuade Gao Lan to switch sides and forsake Yuan Shao and join our cause.
A secret meeting was arranged, and Gao Lan, unhappy with Yuan Shao, (perhaps over the fact that he wasn't taken with Yuan Shao to inspect the troops? Or perhaps he was upset his placement as governor would prove to only be temporary), agreed to forsake that arrogant half-peasant Yuan Shao and join the righteous cause of Lord Kong Rong in exchange for 1,000 gold and the promise that he would keep his title of governor of Nan Pi. Xin Pi, speaking on behalf of Lord Kong Rong, agreed to these terms! Not only did this put Nan Pi under our command, but the entire army Yuan Shao had stationed in Nan Pi agreed to continue serving under Gao Lan, now fighting for Lord Kong Rong!
With our little flavor text out of the way, let's talk about what REALLY happened. It all started shortly before the release of issue 223, when I noticed that I accidentally claimed that we have Gongsun Zan as an officer. We don't have Gongsun Zan; we have Gongsun Du, two very different people! I'm not even sure if they're even related. Blof or LGM can fact check me on that. When I loaded the game to make sure it was Gongsun Du, I decided to play a few turns that were supposed to be non-canon just to see what would happen. In those turns, I decided to send a spy into Yo Territory. When you send a spy, you take one of your officers that has the "Spy" ability and send them into said territory for upwards of six months. While your spy is spying, you'll have access to all the data you need about all the cities in said territory, as well the data on what officers are in what cities and, crucially for this, what their loyalty is. When I did this, Gao Lan was not a lone officer in charge of Nan Pi; instead, Yuan Shao was there with a full officer corp. But I noticed the earlier mentioned Zhang He and his relatively low loyalty rate of 77, so I decided to attempt to recruit him, thinking, after all, that I wasn't gonna keep these turns. I figured I might as well see what happened. But I didn't have much gold, so I failed. With the data I needed to make my plans for what was originally going to be a much more boring issue, I returned to my original save state which was in June of 191. There, I decided "screw it, let's try recruiting Zhang He again", but this time I had like 1,200 gold, so I was going to attempt to bribe him with the full 1,000. This time, however, Zhang He wasn't there; instead, the only officer was Gao Lan. Now, at the time, I didn't know that his loyalty was only 70, but because I wasn't planning on keeping anything I was doing for this as actual 'Shroom canon, I decided to attempt to recruit him. Shockingly enough, he accepted. Now, I didn't think much of this because I've recruited other rulers' officers before and usually they just join your city. I didn't know that if you successfully recruit the sole officer of a city, not only does he join you, but he brings the city and all its soldiers under your control! That was a happy surprise and I immediately dropped down a save state to make sure I didn't accidentally lose it!
I really can't overemphasize how much this changes the complexion of the game. The initial breakout of your home city, especially for a low population one like ours, is always the most difficult part of the game. You just can't scale as quickly as your neighbors when you're only able to draft 35k soldiers each draft as opposed to larger cities that can draft many more soldiers.
In addition, Yuan Shao is one of the game's more aggressive generals, meaning that breaking away from him was probably going to either require us to invade him when he has a large ever-building army or the building of such a large army that we could move south while still maintaining a large enough force to ward off Yuan Shao from invading. But now with this almost divine stroke of luck, we've basically crippled Yuan Shao! When I said we took control of the bulk of Yuan Shao's forces, I mean we took control of the bulk of his forces. The city we've taken control of has a force 197k strong.
Yuan Shao's other two cities have a combined force of less than 130k, with Bei Ping having 61k soldiers and Dai Xian having 67k soldiers. In addition, not only do we no longer have a force 197k strong that could swell to over 300k strong siting on our borders, but we've stolen Yuan Shao's most well-trained soldiers. The forces in Nan Pi currently sit at 82 Train, meaning that they hit significantly harder than our soldiers (who are sadly barely above a local rice farmer at only 56 Train)! One last thing - taking Nan Pi means that we've taken control of our first "big" city. Nan Pi has a population 422,000 compared to Bei Hai's 73,000. This means not only will we be able to recruit larger armies each round of conscription, but we'll also be getting even higher amounts of tax revenue. Not only that, but Yuan Shao has now lost his main source of men and tax revenue, with his remaining cities having populations of only 78,000 (Bei Ping) and 116,000 (Dai Xian) respectively.
The taking of Nan Pi, especially the way we did it without losing a single soldier, has completely changed how this early game is going to play out. It has gone from a struggle against Yuan Shao to probably eliminating Yuan Shao from contention in short order. Now, as much as I'd love to keep writing, Lord Kong Rong, giddy with glee from what is surely a sign from the heavens of our good fortune, has ordered a great feast over what they're calling the "Coup of Gao Lan", so I must be going to attend that!
An Overly Detailed and Funny Walkthrough of Mega Man 4
Played by Sparks through the Mega Man Legacy Collection for the Nintendo Switch.
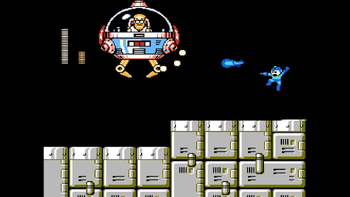
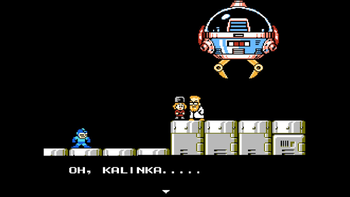
A new month brings another issue of An Overly Detailed and Funny Walkthrough of Mega Man 4! In October, I defeated all 8 Robot Masters and completed my arsenal of special weapons. Now we must confront Dr. Cossack, the one who created these robots and started this whole ordeal. Surprised it isn't Dr. Wily?
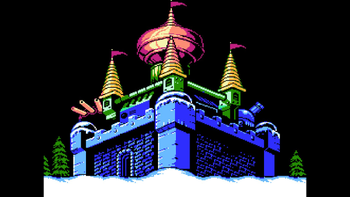
We have no time to waste! We must breach Dr. Cossack's fortress right now! We must reach a star marked on the map. Remember, this is a fortress, meaning weapon energy won't be refilled upon arriving at the next stage. Don't use your specials too much!
Dr. Cossack stage 1
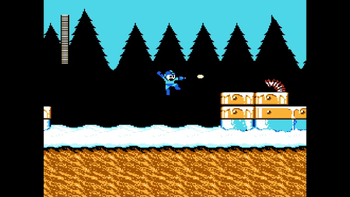
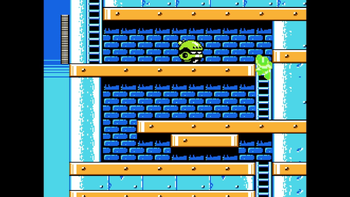
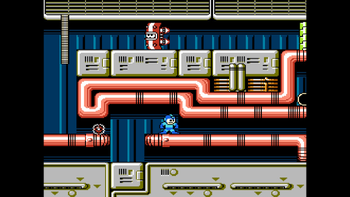
We start outside of the fortress, in the snow. The snow slows us down when walking in it, so jumping through will help speed things up. Hidden in the snow on the left side of the screen is an E Tank just waiting to be grabbed!
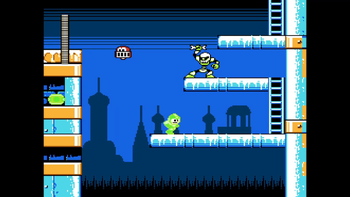
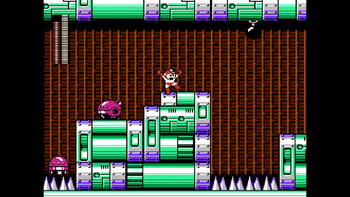
This is a hallway with plenty of snow, plus some icy platforms along the way, so be careful Mega Man doesn't slide into danger! There is a new enemy that looks slinky, and there are multiple of them. They have more HP than most enemies in the game, and they just slink back and forth, dropping down ledges if the platforms are close enough. If one comes across a ledge that is too low, it will turn around. Just keep your distance and get rid of them before you proceed. One of them even generously gave me a 1-Up! There is a ladder above a pit that must be grabbed and climbed to the next area.
After climbing up the ladder, we must get past two of those spinning enemies from Drill Man and Ring Man's stages. These ones are lime green, and because they are near the same point of the Y-axis (up and down), they will continuously spin towards Mega Man, although they are unable to attack him. I force them to spin to one side while charging up my Mega Buster, and then I unleash the attack to wipe them out with one shot! After getting rid of them, we can proceed further.
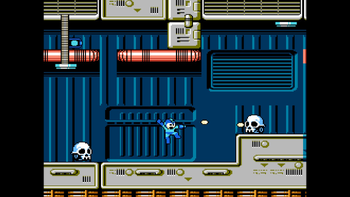
This next section is the longest one in the level. We must make our way to the right while traversing icy ground and leaping over lethal pits. Remember those annoying enemies from Dust Man's stage? The ones that flew out of pits when Mega Man approached? Yeah, those guys. They're back, so force one to come out before jumping across so you won't fall! There are also many skeletons from Skull Man's stage. Once again, a fully charged Mega Buster shot will get rid of them for good. You could also use Flash Stopper to prevent the pit enemies from appearing and ensure the skeletons are destroyed without having to worry about them reviving. There is a large weapon energy capsule along the way (through a small gap accessible by sliding), so you could use a little bit of Flash Stopper energy if you'd like... I don't need it though! The final jump may look intimidating because of a skeleton on the other side, but because Mega Man is at such a high point, the pit enemies won't reach him in time when he jumps, so you only have to worry about the skeleton here! Time to climb some more!
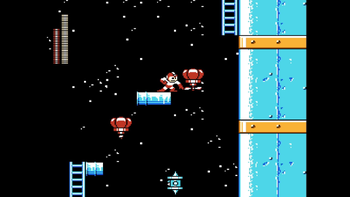
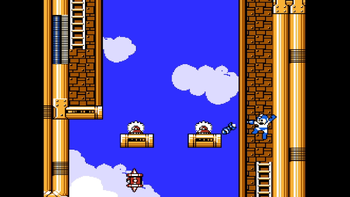
These next two rooms have floating platforms off in the distance leading to ladders while those flying enemies from Skull Man's stage fly by. These enemies aren't likely to cause issues, but the jumps are intimidating if you don't have the sufficient weapon energy. You'll have to grind from the skeletons if you happen to lose a life. Fortunately, I have Balloon, so I can get by easily! If you don't have it, Rush Coil works too.
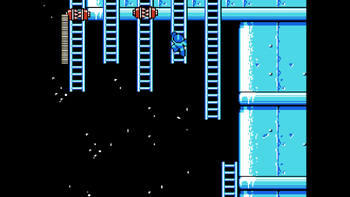
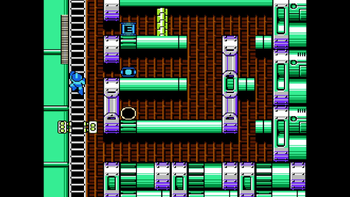
Almost there! In this last part of the stage, we must jump from ladder to ladder to reach one that'll take us to the boss gate. Two of the ladders have these spiky things that close from time to time, attacking anything on the ladder within their range. We have to time our movements and get by without getting hit and falling down. This means we must climb up a ladder to reach a break, climb down the next ladder and jump to the next one and do the same thing again. Both breaks have large weapon energy capsules, so these are great to fully recharge Rush Coil/Balloon. A large red hopping enemy guards the boss gate, but it's easy to dispatch.
Time for the boss! What will it be?
Butterfly fight
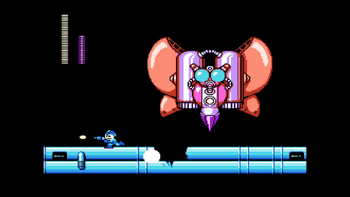
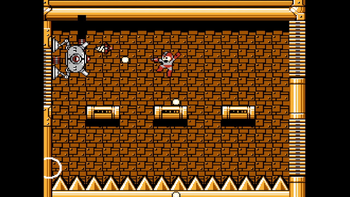
The first fortress boss is a giant butterfly? I don't know what its official name is, but I'm simply going to call it a butterfly because it looks like one! The butterfly wavily moves to the left and right, shooting out a large bullet towards Mega Man's position every few seconds. Sometimes it suddenly drops down as an attack, so try your best not to be under it. The butterfly also has the ability to stop and mid-air and strike the ground with its spike, destroying some of the battlefield. Two strikes in the same location will create a pit that Mega Man can fall in. There are three locations where the butterfly can break the ground.
Because of its ability to create holes, you'll have to defeat this boss quickly before it gets that chance! Thankfully it struck two separate areas once, so it only made the battlefield uneven. The boss's weak spot is the red circle on it, and I'm pretty sure the best weapon to attack is the Drill Bomb. If this boss proves too difficult, then you can use Drill Bomb to defeat it, but just remember to recharge it afterwards! I just used Charged Mega Buster shots to take it down. I'm so glad that's now a thing... I'm going to likely do this for the other bosses as well to preserve weapon energy. Epilepsy warning: Defeating a fortress boss will cause the screen to flash repeatedly due to the explosions. Be careful!
With the butterfly gone, we can move on! Stage 2 is up next.
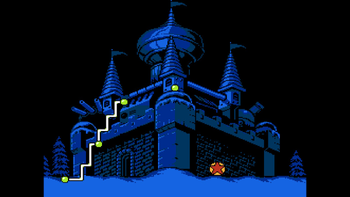
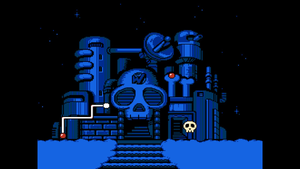
Oh, and for those wondering, this is what the map looks like:
Dr. Cossack stage 2
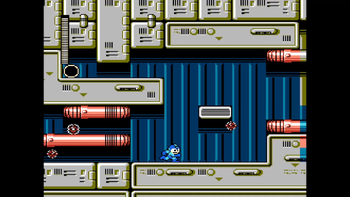
We have successfully infiltrated the fortress! The first room gives us two choices on which ladder to climb to get to the next area: the left or the right. The left one leads to two of those spinning enemies from Bright Man's stage, while the eastern one has one of those spiky things from the previous stage on the same ladder. It's easier to deal with than the spinning enemies I say! No matter which ladder you chose to get here, one ladder leads to the room after this one.
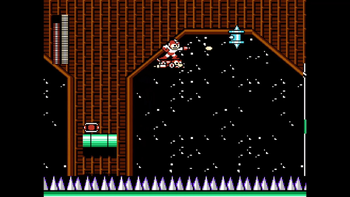
We then enter a room where a large weapon energy capsule rests near spikes on a small platform. You can descend through a tiny gap above to reach it, or you could carefully jump and ignore it. Be mindful of the small ceiling if you try to avoid it! We soon come across a skull generator on the ceiling that drops skulls on wheels that drive towards Mega Man upon landing. The skulls have one HP, and because of this, this is a great way to recharge life and weapon energy. Past it is a very wide spike floor, so we must use Rush Coil to get across. There are floating platforms containing large weapon energy capsules, but they aren't needed to get across. A full Rush Jet is enough to get through. Those flying enemies from Skull Man's stage strike again during the flight, so shoot them before they knock you off of Rush and into the spikes. A high-up ladder at the end of the section leads to the next area, so make sure you're at the right elevation beforehand!
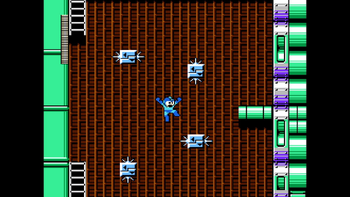
Now it's time to climb up some more! In these next two rooms, we must jump across spiky platforms to reach ladders leading ever higher up. These platforms aren't as bad as they sound, as only two of their sides have spikes at a time, and they don't drain all of Mega Man's health in one hit. They do change the sides the spikes inhabit every few seconds, indicated by the flashing arrows on them. We'll need good timing to jump across the spikes and avoid damage. The first room has a sawblade on the ground, but it's only an issue if you happen to fall.
Now, we enter a new room containing bats on the ceiling, just waiting for Mega Man to arrive so they can attack! There are also those colorful spinning enemies (the ones that are invincible while spinning, not the ones from Bright Man's stage) on platforms separated by spikes. A tall wall blocks the way, but thankfully we can get over that with something like Wire or Rush Coil. There is a large weapon energy capsule in a small space, so I grabbed that to fully recharge my Rush Jet energy. The downside to getting it is that we'll have to scale the wall again, but that's fine. These spinning enemies are placed in locations where they can be avoided entirely by jumping over them while they spin, so defeating them isn't necessary. There is a big gap of spikes to be jumped over at the end of the room, so make sure you're at the very edge of the platform before you jump! Not confident you'll get across OK? Use Rush Jet! A ladder at the end will take us upwards.
The next room is a small one with two of those spinning enemies from Bright Man's stage. A lot of different spinning enemies here, I know! There's another free large weapon energy capsule here, so I used that to fully recharge Wire. Climbing up some more, we enter a room filled with goodies we can grab if we want to. The image above shows what they are: a large health powerup, a large weapon energy capsule and an E Tank. The E Tank is protected by a special wall that only Drill Bomb can destroy. If you choose to get the items, make sure you don't get attacked by that spiky thing when you return to the ladder! The next room is the last one, containing the boss gate and a 1-Up on a high ledge. In front of the 1-Up are two spiky platforms from earlier. I currently have "O7" lives, so I don't need it. An easy way to grab it is by using wire right next to it; by using this method, you won't have to worry about the spiky platforms.
All right, it's time for the boss fight!
Square fight
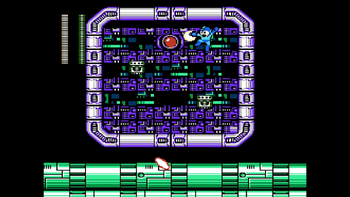
The second fortress boss is a giant square. Upon entering the boss room, there is nothing in it. After the boss's HP bar fills up, the three pieces of the square zoom across the screen at incredible speeds. The lowest part of the square can knock Mega Man into an edge, damaging him if that were to happen. So, we must slide to avoid the lowest part of the square when it goes by. The pieces then zoom by again, this time at a slower speed. They then do it one last time at a very slow speed, but they don't go off the screen; instead, they unite to form the giant square! While the square is whole, it shoots out three oval-shaped laser projectiles at Mega Man's location from the big red circle in it, each fired one at a time with a delay between shots. After the third bullet, the square breaks apart and the attack pattern restarts. Sometimes the pieces of the square initially zoom in the middle and slowest speeds instead of starting with the fastest one.
The only way we can harm the square is by attacking the big red circle near the top of its interior. We first must get inside the square by jumping on the lowest piece and sliding below the middle piece when they're at their slowest speeds. Once inside, we must dodge the projectiles and use the two rising/lowering platforms within it to reach and attack the boss's weak spot! I can get in two Charged Shots with each cycle, meaning I deal about 6 damage at a time. I think I remember the square being weak to the Dust Crusher? That can be used to speed up the battle a little bit.
This is a waiting game. We have to dodge for most of the time and strike when the square unites. It may take a little longer than the average boss, but it's more annoying than difficult.
With the square destroyed, it's time for level 3!
Dr. Cossack stage 3
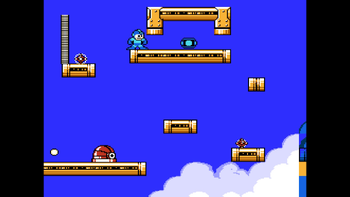
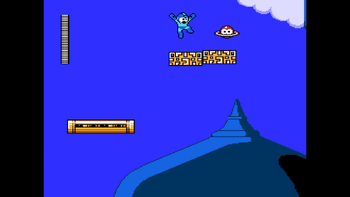
We're high above the ground now, and strangely the skies are clear.
At least 80% of this stage is autoscrolling! The first section is a long hallway that autoscrolls slowly to the right. Mega Man must traverse across many floating platforms and make sure he doesn't fall to his demise. Many of the platforms have these red electric things that travel along the surface of them, moving across all four sides at a fast speed. They're not the only dangers to watch out for, as there are those cannons with shutters from Drill Man's stage placed on some platforms too. Remember that they can only be defeated by shooting at them when they briefly open up to fire.
I recommend staying in the center of the screen; not too far to the left where you can't catch up, and not too far to the right where an unexpected foe can knock you into a pit. The path also splits up into high and low sections early on in the section. The top path has large weapon energy capsules, easier jumps and less enemies, so aim for that path! The screen stops moving on its own once the end is reached. A large red hopping enemy guards the ladder leading upward to the next room.
Now here is the only room (besides the boss room) that doesn't have autoscrolling. We must jump across two floating platforms to reach a ladder leading to the next section. Both platforms are very small and are occupied by buzz saws. There are also red flying enemies but they're usually not in our way. This looks impossible to bypass, but with Dive Missile, I can get rid of those saws in three shots each! I'll remember to recharge the weapon when I get a chance. With them out of the way, we can move on.
Now for the final section of the level! There's more autoscrolling going on, so don't get left behind. Now the only threats to deal with are those Saturn enemies from Ring Man's stage. They could potentially knock you off, but they're pretty easy to get rid of. This section does introduce these unique rectangular platforms that appear out of thin air and slowly sink when Mega Man stands on them. After Mega Man stands on one of these platforms once, it'll quickly rise up into the air when Mega Man is not on it anymore. There are bits of solid ground along the way, with one of them having a large weapon energy capsule to recharge my Dive Missile!
If the next jump is too high to reach, repeatedly jumping on a rectangular platform will make it rise a little, allowing for more altitude and enabling Mega Man to make the next jump. The very last platform must be stood upon for a little while so that it descends low enough for Mega Man to enter a passage leading to the boss gate. Because of this, don't stay too far on the left of the screen because you won't have enough time to lower the platform to its desired height! There is an E Tank right before the boss gate, but it's in a small gap above the ground. To get it, Balloon must be used to reach to where the gap is and then slide right before the balloon disappears. I have many E Tanks, so I'm good. Now for the boss!
Wall Walkers fight
I consider this next boss - or should I say bosses - to be the hardest of the fortress bosses, at least for Dr. Cossack. The battlefield consists of three floating platforms above a row of spikes, so it's very easy to fall and lose a life if you're not careful.
We must defeat two of these things that walk on the surfaces of the room. I'll call them "Wall Walkers". The battle starts with the first one appearing from the top gate, and it moves across the ceiling at various speeds. Sometimes it stops to either shoot one bullet straight down or two from its side cannons, both traveling in diagonals. After shooting, it resumes moving. The scary part is that when it stops to shoot - and even how it attacks - is inconsistent and random. I stood on the first platform so that I will spend most of my time distanced from the Wall Walker. To attack it, Mega Man must jump and shoot at the peak of his jump so he can hurt the boss. I actually forgot what it was weak too, so for this battle, I used Drill Bomb against it. It did two points of damage with each hit, so that's better than one! I wish I can give better advice than "be careful and stay away from the boss".
Both Wall Walkers share the same health bar, so they have fourteen HP each. After fourteen points of damage are dealt to the first Wall Walker, it explodes and the second one immediately shows up from the lower gate. This one moves much faster than the first and travels on all four surfaces of the room in a clockwise motion. Like the first Wall Walker, this one occasionally stops to shoot. Its projectiles are different however; instead of one bullet going straight ahead, it fires a big bullet at Mega Man's location, and instead of two bullets from the side cannons, it shoots a total of four, with two bullets spread out for each cannon. Fighting this Wall Walker on the middle platform is a wise idea, as it'll give you plenty of room and time to dodge the attacks of the boss. It's still weak to Drill Bomb, so I used that to defeat the boss. Thankfully, hitting this one is somewhat easier because it traverses the walls, allowing for Mega Man to attack it without having to jump.
Once the second Wall Walker is done for, the stage is cleared. Mega Man can still move after defeating a boss, so don't accidentally fall in the spikes while you celebrate! Now, it's finally time to confront Dr. Cossack once and for all!
Dr. Cossack stage 4
We start at what seems to be the rooftop of the fortress, with a beautiful night sky in the background. We must drop down a hole in the roof and enter the fortress. When we fall, we enter a small room with two openings in the walls, located high above the ground. Each one contains a large weapon energy capsule, so try to stick to one side when you fall! I was able to recharge some of my Drill Bomb energy from one of them. Now we must fall down some more to reach a new room where two of those shutter cannons are. They're on different elevation levels, so caution is advised when going down to attack them. An E Tank is located behind destructible wall, and you know what? I'll grab it just for fun.
After falling once again, we enter a small hallway leading to the right. A large red hopping enemy greets Mega Man, but it's no match for the power of spamming. Those electric things from the previous stage also return, inhabiting floating platforms like before. There is a small gap we must slide under, but two of those electric things are traversing it, so timing is key. There is a large health powerup to grab, but we must jump across a small platform with another electric thing. Ignoring it is an option, because we don't need to get it. Ladders at the end leads to the next room.
This next room has three bats, and two paths to take! Both lead to completely different paths, so I won't be able to cover them both, I'm afraid. The choice is yours: a ladder leading higher, or a pit beyond a destructible wall leading downwards? If taking the latter path, you'll need to reach the wall first with Rush Coil or Wire, and then use Drill Bomb to destroy the wall. The other path requires no weapon energy use, but I'm going to take the pit path. You should probably defeat the bats before proceeding.
So I'm falling down even more. In the room we end up in, there's an E Tank between two destructible walls, but considering I got one earlier, I'm fine. We move on towards the right, where there are steps with two slinky enemies from the first fortress stage placed on different elevations. They're easy to dispatch. This leads us to the next section. Above Mega Man are two of those fast-moving shield enemies, but they're only a problem if the other path is taken. Moving on once more, there is another electric thing on a platform, and more gaps for us to slide through. There is an upper path leading to a large health powerup, but it's protected by a shield enemy and a destructible wall. I'm already at full health anyway. We then fall down again, entering a small room with stairs leading downward.
The final section before the boss has two skull generators from the second stage. This is the perfect room to grind for weapon energy, so make sure everything is fully charged before moving on! The same goes for your health! It's not worth going for that high-up large weapon energy capsule.
Dr. Cossack waits beyond that gate for a showdown. Are you ready?
Dr. Cossack fight
Dr. Cossack is inside a large claw machine in the air. Half of the battlefield is higher elevation, and you'll need that to attack the boss. As for Dr. Cossack himself, his movements are strange: he moves horizontally towards Mega Man's location and stops when he's above him. The boss can then raise or lower his height before moving towards Mega Man again. He has two attacks:
- While Dr. Cossack is moving, he shoots out three bullets in a spread formation from the side cannon faced towards Mega Man.
- If Dr. Cossack is directly above Mega Man, he might suddenly drop down in an attempt to grab Mega Man. If Mega Man is caught, the boss will lift him up before dropping him to the ground, dealing high damage.
Dr. Cossack is weak to the Dust Crusher, but I used Charged Mega Buster shots instead. Dust Crusher will end the fight faster though!
The strategy I did to win the battle involves two main steps:
- I lure Dr. Cossack all the way to the left side of the screen before jumping to the higher elevation and running over to the right side.
- I attack with fully-charged Mega Buster shots as the boss approaches. When he's near, I slide under him and get to the left.
Repeat. Note that sometimes the boss can be hit even if you're on the lower elevation. Take advantage of this! Always be sure to slide when Dr. Cossack is above Mega Man just in case he decides to attempt a grab. Dodging the bullets is easy, but the grabs are more difficult to dodge. Always be ready!
Interestingly, you do not have to drain all of the boss's health. Once it is low enough, the battle stops, and Proto Man arrives to bring Kalinka, Dr. Cossack's daughter. She speaks to Mega Man:
"Please Megaman don't!! My father is not really evil. Dr. Wily took me hostage and forced my father to fight you. Please Megaman, don't hurt my father any more."
Dr. Cossack then jumps out of his machine and talks:
Dr. Cossack: "Oh, Kalinka....."
Kalinka: "Father....."
Dr. Cossack: "Megaman, forgive me!"
".................."
Suddenly, Dr. Cossack's machine explodes, and Dr. Wily arrives similarly to how Mega Man and Proto Man do.
"You betrayed me, Protoman!! I'm gonna break you, Megaman!!"
Afterwards, Dr. Wily is seen inside of his UFO. He wags his eyebrows before departing for his own fortress:
(Gwonam voice) Here is the map!
Mega Man 4 is not finished yet! Next month will be the assault on Wily's Fortress! Stay tuned!
| The 'Shroom: Issue 224 | |
|---|---|
| Staff sections | Staff Notes • The 'Shroom Spotlight • Poochy's Picks • Awards Director Election • The 'Shroom Spooky Scavenger • Credits |
| Features | Fake News • Fun Stuff • Palette Swap • Pipe Plaza • Critic Corner • Strategy Wing |
