The 'Shroom:Issue 189/Strategy Wing
Director's Notes
Written by: Hooded Pitohui (talk)
♪ Deck the track with words of writers. Fa la la la la, la la la la (fa la la la la, la la la la)! The lightning makes the course brighter. ♪
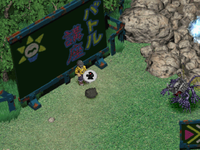
Hello, and happy holidays, all of you readers of The 'Shroom! The Strategy Wing team has been standing out here on the racetrack since we last sent our sections back to the HQ, and, I have to say, I think we've done a swell job making The 'Shroom's track look quite festive. Thanks to Waluigi Time's To Infinity and Beyond, we have all kind of lights strung up on the stands, mostly salvaged from toy spaceships. Following professional heister Kingster's tips, I went down to a hardware store and bought up all kinds of drills and lock picks that I'm sure everyone will be thrilled to unwrap. Of course, with the Wandering Shoestrel around, we've hardly been short on caroling, either! To top it all off, we even had the wonderful BBQ Turtle (talk) come by to help us decorate by designing an to drape over the walls of the track. You can see it above! Thanks, BBQ!
It's really starting to feel jolly and festive around here, yes indeed. It's been hard, prepping with racers going around the track, and the checkered flag is about ready to drop on both the race and the holidays proper. Luckily, we've got our gifts for you all prepared already (and there's minimal power tools included among them)!
You'll find our usual slate of sections below, just waiting to be unwrapped. We have Pokémon, we have a bank robbery, we have the penultimate edition of To Infinity and Beyond, and, of course, we have the final song from our good friend The Wandering Shoestrel. Yes, that's right, we've got a holiday tale for you this year, and it's truly a tense one. Will Sir Cucumber the Brave and Squire Percy the Terrestrial complete their quest and rescue the fair Princess Tomato? Will peace return to the Salad Kingdom? Or will the efforts of our brave heroes end in disaster thanks to the sinister Minster Pumpkin's machinations, plunging the kingdom into tyranny? Hear the song of the Shoestrel and find out, and remember to thank our wandering entertainer for his song before he moves on to spread the tale to others!
Before you go and unwrap the gifts our writers have prepared, have you ever considered joining the Strategy Wing team? Do you want to share a detailed history about a subject you're fond of, like Superchao did for us in Mach Speed Mayhem? Do you want to guide us through a mission like Kinger in Getting that Payday? Do you want to share some more concise, even comedic tips, like SIMulation does? Whatever you want to do, take a look at our sign up page and send an application to our Statistics Manager, Meta Knight. We have a place for you on the team, whether you want to tell us about shortcuts in Mario Kart courses or you want to share some tips for effectively hiding things (like one might hide gifts, or like the items in the scavenger hunt in this issue, which you should be sure to check out).
Now, beat the traffic circling around the track, and race off to unwrap your gifts from the Strategy Wing team!
Section of the Month
Get ready for your interview with Mr. Zero, Superchao (talk), as you raced right into the winner's circle with the final edition of Mach Speed Mayhem, adding information on all of F-Zero's drivers that you couldn't cover in their original articles and rounding up all the characters still left over. Thank you for supporting Strategy Wing for four years with an exemplary section! And thank you, readers, for showing your support for Superchao's efforts with your votes. Give our writers a gift this holiday season by continuing to show your support with your votes!
| STRATEGY WING SECTION OF THE MONTH | ||||
|---|---|---|---|---|
| Place | Section | Votes | % | Writer |
| 1st | Mach Speed Mayhem | 9 | 69.23% | Superchao (talk) |
File City Files
Hello again, and welcome to another File City Files, The 'Shroom's premier (and only) Digimon World section, hosted by yours truly, the wiki's foremost Digimon World expert, Shoeymon. Last month, in our premiere issue, we looked at some of he basics of Digimon raising, so you might think we're ready to actually play the game, right> And save File City, right? WRONG! What we did last month was just half of the basics we need to go over before you're ready to begin your quest! So strap in this month as we look at three things: the lifespan of Digimon, Digivolving, and Care Mistakes.
Lifespan of a Traveling Digimon
So here's a very sad fact for you. Unless you're a pro world-class Digimon World speed runner (in which case, what are you doing here?!), at least one of your Digimon will die for no other reason than old age! You see, every Digimon stage has its own mostly-set lifespan where it will either expire or Digivolve.
The first three stages, Fresh, In-Training, and Rookie, have set lifespans, and, outside of dying in combat or from sickness, will always Digivolve. Those lifespans are:
- Fresh - 6 in-game hours
- In-Training - 24 in-game hours
- Rookie - 72 in-game hours
Those three phases, give or take a little bit when sleeping is factored in, are set. They will always happen as long as your Digimon isn't killed by some other means. What are not set are the the next two phases, Champion and Ultimate, because both of those phases can die of old age. So, here's the thing, you are not guaranteed to have your Champion Digivolve into an Ultimate. In fact, more than likely, your Champion will not Digivolve., and it will just die of old age, but we'll get to that in due time. A Champion Digimon will generally live to be between 11 and 15 days old, and an Ultimate will generally live to be between 16 and 19 days old. There's a number of factors in how the game determines when your Digimon will die of old age, and, to be honest, I really don't fully understand them. Basically, things like having high discipline, strangely enough, will lower your Digimon's lifespan, whereas, conversely, having high happiness will increase your Digimon's lifespan. For the most part, it's very difficult to actually influence lifespan because of how the game determines it. Like, there's like a weird value system and different things tick off different amount of time, I don't know. It's confusing, but there are a handful of items that I know for a fact can make a huge impact on your Digimon's lifespan:
- Devi Chips: These are a late-game item. You can't get them until you defeat Devimon in Mt. Infinity. These chips come in a variety of flavors, and each one buffs a specific stat, but, as a trade-off, each Devi Chip your Digimon eats reduces its lifespan by a full day. Eating these will make your Digimon very powerful, but at the cost of destroying its body.
- DigiSeaBass: These are catchable at Dragon Eye Lake once you get the up-gradable fishing rod from ShogunGekomon in Geko Swamp (you can technically catch them with the rod you find in Trash Mountain, but... good luck). A Digimon that eats these will see their lifespan increase by 4 hours, but watch out, because the time-altering DNA of DigiSeaBass can make your Digimon sick!
- Chain Melons: These are the big ones, a rare item that's kind of just found in the world. Taking a bite out of these juicy fruits increases a Digimon's lifespan by 20 hours! The trade-off is that, outside of glitches, these melons are very rare, so you need to make sure you're using them on the right Digimon.
Much like in the human world, death is natural and, also much like the human world, we don't want to accept that! More than likely, your Digimon will eventually die of old age no matter what you do. Like, yes, you could, in theory, get sixty Chain Melons and you could have your Digimon live forever, but more than likely you're not going to have an opportunity to do that. Luckily, when a Digimon dies, they do not die forever. Rather, they return to egg form, ready to start anew.
Di-Di-Di-Digivolve
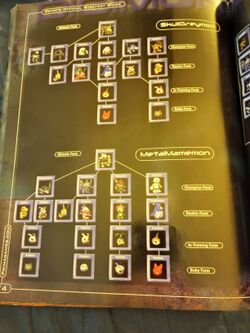
I'm just going to be upfront now. Digivolution in this game has a lot of factors. There are a lot of factors that go into how your Digimon evolves. There's a whole, whole lot that goes into it. It's very complex and it's hard to master without knowing the exact Digivolution chart for each Digimon. The cycle itself is pretty straightforward, though. It goes from Fresh to In-Training to Rookie to Champion and finally to Ultimate. Where it starts getting tricky is the ever-expanding amount of Digimon your Digimon can Digivolve into. It starts fairly simple, because there's never any variance between what In-Training Digimon your Fresh Digimon will turn into. That's set in stone the second you pick an egg. There's more variance between In-Training and Rookie, because each In-Training Digimon will turn into one of two Rookie Digimon, and this is where the game's Digivolution check system starts to come into play.
Take Koromon for example. It can Digivolve into either an Augmon or a Gabumon. If its offense is higher than its defense or speed, it will turn into an Augmon; conversely, if its speed or defense is higher, it will Digivolve into a Gabumon. Like I said, each In-Training Digimon has two set Rookies it can Digivolve into. There is a third that all In-Training Digimon can turn into, that being Kunemon. The way you get Kunemon is, if you have your In-Training Digimon sleep in the Kunemon's Bed area, then you have a 50% chance it will Digivolve into Kunemon. So if you want an electric caterpillar, that's how you get it! Where things really get complex is the Rookie to Champion system. I'm honestly not going to really dive into it because it's so complex, but basically each Rookie has six main Champions they can Digivolve into. That's not counting Digimon like Bakamon, Numemon, and Devimon, who have additional specific conditions to meet. Basically, each Champion Digimon has set parameters based on things like weight, stats, and Care Mistakes. For stats, the game has set numbers of specific stats, such as Speed for Birdamon, you have to meet in order for the game to Digivolve your Digimon into it. So, basically, what happens is, when you Digivolve, the game checks each parameter and whatever Digimon you either qualify for (or most closely qualify for), that's the Digimon you get. If there's a specific Digimon you want, you're going to have to look up an in-depth guide, because a lot of them are very specific and there can be overlap.
So remember how I said you aren't guaranteed to get to Ultimate? Well, you aren't! Ultimates are, as the name suggests, the best Digimon in the game. Getting an Ultimate basically means you'll be kicking ass, and, as such, getting an Ultimate is an extremely difficult process. You see, getting an Ultimate is harder in every way than getting a Champion. While most Champions only have one or two specific stat requirements, Ultimates require all five stats to be specific numbers. In addition, Ultimates will also have additional requirements. For example, in order to have a Champion Digivolve into a Vademon, your Champion must be alive for at least 15 days. Many Ultimates require things like having fought either a certain amount of battles or having learned a certain amount of techniques.
Much like the Rookies, each Champion has a certain amount of Ultimates it can evolve into (with the exception of Vademon, who can Digivolve from any Champion), so, if you want a certain Ultimate, you'll need to be planning from when the egg hatches. Ultimates are tough; they're a reward for being an expert Digimon raiser. Getting an Ultimate is one of the most rewarding things in the entire game because, not only do they get a lifespan increase, but they also get huge stat buffs. Getting an Ultimate, however, without a specific guide to let you know what exactly it needs is really tough, but it is doable. I've managed to bumble my way into Ultimates a few times. More than likely, though, you're probably not going to get an Ultimate unless you know what you're doing. Now, there are items that let your Champion Digivolve into specific Ultimates (as well as items that turn Rookies into specific Champions), but those will be a story for another day.
Be Careful You Don't Make These Mistakes
One of the games hidden stats, Care Mistakes, are exactly what they sound like. They're a mistake that negatively impacts a Digimon's development. But what exactly is a care mistake, you ask? Well, here's the thing. The game never actually explains what a Care Mistake is outside of some vague musings and, in fact, the game might not even give you that much. Here's the other thing. Care Mistakes are actually very important, because they serve as part of the game's checklist for Digivolving; the more care mistakes you have, the better odds you have of getting a mediocre of even a bad Champion Digimon. Now here's the weird thing. Oftentimes, Care Mistakes lead to getting bad Champions, but, on the flip side, a lot of the Ultimate Digimon, in addition to the stat requirements, require a huge amount of Care Mistakes. For example, in order to get Piximon, Mamemon, and Giromon, you need, at minimum, fifteen care mistakes (and a Champion that can Digivolve into them). Here's one more thing. Care Mistakes will wreck your Digimon's happiness and discipline meters, which will affect the Digivolution possibilities of the next Digimon you choose after your current Digimon dies. It's just honestly better, if you're doing a standard playthrough, to minimize Care Mistakes, because, while you can get great Digimon, unless that's the Digimon you're going to beat the game with, it can really screw you in the long run.
Now, let's talk about what actually is a Care Mistake, because, believe it or not, there are actually a lot of misconceptions as to what is and isn't one. It's mostly because the game never gives you the specifics on Care Mistakes and because the game's code is mess, but here is the list of care mistakes:
- Not feeding your Digimon when it's hungry
- Letting it poop on the ground
- Keeping it awake when it's sleepy
- Losing a battle
- Letting your Digimon get sick
- Training it to the point of exhaustion (represented by a sweat bubble above its head)
Those are the game's six Care Mistakes. For the most part, they're pretty easy to avoid, ya know? Always carry food for your hungry digital boy, let your Digimon sleep when he's tired, and don't let them poop on the ground, damn it! We live in a society! The hardest one to avoid is probably sickness, because that one is based primarily around taking a Digimon to a climate that's not good for it, like taking a Fresh Digimon to Freezeland. Sickness can also come from eating certain items, such as Happy Mushrooms (which raise a Digimon's happiness) and DigiSeaBass. The biggest misconception people have with Care Mistakes regards the training one. A lot of people think that as soon as you get sweat bubble, you've already triggered the Care Mistake. That's not true. The game doesn't consider it a Care Mistake unless you train after getting the sweat bubble. As you can see, Care Mistakes are mostly common sense things, and the game does give you some indication of how to prevent a Care Mistake, but the game doesn't actually tell you what is a Care Mistake. But now you know and you can make sure to avoid them!
Now that we've got (most) of the basics down, we can finally starting convincing people to move to the city. So join us next month as I start the process of city planning!
Getting That Payday
Welcome back, friends, to Getting That Payday, a Payday 2 strategy guide. I hope that the holiday season has been nice to you all, and that you've been enjoying spending time with the friends and family whom you hold dearest... But why talk about that when we can talk about getting gifts, obviously the main reason why the holidays exist? The game sale gods have smiled upon me at the very least, as I now own like five new games from the variety of Black Friday sales. However, you may be short on cash. After all, even with holiday sales, things are expensive. That's why, for the final Getting That Payday of the year, we're nailing the biggest bank in the world with the heist called, well, Big Bank! This behemoth of cash security has stood tall for over 200 years, never having been successfully robbed... until today. We're making history as the first people to knock over the (fictional) Benevolent Bank! Due to the nature of this heist as another Dentist-contracted heist, there are a mountain of preplanning options that we will actually go over because of how integral they are to the heist. Without any further delay (minus what a Payday 2 actually is), let's take them down!
What's Payday 2? That sounds like a disease.
Wow, that's awfully rude of you to presume such a nice, kind young game is some hooligan! Or an EA title. Payday 2 is a funky co-op shooter about crime, crime, donating to charity, and crime. As one of the co-op shooters of all time, this game is packed with way too much to do with all of the heists, weapons, tools, etc. This here guide tells you what to do during it, or at least how to be funnier while playing until, inevitably, a Cloaker knocks you out and you have to contemplate your existence while bleeding out on the ground.
Breaking the Bank
Starting off, this month's issue is racing themed, no? I don't really have much, as racing isn't a part of the game, but I can provide some fine escape options! Your basic loud escape is a classic airlift via helicopter from your friendly neighborhood helicopter pilot, Bile. Of course, the roof is rather far from the vault, so how about an elevator to drop off loot and escape through? Or, through some C4, you can blow your way through a nearby building and get picked up over there! Maybe you want some flash, though, so why not send a bus through a wall and hop in a van from there! There are plenty of options with the exit, so just pick whichever feels the best to you! Of course, any non-basic options cost both money and some of your limited favors, and, as such, you have to keep your budget in check at all times. From here on out, just work with the assumption that everything here will cost you. Also, we won't be going super in-depth about them, since, if we did, it would take at least two issues worth of words.
The other mission critical piece of customization is the cracking plan, how you get into the vault! You can get in for free by using The Beast, a giant drill, in order to force the vault open. However, if that's too blunt for you, then we have three different places to pick up some thermite and burn a way open. The vault access corridor, the security room, and the counting rooms are all great places to grab your "special delivery", but no matter where you place it, you still have to burn into the vault through the top.
Besides those two major ones, we have a variety of extras that can significantly help, should you know what ones to take. Remember that some of these will need the second version of the skill Sixth Sense, so picking that up beforehand could be very beneficial. The Doctor Bag, Ammo Bag, Grenades, and Body Bags dead drops are all as simple as they sound: some extra supplies dropped where you need them. The Additional Beast Bits are also as simple as that, being more pieces to the drill so there's less running around. However, as they say, information is key, so let's get some surveillance placed down! Camera Access plants a point in the map where you can look at the cameras, duh, you big doofus. The spycam, however, is an extra, tiny camera that lets you see guards and special enemies more clearly without the camera itself being seen. Those are expensive and limited, though, so you can place down extra normal cameras. This means more chances to get caught, but more places to use to examine the place. More risk, more reward. Plus, we can always put a bit of hacking to use. We can get someone to plant a Thirty Second Alarm Delay, giving us that much extra time before the cops are alerted and rush to your location to drop kick your jaw out of existence. Some skipping of annoying locks would be nice, too, so let's grab the good old Time Lock Glitch Routine and get a head start at the lock guarding the entrance to the inner bank. The Dentist still has some extra connections, however, and can get us some insider help. Planting a Key Card somewhere will help us get through the building easier, and a Poisoned Cake lets us take out one guard without even having to gun him down. On top of all that, we can also get some extra little bits of help. We can have someone leave a window or door open, or get us the information on where the Key Box is. Finally, we can get a zip-line point left open, allowing us to drop off the loot that much easier.
Now that we have the set-up done, we get to the crime itself. Opening with the stealth route, we need to get into the building itself. This already poses a problem as the place is crawling with guards, and dotted with cameras everywhere. You'll have to immediately get to work, knocking out cameras and guards in order to make the place more maneuverable (keep in mind the civilians, as they can completely ruin a stealth run simply by existing). First off, we need the code for the time lock that keeps us out of the inner bank. By finding and breaking into the security room, your friendly support Bain can get into their servers and find the code. The security door room is locked, however, and you will either need a keycard, an ECM jammer (an electronic counter-measure), or you can simply drill it open. This is a nice place to use that keycard you might have gotten while planning! Even once you're in, the troubles aren't over. While there is a small chance the servers are unprotected, there's most likely a firewall you'll have to get past. Going over to the employees section, you'll find a lot of computers. Just start hacking away, as one of them will eventually have the main firewall program that can be disabled to allow Bain in. If you aren't fond of spending forever to find the right one, then having another player use the security computer will make the correct computer beep and display a command prompt. If you're solo, well, this is going to take a while.
Eventually, though, once we get past the firewall, we'll manage to get the code. Use the code on the time lock located at the north end of the bank, and wait. After a second, though, a security officer will call about the time lock. Just get Bain on the phone, and he'll handle it for you. Beware of civilian casualties, though, as the manager may not believe the story and send guards to investigate if you kill a handful of them. Either way, the time lock will eventually finish, and you'll be granted access into the next part of the heist. The vault itself will have a fingerprint scanner, and a second time lock to make your way into. Simply use the scanner, and press both the buttons to start the time lock. More waiting later, and you're almost there. Go over to the manager's office, grab the vault code from the computer, and enter it into the keypad to finally open the vault and let you access the shitton of money and gold inside. Start bagging up loot, and transport it either to the van that's stationed outside the building, or, if you got the alternate elevator escape, through the open elevator, which itself leads to another escape van. Put the bags in, and hop into the van for a successful mission.
By now, though, you most likely already know that stealth isn't the only option. If you've been feeling rather angry lately, then get ready for some chaos. The opening of the heist is the same on both stealth and loud, being getting in there, breaking into the security room, getting past the firewall, and going through the time lock. You just now have to deal with the cops breathing down your neck at all times. The difference comes once you get the time lock going, as now you have to drop off parts of The Beast. The gang always does things in style, and as such, a giant piggy bank has been set up to be dropped by a crane, straight through the glass roof of the bank. Within, there are a couple of duffel bags that contain the parts of The Beast. Yeah, sometimes you forget that part of the Payday Gang's whole plan is country-scale spectacles and social reform. Do you think they'd get along with the Phantom Thieves?
 Alternatively, if you got the thermite in the preplanning, then you can grab that and completely skip the piggy bank sequence. Handy, eh? The other complication before getting through is the time lock. Yes, again, as you're going to need to get into a shed on the roof and flip some breakers to get the time lock properly going. The door's stubborn, too, needing to be drilled or blown open. Yeah, that time lock's a massive pain in the ass. Eventually, you'll get through both the time lock and the vault (after The Beast breaks a few times), and will be able to grab the money.
Now, we have our loud escape options. Starting off, there's the standard helicopter escape. Just drag the bags to the top of the building, drop them off, then get going. Don't take this one. Trust me, it is awful. If you want some alternatives, then there's always the elevator escape, but for something more unique, you can try blowing your way through another building! Although this is risky as it leaves you open to the many snipers lining that side of the bank, it also means you don't have to go far in order to deposit everything. Along with that, you can also get someone to drive a bus through a nearby wall to get you access to a parking lot, with a van safely tucked within. This also feels like a good time to re-mention that all but the basic van escape for stealth, and The Beast and the helicopter escape require preplanning, so try not to get caught off-guard when your master escape is foiled by forgetting to take the right extras beforehand.
And with that, we now have the biggest bank in the world taken out! You know, having done this series for 2/3rds of a year, I've felt as though my writing's gotten much better, so I look forward to delivering more fun articles (and heist plans) to you all! So I'll see you all again next year, and until then, this is professional heister Kinger, signing off.
Pitohui's Pokémon Academy
Written by: Hooded Pitohui (talk)
'ello, 'ello, hola! Ciao and bonjour, class!
...nothing, then? Here I was told that was a popular greeting these days. Well, never mind all of that. With the holiday break so close, I won't have any chance of holding your attention if we don't start straight away, I suspect! Now, I know everyone is eager to leave their classes behind and get on with their break, and I've also overheard all of this talk about going out and racing this month. "Gotta go fast" and all that, as the kids say, no? Taking all of this together, I thought it might be prudent to bring a big surprise along for this meeting, so I went off and met with some associates at Uva Academy.
Thanks to their generosity, today, we'll be looking at an extremely rare Legendary Pokémon, one still under study, no less! That's right, today, we're going to look at one way you might raise, should you ever be lucky enough to encounter one, a Miraidon!
First, though, for anyone who is just joining us, you may wish to review the condensed version of our usual syllabus in the box below.
First, a Smogon University course, this course is not. No, this academy's lessons are designed to get trainers of any stripe thinking about how they can raise their Pokémon, and, as a result, aren't designed to keep up with the widely-accepted metagame for the series. In some cases, the way I've raised my Pokémon may even flies in the face of conventional wisdom. If you're looking for top-tier strategies, do check out Smogon, but if you merely want to get a little deeper into raising Pokémon while still doing things your own way, feel free to use this section as a reference.
Since we all know the importance of citing our sources, I also need to credit the design of some of the tables used in these lectures to Crocodile Dippy, author of the Pocket Handbook which can be found in early editions of Strategy Wing.In addition, should you need a refresher on terms commonly used in this class, you'll want to take a look in this second box. If you ever find yourself lost during class, feel free to message me, and I can update this handout with additional terms.
Base Stats: Base stats are the values associated with a particular Pokémon species, and are the same across every individual Pokémon of a given species. You have no influence on them. You can think of them as traits tied to a species. A chimp isn't ever going to be able to get as good as digging as a mole will be, and, likewise, an Abra is never going to have the defensive prowess a Shuckle has.
Individual Values (IVs): Individual values, as their name implies, are associated with individual Pokémon. They range from 0 to 31 in each stat, with 31 being considered a "perfect" IV and higher numbers corresponding to different stats. Magikarp A and Magikarp B will have the same base stats, but they may very well have different IVs. To stick with the animal analogy, one mole may be born with larger claws than another mole, and that first mole is probably going to have an easier time digging through dirt than the latter. Individual values are set in stone, strictly speaking, but you can use Hyper Training (from Generation VII onwards) to functionally get a perfect IV in a stat.
Effort Values (EVs): Effort values are the one thing you can easily change. A Pokémon can earn, primarily through battling, but also through means like the use of certain items or mechanics like Super Training, up to a total of 510 effort values, with up to 252 in any given stat. To finish off the animal analogy, no matter what kind of claws a mole is born with, moles who have more experience digging are probably going to be better at digging than moles which have never dug.
Nature: A Pokémon's nature is, more or a less, a stat modifier with a name meant to make it sound like a Pokémon has some personality. Natures will raise one stat by ten percent and lower another stat by ten percent. Some natures raise and lower the same stat, canceling out the effect and leaving stats unchanged. Natures can be changed with the use of special mint items from Generation VIII onwards.
STAB: STAB stands for Same-Type Attack Bonus, and refers to the boosted power of moves that match the type of the move's user. To illustrate this, consider the case of a Lombre, a dual-type Pokémon which is both a Water-type and a Grass-type. Any Water-type moves Lombre uses will have their power boosted by 1.5x, and any Grass-type moves Lombre uses will, likewise, have their power boosted by 1.5x. (There are circumstances where this does not apply, and, while the 1.5x multiplier is typical, some games use other multipliers.)
Legendary Pokémon or not, we can begin our discussion by looking at Miraidon's base stats, just as we always do. With only one base stat below 100, Miraidon is as powerful as you would expect, given its status. Still, while Miraidon has strong stats all-around, we can see that its special stats are higher than its physical stats, and that its offensively-oriented stats are, taken together, higher than its defensively-oriented stats. We know we're going to have a special attacker, so we can declare right away that attack will be our dump stat, with no investment and a nature that negatively impacts it. Since we've already determined that Miraidon has higher offensive stats than defensive stats, we'll focus on maximizing special attack and speed with minimal defensive investments and make a glass cannon... of a sort. Miraidon won't be too frail, even with minimal investments in its defenses, thanks to its high base stats.

|
Name: | Miraidon | Base HP: | 100 | |
| Species: | Paradox | Base Attack: | 85 | ||
| Type: | Electric | Dragon | Base Defense: | 100 | |
| Ability: | Hadron Drive | Base Special Attack: | 135 | ||
| Base Special Defense: | 115 | ||||
| Base Speed: | 135 | ||||
Our job here, then, is very simple. We ensure Miraidon has a 31 IV in speed and in special attack, we aim for 31 IVs in defense, special defense, and HP, we take anything in attack, and we select a nature which lowers attack and raises either speed or special attack. I recommend raising speed with a Timid nature, as Miraidon's special attack already gets a small boost from Miriadon's ability, Hadron Drive, which both creates Electric Terrain when Miraidon enters battle and boosts Miraidon's special attack so long as the Electric Terrain persists.
We then invest the maximum number of EVs (252) in speed, do the same in special attack, and allocate the last six EVs to one of the defensive stats. I invested in HP, in hopes I might extend Miraidon's longevity no matter what attacks or status conditions or conditions chip away at its health, but you might also choose to invest in special defense, since you'd rather keep Miraidon out against special attackers than out against physical attackers and the tiny bit of extra bulk may help it in that role.
We've covered IVs, EVs, and ability in record time for our class, so, since we're racing ahead and have time to spare, let me share some incidental information. Miraidon, as with most Legendary and Mythical Pokémon, is in the "No Eggs Discovered" egg group, meaning that Miraidon cannot produce eggs even with a Ditto. You might ask, then, how you can obtain a Miraidon with the right IVs and the right nature. Well, one peculiarity of Pokémon in this egg group is that they will always have three 31 IVs when you capture them, which ought to help you get started. If you still end up with a Miraidon without a 31 in, say, special attack, you can exchange a Bottle Cap to get a Miraidon above level 50 (at level 100 before generation IX, but Miraidon isn't in those generations) "Hyper Trained" in a specific stat (a Gold Bottle Cap can be used for all six stats at once), which will functionally give it a 31 IV in that stat. You can also use Mints to change your Miraidon's nature. Bottle Caps, Mints, and (if you want to speed up EV training) vitamins are all available for purchase in generation IX, so even No Eggs Discovered Pokémon can be raised exactly as you would like, so long as you have money to spend (take note, your professor spares no expenses - perhaps the administration can be reminded of this when they're considering a salary increase, what do you all say?).
With stats all worked out, we can move onto Miraidon's moveset. Since we have a special attacker, let's begin by looking at special STAB options. We can get STAB from both Electric-type moves and Dragon-type moves, and we may as well pick up both so we have as much coverage as possible and so we won't be, say, out of luck against a Ground-type. Normally, now is when you'd make the call between a reliable move with a respectable base power or a move with high base power that comes with a drawback like lowering a stat or having low accuracy. Indeed, for a Dragon-type STAB move, we'll do exactly that, choosing between Dragon Pulse and Draco Meteor, with the latter lowering Miraidon's special attack by two stages with each use. I prefer reliability for my STAB moves, so I went with Dragon Pulse, but, should you feel you'll be switching Miraidon out often (or that it has enough power that the special attack drop won't matter), you might choose Draco Meteor instead.
| Electro Drift | Special | The user races forward at ultrafast speeds, piercing its target with futuristic electricity. This move's power is boosted more than usual if it's a supereffective hit. |
| Dragon Pulse | Special | The target is attacked with a shock wave generated by the user's gaping mouth. |
| Parabolic Charge | Special | The user attacks everything around it. The user's HP is restored by half the damage taken by those hit. |
| Overheat | Special | The user attacks the target with all its might. The recoil from this move harshly lowers the user's Sp. Atk stat. |

You might expect, if you've been following along and are familiar with Electric-types, that we're going to make a choice between Thunderbolt and Thunder, or perhaps weigh Electro Ball against Thunder. Normally, we would do just this, but, in this case, we don't have to make this choice because Miraidon has the signature move Electro Drift. Electro Drift has a high base power of 100, has no drawbacks, gets STAB, gets boosted by the Electric Terrain Miraidon creates, and will get a further power boost if it hits a Flying-type or Water-type Pokémon. There's no contest here. Electro Drift is our Electric-type STAB move.
For a third move, there's two options I'd like us to focus on. We have room to spare on another Electric-type move, and Miraidon gets both Volt Switch, a respectably powerful move that allows the user to attack and then switch out, and Parabolic Charge, which isn't too powerful but does heal Miraidon by half the amount of damage it inflicts. Moves that let a Pokémon switch out are almost always extremely useful, as they let you quickly pivot out a Pokémon if it comes across an opponent it can't handle effectively or an opponent that threatens it. At the same time, almost any Pokémon benefits from having a way to restore its health. A more reliable recovery option like, well, Recover, would be preferable, but Parabolic Charge is the only recovery option available to Miraidon. I chose to use Parabolic Charge so Miraidon has some way to heal, but you might deem Volt Switch the better option, and, if you do, that provides you with more incentive to choose Draco Meteor over Dragon Pulse, as you can easily switch out while dealing damage, making it easy to shrug off the special attack reduction.
You might be asking "why not just incorporate both into the moveset, since there's still room?". If you have three Electric-type moves and one Dragon-type move, you'll be in a bind if you encounter something like a Zacian, a Whimsicott, or, if you're extremely unlucky, a Steelix. If your Miraidon encounters a Steelix, it can either switch out, or it can keep using Dragon Pulse, which Steelix resists; it won't be a fun time for you. That's why I recommend saving your Miraidon's fourth moveslot for an additional coverage move. Even though it has the drawback of harshly lowering Miraidon's special attack, just like Draco Meteor, I've chosen Overheat. It provides Miraidon with a super-effective option against Grass-types and Steel-types, which both resist Electric and, in the latter case, which resists Dragon, as well. It's also super effective against Ice-types, which might (emphasis on might, considering how poorly Ice types fare in general and Miraidon's strength) otherwise threaten Miraidon. You might consider something like Dazzling Gleam or Snarl, or you might come up with some clever strategy to use Reflect or Light screen to increase Miraidon's bulk or to use Taunt to ruin tricky strategies, but I would argue you'll get the greatest benefit from using Overheat, which will make use of Miraidon's high special attack and speed and will expand your coverage.
With that said, that brings us to the end of class. Even with an aside, we've ended early today, haven't we? Consider that an additional gift before we break for the holidays, if you will! Well then, I won't keep you any longer. If you'd like to spend a little more time with Miraidon, I've got a few sandwiches up here you can feed it, but if you're ready to leave, just remember your opportunity to send Professor Jacq some questions via email for extra credit, and go on to enjoy your holiday break. I will see you all for our next class session bright and early in the new year!
The Greatest Quest
Written by: The Wandering Shoestrel (talk)
Hello again, yon readers, and welcome to what will be the final chapter of our great quest. It has been an epic quest of stealth, of strength, of wit and cunning, and of vegetables and farmers. So many great victories we have seen, such as Sir Cucumber the cunning outwitting the cruel Sergeant Pepper and escaping from prison, or striking down the dreaded Saladron and recovering the the legendary Yam Medallion. Let us not forget the tale of Sir Cucumber the brave blowing up the fearsome Bananda and saving the Peanut Mayor's daughter. And now, yon readers, there is but one last thing to do. Our heroes have entered the castle of the sinister Minister Pumpkin and are closer than ever to saving Princess Tomato from his grapes, er, grasp. But before I finish this tale, perhaps a song to set the mood?
♪ They entered the castle ♪
♪ of the Minister so depraved. ♪
♪ It's the final chapter, ♪
♪ the Princess they'll save. ♪
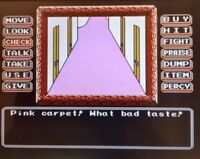
Inside the castle, our heroes find themselves inside a storage room. Looking around, Percy notices the room is full of junk. Checking the vicinity, Sir Cucumber discovers what appears to be an oil pot and a pine tar pot. Naturally, Sir Cucumber takes both even though Percy "doesn't see the point" of taking the pine tar pot. Exiting the storage room, Sir Cucumber and Percy find themselves in a terribly decorated hallway. I mean, really, pink carpet?
What is this, the color seasons of Andy Griffith? Quickly regaining his composure from the horrible, horrible carpeting, Sir Cucumber instructs Percy to check the doors. Percy then reports back that, unfortunately, they all look the same! Feeling disorientated, Sir Cucumber moves forward, only to find another hallway with more doors and more awful pink carpeting. This hallway also has a left turn and a right turn. Turning left, our heroes are faced by the shadow of a sleeping guard. Not wishing to face combat and risk alerting the other guards, Sir Cucumber wisely backs away for now. Turning right results in the same thing. As does moving forward. This will occur if you try anything in the hallway. Percy says it would be a good idea to attempt to throw something to distract the guard, but our heroes don't have anything to throw (and, no, you can't throw the pin tar pot, I checked). Seemingly out of options, Sir Cucumber decides to start opening the many, many doors in the previous hallway.
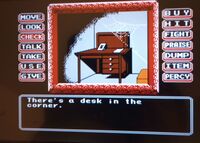
Returning to the original hallway, Sir Cucumber first tries the far right door. Attempting to enter it, Sir Cucumber finds it locked. The mighty Sir Cucumber is prepared to hack down the door if he has to, but before he can, Percy reminds him of the key. Feeling a little embarrassed, Sir Cucumber uses the key, unlocks the door. However, the key is also stuck inside, so R.I.P. Key, your sacrifice will never be forgotten. Inside is a dark dusty room. Checking the vicinity twice, Percy notices the very obvious desk in the corner. Checking the desk reveals three drawers, a picture frame, and a piece of paper.
Sir Cucumber quickly checks the paper, which is a letter to Minister Pumpkin from his son Jr. Pumpkin. Thinking there might be political advantages to having this letter for the coming trials, Sir Cucumber has Percy pocket the letter. The picture is a picture of Minister Pumpkin and his son. While two of the drawers are empty, the last one contains a gold coin which Sir Cucumber gladly pockets!
Deciding that this far right room has been thoroughly explored, our heroes move onto the near left door. Again, it's locked, and as our heroes turn away, the door opens. The door is opened by... Can it be? It's Her Majesty's chambermaid! Recognizing Sir Cucumber as the hero he is, the chambermaid tells him that the Princess has gone to take a bath, and that all the farmies are attending a festival. With the Princess apparently near, Sir Cucumber gallantly enters the far left room, which is apparently the royal shower room! Sir Cucumber sees a figure in the shower! Could it be? Could his long quest finally be over? Without even thinking, he rushes towards the shower. Percy tries to stop him, but it's too late. Sir Cucumber throws open (checks) the door, but, uh... it's not Princess Tomato. Rather, it's a royal orange... Startled, talk to her and she'll tell you that the Princess went for a walk in the garden. Embarrassed, Sir Cucumber exits the bathroom and enters the hallway.
With only one door left, Sir Cucumber attempt to enter the near left door. Unfortunately that door is still locked, and, sadly, thanks to Key's tragic sacrifice, our heroes have no way to enter the room. With tears in his eyes thinking about the loyalty of the key, Sir Cucumber decides to venture into the next hallway.
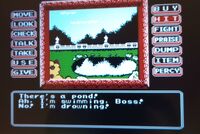
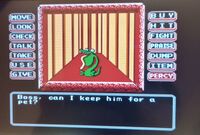
With his keen vision, Sir Cucumber notices that there is no longer a guard on the leftward passage, so our heroes turn left, which leads to a very beautiful garden, perhaps the same garden Princess Tomato was said to be walking in. Checking the pond, Percy will notice that the rocks look slippery. Suddenly, Percy checks the pond again and, oh no, he's slipped on the slippery rocks and starts to drown!
Thinking quickly, Sir Cucumber leaps into action, throwing the wings to Percy, which Percy uses to narrowly escape drowning! In his struggle, though, Percy manages to grab onto some sort of ornament. The ornament gives Sir Cucumber a brilliant idea. Returning to the hallway with the guard, Sir Cucumber throws (uses) the ornament into the hallway. Unfortunately, that just makes the guard notice our heroes. He rushes at them, but then Percy has a clever idea! He uses the oil pot to make a pool of oil that that guard then steps into, slipping before hitting his head. Percy then quickly ties up the guard with a chain (the chain is found in the storage room along with a mirror, but you only need the chain) Our heroes now have free rein of the hallway and its doors, but, uh, none of the doors in the hallway actually do anything... because they're locked and our heroes don't have a key... so... This is going somewhere, I swear!
Anyways, um, um, turning right sees our heroes in front of a jail door! That's pretty exciting, right!? Inspecting (looking) at the door twice, our young Squire Percy will notice the guard's keys! I think it's time for a jail break!
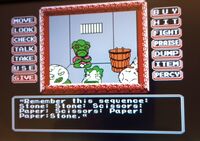
Entering the jail, our heroes see four prisoners. Checking with Percy, Sir Cucumber learns that they are Cabbage, Lettuce, Garlic, and Bell Pepper. At first the prisoners are standoffish, feeling that our heroes are either farmies or traitors. To soothe their concerns, Sir Cucumber shows them the Crest of the Resistance. Bell Pepper tells our heroes that he will trade information for a gold coin, because, even in prison, people gotta get paid! Sir Cucumber gladly hands over his last gold coin in exchange for valuable information. Bell Pepper then whispers to Sir Cucumber "Stone, Stone, Scissors, Paper, Scissors, Paper, Paper, Stone."
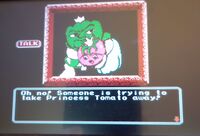
Sir Cucumber thinks for a second as Percy looks on confused. Suddenly a light goes off in Sir Cucumber's head, and he thanks Bell Pepper for the info. Sir Cucumber then talks with Garlic, who reveals that Minister Pumpkin is planning to marry Princess Tomato and his son in an attempt to legitimize his treason.
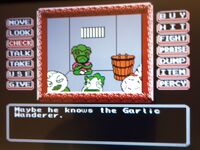
Garlic then wishes our heroes good luck on saving the princess as our heroes begin to leave the jail cell. But then, suddenly, Sir Cucumber has a feeling. He tells Percy to check the room, which reveals a barrel. Percy then checks the barrel, which is just an ordinary barrel. Sir Cucumber then, just to make sure, because he's got a feeling in his gut, has Percy check the barrel again. Percy now notices a dried-up White Leaf inside the barrel. Not one to see another suffer, Sir Cucumber sprinkles water (which you get from the pond) on the leaf, who regains consciousness.
At first, the White Leaf is hesitant to talk to us, thinking that we are also farmies. Percy then shows the Crest of the Resistance to the Leaf. Now convinced of our righteousness, the Leaf introduces himself as Lord White Leaf, who tells us that we must stop Minister Pumpkin and his son. He then reveals that Minister Pumpkin's son is allergic to caterpillars, very valuable information for the coming fights.
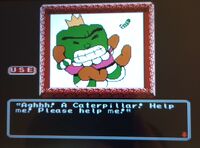
Sir Cucumber and Percy begin to leave the jail cell when Cabbage, realizing that we are here to help, begins talking to our heroes. She tells us that Minister Pumpkin's guard, the Eggplant Soldier, has a tell when he is fighting. When fighting, he has a tendency to look up. Hearing this, Sir Cucumber quickly begins to formulate a plan to defeat the Eggplant Soldier if they must come to blows. Focusing on the coming fight, Sir Cucumber begins to leave the jail cell when, suddenly, Percy checks Lettuce and sees that there's a caterpillar on him. Percy calls out to Sir Cucumber, but he's too busy thinking about his battle plan, so Percy takes it upon himself to take the caterpillar. As Percy begins to leave, Lettuce finally speaks up and tells Percy that an old woman was recently here but that she returned to her room. Hearing this, Percy gets a feeling in his gut and he convinces Sir Cucumber to put off his fight with the Eggplant Soldier and instead take a peak at the near left room.
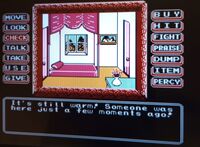
The near left room is the chambermaid's room. Inside, the chambermaid is sleeping, and, not wanting to be rude, our heroes decide to enter the next room instead. Inside the next room is what appears to be another bedroom. Checking the bed, Percy tells Sir Cucumber that it's still warm.
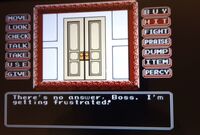
Looking around, Sir Cucumber notices that there is another door on the right side of the room. Attempting to enter, our heroes find the door locked. Frustrated beyond belief at all this door nonsense, Sir Cucumber leaves for the hallway. Inside the hallway, Percy convinces him to try again, and, so, completing a full circle, Sir Cucumber tries to door again, and, this time, it's unlocked for some goddamn reason! Inside is a dressing room where Percy immediately checks the stool and notices that it looks kind of weird. Tired of logic and reason, Sir Cucumber hits the stool twice before Percy, worrying they're gonna break it, checks the stool twice and finds a diary. Because this is medieval times and privacy rights don't exist yet, Sir Cucumber and Percy read the diary. Through the diary, our heroes get confirmation on what they fear the most, that the sinister Minister Pumpkin is forcing Princess Tomato to marry his son. The Princess has been putting on makeup to make herself look ugly, but, sadly, she has resigned herself to this terrible fate. With tears in his eyes, Sir Cucumber swears to Percy that he will not let his happen, even if it costs him his life! Our heroes then leave from the dressing room, using the near left room to enter the chambermaid's room before making their way to the Princess' room. Here, an old-looking tomato appears, looking longingly on the bed. Talking to her, she expresses mistrust in Sir Cucumber, who instructs Percy to show her the Crest of the Resistance. Taken aback, the Old Tomato claims the crest a forgery and angrily tells our heroes to leave her side. Attempting to give her space, our heroes move back, but something Percy says catches Sir Cucumber's ears. Percy says how weird it is that she looks so old but sounds so young, and then it hits Sir Cucumber. He returns to the Old Tomato and gives her the Chameleon Grass. The age leaves her face and, suddenly, before our heroes is Her Majesty, Princess Tomato! Princess Tomato apologizes and reveals that, since she was taken here, she was unable to trust anyone.

Talking to her again, she reveals that Minister Pumpkin stole the Turnip Emblem and she begs our heroes to bring it back. Falling to his knees, Sir Cucumbers vows that he will return the emblem.
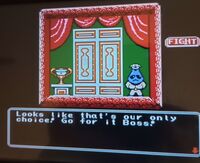
With the Princess located, Sir Cucumber decides that now it is time to defeat the Eggplant Soldier. Returning to the hallway Sir Cucumber moves forward, finding himself in front of a door protected by Minister Pumpkin's hired killer, the Eggplant Soldier.
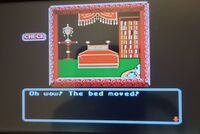
The two lock eyes. Sir Cucumber draws his blade and charges at the Eggplant Soldier for the fight of his life. Remembering that the Eggplant Soldier always looks up, Sir Cucumber is able to narrowly land the decisive blow, subduing the powerful opponent. Impressed by Sir Cucumber's strength, the Eggplant Soldier allows him to enter the next room. Inside appears to be a throne room, but our heroes quickly notice there isn't anything of value in there. Instead, moving, to the next room, our heroes find what appears to be a royal bedroom. Checking the bed, Percy realizes that there's something strange about it. Checking the shelf, Sir Cucumber notices that it's full of many different books. If you take the books, then check them, Percy read that one of them says "when retreating from Baby Monster, run straight until you have to turn. The holes will help guide you". Sir Cucumber wisely dismisses the books as nonsense before turning his attention back to the bed. Returning to the bed, Sir Cucumber checks it carefully, and then the bed begins to move, revealing a secret passageway!
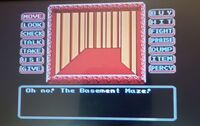
The secret passageway leads to a set of stairs. Curious, our heroes check the stairs, when, suddenly, somebody from behind shoves them down the stairs! They fall into a completely pitch black room. Percy clutches onto the brave Sir Cucumber's hand as he gallantly ventures forth into the darkness, but what he finds, dear listeners, is a horror I almost dare not say. For, through the darkness, our heroes find ANOTHER GODDAMN MAZE!
The basement maze actually has a pretty unique gimmick compared to the others. The maze contains three monsters, a Baby Monster, a Mama Monster, and a Papa Monster. Our heroes need to make it to the Papa Monster, but first our heroes must find the Baby Monster that was spoken of in the books (perhaps literacy isn't so bad...). Once our heroes have found the Baby Monster, they then traverse the maze, only turning when they are forced to turn. Luckily for them, there are three holes in the ground at different parts of the maze to aid them (seriously, once you find the Baby Monster, do not make any turns you are not forced to make - otherwise the Papa Monster will not spawn).
Through grit and determination, our heroes finally make it to the end of the maze, where they are met face to face with the dreaded Papa Monster! The beast, licking its chops, charges, ready to devour the brave-yet delicious-knight.
Percy begs Sir Cucumber to flee, but our brave hero draws his sword, determined to fight this beast to the death! Luckily for Sir Cucumber, many of the maze's dead ends contained a Mama Monster, where Sir Cucumber discovered the family tell. Each time the beasts lost a round of finger wars, they would turn left. With that knowledge, our hero easily slayed the beast! With the beast slain, our heroes discover an opening in the wall. They climb through it, only to find themselves face-to face-with the Sinister Minister Pumpkin.
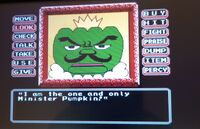
Sir Cucumber and Minister Pumpkin lock eyes, looking at each other intensely. Minister Pumpkin begins talking to our heroes, congratulating them on defeating his monster, but saying there's no way they'll defeat him. Sir Cucumber readies himself for the fight of his life.
Minister Pumpkin charges, his strength unmatched. He slams into Sir Cucumber, nearly breaking the brave knight's arm in the process. Sir Cucumber swings his sword, but Minster Pumpkin easily blocks it with his great sword. Things looked dour for Sir Cucumber, when, suddenly, he remembers the information he bought off Bell Pepper. "Stone, Stone, Scissors, Paper, Scissors, Paper, Paper, Stone," he thinks to himself as he begins to move as if he's dancing with the sword as his partner. The fighting goes for an hour before, finally, Minister Pumpkin collapses! He can take no more; Sir Cucumber has won.
Talking quietly, Minister Pumpkin begins to laugh, taunting Sir Cucumber and saying that he hasn't yet won, because Minister Pumpkin has given the Turnip Emblem to his son, who will still marry the princess. Realizing the Princess is in danger, Sir Cucumber and Percy make haste back into the Princess' room. Talking to the Princess, she asks that, if Minister Pumpkin doesn't have the Turnip Emblem, then who does? Before Sir Cucumber can give her the tragic news, Princess Tomato says they should escape through the garden. Returning to the hallway outside of the Princess' room, our heroes, now with the Princess safely rescued, turn left and go into the garden. Once in the garden, they quickly move towards the exit, easily defeating the guards and escaping the clutches of the sinister Minister Pumpkin at last.
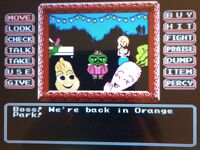
Our heroes manage to make their way back to Orange Park, where the resistance members have thrown a party to celebrate our heroes successfully rescuing the Princess! All of our greatest allies are here, including Nutty, Carrot, General Cantaloupe, and Princess Lisa.
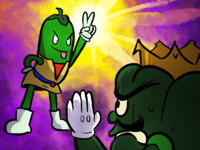
Lisa talks to our heroes, thanking them for rescuing her sister. As she begins to say that the land will now return to peace and prosperity, suddenly a mysterious vegetable arrives to kidnap the Princess! It's that treacherous Pumpkin Jr.!
Sir Cucumber begins to make chase, when, suddenly, through the crowd, the Wanderer returns and knocks Pumpkin Jr. down with a mighty blow!
The Wanderer escorts the Princess to safety, when, suddenly, Minister Pumpkin Jr. raises the Turnip Emblem into his hands before asking if there is any warrior brave enough to come and face him. Sir Cucumber eagerly steps up, preparing to end this once and for all. A fight as epic as it is annoying ensues, for Minister Pumpkin Jr. truly has no tell. Finally, Sir Cucumber, with his mighty combination of rock and right, knocks Minister Pumpkin Jr. to the ground! Sir Cucumber demands that Minister Pumpkin Jr. surrender, but Minister Pumpkin Jr., unwilling to accept defeat, presents the Turnip Emblem, threatening to destroy it if Sir Cucumber comes any closer. Percy, in a move that bards will hail for the rest of time, remembers Minister Pumpkin Junior's allergy as he throws the caterpillar at the junior Pumpkin, who panics before running away like a scared child, dropping the Turnip Emblem as he flees.
Sir Cucumber picks up the Turnip Emblem and presents it to the Princess. With the Turnip Emblem returned to the royal family, a new era of peace and prosperity begins in the Salad Kingdom. The spell Minister Pumpkin cast over the farmies has broken and they've returned to being respectable carnivores! With peace restored, Sir Cucumber takes Princess Tomato's hand in marriage and begins a new life with his beloved wife, the Princess, and with his young squire, Percy.
With that, my friends, our story comes to an end. With the wisdom of Princess Tomato and the sure hand of Sir Cucumber, the Salad Kingdom was quickly rebuilt from its shattered state, and would see generations of peace and prosperity. I would like to thank all of you who listened to my story, and, while this may be the end of this tale, there are many other tales to tell. Perhaps someday, I will be able to sing them to you! But until then, one final song before I shall resume my life of traveling.
♪ And so ends the story, ♪
♪ princess and kingdom saved, ♪
♪ peace owed to the great hero ♪
♪ Sir Cucumber the Brave. ♪
To Infinity and Beyond
Written by: Waluigi Time (talk)
Greetings, space rangers, and welcome to the penultimate issue of To Infinity and Beyond! Everything up to this point in the game is dealt with, and with a whopping 45 Pizza Planet Tokens under our belt, it's time to jump into the last normal level of the game! We're pretty much at the climax of the film now, and Woody's finally been rescued, for real! Unfortunately, they're unable to help Jessie before she's loaded onto the plane, prompting one final chase out onto the tarmac. The urgency's not quite there in the game version, but the setting remains intact, at least! Welcome to Tarmac Trouble! It's unlocked once you have 29 Pizza Planet Tokens, so if you've gotten this far, you'll already have access to it. Here's the music for the level as always. Let's roll!
Despite being the last regular level, Tarmac Trouble has the simplest layout in the game, essentially just being a really big circle. It's split up into eight numbered zones, each containing a Thing that you'll want to interact with. You start off in zone 4, and we'll head around the circle clockwise to see what we can find. Pretty much immediately once you head left, there's some particularly bouncy luggage that you'll want to grab. As we head around the loop, a couple things to mention. First of all, closer to the center, you'll find a plane driving around in circles. This will be more important later, but for now, make sure not to touch the tires, or you'll take damage. (The tires have "Bad Ear" written on them, a spoof of Goodyear tires. This comes several years before Buzz Lightyear himself would inspire the more prominent Goodyear spoof used by Pixar.) Second, throughout the level, you'll find Rocket Boots scattered around. They're not required for anything, but they're nice to use to get around quicker.
Moving along, in zone 5, we find Hamm tucked away in a corner, but it's much too early to do anything with him. Zones 6 and 7 don't have anything we can do from down here on the ground, so we'll deal with those later too. Zone 8's main objective is out of reach as well, but there is a green laser power-up nearby, so make sure to get that. From here it loops back around to zone 1, but we'll want to go ahead to zone 2 first. Here you'll find a luggage car where Rex is. Before doing anything else here, jump into the car itself and get the second luggage inside. Head back out onto the carts, and jump onto the pole on the last cart closest to the wall and use it to reach the zipline. Ride it into zone 1, but make sure to jump off before you reach the end, otherwise you'll just get dropped down below.
Here we find the puzzle for this level! If you remember the Elevator Hop puzzle where we had to line up the wires, it's sort of similar to that, but more complicated. There's two sets of four colored light bulbs, and four different switches to stomp on that control the set on the bottom. Each switch will turn on one colored bulb while turning off a different one. The goal here is to make the pattern on the bottom match the one on the top, but you only get three tries, so you can't just brute force the puzzle and eventually get it. If you stomp a fourth button, they'll all reset and create a different pattern that you'll have to match. The number of stomps remaining is displayed on a panel nearby. Once the light bulbs are matched up, this signals a helicopter to come down, enabling you to reach the Pizza Planet Token underneath it. Also, if you jump down from here around the area where the zipline was, you can get a battery.
All that's left is zone 3, but this is once again something we can't do yet, because this is where the Airport Little Tike is waiting for us once we find all of his luggage. For now, we'll head towards the center of the level, because there's stuff for us there as well. Just mind the green slime on your way to the central pole, and stick to the brown paths. In the middle, you'll find Slinky with another race challenge, making one last appearance in the game! (Out of the core group of characters from the film, he shows up the least, only appearing three times, compared to Mr. Potato Head, who is in five, Hamm and Rex, who are in all ten non-boss levels, and Buzz, who's obviously the main character of this game. Slinky's also the only one to share the same role as other NPCs, being a guy that assigns you race missions sometimes, whereas Hamm, Rex, and Mr. Potato Head all have a specific function no one else does.) Talk to him, and he'll give you 66 seconds to reach the end of the path without jumping or taking damage from the slime, preventing you from cheesing it. It's a pretty generous time limit, so just take it slow and steady and don't try to cut too many corners. There's a battery along the path, but it's above the slime, so don't take the bait. If you need it, come back for it later. Once you reach the end, the Pizza Planet Token is yours!
Head back to Slinky and climb up the pole hanging right by the central pole. This is when the plane becomes really important, because you can jump onto its right wing from here! On top of the body of the plane you'll find the third luggage, and then go out onto the left wing. Just be careful while you're on the plane, as you'll slide a little bit as it moves. From the wing, we can now access zones 6, 7, and 8. It doesn't really matter what order you do them in, so just jump off at whichever one you arrive at first. Unfortunately, the plane moves too fast to be able to jump off to complete the objective and jump back on. You'll either have to wait for the plane to make another loop around and jump back on (not advisable, since the only one you'll be spending a significant amount of time in is zone 7) or head back to the center each time. In zone 6, there's an inactive conveyor belt used to load baggage onto a plane, and appropriately, the fourth luggage is here. There's also an extra life nearby if you jump off. Zone 8 has the fifth luggage on top of what I can best describe as some sort of square.

The top of the building in zone 7, however, has the level's boss, the Blacksmith! This guy is basically just Prospector 2. When you're in range, he'll use his single attack of pounding the ground with his mallet repeatedly, and walk towards you when you're too far away. He attacks less frequently than the Prospector, leaving himself a lot more open, but the shockwaves created by his mallet home in on Buzz and can be tricky to get away from without taking damage. The farther you are from the Blacksmith when he attacks, the better chance you have of outrunning it, so it's probably best to time your attacks between his and get out of there. There's also a battery in one of the corners if you need it. Spin attack him ten times and he'll be down for the count, giving you another Pizza Planet Token. Something that's kind of funny here is that if you stand on the raised ledges, the Blacksmith will ignore you and walk around aimlessly until you go back into the arena. However, if you stand on the inner corner in the bottom right (relative to the way you were facing when the fight started), not only will he resume attacking you, with the shockwaves glitching up onto the ledge, but if you stand far enough away so that he'll start following you, the Blacksmith himself can actually glitch up onto the ledge with you! This probably makes the fight even more difficult, but it's funny to see. Anyway, if you haven't gotten the luggage in zone 8 yet, hitch a ride from here on the plane if you can.
At this point you should have all five luggage, and hopefully enough coins to return to Hamm. There's plenty of coins around the level, but it has a pretty sparse layout, so you may need to put in a little more effort to grabbing them all. Of course, it doesn't really matter whether you visit Hamm or the Airport Little Tike first. Just remember that Hamm is in zone 5 and the Airport Little Tike is in zone 3, so just head for whatever's the closest one. Once both of those are dealt with, we now have all 50 of the game's Pizza Planet Tokens! It took 16 issues, but we finally got here. Unfortunately, you don't get anything too interesting for going for 100% on them, just a "congratulations" message and a bonus movie clip (in the N64 version there's no movie clips at all, so you just get the message). But it's fun, so that's all that really matters.
Now there's just one thing left to do. In the next issue, I'll be wrapping up this section by tackling the final boss! I hope to see you there.
Gameplay screenshots were taken from Nin's playthrough on YouTube.
| The 'Shroom: Issue 189 | |
|---|---|
| Staff sections | Staff Notes • The 'Shroom Spotlight • End-of-the-Year Awards • Director Election • The 'Shroom Holiday Scavenger |
| Features | Fake News • Fun Stuff • Palette Swap • Pipe Plaza • Critic Corner • Strategy Wing |
| Specials | Thank You, Ninja Squid! • PC Election Proposal |


