The 'Shroom:Issue 188/Strategy Wing

Director's Notes
Written by: Hooded Pitohui (talk)

Hello, all you readers of The 'Shroom! Buckle up, strap yourselves in, and get ready to experience some intense G-forces, because we've stepped out of our offices and onto the F-Zero track this month! Yes, that's right, after four years with the Strategy Wing team, Superchao (talk) is speeding onto the track with the final issue of Mach Speed Mayhem. This Strategy Wing staple has grown into one of the most comprehensive guides to F-Zero's cast available, even reaching out and incorporating information from long-gone official sites and titles that only came out in Japan. As we say farewell to Superchao and thank him for bringing us up to speed on everyone from the heroic Captain Falcon himself to the slimy Don Genie (and for some fun months voting for the racers set to be covered), be sure to check out the final edition of Mach Speed Mayhem!
While Mach Speed Mayhem ends, another section nears its end! The Wandering Shoestrel (talk) has but two more verses for us, and is sharing one of them this month. Now that Sir Cucumber the brave and Squire Percy the young have infiltrated Sopville, stronghold of Minister Pumpkin and the farmies, how will the penultimate chapter of our hero's quest unfold? You'll have to listen to the bard himself to find out!
While some sections end, and others continue on, new sections arise, as well! Boot up your Digivice, because Shoeymon (talk) is giving us a guide to the basics of the ever-obtuse Digimon World! Follow along, and he'll make you into an expert adept at raising digital monsters.
Uh oh, I haven't much time to finish writing this. I just heard Mr. Zero shout out "the final lap!". I better finish writing this up so the team can sit back and enjoy the last stretch of the race! Let me just squeeze one final note in here. Are you interested in following in the footsteps of Shoeymon and joining our team? It's simple as can be! Take a look at the sign up page and send an application to our Statistics Manager, Meta Knight. Whether you want to draft Mach Speed Mayhem and give us a detailed history of a topic near and dear to you, send in a guide like To Infinity and Beyond, give out concise tips like File City Files and Getting that Payday, or even entertain us with more humorous instructions like SIMulation, we have a place for you!
Go on, read what the Strategy Wing team has put together for you this month, then head down to Meta Knight's office! We'll see your application soon!
Section of the Month
Now that's what we want to see when Meta Knight steps into our offices! Thank you all for showing your support to our writers with your votes last month! ZelenPixel (talk) certainly impressed with her final look at Spore's history, where she cracked open the hood to find secrets inside,. For it, she takes a joint first with Waluigi Time (talk) and his feat of actually making an airport seem fun (in Toy Story 2: Buzz Lightyear to the Rescue, that is...). I'd like to thank all of our writers in the Strategy Wing team, especially as they depart or prepare to depart from us, and I hope you'll show your support by casting a vote for your favorite section!
| STRATEGY WING SECTION OF THE MONTH | ||||
|---|---|---|---|---|
| Place | Section | Votes | % | Writer |
| 1st | On the Origin of Species | 5 | 31.25% | ZelenPixel (talk) |
| 1st | To Infinity and Beyond | 5 | 31.25% | Waluigi Time (talk) |
| 1st | Pitohui's Pokémon Academy | 5 | 31.25% | Hooded Pitohui (talk) |
File City Files
Hello, and welcome to a new Strategy Wing section, the File City Files, all about the hit PS1 game Digimon World. Digimon World is an interesting game. It's a mixture of an RPG and a pet simulator, one where you raise a series of Digimon in your quest to restore File City to its former glory so you can save the digital world. Digimon World is the worst best game ever created. On the plus side, the world is very fleshed out, with a lot of different areas full of Digimon to recruit, and every Digimon you recruit serves a different function inside File City, albeit with different levels of usefulness. However, on the negative side, the game is full of mechanics that range from vague and half-explained to completely unexplained, which can make the game very frustrating for a new player. Don't worry, as that's where I come in. I'm Shoeymon, Digimon World expert, and I'm here to turn you into a Digimon World pro so you'll finally be able conquer the unbeatable and bring peace to the digital world. For the first few issues, however, we're just going to be going over the basics of the game. This month, we're going to be looking at two things to start with, those being the initial choice of Digimon and the basics on how to train a Digimon.
Questions Arise, Who Will You Choose?
The first thing that happens in Digimon World (well, in the intro cutscene) is that you are sucked into your Digivice. Appearing before you after this is an elderly-looking man, but don't be fooled. This isn't a man; he's instead an elderly sage-like Digimon named Jijimon. The first thing Jijimon asks you is if you have a Digivice, which seems like kind of an odd question to ask, considering we were sucked into one... You can answer "yes" or "no" to this question. Answering "yes" causes him to then ask if you prefer day or night, while answering "no" leads to him asking you whether or not you have any friends.

These two questions are the actually important questions, because answering "day" or "yes" leads to your starting Digimon being Agumon, while answering "night" or "no" gives you Gabumon as your partner.
This is important because, unlike with Pokémon, you can only have one Digimon at a time, and, until it dies through either combat or old age (more on that in a future issue), you'll be stuck either Agumon or Gabumon and their respective Digivolutions for the foreseeable future. Personally, from a utility standpoint, I prefer Agumon primarily because he starts with Spit Fire, whereas Gabumon starts with Sonic Jab. The reason I prefer Spit Fire is that it's both more powerful, being a base 66 move where Sonic Jab is only base 52, and, in addition, Spit Fire is a ranged attack where Agumon shoots fire out of its mouth, allowing it to keep its distance from its enemies. Sonic Jab, on the other hand, is not a ranged attack and instead requires Gabumon to run up and strike its foes. In addition, I think Agumon has a stronger Digivolution pool, because, while they both have six Champions they can Digivolve into (and in this game Digivolutions are permanent), and they share three Digivolutions (Monochromon, Centarumon, and awful, hate-filled, disgusting Tyrannomon), Agumon has access to Birdramon. Birdramon, with the right stats and a little luck, is the best Champion in the game, especially if you're lucky enough to learn Prominence Beam!
After you answer these questions, you get to name yourself and your Digimon. Then, a cutscene happens where you're sucked into the digital world, where you awaken in the middle of a mostly abandoned File City. Once a thriving metropolis, File City has now been reduced to a city of just Fresh and In-Training Digimon. Jijimon then explains to you that Digimon have suddenly been reduced to animals and have, as a result, abandoned the city. Jijimon grants you the last remaining Rookie Digimon in the city and implores you to travel the digital world to bring the wild Digimon back to their senses and convince them to return to File City.
Remnants of an Abandoned City
Just because the city has been reduced to Fresh and In-Training Digimon doesn't mean there's nobody that can help you. Even though these are the weakest of weak Digimon, they're still determined to help you save their world. Many of these Digimon play an extremely useful function in the early game and can help you as you grow your city. The important Fresh and In-Training Digimon are:
- Yuramon: A small, hairy Digimon located right outside of Jijimon's hut. He'll explain to you what surrounds File City and tell you about the training camp. Later, he will tell you rumors he has heard, which can be useful for locating new Digimon as you try to recruit them to return to the city.
- Tanemon: Located near the waterfall. This plant Digimon serves the vital task of tending to the meat farm. Digimon need to eat, and you'll need to feed this meat to your Digimon when they get hungry. Each day, she will give you three pieces of meat. If you run out, you can always pick mushrooms from Native Forest!
- Tokomon: Located in Jijimon's hut. This little rabbit-looking Digimon gives you lots of items for you to start off with, including three more meat, items that heal both MP and health, and a restore (revival item). If you talk to him after getting the items, he'll explain how each day has 24 hours and that each year only has 30 days!
- Poyomon: Located in the corner of Jijimon's hut, this little Bakamon-looking guy explains the very basics of Digivolution. but we'll come to that later!
- Botamon: Also located in Jijimon's hut. This little black ball gives you tips on how to care for your Digimon, explaining things like feeding your Digimon when they get hungry and making sure you take them to the bathroom when they need to poop. He also explains that ignoring a Digimon when they're tired can make them sick, and that you should praise them when they do good and scold them when they do bad.
- Tsunomon: Probably the least useful of the initial Digimon in the city. This little mohawk-sporting guy hops around in the abandoned main street portion of the city. If you talk to him, he'll tell you about Digimon Bridge, which exists just outside the city is currently out. He also tells you that all the Digimon are working together to fix it.
- Koromon: The only In-Training Digimon at the Green Gym. This pre-evolution will answer your questions on how training works.
- Punimon: The last Digimon in Jijimon's hut and, in my opinion, the most important. This little red blob lets you take a rest after a long session of training. This removes tiredness from your Digimon, allowing you to resume training.

Tiredness is represented by a thought bubble with drops of sweat appearing above your Digimon's head. Resting takes one hour, and, be careful, because it is possible for your Digimon to poop while resting, which will be a strike against both your Digimon's discipline and virus meter.
As you can see, despite the fact that the city is a shell of its former self, the Digimon who remain still have a lot to offer. While their services may soon be filled by better Digimon, that doesn't mean we can't appreciate what they can do for us!
Swole is the Goal
Before we can explore the island, though, we need to talk about your Digimon's stats and how to improve them. Digimon have six stats that can affect battle, those being:
- HP: Your health (obviously).
- MP: The equivalent of Magic Points. Each move you use costs MP, so the more MP you have, the more moves you can use.
- Off: Offense. How powerful your attacks are. The strength of every attack is based off of this stat.
- Def: Defense. The more you have of this, the less health enemy attacks will take from you.
- Speed: This stat determines how quickly your Digimon will attack. It's especially useful when you have ranged attacks, because your Digimon can spam them, preventing the enemy from attacking (enemies are stunned briefly after each successful attack).
- Brains: Probably the most unique stat in the game. It has to do with how effectively you can command your Digimon, but this one needs more explanation than the others.
You see, combat in Digimon World' is a lot more passive then in most games. The way fights work is that you'll yell commands at your Digimon, and then it'll wander around the battlefield before throwing an attack. So, when you start, your brains are low and the only command you have is "Your Call", which is quite literally just your Digimon staggering around until it decides to do something. The brains stat gives you access to different commands. These new commands start with you gaining access to the attack command, which will make it so that your Digimon will use an attack when it finally decides to do something. The higher the brains stat, the more commands you get access to, but keep in mind, like all the other stats, brains resets to a low number once your Digimon finally dies, so there is no way to have commands carry over to the next Digimon.

HP and MP cap at 9999 while offense, defense, speed, and brains cap at 999 (not that you'll see those numbers in a normal Digimon). Now, you might be asking yourself, "well, how do I make my Digimon as buff as possible?". The answer is that there are three primary ways that you'll use most often, but, today, we're only going to talk about the Green Gym. The Green Gym is located to the left of Jijimon's hut in File City. Manned by a Koromon, the Green Gym contains six different pieces of exercise equipment, each one primarily boosting a single stat. The equipment in this gym are:
- A giant boulder that your Digimon pushes to increase its HP, while also getting a small boost in offense.
- A punching bag log that your Digimon strikes to increase its offense while also getting a small boost in speed.
- A large spring-loaded boxing glove that strikes your Digimon in the face to increase its defense and also to give it a small boost in brains. (Which is weird. You'd think being punched in the face over and over would reduce brains.)
- A race track that increases speed while giving a small boost for HP.
- A chalkboard that grows your Digimon's brains while also giving them a small MP boost. Also unique to this one is that you can very rarely learn moves from doing this.
- A waterfall your Digimon meditates under to boost its MP with a small defense increase.
Each training exercise takes one in-game hour and will always result in the same stat increase of either 80 points (for HP and MP) or 8 points (for offense, defense, speed, and brains). The small boosts you get come out to an increase of 10 points (for HP and MP) or 2 points (for offense, defense, speed, and brains). If you're feeling lucky, you can try the "bonus try" minigame, which is just a slot machine. Match three pictures, and you'll be given an increase on your training results, but if you fail, you only get half as much increase as you normally would. Personally, I never do the bonus try, because, since it's a slot machine, it's just too luck-based to be worth it. Training also increases your Digimon's hunger, so make sure you have a lot of food in your inventory before you start a day of training. More importantly, too much training causes your Digimon to become tired. This is represented by a thought bubble with sweat drops on it, as mentioned earlier. When this happens, you need to take your Digimon to Punimon and rest for an hour. Failure to do so will result in a dreaded care mistake, which can impact what kind of Digimon your Digimon will Digivolve into. There's a widespread misconception that you're already given a care mistake once the thought bubble appears, but that's incorrect. As long as you rest before training again, you will not be given a care mistake.
Stats are obviously very important, because, not only do they make your Digimon better at fighting, but they also play a very important role in Digivolution. That, however, is a story for next month, so join us then for another File City Files, where I'm going to break down the basics of both Digivolution and the basic lifespan of Digimon.
Getting That Payday
Welcome, criminals, to Getting That Payday, a Payday 2 guide. Last month, we covered one of the many heists that you'll end up doing on the job. Today, we have an actual heist, unlike last month's election rigging. Today, we've got a contract from another mysterious figure known as "The Dentist" (yes, he is related to the Elephant, no I will not elaborate how, it's weird) in order to grab... something. He doesn't actually tell us what it is, but we'll figure it out later. You will. I know what it is; I'm just keeping it a secret for the purpose of a narrative.
What is a Payday 2?
So, ya like crime? Or do you like co-op shooters? Then do we have the game for you! Payday 2, an excellent crime co-op shooter, is a thing! It has plenty of weapons customization, murders to commit, and a strange global conspiracy that is also supernatural for some reason! Also, it's really cheap! Like, you can pick it up for under $2 total during the Steam Autumn Sale™ in around a week. Do it. This isn't a request anymore. This is a threat.
A Full House
Before jumping into it, we should talk about preplanning. As The Dentist contracted this heist, that means you'll have access to his large amounts of connections. This leads to a mountain of options for starting out the heist. From extra equipment, to different escapes, to taking out obstacles in our path, there's a lot we can do. For this guide, however, we're going with just entry preplanning, but know that you can skip out on large parts of the heist for just a few favors.

Let's go stealth first. Starting out, you'll notice that you're missing all of your gear. This is because right now you are in Civilian Mode. Don't worry, your gear is still here, you just have to grab it. The game should show where you can grab it. Don't just rush to get it, though, as in Civilian Mode you can't be caught for anything. Scout out the surrounding area, and figure out your game plan before going in. Once you think you're ready, grab your gear (and some sleeping gas that will help us later) and make your way towards the staff area. Heading downwards you'll find the archive, where you need to grab a blueprint for your overwatch, Bain. Pop over to the nearby IT center and use a mysterious and ancient machine known as a "Fax Machine". Bain, now with the map for the place, will need to see who's here. Grab a USB drive that's conveniently nearby and slip through to the receptionist area. Plug it into the PC, and grab the list. Take the drive back to the IT department, and send it to Bain.
Now we're almost into the vault, but there's one more thing. Remember the sleeping gas? Well, we're putting it to good use. Bain will pull up a guest that's somewhere in the building. What you need to do is figure out what they're drinking, spike a bottle of it with some drugs, and refill their drink with the spiked alcohol while Bain distracts them. Once they get to the bathroom, take them out and grab their room key. All that's left is to get into the room, and empty the sleeping gas into the vents that lead directly into the security room. Without the guards, the cameras are also taken down, meaning you can move with a bit more freedom. Take advantage of this by grabbing the vault code from three briefcases across the map. There's one in the manager's office, one in the security chief's locker, and one next to the pit boss. Don't worry about remembering them, Bain will rattle them off when you need to input them.

Finally, we can get into the vault. Make your way to the security office, and hack into the PC there to disable the lasers blocking the vault entrance. Go to the vault and enter the digits, and find the fruits of your labor. To your right, there's the loot that the Dentist has been trying to get his hands on. To the left, there's plenty of additional loot for your plundering desires. Going to the right and drilling down the door, we find a laser-guarded room that, once carefully crossed, has a... strange Illuminati box? You know what, it's not our job to bother figuring out why a Dentist needs access to Illuminati technology. I think it's probably either a high-powered toothbrush or something needed to obtain the ability to rebirth yourself in the body of the president. You know, the usual stuff. You can also head left and grab some loot in the locked cells that can be opened a variety of ways. Once you grab what you need, drop it all off at the van, and leave the place none the wiser.
But I didn't come here for stealth. This shotgun is bloodthirsty, and there's no way it's getting its fill from just a handful of stealth kills. We're going loud. Now, in order to get this route going in our favor, we need to spend a few, well, favors. We're just going to quickly pop over to the preplanning menu, and grab the "loud entry" plan. With that, we can get going.
You'll draw heat from the police immediately, since your very loud entrance means they already know you're here. On the bright side, you don't have to bother with nabbing your stuff from a guitar case! Now we need some C4 that, luckily, is in the building. Like the stealth route, you need to find three briefcases, one in the manager's office, one in the lockers in the staff gym, and one somewhere on one of the first two floors of the casino. Find these, input the code, and nab the C4. Or you could just spend some favors and start with the C4 in the entrance limo, either works. By now the police are on you, so make sure you also take them out as you move along.

With the C4, we can now get moving to the main room. Plant four pieces of C4 around one of the roulette tables. If it's the right one, we can get moving. If it's not, then don't worry, we've got enough to blow up a few more tables. Eventually, you'll find the top of the vault underneath one of them. This is where the fun begins. In order to get into the vault, we need a drill. Specifically, the Big F*cking Drill (small children reading this, you're welcome for the censor. Also, go to bed, it's probably past your bedtime), AKA the BFD. This needs quite a few parts to put it together, so let's get started. Drop off a flare over on either end of the casino. This will get your helicopter pilot, Bile, to drop off the winch for it at that location. Drop off the parts, and grab yourself some fireworks. They should be somewhere in the building, so you've just got to find it. Once found, set them off on a balcony to trigger a blimp to drop off the rest of BFD. Now it's assembly time. Much like IKEA furniture, it thankfully comes with instructions that will not be covered here. Just, like, do the heist yourself if you want to know how big fucking drills get made (uncensored now that the kiddos should be asleep).
Now that it's running, you need to maintain it. It's very, very, big, and, as such, needs a lot of materials to keep it going. You'll have to defend the batteries it's plugged into, along with the drill itself, and keep the water cooling the drill down fresh by refilling it when needed. Eventually, the drill will finish and let you into the vault. You'll find yourself in a counting room filled with cash bundles for the taking. Going down a few floors, you'll find the main vault from the stealth heist. Steal the Dentist's loot, grab any other loot bags you want, and carry them to the exit. It would be important to note that there's an elevator in the vault to carry the loot up the stairs, making transportation way easier. Get all this done, and the Dentist will be satisfied.
And there you have it! Originally, I was going to do the Big Bank heist, but the planning there is so important I wouldn't be able to skip it, and it ended up too large. Next month, though, as it will be the holidays, will most likely be Big Bank. That's right, your Christmas, Hanukkah, and other December holiday gift from me will be an extra large article from yours truly! I mean, this is so far the biggest article made by me by far, sitting at around 1500 words, but like, extra extra big. Though until then, this is professional heister Kinger, signing off.
Pitohui's Pokémon Academy
Written by: Hooded Pitohui (talk)
Hello once again, class. I'm glad to see that the change in weather and the end of DST aren't deterring you from attending your class sessions. Er, well, aren't deterring too many of you, I should clarify. Myself, I find myself quite energized by the arrival of deep autumn. The chill in the air, the grey, damp days filled with steady rains, it's the time of year I most thrive. I've been compared to a mushroom on more than one occasion as a result.
Yet, though my preferences may suggest otherwise, my habits and likes aren't dictated by any fungi. The same cannot be said, however, for the Pokémon we'll be examining today. No, Parasect's body and mind has been taken over completely by the mushroom on its back. It'd almost be a tragedy, a horror story playing out in real time, if it weren't so cute.
We're going to jump right into our examination of the Mushroom Pokémon. If you're joining us for the first time today, I suggest grabbing the summarized course syllabus from the box below so you aren't too lost.
First, a Smogon University course, this course is not. No, this academy's lessons are designed to get trainers of any stripe thinking about how they can raise their Pokémon, and, as a result, aren't designed to keep up with the widely-accepted metagame for the series. In some cases, the way I've raised my Pokémon may even flies in the face of conventional wisdom. If you're looking for top-tier strategies, do check out Smogon, but if you merely want to get a little deeper into raising Pokémon while still doing things your own way, feel free to use this section as a reference.
Secondly, know that, unless otherwise noted, these builds assume these Pokémon were raised in the seventh generation of Pokémon games (Sun, Moon, Ultra Sun, and Ultra Moon). Generation VIII cut some moves out of the games, and I'm not keen on changing the movesets for Pokémon I raised a few years ago.
Please note, also, that I'm having to guess at the effort value (EV) spreads of some of these Pokémon. Again, I raised these years ago, so I'm using stat calculators and working backwards to figure out their EVs in some cases.
Finally, since we all know the importance of citing our sources, I need to credit the design of some of the tables used in these lectures to Crocodile Dippy, author of the Pocket Handbook which can be found in early editions of Strategy Wing.Now, should you need a refresher on terms commonly used in this class, you'll want to take a look at this second box, instead. If you find yourself lost during class, feel free to message me, and I can update this handout with additional terms.
Base Stats: Base stats are the values associated with a particular Pokémon species, and are the same across every individual Pokémon of a given species. You have no influence on them. You can think of them as traits tied to a species. A chimp isn't ever going to be able to get as good as digging as a mole will be, and, likewise, an Abra is never going to have the defensive prowess a Shuckle has.
Individual Values (IVs): Individual values, as their name implies, are associated with individual Pokémon. They range from 0 to 31 in each stat, with 31 being considered a "perfect" IV and higher numbers corresponding to different stats. Magikarp A and Magikarp B will have the same base stats, but they may very well have different IVs. To stick with the animal analogy, one mole may be born with larger claws than another mole, and that first mole is probably going to have an easier time digging through dirt than the latter. Individual values are set in stone, strictly speaking, but you can use Hyper Training (from Generation VII onwards) to functionally get a perfect IV in a stat.
Effort Values (EVs): Effort values are the one thing you can easily change. A Pokémon can earn, primarily through battling, but also through means like the use of certain items or mechanics like Super Training, up to a total of 510 effort values, with up to 252 in any given stat. To finish off the animal analogy, no matter what kind of claws a mole is born with, moles who have more experience digging are probably going to be better at digging than moles which have never dug.
Nature: A Pokémon's nature is, more or a less, a stat modifier with a name meant to make it sound like a Pokémon has some personality. Natures will raise one stat by ten percent and lower another stat by ten percent. Some natures raise and lower the same stat, canceling out the effect and leaving stats unchanged. Natures can be changed with the use of special mint items from Generation VIII onwards.
STAB: STAB stands for Same-Type Attack Bonus, and refers to the boosted power of moves that match the type of the move's user. To illustrate this, consider the case of a Lombre, a dual-type Pokémon which is both a Water-type and a Grass-type. Any Water-type moves Lombre uses will have their power boosted by 1.5x, and any Grass-type moves Lombre uses will, likewise, have their power boosted by 1.5x. (There are circumstances where this does not apply, and, while the 1.5x multiplier is typical, some games use other multipliers.)
Alright, let's begin, as usual, with a look at Parasect's base stats. Right away, it's apparent that Parasect has... well, there's no way to sugarcoat it, overall poor stats, especially for a fully-evolved Pokémon. In the words of Melons-N-Soda at Smogon University, "it is absurdly slow, has lackluster bulk, and has an awful defensive typing". Parasect has a low overall base stat total, and none of its stats stand out. We're not here, however, to indict any Pokémon on charges of poor performance, so we'll ask the question "what can we do anyways?".
Parasect's attack isn't horrible, but, with such a low speed and so many weaknesses (including one to common hazard Stealth Rock), it'd be difficult to take advantage of that offensive power unless you ran Parasect in a dedicated Trick Room team. While that is an option, albeit one still fraught with risk due to Parasect's many weaknesses, we'll turn our attention to Parasect's defensive stats. While its HP is lower than would be ideal here, its defense and special defense are decent enough, and with a little elbow grease, we might just be able to turn Parasect into an annoying stall Pokémon that can whittle down the HP of its opponents.

|
Name: | Parasect | Base HP: | 60 | |
| Species: | Mushroom | Base Attack: | 95 | ||
| Type: | Bug | Grass | Base Defense: | 80 | |
| Abilities: | Effect Spore | Base Special Attack: | 60 | ||
| Dry Skin | Base Special Defense: | 80 | |||

|
Damp | Base Speed: | 30 | ||
With our focus on making Parasect as bulky as possible so it can last in battle to chip away at the opponent's HP, we have a clear and simple path forward here. We want max IVs in defense, special defense, and HP. Ideally, you'd get a 31 IV in attack as well, so Parasect can make full use of a physical STAB move when an opportunity arises. As you can see, I failed in that regard, but, then, my mistakes become your lessons, so we'll brush over that. Any values for speed and special attack IVs will suffice. We aren't concerned with them at all (though, if you add Parasect to a Trick Room team, you'll want to get as close to a zero there as you can, and, in any other case, higher speed is slightly preferable to higher special attack).
For EV investment, simply invest the maximum 252 EVs into defense, then do the same for special defense. To make Parasect's bulk go as far as possible, invest the remaining EVs into HP. I put them into my Parasect's attack, for reasons unfathomable to my present self, but there's no reason to put them anywhere other than HP.
This may have been our most straightforward examination of a Pokémon's stats and exercise in building a plan to raise a Pokémon yet, but there is one more matter to consider before we turn to the subject of a moveset. Of Parasect's three potential abilities, we can immediately discard Damp as too situational. That leaves us with a choice of Effect Spore or Dry Skin, and the decision between the two is easy. There's no reason to rely on random chance to inflict status conditions when we can incorporate more reliable status moves in Parasect's movement, and an immunity to Water-type moves (and passive healing in the rain) is too valuable to pass up. Raise a Dry Skin Parasect. With its double weakness to Fire-types, you'll be keeping it away from fire anyways, so there's no downside to Dry Skin.
| Level: 37 | HP IV | 31 | HP EVs: | 0 | HP: | 102 | ||

|
Attack IV | 24 | Attack EVs: | 6 | Attack: | 92 | ||
| Defense IV | 31 | Defense EVs: | 252 | Defense: | 98 | |||
| Special Attack IV | 31 | Special Attack EVs: | 0 | Special Attack: | 54 | |||
| Special Defense IV | 31 | Special Defense EVs: | 252 | Special Defense: | 98 | |||
| Nature: Adamant | Speed IV | 20 | Speed EVs: | 0 | Speed: | 34 | ||
We can now move onto Parasect's moveset. Our first priority here is to select a move that will allow Parasect to constantly drain the health of its opponents. Parasect has no means of burning its opponents, so it will have to either poison them or afflict them with Leech Seed. Leech Seed is not a bad option here, as it will passively restore Parasect's HP, and only one type resists it (Grass) while aiming to poison foes will make it difficult to wear down Poison-types and Steel-types. Leech Seed is an egg move, however, so it will take a little more work to breed onto Parasect. If you forego Leech Seed, you can do as I've done here and add Toxic to Parasect's moveset. While this doesn't come with passive healing, it does badly poison your opponent, meaning them damage the poisoning inflicts will increase each turn.
| X-Scissor | Physical | The user slashes at the target by crossing its scythes or claws as if they were a pair of scissors. |
| Synthesis | Status | The user restores its own HP. The amount of HP regained varies with the weather. |
| Spore | Status | The user scatters bursts of spores that induce sleep. |
| Toxic | Status | A move that leaves the target badly poisoned. Its poison damage worsens every turn. |
We've set one status move in place so we can do gradual damage, and now it's time to see if we can make Parasect annoying. We want a way to reduce the rate which damage is done to Parasect by making it so its opponent can't attack as often. While we could aim to paralyze opponents with Stun Spore, putting opponents to sleep would be the superior choice, and, luckily, Parasect has a reliable way to do that. You'll want to teach your Parasect Spore, no matter what else you do. It puts opponents to sleep, and, unlike most sleep-inducing moves, it has 100% accuracy (do note that this isn't the same as saying it can never miss, only that, barring changes to accuracy and evasion, it will reliably hit). You can Unfortunately, you won't be able to poison the opponent and put them to sleep at the same time, as nice as it would be, so we'll have to find another way to take health off of a sleeping opponent.
This is where Parasect's STAB move comes in. I taught my Parasect X-Scissor, as it's a reliable, straightforward, and physical STAB Bug-type move that takes advantage of Parasect's base attack stat. That said, there is a better choice. Leech Life has the same base power, gets STAB, runs off attack, but it also restores some of Parasect's HP. The only drawback to Leech Life is that it has slightly lower PP, but you most likely won't find that limiting, so I suggest making Leech Life your STAB move and your primary way of quickly inflicting damage.
Finally, we'll extend Parasect's longevity by teaching it a reliable and quick way to heal itself. With Synthesis, Parasect can restore half of its HP in one turn, and has a way to heal even if it faces off against an opponent that resists Leech Life. In harsh sunlight, while Parasect takes damage every turn due to Dry Skin, your Parasect will at least get the benefit of healing even more (2/3) of its HP. Synthesis will ensure Parasect stays out on the field longer to keep chipping away at opponents' HP by poisoning them or putting them to sleep and hitting them hard with Leech Life.
Is that everything, then? Why, I believe it is. Class felt shorter than usual today, but, well, I suppose that's how it goes at times. With the extra time, anyone who'd like can get a pair of gloves and a mask and pet Parasect, if they wish. Otherwise, you're all dismissed. Go enjoy the rain, and, well, if it's too dark, cold, and damp for you and you'd prefer to curl up inside, perhaps it's a fine time to catch up on your studying, hmm?
The Greatest Quest
Written by: The Wandering Shoestrel (talk)

I welcome you, yon reader, to the return of The Greatest Quest. I must apologize for my absence, but in these two months, I have learned many stories and many tales. Perhaps someday I shall tell them to you? But, until then, we shall return to the story of the brave Sir Cucumber and his squire, the young and wily Percy. In our last chapter, Sir Cucumber the bold slayed the horrid Bananda, rescued the peanut mayor’s daughter, and crushed Minister Pumpkin's mecha forces at the battle of the big tree. Squire Percy the young solved the mystery of the Chameleon Grass, allowing him and Sir Cucumber to disguise themselves as Farmies and enter the Minister Pumpkin stronghold city of Sopville. I can promise you that this month's chapter will be a tale of stealth and intrigue, but, before we begin, I feel a song will set the mood.
♪ Sneaking into Sopville, ♪
♪ Minister Pumpkin, the trail, ♪
♪ Disguised as some farmies, ♪
♪ The princess awaits in her jail! ♪
Arriving on main street, looking around, our heroes see that Sopville is throwing a celebration in honor of Minister Pumpkin. Checking the surroundings, young Percy reports on four topics:

- The Vicinity: Percy notices three wanderers named Yam, Asparagus, and Squash.
- Lt Store: The store to the left is a general store for all your general needs.
- Rt Store: There's a bar where loyal farmies can wet their whistles.
- Ground: Nothing... Oh, great, a waste of time!
In his wisdom, Sir Cucumber attempts to converse with the locals. Yam says that he's hungry, Asparagus says that he's thirsty, and Squash questions whether or not Sir Cucumber and Percy are really farmies! Silently panicking, Percy tells Sir Cucumber that they should help the three wanderers, and Sir Cucumber, ever the hero, agrees. Our heroes enter the general store, where they then buy a loaf of bread and some juice. Returning to the wanderers Sir Cucumber talks to Yam before giving him bread. He then talks to Asparagus before giving him some juice. Thankful for being fed, the starving Yam tells Sir Cucumber that people who aren't farmies are abused in this town. Asparagus lets our heroes know that there's a man on Pea Street who sells info.

This allows Sir Cucumber and Percy to now venture onto Pea Street. Also on the street, our heroes' good friend Octoberry can appear and "drop" a coin to aid our heroes.
Before our heroes decide to venture onto Pea Street, they first drop in on the bar. Checking the vicinity of the bar, they notice that the bartender isn't around. Looking around, they notice three patrons sitting at the bar, those patrons being two farmies by the names of George and Dan and a radish by the name of Ron. Talking to George or Dan is useless, because George is sleeping and Dan is top busy laughing at his own joke (it was probably a racist joke since, according to Percy, everyone here is prejudice against radishes.)

Ron, on the other hand informs our heroes, who talk to him, that George and Dan are working for the farmies and that the Princess is being kept prisoner in the castle (I mean, where else would you keep a princess imprisoned?). With this new information, our heroes decide to venture onto Pea Street in search of this supposed information broker. Upon entering Pea Street, they see what appears to be... Oh no, it's local street toughs!

Checking them, Percy identifies them as E.P. and D.R., local street wanderers well known in town. Talking to E.P., he reveals himself as the local information broker and tells Sir Cucumber that, if he has gold, E.P. has information. In complete shock that somebody takes gold and not coins, Sir Cucumber gives E.P. all the gold he has (eight pieces).

After receiving the payment, E.P. gives our heroes a shovel (since Percy lost the last one) and tells them to show the crest of the resistance to D.R., who, after our heroes talk to him, reveals he hates farmies. Upon seeing the crest, D.R. reveals the existence of a tunnel that's dug halfway between here and the castle and tells our heroes to talk to the lady that owns the house around the corner for more details.
Entering the old woman's house and talking to her, she will reveal herself as the Carrot Hermit's wife. Checking her, Percy will notice that she seems sick. Always the compassionate man, Sir Cucumber gives her the medicine he had left over from the pharmacy. Upon taking the medicine, Carrot Hermit's wife tells Sir Cucumber that Ron from the bar found a key that goes to a room in the Pumpkin Minister's castle. Thinking quickly, our heroes return to the bar, and, after showing Ron the crest of the resistance... in the middle of the bar... for some reason... and talking to him three times, Ron shouts "long live Princess Tomato!" and entrusts Sir Cucumber with the key. If you return to the bar later, you'll learn that Ron proceeded to get his ass beat in a fight with the farmies, which, like, yeah, that makes sense. With key in hand, our heroes return to the Carrot Hermit's wife's house and talk to her until she reveals the location of the passage.

Entering the passage, Sir Cucumber and Percy find a cave blanketed by darkness, completely pitch-black. Going forward, our heroes find... Oh no, oh god, no! Why!? Another maze! Noooooooo! Why does this tale have so many mazes? Who thought this quest needed so many mazes!?

Luckily, however, unlike the other horrible mazes of pain and terror, for this maze, our heroes merely need to talk to the Carrot Hermit's wife for the answer. After talking to her three times, she tells Sir Cucumber to go Forward, Right, Left, and Forward. Following the path of the Hermit Carrot's wife, Sir Cucumber and Percy run into a large rock. Thinking quickly and with the strength of a tiger, Sir Cucumber destroys the rock with the shovel he was given. Beyond the rubble of the rock lies a door at the end of the tunnel. Our heroes bravely venture into the door, entering the castle, their quest almost at an end.
But, unfortunately my friends, this is where this chapter will end. Our heroes, having finally located Princess Tomato, have infiltrated the castle where she is being held. The next chapter will determine the fate of the Salad Kingdom. Will Sir Cucumber the brave and Squire Percy the young defeat the evil Minister Pumpkin, rescue Princess Tomato and restore peace and prosperity to the Salad Kingdom like the heroes of old? Or will Sir Cucumber be felled in battle by Minister Pumpkin's forces like the heroes of Greek tragedies? Only time may tell, so join me next month when I spin the final chapter of The Greatest Quest. As we wait for the final chapter, I feel a song coming on...
♪ Paid off an informant, ♪
♪ The townsfolk gave aid. ♪
♪ Dug into the castle, ♪
♪ the princess to save! ♪
To Infinity and Beyond
Written by: Waluigi Time (talk)
I can't believe I'm using this exact joke again on a Saturday... THIS EXACT JOKE!
Greetings space rangers, and welcome back into the final stretches of Toy Story 2! Last time, we completed Airport Infiltration and got the Hover Boots from Mr. Potato Head. Those will let us get that elusive final Pizza Planet Token in Al's Toy Barn, so today we're headed back there to clean things up. Just like last time we backtracked, I'm going to recommend taking a look at the first section covering this level if you didn't read it or need a refresher on the level's layout. Alright, let's get started!

The only thing we weren't able to do last time was find all of the chicks for the Chicken (wow, creative name!) and there was actually only one of them locked behind the Hover Boots this whole time, as Rex will tell you if you talk to him. It's probably most efficient to grab that one first, so head all the way to the back of the level and go into the storage room. I recommend jumping onto the checkout counter with Mr. Potato Head at the beginning and grabbing the Rocket Boots to get there faster. Immediately inside the door, there's a set of Hover Boots. Grab those, hold down the jump button, and hover straight ahead until you reach the wall. Once you get there, wait for the Hover Boots to run out, and then jump over to the boxes along the wall. The next three sets of boxes are being moved up and down by lifts, so wait until those are at the right heights to be able to jump to. At the end, jump to another stack of boxes to the left, and then to even more boxes close to those. The chick is at the top. Once you've collected it, you can also turn around and drop down to collect a battery.

Leave the storage room, and in the hallway, talk to the Rooster. We already did this the first time we were here, once for a chick, and a second time for a Pizza Planet Token. Since we already grabbed the Pizza Planet Token the first time around, we only need to do it once. I've already covered this, so I'll just let Issue 180 WT quickly talk you through it.
The first time you talk to him, he'll give you 50 seconds to reach the hatching egg on the other side of the level to collect the Chick inside. [...] Once the timer is activated, jump onto the nearby skateboard to quickly get to the trampoline, jump up onto the shelf, then to the shopping cart to the left, and do a bit of platforming to reach a zipline that will take you straight to the egg where you can collect the Chick - just make sure to jump over to the shelf before you reach the end, or you'll smack into the wall instead. It's pretty easy, and there's a lot of room for error.
(Copying my old writing reveals inconsistent capitalization... In my defense, the text in this game is in all caps!)

After you get the chick, drop down below and stomp on the lever to activate the hay bale ride. Like I said last time, you can either do this the intended way by using the Rocket Boots to move along the checkout counters and doing some platforming, or you can just cheese it by jumping onto the side of the sign and having Buzz pull himself up. Personally, I prefer the cheese strat here since it's much more convenient. Whatever method you choose, jump onto the hay bale ride and get flung across to the gumball machines, where the third chick awaits.

Now it's time to explore some uncharted territory for the last two! Go towards the back of the level again, but this time turn left down the aisle. This section of the level has always been accessible, but since the only time you actually need to go here is for this specific Token as there's enough coins for Hamm in the rest of the level, I skipped it last time. Down the first stretch, Buzz has to deal with... deadly basketballs! They're endlessly falling off of the basketball racks at the end and will bounce along the aisle. You'll take damage if you touch them, but they can be deflected with a spin attack. Once you reach the end, jump on the box to reach a shelf with bicycles on it. The wheels are turning by themselves (this whole section once again brings up questions of what is and isn't sentient in the Toy Story universe) and you'll have to jump through them when the spokes aren't in the way, or you can just jump around them, which takes a bit more effort. Also, watch out for yellow balls being launched from the "Ball Shot" dart guns (who is shooting them??) on the other end of the aisle, because those will hurt you too. Like the basketballs, you can deflect them with a spin attack. After getting past two bicycles, there's a rope to climb up to the other set of wheels and get through those as well, which works the same way. Past those, jump across to the top of the shelf, where you'll find the fourth chick and a skateboard. You can optionally drop down from here to grab an extra life, or you can reach it by jumping over the cones on the floor and walking along the edge of the shelves.

The skateboard works just like the one in the Rooster's race. When you jump on it, it'll propel forward off onto the shelf and across the floor (you need it to get across without being damaged by the green slime on the floor) until crashing into a set of cones that sends Buzz into the air and to the next safe portion of the floor. We finally meet the Chicken here, but with one chick still unaccounted for, best to leave her alone for now. There's a large box that you'll need to push through the next stretch, and the challenge here is a set of hula hoops that keep falling off of their peg and rolling across the aisle until they reach the end, at which point they clip through the wall and phase out of existence for some reason. Unlike the other obstacles so far, you can target them in visor view, but you can't actually eliminate them. You can knock them around a bit with either a laser shot or spin attack, though. Once you get the box to the end, well, you probably know the drill, jump onto it and climb up onto the last shelf, where there's yet another box to push down onto the floor and across the aisle! There's nothing too fancy to try to stop you this time, just a Plane Box. Getting the box to the end lets you reach a shelf with the last chick on it. At this point, you can either turn around and backtrack to the Chicken (you won't need to deal with the shelves, so you can just walk across the floor this time), or walk through a vent that leads back to the beginning of the level. There's a battery in here (along with a Laser-Bot, this guy probably just wanted to slack off and picked the most remote location possible) so it may be worth your while to at least take a look, but I think it's quicker to backtrack. Once you reach the Chicken, talk to her and get that Pizza Planet Token!
Alright, with that done we now have 45 Pizza Planet Tokens! There's only one regular level left standing between us and the final boss. Next time we'll tackle that, see you then!
Gameplay screenshots were taken from Nin's playthrough on YouTube.
Mach Speed Mayhem
Hello, 'Shroom readers! Welcome to the grand finale of Mach Speed Mayhem. Yes, here it is. We have covered every character who deserves their own article, and plenty of votes have happened. Epic showdowns, dramatic decisions, and far too much shilling. But now... now we are at the end. So what's left?
Well. A lot, actually! We've got some weird non-canon lore and some characters to cover who simply didn't have enough to talk about in a full article. Let's jump right into it, because we'll be here a while!

The Non-Canon F-Zero X Lore
Way back when F-Zero X first released, Nintendo of America decided to promote it with a long-gone Flash website, as many games got during the end of the 90s and most of the 00s. And on that flash website was lore. Expanded lore, even! However, this lore is weird and contradictory to the rest of the lore in the series. The website went down a couple years after it first went up, and thus vanished into the mists of time, leaving only re-uploads elsewhere. I'm not ashamed to admit that when I first discovered them, I thought it was just a fansite that had grown wildly out of control and become accepted parts of F-Zero fandom, and thus dismissed it all going forward, until I found this scan of an old magazine ad, complete with actually seeing an archived copy of the magazine. So there's egg on my face, because this stuff actually is real, even if not canon. And that's why we're covering it here!
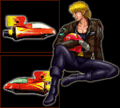
#07: Captain Falcon
According to this lore, Falcon's full name is Douglas Jay Falcon. His past remains as unknown as it is in canon, but this time there's rumors about it - theories that he got the title from his time in Internova Police Force, though even here there's basically nothing to back up the story. In order to keep himself safe from everyone who wants revenge on him over the years, Falcon lives on a series of islands off of Port Town, all of them heavily guarded under strict security and with test tracks to practice driving the Blue Falcon. He spends all his time there with two exceptions: high bounties to hunt and the thrill of racing in F-Zero.
#30: Black Shadow
This lore explicitly makes Black Shadow a user of black magic, which isn't that much of a surprise when you consider some of his stunts. What's definitely wild is that according to this, Black Shadow worked with a voodoo priest named Jay Gonso Snaky. In fact, Snaky taught Black Shadow everything he knows about dark magic, up to and including immortality... until he got transferred to the high-security Miptorian prison and died in the Unionist Riots, of which we know nothing. Since Falcon is the one who captured Gonso Snaky, Black Shadow has doubled down on his hatred for Falcon, even using voodoo magic to create Blood Falcon.
#05: Samurai Goroh
The descendant of actual samurai from ancient Japan! That's not too much of a reach, where they got inventive was that Goroh used to be a member of the Internova Police Force that Captain Falcon was also rumored to be part of. Unfortunately, he and his partner at the time went rogue, doubling down on going outside the law and flouting regulations, until eventually this got them fired. Naturally, Goroh blamed his ex-partner, and proceeded to go into business for himself as a bounty hunter. He's the number one rival of Captain Falcon, and it's always a highlight when they meet in F-Zero!
#25: Blood Falcon
Created by the dark magic that a voodoo priest taught to Black Shadow, Blood Falcon in this version suffers from an identity crisis. Unsure of who or what he is, because Black Shadow ain't telling him, he's doubled down on killing Captain Falcon because what else can ya do? And that's about it, they didn't say much for him.
#10: James McCloud
This version of the lore has a backstory for Galaxy Dog! In the 24th century, there was a lot of lawlessness and misrule throughout the galaxy, and in the Ring Coalition it was worse than anywhere else. A small group of professors, scientists, and engineers decided to come up with their own alternative, and led by one Professor Shields Wyvern, they formed Galaxy Dog. The name started as a sardonic joke - who could possibly protect the whole galaxy? - but over time they developed into a real team, and helped restore order to plenty of star systems that needed the help. Even now, the Milky Way Federation allows them to operate anywhere, but they're starting to run out of budget despite their storied history. So James has decided to take matters into his own hands and win the F-Zero for the money.
#09: Mr. EAD
Rather than friendly and approachable, EAD is a meticulous perfectionist. He considers any mistake to be a sign that he needs improvement and upgrades, and he watches his performance obsessively to find any errors he made and works to eliminate them, meaning he's never made the same mistake twice - though he's constantly frustrated, unable to calm down about his need for true perfection. In fairness, if you're one of the few who does get close to him, you find that he has a sense of humor and is a chill guy off the track! It's just that on the track, he has one goal.
#15: Bio Rex
Created by the Keerlon Corporation, Bio Rex is the product of currently illegal genetic science. But since his home location is a space station around Jupiter, it's all good! Keerlon entered Bio Rex in F-Zero to show off his intelligence and their genius work, but the constant attention got on his nerves - he wasn't made for press conferences or news articles, he just wanted to race. A few temper tantrums later, and Keerlon pulled out of supporting Bio Rex, not that he cares. As long as he can race and prove his superiority to mammals, he's happy.
#16: The Skull
A big part of one of the most changes we get, the Skull is named Sterling LaVaughn here. He drove in the old days of the Grand Prix, back when it was wildly dangerous and people died all the time. Deciding not to wind up like all the others, Sterling here sought to avoid getting killed in a wreck, and sought to use both the power of science and that of black magic to keep him safe. When a massive wreck did come, it was the Grand Finale of the Grand Prix, the NoA X Lore's equivalent of the Huge Accident - but whereas the canon Huge Accident was a miraculous save that resulted in nobody truly dying, the NoA Grand Finale resulted in a whopping 34 racers dying, though only 33 of those stayed dead. Sterling climbed out of his grave as a rotting skeleton, and now seeks to find joy in racing. And hey, since he can't die a second time, he's become an even better pilot, one unbound by any fears.
#08: Octoman
The planet of Takora is covered in oceans, and after some touchy first contact situations involving the Federation trying to take the water, they've cut off all outside communications. So it was a bit of a surprise for Octoman to show up one day and say he was gonna race. Octoman, a genius and savant, refuses to speak of his planet - or anything beyond racing, for that matter, even though people show up to gawk and ask questions all the time. Even Octoman isn't his real name, instead just a human-pronounceable translation. He does like the few people who can engage his mind, and is often seen with Mr. EAD, Mrs. Arrow, or Dr. Clash. And he once gave an interview, where he revealed he's married with 9 kids and everyone on Takora has to watch all his races. That's one way to build a fanbase!
#18: Beastman
Rather than his encounter with a giant gator happening on the planet White, in this case it happened in the far-off exotic world of... Florida. Beastman is portrayed as much more unhealthy in this lore, with a single-minded obsession that he's trying to channel productively by racing in the F-Zero instead of hunting beasts all the time. Unfortunately, it hasn't entirely worked, because Beastman is currently hunting beasts AND racing the Grand Prix, making it clear to other drivers he's for hire. Oh, and he's named Christopher Annex here.
#22: Gomar & Shioh
The Furikake in this version are abnormally long-lived - where F-Zero GX went on to say Gomar and Shioh are 102, this version says they're over nine thousand. Additionally, rather than what we'd get (splitting their pair up to marry), it's listed as one pair marries another pair. It also mentions that the EAD Foundation is what tipped the F-Zero committee in favor of allowing Gomar & Shioh to participate. Thanks, EAD!
#02: Jody Summer
For a character who had very little in F-Zero X, the NoA bio writers went ham here. Jody is listed as an absolute superhuman, getting a fourth place in the not-Olympics at 14, skiing across a huge ice plateau as the third person ever at 16, and climbing Olympus Mons at 18. Additionally, her dad, Mason Summer, is dead - right as she started racing in F-Zero, he was killed in a ship crash. He always called her White Cat, so now her machine is called White Cat as a tribute, and she races to win for him.
#06: Pico
Here, Pico is listed as from the plant Toritz 3, and that he's considered a teenager in his family. His success as a hitman is played up incredibly high, Pico said to have killed over 70 officials when he was working in the army unit he was part of. The day he showed up at the F-Zero X GP Academy (the racing academy being another thing invented by this lore), someone made fun of him and was never seen again. So, naturally, he's still suspected to be an assassin. At least he's calm outside of the track... though that might not be a good thing.
#01: Mighty Gazelle
Rather than the canon "hell yes I love being a robot" vibe Mighty Gazelle gets in GX, here he's played much more tragically. He was originally a very nice guy who had a lucrative career in 3D photography, and he loved to play video games. He got so good at driving games he made the fatal mistake everyone does and tried the real thing, which actually went well! Then he crashed and got turned into a robot. As opposed to the woman he's happily dating in GX, his fiancee in this continuity saw him as a robot and promptly ran off crying as their breakup. Robots just can't catch a break in NoA, apparently.
#11: Billy
As opposed to being a genetically advanced monkey, this version of Billy is named "Eeeach Koo-koo-koo Yia", is an alien simian who comes from the planet Odyapes, and lives to 16 years old at maximum. Poor guy. He's also friendly rather than money-hungry, and one of the better drivers on the circuit. Though don't make fun of his racing. He gets mad about it.
#03: Dr. Stewart
Named Garron Andrew Stewart here instead of GX's Robert, the NoA lore makes his dad's death much more influential. Stewart here went into medicine thanks to his dad encouraging him, while his father, Gilbert Andrew Stewart, went on to more success in F-Zero. Dr. Stewart got stuck in the wild side of life, though, and they fell out of touch until he learned that his dad was killed in a tragic accident in F-Zero (possibly the Grand Finale?). Hearing rumors that it was murder, Dr. Stewart fixed up the Golden Fox and joined the Grand Prix, ready to find the truth.
#19: Leon
Leon's portrayed as a bit of a dim bulb here, but with the advantage of Natural Instincts and great reflexes, and he's cited as coming from the planet Kericho. He's been adopted by Super Arrow and Mrs. Arrow, who let him try out the King Meteor and were astounded to learn how much potential he had. They quickly talked to Leon's family and footed the bill for his stay at the F-Zero Academy, as well as his machine. Honestly, they went so hard on this it's too bad there wasn't some sort of connection joke in the canon lore.
#13: Zoda
Remember how Zoda in GX revealed he's a modified human? Not here! He's from the planet 41 Uma, leading the Zolorkian Coalition, and the arch-enemy of the Arrows - he even tried to hit on Mrs. Arrow once. At first he was just on Earth to scout the place out for the Zolorkians and resource harvesting, but then he found the underground races - when the Grand Finale killed a lot of people, F-Zero was banned, but some people stayed racing in secret, making sure to stay as clean and fair as they could to keep it alive. Zoda joined this, and he upgraded his machine so much that when he crashed, it caused two other people to die while Falcon rounded up several of his men. This has led Zoda to swear revenge on everyone in his way!
#04: Baba
NoA decided to give Baba a last name - Orninion. As well as a homeland, the planet of Hai 4. He's explicitly a student from the F-Zero academy, and his big skillset is being super observant - he's always watching for new information and taking it in, gradually learning everything he can as he works on becoming the best he can be. As much as the other racers are annoyed by it, they can't keep Baba down!
#20: Super Arrow
NoA took one look at Super Arrow and decided he's the main character. First off, they added that Super Arrow used to drive back in the old days of the Grand Prix, before the catastrophe, as well as naming the guy who gave him his falcon. One Lazlo Falconi, as opposed to the Professor Hollow who made his stuff in the canon lore. Second, Super Arrow actually won the Grand Finale race, surviving when over thirty other drivers died in the wreckage (great vargon). And thirdly, he was the one who brought back F-Zero! Petitioning to the Federation, he was able to form the F-Zero Academy and use it to train up new young drivers like Leon and Baba for the new, improved F-Zero. He also went underground to recruit some racers, where he developed his rivalry with Zoda and met his beautiful wife. Kinda fitting that it's the guy who looks like an American comic book hero who got the big push, huh?
#21: Mrs. Arrow
This lore certainly didn't leave Mrs. Arrow out of the shilling! Named as Monique L'amoreaux, she had a father who was a powerful businessman, and a mother who was a high-ranking politician. Mrs. Arrow studied linguistics and music, knowing 40 languages and able to speak Takoran to Octoman, and playing multiple instruments to the levels of participating in an orchestra. Where she really shone was the F-Zero races, though, and through them she met Super Arrow. Love at first sight, and she went on to marry him and help him with the Academy.
#23: Silver Neelsen
They actually didn't come up with that much for Silver Neelsen, though they did say he was named Mortimer, with Silver just a nickname. People love to bet on this being when he finally starts winning, and bookies have gotten rich off of that - and plenty of the more ignorant hotshot pilots dismiss him as a joke past his prime, especially considering his machine is old-fashioned as Neelsen sticks to the classics. People who want to learn, though, can learn more from an evening talking with Neelsen than they can from racing for a year. Maybe someday, he'll finally get that win!
#17: Antonio Guster
While Guster's backstory didn't change much, NoA decided to put a bunch of added details. Goroh used to know Guster as an informant when he was a policeman, and after getting bounced, he teamed up with Guster to work as bounty hunters. Heck, the writers here threw in a gag that they were so inseparable they were nicknamed after Gomar and Shioh's race. Unfortunately, as we all know, Goroh betrayed Guster. When they were escorting someone named Lord Kimbo, Goroh ditched Guster and let the Takorans capture him, and Guster had to break himself out. Now he seeks only one thing - revenge!
#27: Draq
Continuing the trend for this lore to give people full names, Draq is named "Bellonngian Draquillie". Honestly, they didn't add much - it's still just the transportation guys who talked about being in the Grand Prix, and then just happened to stumble across two machines. Draq went for it, and he's always watching his back for fear they lose the machines - though for now, he's also talking to the classic drivers of old so he can get to live his lifelong dream!
#24: Michael Chain
The gang wars element got played up here, as Chain got both of his parents killed in a drive-by shooting when young. He also got his driving practice from stolen cars, and represented them in street races, which led to him eventually graduating to the F-Zero races. Here, he's listed as coming from the planet Mandrill 4 and the city Angelopolis, using the gang to pay for the F-Zero racing. Additionally, he listens to a mix of heavy metal and opera, which he says reminds him of his parents.
#29: Dr. Clash
Given the full name Theodore Clash and the nickname of a "supertonic geekoid", he's also given a taste for rock and roll. While it's already confirmed that he works with F-Zero machines, this lore says he holds seventeen patents, and that he's built eight of the currently active machines. Ironically, F-Zero GX would confirm that this is true in the case of Beastman's Hyper Speeder, at least! The rest of the lore is about the same as canon - he got tired of everyone else getting the races, and built his own machine to race in.
#14: Jack Levin
NoA wanted a lot of dramatic, tragic backstories, and Jack Levin was another of those! As in canon, he's a super successful pretty boy with plenty of merch sales, but they add that his life has been one of hard knocks. His dad walked out when Jack was four, and his mom was left bedridden after "Gonskie flu" hit her when Jack was nine, leaving Jack to take care of his two younger sisters and his mom basically on his own. It wasn't even his idea to enter the F-Zero competition, but when a competition searched for a new young and hip driver, his sisters entered his photo. Naturally, Jack used his newfound fortune to give them a better home and hire the best medical care for his mother... as well as to upgrade his machine. He's here to win!
#26: John Tanaka
Expanding on how John knows Jody, here he's the protege of her deceased father, Mason Summers. He created a personal machine flying assistant, which here is named J-Love-1, and when Mason died John decided he'd help protect Jody - even though she doesn't really want the help. John goes all-in on helping her win, sometimes even wrecking himself, but his little robot has other ideas. J-Love-1 wants to win, and provides plenty of advice to John to help him in that regard instead. Also, John's bio implies that Mason's flight wasn't an accident - these writers really loved adding their intrigue, huh?
#12: Kate Alen
Here, the writers went for the obvious parody, stating that Alen's singing career started as part of a group of eleven siblings named the Alen Eleven. She went on to her own solo career, and though she wasn't into it, she got plenty of success, especially from a song named "A Little Love Never Hurt No One". That's when she saw F-Zero, fell in love, and immediately shifted her entire career to focus on it instead. Follow your dreams!
#28: Roger Buster
The big difference between Roger in this lore and Roger in canon lore is that here, Roger really wanted to be an F-Zero pilot as well as Draq. Additionally, the delivery actually had a destination, in the Bodega System - rather than Draq convincing Roger they could race the machines to get them to their intended owners, here Draq just convinced Roger to outright steal the machines with him. At this point, though, since Roger has lived the dream, he just wants to raise enough money to pay off the people who were supposed to get the machines. Mind you, this is all rumor in this lore!
F-Zero: Maximum Velocity
F-Zero had three games on the GBA. The latter two were tie-ins for the anime, and have been mentioned before for that reason. But the first one featured a timeskip, and a set of ten characters - all of them brand new humans who were meant to be new stars! They didn't really go anywhere; outside of the game itself, Maximum Velocity has never been acknowledged. And thanks to it being a GBA game with no in-game info and little manual info, there's very little bio info on them! Certainly not enough to write monthly sections about. So here's a gallery of them all instead!

Megan, pilot of the Hot Violet. Might be a karate expert.
Mickey Marcus, designer and pilot of the Fire Ball. A fan fave.

Jane B. Christie, pilot of the J. B. Crystal. Likes classic automobiles.

Nichi, pilot of the Wind Walker. Nicknamed "the Sweep Man".

Lord Cyber, pilot of the Sly Joker. Wealthy and has an army of mechanics.

Alexander O'Neill, pilot of the Stingray. Previously a pro football player.
Blitz Wagner, pilot of the Silver Thunder. Studied under Dr. Stewart.

Kent Akechi, pilot of the Falcon MK-II. Claims to be Falcon's son.

Kumiko, pilot of the Fighting Comet. Nicknamed "the Bullet".

Professor Yazoo Jr., pilot of the Jet Vermilion. Son of a famous designer.


Yeah, that's about it. You guys see why they got covered here.
Stray Anime Characters
There's a few anime characters who are worth mentioning here, but who I didn't feel needed full sections. Let's go down the list!


Berserker
Who is this mysterious masked man? Is he even a man? Berserker shows up during the Don Genie arc in the late game of the anime, making his first appearance in Episode 42 as a strange figure who, in his machine the Red Bull (number 77), outperforms everyone else he can. At the end of the episode, it becomes clear very quickly that he has his own agenda. Whatever that is, he keeps winning races and taking names, outdoing the Mobile Task Force members until episode 47. Clank's got his own suspicions about just who's under that hood, but everyone keeps shutting him down as just wishing Falcon wasn't dead...
So, of course, it turns out that Clank was right and wins the bet. In Episode 47, Berserker shows up to help Rick, whereupon he dramatically reveals that his true identity is... Black Shadow Captain Falcon! And the Red Bull's true identity is also Black Shadow the Blue Falcon! He never really explains why he did the whole Berserker thing, but notably, the Red Bull shows up a few times in the penultimate episode, including one that's driven by Don Genie. Would have been asking too much to give him the Fat Shark, apparently.

Gordon
Kate Alen's manager. While Kate is feisty and constantly trying to go out on her own, it's Gordon's job to keep her career afloat and make sure that nothing bad happens to her - and according to the dub, it helps that he's in tight with John Tanaka. Nothing like having some connections. He geniunely cares about Kate, though, and it's his idea to get the Mobile Task Force to protect her after Zoda makes his threats. He's also unhappy to see the way that show business has worn Kate down, and really hopes she finds her legitimate passion again. Besides her big focus episode, he makes a cameo in the Ladies' Race, mourning Kate's disappearance alongside John Tanaka. No words on how he reacted to her destructive return.

Anthony Ropkin
Silver Neelsen's best bud and legendary rival! Anthony here and Silver used to tear up the course together, the two of them making a name for themselves in F-Zero race after F-Zero race, way back in the day. But a tragic accident meant that Anthony was never seen again, despite Silver's best efforts. The old man was forced to go it alone from there on, and try to win for both of them, until in the present day he saw a new racer on the track. This racer was suspiciously like Anthony, who then showed up to tell Neelsen that actually he was just cryofrozen for years instead. One of those things, you know? It happens. After that, Anthony joins the dramatic race of the finale, putting his all into trying to beat Silver but coming up short against Jack Levin. Fun fact: His machine is a red recolor of the Golden Fox, since they weren't gonna make a new model for a single episode. The Red Fox, maybe?

Alias
A young boy with a mysterious disease, Alias first meets Rick Wheeler when Rick shows up for charity. Signing autographs, telling stories, it's like Rick is a regular member of the Make-a-Wish Foundation now. Alias's mystery disease is treatable with both medicine and an operation, and the former gets handled in his debut episode - some of the medicine has been stolen, leading to Rick's first meeting with Samurai Goroh. His second meeting is when he's getting ready for a big operation, but he's very nervous. Luckily, his two racing heroes, Rick Wheeler and Roger Buster, are here to encourage him! Sure, the race gets complicated by everything that happens with the bombs, but they overcome it to win and inspire him. Alias later befriends Clank, and thanks to that, he gives Rick a diary from his ancestor - who just so happened to be Haruka's friend, giving Rick a bunch of info on what happened while he was out cold. Heck, we even see Alias in the epilogue at the end. The writers really wanted to have payoff to this kid, huh?

The Chief
Ahhh, the Chief. The boss over all of the Mobile Task Force! He doesn't really do much. Mostly he shows up to tell John Tanaka that he's bad at his job, or to be an obstacle for the heroes to convince. His one really major role is in episode 39, with the shapeshifting Blood Falcon - there, the team is already on the outs with the Chief after losing a race to Dark Million, and he tells them off before working along in his office. This means that when the Blood Falcon ties up, hides, and impersonates the chief, everyone thinks it's just him being mad. Except for Clank, who saw it happened and is once again not believed. Poor kid never catches a break. Oh, and don't worry, they did find the Chief in the end.

Bibirichi
A recurring antagonist of Samurai Goroh's and Lisa Brilliant's. This guy and his followers (all of who dress like cavemen for some reason?) show up in a few Goroh episodes with the same role every time - namely, they're there to complicate things and help Dark Million out, only to get wrecked because they're on the bottom end of the competence and power scale. In fact, in his last appearance, he's now working for Lisa Brilliant outright, having apparently been forcibly recruited offscreen. What a chump.
Goroh's Team
In this continuity, Samurai Goroh has four members of his bandit gang who actually get distinct appearances (not counting Antonio Guster). They don't really have much, so here's just the lineup.
Sasuke! With the power of being a ninja!

Hakuun! With the power of a strong staff!

Tsukikage! With the power of knowing how to fly their ship!

Genzai! With the power of a pointy head!


Dark Soldier
And, finally, we finish it off with the Dark Soldier. These guys are the foot soldiers of Dark Million, an endless supply of expendable mooks to allow for machines to crash and dramatically explode without expending the actually important characters in any way. Basically any time that the heroes need to fight Dark Million and actually stop someone, these guys will show up and take the dive for them. Interestingly, while the Death Anchor repaint, the Soldier Anchor, is the main one associated with them - to the point where it's a playable machine in F-Zero Climax - they also show up in repaints of other machines associated with Dark Million throughout the series. The Mad Wolf, the Wild Goose, the Wild Boar, those ones get used all the time to pad the numbers.
Conclusion
And that is the end, my beautiful friends. After four years, we've finally run out of Mach Speeds to Mayhem. Perhaps someday I will stand here again, writing about the changes F-Zero NX or SX made to the lore and talking about characters 41 through 50. Perhaps this will be the end of Mach Speed Mayhem once and for all. But until we find out in the future...

| The 'Shroom: Issue 188 | |
|---|---|
| Staff sections | Staff Notes • The 'Shroom Spotlight • Awards Director Election |
| Features | Fake News • Fun Stuff • Palette Swap • Pipe Plaza • Critic Corner • Strategy Wing |