The 'Shroom:Issue 187/Strategy Wing
Director's Notes
Written by: Hooded Pitohui (talk)
Hello, all you readers of The 'Shroom! It's October, which means I've been putting up the Halloween decorations here in the Strategy Wing offices. Crows, ravens, pumpkins with plague doctor masks attached to give them beaks, Sensu Oricorio, and, honorarily elevated to birds, just for this time of year, even stuffed bats are hanging around the office. I'm sure Superchao won't mind taking them down come the end of October, what with how much they liven (deaden?) up the place!
We have our usual great lineup of sections for you this month. Even with the weather turning and ghouls emerging, the Strategy Wing team stays hard at work (and not, no matter what you might hear, because I offered to sneak some leftover Halloween candy to the rest of the team at the end of the month). SIMulation and Koops, Your Emblem is on Fire are on a brief pause, but we have some... unorthodox, shall we say for any New Wikisburg authorities reading this, electioneering happening in Getting that Payday, more Buzz Lightyear Adventures, an examination of Gourgeist, and our last look at Spore.
That's right, this is the finale of On the Origin of Species. Thank you, Zelen, for taking us on a galactic adventure in Spore and for leaving us off with some development history information. Be sure to check out the finale!
Should you feel inspired to join our team, take a look at the sign up page and send an application to our Statistics Manager, Meta Knight. You can guide us through a game or activity you enjoy, you can share some concise tips and tricks, you can suggest challenges to help readers developer their skills. It doesn't have to be long or exhaustive, and your skill level doesn't matter. Join in writing about something you enjoy doing that you want to share! If you want to talk through an idea, don't be afraid to reach out to me!
The scariest possible horror you could face this month may well be lengthy Director's Notes, so, let me sign off here so you can go and read what Strategy Wing's writers have put together for you this month!
Section of the Month
Congratulations go out to Ray Trace (talk) for winning Section of the Month by helpfully guiding us to Batuu's restrooms in The Sims 4: Journey to Batuu. If you enjoy what our Strategy Wing writers bring you each month, be sure to vote to show them your support!
| STRATEGY WING SECTION OF THE MONTH | ||||
|---|---|---|---|---|
| Place | Section | Votes | % | Writer |
| 1st | SIMulation | 3 | 75.00% | Ray Trace (talk) |
Getting That Payday
Welcome back, friendaroos, to Getting That Payday, the Payday 2 strategy guide! Now, for the last five issues, we've been going over a whole lot of weapon talk. I figure it's about time you learn where you're gonna use 'em! Today, we're going over a full guide towards the heist Election Day. Hope you're ready to help some little politician out there hit it big!
Definitions
In the first-person co-op shooter Payday 2, you cause complete and utter mayhem via the very powerful method of shitposting. Hate the police? Great! Get shooting! (I must say to readers of The 'Shroom that I am non-political and I do not intend any political undertones. [Really, I am not endorsing violence against the law and anything said in this article is about the video game Payday 2. Shoot cops there. (Saying this despite the fact that Payday 2 does have many political elements in it. [The more I speak the bigger the hole that I'm burying myself in gets... Uhhhhh, LOOK OVER THERE! A NEW TEARS OF THE KINGDOM TRAILER!])]).
Yes We Can!
Now, Election Day is about some vote rigging, in both Stealth and Loud. No, you won't be stealing hundreds of thousands, but you will get plenty of money once the job is done. The Elephant, a shadowy political figure, needs you to get his man into the office of DC, and for some reason, he thinks you're the best folks to do it. Starting day 1, you've got to figure out where the ballot machines are being kept. Going Stealth, you have to find and tag the right truck. You could, of course, just guess, but that's a bad idea. There is a "secret" plan C (in quotations, it's pretty well known), but we'll cover that later. Right now, you need to hack into a computer in a warehouse at the top left of the map. Doing this gets you the knowledge of what truck to tag. Just get over there, chuck the tag on the truck, and leave.
Of course, it is far more likely for you to get spotted by a guard immediately. When that happens, the heist goes loud. Hope you're packing firepower, because it's about to get bloody. The objective is largely the same. Find the computer, and start hacking. Of course, since the truck-tagging isn't going to work (on account of the dozens of cops checking your every move), you're instead trying to get where the ballot machines are being held by force. Bain (your man in the sky helping you out with hacking, planning, etc.) will need a good bit longer in order to figure out where the machines are being held. From here, it's just wave defense. Fight the cops and survive long enough for Bain to finish hacking, around 300 seconds. From here, you have two options. You can get out with only part of the info, or you can grab the rest for a money bonus. It takes another 300 seconds, and is completely optional. Whatever you choose, you have to get out afterwards. Find the escape van, and make your way to day 2.
Now that you've got the place, you've got to make some illegal votes. You'll have to make your way into the warehouse, and find the ballot machines. Each one takes 30 seconds to hack into. It's more efficient to get multiple going at once, so try to find and set up as many as possible at once. Exit the building, and make your way out to the van. As a thank you for getting the job done quietly, The Elephant dropped a few bags of gold off next to the van. Grab and secure those, and get out home free.
Perhaps, however, you prefer to cause some damage. If you want violence, then feel free. You still have to hack into the ballot machines, but since Bain has to also plant some false evidence that this was to get someone else into office, it takes 100 seconds per machine. Once you've got the votes rigged, you need to erase any evidence you were there. Find the primary computer, and hack into it to destroy the camera footage. It'll take another 400 seconds, so make sure you have plenty of supplies. From there, you just have to get out. Run to the escape van, and leave with a path of carnage behind you.
Now, you may have been able to get through day 1 stealthily, but you messed up by tagging the wrong truck. Hey, it happens to the best of us. In this case, you're gonna have to go with Plan C. Not having a way to access the warehouse where the votes are being stored, you're going to have to take a more… direct approach. Namely, disguising the destruction of various votes and voting machines in a district where the most popular candidate is your direct rival as a bank robbery. This is loud only, so make sure to pack some firepower. You're gonna be entering through a building next to the bank, where the ballot machines are being held. You'll have to hack into the primary server and scramble it. This could take anywhere from 60-180 seconds. It may also have to be rebooted a few times. Once this is done, you'll have to pull off the actual bank-robbery part of this coverup.
Planting some C4 on a nearby wall, you'll blow through both the wall to the bank, and several ballot machines. Afterwards, a thermal drill will be thrown down one of the elevator shafts of the building. Be careful, since there is a chance that a bulldozer (a heavy unit with heavy guns) or a cloaker (invisible until it drop kicks you onto the ground) will be waiting there for you. Grabbing it, you've now got to assemble it and drill through the bank door, standard heisting business. After around 6 minutes, the door will pop open and you'll make your way in. If there's loot, great! You now have to grab at least two bags, and make your way out. There's a small chance of a stacked vault with 12 bags of cash, but there's also a chance for a completely empty vault. If it's empty, congratulations! You've just proved Murphy's Law right, and got an achievement for it. Just get out of there to complete the mission.
Now you've got the run-down on your first contracted job, and how to get your first big Payday. 2. for PC, Xbox, Playstation and Nintendo Switch. I hope this guide helped out you heisters, since I had to squeeze writing this in between all my school work. Until next time, this is professional heister Kinger, signing off.
Pitohui's Pokémon Academy
Written by: Hooded Pitohui (talk)
Welcome back, class. I know many of you are eager for Halloween. I've seen you around campus, dressing up with Houndoom horns and Shedninja wings and those Hatterrene and Braixen costumes so popular around this time of year. Naturally, I thought we'd lean into the Spiritomb - dohoho - of the season and examine a Ghost-type in depth for this month's lesson. Feast your eyes, but not your mouths, for despite appearances, this Pokémon is not a treat to be plucked from the garden and eaten, on Gourgeist!
Before we can begin our work, I'd like to remind all students attending today that, as a matter of policy, I make the syllabus and reference notes available at the beginning of every class session. If you need an overview of our course, open up the box below.
First, a Smogon University course, this course is not. No, this academy's lessons are designed to get trainers of any stripe thinking about how they can raise their Pokémon, and, as a result, aren't designed to keep up with the widely-accepted metagame for the series. In some cases, the way I've raised my Pokémon may even flies in the face of conventional wisdom. If you're looking for top-tier strategies, do check out Smogon, but if you merely want to get a little deeper into raising Pokémon while still doing things your own way, feel free to use this section as a reference.
Secondly, know that, unless otherwise noted, these builds assume these Pokémon were raised in the seventh generation of Pokémon games (Sun, Moon, Ultra Sun, and Ultra Moon). Generation VIII cut some moves out of the games, and I'm not keen on changing the movesets for Pokémon I raised a few years ago.
Please note, also, that I'm having to guess at the effort value (EV) spreads of some of these Pokémon. Again, I raised these years ago, so I'm using stat calculators and working backwards to figure out their EVs in some cases.
Finally, since we all know the importance of citing our sources, I need to credit the design of some of the tables used in these lectures to Crocodile Dippy, author of the Pocket Handbook which can be found in early editions of Strategy Wing.Now, should you need a refresher on terms commonly used in this class, you'll want to take a look at this second box, instead. If you find yourself lost during class, feel free to message me, and I can update this handout with additional terms.
Base Stats: Base stats are the values associated with a particular Pokémon species, and are the same across every individual Pokémon of a given species. You have no influence on them. You can think of them as traits tied to a species. A chimp isn't ever going to be able to get as good as digging as a mole will be, and, likewise, an Abra is never going to have the defensive prowess a Shuckle has.
Individual Values (IVs): Individual values, as their name implies, are associated with individual Pokémon. They range from 0 to 31 in each stat, with 31 being considered a "perfect" IV and higher numbers corresponding to different stats. Magikarp A and Magikarp B will have the same base stats, but they may very well have different IVs. To stick with the animal analogy, one mole may be born with larger claws than another mole, and that first mole is probably going to have an easier time digging through dirt than the latter. Individual values are set in stone, strictly speaking, but you can use Hyper Training (from Generation VII onwards) to functionally get a perfect IV in a stat.
Effort Values (EVs): Effort values are the one thing you can easily change. A Pokémon can earn, primarily through battling, but also through means like the use of certain items or mechanics like Super Training, up to a total of 510 effort values, with up to 252 in any given stat. To finish off the animal analogy, no matter what kind of claws a mole is born with, moles who have more experience digging are probably going to be better at digging than moles which have never dug.
Nature: A Pokémon's nature is, more or a less, a stat modifier with a name meant to make it sound like a Pokémon has some personality. Natures will raise one stat by ten percent and lower another stat by ten percent. Some natures raise and lower the same stat, canceling out the effect and leaving stats unchanged. Natures can be changed with the use of special mint items from Generation VIII onwards.
STAB: STAB stands for Same-Type Attack Bonus, and refers to the boosted power of moves that match the type of the move's user. To illustrate this, consider the case of a Lombre, a dual-type Pokémon which is both a Water-type and a Grass-type. Any Water-type moves Lombre uses will have their power boosted by 1.5x, and any Grass-type moves Lombre uses will, likewise, have their power boosted by 1.5x. (There are circumstances where this does not apply, and, while the 1.5x multiplier is typical, some games use other multipliers.)
Is everyone ready? Right, let's get to it. This is normally where we'd jump right in with a look at Gourgeist's base stats, and don't fret if you've already made a header in your notes, for we will be getting to its base stats momentarily, but first we need to talk about Gourgeist's various forms. You see, Gourgeist is a Pokémon which comes in four different sizes. You can find Gourgeist that are small, Gourgeist that are average, Gourgeist that are large, and, finally, Gourgeist that are super size. Yes, yes, we researchers are masters at creative naming, aren't we?
Giggles at our creativity or lack thereof out of your systems, there are two matters affected by a Gourgeist's size, one which concerns us, and one which does not (the latter being that super sized Gourgeist have a deeper cry than Gourgeist of all other sizes). The matter that concerns us are Gourgeist's base stats. For every size increase, a Gourgeist loses fifteen points from its base speed, gaining, instead, ten points in its base HP and five points in its base attack.
You'll notice that Gourgeist's base defense does not change with the Pokémon's size, and you'll also notice that, at 122, Gourgeist's base defense is remarkably high. If you've followed our previous lessons, you've probably worked out by now that our aim should be to focus on Gourgeist's bulk, taking advantage of its naturally strong physical defense. To complement that bulk, we'd rather have high HP than high speed, so, as a result, our focus here will be entirely on super sized Gourgeist.
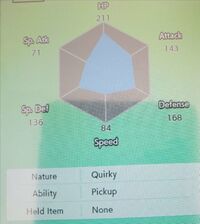
We've already determined that we'd like to focus on Gourgeist's bulk, so let's begin by assessing its defensive stats. We've noted its remarkably high defense, and turning to HP, we find that it's fairly decent. We can certainly work with 85 base HP, but we'll want to support that and raise it as high as we can by investing EVs into it heavily and making sure we have a 31 IV there. Special defense is more disappointing, sitting at 75, a number we can work with but that isn't ideal. We'll want a maximum IV here, because there's no harm in it, but when it comes to EV investment, it's hard to say at this stage whether we should invest everything into bulk by maxing out special defense along with HP or whether we should focus entirely on Gourgeist's physical stats alongside its HP.
To make this determination, we turn to Gourgeist's offensive stats. Gourgeist has a respectable base attack, and a dismal base special attack, which is helpful for our purposes, because it gives us a stat we can simply write off. We don't need to concern ourselves with special attack at all, and we don't need to give it any investment. Speed is likewise too low to use, so we'll write it off, as well.
Going off on a brief tangent for a moment, one mistake I've made here is settling for a neutral nature that neither lowers nor raises any stats. When raising your own Gourgeist, aim for a nature that lowers speed or a nature that lowers special attack. Ideally you raise special defense in exchange with a Careful or Sassy nature, but, if you don't care to get that specific, take anything that lowers one of those aforementioned stats and doesn't raise the other.
When looking at abilities with Gourgeist, Insomnia and Frisk are both decent options. Insomnia's sleep immunity can save you unnecessary headaches, and I would slightly favor it for offering immunity to a status condition, but Frisk can, by identifying your opponent's held item, help you to work out your opponent's strategy and avoid any tricks (and who wouldn't want to avoid tricks to focus on the treats this month?). The only ability to avoid here entirely is Pickup, which will be useless to you in battles against others, and, which... naturally, my Gourgeist has...
All of that laid out, we've still yet to make our choice, yes? Examining everything, the truth is, I see both options as equally reasonable. Focus entirely on HP and the physical stats, include multiple STAB moves for coverage, and try and keep your Gourgeist away from Pokémon with high special attack, or let Gourgeist's attack stat stand on its own, without investment, and shore up its defenses with a 31 IV and 252 EVs in special defense combined with, perhaps, Synthesis to give Gourgeist greater longevity. Either route seems appropriate, so long as you commit to one. Those of you who have been attending classes regularly, may, then, not be shocked to hear that I unwisely attempted to split the difference, doing both at the same time.
Yes, as you can see, rather than invest the maximum 252 EVs in HP, I attempted to, again, "even out" Gourgeist's defensive stats and make my Pokémon bulky all-around. I would heavily advise against this, but, then again, this is all about fun and stepping into the world of raising Pokémon, so don't stop yourself from doing what you want if you have an idea you like. Even with this all-around spread, I can't justify investing in Gourgeist's attack stat over maximizing its special defense. If you take any lesson away from this, it should be that, when raising your Gourgeist, you want to commit to your path fully, and your plan should hinge on special defense. Maximize Gourgeist's HP, and then decide whether you want to maximize its special defense and focus on defense and longevity or whether you'd prefer to focus entirely on its physical stats and leave special defense as the investment afterthought.
Moving on to look at my Gourgeist's moveset, a close examination, in conjunction with the previous remarks on moveset I offered, you should be able to tell that this moveset more closely aligns with the latter option. Evidently, I should have focused on Gourgeist's physical stats, with the build I have here. You can see the two STAB moves worked into the moveset for greater coverage, meant to build off of Gourgeist's attack stat. We'll get to those in a moment, however.
| Seed Bomb | Physical | The user slams a barrage of hard-shelled seeds down on the target from above. |
|---|---|---|
| Phantom Force | Physical | The user vanishes somewhere, then strikes the target on the next turn. This move hits even if the target protects itself. |
| Will-O-Wisp | Status | The user shoots a sinister flame at the target to inflict a burn. |
| Leech Seed | Status | A seed is planted on the target. It steals some HP from the target every turn. |
Will-O-Wisp is a move you'll want regardless of the route you take when raising a Gourgeist. It not only gives you a way to passively damage your opponent over time, but also halves the damage your opponents inflict with physical moves (outside of select situations, such as your opponent using Facade), which makes Gourgeist's high defense stat go even further. Immediately, this takes some pressure off of you when raising your Gourgeist, even further reducing the need to invest in its physical defense and making it easy maximize its HP and special defense without worry of jeopardizing its bulk.
Leech Seed, then, builds on Will-O-Wisp by inflicting even more damage on your opponent each turn and increasing Gourgeist's longevity by allowing it to passively restore its HP. It might be a slow restoration of health, but it can help this pumpkin Pokémon stay on the battlefield a turn or two longer even when there's significant offensive pressure on it, and even when faced with another defensively-oriented Pokémon, Leech Seed gives Gourgeist an edge. Helpfully, few Pokémon resist both seeding and burning, so even if one of your passive damage options is blocked off, you'll have the other at your disposal.
Now we return to the STAB moves in Gourgeist's moveset. To begin, we have Phantom Force. Nine times out of ten, I'd recommend against two-turn moves like Phantom Force, as they're quite predictable and give your opponent an opportunity to set up a counter-strategy or switch in a Pokémon that resists your coming attack. In this case, however, Phantom Force not only serves as a powerful physical STAB move that complements Gourgeist's high attack, but serves a dual offensive and defensive role. Even if you don't land your attack (or, at least, don't land it effectively), you've spent a turn in a semi-invulnerable state where you opponent can't (usually) damage you and where they're still being worn down by passive damage. If you've seeded them, you're also passively healing on this turn. Even in the worst case scenario where your attack fails entirely (as might happen if your opponent switches to a Normal-type), you've still done damage and bettered your position.
Now, for the last slot, if you're running a more defensively-oriented Gourgeist, you might want to consider Synthesis for a larger, quicker heal that can get Gourgeist out of a pinch and keep it on the battlefield. You might also, with either route, consider Gourgeist's signature move Trick-or-Treat, which adds the Ghost type to the target's type as a second or third type. This will make Phantom Force supereffective against your opponents, making it harder hitting. What I've done here, though, is added a second STAB move for extra coverage, so that I'm not up against a wall when, say, facing a Normal-type. This is perfectly respectable for a physical-oriented Gourgeist. There's not much thought here. I went with a powerful, simple, and accurate physical Grass-type move. You could choose Power Whip instead for extra strength, but beware it missing at critical times.
Well, it seems we've burned the candle down, as it were. Does Gourgeist look smaller to you? Ah, don't worry. That's only a joke. Gourgeist hasn't been burning away while I've been prattling on. It's still the super sized Pokémon it was when you entered today. Besides, were it feeling peckish, it would simply enrapture you with a song, seize you with its arms, and carry you away to the afterlife! Why, I hear besides those wandering around and answering doors in the dead of the night, its favorite prey are students who fail their exams. It's a good thing you lot don't have to worry about that, right?
Hmm, hmm, hmm, well then, keep up your studies. Class is dismissed, and I'm certain that you'll have studied before our next session, so long as you don't get too caught up with the Halloween spirit.
To Infinity and Beyond
Written by: Waluigi Time (talk)
Greetings, space rangers! We're jumping back into Toy Story 2 today, getting very close to the end as we start out the final zone. After dealing with Zurg in the elevator shaft, the toys continue their pursuit of Al to the airport to stop him from shipping Woody and the rest of the Roundup gang to Japan. So that's where we are today, Airport Infiltration! It's unlocked once we get 28 Pizza Planet Tokens, so it's available immediately after defeating Zurg. As usual, here's the music from the level.
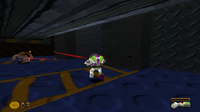
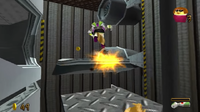
Starting things off on the floor of the x-ray room, head forward and to the left, then go through that corridor and turn right. It's pretty straightforward since there's only one way to go. You'll run into some Gunners and Rattlesnakes on your way through, and I do want to mention a couple things I neglected back in Al's Penthouse. First of all, the Gunners can only shoot straight forward, and are unable to hit you if you're above or below them. Second, their bullets can actually be deflected with a spin attack. My apologies for not mentioning that sooner! Anyway, in the room at the end of the corridors, in the corner you'll find a blue suitcase. Throughout this level you'll find both blue and orange suitcases, but the blue ones are important because they act as trampolines when you stomp them! So give this one a stomp and get up onto the first conveyor belt. At the end, you'll find a pole to swing across to the next conveyor belt, but you'll need to ride one of the orange suitcases that keep passing through to get enough height to reach it. Repeat this process for the second conveyor belt. On the third conveyor belt, there's blue suitcases, so use one as a trampoline to get on top of the x-ray terminals. You'll want to backtrack to the first conveyor belt across these, and at the end you'll find the first Little Tike passenger. Once you've got them, then backtrack again to where you were before. Near the end of the room, you'll find Hamm on a shelf to the left, but it's way too early to talk to him.
At this point, you can follow the last conveyor belt into the next room, which is... the conveyor belt room! With regards to progression, you have two choices. Either follow the conveyor belt to the end and trampoline off the suitcase to continue exploring above, or drop down to the right onto the floor. It really doesn't matter which one you pick first, but I'm going to opt to go down onto the floor first so we can eventually get the green laser upgrade, which will be nice to have.
But first, we have a challenge to take care of! In the corner you'll find Rocky Gibraltar (Rex misspells his last name as "Gilbraltor"), of all characters. It's an odd choice since he's a very minor character in the movie and doesn't even step foot outside of Andy's house, so how he ended up all the way here is anyone's guess, but here he is! Talk to him, and he'll ask you to find five weights in 60 seconds. Head left immediately and at the end of the room you'll find one of the weights by some doors, and right next to this one is a hole in the wall leading to the repair hangar, where there's another weight just a little bit straight ahead. Turn back into the conveyor belt room, and get back up onto the conveyor belt that leads into the room to find the third one. Drop down from the left side where you'll find a hole leading into another room, where there's another weight not too far from the entrance next to the stack of suitcases. Turn back, then grab the final weight underneath the conveyor belt, and head back to Rocky for the Pizza Planet Token. It's not a very difficult challenge all things considered, and you get plenty of time for it.
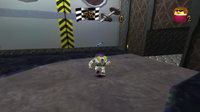
With that out of the way, head back into the repair hangar. They're taking apart a plane in here, so it's a bit of a mess. Go ahead to the left a bit first, and you'll find the green laser upgrade near a pair of Gunners. Once you have that, go over to the right side of the room instead. There's a loose set of airplane wheels that you can push to be able to get on top of the first wing. These wings are basically giant see-saws, so you'll need to weigh them down on one side before quickly running over and jumping to where you need to get to. At the end of the first wing, there's a second wing to jump to, and at the end of that one, you can jump onto the plane's tailfin. From here, you can jump onto the scaffolding surrounding the body of the plane. Here you'll find Mr. Potato Head's mouth (if you try to talk to him before returning it, he'll only be able to make muffled noises, with the exception of the words "mouth" and "Hover Boots"). What you're intended to do is leave and go return it to him back in the room with the stack of luggage, since you need the Hover Boots he gives you in this room, but we can actually cheese it! So I'm just going to keep going ahead, it saves a bit of backtracking.
Just to the left, there's more pieces of scaffolding to jump on, and a pole to swing up to the next level. Up here there's a chunk of the plane that's somehow floating? Hop over to the floating plane part and jump to the similarly floating poles. Be careful here, as the engines on the other side of the room will periodically turn on and blow wind across the room, which can send you off course and, if you're really unlucky, back down to the floor. There's also a Little Tike passenger on the lower engine. You can reach it by jumping from various points in the level (off the floating platform is probably the easiest) and grabbing onto the pole on the side. (There's nothing on the top engine, I checked.) On the section of scaffolding on the other end of the poles, you'll find a set of Hover Boots. You're supposed to use them to hover up to the remaining platforms and on top of the plane, where the Pizza Planet Token is. However, if you come across one of Mr. Potato Head's items that you haven't unlocked yet, it's kept inside of a box. The cheese strat here is that jumping on the box actually gives us enough extra height to be able to jump onto one of the platforms, and up onto the top of the plane! Grab the Pizza Planet Token up here, and also a battery, if you want. Before you leave, jump back down onto the scaffolding where the Hover Boots were, and carefully drop to the platform two levels immediately below it. There's another Little Tike passenger down here.
Also, I collected 50 coins in this room on my run - not because there was an abundance of coins in the level so far, but because I didn't follow my own advice and ended up tackling the conveyor belt room first. Sometimes the pathing on my practice run and what gets into the final section don't quite match up, but that's what practice runs are for.
That's everything we can take care of in the repair hangar for now, so head back into the conveyor belt room. We could tackle this now, but with Potato Head's mouth, we might as well make our way across and deal with that room first. Mr. Potato Head is off to the left around the middle of the room, and in addition to his mouth being gone, he's also lacking his mustache for some reason, even though it connects to his nose, not his mouth, and there was also no sign of the mustache when we grabbed the mouth. Oh well. Return it to him, and say goodbye, because this is his last appearance in the game. Anyway, as you probably know by now, he gives you the Hover Boots! They're found both here and back in Al's Toy Barn, and you need them in both levels. When you collect them, Buzz will be able to hover for a short time. Holding the jump button causes him to hover higher, though there's a limit to how high he can go, while letting go lowers him back down. You'll have a bit of time to react when they run out, because the circles coming from the boots will change from green and purple to red.
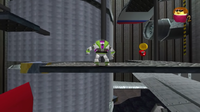
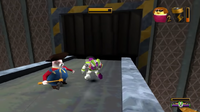
Now we'll turn our attention to that stack of luggage. Rex is here tucked away in a corner if you want to talk to him. Jump up onto the purple suitcase at the bottom and climb across the suitcases, until you reach another purple suitcase closer to the entrance of the room. There's a pair of Hover Boots here, so collect those, head to the left, and just hover up to the top! (There's also a battery on the way if you want one, but you'll probably need to make a second trip if you try to go for it.) At the top, jump over to the conveyor belt in the middle of the room. Here we'll find the boss of this level, the Prospector, the last boss in the game to actually appear in the movie! Luckily, the conveyor belt is stationary, so no need to worry about that. He's not that interesting, his only attack is striking the ground with his pickaxe, sending a projectile across the floor. However, he is immune to Buzz's laser, so you'll need to use your spin attack instead. Ten hits and he's done for, and we get another Pizza Plant Token! The Prospector also has one of the sillier instances of being out of bounds in a boss fight. If you stand on the sides of the conveyor belt rather than the belt itself, he'll completely ignore you and just wander around aimlessly.
Don't jump back down just yet, though. There's a blue suitcase on one side of the conveyor belt. Use it to jump up, grab onto the nearby pole, and climb it until you can jump onto the zipline above. Zip across to another conveyor belt, and pick up the Little Tike passenger up here. (The suitcase also makes things weird with the Prospector boss fight, by the way. If you stand on it, he'll keep trying to attack you, but he can't actually reach you. It's also possible to get the Prospector to glitch up onto the suitcase.)
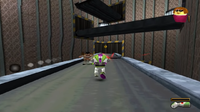
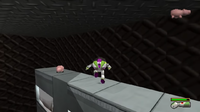
There's nothing in the way of keeping us from cleaning out the rest of the conveyor belt room, so let's get to that. Climb up onto the conveyor belt, hop onto a blue suitcase, and trampoline up to the pole above. Jump over to the conveyor belt, and use the suitcase there to get to the conveyor belt above that one. Things get a bit more dicey from this point on, as you'll have enemies to deal with and gaps in the conveyor belts (what airport employee thought this was okay?!). If you're having trouble, I'd suggest walking along the sides of the conveyor belts, so you don't have to worry about fighting against it or flinging off the side when making jumps. Just watch out for Gunners. At the end of this set of conveyor belts, there's a pole that leads up to another set of conveyor belts. Rinse repeat up here, then climb up yet another pole! (This bit of the level doesn't make for good writing, I'm sorry) Jump across to the other kind of poles that you swing across to yet another climby pole, and at the top, there's a zipline to take over to the last set of conveyor belts up here, finally. At the end you'll find the last Little Tike passenger. Now here's the fun part... Hurling yourself off the top! See if you can dodge all the conveyor belts on the way down to watch Buzz flail for the longest amount of time.
At this point, there's nothing left to do but visit Hamm back in the x-ray room to turn in the coins if you haven't already, and return the passengers to the Little Tike pilot. I've already mentioned Hamm's location at the beginning, but not the Little Tike pilot. You can find him in the back of the repair hangar on the side closest to where you entered. Whatever order you decide to do these in, grab those Pizza Planet Tokens, and finish the level!
Another level down! With the Hover Boots unlocked, we now have access to Buzz's full set of abilities, which means it's time for one more backtracking issue! Next time, we'll be going all the way back to Al's on a Saturday... ALL THE WAY BACK TO AL'S!
Gameplay screenshots were taken from Nin's playthrough on YouTube.
On the Origin of Species
Written by: ZelenPixel (talk)
Back again! Happy Halloween also!!! This was going to be included in my history of Spore overview last month, but it was getting ridiculously long as is, so I had to split this up, and this also allows me to write more about the prototypes than I was planning. This is also the 12th issue of this section! Not actually the year anniversary, since I had to skip a few months, but hey! Make sure you read the previous issue for my coverage of the development history of the game, because I put a lot of effort into it, but also because both of these coverages will help contextualize each other.
Prototypes
Unlike any other game I'm aware of, the Spore website features a bunch of prototypes you can download and see for yourself. Here they are! There's so many interesting things to see here, so let's do that. They're kind of sorted here, with the most interesting prototypes being at the end!
Mac OS X Gift Pack is there. I use Windows, so I never downloaded it, but it just tests some of the official website's Sporepedia feeds. Also, there's Crowd, which is is a Sim City 4 prototype. I have no idea what it's doing here! It's mentioned it was made by the Spore prototyping team, though, so maybe that's why.
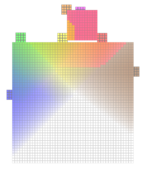
TextureBox is one of the weirdest prototypes of the bunch. I don't understand how it works. The description makes it sound pretty complex with the cellular automata, but in practice, it's just a bunch of tiny colored canvases forming big rhombuses on blank larger canvases when they're in contact? I'm sure it's cool, but from my perspective, it's not much. I don't think any of this was used in the final game either. You can see some coverage of how the final creature paint system actually works here.
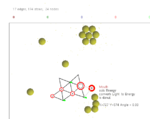
NetCity is a programmable simulator used to explore the evolution of complex behavior from simple components. It uses a system of nodes connected to each other that do things on contact with other nodes, or move or detect things, for example. It's interesting, and seems rather complex, but, in practice, every example that the prototype comes with has most of the nodes end up just dying out after some time. It mostly depicts living organisms, though, like fish or cells.
Cell Culture is a simulator of how life spreads on a small plane, disc, or planet, all with various elevation. That life has its own assigned color (in fact, culture), and a bunch of variables, like how fast it spreads, what elevation it prefers and how well can it terraform its current elevation to match its preferred elevation, the population in a cell, etc. It's interesting setting specific parameters and watching them go loose evening out the environment or whatever! As life spreads, it may gain a different set of parameters, mainly the color, and if you set only one culture loose, it's going to become very multicolored, eventually entirely randomizing the colors, and having many patches of colors moving and shifting until they eventually mostly settle down! Worth noting none of this was used in the final game either.
City Maze is a prototype for the Civilization stage. You have a small field with "sim creatures", or just sims, on it. You can place buildings with certain functions anywhere on that field, unlike in the final game, where the buildings can only be in specific spots in cities. You have to maintain your sims' well-being with houses so they don't get frustrated and leave, and they can also work in factories to make money to purchase more buildings. Sometimes there are raider attacks, which cause some sims to leave the city, but you can defend against them with a special type of turret building that citizens go into permanently. Sometimes invaders will just enter buildings and become one of your citizens for some reason, which is how the population grows naturally without having to get citizens through a menu option. There's also a bunch of cosmetic placeable things, alongside a weird thing that attracts citizens to it, but that's basically the gist of it. It's not exactly like the final Civilization stage, but it's interesting! It's also similar to the City stage in another prototype. I'll cover that later in the section.
Gaslight simulates the formation of stars in nebulae in a flat field. It's also a bit confusing to me, but it's also neat! You can watch stars spontaneously form, move around, explode, with the lifespan of some stars lasting a few mere seconds. Sometimes there are even chain reactions of explosions! I'm sure this would be much more interesting to an astronomy nerd, but I'm more of a biology nerd, so I don't have much to say about this, sadly. You can draw a whole bunch of stars in one spot, watch them orbit each other and die out until only red giants are left. Neat! Once again, this wasn't used in the final game.
ParticleMan simulates gravitational attraction between particles in a cloud. This system was used to study such gravitational dynamics as orbits, nebula formation, star formation and particle streams from sources like pulsars and black holes.. This prototype is somewhat adjacent to Gaslight, also involving stars, and it's also probably something more interesting to astronomy nerds than myself. I do sometimes like to leave it on, set the camera to follow the largest star, and see how much it can grow! This also wasn't used in the final game.
WaterBoy is a water simulation. You can modify the terrain and move the water around on it via fountains or drains, or just let it flow to places. Unfortunately, it's very easy to break; for example, if you place one too many drains in a place, or shift the terrain up and down way too much, or some other methods I can't figure out, it will make the water go all ripply, and if it isn't resolved, eventually it'll just "explode" into the sky and will be absent until you entirely reset both the terrain and the water. It's weird! It's still a nice prototype, with nice looking water, and fun to toy around with. And, as most of these, this wasn't used in the final game, where the water is just kind of a sphere that overlaps the planet and there's no water physics to speak of.
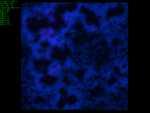
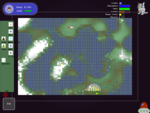
BIOME uses cellular automata (similar to Conway's Game of Life) to simulate many various things. The examples that come with the program include some that just form pretty shifting patterns, a simulation of the formation of ice crystals in an maze-like pattern, a simulation of forest fires burning out a forest and then it regrowing, the actual Conway's Game of Life, white noise, galaxies, etc. Some examples can be in a continuously moving spiral pattern, which can be tricky to work with sometimes. I like BIOME a lot, it's very interesting! It wasn't used in final either, though.
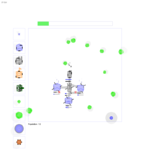
Tidepool or Tide Pool is a sort of minigame using water physics from WaterBoy and the forest fire simulation from BIOME. Tide Pool later inspired SPUG and GonzagoGL. In this one, you play as a little flying blue or red (depending on the amount of water you have) orb with eyes and wings trying to put out fires by creating water, so the similar, if wingless (though you can also hide your own wings) yellow orbs, called critters, don't die. The controls are a bit confusing at first, but they're explained in the RTF file the prototype comes with. It's not much, but it's neat! I like the little flying guy you play as.
SPUG is a prototype of GonzagoGL, more or less. Both are prototypes of the Creature Stage as well. It's a lot like GonzagoGL, but far more simplistic, with a flat terrain in flat colors where you play as a wireframe tetrahedron and hopefully defeat your prey to eat it. You can level up at any time with no cap on any of the values, which, for example, can lead you increasing your speed so much that your energy will completely run out the moment you try to move faster. It's not particularly fun to play, but some things in it are pretty interesting, comparing to GonzagoGL!
Space
Space deserves its own section, as it's one of the two most interesting prototypes, both also being the only ones with actual gameplay. It's the only one with music! As you may be able to tell, this is a prototype of the Space Stage, with a lot of the systems already in place. You can visit planets, terraform them, place colonies, and talk to the NPC empires scattered around the star field, a lot like the final game.
A thing unique to this prototype is that you can scan plants and creatures and add them to your encyclopedia, which just lists their name, type, and diet or elevation where applicable. There are actually aquatic creatures and plants, and plants that only live on certain elevations, both not an element in the final game! The encyclopedia also lists how many species you've scanned, but, unfortunately, I've never been able to scan them all even when I explore every system imaginable, as the game doesn't guarantee every species will spawn in the star field. Also, the sapient species from this game, as well as Tripods (you may know them better as Willosaurs) can make an appearance as random animals on planets, and are the only animals that aren't from our own planet!
You can earn money passively by just being on the planet of your colony, or allied empires' colonies. Instead of waiting for the money to reach the $5000 cap, you can speed it up with the Time Accelerator, and then zoom out of the planet to get the money. You can spend that money on various tools, and you'll need the InterSteller and SETI right away in order to move to other systems and detect any sapient life within them. You also spend a little bit of money every time you move between stars, unlike the final game's spaceship energy system.
There are four empires in the game: the yellow-colored Meeps which you play as and have 7 systems by default, the green-colored D-Saurs with only 1 system, the orange-colored Fanches with 10 systems, and the red-colored Zards with 6 systems. You can communicate with each empire and ally or attack them, and they'll try to offer you missions that don't really do anything, and allying with them also doesn't seem to do anything, beyond letting you get money by tribute from their colonies. The relationship systems with other empires don't seem to be built in in place yet, so you can meet an empire and ally with them immediately after, which is funny! NPC empires don't spread out to other systems, and I'm not sure if you can capture their planets or not. You probably can, I've never tried it.
You can place colonies on a planet which will either grow or shrink depending on their environment, and they'll just produce money there. To terraform, you place an Atmo Generator on a planet, and then you can put plants you pick up in your cargo once there's enough atmosphere, which opens enough space for animals, then you can start placing down colonies. It appears that the systems upon which life spreads on the planet is similar to what's used in CellCulture, interestingly enough. Terraforming actually feels a lot more tricky to deal with than in the final game, despite what it may seem at first, and this planet I tried to colonize just had a large dead zone where no plant wanted to grow for some reason, regardless of the plants' preferred elevation. You can also start placing down as many colonies as you wish, and, unlike the final game, they can't go on unterraformed planets at all, and will die out if there are no animals.
There are other things here, but that's the gist of it! Very interesting prototype! I also really like the music in it, especially the solar system music. The songs from this prototype kept playing in the 2005 and 2006 videos of the game I referenced earlier! That, or at least really similar songs, but point stands! Also, this game also has some unused content of its own, though it mostly extends to a bunch of textures, and a few commented-out species, from my understanding. One of the image folders mostly consists of things from the swf on the 2005 Spore website!
GonzagoGL
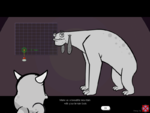
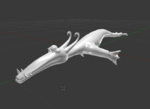
GonzagoGL, as previously stated, is a prototype of the Creature Stage, and is the most interesting prototype by far. It was the final prototype developed for the game! You play as a unique blue creature, which is actually a model seen in some early texture tests, like here, where the filename refers to it as a beetle!. All the other creatures are tetrahedrons with eyes, and each creature (you can tell them apart by their color and sometimes size) has its own set of behaviors and diets; for example, the herbivorous pink creatures tend to herd together in huge groups, and the baby blue (called so in code) creatures are large carnivores that can roar and deal a lot of damage to your creature.
The blue creatures, similar in color to your own, are actually your own species as well despite also being tetrahedrons with eyes, and you can socialize with them to get them to follow you and help out with attacking other creatures, or mate with them to increase your stats. Unlike the final game, the creatures you add to your pack will only stay in it as long as you keep periodically grooming them, which plays a cat purring sound.
You can hunt other creatures or eat plants in order to gain Food Points, which you gain as long as your hunger meter is full. Eating creatures will net you more Food Points than eating plants, and NPC blue creatures are stated to be carnivores in the game's code. You can hunt creatures by approaching them and then engaging in a simple fight where you basically stab them and try to not expend your energy too fast, and try to avoid being stabbed yourself. I do it by mostly just going back and forth to attack and avoid attacks myself.
You can use Food Points to mate with other blue creatures (as long as they're in heat, actually, which is indicated by them having a blue circle around them), upon which you get one Evolution Point to spend on your Speed, Attack, Defend, Stealth, Climb, Swim, and Brain. Most of these stats are self explanatory, Swim doesn't actually seem to do anything as you can still get stuck in "water", Brain just makes you complete the game once it reaches 5, and Stealth, once maxed, can make your creature invisible to other creatures at all times and get easy kills, which is pretty strong. It's also worth noting that your creature will be stealthier near trees too! A lot of this is pretty different from the final game, where stats are only increased from defined parts, and stealth is only a timed ability instead of a free "sneak up on creatures to eat them easily forever" card. The combat is different too, you only have one attack here and it goes slower generally.
There is actually a whole planet to explore, with mountains and bodies of water! It's significantly smaller than planets in the final game, and creature nests will be sparser the further away from the spawn point you go, but it's still pretty impressive! There are actually several planet layouts stored in the files, which I haven't been able to see, but it's pretty cool. This is my sloppy little segue into the unused or not-easily-seen content in the game, which there is a lot of! Some of the most interesting unused models includes the ones in the gonzagogl/Data/models/Underwater folder, which features Aquatic stage creatures from the 2005 showcase, including even the aquatic Willosaur, with the filename of swimmingtripod.obj! None of these models are textured, but this is still great! The models folder in itself also has a bunch of stuff labeled TribalGame (mostly for creatures) because, yes, this is actually a prototype for several stages!
Thanks to this video for help on this. You can also view some creature gameplay in that video, with music from the Space prototype!
GonzagoGL has a bunch of other stages and different launch states, and they can be loaded in a similar way to Spore's own launch states, by setting them on your shortcut. For example, -exception makes the game crash instantly upon loading! This is actually my first time trying out any of these launch states, so my info isn't going to be as comprehensive.
-tribemode seems to be similar to the final Tribal Stage. You can gather food, buy tools (with food), all that stuff. Wild animals are represented by faceless tetrahedrons, referred to as herds of several creatures, and they actually have more unique behavior, such as grazing and stuff, which isn't in the final game OR the creature game here. You can set specific tribe members to be nesting, which I think should produce a baby, but I haven't figured out how it works. There are also NPC tribes, which actually use the same creature model as you do! Wow! I figure you can attack or recruit them somehow. I haven't played that much of it, admittedly.
-citymode is based on the scrapped City stage. Your creatures are tetrahedrons with eyes again. It's actually kind of like City Maze and the Civilization Stage, though, like the Tribal Stage, each individual city member is selectable and you have food to worry about. There are also nearby tribes. You can select citizens to gather food from farms (they'll go to farms automatically as long as you have a farm building) and trees and sell it to tribes, upon which one of your citizens will pick up the bundle and deliver it to the tribe you selected. Selling food to tribes will also make them like you more.
Upon upgrading your city hall, you can buy the recruit (or temple) and trade buildings, and, by clicking on tribes, you can initiate trades with them, or allow members of a selected tribe to go on pilgrimage where they may join your city as a citizen. Othewise your population just kind of grows on its own. You also have to maintain the citizens' needs or else they start fighting each other.
This state is particularly interesting, being a prototype of a stage that isn't actually in the final game, and one can only wonder what it would be had it made the cut! As I mentioned last issue, it's actually pretty different from the City stage as shown in the 2005 and 2006 showcases, where it was a lot more like the Civ stage.
-civmode is the actual Civilization Stage prototype. There are vehicles now, and even a minimap like in the final game, but no creatures! You can send your land vehicles to place embassies on cities which I think will earn you some more money, and you can also attack and be attacked by other cities. There are land, amphibious (not sea!), and air vehicles, similar to the final game. I can see similarities to the final game's Civilization stage, but this is, admittedly, confusing to me. It's worth noting that these launch states have no official acknowledgement of their existence, let alone any actual documentation, so you have to figure out things on your own.
-spacemode only loads in a black screen with text saying "Hi, I'm in cSpaceGameMode::OnRender()", and the only space data seems to be the camera file, which has two lines of text and nothing else. You have another prototype for the Space Stage anyways!
Not a launch state, but I have to mention this somewhere; you can edit Gonzago.ini to launch the creature game in a different state that can be found in the files (like "predators", "socialtest", "readymelee", etc), which will spawn different creatures on the same terrain generally. Some of these types will have different creature colors that seem to fill similar functions to the ones that spawn by default; for example, brown creatures are similar to baby blue creatures, both being large carnivores, though there's a few minor differences. So I wrote a lot here, I love GonzagoGL if you couldn't tell.
And that's it, for real! Copy pasting these from the previous issue, for further reading about cut content, you can visit the TCRF page on the game, the SporeWiki, or the Spore Modding Community Database, which has pages on cut content and other assets. Again, it's got a really fascinating development history! More people should know about it and cover it!
I know like half of this whole Spore section was spent on me mumbling about in the Space Stage not accomplishing much, but, to those who read any of it anyway, thank you so much. This was very fun to do! I think this section should make it clear that I adore this silly little game more than any other, considering how much I've been willing to ramble on and on and on about it, which has really been so much fun. I should note that I am willing to bring back the section as one-offs or just entirely for another playthrough, if I wish, but, for now, that's it!
| The 'Shroom: Issue 187 | |
|---|---|
| Staff sections | Staff Notes • The 'Shroom Spotlight |
| Features | Fake News • Fun Stuff • Palette Swap • Pipe Plaza • Critic Corner • Strategy Wing |


