The 'Shroom:Issue 132/Strategy Wing
Director Notes
Written by: Meta Knight (talk)
Hey there everyone and welcome to Strategy Wing! I hope you're ready to spring ahead into all of the great sections. I have some good announcements to make. Chester Alan Arthur (talk) has joined this team bringing about two new sections! If you want to conquer Japan or look at shoes, you should definitely check them out. The life bug has caught a few of our other writers this month, but it's always a pleasure to have new sections on board. Please consider signing up if you've got a fresh idea or want to spread your knowledge of gaming! That's all for now, please enjoy this issue!
Section of the Month
Congratulations to Yoshi876 (talk) for winning this month! Thanks to YoshiFlutterJump (talk) as well for his section!
| STRATEGY WING SECTION OF THE MONTH | ||||
|---|---|---|---|---|
| Place | Section | Votes | % | Writer |
| 1st | Pokédex Power | 15 | 53.57% | Yoshi876 |
| 2nd | YoshiFlutterJump's Tips and Tricks | 11 | 46.43% | YoshiFlutterJump |
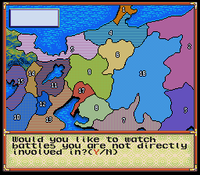
Chester Alan Arthur tells you to the first step in conquering an empire!
[read more]
So You Want to Conquer Japan?
Written By: Chester Alan Arthur (talk)
By: Chester Alan Arthur (talk)
Have you ever wanted to conquer Japan? Have you tried but failed? Do you just not have the right strategies? Have you come up short time and time again? Well don’t worry folks, because your old pal Shoey is here with his foolproof multi-part plan to conquer Japan (in Nobunaga’s Ambition for the SNES).
Right off the bat, this is only gonna help you in scenario 1 of Nobunaga’s Ambition. Quite frankly, the other 3 scenarios have like 50 fiefs and boils down to getting lucky (believe me it took me like 4 months when I did it). Scenario 1 only has 16 fiefs and doesn’t take a million hours.
So first thing we gotta do is choose our fief
One of the things I like about this game is that every fief starts with a different amount of troops, and have different terrains. The only constant is that each fief has a castle and a town. I like that because every fief gives a different playstyle. It gets pretty interesting because fiefs can have things like forests and mountains, so terrain can really mix up your defensive strategies. Another thing is that each fief has a different population from which you can draw troops from. This isn’t a particularly important thing, but I have run out of people in a fief before. First things first, never chose fief 12 because it's the worst fief. Fief 12 has a small amount of troops, ambitious neighbors, and your terrain is just a flat area, so you’re more than likely going to get invaded turn 1. Looking at the map you’ll notice that fief 1 has only one neighbor. You might think “hey this is a good one”, but watch out because it’s a trap. While fief 1 does indeed only have one neighbor, it also has low starting troops and low civilian morale. This means that at least 70% of the time you’ll face a revolt in the first three turns. One other thing to note is that fief 17 is Oda Nobunaga’s fief. You’ll want to avoid being neighbors with him because he has the highest amount of starting troops and is generally aggressive.
Personally, I’ve always had great success with Fief 2 under Kenshin of Echigo. I find that his fief has a solid number of troops and good terrain. In addition, his civilians and troops have high loyalty, so they rarely are rebellious. For that reason, I’m going to be writing this section from the perspective of choosing fief 2.
Now that we’ve chosen our fief, it’s time to do what is probably the worst part of the game. This involves the random number generator to decide our stats. This game has five different stats, and to explain these stats we will now refer to 2012 Shoey’s review of Nobunaga’s Ambition:
Health: This is pretty self-explanatory. The higher health you have, the longer you will live, and the lower the chances are that you will get sick. Being sick prevents you from moving your Daimyo to a different Fief, and prevents you from declaring war effectively. Drive: This affects how successful your invasions are, and I'm pretty sure the higher the drive stat is, the easier it is to train your troops. Luck: This mainly affects how successful your offers to marry your daughter to other people are. It also might help with Ninja attacks. Charisma: Helps make your efforts to marry your daughter off more successful. Intelligence: Helps with the effectiveness of wars you declare, goes up if you win and down if you lose.
Of these stats luck and charisma are really the least important, since we aren’t going to deal with diplomacy a lot. Health is really important because in this game you can only do one action per turn. Each turn represents one season in a year, so if your Dayimo gets sick you’re probably gonna waste a turn resting. Additionally, if you rest in a season you get invaded, and you can’t personally control your troops in battle. Drive is important because the higher it is, the faster your troops train. Drive might also determine how high your troops' max training level can be. It’s either that or it’s determined by which fief you pick. Then finally, intelligence is important because the higher it is, the better your troops do. Here’s where it gets tricky though. You see, the stats are determined by a fast moving number generator. It’s basically luck to get any high stats, but a good rule of thumb is to not give up till you hit over 500 total stat points. However, if you got really high Health, Driver, and Intelligence you should be fine to just start. Now that we’ve chosen our fief and got our stats we can actually play the game. Tune in next month when we begin our conquest of Japan!
Galactic Expedition
Written by: ![]() Meta Knight (talk)
Meta Knight (talk)
Metroid II Walkthrough
Current Inventory: 4 Energy Tanks, 210 Missiles, Morph Ball, Bombs, Spider Ball, Ice Beam or Wave Beam or Spazer Beam or Plasma Beam, High-Jump Boots, Varia Suit, Spring Ball,Space Jump
Metroid Counter: 27 killed, 12 left
Hey everyone and welcome to another exciting adventure! It's been a while since the last part, but here we are in Area 6. We're going to take down some more Metroids and maybe find some new surprises. Currently, from in the save room, head to the right, fall down the pit, and exit through the door. You'll be in a huge open area, what could be the outside of a tower. Walk directly right and you'll see a Metroid shell. Stand on the center to fall through. You will fall down into a liquid, but it won't harm you. Drop down more to the ground and head left to get a Missile Tank [220].
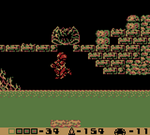
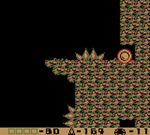
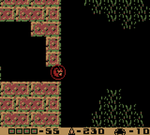
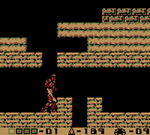
Climb back up through the Metroid shell where you were. Use the Space Jump to keep moving through the air. Keep an eye out for an opening along the right wall, and when you see it go through. You'll be in a long corridor with several spikes all over the place. You need to Space Jump to maneuver through the deadly room. I recommend several short taps on the jump button so that you don't jump high enough to hit the ceiling spikes, but still can get above the spikes in the middle of the room. When you make it across, head to the right. You'll be greeted with a new deadly encounter, the Zeta Metroid!
Boss Guide: Zeta Metroid
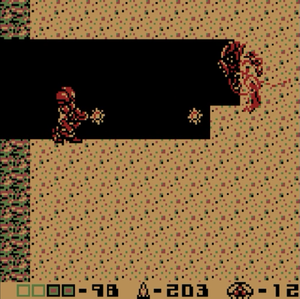
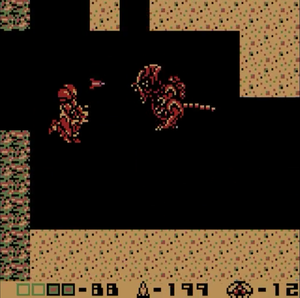
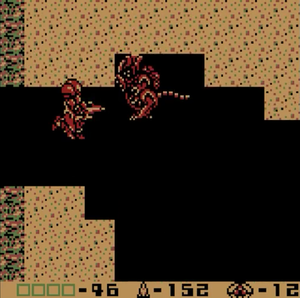
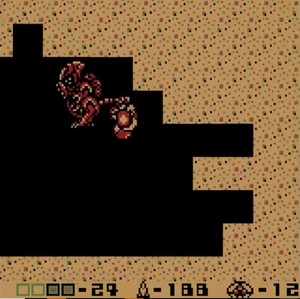
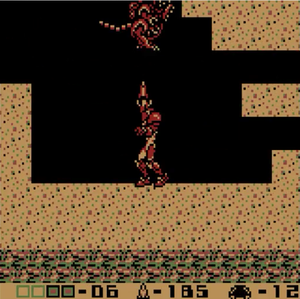
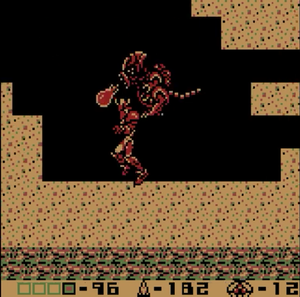
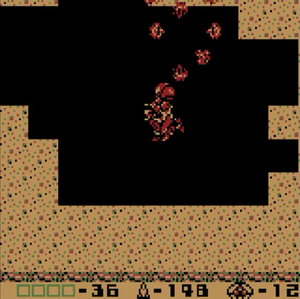
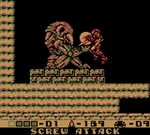
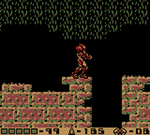
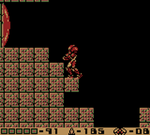
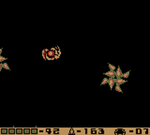
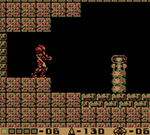
The Zeta Metroid is the next stage in the Metroid evolution cycle, and boy does it show. These things are dangerous to handle. This particular room doesn't have a lot of space, so before you do anything, get rid of some of the sand in the room. The Zeta Metroid will not attack until you take a step forward, and it will do quite a bit of damage. When you're ready to fight, simply trigger the fight. The Zeta Metroid has intense fireball attacks and is also physically big. You need to be careful to dodge the fireballs and not bump into it at the same time. Use your missiles to try and aim for his head or abdomen. Getting behind him and shooting his back will also work, but you cannot stand on the ground and hit him. Your missiles will not do damage that way. Keep your distance, and move around to get rid of him. You might need some buffer damage for this fight. It will take 20 Missiles to defeat the Zeta Metroid.
| Image Guide: Zeta Metroid |
|---|
Back To Path
Well after the Zeta Metroid is defeated, you'll have to go back through the long spiky corridor. Be very careful, as it would be annoying to die here. You'd have to fight the Zeta Metroid again. When you're back outside, continue to Space Jump upwards along the right wall, still keeping mind of the spikes. You'll likely notice a Missile Tank as you climb up. To get it, land on the flat ledge above it, and stand on the right side of the spikes to bomb a break a hidden block. Drop down in Morph Ball mode to obtain the Missile Tank [230].
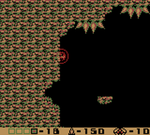
Space Jump up and you'll see another opening above. Go through it and you'll immediately be ambushed by a Gamma Metroid. Get to ground immediately so you don't fall down and unleash your missiles on it. If you need a detailed refresher on how to handle them, check out this issue. You might also be low on health from that Zeta Metroid encounter, so be extra careful and take it out quickly. Fortunately though, when he's defeated you can get an Energy Recharge by using the Spider Ball along the left wall and crawling into the opening. You likely won't have the time or resources to get here while the Gamma Metroid is still alive in this room, but you're welcome to try if you need it in a pinch. This is also a good spot to return to whenever you feel low on health in this area since there's going to be quite a few unpleasant encounters.
When you're ready, head back down out of this room to outside the tower. Space Jump your way to the left while being careful not to fall down, as it's a long drop. You'll see a small opening with a Metroid shell and a Missile Recharge. Go ahead and refuel your missile supply, and if you're ever low you can come back to this spot. For now, use the Spider Ball to scale the left wall. The reason for this is that there is a breakable bomb block with a narrow path. Bomb the block and head to the left.
You'll see a Metroid Shell and at the end of the room be ambushed with another Zeta Metroid! Use the same pattern to defeat it as before, except this time there's more room to start with. Be sure to utilize the space to dodge the projectiles and get around it. You might even be able to stand on one of the block stacks and just unload a large number of missiles on it. When it is defeated, use the Space Jump to go through the narrow opening in the ceiling. From here, use the Spider Ball to scale the top wall and bomb the block.
Then, walk to the right and bomb another breakable block. You'll see a Chozo Statue. Drop down and once again, bomb the blocks to get to the Chozo Statue. You'll definitely want to pick this item up because it is the legendary Screw Attack! This will give your somersaulting jumps an electrical charge that will defeat enemies. It is pretty useful because you won't have to worry about bumping into things when you Space Jump around. Head back the way you came out of this room to outside the tower.
When you're back outside, Space Jump all the way up while keeping to the right to see another opening. Take the entrance and there'll be another narrow corridor with spikes. Carefully dodge them and make it to the next screen. You'll be in a room with a lot of sand. Shoot it out of the way to make room to fight a Gamma Metroid at the end. When he is defeated, there is nothing more to this room so head back and to the outside area.
You actually will want to Spring Ball onto the ceiling and Spider Ball along the wall. Just as the wall turns 90 degrees into a ceiling, start bombing the blocks so that you can see a hidden path. Keep bombing in that area until you reach a narrow tunnel, and follow along to pick up an Energy Tank [5] and a Missile Tank [240]. When you're at the end of the tunnel, bomb where you're at to head back down.
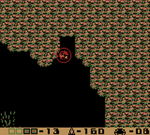
As you fall, move slightly to the right. You'll land relatively soon next to a rhino-like creature. If you were too far left and notice you're falling a long time, simply Space Jump back up. Along with this platform, you'll see a small pit that you should jump in. From this point, you'll be in a completely dark room. It's incredibly difficult to see, but your goal is to get a Missile Expansion [250] that is to the right and below. It's hard to keep track of where you are, but if you bomb and just fidget around to where you can go you should be able to get it. Also, try to remember how you got there so getting back is easy.
There's also a pathway that leads to an Energy Tank, but you already have the maximum amount of Energy Tanks that you can carry, so unless you're low on health it isn't worth it, but even then there is an Energy Recharge not too far away. It's also worth noting that your maximum missile count is now 250, which means there are no more Missile Tanks to obtain. If you want to go grab the Energy Tank you can, but when you're ready to do your best to head back to the main outside area.
When you're back outside, move left and jump off of the building. I recommend falling with a Screw Attack active because there's a lot of enemies here that could damage you otherwise. Keep along the right side and you'll see a ledge that you can go through. In this room, move right and you'll fall down a fake floor. There are four red doors along the wall. Each one contains a different beam. From top to bottom they are Plasma Beam, Spazer Beam, Wave Beam, and Ice Beam. If you do not have the Ice Beam already, I highly recommend getting it now. There's a reason for this, which you'll find out about later.
When you've got the beam you want, drop down into the next room and head left so you're back outside in the main area. From here, Space Jump up, this time staying along the left side of the wall. There will be a passageway for you to go through. Once again, dodge the spikes to get through this corridor and there will be a Gamma Metroid for you to eliminate. This room is standard, so it shouldn't be a problem.
Go back outside and drop all the way down, keeping to the left again. You'll see another open path that you can go through. If you fall in the water it's okay, simply jump back out. There's yet another spike room that you have to dodge through, but this time you're greeted by a Zeta Metroid! There's a lot of space here too, so you're able to get around the room and take him down fairly quickly.
When the Zeta Metroid is gone, you'll hear the planet rumble as the lava lowers to the next area. Head back right to the main area. Space Jump up and look to the right and take the first opening you see. You'll be back in the Save Station where you started. You might be thinking "Wait didn't we just go in a big loop"? Yes, we did, but the reason we took the route we did is to get the Screw Attack earlier and have Energy/Missile Recharge stations available. This is a good end point for now though, so I'll sign off and see you on the next adventure!
Observing a New Sole
Written by: Chester Alan Arthur (talk)
Hello all! It's me Shoey here with a brand new section; Observing a new Sole (name provided by Meta Knight), yayyyyyyyyy! In this section, I will be looking at changes made between original games and their direct sequels. I’m going to have 3 categories for this section -- What's In, where we look at new features in sequels; What's Out, where we look at what has been removed; and Changes, where we look at what features have changed between games. Since I got this idea from thinking about Ogre Battle while I was driving a forklift at work, I think it's only fitting that the first section be about my two favorite tactical RPGs, Ogre Battle: March of the Black Queen for the SNES, and it's sequel Ogre Battle 64: Person of Lordly Caliber. Before I start, I'll go ahead and give a little description of Ogre Battle, since I'm sure many people have never played one. Ogre Battle is a series of tactical RPGs with real-time elements. You create units of up to 5 characters (with large characters such as dragons counting as 2 characters), and have them traverse maps of varying terrain to engage enemy units throughout the map. Each battle is mostly automated, with the player's role being to determine the strategy that unit will take. The choices are auto, attack strongest, attack weakest, attack best, and attack leader. The cool thing is during battle you can constantly change tactics between each character's attacks. There’s a lot more to these games, such as character classes and special moves, and just a bunch more stuff that I don’t have time to describe in this section. But in all honesty, 10/10 both of them, go play 'em they’re a blast.
What’s In: Perhaps the biggest addition to Ogre Battle 64 is that every unit now has a stamina meter when they march. See in Ogre Battle SNES, a unit could basically move forever without having to rest (it was a tougher generation), whereas in 64, units can only move so far before they have to make camp and rest like the little *bleep*es they are. One cool thing about that stamina meter is that it’s actually impacted by the terrain you march through. If you have a regular unit of soldiers march over a mountain, they’ll get tired faster than if they were just marching in a plain. Now the good news is the enemies also have the same stamina meters, so it’s entirely possible to attack the enemy while they are camped out (honor is for the weak). If you attack a camped out unit (or get attacked), the enemy will be sleeping, which means they will miss at least one turn. However, if you simply attack a tired unit, they will instead attack for much lower values and miss a lot more. The other big addition is that you can now combine units together to make legions. The big advantage of legions is that you can immediately shift around units to get optimal match ups, but the downside is that you lose the ability to have those units split up on the field, so you’ll just have one big *bleep* off unit. This game also has a few chapters with guest units; these units are not controlled by the player, and just kind of do their own thing. Usually in these chapters, you can’t allow the leader of that unit to die or you fail the mission. These missions are ok, but they don’t really add anything and can be annoying to watch the idiot prince run right into the enemy when you just want him to hide. There is also a new training mode; for a nominal fee you can have units do battles with... I guess other allied units, where if they win they will gain exp that will carry over to the main game. That’s really all of the major additions; obviously being an N64 game, it’s got obvious improvements such as being able to articulate the plot outside of boss battle cutscenes, but at it’s core, it’s still Ogre Battle.
'What’s Out: Probably the biggest removal in Ogre Battle 64 is that they took out hidden towns, which in my opinion is a godsend. See, Ogre Battle SNES had a number of maps with hidden towns that you could only find by traversing every corner of every maps (or be like me and have a guide, because again, honor is for the weak). There were also a number of recruitable characters that only appeared in hidden towns, who could only be recruited on the first visit, causing me to have to redo missions to get them. Thus, in all honesty it’s a good thing they removed them. They also removed towns with barriers, which required either a special item to destroy them or a flying enemy to go over the barrier. Honestly, towns with barriers weren’t really anything special; they rarely came up so them being removed is no big deal. One change that I had completely forgotten about until a friend reminded me was that they removed the unit tax in Ogre Battle 64. See, in Ogre Battle SNES, you paid a fee for every year a unit is on the field (the fee takes into account all the units you have on the field, and it gets lower or even overtaken from the profits you make from taxing cities you liberate). However, in Ogre Battle 64, you only pay a unit fee when you first deploy your soldiers; after that, the sweet feeling of fighting for freedom is all the payment they need. They’ve also removed all of the seafaring classes that were in Ogre Battle SNES. In Ogre Battle SNES there were two seafaring units; Octopus and Mermaid (and their upgrades of course). The main benefit of those units was that they crossed the seas directly, which could make getting to targets quicker. The downside was that they would sometimes go to seas that were completely out of the way and cause them to take longer to achieve a goal. All in all, seafaring classes were of limited use and their removal isn’t exactly super important. Special shoutout to the unjust removal of my boys, the Halloween class. Halloweens were an upgraded version of Pumpkinheads who could attack twice in a battle, draining half the target's current HP. They were amazing, I loved them, goddang you Atlus for taking them out of Ogre Battle 64!
Changes: Perhaps the biggest change is what happens to the enemy unit when their leader dies. In Ogre Battle SNES, if a enemy unit’s leader died, they would immediately run back to their base super fast and replace him (as well as all the guys they lost). However, in Ogre Battle 64, killing the leader of an enemy unit instead causes that unit to run away from your units, but not back to their base. Instead, they’ll just kind of run to the corner of a map, trying to avoid getting killed. This change greatly streamlines the battles and allow you to simply cut the head off a unit rather than destroy it in full. However, this change also means for the most part you’re simply going to attack the leader, since that’s the quickest way to destroy another unit, so it kind of takes away from the strategic aspect. The other notable change is that you can now fight different units from different directions. This is pretty cool because if you get hit from the left, your units will be facing a different direction and won't be in optimal position for its setup. This also means that you’re able to hit an enemy from a different position; you could gain an advantage and wipe them out easier. This adds an extra layer of strategy because you’re always going to be looking for enemy units that you can pierce from whichever side will give you the most advantage. Another notable change is that they replaced the Tarot cards from Ogre Battle SNES with special artifacts, which trigger a special move if a battle lasts long enough. The thing is that you can only acquire one special artifactm and you get it as the beginning of the game based on your answers to some questions. In contrast, Ogre Battle SNES had the tarot card system, which was basically at every town you liberated (or conquered if you were a bad person), you had the option to take a random tarot card. Each tarot card had different effects and you could use as many as you wanted in battle. By contrast, the new special moves feel limited; you only get to use them in long battles and they all basically do the same thing, a lot of damage to the enemy unit. Perhaps the saddest change in my opinion is that they nerfed the undead class, making it a shell of it’s former self. See, in Ogre Battle SNES, undead units could only be defeated with healing magic, so if an enemy didn’t have the ability to heal, your undead are untouchable. But in Ogre Battle 64, the undead instead function as regular units who can be killed by anything. The flipside is that in Ogre Battle 64, the undead respawn after they are defeated (unless they die to a holy item, in which case goodbye spooky spirits), which is pretty cool, but it’s just not the same as the untouchable kill beasts they are in Ogre Battle SNES. There a few other minor changes, like enemy units will now be stationed in towns rather than just going to them when they are weakened (which can result in like four units being stationed on the same town), and you can now enter the towns you liberate and get a little cutscene talking to someone who lives there.
Well, those are all the major changes between Ogre Battle SNES and Ogre Battle 64. They’re both excellent games and… I’m honestly not sure how to end this section, so I guess... this has been Shoey and I’ll see you next month when we talk about Pikmin and Pikmin 2 probably!
Pokédex Power
Hello everyone, it's me, Yoshi876 again with a new edition of Pokédex Power, the section written by the person who saw the supposed Generation VIII starter leaks, but never actually believed them, mainly because Generation VIII hasn't been officially announced as far as I know. For the record, however, the starter that I would have gone for is the platypus. The Fire-type looked cool, but the fact that there hasn't been a platypus Pokémon before, and the fact that it was so cute won be move. The grass lion thing looked too strange for me, so I would have avoided that one.
This month, we'll be taking a look at our first Legendary / Mythical Pokémon, the forest guardian Celebi. In the main games, Celebi is an event-only Pokémon, and as such I have never used one. This is generally because I never seem to actually follow when the event Pokémon are being released, I think the only one I actually have is a Mew. That said, I do have some vague recollections of Celebi from the anime, and I absolutely loved its appearances, so hopefully that love will transfer onto its Pokédex entries.
Generation II
| Pokémon Gold | This Pokémon wanders across time. Grass and trees flourish in the forests in which it has appeared. |
| Pokémon Silver | When Celebi disappears deep in a forest, it is said to leave behind an egg it brought from the future. |
| Pokémon Crystal | Revered as a guardian of the forest, Celebi appears wherever beautiful forests exist. |
| Pokémon Stadium 2 | This Pokémon wanders across time. Grass and trees flourish in the forests in which it has appeared. |
We start off with some pretty decent entries for Celebi's first appearance. We quickly confirm that this Pokémon not only time travels, but is generally seen as the guardian of the forest. But other than that, there's not a lot else. In Silver we get the fact about this mysterious egg, but this is least favourite Pokédex entry for Celebi. For starters, how do we know that Celebi is disappearing deep into the forest? This Pokemon can time travel, surely that's what it's doing. And secondly, how do we know this egg is from the future? Considering the fact that Celebi can time travel, it's fairly feasible that this egg is from the past as well. The entries about how forests flourish in its presence is fairly interesting, but it would have been nice to have seen some more about it, like do all forests flourish, even when dead?
Generation III
| Pokémon Ruby | This Pokémon came from the future by crossing over time. It is thought that so long as Celebi appears, a bright and shining future awaits us. |
| Pokémon Sapphire | This Pokémon came from the future by crossing over time. It is thought that so long as Celebi appears, a bright and shining future awaits us. |
| Pokémon Emerald | This Pokémon came from the future by crossing over time. It is thought that so long as Celebi appears, a bright and shining future awaits us. |
| Pokémon FireRed | When Celebi disappears deep in a forest, it is said to leave behind an egg it brought from the future. |
| Pokémon LeafGreen | This Pokémon wanders across time. Grass and trees flourish in the forests in which it has appeared. |
Generation III only gives us one new entry, but it's a bit annoying considering that we already knew that Celebi time travelled. However, the rumours surrounding the future whenever it appears are slightly interesting. Although, it would be nice to know if there was a timeframe on its “forecasts”. How long do these last? 100 years? 200 years? Next Tuesday when I need to pop down to the shops for some milk?
Generation IV
| Pokémon Diamond | It has the power to travel across time, but it is said to only appear in peaceful times. |
| Pokémon Pearl | It has the power to travel across time, but it is said to only appear in peaceful times. |
| Pokémon Platinum | It has the power to travel across time, but it is said to only appear in peaceful times. |
| Pokémon HeartGold | This Pokémon wanders across time. Grass and trees flourish in the forests in which it has appeared. |
| Pokémon SoulSilver | When Celebi disappears deep in a forest, it is said to leave behind an egg it brought from the future. |
Generation IV sort of offers up something new, saying that Celebi only appears during peaceful times, but it doesn't really go into further detail on this. Does Celebi not like war? How can peaceful be defined? Does peace need to be worldwide, or only in the area where Celebi appears?
Generation V
| Pokémon Black | It has the power to travel across time, but it is said to only appear in peaceful times. |
| Pokémon White | It has the power to travel across time, but it is said to only appear in peaceful times. |
| Pokémon Black 2 | It has the power to travel across time, but it is said to only appear in peaceful times. |
| Pokémon White 2 | It has the power to travel across time, but it is said to only appear in peaceful times. |
Last month, Generation V offered us up some new information, this time it did not.
Generation VI
| Pokémon X | This Pokémon wanders across time. Grass and trees flourish in the forests in which it has appeared. |
| Pokémon Y | It has the power to travel across time, but it is said to only appear in peaceful times. |
| Pokémon Omega Ruby | This Pokémon came from the future by crossing over time. It is thought that so long as Celebi appears, a bright and shining future awaits us. |
| Pokémon Alpha Sapphire | This Pokémon came from the future by crossing over time. It is thought that so long as Celebi appears, a bright and shining future awaits us. |
Generation VI also continues its proud tradition of not giving away any new information.
Conclusion I really like Celebi as a Pokémon, but its Pokédex entries are incredibly poor. I understand that this is a mythical Pokémon, but surely the Pokedex could at least impart some decent knowledge on the time. The time travel aspect is amazing, but it is so unexplored, maybe it could have something where Celebi shows certain people what the future looks like. And surely this egg thing could have been explained by now, what's in the egg, come on Nintendo, tell us! For a Pokémon that times travels, maybe it should travel back in time and get someone to write it some better entries.
| The 'Shroom: Issue 132 | |
|---|---|
| Staff sections | Staff Notes • The 'Shroom Spotlight |
| Features | Fake News • Fun Stuff • Palette Swap • Pipe Plaza • Critic Corner • Strategy Wing |
| Specials | Super Mario Odyssey Photo Contest |

