The 'Shroom:Issue 218/Strategy Wing
Director's Notes
Written by: Hooded Pitohui (talk)
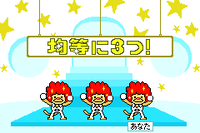
Hello, all you readers of The 'Shroom! It's an exciting day here in Strategy Wing, because we have ourselves a brand-new addition to the team! Those of you who might be wondering, "hey, what's this Rhythm Heaven all about?" with the recent announcement of Rhythm Heaven Groove won't want to miss Rhythm Review, the new section by our very own Pipe Plaza Director Zange (talk) that will be taking us through the series' stages. Even if you know these funny little rhythm games like the back of your hand, give it a read for a walk down memory lane and for Zange's tips and commentaries.
In other news, the mail's finally made it from ancient China (the postal service never ceases to amaze), so Shoey (talk) is back to give you all the help you'll need in building up your sprawling bureaucracy and developing all the cities united under your banner in So You Want to Romance the Three Kingdoms?. Although, on second thought... maybe not all the cities... But, hey, I'm sure as long as you conquer your foes, your dynasty will last for generations! When have a few dozen neglected cities full of demoralized subjects ever been a threat to a dynasty, am I right?
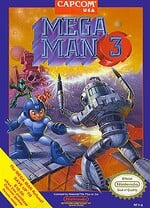
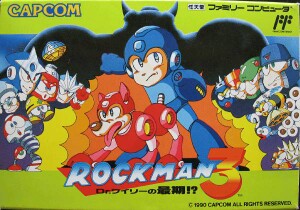
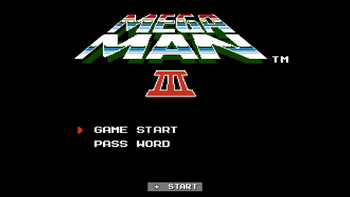
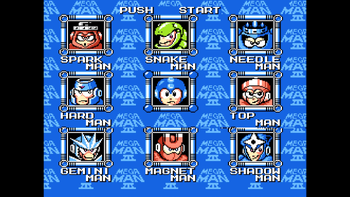
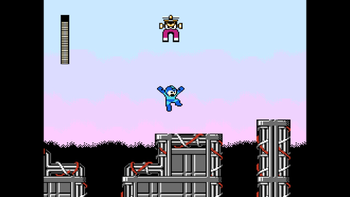
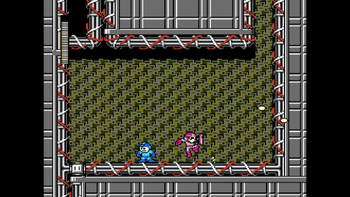
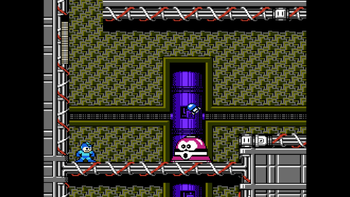
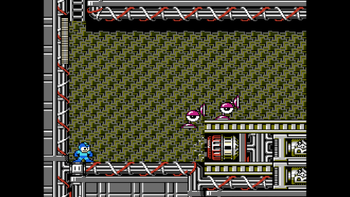
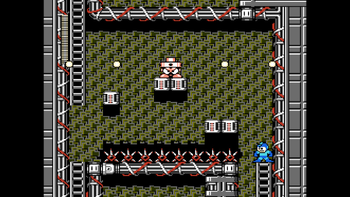
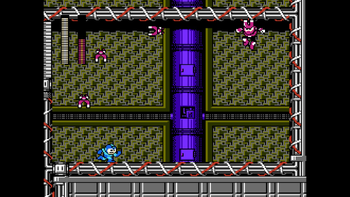
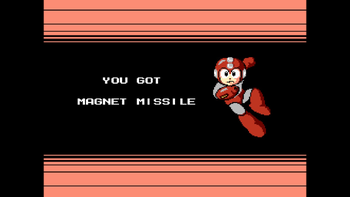
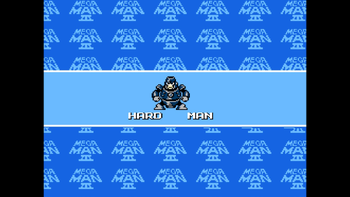
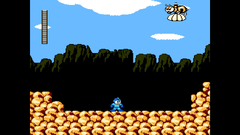
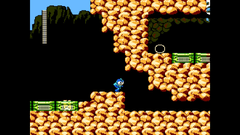
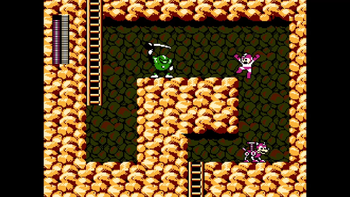
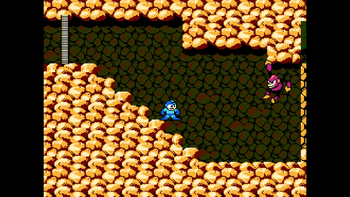
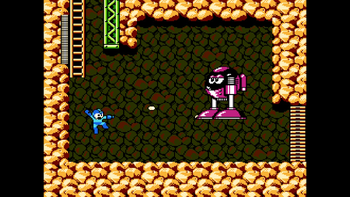
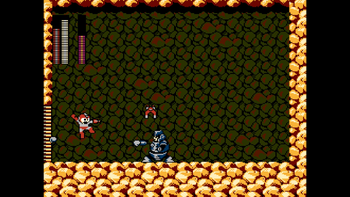
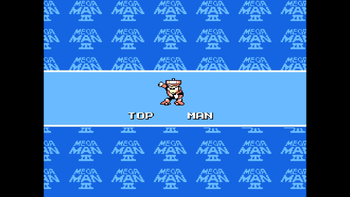
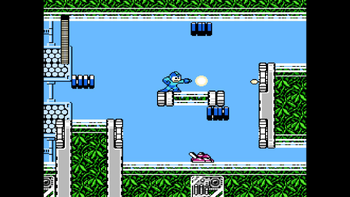
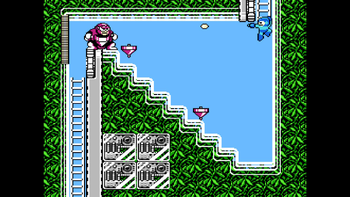
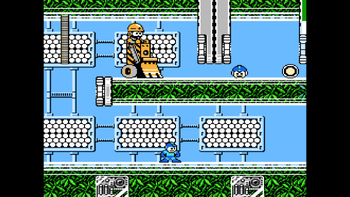
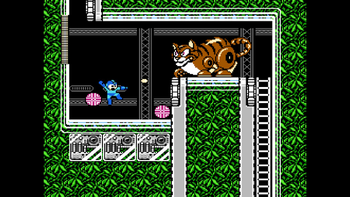
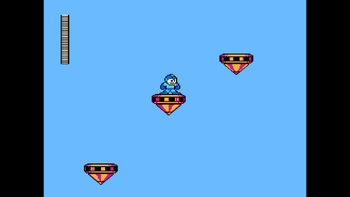
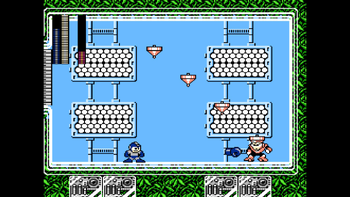
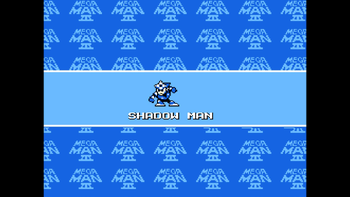
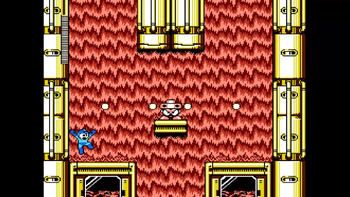
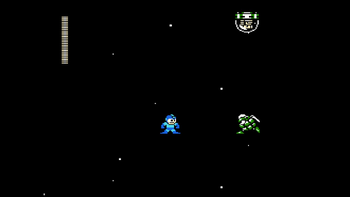
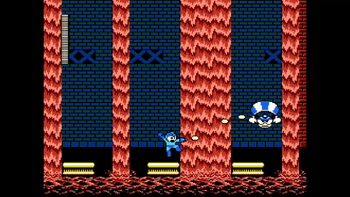
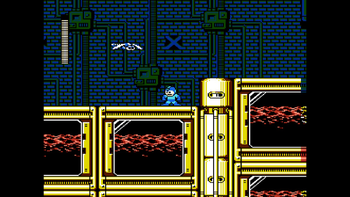
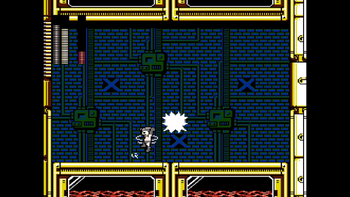
Also rejoining us is Spark's (talk) An Overly Detailed and Funny Walkthrough of Mega Man, with Sparks turning to the third installment in the series. With eight new Robot Masters to face and the robot dog Rush at this side, Sparks has a grand adventure awaiting, so check out his battles against Magnet Man, Hard Man, Top Man, Shadow Man, and the ever-persistent Proto Man and pick yourself up a few tricks for your own adventures as the Blue Bomber.
All that, and we've touched on fewer than half our sections this month! From a battle against Ten of the Extension Corps to a romp around Ricco Harbor, we have plenty for you to look at even as Killing the Killing Game Roles takes a month off.
You have plenty to read, and I'm sure you've seen mention of Awards and next month's villain-themed special issue plenty of times elsewhere in this issue, so I'll just leave off by reminding you you're welcome to send a one-off section to Strategy Wing for next month's special. What's a game without its imposingly evil and cunningly cool baddies? If you've got some favorite villains and bosses you'd like to look at in-depth, we're the place for you! Feel free to reach out to me if you need any assistance getting your ideas together or need some technical help!
That said, go on and enjoy what this wonderful team of writers has crafted for you!
Section of the Month
It looks like you all had a swell time learning why you should teach Belly Drum to Gobblick in Sparks' (talk) Brothership Boss Battle Guide and why it's wise to avoid jumping on a Sandslash in Pokémon Academy! Er, wait, do I have something mixed up...? Ah, never mind all that! The point is, we ought to give Sparks a round of applause for that guide to taking on Gobblick, and Roserade (talk) for coming close behind with that extensive analysis of where the Ultimate Monster Salesman failed to hit the mark.
| STRATEGY WING SECTION OF THE MONTH | ||||
|---|---|---|---|---|
| Place | Section | Votes | % | Writer |
| 1st | Brothership Boss Battle Guide | 4 | 28.57% | Sparks (talk) |
| 1st | Pitohui's Pokémon Academy | 4 | 28.57% | Hooded Pitohui (talk) |
| 2nd | Four Steps for a 3D World | 3 | 21.43% | Hooded Pitohui (talk) |
| 2nd | Killing the Killing Game Roles | 3 | 21.43% | Roserade (talk) |
Brothership Boss Battle Guide
Hi there! Welcome back to Brothership Boss Battle Guide, just the place to learn everything you need to take down the bosses of Mario & Luigi: Brothership! In April's issue, we took down the pesky pitcher plant that is Gobblick, the first Great Lighthouse bosses!
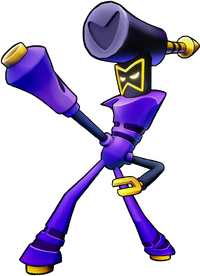
The next boss is the third one; it's Ten, one of the members of the Extension Corps! Strangely he's not the tenth boss, that would've be funny. Anyways, now in the Color-Full Sea, Mario and Luigi continue to link up islands and restore Concordia to its former glory. Their first island in the sea is Desolatt Island, a desert with many buildings. The Bros. encounter a group of children - Ireen, Dulles, Loog and Ellow - all part of IDLE. They want to help out too, but they also challenge the brothers to a game of hide and seek. Once everyone is found, they all make it to the lighthouse to connect the island, but Zokket and the Extension Corps are there too! Ten, one of the Extension Corps' members, decides to battle Mario and Luigi on his own, so here we are!
These are the stats of Ten!
Ten's stats
| Image | Level | Location | HP | POW | DEF | SPD | Type | EXP | Coins | Item(s) |
|---|---|---|---|---|---|---|---|---|---|---|
|
14 | Desolatt Island | 712 | 51 | 32 | 66 | Normal | 450 | 189 | Sturdy Wear |
Ten's abilities
Ten has two standard attacks, both of which must be defended against by using hammers:
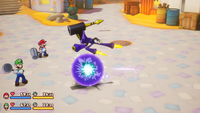
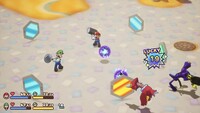
- Ten moves in front of either Mario or Luigi and creates a large orb of electricity. Ten then hops on top of it and charges at whoever he's in front of. The targeted character must strike the orb before it hits them. A successful counter will damage the orb, and Ten will charge again at the same brother, requiring another whack, damaging the orb even more. After a third charge and subsequent counter, the orb will break, and Ten will fall in front of his target, somewhat dazed. He can be attacked with the hammer while in this state - doing so will deal damage to him! Sometimes before charging, Ten will back up and rush at them from a distance. All this does is change the timing. To summarize this attack, the orb must be struck three times to successfully ward of Ten's attack. If Mario or Luigi get hit, they take damage and the attack ends.
- Ten can also create five mirrors around the Bros. in a pentagon formation. Three of them are blue, with one red mirror and green mirror as well. The camera will also change to a unique angle for this attack only. After the mirrors appear, Ten will fire three or five orbs of electricity - one at a time - towards one of two mirrors. The orbs bounce off of four mirrors before heading towards Mario or Luigi. The Bros. must counter the orbs before they get hit by them - successfully countering an orb will send it right towards Ten, hurting him! If Ten shoots towards the side Mario is on (right), the orb will bounce off the green mirror before flying towards Luigi. If Ten shoots towards Luigi's direction (the left side), the orb will ricochet off the red mirror before it travels directly to Mario.
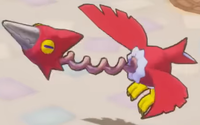
Ten also has the ability to summon two Snaptors at once. They will join him in the battle. Ten cannot summon more Snaptors if at least one is remaining.
These Snaptors have unique stats!
| Image | Level | Location | HP | POW | DEF | SPD | Type | EXP | Coins | Item(s) |
|---|---|---|---|---|---|---|---|---|---|---|
|
13 | Desolatt Island | 102 | 46 | 23 | 52 | Flying | 0 | 0 | None |
Additionally, if both Snaptors are present, Ten has an additional attack that must be avoided by jumping:
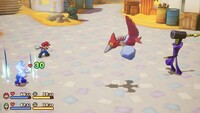
- Both Snaptors fly off-screen. Ten then commands them to attack several times; by waving one of his arms, a Snaptor will fly in and drop something in front of a character. That "something" can be one of three things, either a rock, Mushroom, or Spikely. Rocks and Mushrooms roll towards a brother, while Spikelies bounce over them. Rocks are safe to jump on, as stomping on them breaks them. Mushrooms do not deal damage but instead heal 30 HP upon contact. If Ten waves his claw arm, then the incoming Snaptor will attack Luigi. If he waves his cannon arm, that means Mario is the target. After several fly-bys, Ten will wave both of this arms forward, signalling both Snaptors to bring a log that rolls towards both Bros. Both Mario and Luigi must jump over the log, and jumping on it will hurt them.
Interestingly, this battle does not have a Luigi Logic. Less writing for me!
Tips and tricks
Recommended gear
Here is the best equipment the Desolatt Island shop has:
- Boots: Steady Boots
- Hammer: Steady Hammer
- Wear: Bros. Wear
You know those Gobblick Boots you got after defeating Gobblick? Equip them! Not only are they stronger than the Steady Boots by one point (with a two point bonus to Stache), but they recover the wearer's HP by 5% of the damage!
In a ? Block on Desolatt Island is a Knockout Hammer. It's stronger than a Steady Hammer by one point and also grants two points to DEF. Unfortunately, its passive ability (defeating an enemy with it increases the wearer's POW by 20%) cannot be utilized, as the Snaptors are flying enemies. But because it's stronger overall, that makes it worth it!
Sturdy Wear (also sold at the Desolatt Island shop) is about the same quality as Bros. Wear (1 point weaker in DEF than Bros. Wear) but Bros. Wear has the passive of regaining 1 BP after taking damage. Two of Ten's attacks involve multiple hits, so if you happen to get hit you can get some BP restored! If you have the extra coins to spend, then get it instead!
If you're broke and want the cheapest options that can still help you, then get the Picnic Boots, Picnic Hammer, and Picnic Wear! Of course, you can always battle those Drillbies and Snaptors to get more coins to be able to afford the good stuff. Plus you'll get EXP too, I recommend you do that instead!
Basically, equip the Gobblick Boots and Knockout Hammer, and have Steady Boots and the Steady Hammer for the other slots. Try to get at least Sturdy Wear for both Bros. Bonus points if both have Bros. Wear!
Have whatever accessories and Gloves you want, as they support different playstyles. I'm not going to go into detail about those.
Other things
This fight is not bad. Ten is tougher than Gorumbla but has less HP than Gobblick, but that doesn't mean he's easier!
Ten is level 14, and the summoned Snaptors are level 13. Try to reach to or surpass Ten's level so you'll be at the same power level or gain an advantage.
By himself, Ten is not a threat. When he summons Snaptors, however, that's when you have to watch out. They can attack on their own, but because of the numerous Snaptors you've (hopefully) battled on your way here, you know their attacks and how to dodge them. Ten does gain an additional attack if both Snaptors are present however, so be ready for that. There are multiple ways to go about this:
- You can ignore the Snaptors and just focus on taking down Ten. The Snaptors will leave if Ten is defeated, so one strategy is to end this fight quickly. As a bonus, sometimes the Snaptors will bring you Mushrooms to recover if Ten decided to command them to attack!
- You could get rid of only one Snaptor, making the battle a little less chaotic. Ten will be unable to perform his unique attack, and the remaining Snaptor can only attack by itself. Take note that by countering the enemy too much might destroy it, allowing Ten to summon more.
- Don't like the Snaptors? Then get rid of them! Perform jump attacks to take them down. Luigi's Green Shell can only damage Ten, as it is unable to target flying enemies, so don't use this Bros. Attack if you want to target everyone at once. If you hate the Snaptors, use Red Shell against them! Knock 'em out in one shot, one at a time. Make sure you have enough BP, and be sure to bring Syrup Jars to the battle! With this strategy, the battle will take longer, but you'll be taking your time, making sure nothing gets too out of hand. It also allows more chances to recover if needed!
I keep saying this, but be sure to bring plenty of Mushrooms and Syrup Jars! Status effects aren't a problem this time around, but who knows? Maybe Trip can still occur. Always be ready!
Ten's attacks aren't too difficult to avoid, but if you just can't get their timings down, you can always use Emergency Guard! Try to dodge the attacks first before using it though. It's better to avoid damage entirely rather than take less of it.
Use Red Shell against Ten. The attack is stronger and cheaper than Green Shell. You can use Green Shell if you want, but remember that it has no effect against the Snaptors. Thus, I don't recommend restoring Luigi's BP if he runs out of it. Focus on Mario and his Red Shell instead.
During Ten's Snaptor attack, jump over rocks and the log at the end, but don't leap over Spikelies and Mushrooms!
Due to the angle when Ten performs his mirror attack, this makes it tougher to counter orbs sent towards Mario. It's easier to tell when they will strike Luigi. Additionally, Ten always shoots in the same rhythm. Counterattack the orbs in that same rhythm!
Ten cannot be countered during his Snaptor attack. After shattering his giant orb, be sure to whack him for extra damage! If you can counter all of Ten's smaller orbs during his mirror attack, then you'll deal heavy damage right back at him. Emergency Guarding doesn't allow for counterattacks!
Due to there being no Luigi Logic, treat this battle as you would a normal enemy. A really strong normal enemy.
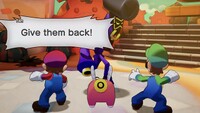
After defeating Ten, he retreats by calling a Snaptor to carry him away. He drops something however, something that will benefit Mario and Luigi as well as make these battle more exciting - Battle Plugs and a Power Tap! By equipping these in battle (that is, by plugging in Battle Plugs to the Power Tap), interesting things happen during battle, benefiting Mario and Luigi while hindering the enemies. Right now, there are two Power Taps, so up to two Battle Plugs can be equipped at once.
But what's this? Ten realizes he dropped these game-changing goodies and battles the Bros. again! Clearly he's not happy they stole his stuff.
Second fight
Ten's stats for this unexpected fight are right here!
| Image | Level | Location | HP | POW | DEF | SPD | Type | EXP | Coins | Item(s) |
|---|---|---|---|---|---|---|---|---|---|---|

|
14 | Desolatt Island | 411 | 51 | 32 | 66 | Normal | 216 | 95 | None |
| Notes | This enemy will automatically flee after two attacks, and the enemy’s HP cannot go below 1. | |||||||||
Despite having EXP and coins, Ten cannot be defeated. If you're somehow insanely powerful and deplete all of his HP, he will be left with one no matter what you do.
This battle is meant to be a tutorial for the newly acquired Battle Plugs. Two of them are showcased here: Easy-Peasy Counters and Kaboom Attack. Ten attacks the Bros. (with the move where he shoots electricity orbs at the mirrors; I have not seen him perform his other move), allowing for them to see Easy-Peasy Counters in action. He can shoot up to five orbs this time, which means more opportunities to try out the Battle Plug!
Ten will then summon two Snaptors, setting things up for a perfect Kaboom Attack. After a successful Kaboom Attack on any enemy, Ten will realize he's in trouble and will flee, ending the fight. No EXP, coins, or rewards are given. Ten will then angrily fly off, allowing for Mario and Luigi to reconnect Desolatt Island.
Alright! With Ten taken care of, the next boss I'll cover will be Mega Snaptor! Oh boy! A boss where I can talk about Battle Plug strategies! That should be exciting right? See you in June!
Four Steps for a 3D World
Written by: Hooded Pitohui (talk)
Hello, all you readers of The 'Shroom, and welcome back to Four Steps for a 3D World, a section where we are once again going to eschew the usual introduction on account of today's level not adhering rigidly to our four steps! We've looked at a lot of levels, and from our discussions of level design, we've learned how vital it is that a level offers some core mechanic, some new interconnected lesson to learn and master. We've seen a few levels which have squeaked by on spectacle instead, but the vast majority of the time, designing a level or mission requires focusing on some core mechanic.
Not every level's design goals stop there, however. In addition to introducing a new mechanic, some levels or missions need to, say, take the player on a tour, familiarizing them with the environment they're operating within. Other levels may need to wow a player with a game's selling points, especially if they come early in the game. Some levels may even need to tell a story, giving players a little more reason to care what's happening within them. I have a few levels in mind to cover which lean into these secondary design goals, and we'll spread them throughout the rest of 2025.
For today, let's begin with the first mission of Super Mario Sunshine's Ricco Harbor, "Gooper Blooper Breaks Out". We'll see a reasonably-developed mechanical backbone to this mission as we go along, but let's also examine this mission to see how it gives the player an opening tour of Ricco Harbor and sets the stage's story.
Entrance
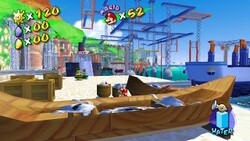
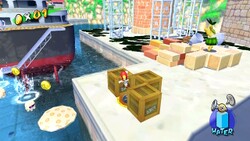
The mission plops Mario down on a stretch of harbor which seems to serve as an area to move things to and from ships into some warehouses and to launch smaller fishing vessels. An opening cutscene just before the mission's start puts focus on a wriggling tentacle poking out of some shipping containers in the freight area on the other side of the harbor, so there's no question where to go from here. A couple of NPCs serve to further reinforce that there's something strange in the freight area, and a metal walkway leading to a ship placed directly in front of Mario ensures players know the direction in which they need to head, but other than giving players some direction and being a flat, open space, this area doesn't accomplish much, mechanically-speaking. This doesn't even hint at the level's core mechanics.
Don't let that fool you, though, for this area actually plays an important role in framing Ricco Harbor's story. If a player pokes around rather than dashing straight up the metal walkway, they'll find scattered crates strewn around the area, seemingly cargo which nobody has bothered to store in the warehouses or load onto a ship. There are Piantas around here, but as mentioned, they're too busy gawking at the state of the harbor and fretting over the strange happenings elsewhere to be working. Another large ship floats nearby, a handful of construction materials lying uselessly on it, but no walkway makes it accessible. It paints the picture of a port brought to a halt, of work ceasing in the face of disaster, a notion reinforced by the distant oil slick visible on the water. Additionally, only dead Bloopers and Bloopads fill the fishing boats, a sight at odds with the tourist guide's description of a thriving fish market. These boats serve as another sign of the troubles which have engulfed the harbor, endangering the normal routines and livelihoods of its residents. As little as it does from a mechanical standpoint, this area sets up Ricco Harbor's story spectacularly through these little touches.
A Bloop In A Box On A Ship
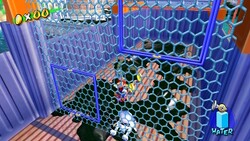
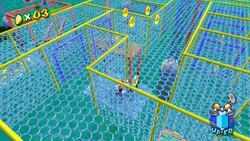
Once a player does have Mario climb the metal walkway, they arrive on the first of many ships they'll see across Ricco Harbor's missions. Here, they find grates arranged into a wall and a ceiling, forming a box-like cage on the ship. Inside, a single Blooper patrols a deck covered in graffiti along with some emerging Goobles. Whether players try to avoid the goop and enemies or want to reach them, they confront a wall too high to clear with a jump. If they attempt to jump at it anyway, they discover that they can cling to the grate! With a little prodding from FLUDD, this area gives players a chance to work on moving about on grates and flipping panels in a relatively safe environment, better fitting our usual Introduction than the level's actual entrance. It's a nicely-designed setpiece that just about forces new players to get familiar with grates to get atop the box (a natural skill gate!) and can all at once tempt or punish players, with the mess inside either encouraging players to find a way in or giving them a mild punishment if they fall off the grates. Once a player reaches the top of the box, things become more straightforward, with an arrow pointing players in the right direction on a flat deck which only has a Blooper and a Pianta.
It's a nice touch, too, that grates run up and down the sides of the ship, giving players an easy way back up if they jump into the water which also further acclimates them to climbing.
This section plays a key mechanical role, but it doesn't add much story-wise that wasn't already established. It's clear already normal operations have been disrupted. From a touring perspective, though, this ship feels a little more relevant, giving players some sense that they'll be using boats and other vessels as platforms throughout the harbor and introducing the first live Blooper, an enemy they'll encounter again and again here.
Why Are Your Bloopads Here?
Before following the arrow and proceeding with the mission, I want to point out that there's a side area to the left both visible and easily reached from the ship, one covered in graffiti and host to a few Bloopers and a Pianta. Now, usually, with these older sandbox games especially, I avoid going off the beaten path for these analyses. In this case, though, this area is visible enough and has enough draws that I think more than a few new players will visit it, and, more importantly, it has some peculiarities I want to discuss. I presume this area is some sort of active construction site, given that it's at the base of Ricco Tower, which is surrounded by metal scaffolding, and that it has what appear to be bricks laying around along with a cement mixer. All this area establishes narratively is what we already know. The Bloopers have made a mess and work has ceased. It also doesn't necessarily contribute to an introductory tour to Ricco Harbor, being tucked away and without many accessible landmarks or rewards save for a few Blue Coins.
Despite seeming like a dumping ground for Blue Coins, this area does have an actual part to play in this mission and in the development of its mechanics. Firstly, by breaking a few crates, players gain access to a manhole. Following the sewers, they can get a little preview of the freight area, but because crates block the manholes in the freight area as well, they can't actually reach it. It's a fun preview and it serves to alert players that they can create a convenient shortcut for themselves once they reach the final stretch of the mission, I can give it that.
What's strange here, though, is the group of Bloopads in the water, forming a little path back to the ship. Some coins float over the Bloopads so players will be lured to hover over them and discover that sprayed Bloopads flatten into temporary platforms, and there are no dangers in the water, giving players a safe place to learn to work with Bloopads. It's a well-crafted and safe lesson that does get payoff later in the mission, but... it's just so tucked away? Not to mention, it's easy enough to hover back to the ship without using them at all, and the grates on the side of the ship are arguably more inviting for a player. This group of Bloopads is great in theory, but they really needed to be placed more directly in the player's path rather than stuck in an optional area that has multiple options for getting back to the mission's main route.
Back On-Track And It Feels Grate
In the interest of keeping this edition somewhat condensed, I'm going to keep the description here light. After following the ship's arrow, players have to guide Mario onto a moving platform suspended by a crane and ride it out to a platform in the ocean. Timing jumps to moving platforms and riding them across gaps is fairly fundamental, as mechanics go, but we do see those mechanics return a couple times in this mission, and, from a perspective of touring Ricco Harbor, this nicely sets the tone for riding heavy machinery around the level in missions yet to come.
From here, a strange network of grates without any kind of floor stretch over the ocean towards the next platform players need to reach. This is the closest this stage gets to a proper Development section, asking players to navigate a longer and slightly (emphasis on slightly!) more complex set of grates. It's not a bad payoff to the lessons on the ship for this early in the game, but it also takes such a straightforward route that I wish it meandered a bit more, or that one of the side-branches had a 1-Up or Blue Coin to tempt players into putting in a little more effort.
After navigating the grates, players hop onto one more moving platform and ride it over to the next platform sticking out from the ocean.
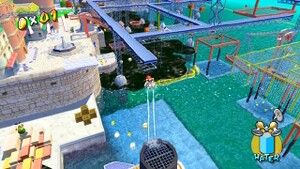
From a mechanical development perspective, this is a decent stretch of the mission. It pushes the grates further and tosses in some new lessons with the crane-suspended moving platforms. It's nothing outstanding, but it suffices. On the other hand, this is a nice stretch from a touring and narrative-building perspective. This stretch of the level takes the player away from solid ground and pushes them over the ocean, where they navigate Ricco Harbor's metallic infrastructure, something they will come to do repeatedly. Narratively, all this infrastructure and open water make for a conspicuous lack of ships, showing that not only has work stopped, but that almost no vessels are bothering coming into the polluted harbor.
We All Thrive On A Yellow Submarine
Looking ahead from the platform they've reached, players see what looks vaguely like a path to a crane lowering and raising a platform. With Bloopads jumping out of the oil slick, it looks like it should be a straight shot, but they're a little distant. Notably, a submarine sits under the water, and a mechanism with what looks to be a turbine or some such does seem to connect to it. A Pianta on the platform even stares at the mechanism and hints that it should be able to raise the submarine. In a fairly unique and memorable moment, the player can have Mario spray the device to lift the submarine, creating a platform by directly using Ricco Harbor's heavy equipment.
With the submarine raised, players cross it and arrive at the Bloopads. This is the payoff to the earlier group, and the reason why that earlier group really ought to have been directly in the player's path somewhere. It would be a satisfying little challenge to overcome if the game had properly set it up, but... honestly, it's not hard to hover past them anyway, so it's only a small loss. Past the Bloopads, players have to ride a platform up, timing their jump so the platform's lowering doesn't dip them into the goopy water. The platform lifts them to what else but a coin-lined grate which they can climb and drop off from to finally reach that upper-level freight area! As simple as this sequence is, it's a highlight of the level. That unique submarine interaction combines with the way the level puts its three main lessons (grates, moving platforms, Bloopads) together to make a very satisfying sequence. It's just a shame it's not as good as it could be because of the Bloopads.
In the touring sense, this stretch offers little. and in the narrative sense, it mostly serves to introduce two NPCs who will keep cropping up in Ricco Harbor, a Pianta captain who is more of an ideas guy than an action guy and a lowercase-c chuckster who develops his throwing arm over the level's mission. Still, it's swell in terms of mechanics!
A Final Stretch To Set The Scene
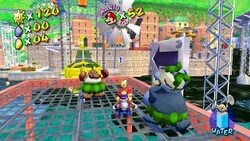
Now on the high ground, players... more or less have a straight shot to the boss battle that caps off this level. A couple Piantas mill about, some Bloopers might attack, and some crates wait to be broken to open a shortcut, but the mission stops developing its mechanics here. This stretch is half a breather before the boss and half set dressing. In terms of touring the level, it finally acquaints players with the large open space up here that they spent all of the mission trying to reach and which will get more focus near the end of Ricco Harbor's story. In narrative terms, it drives home how abandoned Ricco Harbor feels at this stage. With a row of buildings, a fountain, giant fruit dispensers, and colorful artwork over where the shipping containers are stacked, this feels less like the part of Ricco Harbor in which Piantas work and more like where they live and shop, yet the area is almost devoid of activity and Bloopers roam freely. I'm not going to say the atmosphere of this stretch succeeds in making the upcoming boss feel imposing, but I will give it credit for trying.
Gooper Blooper Breaks Out
Finally, players approach the shipping containers and, perhaps with prompting from FLUDD after squirting the tentacle does nothing, they grab it and pull. Gooper Blooper leaps high into the air in a cutscene, and the battle begins in earnest, with players needing to get Mario close enough to pull Gooper Blooper's... snout until it stretches far enough to snap back and injure the big bad bloop. Of course, the task becomes easier if Mario first flattens and pulls off Gooper Blooper's tentacles.
Honestly, this boss battle is fairly divorced from the rest of the mission. It focuses on its own mechanic (pulling) which doesn't come up at all in the mission before this, so I don't want to dwell on it here. It's well-designed on its own, very much so, in fact! The initial tentacle pull before the boss fight begins ensures you immediately have some idea of what to do, and Gooper Blooper gaining the ability to fire off goop in his second phase is conveyed well through the first hit on him uncorking his snout. If this were a boss battle analysis, we'd have much to dive into, but in the context of a mission analysis, it's fun but also kind of its own entity entirely. Upon Gooper Blooper's defeat, the Shine Sprite appears and players get to snag it!
Final Thoughts
Alright, so putting it all together, "Gooper Blooper Breaks Out" clearly doesn't follow our four steps. It does have a few mechanical focuses it develops a little bit and combines together at the end there, but the execution of the Bloopads leaves something to be desired and it could have stood to push its mechanics further. From a standpoint of gameplay, it hits the minimum requirements, but doesn't leave a great impression. On the other hand, the mission smoothly acquaints players with a pretty sizable chunk of Ricco Harbor and does an impressive job of cultivating a sense of a harbor in deep trouble. All in all, for having to juggle multiple design goals, this mission performs respectably, coming up a tad short in gameplay, but balancing that out with spectacular work in communicating its narrative.
With an admirable effort here, it sure is a good thing everyone plays this mission following this marked-out route! I mean, could you imagine if there were some easy way to, I don't know, skip most of the mis...
Ah, I should address the elephant in the room, shouldn't I? As many know, players can skip the entire route over the moving platforms and the grates out at sea by backflipping and hovering from the ship's smokestack, cutting out... most of the mission's intended mechanical progression, actually. This route also makes it less likely a player picks up on the conspicuous absence of ships. This shortcut might seem like it entirely undermines the mission, but I don't know I've ever heard anyone raise a complaint against the mission for it. Even amidst Sunshine's rushed development, I have to imagine Nintendo knew this alternative route was there, and considering that Sunshine is a sandbox game, why shouldn't there be an accessible alternate route? For a young player discovering they can reach the smokestack, pulling off the jump and hover required feels exhilarating and for more experienced players, the option to take a shortcut is appreciated. Just because you aren't following the mission the course lays out doesn't mean you aren't being challenged and rewarded for pulling a move off!
A level can have more than one design goal behind it, and can offer more than one route to an enjoyable experience. When we circle back to levels juggling multiple goals later this year, keep the lessons of Ricco Harbor in mind. Until then, with four tentacles to rip away from Gooper Blooper, three platforms suspended by cranes, two groups of Bloopads, and one submarine to raise, this has been Four Steps for a 3D World!
Rhythm Review
Hello everyone! This is Zange, and I’m very excited about the announcement of Rhythm Heaven Groove! This got me back into playing the other games in this series, and now I guess I’m writing a new ‘Shroom section about them. Funny how that works! Anyways, in this section we’ll be talking about the individual rhythm minigames, their gimmicks, and how to get that Superb result! Since doing one minigame every month would take forever to get through the whole series (and it would probably be a pretty short read each month, if you know me you know I like to write A Lot when it comes to things I’m passionate about and I love these games too much), we’ll be covering one stage each month instead! We’ll be covering these games in order, so we’re starting off with Rhythm Tengoku (or Rhythm Heaven Silver if you’ve played the fan translation) for the GBA!
In most Rhythm Heaven games, a stage consists of four rhythm minigames, followed by one remix, in which all the other minigames in the stage are put together in a new way to new music. However, Rhythm Tengoku is weird and has five minigames in each stage instead of four! There’s also eight stages instead of ten like most of the other games soooo these first eight editions are gonna be a little longer than they would be normally. At least they still do one remix per stage… Anyways, let’s jump in!
Karate Man
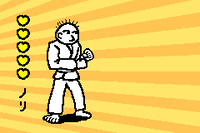
The first ever rhythm minigame of the Rhythm Heaven series is perhaps one of the most iconic, and has had a new version appear in every subsequent game in the series. We’re starting off with Karate Man, featuring everyone’s favorite karate student, Karate Joe. In this minigame, you use the A button to punch flowerpots, rocks, lightbulbs, and more to the beat of a very catchy song.
The nice thing about most of the rhythm minigames is that they allow you to practice a bit before throwing you right in, giving you a chance to figure out when the hell you’re actually supposed to press that button. In true Rhythm Heaven fashion, the practice for this game first makes you try to hit flowerpots without any sort of audio cue to go with it. After what’s likely to be an embarrassing amount of time spent trying to hit three pots, you are then given an audio cue to work off of to hit three more pots. That’s because Rhythm Heaven, as a series, tries to make you rely on your internal sense of rhythm as opposed to visual cues like many other rhythm games. As a nice little gag, the audio cue used for this practice is used at the very end of the song played in the actual minigame!
Gimmicks
You may notice a gauge on the left side of the screen, featuring five hearts. This is the Flow gauge, and it’s only used in this minigame. Every time you hit something on beat, one heart is filled in. The first two hearts will be filled in blue, while every heart past that will be filled in red. Once all the hearts are filled in, they will all turn yellow. Hit something too early or too late, and you lose a heart. Miss something entirely, and the gauge resets. This gauge serves two purposes in this minigame: First, it serves as a nice little visual indicator for how well you’re doing, which is especially helpful for anyone new to Tengoku or Rhythm Heaven as a whole. Second, you are unable to hit certain objects, namely rocks or bombs, unless you have three or more hearts on the gauge. Attempting to hit one of these objects with two or fewer hearts will count as hitting it too early or too late, and you will lose a heart on the gauge.
Additionally, there are a few times throughout this minigame that you will have to watch for some text cues. These are either Hit 2 (hit two objects in a row), Hit 3 (hit three objects in a row), or Last One! (the minigame is almost over) Beyond those, you honestly don’t really need to pay attention to the screen while playing this if you know what you’re doing and what to listen for.
How to Get That Superb
On top of excellent performance, there are certain criteria on each rhythm minigame that must be met in order to earn a Superb result. Usually, this can be gleaned from some of the dialogue the game gives you after completing the minigame. Failing to meet all criteria can result in an OK result, or even a Try Again if played poorly enough.
For Karate Man, the criteria is quite simple. First, you must be able to hit consecutive objects in time to the music. So those Hit 3 and HIt 2 cues mentioned earlier are absolutely necessary. Second, you need to be able to hit the object thrown at you after the “Last One!” cue. As long as you have a good handle on your timing and don’t mess up near the end, getting a Superb should be a piece of cake.
Difficulty Rating
As a fun little bonus, I’m going to rate every rhythm minigame on a scale of 1-5, with 1 being the easiest and 5 being the hardest.
With this being the first minigame in Tengoku, it shouldn’t be a shock that this is getting a 1/5. It serves its purpose as an introduction to the style of rhythm game that the Rhythm Heaven series strives to be, and it’s perfect for welcoming a newcomer. The Flow gauge being there also contributes to this rating, since not many other rhythm minigames have visual indicators of how well you’re doing that stick around for the whole song like this. Many others give you visual indicators when you mess up or do well at certain points, but they only last for moments.
Rhythm Tweezers
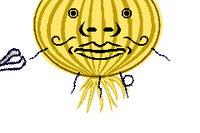
Moving on to the second rhythm minigame of Stage 1, we have Rhythm Tweezers! You’ll be using the A button and D-pad to pluck hairs off of onions, turnips, and potatoes to the rhythm of a cool song. Why do these vegetables grow hair? No one knows! But they need to be plucked clean for profit. Such is the way of capitalism…
Gimmicks
So within the Rhythm Heaven series, there are many rhythm minigames in which you are given a rhythm and must repeat it back. This happens to be one of those minigames! The rhythms start out simple, but grow more complex as the game advances. This is a big chunk of why you’re allowed to use both the D-pad and the A button to pluck hairs, since there are rhythms where some beats come very quickly after each other and it’s only possible to nail them by using multiple buttons.
Additionally, there are short hairs (that can be plucked normally) and long hairs (that require you to hold down your button of choice for a little longer in order for the hair to be properly plucked).
How to Get That Superb
Once again, the criteria for this minigame is fairly simple. First, you need to be able to pluck the longer hairs without leaving too many behind. Second, when you get vegetables with many hairs, you need to be able to pluck them in the precise rhythm that the game gives you. Miss too many hairs and you may be stuck getting OK results for a while. As long as the rhythms don’t trip you up too badly, this should be another easy Superb to get.
Difficulty Rating
We’re still in Stage 1, these are still pretty easy rhythm minigames, so I’m giving this a 1.5/5. It would be a flat 1 except the rhythms they give you at the end have tripped me up a number of times… And honestly it’s way too easy to miss your cues or hit them early/late (and have a baby laughing at you when you do!!) so I think it’s justified. That or I’m just bad at precise rhythms, oops.
Marching Orders
Ten-hut! Welcome to Marching Orders! In this minigame, you’re one of many squadmates following orders from Sarge. Depending on commands he shouts out, you’ll begin marching to the beat (A button), stop marching (B button), face right (right on the D-pad), or face left (left on the D-pad). Whatever mission these squadmates are going on, you’ll march confidently alongside them!
Gimmicks
Not too much happening with this one gimmick-wise! It’s purely an audio cue-based minigame. Unfortunately, thanks to Tengoku never receiving a release outside Japan, you do need to understand a handful of Japanese words even if you’re playing the fan translation. Thankfully, practice exists so you know what you need to be listening for.
It’s also worth pointing out that there is a segment at the end where the squadmates march off-screen, and you do still have to keep marching until the screen fades to black and the minigame is over.
How to Get That Superb
Pretty easy criteria this time as well. You simply just need to follow the orders in rhythm, and keep marching in rhythm when your character goes off-screen. Again, as long as you have a good handle on your timing, a Superb should be a piece of cake.
Difficulty Rating
This one’s gonna be a 1.3/5, and it’s mainly because you do need to understand the handful of Japanese words this minigame gives you in the audio cues. If it weren’t for those, I’d just have given this a 1 because it’s extremely easy otherwise.
Spaceball
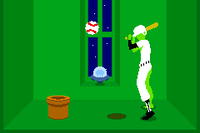
One of my absolute favorite rhythm minigames from Tengoku, Spaceball has you playing as a batter practicing his hits in outer space! You’ll press the A button in rhythm to swing at the baseballs that launch up from the floor to a very tropical-sounding track. Steel drum my beloved….
Gimmicks
There will be normal balls that you hit after one beat, and high balls that you hit after two beats. These are differentiated through audio cues. Additionally, the camera will zoom in and out at various points throughout, making it difficult to see the ball at times and forcing you to rely on your own internal sense of rhythm. As a fun visual gag, the batter changes costumes between a few of the more drastic zooms.
How to Get That Superb
Once again, the criteria for a Superb is fairly simple. You just need to have good timing on your hits, and be able to hit the ball even when the camera is zoomed way out. It may take a few extra tries to be able to hit the ball in rhythm when the camera zooms out like that (especially considering the practice for this minigame doesn’t incorporate any of the zooms), but this should be another easy Superb to get.
Difficulty Rating
Because of the camera zoom gimmick and its tendency to throw off newcomers, I’m giving this a 1.3/5. Once you master that aspect, it’s a very easy rhythm minigame, and in my experience, a lot of fun to go back and replay from time to time.
The Clappy Trio
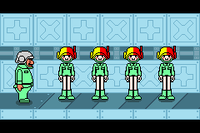
The final regular rhythm minigame of this stage is The Clappy Trio, with a stylish disco-like song. You play as the third of a trio of lions who specialize in clapping in rhythm. You’ll press the A button to clap after the first two!
Gimmicks
Another common gimmick in the Rhythm Heaven series is that you need to time your inputs to match in a pattern that the minigame gives you. This is one of those minigames. You only have two claps before you have to come in with the third clap, and they happen at various tempos. Additionally, there are moments where the trio all make this face that I like to call the “sneaky face”. If you see this, that usually means to expect the unexpected in terms of what pattern this minigame will give you next - it could be very fast or very slow, and there’s no telling what it’ll be until it happens!
How to Get That Superb
They’re starting to step it up with the criteria for a Superb result, as this is the first rhythm minigame in Tengoku to have three lines of text you need to see instead of just two. First, you need to be able to clap on rhythm during the syncopated parts. In other words, there are parts where you will have to clap on the offbeat. Second, you need to be able to keep the flow going during the slower clapping parts. Finally, you need to be able to clap on rhythm during the faster clapping parts. It may take a few tries, since it’s not easy to predict what tempos the clapping parts will happen at, but this is another Superb result that should be pretty easy to get.
Difficulty Rating
After mulling it over a bit and replaying every rhythm minigame in this set a number of times, I’ve finally landed on a 1.4/5 for this one. Somehow it’s not the hardest of the normal rhythm minigames in this set (curse you Rhythm Tweezers….) but it’s still a bit of a challenge at first. It’s really easy to get off rhythm by accident in this game, and that’s a death sentence if you’re aiming for a Superb or you’re in the middle of a Perfect Campaign (more on that another time). There are still rhythm minigames more challenging than this ahead; however, it’s a nice challenge to put any overconfident newcomers in their place.
Remix 1
Finally, we are at the first remix of Tengoku, and the Rhythm Heaven series as a whole! For those that aren’t familiar, remixes take every rhythm minigame in the stage and create an entirely new minigame using them. It starts out simple with one minigame, but every so often it switches to a different one, and by the end of the remix there can be some very quick transitions in between minigames. They can be difficult to get the hang of at first, but once you get into the rhythm they’re a lot of fun!
Traditionally, the minigames in the remixes are retextured to fit some kind of common theme. Some examples from the series include tropical, honeybee, and carnival themes. However, continuing in the pattern of Rhythm Tengoku being weird, most of the remixes in this game don’t do that! First game in the series and all that, they were still working out the kinks… One traditional aspect of remixes that began in this game, however, is that there are no practices for them at the beginning. So I hope you remember the controls for everything so far!
Gimmicks
Since this is a remix, all gimmicks return for their respective minigames. However, sometimes remixes introduce something new to spice things up a little bit. The closest thing I would say this remix has is there is one moment where The Clappy Trio pops up in which there are four lions in the line instead of three. Of course, you are still last in line.
How to Get That Superb
The remixes, in every game, give you the same lines of text depending on what result you get. Because of this, it’s a little more difficult to figure out where the line is drawn between just an OK and a Superb. However, the safest answer I can give you is that as long as you have the basics down for each game in this set, getting a Superb in the remix shouldn’t be that much harder. In other words, if you can get a Superb in every other minigame in this stage, you should be able to get a Superb in the remix, it just might take a few extra tries because you’re not sure what to expect at first. Just pay attention to the transitions!!
Difficulty Rating
Keeping in mind that this is a remix and not a regular rhythm minigame, I am giving this one a 2/5, primarily because some of the transitions into the Clappy Trio segments don’t give you a lot of breathing room, so it’s really easy to mess up there if you don’t know what to expect. Also, not really related to the rating, but for some reason the minigames are weirdly spread out through this??? Like the first half is basically just Marching Orders and Karate Man which feels wrong.
Final Remarks
Overall, Stage 1 of Rhythm Tengoku is a good introduction to the game! It’s got a little bit of a challenge to humble any overconfident players, while still remaining easy to pick up and get into. That’s what the first stage should be all about! Anyways, tune back in next month for Stage 2!
So You Want to Romance the Three Kingdoms?
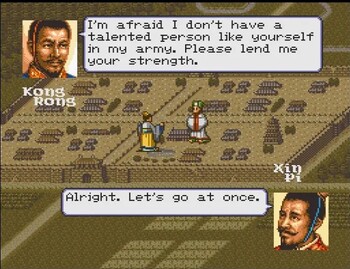
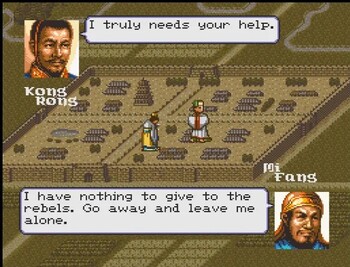
Hello and welcome back to So You Want to Romance the Three Kingdoms?, Strategy Wing's premier filler section you sort of glance at but then skip because you couldn't possibly care less about the topic at hand (as we say on the staff wiki, the Shoey Special). Last time, we spent a ton of time talking about locations and which rulers have the best or worst starting positions before throwing that all away and picking Kong Rong 'cause his name is funny. This month, however, we're still not ready to actually start the game; instead, we're going to be looking at some of the in-depth mechanics you'll need to master if you wish to be a successful ruler!
An Experienced Officer Core Is Essential To Our Lord's Success
So perhaps the biggest difference between Romance of the Three Kingdoms Part IV: Wall of Fire and Nobunaga's Ambition is that in Nobunaga's Ambition your Daimyo essentially does everything alone. Sure, there's references to other generals, but those are just nameless faces. All other actions, whether they be diplomacy, bestowing gifts to the people, or even engaging in trade, appear to be done entirely by whichever Daimyo you decide to play as, with no help from an administrative state. Well apparently, China doesn't play by those rules, because Romance of the Three Kingdoms Part IV: Wall of Fire contains a very detailed administrative state that you must work with if you're going to accomplish anything!
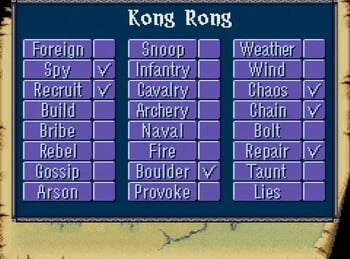
The administrative state in this game takes place in the form of recruitable officers. Basically, these are named figures from prominent clans who support a city's rulers. One cool thing about the officers is that I'm pretty sure each one is actually a figure from the actual Chinese historical period covered by the game. Anyways, each officer has multiple sets of stats for things that they are best at or can do. Now, there are some things every officer can do. Every officer can work in developing your city, lead or train, or draft citizens to war. They also can each attempt to raise citizen morale by giving them food (more on that later). Every officer can also engage in trade, and, finally, any officer can be put in charge of a vassal city. But on the other hand, there are things only certain officers can do based on their learned skills.
For instance, I mean, could you imagine somebody like Dong Tuno attempting to recruit civilized officers to your cause? The man's little more than an up-jumped barbarian! It would be a dishonorable disgrace to your cause to even attempt to do so! Obviously only civilized imperial officers like Xin Pi can be trusted to convince wayward officers to flock to our cause! When it comes to skills for city development, the most useful skills are Foreign (which allows said officer to engage in diplomacy), Spy (which allows them to assess other territories' troop strength as well as city stats), and finally Recruit (which allows them to recruit other officers to your cause). Whereas for battle the main skills you want to look at our Infantry, Cavalry, or Archery, because an officer who is proficient in any of those stats is the best pick to lead their chosen type of unit.
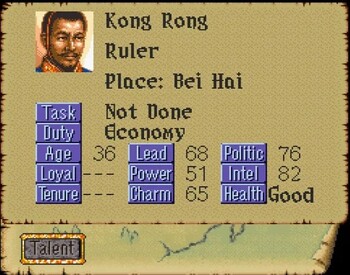
Officers also have stats similar to the ones your Daimyo had in Nobunaga's Ambition. These stats help determine how good an officer will be at various different things in the game. For example, an officer with a high lead and power stat will be better at leading the troops into battle and training your army, whereas an officer with high politics and intelligence stats will be better at working on developing your city through public works projects. High charm is also incredibly useful in an officer because officers with high charm have an easier time persuading other officers to join your cause and they get lessened morale drops when you recruit troops!
But here's the rub. Much like in real life, the vast majority of the officers you'll recruit in this game are useless morons with super low stats. Most of them are barely fit to serve in the army, much less lead the troops into battle! And if it were up to me, I wouldn't trust any of them with a sack full of gold and leave them to develop our precious farm land. But beggars can't be choosers and if we're going to control all of China, we're going to need as many officers as possible. Especially considering that, when you think about, if you want a basically full-service city, you need a lot of officers to manage it. And if it takes a lot for a single city, think what it'll take for multiple! You need officers to spy on various regions, to raise and train troops, and to develop your city into a modern-day Alexandria. Each one of those tasks takes an officer, and a lot of those tasks take an officer out of action for months at a time. For instance, a general who is training troops cannot be used to invade another city until he's done training troops. So, to really manage your city properly, you need at least six if not eight officers, and each time you take a city, you need more officers to help you manage that city. So it's really easy to get yourself into an officer deficit where you just basically brain drain your empire by stretching your talent too thin.
That's why, and I can't stress this enough, you want to recruit any officer you can, especially early in the game. I would even probably recommend save scumming before each recruit attempt to ensure better odds!
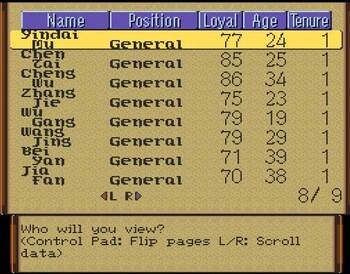
One thing I don't like about the officer system is that so many of them have the same first name. Like, there are probably 30 different Wangs. And when you're looking for a specific officer, there's no way to look them up via stats. So, and especially once you conquer a lot of cities and have a few different fronts open, it can be very difficult to remember which officer is doing what in which city. A lot of times I find myself just scrolling through cities trying to find officers that are good at battle to send them to my front lines. I just wish there was a better organization system for the officers you recruit.
So you're probably asking yourself "well, how do we get these officers?", and I'm glad you asked! There are basically four different ways to get officers!
The first and most common is recruiting wandering officers. Basically (especially in the early game), there are a ton of wandering officials who aren't loyal to any ruler yet. If they arrive in a city you control, you can go to the staff option and click on "recruit" and, as long as you have officers who have the Recruit skill, you can attempt to recruit them. This triggers a cute little cutscene where you implore them to join you and they either accept or decline. Each month an officer can attempt one recruit. So if you have multiple officers who can recruit, you get multiple chances to recruit. Just note that recruiting counts as your officer's action for the month, so if you recruit, then you can't use that officer to, say, raise troops or give food to the peasants. But that officer can still do what I call passive actions, AKA developing the city.
Now if you're playing on the Switch or, god forbid, the Wii U for some reason in 2025 the year of our lord, I recommend creating restore points before each recruitment attempt, because you don't want to lose out on precious, precious officers.
The next most common way to recruit officers is as what I call the spoils of war!. You see, during a war, if you completely smash an enemy's division, you'll capture the officers in charge of that division. Often, those divisions have multiple people assigned to them, which if you completely capture that division, you'll be able to take every officer in that division prisoner. In addition, if that division attempts to flee before being annihilated, you can still end up capturing officers who've attempted to flee. Finally, if you take a city, you'll take every officer in that city prisoner. This is important because you can attempt to win over these officers to your righteous cause! Your success is based a lot on their loyalty to their ruler, so people with high loyalty are much harder to recruit than people who aren't loyal. But don't worry! If you fail, you can just throw them in prison!!! After all, I'm sure a few months in a cold cell will show them how resistance is futile. You can also execute or free them, but that's stupid, lol. This is an imperial system and I've won a fight of conquest; they don't have the right to oppose me! Putting them in prison means that every month you'll have a chance to bring them into your fold. It can be a real pain in the ass, lol. I think there were times that I had upwards of 20 POWs just because "they didn't recognize me as their ruler" - fucking babies!
Now, one interesting thing is that you can actually convince a fellow ruler to join your cause, but rulers are a little strange to recruit. For starters, some will just straight up refuse to join you and that's usually based on their hostility stat. Obviously somebody who hates your guts isn't going to side with you. And even some that can theoretically be recruited will refuse to join you. And the thing is, you can't imprison a ruler, so your only choice is to either free them or execute them. Now a guy like me, I choose the block each time. Don't want people to think I'm weak and soft and will let people like Yuan Shu walk all over me! I'd also just in general warn against freeing them because, if you free them, they can take over any vacant city and then that's just another asshole you've got to deal with. Or worse, they'll constantly be asking me for food and gold and even when I want to give it to them they somehow always manage to ask in a city that doesn't have any resources and I just hate it so much!!!
The next-most useful recruitment option is one that's much more useful in the early game when personal loyalty is low rather than later in the game when loyalty tends to be high. You can actually steal away officers from neighboring cities (any city that connects to you) by clicking on the "recruit "option in the staff menu.
You can even bribe them upwards of 1,000 gold to come over to your side! This option is much less useful after the first 5-10 years because they end up so loyal to their rulers that they have no interest in joining you. But still, it can be useful in the early game to steal away a few officers. Finally, and the rarest one I've seen, every now and then a wandering officer will just ask to work for you. It's nice when it happens, but I don't really know what determines it. I've seen it mostly in the first month of the game where at the very start officers will just ask to join you. You can decline but I don't know why you would?
Developing Your City
Next and lastly, let's talk about another very important aspect of the game - developing a city into a resource-making machine. So, this is somewhat similar to Nobunaga's Ambition, with there being four different aspects of public works you can develop. In Nobunaga's Ambition, there were three sectors you could work on, those being Town, Farm, and Dam, and the way you built them was that every season you could put gold into one of them to build it up. In Romance of the Three Kingdoms Part IV: Wall of Fire, there are four public work sectors: Farm, Dam, Economy, and Technology. And the way they work is a lot neater in my opinion. The way it works is you assign up to two officers to an area, you give them a budget, and then throughout the year in the background they work on improving that sector. It's pretty neat and for the most part it all makes sense. People with better political skills create better results and they use up less money, whereas people with lower skills creator poorer (but still some) results and use up their money faster. This is where you can really use officers of a lower caliber, especially in the early game or if you have control of a lot of different cities. It still makes sense to have even poor officers working in some capacity on developing a city under your control because it can still improve things such as tax revenue or the harvest success. Plus, if you go to the report page, you get a little in-game report from the officers on how things are going! A touch that I really like!
I don't think I really need to explain the categories too much. Farm increases rice yields during the harvest, which is important because it turns out armies need food! And you can sell that rice for money in a pinch and use rice to improve citizen morale. Economy increases the amount of tax revenue you get at the start of each year, which is obviously important because money can be turned into things like more soldiers, bribes, and ponies to stomp your enemies to death in a glorious cavalry charge. I think Economy might also decrease your chances of getting infected by the plague because a better city equals less people peeing in the drinking water! Next, we've got Dam, pretty self-explanatory. It helps protect your cities and farmlands from the typhoons that flood the nation.
The last one is probably the most interesting one, but also the one I kind of ignore the most. The last one is Technology. Building up your technology increases the amount of weapons your builders can create. There are five things you can build once your technology gets high enough: X-Bow (crossbows), Strong-X (strong crossbow), Auto X (auto crossbow???), Ram (battering ram), and finally C-Pult (catapult). Now, you can actually buy X-Bow and Strong-X from the market, but it's cheaper to make them yourself. The other three, Auto X, Ram, and C-Pult, you have to build. But here's the thing, and maybe I'm just stupid, but I don't see Technology as being super useful. I've never had a real use for crossbows. Now, in theory, obviously you'd use them to rain death from above in situations where you were invaded. But I'll be honest, even the strongest crossbow seems to do very little even when you have a lot of them. Unless of course they're in the hands of Cao Cao, but that guys uses GameShark, so he doesn't count. Rams are only really useful for knocking down the castle doors during sieges, but they take so long to build and so long to knock down the door that I just don't bother with them. Finally, C-Pults might be useful, but again it takes like eight months and a ton of gold to build a single C-Pult, so then I'm tying up an officer for eight months to make one. And one is worthless, so if I really wanted to use them I'd have to be getting a ton made throughout my kingdom, and then I'd have to coordinate them all in one spot. And it's just too much work!
So yeah, and this could just be a wrongheaded opinion of mine, but I don't usually put a whole lot in Technology. One thing I find strange is you don't get anything for maxing out a city's technology stat, which is weird, right? I thought at one point that's how you got boats for sickass naval combat, but nope, that's not how you get boats! To this day I'm not entirely sure how boats work 'cause I've never seen them! So yeah, when it comes to developing a city, the most important areas are Farm and Economy, then Dam, and at the very bottom Technology.
One last thing! Eventually you'll reach a point where you have so many cities that some just aren't worth really developing. I'd say once you've gotten to the point where you have cities not directly connected to your frontlines, then for any city with less than 300,000 people, I'd only leave a skeleton crew of 1-3 officers there. And instead of actively working on making the city better, I'd use them as a feeder to recruit soldiers and transfer money and provisions to my frontlines. But, uh, maybe that's why the game always gives me a poor ruler rating at the end of the game. So maybe you'll be a better ruler than me and treat all your cities with love and care!
That's all for this month. Join me next month as I discuss even more mechanics from this goddamned Super Nintendo game!!!
Pitohui's Pokémon Academy
Written by: Hooded Pitohui (talk)
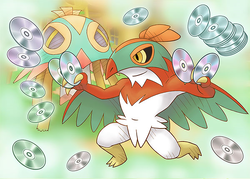
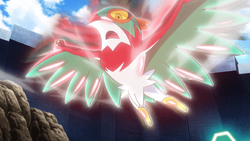
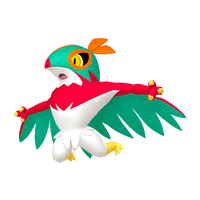
Welcome back, class! I do hope you exited our previous session without feeling that the lecture was too... dry. ...*ahem*, well, reviewing our time together, it has come to my attention that never once have we examined a Pokémon of the Fighting-type. Now seems as fine a time as ever to correct this omission, so today our focus shall fall upon a natural featherweight combat expert - the Kalos' regions Hawlucha!
Before we get underway, though, for those of you just joining us, you can find our course policies and aims in the first box below and a refresher on frequently-used terms in the second box. By all means, skip them if you're already familiar with what we do here!
First, a Smogon University course, this course is not. No, this academy's lessons are designed to get trainers of any stripe thinking about how they can raise their Pokémon, and, as a result, aren't designed to keep up with the widely-accepted metagame for the series. In some cases, the way I've raised my Pokémon may even flies in the face of conventional wisdom. If you're looking for top-tier strategies, do check out Smogon, but if you merely want to get a little deeper into raising Pokémon while still doing things your own way, feel free to use this section as a reference.
Since we all know the importance of citing our sources, I also need to credit the design of some of the tables used in these lectures to Crocodile Dippy, author of the Pocket Handbook which can be found in early editions of Strategy Wing. Additionally, I'd like to give nod to the Bulbagarden Archives, the source of many images in this section.Base Stats: Base stats are the values associated with a particular Pokémon species, and are the same across every individual Pokémon of a given species. You have no influence on them. You can think of them as traits tied to a species. A chimp isn't ever going to be able to get as good as digging as a mole will be, and, likewise, an Abra is never going to have the defensive prowess a Shuckle has.
Individual Values (IVs): Individual values, as their name implies, are associated with individual Pokémon. They range from 0 to 31 in each stat, with 31 being considered a "perfect" IV and higher numbers corresponding to different stats. Magikarp A and Magikarp B will have the same base stats, but they may very well have different IVs. To stick with the animal analogy, one mole may be born with larger claws than another mole, and that first mole is probably going to have an easier time digging through dirt than the latter. Individual values are set in stone, strictly speaking, but you can use Hyper Training (from Generation VII onwards) to functionally get a perfect IV in a stat.
Effort Values (EVs): Effort values are the one thing you can easily change. A Pokémon can earn, primarily through battling, but also through means like the use of certain items or mechanics like Super Training, up to a total of 510 effort values, with up to 252 in any given stat. To finish off the animal analogy, no matter what kind of claws a mole is born with, moles who have more experience digging are probably going to be better at digging than moles which have never dug.
Nature: A Pokémon's nature is, more or a less, a stat modifier with a name meant to make it sound like a Pokémon has some personality. Natures will raise one stat by ten percent and lower another stat by ten percent. Some natures raise and lower the same stat, canceling out the effect and leaving stats unchanged. Natures can be functionally changed with the use of special mint items from Generation VIII onwards.
STAB: STAB stands for Same-Type Attack Bonus, and refers to the boosted power of moves that match the type of the move's user. To illustrate this, consider the case of a Lombre, a dual-type Pokémon which is both a Water-type and a Grass-type. Any Water-type moves Lombre uses will have their power boosted by 1.5x, and any Grass-type moves Lombre uses will, likewise, have their power boosted by 1.5x. (There are circumstances where this does not apply, and, while the 1.5x multiplier is typical, some games use other multipliers.)
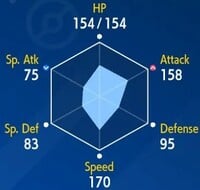
Examining Hawlucha's base stats, there should be no question as to where this Pokémon excels. Agile and swift, Hawlucha boasts a speed stat which even a Manectric would envy, and respectable physical strength. Giving due consideration to these strengths, and noting that every other stat of Hawlucha's is middling at best, we will take a simple approach by investing maximally in speed and attack. Our remaining few EVs, we will spend on HP, giving Hawlucha just a tad bit more longevity.
Our aim of allowing Hawlucha to outspeed all of its foes and to strike with great force needs to inform our choice of ability this month, as Hawlucha has access to three abilities, all of which one might make some case for. The easiest of these three to discuss first is Limber, which prevents Hawlucha from being paralyzed. This could have some benefit for a Pokémon so dependent on speed, but its usefulness depends entirely on what opponents Hawlucha faces. Its activation is out of our control, reliant upon Hawlucha's opponent. So let's table Limber for a moment, and turn to Mold Breaker, an ability which allows Hawlucha to ignore its foe's ability when using a move. This is... quite situational, so let's discard Mold Breaker.
That decision leaves us with Unburden to examine. When a Pokémon with Unburden loses its held item, its speed doubles. Ah, now we have an ability we can trigger at will with only our input, and one which massively increases Hawlucha's already enviable speed. In Unburden, we have a clear winner, but we shall need to remember its effects when designing a moveset so that we can find a means by which to remove or use up Hawlucha's held item. Of course, we shall need to choose a held item, as well!
|
Name: | Hawlucha | Base HP: | 78 | |
| Category: | Wrestling | Base Attack: | 92 | ||
| Type: | Fighting | Flying | Base Defense: | 75 | |
| Abilities: | Limber | Base Special Attack: | 74 | ||
| Unburden | Base Special Defense: | 63 | |||
| Mold Breaker | Base Speed: | 118 | |||
Before we proceed with crafting a moveset, however, I should briefly note that Hawlucha most benefits from an Adamant nature. While you may be tempted to go with a speed-raising nature for a larger increase, Hawlucha's speed stat doesn't need the increase, especially with a boost from Unburden. While respectable, Hawlucha's physical attack is not outstanding, and so a boost there is much appreciated. Special attack, of course, does not matter to Hawlucha in the slightest and may safely be lowered.
Now then, moving into constructing a moveset, we need to keep in mind two primary goals. First, as usual, we will need a high-powered STAB move which runs off Hawlucha's attack stat, and we also need a move which can rid Hawlucha of its held item - or ideally, a move which can do both at once! Surveying all of Hawlucha's Flying-type and Fighting-type physical moves, do we find any which fit our dual criteria? Indeed we do, and two, at that! For our first STAB move, we can choose between the two-turn Sky Attack combined with a Power Herb (which will skip the charging phase of the attack one time) or the defense and special defense-lowering Close Combat combined with a White Herb (which will reset Hawlucha's lowered stats one time). Between the two, Sky Attack has higher power, but also lower accuracy, and because both of these Herb items will only activate once, Sky Attack will only uselessly take up a moveslot after it has been selected once. For that reason, we will go with Close Combat.
We can immediately send Hawlucha out to deal a considerable amount of damage with Close Combat, which will then activate a stat drop, in turn consuming and using up the White Herb to activate Unburden. That's a synergistic sequence already, no? Can we add even more synergy? We can still use a STAB Flying-type move, so let's turn our attention there. We can eliminate Wing Attack and Aerial Ace for having too low of a base power (60), eliminate Bounce for being a two-turn move of unreliable accuracy (85%), and eliminate Fly for being a two-turn move. After striking those, we have Dual Wingbeat, Brave Bird, and Acrobatics left to choose from. Now, Acrobatics may on the surface seem the weakest of these options, with only 55 base power to Dual Wingbeat's effective 80 and Brave Bird's 120, but Acrobatics doubles in power if the user is not holding an item... and Close Combat has already consumed the White Herb, leaving Hawlucha without an item... You see where this is going, yes?
With a boost in power, Acrobatics easily beats out Dual Wingbeat. While it does still come up shy of Brave Bird, Brave Bird has recoil damage which erodes Hawlucha's longevity, while Acrobatics does not. With the base power gap as small as it is, let's play it safe here and add Acrobatics as a second STAB move.
| Close Combat | 
|
The user fights the target up close, inflicting damage without guarding itself. This also lowers the user's Defense and Sp. Def stats. |
| Acrobatics | 
|
The user nimbly strikes the target. This attack does massive damage if the user isn't holding an item. |
| Swords Dance | A frenetic dance to uplift the fighting spirit. This sharply boosts the user's Attack stat. | |
| Encore | The user compels the target to keep using the move it encored for three turns. |
At this point, the Hawlucha fanatics among you may have a question forming in the back of your minds. You may be thinking that we could free up a moveslot if, rather than having separate Flying and Fighting moves, we simply used Flying Press, a Fighting-type move which acts as though it also has the Flying-type. That is an astute observation, and I would certainly encourage you to pursue the use of Flying Press on Hawlucha further! After all, it is great fun when you can make use of a Pokémon's signature move. That said, Flying Press neither easily activates any held items, which breaks the Close Combat-White Herb-Unburden-Acrobatics chain right at the start, nor does it have more power than either Close Combat or a boosted Acrobatics. It simply doesn't perform as well as either of the options we've already selected. Further, combining these two types onto one move... does not actually make it more useful than a regular Fighting-type move from a type effectiveness perspective. Close Combat hits five types (Ice, Rock, Steel, Normal, and Dark) for super effective damage. Flying Press hits... five types (Ice, Grass, Fighting, Normal, and Dark) for super effective damage. Fighting and Grass can be covered better by a pure Flying-type move. With one Fighting-type move and one Flying-type move, Hawlucha covers seven types rather than the five it would cover with Flying Press. As fun as Flying Press is, it's the inferior choice, here, so we will continue with Close Combat and Acrobatics.
At this point, we can look briefly at what coverage moves Hawlucha can access. Looking solely at physical moves, Hawlucha can make use of the following types: Bug, Dark, Electric, Fire, Grass, Ground, Psychic, Poison, and Steel. Of those, Bug could offer coverage against its Psychic-type weakness, as could Dark. Electric could in theory counter Flying-types, but Hawlucha only has access to the 75 base power Thunder Punch, making it a rather weak option. Fire provides no benefits which Fighting does not already provide while Grass provides no benefit at all, and Ground can be discarded on account of Hawlucha's only move of the type being the two-turn Dig. Poison can cover a Fairy-type weakness, at least. If you are looking to add a coverage move, I suggest considering either X-Scissor, Lunge, Throat Chop, or Poison Jab, but, today, we will be taking a different approach.
Instead of a coverage move, we will add Swords Dance so that Hawlucha can bolster its attack by two stages, turning its power from merely respectable to formidable in the span of one turn. Now, with Unburden boosting speed and Swords Dance raising attack, Hawlucha will be well-positioned to quickly KO opponents! There is, however, the small matter of Hawlucha's frailty... If it gets hit while using Swords Dance, it may well be KO'd before it can act, so we must find a method by which it can use Swords Dance safely!
Enter Encore. With its high speed, Hawlucha can use Encore just after an opponent has used a status move to, say, boost its stats or lay out a Stealth Rock, locking its foe into that status move. Either they shall have to waste turns using the move again and again, or they will have to switch out. In either case, Hawlucha secures itself a turn to use Swords Dance! With two powerful STAB moves and methods to increase both its attack and speed, our Hawlucha is well-equipped for battle, and our task is complete!
Now, as I said, those of you wishing to continue working with Hawlucha might consider investigating Flying Press. I know I typically linger after class, but this month, I must hurry on out. I received a request to arrive promptly at a warehouse for a conference, you see, and I would prefer not to leave this Dr. Blastinoff waiting!
An Overly Detailed and Funny Walkthrough of Mega Man 3
Played by Sparks through the Mega Man Legacy Collection for the Nintendo Switch.
Introduction
Hello everyone! Before I start, I want to apologize for holding off on Mega Man 3 for months. I played through Just Shapes & Beats and that was fun, but it's time to get back to Mega Man! I promise from here on out I will get through the remaining classic games without any other games interfering. Thank you for your patience!
So... welcome to the start of my Mega Man 3 walkthrough! This is the third game of the Mega Man franchise, released in 1990 in Japan and the United States and 1992 in the Europe. This game has no intro cutscene (and there's a reason for that on which I'll elaborate later), so let me tell you the plot: 2-3 years after the events of Mega Man 2, Dr. Wily claims he has reformed and works with Dr. Light to create Gamma, a large peace-keeping robot based on Guts Man. Eight Robot Masters in charge of the "mining worlds" go berserk and make off with eight of Gamma's power crystals. It's up to Mega Man and his new companion - a robotic dog named Rush - to stop them!
About Rush... he's a pretty cool dog who helps out Mega Man on his adventure! Initially, he can only propel Mega Man upwards by launching him in the air with a spring, but after defeating specific Robot Masters, he gains the abilities to transform into a submarine and a jet, allowing Mega Man to easily navigate underwater and airborne areas. Like Mega Man's weapons, Rush has a limited amount of energy that can be restored with Weapon Energy. Mega Man also gains the ability to slide by holding down on the stick and pressing the "jump" button! This allows for evasive maneuvers and for sliding through small passages.
Unfortunately, Mega Man 3 is my least favorite of the classic games. The game had a rough development, and so not everything that was planned made it into the final product. The game has random difficulty spikes and a series of stages after the eight Robot Masters bring the game down greatly. Even Keiji Inafune, the co-creator of Mega Man, said that Mega Man 3 was one of his least favorite games in the series. Hopefully my opinion will improve on it after I beat it again, but this is a strategy guide, not a review!
Like my previous Mega Man walkthroughs, this one will have lots of images and plenty of humor to keep you entertained. I will reduce the amount of images I put here however; I think 5 per stage is a good limit.
Now, let's start the game!
Unlike Mega Man 2, the game only has one difficulty setting. The password system does return however, and serves the same purpose.
So the eight Robot Masters for this game are, from left to right starting with the top left corner: Spark Man, Snake Man, Needle Man, Hard Man, Top Man, Gemini Man, Magnet Man and Shadow Man. Here's a general idea on what everyone is weak to:
- Spark Man is weak to Shadow Man's weapon.
- Snake Man is weak to Needle Man's weapon.
- Needle Man is weak to Gemini Man's weapon.
- Hard Man is weak to Magnet Man's weapon.
- Top Man is weak to Hard Man's weapon.
- Gemini Man is weak to Snake Man's weapon.
- Magnet Man is weak to Spark Man's weapon.
- Shadow Man is weak to Top Man's weapon.
Keep in mind that other special weapons deal additional damage to Robot Masters, but these ones are the most effective.
Do you notice something odd about the weaknesses? I'll talk about that in part two...
I'm going to choose Magnet Man first. Here we go!
Magnet Man
Magnet Man stage
Now with different theme music!
Magnet Man's stage starts out in the exterior of his "base". The first section of the stage has these flying magnet enemies that "attract" Mega Man and carry him with them! They come from both directions, so they may actually help you get past the gaps! Just be sure not to directly touch them - they hurt! The terrain is also uneven, so make sure you don't get brought into a wall and fall to your doom. I just get rid of the enemies so they aren't in my way. The end of this section has a ladder leading downward.
After climbing down, we find ourselves in a big room. A whistle is heard, and suddenly this red robot who looks a lot like Mega Man arrives and attacks us! This robot is Proto Man, a prototype who is Mega Man's brother. Is he friend, or foe? Well for now he's a foe. He simply walks back and forth, occasionally jumping and shooting two bullets while airborne. To get past him, slide under him when he jumps. Don't worry! The bullets are not at ground level, so you're safe if you're not in the air. He's not too bad; just keep shooting him until he's done for. You can jump with him when he's facing the opposite direction so you can get more shots on him. After taking enough damage, Proto Man retreats and the way to the next section opens up.
After descending more, we encounter a large version of those annoying floor enemies from Mega Man 2. This enemy moves slowly along the ground and attacks by firing homing missiles from its head. The missile can be dispatched with one bullet. If Mega Man is very close to the enemy, it will malfunction and "spring" back and forth. Unlike their Mega Man 2 counterparts, normal bullets can hurt and defeat them. When proceeding to the right, there's another one! Those missiles are a pain if they stick around. A ladder brings us even deeper.
There is then a staircase with two walking eye robots walking towards us. These enemies are pretty easy and are rid of from three shots. We must descend even more!
The next room has more walking eyes. Additionally, this section introduces fans that can pull or push Mega Man. These ones pull Mega Man. The fans do no damage and are only found in this stage. Hey, do you know what's at the end of this room? Another ladder! Leading downwards!
This next room is a bonus room with four small health power-ups on a high ledge. Try not to miss them if you're hurt! Afterwards is a long section with four sets of those annoying blocks that appear and disappear at specific spots. The first set is easy, but the second one has a fan that attracts Mega Man, which can easily mess you up. The third section has a pit where you can fall, with a fan close to one of the blocks. You can avoid the "danger block" by simply leaping from the first block to the third. The last set is similar to the third set, with another fan by a block we can avoid. There is then a ladder where we finally climb upwards!
While climbing, we see to our left several power-ups: one for a lot of health, one for a lot of weapon energy, and two for a small amount of weapon energy. The room after this one allows us to get to them, but I don't need them. The next area is where the ladder ends. We must jump across spikes to reach another ladder, but this odd enemy blocks our progress. It shoots three sets of bullets left and right, and when you get close to it, it gains the ability to lob bullets directly to your location. A tricky enemy indeed! It's in a good position too, so I'll have to shoot it while jumping. A few shots will get rid of it. Thankfully its attacks are weak.
After climbing once more, we arrive at the boss door! There is one of those large ground enemies guarding it, however... Mow it down!
Magnet Man fight
Time to fight Magnet Man! He's not too difficult, as the Mega Buster deals more damage than usual to him. He's got some moves of his own:
- Magnet Man jumps twice in quick succession in the same direction. The second jump is higher. Try to have him jump over you from his second leap. After jumping twice, he does one of two attacks:
- He jumps straight up to the ceiling and throws out three Magnet Missiles straight ahead. If Mega Man is beneath one, it will fall straight down. Upon colliding with the ground, the missile disappears. If you can, try to be far away and slide so that you'll avoid all three at once. Magnet Man will then descend to the ground.
- Magnet Man will try to attract Mega Man towards his location. This attack last for many seconds and the boss is invincible while performing it. Just keep sliding away from him.
Magnet Man is quick and difficult to hit, but his lower-than-usual HP makes this fight one of the easiest in my opinion. The best time to attack is when he's jumping.
After defeating Magnet Man, we obtain the Magnet Missile! It allows Mega Man to toss Magnet Missiles straight ahead. If an enemy is above or below the missile, it will fly up or down toward them! When Magnet Missile is equipped, Mega Man turns red. The letters for it are MA.
I forgot to mention this, but we also have Rush Coil when the game starts. I mentioned what it does earlier, but I'll remind you! It summons Rush close to Mega Man. When he's jumped on, Rush has a spring that propels Mega Man upward. Mega Man can also shoot bullets when Rush Coil is equipped. The letters for it are RC, and Mega Man also turns red when it's equipped. I didn't need it in Magnet Man's stage, but I thought it'd be nice to mention.
The second Robot Master is Hard Man!
Hard Man
Hard Man stage
Two images of the first section of the stage...
Hard Man's stage looks to take place in a mountainous area. We must proceed to the right to make progress. It looks to be empty, but these giant bee enemies appear in the sky and drop bee hives(?) in front of Mega Man. Upon landing on the ground, the hive breaks and five bees fly towards Mega Man to attack him. The hives deflect attacks and I'm not sure if the large bees carrying the hives can be defeated. The smaller bees summoned can be destroyed, so get rid of them before you're swarmed! There is a loophole with this enemy; when the bee appears in the sky, go backwards until it's off-screen. When you progress, they're gone! This allows for an easier time on getting through. At the end of this section are these green bear traps. When stepped on, the trap itself will activate, dealing damage to Mega Man if he's on it. Just keep moving and don't stay on them for too long! We also seem to enter a cave and there's a ladder leading upwards. There's also a large health power-up past more beartraps if you need it.
After climbing, we enter a room with an enemy that throws hammers, but not the ones you're thinking of. Ever hear of the "Hammer Throw" event in the Olympics? The hammers this enemy tosses are like those ones. The enemy swings one around before opening its eye and throwing it. While the enemy's eye is closed, it's invincible. The hammers can be avoided by jumping or sliding with good timing. This particular enemy is on a high ledge. We must use Rush Coil to get up there and take him down! Be sure not to get knocked off the platform. If you just so happen to run out of Rush Coil energy, go back and keep defeating bees until you're recharged. Another ladder leads us upward.
Up next is a "hallway" leading to the right, where another ladder is. There are two ape enemies here, and they're not monkeying around! When they appear on the screen, they jump up and grab the ceiling. When approached, they will drop down and constantly jump towards you, sometimes grabbing the ceiling if there is one. They are very annoying enemies and can cause many problems if not dealt with. The best way to get rid of them is when they're holding onto the ceiling. You can attack them safely and they won't do anything about it. You can also use Rush Coil to jump up and quickly shoot them. Magnet Missile might work too, but I'm saving it for Hard Man. Anyway, this section has two of those apes. Thankfully one of them can be shot while standing on stairs.
While climbing up the ladder, there is a small opening where a hammer enemy guards a large health power-up. If those apes did a number on you, you should probably get it. Upon reaching the top of the ladder, there is another ape! Not wanting to risk taking damage, I used Rush Coil to get rid of him while he was hanging on. There is then another ladder.
The next area is another long hallway. There are also three of these bulldozers driven by Mettaur-like characters throughout it. They "drive" forward, occasionally stopping. If they reach a ledge or touch a wall, they turn around. The driver must be attacked directly, as attacking the bulldozer won't do anything. Near the end of the hallway are two paths: one high and one low. The high path has a bulldozer guarding an E Tank! Obviously that's the correct choice, right?
Both paths lead to the next area, where two Mettaurs guard another ladder. These Mettaurs act differently than in past games; they stay hiding, making them invulnerable, but when approached they "wake up" and fire three slow-moving bullets in a spread. They then charge forward before hiding again. If you take the lower path in the previous room, then you have access to three small health power-ups.
This next room is a chaotic one. Basically the entire floor is composed of bear traps, and there is another bee enemy. This one cannot be cheesed, as there is no room to make it disappear. Fight the bees on the safe terrain before progressing. Make sure to keep jumping to avoid the bear traps!
After descending more, Proto Man's whistle is heard, indicating another fight with him. The room he's fought in has uneven terrain however, so it's more difficult to battle against him. What I did was stand in the center and keep shooting at him when he's close. Proto Man's first jump allows him to shoot directly on the highest elevation, so jump first before retaliating. After he retreats, we descend even more!
We get a breather room with another large health power-up. Afterwards is the boss gate! The enemy guarding it however is a large stomping one. It "sleeps" on the ground for about two seconds before jumping forward. While it's sleeping, it takes no damage. It can only be harmed while it's in the air. The health of it is lower than what you'd expect from an enemy of this size.
Hard Man fight
Hard Man lives up to his name if you don't have his weakness. He has two attacks:
- Hard Man fires two Hard Knuckles towards Mega Man. They change direction and fly towards Mega Man a second time. Difficult to avoid, honestly.
- He jumps high up above Mega Man before slamming downwards. Upon impact, the screen shakes and everything freezes. This attack is powerful and getting hit by it is really bad.
The Hard Knuckles are the hard part. You need quick reflexes to dodge both of them, as their homing capabilities are troublesome. To avoid Hard Man's slam attack, simply slide under him. You'll still be stunned if you're in the air, so there's no point in jumping unless you're dodging Hard Knuckles. Just keep firing Magnet Missiles at the boss until he's done for. He's a large and easy target further helped by the homing capabilities of the missiles.
After defeating Hard Man, we get the Hard Knuckle! It allows Mega Man to fire a large knuckle that slowly travels towards the direction it's shot it. The knuckles can be moved up and down a little by holding up or down on the control stick. The attack makes up for speed with high power. The letters for this weapon are HA, and Mega Man turns dark blue when it is equipped.
The next Robot Master is Top Man!
Top Man
Top Man stage
In my opinion, Top Man's stage has the best music in the game. At least out of the eight Robot Masters!
Now I have no idea what location Top Man inhabits, but it seems to be very bright. There are lights in the background, and many of the platforms look to be made of glass. Anyways, the first section is a hallway leading to the right. Along the way are many enemies, consisting of two brand-new enemies repeated throughout! One of them is a screw-like enemy that appears out of nowhere while the other half flies in to complete it, after which it will start to slowly chase you. The enemy can only be attacked when it starts moving; attacking it while it's being "completed" will do nothing. The other enemy is one that is low to the ground, too low to shoot at with the Mega Buster. At random intervals, it will jump at Mega Man, either doing a small leap or a huge hop. They're annoying if you plan to defeat them normally. At the end of the hallway is a large health power-up on a high ledge. A ladder leading downwards brings us to the next part.
Upon descending, we see a large top enemy on a staircase. He shoots out tops that travel along the ground and turn around when they hit a wall. The tops can be destroyed. I can actually stay on the ladder and just keep shooting at him until he's done for... heh! Going down even more, there's a bonus room with two choices to make: three small health power-ups or a large weapon energy capsule. I don't need either of them. Afterwards is a small room with spikes on the ground, with platforms in the air to help make it across. One of those screw enemies will show up midjump, so be cautious!
Up next is another hallway that has those bulldozers from Hard Man's stage. A high-up platform has both a 1-UP and a large health power-up. Use Rush Coil to get up there but be aware of the bulldozer guarding them. The end of this hallway has another ladder leading downwards, where we find another staircase, albeit this one has less steps than the first one. Two Mettaurs inhabit the stairs, so defeat them to safely move onward.
The next area has a black background... and a strange surprise! A large cat robot blocks our way and attacks by spitting out two bouncing hairballs. The hairballs can be destroyed, but a few shots are needed instead of one. If the hairballs are gotten rid of, the cat will send out three fleas to jump at Mega Man like those low-jumping enemies from before. If the fleas are dispatched, the cat will spit out more hairballs. Due to the small space here, dodging the hairballs is very difficult, so just keep shooting at the cat until it explodes!
Afterwards is another somewhat large room. There is another top enemy on a small staircase, but this one actually gives me a 1-UP! How generous! Past him is another dark room with another cat, but the hairballs can actually bounce off-screen this time. This allows for you to see the flea attack. It's easier to fight against than the first one, if I'm being honest. We then climb a ladder upwards this time, where we must leap across small blocks over spikes to reach another ladder. A Mettaur inhabits a block above us, so wait until it runs down to get rid of it before moving on. A large health power-up is located on a higher block not above spikes.
After climbing upwards once more, we encounter weird terrain with low passages that only tops and sliding Mega Man can get through. Speaking of tops, there's another top enemy that uses the environment to his advantage. Fun fact, he can only have three tops onscreen; he won't shoot out more if they remain! Take your time reaching this one, as you need to shoot the tops and then slide! Past him is a big area that has no ground, walls or ceiling! There are these handy top platforms that you can use to get across though, but be careful! Standing on one makes Mega Man "move" left and right because these tops are spinning. Three of these top rise from the pit, while the other three descend from the sky. Carefully time your jumps so you don't fall! After making it past that, we finally make it to Top Man!
Top Man fight
Top Man is super easy, maybe even the easiest in the game. There is a reason why I didn't go for him first though! You'll see later. Anyways, Top Man has two attacks:
- He throws three tops in the air that stay there before quickly flying towards Mega Man. They can be avoided by going far away and then jumping at the right time.
- After the top attack, Top Man spins. While spinning, he's invincible. After a few seconds, he will quickly rush to the other side of the room. The first time he performs this move, he rushes almost immediately after spinning. Simply jump over him at the right moment. I don't know why that is. After rushing, he throws more tops.
This guy has a predictable attack pattern. Like Magnet Man, he takes more damage than usual from the Mega Buster. Hard Knuckle is very effective against him, four hits with it and he's toast!
Defeating Top Man gets us Top Spin, AKA the worst weapon in Mega Man history. Sorry for saying that, but it's just terrible. This allows Mega Man to spin when in the air, consuming no weapon energy if no enemy is within range, but it has such short range and sometimes all or almost all of the weapon energy drains when you attack an enemy with it. DON'T use this weapon against any enemy, save it for the next Robot Master instead. Please. The letters for it are TO, and Mega Man turns gray when it is equipped.
The last Robot Master for this month is Shadow Man!
Shadow Man
Shadow Man stage
You'd think a ninja like Shadow Man would be found in a dojo or something, but he's found in a dangerous location where lava flows in the background! Thankfully it's not as bad as the waterfalls in Bubble Man's stage.
We start on a platform where can can only go one direction - down! After falling, we find that angry bullet enemy from near the end of Magnet Man's stage. Thankfully it's much easier to attack. You can also ignore it and fall down some more if you're quick. The next room has nothing, but the one after that has two of those low leaping enemies from Top Man's stage, but here they're yellow instead of red. After making some progress, there is a bulldozer in our way. Easy peasy!
Falling down once again, Proto Man's whistle is heard once again, meaning there's another battle with him. It's the same battlefield as Magnet Man's stage so I won't explain this again. After he retreats, the way opens up!
This next section is a very long hallway with uneven terrain, but there are no pits or spikes. Those walking eyes are back, and these running grenade enemies are introduced. They move quick and they vault over obstacles. If they come across a wall they can't leap over, they turn back. One bullet defeats them, but they cause an explosion when struck, so be far away from them! Additionally, there are these machines on the ceiling that make everything dark. Only Mega Man and the enemies are visible, but everything else is not. This is a very dangerous enemy if hazards are involved, but thankfully there aren't any here. Because they're high up on the ceiling, they're difficult to attack normally, but the environment reverts to how it was if the machines are defeated or go off-screen.
This next part has four small weapon capsules, followed by steps with red versions of those low leaping enemies. What happened to their yellow variants? After getting past them, we must make a series of jumps across lava. Don't go too fast though! There are these parachute enemies that descend if you get close enough. They plummet at a fast speed, but when they open up their parachute, they glide from side to side and fall at a much slower pace. What I recommend doing is jump to the next platform, shoot down and enemies in the way, and then proceed. Later on they can fall while you're in the middle of a jump! To avoid getting knocked into the lava, go backwards during a jump to allow the enemy to fall, and then get rid of it. At the end of these jumps is one of those low leaping enemies. Watch out! Don't let it push you into the lava! Quickly slide when you reach to the last platform to avoid it, then run! It might still hit you, but it's better than losing a life!
Almost there to Shadow Man! On the way to the boss gate, two large dragonfly enemies will appear at the top of the screen, fly to the left, descend to your position on the X-axis, and then fly towards you. Jump over them or shoot at them until they're gotten rid of. If you hop over them, they'll fly off the screen! If you're not at full HP, keep destroying dragonflies until they drop health power-ups so you can be in the best shape possible. Shadow Man is no joke!
Shadow Man fight
Shadow Man is definitely the hardest Robot Master of the eight, at least to me. He's wildly unpredictable and is super fast too! What is predictable about him is that he jumps forward three times. After the leaps, he does one of two attacks:
- Shadow Man slides at Rainbow Dash-levels of quickness towards Mega Man's location. There is no warning for this attack, and it's avoided by jumping over him.
- Shadow Man can also throw two Shadow Blades, one in front of him and one diagonally upward. You can slide or jump over the lower one, but be sure not to hit the other Shadow Blade or bump into Shadow Man!
You're gonna need super quick reactions to defeat this boss without his weakness. The best way to do this is to stay far away and just keep shooting at him. If he slides, jump over and him rush to the other side of the room. If he throws Shadow Blades, avoid them and just stay where you are. If he constantly uses his Shadow Blade attack, then that's bad. This is because he'll eventually reach you and you'll have to get past him... good luck with that.
I should also point out that his main weakness is the Top Spin. You know, the worst Mega Man weapon ever? Four hits of it will do the trick, but you have to get super close to Shadow Man to be able to use it. Sometimes when using the weapon, a ton of weapon energy will be wasted in the blink of an eye. I think it's because you're "attacking" the boss during his invincibility frames, so this probably can be avoided by just striking the edge of Shadow Man. Thankfully this didn't happen to me, but it could to you, so beware! If you're unlucky enough to have this occur, attack him with all of the Top Spin energy you have, and then just switch to the Mega Buster to finish him off. This is why you should have full HP, to prevent a disaster from happening. If you're low on health and so is the boss, don't be afraid of using that E Tank from Hard Man's stage. Trust me when I say you do not want to fight Shadow Man without Top Spin. If you do lose a life and you're out of Top Spin energy, then I'm sorry. The only thing you could do is just hope you're lucky and somehow defeat the boss with only the Mega Buster, or lose all of your lives to get a game over so that the Top Spin energy is refilled.
Anyways, Shadow Man is done for! We acquire the Shadow Blade, which allows Mega Man to throw a shuriken in any of the eight directions! This weapon is similar to the Metal Blade, but the Shadow Blade acts like a boomerang, returning to Mega Man after it travels a certain distance. It's nowhere near OP as Metal Blade, but it's still a nice weapon to have! The letters for Shadow Blade are SH, and Mega Man turns purple when it's equipped.
But that's not all! Defeating Shadow Man also gives us Rush Marine! This is a new transformation for Rush, usable in water sections. Basically, Rush turns into a submarine, which Mega Man can pilot and have free control in the water. The Mega Buster can be shot while it's active. The energy will slowly drain as Rush Marine is being used. Rush Marine also works outside if water, but you can only jump and not move. Only use Rush Marine in water. The letters for Rush Marine are RM. Mega Man is red when it's equipped, much like Rush Coil.
Alright! Half of the Robot Masters are defeated, leaving four left! Join me in June when I defeat Spark Man, Snake Man, Gemini Man and Needle Man! Goodbye!
An Octet Gazette
Written by: Museful Traveler (talk)
Welcome back to An Octet Gazette, all you readers of The 'Shroom, a section which will be rapidly hurtling through its remaining points over the course of this year. We're finally ready to get into some traveler-specific traits after last month's primer. With the exception of the apothecaries and hunters, most of these will be fairly short, so we'll take them two pairs of characters at a time.
A quick word of advice - I'm going to try and keep story details to a minimum throughout these next few editions. Unfortunately, though, the nature of EX Skills is such that they do somewhat hint at some story beats. If you'd really like to go without even a hint towards any spoilers, you can skip right on down past here to vote in the SOTM poll and maybe toss a Poochy Pick's nomination to someone in the team.
Following the same order we covered the eight base jobs, we'll begin with the scholars.
| Cyrus Albright | Osvald V. Vanstein | |
|---|---|---|
| Artwork | ||
| Path Action(s) | Scrutinize | Scrutinize (Day), Mug (Night) |
| Talent | Study Foe | Study Foe |
| EX Skills | N/A | Teach, One True Magic |
| Latent Power | N/A | Concentrate Spells |
| Notes | N/A | Begins story imprisoned |
Ah, the Octopath 1 side of the table is looking sparse there, huh? This'll be pretty consistent, and it highlights just how many additions and improvements the sequel made. To start off, let's focus on the Path Action shared by both Cyrus and Osvald - Scrutinize. Scrutinize is your rogue information-gathering action, which is a bit funny with Cyrus because he's a fairly friendly guy, but I suppose it would ruffle some feathers for this excitable nerd to barge in and start asking pointed questions. I can see it more with Osvald, given he's a gruff and physically-imposing sort. Back on-track, Scrutinize nets you information. This information is ?mostly flavor text giving you some insight into the lives of the NPCs you use it on, but it gives the world a lot of character and I consider it worth seeking out. In almost every settlement, though, you can find multiple people who offer a perk of some kind alongside their flavor text, be it discounts at the shop or inn, making other Path Actions easier to pull off in that town, or revealing hidden items.
Octopath 2 adds Mug to Osvald's repertoire. Though only usable at night, it's actually a great Path Action because it carries no risk other than some HP loss, and you should be swimming in healing options unless you're doing some kind of restrictive challenge. Mug thrusts Osvald into a one-on-one battle with whatever NPC he has elected to rob. Winning the battle nets you that NPC's items, and losing simply resets Osvald to 1 HP. There's not even reputational damage! You can mug the whole of Solistia with no consequences! Yay for mugging!
Study Foe is a useful Talent, revealing a random unrevealed weakness of each enemy type at the start of a battle. This takes some of the guesswork out of breaking a new enemy variety, which is especially helpful in the early game when you have a limited range of offensive options and is still appreciated even by the end of the game. It's not reflected in a name change, but Study Foe gets a buff in Octopath 2, with Osvald's version revealing two weaknesses at the start of battle for any enemy you've encountered previously. It gives Study Foe stronger legs, making it useful in even the mid-game as a way to quickly complete an enemy's list of weaknesses.
I'm going to let our old skill tables do the talking for EX Skills:
I never found Teach useful in my own playthrough, and One True Magic was very occasionally useful if I needed a flexible way to knock down a shield point or two, but usually Osvald's other spells did the job fine. It's worth noting that One True Magic works with Alephan's Wisdom, allowing it to reach advanced forms which hit two or three times.
Moving into Latent Powers briefly, Osvald's is decent, taking whatever multi-target spell Osvald use while it's activated and focusing it on a single target in exchange for a power boost. It replaces Alephan's Enlightenment from the first game. It's far from the most useful of the bunch, but it can be handy for a boss battle if you want to prioritize damage output for a turn rather than wearing down shield points.
The final note I have on these two is that Osvald begins his story imprisoned, which comes with two unique caveats. Firstly, if you choose him as your starting traveler, you won't have the opportunity to recruit any other party members until you've completed his first two chapters. This... isn't as bad as it sounds on paper, though, because his second chapter is short and light on battles, so he really doesn't feel different from the other travelers in practice. We'll talk more about OT2's flexible chapter system in the final wrap-up edition of this section. The other caveat is a more important one. For a chunk of his first chapter, a muzzle prevents Osvald from casting spells, which is rough for a magically-focused character with poor physical stats! This makes his opening chapter marginally tougher than those of his fellow travelers, though you do get an NPC ally for much of the chapter, another change seen throughout the game which we'll discuss in the final wrap-up!
| Primrose Azelhart | Agnea Bristarni | |
|---|---|---|
| Artwork | ||
| Path Action(s) | Allure | Allure (Day), Entreat (Night) |
| Talent | Summon | Dance Session |
| EX Skills | N/A | Windy Refrain, Song of Hope |
| Latent Power | N/A | All Together Now |
| Notes | N/A | N/A |
Moving on to cover the dancers, we have Primrose Azelhart, who features in one of the heavier storylines of the first game, and Agnea Bristarni, a bundle of sunshine who has what's probably the most light-hearted storyline across both games. Both of them come equipped with the Allure Path Action, which is the rogue path action for getting NPCs to follow the party around. At the risk of reputation damage, you can try to get an NPC to follow you. It has pretty simple use cases for taking NPCs where they need to go in sidequests, but more interestingly, these NPCs can actually be summoned as a form of support in battle.
In the first game, this summoning is actually considered Primrose's whole Talent. An NPC can be summoned into battle a set number of times, after which they'll leave the party and must be retrieved from their original location. When summoned, the NPC will automatically use one skill after Primrose takes her turn, either using a (usually weak) attack on an enemy or providing a buff. Occasionally they might shield Primrose from a hit while they're active. After a few turns or after taking enough damage, they retreat. This might just be me, but with the lack of control over them and how quickly they fled, I never found them that useful in the first game. They were only rarely useful for chipping off an extra shield point here or there.
Octopath 2 made modest, welcome improvements to this system. Firstly, it folded summoning right into Allure's mechanics, freeing Agnea up to have an actual talent - Dance Session. This turns Agnea's NPC follower into a source of additional buffs, and it doesn't even require that they be summoned to battle to function. Whenever Agnea uses a dancing skill, her following NPC will show up (or take action, if already summoned) to grant an extra buff either to a targeted ally or Agnea herself. While their mechanics when summoned don't change that much and I still never found them extraordinarily helpful, this extra buffing power made it a little more worthwhile to always have someone following Agnea, and tying Dance Session to Agnea's oft-used dancing skills makes getting use out of it natural and common.
Turning to Agnea's EX Skills, we have one that's actually worth paying attention to! Outside of items like Soul Stones and maybe random methods like Bewildering Grace, I believe this is the only way of attacking multiple targets with Wind magic in the second game. It's interesting that they locked this away, and while I did sometimes really miss having easy access to multi-hit Wind spells, it was admittedly fun to work around the restriction. The secondary effect here is quite useful, though I sometimes forgot about it because Leghold Trap (my beloved) accomplished the same thing.
As for Song of Hope, it, uhhh, sure exists! I'm sure there are strategies it has uses in, but those strategies weren't mine! It's too much of an SP-guzzler for me to consider it, especially when I can usually just re-apply whatever buffs I need.
Wrapping up, Agnea's Latent Power is a useful one that pairs well with her buffing capabilities. All Together Now, when active, causes any skills that would normally target one ally (not including Agnea herself, because that's self-targeting instead) or one for to instead target all allies or all foes. It's nice for spreading a dancing buff around quickly, and only gets better as Agnea gets access to more abilities.
That covers our first two character pairs. Before I go, I'd like to give a quick thanks to the Fandom Octopath wiki for their repository of character art. Join me next month and we'll go over the merchants and the thieves! The latter counts for the villains issue, right...?
| The 'Shroom: Issue 218 | |
|---|---|
| Staff sections | Staff Notes • The 'Shroom Spotlight • Poochy's Picks • 'Shroomfest Highlights • Credits |
| Features | Fake News • Fun Stuff • Palette Swap • Pipe Plaza • Critic Corner • Strategy Wing |
