The 'Shroom:Issue 190/Strategy Wing
Director's Notes
Written by: Hooded Pitohui (talk)
Hello, all you readers of The 'Shroom! We're ringing in the first edition of Strategy Wing in the new year, and we would be delighted if you would join us! This year marks an important year for Strategy Wing. In November of this year, The 'Shroom will release issue 200, and with Strategy Wing having been created for issue 100, that means that November will mark 100 editions of Strategy Wing!
It's quite exciting, but, lest we get ahead of ourselves, let me return to what we have this month. To kick off the year, we've got content for space rangers and for Digimon tamers, and if that slant rhyme wasn't bad enough for you, we even have content for Pokémon trainers! To get serious for a moment, though, there's two pieces of news I should bring to your attention. First off, beginning in February, our professional heister, Kinger, will be writing on a bi-monthly schedule, so be sure to plan your Payday 2 crimes for every other month.
Secondly, this month, we bid farewell to our brave space ranger, Waluigi Time. Yes, strange as it is after so long, To Infinity and Beyond has reached its epic conclusion. I won't spoil it for you. Go read it and see what final boss battle is in store for yourselves, and be sure to thank Waluigi Time for taking us on this adventure as a part of the Strategy Wing team!
Now, I should let you go read what our writers have prepared for you, but, before you go, I want to remind you that you can join our team at any time you want! Whether you want to follow in Waluigi Time's footsteps and take us through a Let's Play, teach us how to accomplish something like Kinger does in Getting that Payday, or even tell us everything about a game you like the same way Mach Speed Mayhem did, you can check out sign up page and send an application to our Statistics Manager, Meta Knight right now, if you want! If you have any questions or want to talk through an idea before you write, feel free to send me a message, and I'll help you out the best I can!
That can wait just a little bit, though. For now, read onward!
Section of the Month
It seems that Miraidon is a popular Pokémon! Thank you all for voting for Pitohui's Pokémon Academy last month! The Wandering Shoestrel (talk)'s grand finale of Sir Cucumber's epic quest also made a splash, it's clear, with all of its usual quips and jokes and some special art. Above all, thank you for supporting all of our Strategy Wing writers with your votes! Seeing the vote totals we had this month was like getting a present for the holidays! Please do keep voting to let our writers see your support!
| STRATEGY WING SECTION OF THE MONTH | ||||
|---|---|---|---|---|
| Place | Section | Votes | % | Writer |
| 1st | Pitohui's Pokémon Academy | 9 | 40.91% | Hooded Pitohui (talk) |
| 2nd | The Greatest Quest | 8 | 36.36% | Mustard Machine (talk) |
| 3rd | To Infinity and Beyond | 3 | 13.64% | Waluigi Time (talk) |
File City Files
Hello readers, and welcome to File City Files, Strategy Wing's number one section covering the... let's say "popular" Playstation 1 game, Digimon World. In the last two issues, we covered just the basics of learning how to care for Digimon, but this month, we're finally getting out in the world as I tell you about the first three Digimon you're going to want to bring into the city.
Banking is an Essential Part of any Growing City
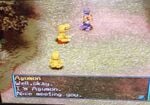
The first Digimon you're going to recruit is going to be Agumon Why? Because Agumon hangs out day or night in the first part of Native Forest, which is the first screen you'll see upon leaving town. Upon seeing you and your partner, Agumon will dart towards your character, and, even if you manage to avoid him, the game won't let you advance to the next screen without defeating him.
Agumon is a very weak Digimon, which makes sense since he's basically the game's tutorial opponent. Since he's sporting only 400 HP and has only two attacks filled by Sonic Jab and Spit Fire (the attacks of the starter Digimon), you should be able to pretty easily defeat Agumon even without doing any training or using any recovery items. Once you defeat Augumon, he comes to his sense and joins the city.
Purpose in City: Agumon fixes up the abandoned building next to Jijimon's hut, turning it into an item bank.
At the item bank, you are able to store up to 100 different items. It's very useful, especially during the early game, when you're only able to hold 20 items. The best things to store are various stat boosting chips you aren't planning on using, mostly, again, because you are only able to keep 20 items on hand at the very start. Also, if you do lose a battle, you could get mugged while making your way back to town, so it's best not to have such useful items on hand to tempt the bandits with (what, if anything, that gets stolen from your inventory after you die is randomly decided by the game).
A Shy Farmer in the Fields
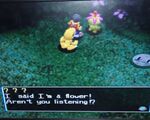
At the very bottom of Native Forest, you will find a Palmon (a plant Digimon with a blooming flower on top of his head) attempting to hide in the trees. Talking to him causes him to tell you to go away, but if you keep talking to him and refuse to respect him privacy then he will challenge you to a fight.
This fight is much tougher then Agumon's fight, and you won't want to do it without having some healing items with you and better stats. I'd recommend not doing it until you train your brain stat up high enough to at the very least allow you to command Agumon to do an attack (as opposed to just running around with the Your Call command). Palmon has 900 HP and three attacks: Poison Claw, Poison Powder, and Water Blitz. Poison Claw is exactly what it sounds like. He runs up and slashes you with him claw. With Poison Powder, he shoots off poison spores into the air, covering the screen in them. Finally, with Water Blitz he conjures a water drop in the sky which then lands on your head. In terms of damage potential, Water Blitz is him most powerful attack, but him two poison moves can cause the Poison status effect. Digimon that are poisoned move far slower then non-poisoned Digimon and poisoned Digimon take periodic damage from the poison. Like I said, Palmon is not a gimme fight thanks to him relatively high damage potential and ability to create status effects. If you use a rookie Digimon, you'll want to make sure you have plenty of Offensive, HP, and some health recovery items before you fight him. When you defeat him, he starts protesting that he hates fighting. Hearing this, our hero invites him to join the city, which he agrees to do in order to escape the violence-filled wilderness.
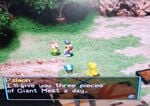
Purpose in the City: Palmon is so important to recruit early on because he upgrades the meat farm. With him superior knowledge of modern agriculture, he is able to upgrade the farm from growing regular sized meat to growing Giant Meat.
Every day, he will give you three Giant Meat, and sometimes he is able to grow and give you five pieces of Giant Meat. Giant Meat is more filling then regular meat, so it fills your Digimon faster and keeps them full longer. This is great, because it means you can spend less time trying to find meat and mushrooms in the wilderness and more time training and fighting. It's especially good for when your Rookie Digivolves into a Champion, because Champions require more meat than a Rookie and other lower stages.
A Merchant from the Sea
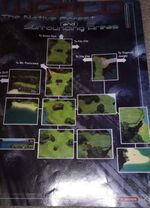
The next Digimon you'll want to get is Coelamon, who is located in Coela Point. Coela Point is located in the furthest south point from where the broken Digimon Bridge is. This fish Digimon (based on the the Coelacanth) appears in the shadows of the water during the late afternoon (the red portion of the in-game clock). If you approach the shadows, Coealmon will offer you a lift to the other side of the water, having his friends make a makeshift bridge of Coelamons for you and your partners to jump across. This will take you to the Tropical Jungle area, then, if you head left, you will get a prompt that the Digimon Bridge has been repaired, allowing you to cross between the Native Forest and the Tropical Jungle and opening the game up quite a bit. Then, if you return to Coela Point, Coelamon tells you he's going to join the city because it means helping everyone in File Island.
Importantly, after you recruit Coelamon, you never have to return to Coela Point, and, in fact, outside of the fact that you can find Mushrooms to give to your Digimon for food (which isn't as important if you have recruited Palmon) there isn't anything else to do in this part of the map.
Purpose in the City: Once inside the city, Coelamon sets up in the city square part of town (the area below where Jijimon's hut is) and opens the first, but not last, Item Shop in File City. The items Coelamon has for sale are:
- Small Recovery - 100 Bits
- MP Floppy - 300 Bits
- Meat - 50 Bits.
Opening the shop is useful because you no longer have to rely on enemy pickups or vending machines to get HP and MP recovery items. The shop also has more variety then the vending machines scattered across the world. The shop never closes, so as long as you have money, you can buy things whenever you want.
Prosperity Should be the Goal of any City
For each Digimon you recruit to the city, the city is given what's called a Prosperity Point. Prosperity Points are basically a unit the game uses to judge how good your city is. Prosperity Points are important because some events won't trigger until you have a certain number of Prosperity Points, such as Greymon attacking the city when your city reaches 15 Prosperity Points. The only way to know how many Prosperity Points you have is by either keeping track in your head or talking to Jijimon in his hut. One cool little detail is that, whenever you recruit a Digimon, if you talk to Jijimon, he'll tell you said Digimon has joined the city and then give you a little detail about what they're planning to do before he tells you the city's current amount of Prosperity Points.
One thing I don't like, however, is that it's possible to not know how many Prosperity Points you have. Then, when you talk to Jijimon, you can accidentally trigger a fight you aren't prepared for, because you didn't realize you had as many Prosperity Points as you did. For the most part, Prosperity Points work on a very simple system.
- Rookies are worth 1 Prosperity Point.
- Champions are worth 2 Prosperity Points.
- Ultimates are worth 3 Prosperity Points.
The only exceptions to that system are the three filth Champion Digimons: Numemon, Nanimon, and Sukamon. These three are each worth only one Property Point.
As you can see, the Digimon we covered today were chosen because of how much they'll help the player in the early game. Agumon stores items, freeing up inventory space for more pressing needs. Palmon allows the player to feed their Digimon more efficiently. Finally, Coelamon brings much-needed capitalism to our once communal city. But don't worry folks, much like how the game has opened up because of our access to Tropical Jungle, this section is going to open up in the Digimon we highlight. But that's all for this month. Join us next time for another File City Files.
Pitohui's Pokémon Academy
Written by: Hooded Pitohui (talk)
Good day class, and a happy new year to all of you. I hope you're all feeling rested and refreshed after that holiday break, as we have a great deal of education and discussion ahead of us. In fact, we have four whole seasons' worth of education ahead of us!
...Ahem, well, that will make more sense in a moment. Before we get started, I'd like to mention that I've looked at your feedback surveys over the break, and, seeing as it appears that many of you expressed enthusiasm over last month's lecture on a Pokémon available in the Paldea Region, going forward, I'll be tailoring these lessons to focus on Pokémon you can find and raise in Paldea (Generation IX). Now, this month, I still have a Pokémon I raised in Alola (Generation VII), but you should still find it possible to apply this lesson in Paldea.
So, with those of us in the north in the depths of winter, and with the start of the new year ushering in a chance for all of us to look forward to fresh experiences across all four seasons, I thought we might familiarize ourselves with the Season Pokémon, Sawsbuck. Let's begin straight away.
First, though, for anyone who is just joining us, you may wish to review the condensed syllabus in the box below to learn more about this course.
First, a Smogon University course, this course is not. No, this academy's lessons are designed to get trainers of any stripe thinking about how they can raise their Pokémon, and, as a result, aren't designed to keep up with the widely-accepted metagame for the series. In some cases, the way I've raised my Pokémon may even flies in the face of conventional wisdom. If you're looking for top-tier strategies, do check out Smogon, but if you merely want to get a little deeper into raising Pokémon while still doing things your own way, feel free to use this section as a reference.
Since we all know the importance of citing our sources, I also need to credit the design of some of the tables used in these lectures to Crocodile Dippy, author of the Pocket Handbook which can be found in early editions of Strategy Wing.In addition, should you need a refresher on terms commonly used in this class, you'll want to take a look in this second box. If you ever find yourself lost during class, feel free to message me, and I can update this handout with additional terms.
Base Stats: Base stats are the values associated with a particular Pokémon species, and are the same across every individual Pokémon of a given species. You have no influence on them. You can think of them as traits tied to a species. A chimp isn't ever going to be able to get as good as digging as a mole will be, and, likewise, an Abra is never going to have the defensive prowess a Shuckle has.
Individual Values (IVs): Individual values, as their name implies, are associated with individual Pokémon. They range from 0 to 31 in each stat, with 31 being considered a "perfect" IV and higher numbers corresponding to different stats. Magikarp A and Magikarp B will have the same base stats, but they may very well have different IVs. To stick with the animal analogy, one mole may be born with larger claws than another mole, and that first mole is probably going to have an easier time digging through dirt than the latter. Individual values are set in stone, strictly speaking, but you can use Hyper Training (from Generation VII onwards) to functionally get a perfect IV in a stat.
Effort Values (EVs): Effort values are the one thing you can easily change. A Pokémon can earn, primarily through battling, but also through means like the use of certain items or mechanics like Super Training, up to a total of 510 effort values, with up to 252 in any given stat. To finish off the animal analogy, no matter what kind of claws a mole is born with, moles who have more experience digging are probably going to be better at digging than moles which have never dug.
Nature: A Pokémon's nature is, more or a less, a stat modifier with a name meant to make it sound like a Pokémon has some personality. Natures will raise one stat by ten percent and lower another stat by ten percent. Some natures raise and lower the same stat, canceling out the effect and leaving stats unchanged. Natures can be functionally changed with the use of special mint items from Generation VIII onwards.
STAB: STAB stands for Same-Type Attack Bonus, and refers to the boosted power of moves that match the type of the move's user. To illustrate this, consider the case of a Lombre, a dual-type Pokémon which is both a Water-type and a Grass-type. Any Water-type moves Lombre uses will have their power boosted by 1.5x, and any Grass-type moves Lombre uses will, likewise, have their power boosted by 1.5x. (There are circumstances where this does not apply, and, while the 1.5x multiplier is typical, some games use other multipliers.)
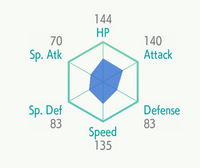
As always, we begin our planning by looking at Sawsbuck's base stats. In this case, it shouldn't be at all difficult to see that there are only two stats here we can really work with, those being attack and speed. Sawsbuck's defenses are just too low for Sawsbuck to have any chance of lasting in battle as a defensively-oriented Pokémon. We also immediately see that Sawsbuck's special attack is dismal, which is actually a boon for us, as it means we have a designated dump stat which we need not concern ourselves with at all. With a quick glance, we've settled on raising a Sawsbuck that strikes quickly and strikes hard, but how do we go about that from here?
Very simply, we make sure that attack and speed have a 31 IV and the maximum investment of 252 EVs. Now, I do recommend going for 31 IVs in your three defensive stats, as well, because, while they aren't as important, there's no reason not to get them as high as possible without compromising our main goal. Take the 6 EVs that are left unspent, and invest them into HP to extend Sawsbuck's longevity by just that tiny bit more.
Now, you'll notice that my Sawsbuck has a Bashful nature, one of the neutral natures that effectively neither lowers nor raises any of its stats. This is acceptable, but it's not ideal. Even better than a neutral nature would be any nature which lowers special attack, and, of those four options, either an Adamant (raises attack) or Jolly (raises speed) nature will serve Sawsbuck best. I wouldn't say that either of those two options has a decisive advantage over the other, because the ability you choose to run will influence your need to maximize Sawsbuck's speed.
With that said, let's begin our examination of Sawsbuck's abilities. We'll look at its hidden ability, Serene Grace, first, as it can be quite a useful ability in certain cases, as anyone who has encountered a Serene Grace Togekiss holding a King's Rock equipped with Air Slash can attest. Serene Grace doubles the chance of a move's additional effect occurring. For example, one move Sawsbuck can use, Headbutt, typically has a 30% chance of making the opponent flinch. With Serene Grace, that chance is doubled to 60%. Now, I suppose if you were to give Sawsbuck a King's Rock to raise that chance even higher, you could spam Headbutt to try and keep your opponent in a near-constant state of flinching so they can't make any moves. I wouldn't recommend it, however, as the strategy is still luck-reliant, your opponent may be able to knock Sawsbuck out in one turn if they do not flinch, and you'll be in a bind if you encounter a Steel-type or a Ghost-type. Furthermore, I would steer you away from running Serene Grace on your Sawsbuck because simply doesn't have many moves that synergize with it. The only physical moves with a respectable base power that Sawsbuck has access to that receive a boost from Serene Grace are Headbutt, Bounce, and Secret Power, with the last of those no longer available in Generation IX, further limiting Serene Grace's usefulness here.
With Serene Grace eliminated as an option, we're left to ask whether we want a situation speed increase that's easy to set up, in which case we'll go with Chlorophyll, or if we want an even more situational attack boost combined with an extra type immunity, in which case, we'll pick Sap Sipper. Broadly speaking, the better option is probably Chlorophyll, as sunny weather is easy to set up and it will take Sawsbuck's speed from "respectable" to "great," and, should you go that route, I would recommend going for an Adamant nature so you can make those quick strikes count. On the other hand, while it likely won't be often that you'll get the attack boost from it, Sap Sipper does give you an effective immunity to Grass-type moves, and a type immunity is nothing to sneeze at (especially since Sawsbuck would have two immunities, since it is naturally immune to Ghost-types. While Chlorophyll is most likely the best option, Sap Sipper isn't a horrible choice and you can work with it, just as I have. Simply be sure to go for a Jolly nature to get that extra bit of speed if you choose Sap Sipper.
With all of that worked out, we can begin looking at moves. As we usually do, we'll begin by looking for STAB moves, physical ones, in this case, of course. When it comes to physical Grass-type moves, the best moves that Sawsbuck has access to are Seed Bomb and Horn Leech. Now, with a base power of 80, Seed Bomb is a little more powerful than Horn Leech (75), and it's a reliable move with no downsides, so you might expect we would go with it. However, Horn Leech has something more going for it. When Sawsbuck uses Horn Leech, it will restore its health by an amount equal to half of the damage done to its opponent. Sawsbuck may be frail, but having a means of restoring its HP is still incredibly useful, especially since it can still strike while restoring its HP. That said, Horn Leech is our Grass-type STAB move.
Looking at Normal-type moves, I recommend starting with Double-Edge. Yes, it does recoil damage, which I usually like to avoid, but it works well with our "hit fast, hit hard" approach. If Sawsbuck is unlikely to take more than a hit or two anyways (without restoring health with Horn Leech), then the recoil damage hardly matters, and the extra power can make all the difference between damaging a foe and knocking them out. Giga Impact does have more power, but the cost of a recharging turn is steep for a Pokémon that is unlikely to weather a hit on that recharging turn. If you feel too uncomfortable with a move with recoil damage, you might consider Body Slam, but, again, I would contend that the drop in power makes it far less effective.
| Horn Leech | Physical | The user drains the target's energy with its horns. The user's HP is restored by up to half the damage taken by the target. |
| Facade | Physical | This move's power is doubled if the user is poisoned, burned, or paralyzed. |
| Double-Edge | Physical | A reckless life-risking tackle in which the user rushes the target. This also damages the user quite a lot. |
As for our other two moves, we'll want one of them, if possible, to counter Steel-types, as both of our STAB moves are not very effective against them. We'll get to that in a moment, though. For our remaining move, we have quite a bit of flexibility. You might consider using Leech Seed to sap your opponent's health while restoring Sawsbuck's own, though I wouldn't particularly recommend this in light of Sawsbuck already having a restoration move in Horn Leech and it being important Sawsbuck stays on the offensive at all times. You could try and run Swords Dance for its attack boost, following up the boosting turn with Horn Leech to quickly heal the damage Sawsbuck takes while setting up its stat boost. Personally, though, I went for Facade, another STAB Normal-type move that has respectable-if-not-great base power, because it helps cover for status conditions. Facade's power will double if Sawsbuck is poisoned, paralyzed, or burned, and it is in those latter two cases that I think Facade is useful, giving Sawsbuck a STAB move even more powerful than Double-Edge should an opponent try to reduce its speed with paralysis or reduce its attack with burn, either of which could otherwise make Sawsbuck much less effective. Facade actually ignores burn's attack reduction, making it even more useful.
Now, returning to a move that will help Sawsbuck counter Steel-types, the move I would recommend varies depending on the generation in which you are raising your Sawsbuck.
IN GENERATION VII
| Jump Kick | Physical | The user jumps up high, then strikes with a kick. If the kick misses, the user hurts itself. |
IN GENERATION IX
| Stomping Tantrum | Physical | Driven by frustration, the user attacks the target. This move's power is doubled if the user's previous move failed. |
In Generation VII, there's a clear winner in the form of Jump Kick, which has a solid 100 base power and counters not only Steel-types, but the decent range of types that are weak to Fighting. It does have the downside of occasionally missing and causing Sawsbuck to damage itself, so it is best used sparingly and there is always some risk involved, but it's by far the best option Sawsbuck has for getting Steel-types out of the way.
Sadly, Jump Kick has been removed from Generations VIII and IX, so, for those of you raising a Sawsbuck in Paldea, we need another option. Unfortunately, there are no options quite as good as Jump Kick was, but Stomping Tantrum will do well enough, with its decent 75 base power (doubled to a much better 150 in certain situations) and its Ground typing. It still will let Sawsbuck counter Steel-types and even some types that Sawsbuck is weak to, such as Fire and Poison, so, while not quite as fitting for a fast and powerful striker, it gets the job done.
There you have it! With that, we've now completed our discussion on raising a Sawsbuck. However, I'm sure there's still a question on everyone's minds and we still have some time, so let me address the Copperajah in the room. This thick white coat that Sawsbuck is sporting for us is not Sawsbuck's only look. Like its pre-evolution, Deerling, Sawsbuck's appearance changes with the season. I'll put photos of Sawsbuck's other forms up on the projector screen for you to peruse, but rest assured that the only changes to Sawsbuck are cosmetic, so you can apply everything we've discussed today to any form of Sawsbuck.
With that, we come to the end of today's class session. Hopefully nothing today was so confusing as to make you shout "oh deer!", ahaha! If you have any questions, you can come to office hours, or you may send me a message on my talk page or through the forum. Read up on Sawbuck's distribution in the Paldea Region and how its form there corresponds to the region's different provinces before next class, please, and I will see all of you for our next session.
To Infinity and Beyond
Written by: Waluigi Time (talk)
Greetings, space rangers! Welcome to the final edition of To Infinity and Beyond! I'm writing this for the second time because I lost the first one, oops. In the climax of Toy Story 2, Woody sneaks onto the plane to save Jessie, but this is Buzz's game, so he gets to be the hero instead! 17 issues, 14 levels, and 50 Pizza Planet Tokens have brought us to this moment, and now it's time for the Final Showdown! No, really, that's the name of the level... Well, kind of. In all versions of the game, this level is actually called Prospector Showdown on the loading screen, but in certain versions (including the PC one!) it's called Final Showdown on the level select. I've always called it Final Showdown, so that's what we're going with here. It's unlocked once we have 40 Pizza Planet Tokens, making only 10 of them optional. If you're curious, this makes the Grappling Hook the only one of Mr. Potato Head's items required to reach the end of the game. Accounting for cheese methods, three of the other items are only needed for a combined total of 5 Pizza Planet Tokens, and the Cosmic Shield, as I've mentioned before, isn't ever required.
Starting things off in the plane, we see Woody (making his only appearance in the game) and Jessie up ahead standing on a pile of luggage. Walk forward a bit, and the camera zooms in on them as they celebrate! Woohoo, we beat the game!
...Or maybe not. The luggage they're standing on bounces around a bit knocking them backwards, and it opens to reveal the Gunslinger, Prospector, and Blacksmith! With a rallying cry of "Get 'em, boys!" from the Prospector, the three of them jump out and the final boss theme kicks in!
That's right, the final boss is actually a rematch against the three Woody's Roundup bosses! The three of them are exactly the same as they were in Al's Penthouse, Airport Infiltration, and Tarmac Trouble. For a quick rundown, the Gunslinger shoots his guns and is the only one of the three vulnerable to Buzz's laser, the Prospector strikes the ground with his pickaxe to send a streak straight across the ground, and the Blacksmith pounds the ground with his hammer to create a homing shockwave. The Prospector and the Blacksmith will both take ten spin attacks each to defeat. Since they haven't been changed at all, and the arena is pretty simple as a big rectangle with little slopes on the sides - probably giving you more room to deal with the Gunslinger and Prospector than in their original fights - the real challenge is having to deal with all three of them at the same time. Speaking of those slopes, if you position yourself just right, Buzz will be able to stand up and the Prospector and Blacksmith will both ignore him and wander around. Not that it gives you any advantage, but it's there, so I mentioned it.
Three on one doesn't seem too fair, and luckily, there's a trick that we can use to even the score a bit. The way draw distance works in this game is basically that, if something is too far away to be rendered, as far as the game is concerned, it doesn't exist. Because the bosses approach when you're out of range (or, in the Gunslinger's case, he just approaches throughout the entire fight), you can abuse this to split them up and only deal with one at a time. Keep in mind that visor view has a separate draw distance, so even if any of the bosses are out of range, toggling visor view might render them and allow them to get closer. Although I'm not sure why you'd want to use visor view in this fight anyway.
Even if you can't or don't want to abuse the draw distance, make sure to use the range of the bosses to your advantage to keep them from attacking you as much as possible. You can deal with them in any order, but I recommend going for the Gunslinger first. He's the easiest to isolate and get rid of since you can defeat him with the laser from a distance where the Prospector and Blacksmith won't be able to do a thing. Since his attack range is the highest of the three, you'll pretty much always be dealing with him, so it's best to take him out quick. There's no green laser this time unfortunately, so just fire away and jump over his bullets. Charged laser shots, as always, will be a big help. Between the Prospector and Blacksmith, if you can keep only one of them focused on you at a time, it doesn't really matter which one you go for first, but I'm going to recommend the Prospector just in case. The Blacksmith, in my opinion, is the toughest of these three, so you don't want the Prospector interfering while you deal with him. Just make sure to avoid his pickaxe strikes. As for the Blacksmith, you'll want to keep as much distance from him as possible and time your spin attacks well to be able to outrun his homing shockwaves. Once all three of them are knocked down, Woody and Jessie celebrate for real this time, and we've won! Now it's time for those beautiful credits...
Gameplay screenshots were taken from Nin's playthrough on YouTube as always. If you're interested, I do recommend checking out this specific video. The fight only takes about a minute and a half, but you really get to see how chaotic it can get when all three bosses are in play at once.
Before we wrap up this section for good, I'd like to highlight a few extra pieces of the soundtrack that didn't get mentioned. The first one is the race theme! This plays at any point where there's a timer onscreen, such as in the racing missions and in a few other situations like the hay bale ride in Al's Toy Barn. The next one is the boss theme. All of the bosses of the regular levels share this, unlike the dedicated boss levels which have their own unique themes. We also have the Toy Story franchise classic in this game, an instrumental of "You've Got a Friend in Me", which plays in the game's menus. In the Nintendo 64 version, this also plays in Andy's House. Finally, what better way to close out the section than with the triumphant credits theme? This one goes completely unused in the Nintendo 64 version, despite being in the game files, as the original Andy's House theme plays over the credits there.
And that is everything that I wanted to cover about this game! Maybe someday I'll be able to bring this section back if this game ever gets a remastered version and there's any new content worth talking about, but I'm not holding my breath on that one. Thank you to everyone who went along on this journey with me, whether you read the entire thing or even just one issue. I hope you enjoyed it. Until we meet again...
To infinity... and beyond!
| The 'Shroom: Issue 190 | |
|---|---|
| Staff sections | Staff Notes • The 'Shroom Spotlight • The 'Shroom Holiday Scavenger • Directorial Address |
| Features | Fake News • Fun Stuff • Palette Swap • Pipe Plaza • Critic Corner • Strategy Wing |


