The 'Shroom:Issue 177/Strategy Wing
Director Notes
Written by: Hooded Pitohui (talk)
Hello, all of you readers of The 'Shroom! Here in Strategy Wing, we've been meticulously measuring the hatching rates of Yoshi Eggs under various conditions, collecting data on the correlation between wind speeds and the appearances of Gusties, and investigating the strange properties of Fuzzies from Yoshi's Island. It's been a busy month, and, yet we still have a slate of sections for you to read!
Unfortunately, the demands of the end of the year (and certainly not any mistakes related to Fuzzies slipping into the ventilation system in a mishap in the chamber we were using to run experiments on Gusties) have resulted in a few of our writers having to take a month off. On the Origin of Species and Turn Right to Go Left are not present this month, but worry not, they are expected to return in the new year!
In the meanwhile, we have a number of great sections for you prepared to read. Mach Speed Mayhem with a look at Daigoroh, an edition of To Infinity and Beyond that takes us into the Construction Yard, the return of I Choose You, and a meaty chapter of Koops, Your Emblem is on Fire (without a gimmick this month) await you!
So, since I have a mess to clean up in the office and I want you all to be able to read these sections as quickly as possible when you get this issue in your hands, I'll end my announcements here.
Should you want to make joining Strategy Wing your resolution for the new year (and you should!), take a look at our Sign-up page! We'd be happy to have you join us as a member of the Strategy Wing Team! Whether you want to tell us everything about a subject you like with your own version of Mach Speed Mayhem or you'd like to give us a guide to something you enjoy doing, like Waluigi Time is doing, or do something in-between like The Shamancer is doing, we have a place waiting for you!
Section of the Month
It's not hard to see what our readers were thankful for last month! You all showed your appreciation for two of our long-running sections clearly. Is it a coincidence that F-Zero buried Clash hard in the anime and that Nergal's backstory was made easily to miss, or do you all like reading about bad writing decisions? Well, either way, thanks for supporting these sections and our more recent additions like On the Origin of Species, and please give our writers a gift this month by casting your votes and showing your support!
| STRATEGY WING SECTION OF THE MONTH | ||||
|---|---|---|---|---|
| Place | Section | Votes | % | Writer |
| 1st | Mach Speed Mayhem | 5 | 38.46% | Superchao |
| 1st | Koops, Your Emblem is on Fire | 5 | 38.46% | Koops |
| 3rd | On the Origin of Species | 3 | 23.08% | ZelenPixel |
I Choose You
Written by: The Shamancer (talk)
Hello readers! Sorry about last month. I couldn’t find time to write a section. Anyways, since it’s the season of giving, I’m "giving" you a section about the frozen grace, Ninetales (Alolan)!
Overview
| Tier | A (data gathered from various sources)* |
|---|---|
| Role | Attacker |
| Type | Ranged |
| Difficulty | Intermediate |
| Offense | 8 |
| Endurance | 3 |
| Mobility | 3 |
| Scoring | 5 |
| Support | 6 |
- Note: this tier list data is subject to change.
Alolan Ninetales is an A-tier Attacker, recommended to intermediate players.
Alolan Ninetales is another attacker (my goodness, there’s a lot of them) but can kind of act like a Supporter depending on how you use it. Anyways, Alolan Ninetale's moveset is geared to either attacking, or defending/supporting. I’ll talk about that more below.
Attacks
Alolan Ninetales starts off with Powder Snow and Icy Wind. Both operate the same and slow down opponents, but they both have different ways to attack enemies with Powder Snow being Area Attack and Icy Wind a ranged attack (Icy Wind actually has more power than Powder Snow, but the trade is that it takes time to actually use it).
Both can be upgraded into the moves Avalanche and Dazzling Gleam (Powder Snow) and Blizzard and Aurora Veil (Icy Wind). Avalanche is an upgraded version of Powder Snow that will actually create a barrier, much like Mr. Mime's Barrier and Crustle's Rock Tomb. Blizzard is a much, much, much more powerful version of Icy Wind, and has a unique habit of splitting in half if it hits an obstacle.
TiMi Studios sure love their giant area attacks, right? (Probably because they're supposed to be ultimate moves, just wish they did something more…) Snow Globe is a giant attack that attacks the area around the user, dealing increased damage to Pokémon that are frozen (this can be caused from a passive skill, which I don't talk about).
| Lv 1-3 | Powder Snow, Icy Wind |
|---|---|
| Lv 4 | Avalanche/Dazzling Gleam |
| Lv 6 | Blizzard/Aurora Veil |
| Lv 9 | Snow Globe |
Best Pokemon to Use With and Best Pokemon to Counter
Alolan Nintales can fit two roles, but suffers from poor speed. Damage dealers like Pikachu can increase the pressure, or you can choose to go with Eldegoss for double the buffs. Since Alolan Ninetales is slow, strong Pokemon with a short dash attack like Machamp can quickly become a nightmare for Ninetale mains.
How to Get
Alolan Ninetales can be bought from the UBC for 8,000 Aeos Coins or 460 Aeos Gems. Alternatively, it can be received from the Launch Welcome Gift Login Reward (not sure if that's still going).
Alolan Ninetales can fit multiple roles and is not too focused on damage, but not entirely a Supporter either.
That’s it for now. Click here if you want to see a certain Pokemon from the roster.
Catch you later,
-- The Shamancer (talk)
To Infinity and Beyond
Written by: Waluigi Time (talk)
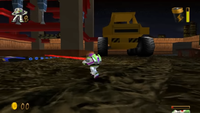
Greetings space rangers, and welcome back to To Infinity and Beyond! Last time we covered the first boss level of the game, Bombs Away, and now it's time to get back to normal with a regular level to start off the next zone. We don't really get to see what happens between Buzz and the gang leaving Andy's neighborhood and reaching Al's Toy Barn in the film, so the game takes some creative liberties to fill in a few gaps for a bit. The fourth level of the game is Construction Yard, and it requires only 3 Pizza Planet Tokens to unlock, so you'll be able to access it immediately after completing Bombs Away. As always, I'll be posting a link to the Construction Yard theme for you to enjoy, hopefully.
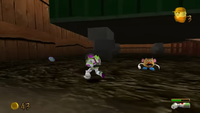
I usually try to keep my routes around the level as efficient as possible, but this time things are going to be a little wonky just because of how things are laid out. Right off the bat, we'll want to head straight to the left to collect the green laser upgrade. Yep, it's just given to you for free at the start of the level. No need to worry about conserving it for the level boss, so you can blast away to your heart's content. I'll explain why in more detail later. Anyway, continue heading to the left until you find a wheelbarrow. There's a large cinder block that Buzz is somehow strong enough to push closer to the wheelbarrow to be able to reach it, or if you feel like doing less work and sticking it to the developers, you can jump onto the wheelbarrow's wheel and climb up onto the wheelbarrow itself. However you get up here, there's the first of five Little Tikes that you'll want to collect. Hamm is nearby, but since we just started the level we obviously don't have nearly enough coins, so ignore him for now.
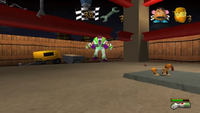
Next, climb up to the foundation of the building under construction. The floor is covered in what I assume is wet cement that slows Buzz down and causes him to sink, so probably best to jump through. There's a new enemy type here that I will conjecturally name the Laser-Bot. They're flying enemies, and when you get in their attack range, they'll fire a diagonal green laser which continues until it reaches the ground. The laser fires continually for a few seconds, before the Laser-Bot adjusts its angle and fires again. They're not too tricky to deal with, and like pretty much everything else, a charged laser shot is enough to take them down. As for other enemies, Spring-Bots and Car-Bots are here too. Anyway, the reason you want to come here is because Slinky Dog is here in the middle of the build, finally making his first appearance in the game. When you talk to him, he'll start a race mission where you have to collect five wrenches within a time limit of 50 seconds. Two of the wrenches are closer to the center, while the remaining three can be found near the outer edges. Once you collect all five wrenches, talk to Slinky within the time limit for your Pizza Planet Token.
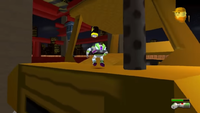
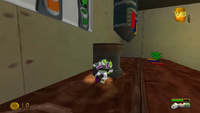
After completing Slinky's mission, climb up the ladder on the back of the loader next to the build. You can collect a battery if you want, and then head inside to collect the second Little Tike. There's also a button that can be stomped on to temporarily lower the loader's bucket, allowing you to ride it on the way back up to be able to reach the girders. (It's also possible to get onto the bucket without lowering it by walking along one of the arms and jumping around it.) Also, there's an extra life on the loader's roof, but you'll have to get some height first to be able to jump down and reach it, since there's no way to get up there from down here.
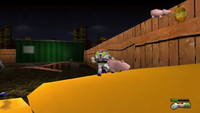
Up on the girders is the most platforming heavy portion of this level. There's occasional gaps to jump across, and when you reach a corner, you'll have to jump around to keep moving. The first level has a few crushers that you have to avoid, but after getting past them, the only obstacles you'll need to avoid for the rest of the climb up are hot rivets that fall from above and bounce across the girders, along with some Laser-Bots. Towards the end of the first level, you'll find the third Little Tike. Also, the first three levels each have a switch that you can stomp on, which will cause a lift to start moving up and down, providing a shortcut back up if you end up falling off, so definitely activate these if you find them. (If you skip one, the lift will always go up to the highest one activated, so don't worry too much about it.) After the first level, things get a bit more tricky, with black and yellow striped girders being moved around by cranes that you can ride to get higher up on the girders. These moving girders work like seesaws, which you'll need to use to your advantage to get higher. On the third level, you'll find the source of the rivets, which will damage you if you decide it's a good idea to jump in. Past that, there's some chains to jump across. Once you reach the other side, you'll find one of Mr. Potato Head's eyes. The final switch for the lift is up here, so activate it, and then jump down off of the girders. It's very important that we have the item Mr. Potato Head gives us before progressing any further.
Head over to the right side of the level, where you can find Mr. Potato Head on the side of a trailer. (If you're wondering where Rex is, if you head left from Potato Head you'll find him hanging out in the corner.) If you talk to him, he'll let you use the Disk Launcher. Including Construction Yard, the Disk Launcher is found in three levels in the game, but in contrast to the Cosmic Shield, it's actually required to collect Pizza Planet Tokens in two levels, including this one. When you collect a Disk Launcher item, your laser will be replaced with the disks. You can hold up to 30 disks, and collecting the item gives you 10. Unfortunately, the Disk Launcher is kind of underwhelming. It has about as much power as the standard laser, but you can't charge it, so you'll have to fire multiple disks to take out most enemies. They're supposed to home in on enemies, but for some reason I've found that this doesn't always work and sometimes they'll just vanish into the ether. Even when it's required, it's for things that easily could've used the laser otherwise, so it feels like something that the developers threw in and arbitrarily made certain things immune to the laser to justify its existence. Also, only collecting 10 at a time and having to wait for the item to respawn is tedious, when it easily could've given you the maximum amount of disks. Honestly, between the Cosmic Shield and the Disk Launcher, I didn't realize how bad some of the power-ups in the game are until I replayed it while preparing to write this section. Luckily, the rest of the power-ups going forward are actually decent.
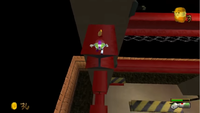
So now that we have the Disk Launcher, we can head back up to where we were on the girders using that handy lift in the back. Continue across the girders, dodging the Laser-Bots and rivets, until you reach the top level. Up here, you'll encounter the Jackhammer boss, and this guy is why we needed the Disk Launcher. The Jackhammer is the first boss that is immune to Buzz's laser, and the only boss in the entire game that is also immune to Buzz's spin attack. As Rex warns you if you talk to him, you need the Disk Launcher to defeat it. The Jackhammer is a pretty simple boss otherwise. It chases you across the girders, though at a speed that's very easy to outrun, and shoots out rivets. That's pretty much it. Just maintain a safe distance and launch those disks! Luckily, if you run out of disks, there's multiple refills up here, along with some batteries. After pelting the Jackhammer with enough disks, it explodes, spawning a Pizza Planet Token where you first encountered it. Oddly, the Jackhammer leaves a coin behind, which the bosses usually don't, unlike standard enemies. Before you leave, be sure to walk out onto the beam protruding outward, because the fourth Little Tike is here. From here, you can jump onto the top of the trailer if you want to collect an extra life and, for some reason, a single coin.
Next, drop down and go inside the trailer. There's sludge covering most of the floor leaking from an overturned container, so avoid that and climb onto the chair to reach the desk. Platform across the room to the filing cabinet drawers, which are somehow opening and closing on their own, and platform across them. Be sure to jump onto the top of the filing cabinet to collect the fifth and final Little Tike, then drop down to the paint mixing station. There's buttons to pour red, blue, and yellow paint, and you need to push the paint can around and correctly mix purple, orange, and green paint, then push the paint can back over to the designated spot for each color. The puzzle is simple here if you know color mixing - red and blue make purple, red and yellow make orange, and blue and yellow make green. It's tedious more than anything, honestly. If you accidentally fill the entire paint can with one primary color, it'll drain automatically, and if you accidentally make a color you've already done, you can just push it to that color's spot again to empty it. After mixing all the colors, a Pizza Planet Token appears.
While I was in the trailer, I collected enough coins to bring to Hamm, so we're pretty much done here! Once you exit the trailer, the Foreman looking for the Little Tikes is straight ahead, so be sure to give those back to him. Then, head straight back to the other end of the level, back to the wheelbarrow where we found the first Little Tike. Climb over to where Hamm is, and talk to him for the last Pizza Planet Token. With that, we're done with the level!
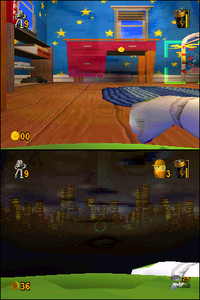
One thing that's pretty peculiar about this level is that for some reason, Buzz's visor view is different compared to how it appears in other levels. I don't know enough about game development or modeling or camera angles or any of that stuff to speculate about why this actually happens, but I might as well point it out.
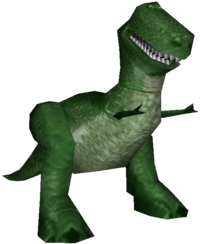
Anyway, I couldn't make my section Yoshi-themed for obvious reasons, so uh... I'll just leave you with an image of Rex's model to make up for it. They're both green dinosaurs, so it's close enough, right?
All gameplay screenshots are taken from Nin's playthrough on YouTube unless otherwise stated.
Mach Speed Mayhem
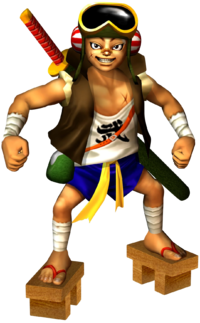
Hello, 'Shroom readers! Once again, we're here at the end of a year with plenty of Mach Speed Mayhem. Kind of wild to realize it ends next year, huh? If only Nintendo wanted to keep this section alive... they could have done it, y'know, if they had put out a new F-Zero! Alas. Well, we'll see off this next year with some more articles. But for this special edition, I chose to go with the closest we get to a baby version of a character in this franchise, #35: Daigoroh! The son of Samurai Goroh, he's got a whole story of his own!
Main Series
Appearing as another of the F-Zero AX debut racers, Daigoroh is, like the rest, freely available if you're lucky enough to find an AX machine in the wild. If not, then instead of playing him on arcade or transferring him to your Gamecube, you need to take on Chapter 6, where Captain Falcon's got a speed-monitoring bomb strapped to his car. The complex and convoluted set of twists and turns and curves need to be tackled at a constant 800 km/h, or else! But survive to the end, and Samurai Goroh's son is yours to use! Of course, that does mean he doesn't appear in story mode... such is the fate of AX characters. His bio mentions that he's a rambunctious wild child, who's somehow older than Digi-Boy, and almost as good with a sword as dear old dad. He's outclassing Goroh in other respects, too - his piloting skills are better, and he's got more potential - but he really loves the guy! Daigoroh has nothing but respect for his father, and his current goal is to defeat Captain Falcon to make his papa proud.
At least Daigoroh's got his interviews to give us some solid info! Imagine how much more sparse these AX characters would be without them. He's certainly happy to knock on his dad - he wants to surpass him as a thief, is fully prepared for his dad to spend all the prize money, and he dropped a frog in Goroh's mouth while he was sleeping. Still, Daigoroh really respects his dad! The reason he wants to surpass Goroh is because he thinks his dad is the best thief ever - why bother setting his sights lower? He also just calls his dad the greatest in general, and he has a Samurai Goroh figure that he absolutely treasures. And the whole reason to beat Captain Falcon is just to impress his dad, after all! Besides that, we don't get much else about Daigoroh himself, as he's mostly just happy to boast. Like everyone, really - winning the F-Zero goes straight to your head!
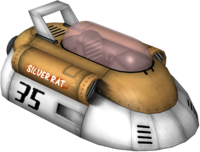
And then there's his machine. Despite what you might assume, the Silver Rat is not patterned or designed after the Fire Stingray! Instead, it's made by Toraemon Echigoya, the creator of the Green Panther, and built with the same design principles as Antonio Guster's machine. It's super tiny, perfect for its equally tiny pilot! The listed stats are a D Body, A Boost, and D Grip, and in-game stats... aren't that hot in any department, really. It's got the lowest top speed in the game, a pretty puny boost in both length and power, and a weak body. Handling's good, and you can accelerate really easily, at least! But... well, let's just say that Daigoroh has a big uphill climb ahead of him before he really gets ahead of his dad.
Other Information
Similar to Michael Chain, Daigoroh is one of the only characters in F-Zero GX to have his alternate palettes actually change his look in more ways than color! Namely, the kanji on his shirt differs depending on which shirt he's wearing. The default one means "warrior", but he can also get one that means "zero", one that means "attack", and most notably, one that means "extreme" and is the same kanji as on Samurai Goroh's shirt! Daigoroh really does admire his old man.
Also, no, there's no connection to Lisa Brilliant in any way. Different continuities, and all that.
Anyhow! That takes care of Big Goroh. Kinda wild to realize how close we are to finishing Mach Speed Mayhem, huh? I'm really gonna miss it once it's over. We've only got a few more votes left, so let's go make one count!
Koops, Your Emblem is on Fire
A section without any monthly gimmicks? WTF?! Today we will take one exactly one map, cause it's quite lengthy and also a story milestone. Enjoy.
We got a new recruit! Let's check him out.
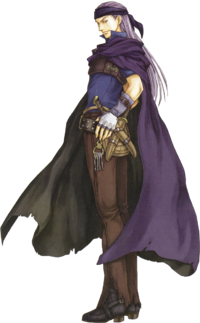
Legault
A former Black Fang once known as Hurricane.
Level 12 Thief.
HP: 26 ~ 29 (60%)
Str: 8 ~ 9 (25%)
Skl: 11 ~ 14 (45%)
Spd: 15 ~ 18 (60%)
Luck: 10 (60%)
Def: 8 ~ 9 (25%)
Res: 3 ~ 5 (25%)
Con: 9
Move: 6
Weapon Ranks: C Swords
God, now I'm reminded how utter shit Assassin promotion gains are...
Legault! The Cleaner of the Black Fang, is here to help us on our adventure, and help us he shall. Legault's primary job is to be our second thief, in the event that Matthew isn't enough or fell victim to player incompetence. Statistically, he pretty much is Matthew but better, with a decent strength base and better speed. His growths are generally lower save for luck and res, but when a thief doesn't see much combat to begin with this is inconsequential.
One thing Legault does have as a combat unit that Matthew doesn't is 9 con, allowing him to wield heavier swords easier than most other footlocked swordies, so you could say that among those, he is one of the better fighters alongside Raven, which does, sadly, say more about sword units in general more than it does about him. His C rank in swords allows him to use things like the Killing Edge and also brings him decently close to being able to use the higher ranked swords. His bulk is also not too bad. 8 defense and 3 resistance at minimum in combination with 26 HP holds up pretty well, all things considered.
The big issue with Legault as a combat unit is that he will forever remain swordlocked, and he will only ever promote to the horrible Assassin class, and even if the class were good, you only get the chance to promote him at the end of a chapter very late into the game. His strength will also more than likely fall off after a certain while, weak as fe7 enemies may be. Effective swords not being very good doesn't exactly help either. So as decent as Legault may seem at first, he is unfortunately doomed to not last forever, unless of course you're very lucky with his strength in which case he can kill things.
All in all, Legault is just that; a better Matthew who completely invalidates the latter when you only need for one thief. Good to have, just not a terribly breaking addition to your roster. I like him though. He's cool.
And with that, we have conquered the dragon's gate! ...only to lose it and be back at square one. Next time, we advance more into the game and hopefully reach some kind of lead, perhaps. See you then!
...You could say that in all this... Ephidel was played like... A fiddle!... I am very funny.
| The 'Shroom: Issue 177 | |
|---|---|
| Staff sections | Staff Notes • The 'Shroom Spotlight • End-of-the-Year Awards • Director Election • 'Shroomfest |
| Features | Fake News • Fun Stuff • Palette Swap • Pipe Plaza • Critic Corner • Strategy Wing |
| Specials | The 'Shroom Staff Recipe Book • Special Thanks |


