Night Tour: Difference between revisions
(→Daily Spotlight: new section) |
VulpixTails (talk | contribs) No edit summary |
||
| (47 intermediate revisions by 21 users not shown) | |||
| Line 1: | Line 1: | ||
{{tour infobox | {{tour infobox | ||
|title=Night Tour | |title=Night Tour | ||
|image=[[File:MKT Night Tour.png|200px]] | |image=[[File:MKT Night Tour.png|200px]] | ||
|start=June 27, 2023<br>11:00 p.m. (PT) | |start= June 27, 2023<br>11:00 p.m. (PT) | ||
|end=July 11, 2023<br>10:59 p.m. (PT) | |end=July 11, 2023<br>10:59 p.m. (PT) | ||
|cups=15 | |cups=15 | ||
| Line 9: | Line 8: | ||
|coin=[[Tour New York Minute|New York Minute]] | |coin=[[Tour New York Minute|New York Minute]] | ||
|before=[[Mario vs. Luigi Tour (2023)|<<]] | |before=[[Mario vs. Luigi Tour (2023)|<<]] | ||
|after=>> | |after=[[Pipe Tour|>>]] | ||
}} | }} | ||
The '''Night Tour''' | The '''Night Tour''' was the ninety-ninth tour of ''[[Mario Kart Tour]]'', which began on June 28, 2023 and ended on July 11, 2023. This tour introduced [[Rome Avanti]], a [[New course|new]] city course set in [[Rome]], {{wp|Italy}}, as well as [[Wii Moonview Highway|Moonview Highway]] from ''[[Mario Kart Wii]]'', marking its first appearance in the series as a [[classic course]]. Fitting with Rome Avanti's theme, [[Donkey Kong]] in a gladiator outfit was introduced as a new driver, the first and only variant of a [[Kong]] character. The tour also includes other city courses set at night (hence its name), namely [[Tour New York Minute|New York Minute]], [[Tour Vancouver Velocity|Vancouver Velocity]], and [[Tour Singapore Speedway|Singapore Speedway]]. The inclusion of Vancouver Velocity may also reference {{wp|Canada Day}}, which occurred during this tour on July 1, and New York Minute may also reference {{wp|Independence Day (United States)|Independence Day}}, which also occurred during this tour on July 4. This was the first tour since the [[Paris Tour (2019)|2019 Paris Tour]] to introduce both a new city course and a classic course, and the second tour in a row to add three courses simultaneously. It was also the first tour to feature the normal variant of New York Minute since its debut in the [[New York Tour]] (the first tour of the game), the first tour to feature New York Minute 2R since its debut in the [[Holiday Tour (2019)|2019 Holiday Tour]] (the seventh tour of the game), and the first tour to feature New York Minute B since its debut in the [[Autumn Tour (2022)|2022 Autumn Tour]]. This tour saw [[GCN Waluigi Stadium]]'s first reappearance immediately following its debut in the [[Mario vs. Luigi Tour (2023)|previous tour]], making this the first tour to feature a course introduced in the previous tour since the second [[Peach vs. Bowser Tour (November–December 2022)|Peach vs. Bowser Tour]]. This tour marked the longest gap between appearances of a bonus challenge, as it marked the first appearance of the [[Vs. Mega]] Donkey Kong bonus challenge since the New York Tour. | ||
This | This was the first tour to introduce a driver with the [[Banana Barrels]] [[Special skill (Mario Kart Tour)|special skill]] since the introduction of [[Funky Kong]] in the [[Jungle Tour]] eighty-one tours prior, being the [[Mii|Light Green Mii Racing Suit]]. Additionally, all Shy Guy colors from ''[[Mario Kart 8]]'' have returned in ''Mario Kart Tour'' as of this tour. This was also the first tour since the [[Marine Tour]], the [[Holiday Tour (2019)|2019 Holiday Tour]], and the [[Peach vs. Daisy Tour]] to give [[Monty Mole]], [[Diddy Kong]], and [[Pink Gold Peach]] a favorite course (being the normal variant of New York Minute, Rome Avanti R/T, and both the normal variant of New York Minute and Wii Moonview Highway R/T respectively). | ||
This tour's [[Coin Rush (Mario Kart Tour)|Coin Rush]] course | This tour's [[Coin Rush (Mario Kart Tour)|Coin Rush]] course was New York Minute, which was reused from the [[New York Tour]] and the [[Autumn Tour (2022)|2022 Autumn Tour]]. The menu's background featured the [[Colosseum]] as the tour's landmark. | ||
The fourteenth set of [[List of challenge cards in Mario Kart Tour#Expert Challenges|Expert Challenges]] was introduced in this tour. This | The fourteenth set of [[List of challenge cards in Mario Kart Tour#Expert Challenges|Expert Challenges]] was introduced in this tour. This was the second set of Expert Challenges to last for seven tours instead of six (until the [[Anniversary Tour (2023)|2023 Anniversary Tour]]); the first was from the [[New Year's Tour (2023)|2023 New Year's Tour]] to the [[Ninja Tour (2023)|2023 Ninja Tour]]. | ||
This was the final tour to introduce a new Wii course. | |||
==Spotlight Shop== | ==Spotlight Shop== | ||
{| align=center width=85% cellspacing=0 border=1 cellpadding=3 style="border-collapse:collapse; font-family:Arial; text-align:center" | |||
|-style="background: #89A" | |||
|colspan=5|'''Week 1 banner items'''<br>June 27, 2023, 11:00 p.m. (PT) – July 4, 2023, 10:59 p.m. (PT) | |||
|-style="background: #ABC" | |||
! style="width: 8%;"|Item type | |||
! style="width: 15%;"|Name | |||
! style="width: 17%;"|Cost | |||
! style="width: 20%;"|Contents | |||
! style="width: 40%;"|Banner image | |||
|- | |||
!style="background: #ABC"|Driver | |||
!Donkey Kong (Gladiator) | |||
|105 [[File:MKT Icon 1Ruby.png|20px]] [[ruby|rubies]] for 1st purchase;<br>150 rubies for 2nd and 3rd purchases respectively | |||
|[[File:MKT Artwork DonkeyKongGladiator.png|x100px]]<br> [[Donkey Kong|Donkey Kong (Gladiator)]] ×1 | |||
|[[File:MKT Tour99 DonkeyKongGladiator.png|x150px]] | |||
|- | |||
!style="background: #ABC"|Kart | |||
!Chain Chomp Chariot | |||
|70 [[File:MKT Icon 1Ruby.png|20px]] [[ruby|rubies]] for 1st purchase;<br>100 rubies for 2nd and 3rd purchases respectively | |||
|[[File:MKT Icon ChainChompChariot.png|x100px]]<br> [[Chain Chomp Chariot]] ×1 | |||
|[[File:MKT Tour99 ChainChompChariot.png|x150px]] | |||
|- | |||
!style="background: #ABC"|Glider | |||
!Rainbow Flappy Wings | |||
|70 [[File:MKT Icon 1Ruby.png|20px]] [[ruby|rubies]] for 1st purchase;<br>100 rubies for 2nd and 3rd purchases respectively | |||
|[[File:MKT Icon RainbowFlappyWings.png|x100px]]<br> [[Rainbow Flappy Wings]] ×1 | |||
|[[File:MKT Tour99 RainbowFlappyWings.png|x150px]] | |||
|-style="background: #89A" | |||
|colspan=5|'''Week 2 banner items'''<br>July 4, 2023, 11:00 p.m. (PT) – July 11, 2023, 10:59 p.m. (PT) | |||
|-style="background: #ABC" | |||
!Item type | |||
!Name | |||
!Cost | |||
!Contents | |||
!Banner image | |||
|- | |||
!style="background: #ABC"|Driver | |||
!Mario (Musician) | |||
|105 [[File:MKT Icon 1Ruby.png|20px]] [[ruby|rubies]] for 1st purchase;<br>150 rubies for 2nd and 3rd purchases respectively | |||
|[[File:MKT Artwork MarioMusician.png|x100px]]<br> [[Mario|Mario (Musician)]] ×1 | |||
|[[File:MKT Tour99 MarioMusician.png|x150px]] | |||
|- | |||
!style="background: #ABC"|Kart | |||
!Yeehaw Wagon | |||
|70 [[File:MKT Icon 1Ruby.png|20px]] [[ruby|rubies]] for 1st purchase;<br>100 rubies for 2nd and 3rd purchases respectively | |||
|[[File:MKT Icon YeehawWagon.png|x100px]]<br> [[Yeehaw Wagon]] ×1 | |||
|[[File:MKT Tour99 YeehawWagon.png|x150px]] | |||
|- | |||
!style="background: #ABC"|Glider | |||
!Mario Bros. Parafoil | |||
|70 [[File:MKT Icon 1Ruby.png|20px]] [[ruby|rubies]] for 1st purchase;<br>100 rubies for 2nd and 3rd purchases respectively | |||
|[[File:MKT Icon MarioBrosParafoil.png|x100px]]<br> [[Mario Bros. Parafoil]] ×1 | |||
|[[File:MKT Tour99 MarioBrosParafoil.png|x150px]] | |||
|} | |||
===Daily Spotlight=== | ===Daily Spotlight=== | ||
The Daily Spotlight contains a mixture of items themed around the tour, items that have ranked tracks as favorites, and gold items. The rates listed are specific for that type of item; drivers, karts, and gliders are selected separately. Items marked with an asterisk (*) do not appear in the Daily Spotlight during the week they are available as Spotlight Shop banner items. | The Daily Spotlight contains a mixture of items themed around the tour, items that have ranked tracks as favorites, and gold items. The rates listed are specific for that type of item; drivers, karts, and gliders are selected separately. Items marked with an asterisk (*) do not appear in the Daily Spotlight during the week they are available as Spotlight Shop banner items. | ||
| Line 56: | Line 111: | ||
|[[Gold Glider]], [[Gold Crane]], [[Silver-and-Gold Hearts]], [[Gold Home-Field Glider]], [[Gold Tanooki Parafoil]], [[Gold Penguin Wingtip]], [[Gold Toe-Bean Balloons]], [[Gold Eggshell Glider]] ,[[Gold Cloud Balloons]], [[Gold Meteors]], [[Gold Umbrella]], [[Gold Candlelight Flight]], [[Gold Tulips]], [[Gold 8-Bit Glider]], [[Gold Swooper]], [[Golden Wings]], [[Gold Boo Masks]] | |[[Gold Glider]], [[Gold Crane]], [[Silver-and-Gold Hearts]], [[Gold Home-Field Glider]], [[Gold Tanooki Parafoil]], [[Gold Penguin Wingtip]], [[Gold Toe-Bean Balloons]], [[Gold Eggshell Glider]] ,[[Gold Cloud Balloons]], [[Gold Meteors]], [[Gold Umbrella]], [[Gold Candlelight Flight]], [[Gold Tulips]], [[Gold 8-Bit Glider]], [[Gold Swooper]], [[Golden Wings]], [[Gold Boo Masks]] | ||
|0.0960% | |0.0960% | ||
|} | |||
==Cups== | |||
{| align=center width=90% cellspacing=0 border=1 cellpadding=3 style="border-collapse:collapse; font-family:Arial; text-align:center" | |||
{{MKT cup table row | |||
|C=Donkey Kong||Ra=1 | |||
|R1=[[Rome Avanti]]||R1.I=RomeAvanti DonkeyKongGladiator||R1.1=1,200||R1.2=1,700||R1.3=2,000||R1.4=2,300||R1.5=2,600 | |||
|R2=Rome Avanti 2R||R2.I=RomeAvanti2R MarioGolf||R2.1=1,200||R2.2=1,900||R2.3=2,200||R2.4=2,500||R2.5=2,800 | |||
|R3=[[Wii Moonview Highway]]||R3.I=MoonviewHighwayWii DaisySailor||R3.1=1,000||R3.2=1,400||R3.3=1,700||R3.4=1,900||R3.5=2,200 | |||
|CN=[[Glider Challenge]]||C.I=Tour82 IceBroCupChallenge||CC=[[Waluigi]]||CT=[[Tour Vancouver Velocity|Vancouver Velocity 2]]||C.1=400||C.2=600||C.3=800 | |||
}} | |||
{{MKT cup table row | |||
|C=Mii||Ra= | |||
|R1=[[DS Twilight House]]<br>(Balloon Battle)||R1.I=TwilightHouseDS LightGreenMiiRacingSuit||R1.1=1,400||R1.2=2,100||R1.3=2,400||R1.4=2,800||R1.5=3,300 | |||
|R2=[[Tour New York Minute|New York Minute R]]||R2.I=NewYorkMinuteR MarioRacing||R2.1=900||R2.2=1,300||R2.3=1,500||R2.4=1,800||R2.5=2,100 | |||
|R3=Vancouver Velocity T||R3.I=VancouverVelocityT MarioSunshine||R3.1=1,100||R3.2=1,700||R3.3=1,900||R3.4=2,200||R3.5=2,600 | |||
|CN=[[Time Trial (Mario Kart Tour)|Time Trial]]||C.I=Tour61 HammerBroCupChallenge||CC=[[Luigi]]||CT=[[Tour Singapore Speedway|Singapore Speedway]]||C.1=1:34.00||C.2=1:27.00||C.3=1:21.00 | |||
}} | |||
{{MKT cup table row | |||
|C=Funky Kong||Ra=2 | |||
|R1=Wii Moonview Highway R||R1.I=MoonviewHighwayRWii CatMario||R1.1=1,100||R1.2=1,800||R1.3=2,000||R1.4=2,400||R1.5=2,900 | |||
|R2=Rome Avanti 2T||R2.I=RomeAvanti2T ToadTourist||R2.1=1,500||R2.2=2,400||R2.3=2,800||R2.4=3,200||R2.5=4,000 | |||
|R3=Rome Avanti R/T||R3.I=RomeAvantiRT MarioMusician||R3.1=1,800||R3.2=2,900||R3.3=3,300||R3.4=3,900||R3.5=4,800 | |||
|CN=[[Goomba Takedown]]||C.I=Tour11 DonkeyKongCupChallenge||CC=[[Donkey Kong]]||CT=Vancouver Velocity||C.1=15||C.2=25||C.3=40 | |||
}} | |||
{{MKT cup table row | |||
|C=King Boo||Ra= | |||
|R1=Singapore Speedway 2||R1.I=SingaporeSpeedway2 LuigiVacation||R1.1=1,700||R1.2=2,800||R1.3=3,300||R1.4=3,800||R1.5=4,900 | |||
|R2=Vancouver Velocity 2||R2.I=VancouverVelocity2 KingBoo||R2.1=1,500||R2.2=2,400||R2.3=2,800||R2.4=3,200||R2.5=4,100 | |||
|R3=New York Minute T||R3.I=NewYorkMinuteT NabbitMiiRacingSuit||R3.1=1,000||R3.2=1,700||R3.3=2,000||R3.4=2,300||R3.5=2,900 | |||
|CN=[[Ring Race]]||C.I=Tour7 RosalinaCupChallenge||CC=[[Rosalina]]||CT=New York Minute 2||C.1=15||C.2=21||C.3=27 | |||
}} | |||
{{MKT cup table row | |||
|C=Ice Bro||Ra= | |||
|R1=Vancouver Velocity R||R1.I=VancouverVelocityR IceBro||R1.1=1,400||R1.2=2,400||R1.3=2,700||R1.4=3,200||R1.5=4,200 | |||
|R2=Wii Moonview Highway R/T||R2.I=MoonviewHighwayRTWii DonkeyKongGladiator||R2.1=1,800||R2.2=3,000||R2.3=3,400||R2.4=4,000||R2.5=5,300 | |||
|R3=Rome Avanti 2||R3.I=RomeAvanti2 DaisyFarmer||R3.1=1,600||R3.2=2,800||R3.3=3,200||R3.4=3,700||R3.5=4,900 | |||
|CN=[[Big Reverse Race vs. 100]]||C.I=Tour99 IceBroCupChallenge||CC=[[Funky Kong]]||CT=Rome Avanti||C.1=80th||C.2=40th||C.3=1st | |||
}} | |||
{{MKT cup table row | |||
|C=Pauline||Ra= | |||
|R1=New York Minute 2R||R1.I=NewYorkMinute2R Pauline||R1.1=1,100||R1.2=2,000||R1.3=2,200||R1.4=2,700||R1.5=3,600 | |||
|R2=[[GCN Waluigi Stadium|GCN Waluigi Stadium R]]||R2.I=WaluigiStadiumRGCN LuigiKnight||R2.1=1,900||R2.2=3,300||R2.3=3,700||R2.4=4,400||R2.5=6,000 | |||
|R3=Singapore Speedway R||R3.I=SingaporeSpeedwayR PaulineRose||R3.1=1,500||R3.2=2,600||R3.3=2,900||R3.4=3,500||R3.5=4,700 | |||
|CN=Time Trial||C.I=Tour99 PaulineCupChallenge||CC=[[Peachette]]||CT=Singapore Speedway 2R||C.1=1:48.00||C.2=1:43.00||C.3=1:38.00 | |||
}} | |||
{{MKT cup table row | |||
|C=Baby Rosalina||Ra= | |||
|R1=Rome Avanti R||R1.I=RomeAvantiR Poochy||R1.1=1,700||R1.2=3,100||R1.3=3,600||R1.4=4,300||R1.5=6,000 | |||
|R2=Singapore Speedway 2T||R2.I=SingaporeSpeedway2T BirdoWhite||R2.1=2,000||R2.2=3,600||R2.3=4,100||R2.4=4,900||R2.5=6,900 | |||
|R3=Vancouver Velocity 2R||R3.I=VancouverVelocity2R BabyRosalina||R3.1=1,700||R3.2=3,100||R3.3=3,500||R3.4=4,200||R3.5=5,800 | |||
|CN=[[Steer Clear of Obstacles]]||C.I=Tour99 BabyRosalinaCupChallenge||CC=[[Bowser Jr.]]||CT=Wii Moonview Highway||C.1=1||C.2=2||C.3=3 | |||
}} | |||
{{MKT cup table row | |||
|C=Luigi||Ra= | |||
|R1=New York Minute||R1.I=NewYorkMinute RockyWrenchMiiRacingSuit||R1.1=1,500||R1.2=2,800||R1.3=3,100||R1.4=3,800||R1.5=5,400 | |||
|R2=Wii Moonview Highway T||R2.I=MoonviewHighwayTWii Luigi||R2.1=1,700||R2.2=3,100||R2.3=3,500||R2.4=4,200||R2.5=6,100 | |||
|R3=GCN Waluigi Stadium T||R3.I=WaluigiStadiumTGCN LightblueShyGuyExplorer||R3.1=1,800||R3.2=3,400||R3.3=3,900||R3.4=4,600||R3.5=6,700 | |||
|CN=[[Combo Attack]]||C.I=Tour28 BowserCupChallenge||CC=[[Koopa Troopa]]||CT=Vancouver Velocity T||C.1=5||C.2=10||C.3=18 | |||
}} | |||
{{MKT cup table row | |||
|C=Cat Peach||Ra= | |||
|R1=Rome Avanti 2R/T||R1.I=RomeAvanti2RT ToadAstronaut||R1.1=1,700||R1.2=3,200||R1.3=3,600||R1.4=4,300||R1.5=6,300 | |||
|R2=Vancouver Velocity 2T||R2.I=VancouverVelocity2T TanookiRosalina||R2.1=2,100||R2.2=4,000||R2.3=4,500||R2.4=5,400||R2.5=7,900 | |||
|R3=Singapore Speedway T||R3.I=SingaporeSpeedwayT CatPeach||R3.1=1,700||R3.2=3,200||R3.3=3,700||R3.4=4,400||R3.5=6,500 | |||
|CN=Goomba Takedown||C.I=Tour7 BabyLuigiCupChallenge||CC=[[Diddy Kong]]||CT=New York Minute 2||C.1=18||C.2=28||C.3=38 | |||
}} | |||
{{MKT cup table row | |||
|C=Peach||Ra= | |||
|R1=Singapore Speedway||R1.I=SingaporeSpeedway ToadTourist||R1.1=1,400||R1.2=2,800||R1.3=3,200||R1.4=3,900||R1.5=5,800 | |||
|R2=New York Minute 2R/T||R2.I=NewYorkMinute2RT MarioMusician||R2.1=1,200||R2.2=2,400||R2.3=2,700||R2.4=3,300||R2.5=5,000 | |||
|R3=Vancouver Velocity R/T||R3.I=VancouverVelocityRT Peach||R3.1=1,500||R3.2=3,000||R3.3=3,400||R3.4=4,100||R3.5=6,200 | |||
|CN=[[Vs. Mega]] Donkey Kong||C.I=Tour1 MetalMarioCupChallenge||CC=Any character||CT=New York Minute||C.1=50cc||C.2=100cc||C.3=150cc | |||
}} | |||
{{MKT cup table row | |||
|C=Fire Rosalina||Ra= | |||
|R1=GCN Waluigi Stadium||R1.I=WaluigiStadiumGCN PeteyPiranha||R1.1=1,700||R1.2=3,300||R1.3=3,700||R1.4=4,600||R1.5=7,000 | |||
|R2=Singapore Speedway 2R||R2.I=SingaporeSpeedway2R FireRosalina||R2.1=1,900||R2.2=3,900||R2.3=4,400||R2.4=5,300||R2.5=8,100 | |||
|R3=Rome Avanti T||R3.I=RomeAvantiT MetalMario||R3.1=1,800||R3.2=3,600||R3.3=4,000||R3.4=5,000||R3.5=7,600 | |||
|CN=Time Trial||C.I=Tour99 FireRosalinaCupChallenge||CC=[[Birdo|Birdo (Yellow)]]||CT=Rome Avanti 2||C.1=1:55.00||C.2=1:45.00||C.3=1:38.00 | |||
}} | |||
{{MKT cup table row | |||
|C=Birdo||Ra= | |||
|R1=Vancouver Velocity||R1.I=VancouverVelocity Birdo||R1.1=1,400||R1.2=2,900||R1.3=3,200||R1.4=4,000||R1.5=6,200 | |||
|R2=Rome Avanti R/T||R2.I=RomeAvantiRT RosalinaAurora||R2.1=2,000||R2.2=4,000||R2.3=4,500||R2.4=5,500||R2.5=8,600 | |||
|R3=New York Minute R/T||R3.I=NewYorkMinuteRT DrPeach||R3.1=1,300||R3.2=2,700||R3.3=3,000||R3.4=3,700||R3.5=5,800 | |||
|CN=[[Smash Small Dry Bones]]||C.I=Tour99 BirdoCupChallenge||CC=[[Pauline]]||CT=GCN Waluigi Stadium||C.1=4||C.2=8||C.3=12 | |||
}} | |||
{{MKT cup table row | |||
|C=Diddy Kong||Ra= | |||
|R1=New York Minute 2||R1.I=NewYorkMinute2 DiddyKong||R1.1=1,200||R1.2=2,400||R1.3=2,700||R1.4=3,400||R1.5=5,300 | |||
|R2=GCN Waluigi Stadium R/T||R2.I=WaluigiStadiumRTGCN LuigiGolf||R2.1=1,700||R2.2=3,600||R2.3=4,000||R2.4=5,000||R2.5=7,900 | |||
|R3=Singapore Speedway 2R/T||R3.I=SingaporeSpeedway2RT DaisySailor||R3.1=2,000||R3.2=4,100||R3.3=4,600||R3.4=5,700||R3.5=9,000 | |||
|CN=[[Do Jump Boosts]]||C.I=Tour1 YoshiCupChallenge||CC=[[Yoshi]]||CT=New York Minute||C.1=8||C.2=10||C.3=12 | |||
}} | |||
{{MKT cup table row | |||
|C=Bowser Jr.||Ra= | |||
|R1=Vancouver Velocity 2R/T||R1.I=VancouverVelocity2RT RoaringRacerMiiRacingSuit||R1.1=1,900||R1.2=4,000||R1.3=4,500||R1.4=5,500||R1.5=8,900 | |||
|R2=New York Minute B<br>(Balloon Battle)||R2.I=NewYorkMinuteB BowserJr||R2.1=1,700||R2.2=3,600||R2.3=4,000||R2.4=4,900||R2.5=7,900 | |||
|R3=Rome Avanti 2R/T||R3.I=RomeAvanti2RT Poochy||R3.1=1,700||R3.2=3,700||R3.3=4,200||R3.4=5,200||R3.5=8,300 | |||
|CN=[[Break Item Boxes]]||C.I=Tour99 BowserJrCupChallenge||CC=[[Lakitu]]||CT=Rome Avanti||C.1=14||C.2=18||C.3=22 | |||
}} | |||
{{MKT cup table row | |||
|C=Wario||Ra= | |||
|R1=New York Minute 2T||R1.I=NewYorkMinute2T Wario||R1.1=1,200||R1.2=2,600||R1.3=2,900||R1.4=3,600||R1.5=5,900 | |||
|R2=Singapore Speedway R/T||R2.I=SingaporeSpeedwayRT MarioSunshine||R2.1=1,700||R2.2=3,800||R2.3=4,200||R2.4=5,200||R2.5=8,600 | |||
|R3=Wii Moonview Highway R/T||R3.I=MoonviewHighwayRTWii PinkGoldPeach||R3.1=1,900||R3.2=4,100||R3.3=4,600||R3.4=5,700||R3.5=9,400 | |||
|CN=[[Big Reverse Race]]||C.I=Tour79 ToadCupChallenge||CC=Any character||CT=Singapore Speedway 2||C.1=50cc||C.2=100cc||C.3=150cc | |||
}} | |||
|} | |} | ||
==Today's Challenge== | ==Today's Challenge== | ||
Players' most recently used kart and glider are chosen, and favorite and favored ones have extra priority. Opponents are arranged randomly. On day 1 of this tour, players finish a | Players' most recently used kart and glider are chosen, and favorite and favored ones have extra priority. Opponents are arranged randomly. On day 1 of this tour, players finish a balloon battle in [[DS Twilight House]] in the [[Mii Cup]] using the [[Mii|Light Green Mii Racing Suit]] for a free pipe launch. Starting from day 2, players have to finish a race in the earliest incomplete course that is not in any of the ranked cups using the driver shown on the course's thumbnail every day to obtain the corresponding reward in the table below. Once all of the courses are completed, the courses are selected at random. | ||
{| align=center width=40% cellspacing=0 border=1 cellpadding=3 style="border-collapse:collapse; font-family:Arial; text-align:center" | {| align=center width=40% cellspacing=0 border=1 cellpadding=3 style="border-collapse:collapse; font-family:Arial; text-align:center" | ||
| Line 70: | Line 234: | ||
|- | |- | ||
!14 | !14 | ||
|<br>Badge | |[[File:MKT 430QB.png|50px]]<br>Badge | ||
|-style="background: #89A" | |-style="background: #89A" | ||
|colspan=2|'''Today's Challenge Pipe''' | |colspan=2|'''Today's Challenge Pipe''' | ||
| Line 79: | Line 243: | ||
|- | |- | ||
|colspan=2|[[Ruby|Rubies]], [[coin]]s, driver (Normal/Super/High-End), kart (Normal/Super/High-End), glider (Normal/Super/High-End), [[item ticket]]s | |colspan=2|[[Ruby|Rubies]], [[coin]]s, driver (Normal/Super/High-End), kart (Normal/Super/High-End), glider (Normal/Super/High-End), [[item ticket]]s | ||
|} | |||
==Rewards== | |||
Gold cells indicate rewards that are exclusive to Gold Pass members. | |||
{|class="wikitable" style="margin:auto; text-align:center" | |||
|- | |||
![[File:MKT Icon GrandStar.png|20x20px]] 30 | |||
|- | |||
|[[File:MKT Icon GoldFishBoneFerry.png|75x75px]] | |||
|- | |||
|style=background:gold|[[Gold Fish Bone Ferry]] | |||
|} | |||
<br> | |||
{|class="wikitable scrollable" style="margin:auto; text-align:center; font-size:90%" | |||
|- | |||
!Grand Stars!![[File:MKT Icon GrandStar.png|20x20px]]!!15!!20!!25!!30!!35!!40!!45!!50!!55!!60!!65!!70!!80!!90!!100!!110!!120!!130!!140!!150!!160!!170!!180!!190!!200!!210!!220!!230!!240!!250!!260!!270!!280!!290!!300!!310!!320!!Total!!Grand total | |||
|- | |||
!rowspan=2 colspan=2|[[Pipe Cannon|Pipes]] | |||
|||[[File:MKT Icon Launch Pipe Green.png|20px]]||||[[File:MKT Icon Launch Pipe Green.png|20px]]||||[[File:MKT Icon Launch Pipe Green.png|20px]]||||||||||||||[[File:MKT Icon Launch Pipe Green.png|20px]]||||||||||[[File:MKT Icon Launch Pipe Green.png|20px]]||||||[[File:MKT Icon Launch Pipe Green.png|20px]]||||||||[[File:MKT Icon Launch Pipe Green.png|20px]]||||||||[[File:MKT Icon Launch Pipe Green.png|20px]]||||[[File:MKT Icon Launch Pipe Green.png|20px]]||||[[File:MKT Icon Launch Pipe Green.png|20px]]||||||||||10 | |||
!rowspan=2|26 | |||
|-style=background:gold | |||
|||[[File:MKT Icon Launch Pipe Green.png|20px]]||[[File:MKT Icon Launch Pipe Green.png|20px]]||[[File:MKT Icon Launch Pipe Green.png|20px]]||[[File:MKT Icon Launch Pipe Green.png|20px]]||[[File:MKT Icon Launch Pipe Green.png|20px]]||||||||||||[[File:MKT Icon Launch Pipe Gold.png|20px]]||[[File:MKT Icon Launch Pipe Green.png|20px]]||||||||[[File:MKT Icon Launch Pipe Gold.png|20px]]||[[File:MKT Icon Launch Pipe Green.png|20px]]||||||[[File:MKT Icon Launch Pipe Green.png|20px]]||||||||[[File:MKT Icon Launch Pipe Green.png|20px]]||||||||[[File:MKT Icon Launch Pipe Green.png|20px]]||[[File:MKT Icon Launch Pipe Green.png|20px]]||[[File:MKT Icon Launch Pipe Green.png|20px]]||[[File:MKT Icon Launch Pipe Green.png|20px]]||[[File:MKT Icon Launch Pipe Green.png|20px]]||||||||||16 | |||
|- | |||
!rowspan=2|[[Coin]]s | |||
!rowspan=2|[[File:MKT Icon Coins 2.png|50x50px]] | |||
|500||||500||||500||||500||||||500||||500||||||||||||||||500||||||||||||||||||||500||||500||||500||||||||5000 | |||
!rowspan=2|15000 | |||
|-style=background:gold | |||
|5000||||||||||||5000||||||||||||||||||||||||||||||||||||||||||||||||||||||||||||||10000 | |||
|- | |||
!rowspan=2|[[Ruby|Rubies]] | |||
!rowspan=2|[[File:MKT Icon 1Ruby.png|50x50px]] | |||
|10||||||||||||5||||||||||3||||||||||||||||3||||||||||||||||||||||||||||||||||||21 | |||
!rowspan=2|56 | |||
|-style=background:gold | |||
|15||||||||||||10||||||||||10||||||||||||||||||||||||||||||||||||||||||||||||||||35 | |||
|- | |||
!rowspan=2|[[Item ticket]]s | |||
!rowspan=2|[[File:MKT Icon ItemTicket.png|50x50px]] | |||
|||||||||||||||5||||||||||||||||||||||5||||||||||||||||||||||||||||||||||||||10 | |||
!rowspan=2|30 | |||
|-style=background:gold | |||
|||||||||||||||10||||||||||||||||||||||10||||||||||||||||||||||||||||||||||||||20 | |||
|- | |||
!rowspan=2|[[Star ticket]]s | |||
!rowspan=2|[[File:MKT Icon StarTicket.png|50x50px]] | |||
|||||||||||||||||||||2||||||||||||3||||||||||||||||||||||||||||||||||||||||||5 | |||
!rowspan=2|5 | |||
|-style=background:gold | |||
|||||||||||||||||||||||||||||||||||||||||||||||||||||||||||||||||||||||||||0 | |||
|- | |||
!rowspan=2|[[Quick ticket]]s | |||
!rowspan=2|[[File:MKT Icon QuickTicket.png|50x50px]] | |||
|||||||||||||||||1||||||||||||||||||||||||||||||||||||||||||||||||||||||||||1 | |||
!rowspan=2|4 | |||
|-style=background:gold | |||
|||||||||||||||||||||||||||||||||||||||3||||||||||||||||||||||||||||||||||||3 | |||
|- | |||
!rowspan=6|[[Point-boost ticket]]s | |||
!rowspan=2|[[File:MKT Icon Point-boostticket1.png|50x50px]] | |||
|||||||||||||||||||||||||||||||1||||||||||||||||1||||||||1||||||||||||||||||||3 | |||
!rowspan=2|8 | |||
|-style=background:gold | |||
|||||||||||||||||||||||||||||||||||||||||||||||||||||||5||||||||||||||||||||5 | |||
|- | |||
!rowspan=2|[[File:MKT Icon Point-boostticket2.png|50x50px]] | |||
|||||||||||||||||||||||||||||1||||||||||||||||1||||||||1||||||||||||||||||||||3 | |||
!rowspan=2|8 | |||
|-style=background:gold | |||
|||||||||||||||||||||||||||||||||||||||||||||||||||||5||||||||||||||||||||||5 | |||
|- | |||
!rowspan=2|[[File:MKT Icon Point-boostticket3.png|50x50px]] | |||
|||||||||||||||||||||||||||1||||||||||||||||1||||||||1||||||||||||||||||||||||3 | |||
!rowspan=2|8 | |||
|-style=background:gold | |||
|||||||||||||||||||||||||||||||||||||||||||||||||||5||||||||||||||||||||||||5 | |||
|- | |||
!rowspan=2 colspan=2|[[Level-boost ticket]]s | |||
|||||||||||||||||||||||||||||||||||||||||||||||||||||||||||||||||||||[[File:MKT Icon Level-boostticket2.png|30px]]||[[File:MKT Icon Level-boostticket5.png|30px]]||[[File:MKT Icon Level-boostticket8.png|30px]]||3 | |||
!rowspan=2|22 | |||
|-style=background:gold | |||
|||||||||||||||||[[File:MKT Icon Level-boostticket3.png|30px]]<br>(3)||[[File:MKT Icon Level-boostticket2.png|30px]]<br>(3)||[[File:MKT Icon Level-boostticket1.png|30px]]<br>(3)||||||[[File:MKT Icon Level-boostticket6.png|30px]]<br>(2)||[[File:MKT Icon Level-boostticket5.png|30px]]<br>(2)||[[File:MKT Icon Level-boostticket4.png|30px]]<br>(2)||||||||||||[[File:MKT Icon Level-boostticket9.png|30px]]||[[File:MKT Icon Level-boostticket8.png|30px]]||[[File:MKT Icon Level-boostticket7.png|30px]]||||||||||||||||||||[[File:MKT Icon Level-boostticket8.png|30px]]||||||||19 | |||
|} | |} | ||
| Line 120: | Line 366: | ||
MKT Icon Wii Moonview Highway.png|[[Wii Moonview Highway]] (N, R, T, R/T) | MKT Icon Wii Moonview Highway.png|[[Wii Moonview Highway]] (N, R, T, R/T) | ||
</gallery> | </gallery> | ||
==Paid banners== | |||
{| align=center width=960px cellspacing=0 border=1 cellpadding=3 style="border-collapse:collapse; font-family:Arial; text-align:center" | |||
|-style="background: #ABC" | |||
!Name | |||
!Availability | |||
!Cost | |||
!Contents | |||
!Banner image | |||
|- | |||
|'''Value Pack''' | |||
|June 27, 2023 – July 11, 2023 | |||
|US$1.99 | |||
|[[File:MKT Icon Ruby.png|30px]] [[Ruby|Rubies]] ×6<br> | |||
[[File:MKT Icon StarTicket.png|30px]] [[Star ticket]] ×2<br> | |||
[[File:MKT Icon ItemTicket.png|30px]] [[Item ticket]] ×3 | |||
|[[File:MKT ValuePack2.png|x150px]] | |||
|- | |||
|'''Driver Point-Boost Tickets 10 Ticket Set''' | |||
|June 27, 2023 – July 11, 2023 | |||
|US$3.99 | |||
|[[File:MKT Icon Point-boostticket1.png|30px]] [[Point-boost ticket|Driver point-boost ticket]] ×10 | |||
|[[File:MKT Tour69 DriverPointBoostTickets10TicketSet.png|x150px]] | |||
|- | |||
|'''Celebrate the Night Tour with the Fish Bone Ferry!''' | |||
|June 27, 2023 – July 11, 2023 | |||
|US$3.99 | |||
|[[File:MKT Icon FishBoneFerry.png|30px]] [[Fish Bone Ferry]] ×1 | |||
|[[File:MKT Tour99 FishBoneFerryPack.png|x150px]] | |||
|- | |||
|'''70 Rubies and Ticket Pack''' | |||
|June 27, 2023 – July 11, 2023 | |||
|US$19.99 | |||
|[[File:MKT Icon Ruby 4.png|30px]] [[Ruby|Rubies]] ×70<br> | |||
[[File:MKT Icon Point-boostticket1.png|30px]] [[Point-boost ticket|Driver point-boost ticket]] ×5<br> | |||
[[File:MKT Icon StarTicket.png|30px]] [[Star ticket]] ×5<br> | |||
|[[File:MKT Tour80 70RubiesandTicketPack.png|x150px]] | |||
|- | |||
|'''150 Rubies and Ticket Pack''' | |||
|June 27, 2023 – July 11, 2023 | |||
|US$39.99 | |||
|[[File:MKT Icon Ruby 5.png|30px]] [[Ruby|Rubies]] ×150<br> | |||
[[File:MKT Icon Point-boostticket1.png|30px]] [[Point-boost ticket|Driver point-boost ticket]] ×10<br> | |||
[[File:MKT Icon StarTicket.png|30px]] [[Star ticket]] ×10<br> | |||
|[[File:MKT Tour80 150RubiesandTicketPack.png|x150px]] | |||
|} | |||
==Challenges== | |||
{{MKT challenge table | |||
|TCR1=[[File:MKT Icon CoinRushTicket.png|70px]] [[Coin Rush ticket]] ×1 | |||
|T1.1=133 | |||
|T1.1E=Do 50 {{Color-link|Jump Boost|#A1A1FF|Jump Boosts}}. | |||
|T1.1S=1 | |||
|T1.2=004 | |||
|T1.2E=Land 3 hits with {{Color-link|Bob-omb|#A1A1FF|Bob-ombs}}. | |||
|T1.2S=1 | |||
|T1.3=011 | |||
|T1.3E=Get a Fantastic combo a total of 5 times. | |||
|T1.3S=1 | |||
|T1.4=376 | |||
|T1.4E=Get 1 item from the Daily Selects section of the Shop. | |||
|T1.4S=2 | |||
|T1.5=323 | |||
|T1.5E=Get 3rd place or higher 30 times. | |||
|T1.5S=2 | |||
|T1.6=097 | |||
|T1.6E=Cause an opponent to crash while gliding. | |||
|T1.6S=2 | |||
|T1.7=009 | |||
|T1.7E=Glide a total distance of 5,000. | |||
|T1.7S=2 | |||
|T1.8=404 | |||
|T1.8E=Cause opponents to crash using a {{Color-link|Mega Mushroom|#A1A1FF}}. | |||
|T1.8S=2 | |||
|T1.9=430 | |||
|T1.9E=Finish every course of every cup, including bonus challenges. | |||
|T1.9S=2 | |||
|TCR2=[[File:MKT Icon QuickTicket.png|70px]] [[Quick ticket]] ×1 | |||
|T2.1=033 | |||
|T2.1E=Land 5 hits with {{Color-link|Red Shell|#A1A1FF|Red Shells}}. | |||
|T2.1S=1 | |||
|T2.2=068 | |||
|T2.2E=Land 3 hits with {{Color-link|Green Shell|#A1A1FF|Green Shells}}. | |||
|T2.2S=1 | |||
|T2.3=105 | |||
|T2.3E=Get 1st place 2 times in a row in 100cc or above. | |||
|T2.3S=1 | |||
|T2.4=140 | |||
|T2.4E=Use {{Color-link|point-boost ticket|#A1A1FF|point-boost tickets}} 3 times. | |||
|T2.4S=2 | |||
|T2.5=161 | |||
|T2.5E=Do 20 Jump Boosts using a driver wearing a tie. | |||
|T2.5S=2 | |||
|T2.6=385 | |||
|T2.6E=Earn a score of 7,000 or higher on 3 T or R/T courses. | |||
|T2.6S=2 | |||
|T2.7=400 | |||
|T2.7E=Land a hit with a {{Color-link|Blooper|#A1A1FF}}. | |||
|T2.7S=2 | |||
|T2.8=183 | |||
|T2.8E=Earn a total score of 15,000 or higher in the {{Color-link|Wario Cup|#A1A1FF}}. | |||
|T2.8S=2 | |||
|T2.9=031 | |||
|T2.9E=Complete {{Color-link|Coin Rush (Mario Kart Tour)|#A1A1FF|Coin Rush}} 1 time. | |||
|T2.9S=2 | |||
|GCR=[[File:MKT Icon 1Ruby.png|70px]] [[Ruby|Rubies]] ×5 | |||
|G.1=076 | |||
|G.1E=Get a combo count of ×30 or higher. | |||
|G.1S=1 | |||
|G.2=067 | |||
|G.2E=Land 15 hits with {{Color-link|Banana|#A1A1FF|Bananas}}. | |||
|G.2S=1 | |||
|G.3=385 | |||
|G.3E=Get 1st place 3 times in a row in 100cc or above. | |||
|G.3S=1 | |||
|G.4=376 | |||
|G.4E=Use a {{Color-link|points-cap ticket|#A1A1FF}}. | |||
|G.4S=2 | |||
|G.5=185 | |||
|G.5E=Earn a score of 7,000 or higher using a driver with a mustache. | |||
|G.5S=2 | |||
|G.6=135 | |||
|G.6E=Cause opponents to crash 3 times while gliding. | |||
|G.6S=2 | |||
|G.7=399 | |||
|G.7E=Use {{Color-link|Lightning|#A1A1FF}}. | |||
|G.7S=2 | |||
|G.8=158 | |||
|G.8E=Earn a total score of 20,000 or higher in the {{Color-link|Birdo Cup|#A1A1FF}}. | |||
|G.8S=2 | |||
|G.9=043 | |||
|G.9E=Send Greeting {{Color-link|Coin|#A1A1FF|Coins}} to a friend. | |||
|G.9S=2 | |||
}} | |||
<br> | |||
{| align=center width=100% cellspacing=0 border=1 cellpadding=3 style="border-collapse:collapse; font-family:Arial; text-align:center" | |||
|- | |||
!colspan=3 style="background: #EEEEFF"|'''Premium Challenges''' | |||
|rowspan=13 style="border-top:1px solid #FFF; border-bottom:1px solid #FFF;" width=5%| | |||
!colspan=3 style="background: #EEEEFF"|'''Premium Challenges+''' | |||
|rowspan=13 style="border-top:1px solid #FFF; border-bottom:1px solid #FFF;" width=5%| | |||
!colspan=3 style="background: #EEEEFF"|'''Premium Challenges++''' | |||
|- | |||
|colspan=3 style="background: #EEEEFF"|'''Cost:''' US$4.99 | |||
|colspan=3 style="background: #EEEEFF"|'''Cost:''' US$9.99 | |||
|colspan=3 style="background: #EEEEFF"|'''Cost:''' US$19.99 | |||
|- | |||
|colspan=3 style="background: #EEEEFF"|'''Three in a row reward:''' [[File:MKT Icon Coins 2.png|70px]] [[Coin|Coins]] ×300 | |||
|colspan=3 style="background: #EEEEFF"|'''Three in a row reward:''' [[File:MKT Icon Coins 2.png|70px]] [[Coin|Coins]] ×300 | |||
|colspan=3 style="background: #EEEEFF"|'''Three in a row reward:''' [[File:MKT Icon Coins 2.png|70px]] [[Coin|Coins]] ×300 | |||
|- | |||
|colspan=3 style="background: #EEEEFF"|'''Completion reward:''' [[File:MKT Icon Launch Pipe Gold.png|70px]] Gold Pipe ×1 | |||
|colspan=3 style="background: #EEEEFF"|'''Completion reward:''' [[File:MKT Icon Launch Pipe Gold.png|70px]] Gold Pipe ×1 | |||
|colspan=3 style="background: #EEEEFF"|'''Completion reward:''' [[File:MKT Icon Launch Pipe Gold.png|70px]] Gold Pipe ×1 | |||
|-style="height: 80px" | |||
|width=10% style="background:linear-gradient(#F2E18F,#B9800F)"|[[File:MKT Icon Launch Pipe Green.png|70px]] | |||
|width=10% style="background:linear-gradient(#F2E18F,#B9800F)"|[[File:MKT Icon Launch Pipe Green.png|70px]] | |||
|width=10% style="background:linear-gradient(#F2E18F,#B9800F)"|[[File:MKT Icon Launch Pipe Green.png|70px]] | |||
|width=10% style="background:linear-gradient(#F2E18F,#B9800F)"|[[File:MKT Icon Launch Pipe Green.png|70px]] | |||
|width=10% style="background:linear-gradient(#F2E18F,#B9800F)"|[[File:MKT Icon Launch Pipe Gold.png|70px]] | |||
|width=10% style="background:linear-gradient(#F2E18F,#B9800F)"|[[File:MKT Icon Coins 3.png|70px]] | |||
|width=10% style="background:linear-gradient(#F2E18F,#B9800F)"|[[File:MKT Icon Launch Pipe Gold.png|70px]] | |||
|width=10% style="background:linear-gradient(#F2E18F,#B9800F)"|[[File:MKT Icon Ruby 2.png|70px]] | |||
|width=10% style="background:linear-gradient(#F2E18F,#B9800F)"|[[File:MKT Icon Coins 3.png|70px]] | |||
|-style="color: #FFF" | |||
|style="background:linear-gradient(#864D00,#A26000); border-top:1px solid #B9800F;"|Pipe ×1 | |||
|style="background:linear-gradient(#864D00,#A26000); border-top:1px solid #B9800F;"|Pipe ×1 | |||
|style="background:linear-gradient(#864D00,#A26000); border-top:1px solid #B9800F;"|Pipe ×1 | |||
|style="background:linear-gradient(#864D00,#A26000); border-top:1px solid #B9800F;"|Pipe ×1 | |||
|style="background:linear-gradient(#864D00,#A26000); border-top:1px solid #B9800F;"|Gold Pipe ×1 | |||
|style="background:linear-gradient(#864D00,#A26000); border-top:1px solid #B9800F;"|Coins ×5,000 | |||
|style="background:linear-gradient(#864D00,#A26000); border-top:1px solid #B9800F;"|Gold Pipe ×1 | |||
|style="background:linear-gradient(#864D00,#A26000); border-top:1px solid #B9800F;"|Rubies ×30 | |||
|style="background:linear-gradient(#864D00,#A26000); border-top:1px solid #B9800F;"|Coins ×10,000 | |||
|-style="color: #FFF" | |||
|style="background:linear-gradient(#A26000,#C88512); border-top:1px solid #A26000;"|''Land 5 hits with Green Shells.'' | |||
|style="background:linear-gradient(#A26000,#C88512); border-top:1px solid #A26000;"|''Land 5 hits with Bananas.'' | |||
|style="background:linear-gradient(#A26000,#C88512); border-top:1px solid #A26000;"|''Land 3 hits with Bob-ombs.'' | |||
|style="background:linear-gradient(#A26000,#C88512); border-top:1px solid #A26000;"|''Land 10 hits with Green Shells.'' | |||
|style="background:linear-gradient(#A26000,#C88512); border-top:1px solid #A26000;"|''Land 10 hits with Bananas.'' | |||
|style="background:linear-gradient(#A26000,#C88512); border-top:1px solid #A26000;"|''Use 10 Mushrooms.'' | |||
|style="background:linear-gradient(#A26000,#C88512); border-top:1px solid #A26000;"|''Land 10 hits with Red Shells.'' | |||
|style="background:linear-gradient(#A26000,#C88512); border-top:1px solid #A26000;"|''Start a new tour.'' | |||
|style="background:linear-gradient(#A26000,#C88512); border-top:1px solid #A26000;"|''Land 20 hits with Bananas.'' | |||
|-style="height: 80px" | |||
|width=10% style="background:linear-gradient(#F2E18F,#B9800F)"|[[File:MKT Icon Coins 3.png|70px]] | |||
|width=10% style="background:linear-gradient(#F2E18F,#B9800F)"|[[File:MKT Icon Ruby.png|70px]] | |||
|width=10% style="background:linear-gradient(#F2E18F,#B9800F)"|[[File:MKT Icon Point-boostticket2.png|70px]] | |||
|width=10% style="background:linear-gradient(#F2E18F,#B9800F)"|[[File:MKT Icon Point-boostticket2.png|70px]] | |||
|width=10% style="background:linear-gradient(#F2E18F,#B9800F)"|[[File:MKT Icon Ruby 2.png|70px]] | |||
|width=10% style="background:linear-gradient(#F2E18F,#B9800F)"|[[File:MKT Icon Points-capticket8.png|70px]] | |||
|width=10% style="background:linear-gradient(#F2E18F,#B9800F)"|[[File:MKT Icon Level-boostticket7.png|70px]] | |||
|width=10% style="background:linear-gradient(#F2E18F,#B9800F)"|[[File:MKT Icon Level-boostticket8.png|70px]] | |||
|width=10% style="background:linear-gradient(#F2E18F,#B9800F)"|[[File:MKT Icon Level-boostticket9.png|70px]] | |||
|-style="color: #FFF" | |||
|style="background:linear-gradient(#864D00,#A26000); border-top:1px solid #B9800F;"|{{Color-link|Coins|#A1A1FF}} ×3,000 | |||
|style="background:linear-gradient(#864D00,#A26000); border-top:1px solid #B9800F;"|{{Color-link|Ruby|#A1A1FF|Rubies}} ×10 | |||
|style="background:linear-gradient(#864D00,#A26000); border-top:1px solid #B9800F;"|{{Color-link|Point-boost ticket|#A1A1FF}} (Kart) ×3 | |||
|style="background:linear-gradient(#864D00,#A26000); border-top:1px solid #B9800F;"|Point-boost ticket (Kart) ×5 | |||
|style="background:linear-gradient(#864D00,#A26000); border-top:1px solid #B9800F;"|Rubies ×20 | |||
|style="background:linear-gradient(#864D00,#A26000); border-top:1px solid #B9800F;"|{{Color-link|Points-cap ticket|#A1A1FF}} (High-end kart) ×1 | |||
|style="background:linear-gradient(#864D00,#A26000); border-top:1px solid #B9800F;"|Level-boost ticket (High-End driver) ×2 | |||
|style="background:linear-gradient(#864D00,#A26000); border-top:1px solid #B9800F;"|Level-boost ticket (High-End kart) ×2 | |||
|style="background:linear-gradient(#864D00,#A26000); border-top:1px solid #B9800F;"|Level-boost ticket (High-End glider) ×2 | |||
|-style="color: #FFF" | |||
|style="background:linear-gradient(#A26000,#C88512); border-top:1px solid #A26000;"|''Do 20 Jump Boosts.'' | |||
|style="background:linear-gradient(#A26000,#C88512); border-top:1px solid #A26000;"|''Start a new tour.'' | |||
|style="background:linear-gradient(#A26000,#C88512); border-top:1px solid #A26000;"|''Do 50 Mini-Turbo boosts.'' | |||
|style="background:linear-gradient(#A26000,#C88512); border-top:1px solid #A26000;"|''Do 50 Jump Boosts.'' | |||
|style="background:linear-gradient(#A26000,#C88512); border-top:1px solid #A26000;"|''Start a new tour.'' | |||
|style="background:linear-gradient(#A26000,#C88512); border-top:1px solid #A26000;"|''Do 100 Mini-Turbo boosts.'' | |||
|style="background:linear-gradient(#A26000,#C88512); border-top:1px solid #A26000;"|''Land 5 hits with Bob-ombs.'' | |||
|style="background:linear-gradient(#A26000,#C88512); border-top:1px solid #A26000;"|''Do 100 Jump Boosts.'' | |||
|style="background:linear-gradient(#A26000,#C88512); border-top:1px solid #A26000;"|''Do 150 Mini-Turbo boosts.'' | |||
|-style="height: 80px" | |||
|width=10% style="background:linear-gradient(#F2E18F,#B9800F)"|[[File:MKT Icon Level-boostticket2.png|70px]] | |||
|width=10% style="background:linear-gradient(#F2E18F,#B9800F)"|[[File:MKT Icon Level-boostticket5.png|70px]] | |||
|width=10% style="background:linear-gradient(#F2E18F,#B9800F)"|[[File:MKT Icon Level-boostticket8.png|70px]] | |||
|width=10% style="background:linear-gradient(#F2E18F,#B9800F)"|[[File:MKT Icon Level-boostticket7.png|70px]] | |||
|width=10% style="background:linear-gradient(#F2E18F,#B9800F)"|[[File:MKT Icon Level-boostticket8.png|70px]] | |||
|width=10% style="background:linear-gradient(#F2E18F,#B9800F)"|[[File:MKT Icon Level-boostticket9.png|70px]] | |||
|width=10% style="background:linear-gradient(#F2E18F,#B9800F)"|[[File:MKT Icon Points-capticket7.png|70px]] | |||
|width=10% style="background:linear-gradient(#F2E18F,#B9800F)"|[[File:MKT Icon Points-capticket8.png|70px]] | |||
|width=10% style="background:linear-gradient(#F2E18F,#B9800F)"|[[File:MKT Icon Points-capticket9.png|70px]] | |||
|-style="color: #FFF" | |||
|style="background:linear-gradient(#864D00,#A26000); border-top:1px solid #B9800F;"|{{Color-link|Level-boost ticket|#A1A1FF}} (Normal kart) ×1 | |||
|style="background:linear-gradient(#864D00,#A26000); border-top:1px solid #B9800F;"|Level-boost ticket (Super kart) ×1 | |||
|style="background:linear-gradient(#864D00,#A26000); border-top:1px solid #B9800F;"|Level-boost ticket (High-End kart) ×1 | |||
|style="background:linear-gradient(#864D00,#A26000); border-top:1px solid #B9800F;"|Level-boost ticket (High-End driver) ×1 | |||
|style="background:linear-gradient(#864D00,#A26000); border-top:1px solid #B9800F;"|Level-boost ticket (High-End kart) ×1 | |||
|style="background:linear-gradient(#864D00,#A26000); border-top:1px solid #B9800F;"|Level-boost ticket (High-End glider) ×1 | |||
|style="background:linear-gradient(#864D00,#A26000); border-top:1px solid #B9800F;"|Points-cap ticket (High-end driver) ×2 | |||
|style="background:linear-gradient(#864D00,#A26000); border-top:1px solid #B9800F;"|Points-cap ticket (High-end kart) ×2 | |||
|style="background:linear-gradient(#864D00,#A26000); border-top:1px solid #B9800F;"|Points-cap ticket (High-end glider) ×2 | |||
|-style="color: #FFF" | |||
|style="background:linear-gradient(#A26000,#C88512); border-top:1px solid #A26000;"|''Get 1st place 3 times.'' | |||
|style="background:linear-gradient(#A26000,#C88512); border-top:1px solid #A26000;"|''Get 1st place 5 times.'' | |||
|style="background:linear-gradient(#A26000,#C88512); border-top:1px solid #A26000;"|''Get 1st place 10 times.'' | |||
|style="background:linear-gradient(#A26000,#C88512); border-top:1px solid #A26000;"|''Get 1st place 5 times.'' | |||
|style="background:linear-gradient(#A26000,#C88512); border-top:1px solid #A26000;"|''Get 1st place 10 times.'' | |||
|style="background:linear-gradient(#A26000,#C88512); border-top:1px solid #A26000;"|''Get 1st place 15 times.'' | |||
|style="background:linear-gradient(#A26000,#C88512); border-top:1px solid #A26000;"|''Get 1st place 10 times.'' | |||
|style="background:linear-gradient(#A26000,#C88512); border-top:1px solid #A26000;"|''Get 1st place 15 times.'' | |||
|style="background:linear-gradient(#A26000,#C88512); border-top:1px solid #A26000;"|''Get 1st place 20 times.'' | |||
|} | |||
<br> | |||
{| align=center width=30% cellspacing=0 border=1 cellpadding=3 style="border-collapse:collapse; font-family:Arial; text-align:center" | |||
|- | |||
!colspan=3 style="background: #C3F84E"|'''Tour Multiplayer Challenges''' | |||
|-style="color: #000" | |||
|colspan=3 style="background: #C3F84E"|'''Three in a row reward:''' [[File:MKT Icon Coins 2.png|60px]] [[Coin|Coins]] ×300 | |||
|-style="color: #000" | |||
|colspan=3 style="background: #C3F84E"|'''Completion reward:''' [[File:MKT Icon 1Ruby.png|60px]] Rubies ×5 | |||
|-style="color: #FFF" | |||
|width=10% style="background: #2F5D1C"|[[File:MKT 145CB.png|70px]]<br>[[File:MKT Icon GrandStar.png|15px]] | |||
|width=10% style="background: #2F5D1C"|[[File:MKT 146CB.png|70px]]<br>[[File:MKT Icon GrandStar.png|15px]] | |||
|width=10% style="background: #2F5D1C"|[[File:MKT 127CB.png|70px]]<br>[[File:MKT Icon GrandStar.png|15px]] | |||
|-style="color: #FFF" | |||
|style="background: #2F5D1C; border-top:1px solid #2F5D1C;"|''Do 10 Jump Boosts in multiplayer.'' | |||
|style="background: #2F5D1C; border-top:1px solid #2F5D1C;"|''Do 3 Rocket Starts in multiplayer{{sic}}'' | |||
|style="background: #2F5D1C; border-top:1px solid #2F5D1C;"|''Land 3 hits with Green Shells in multiplayer.'' | |||
|-style="color: #FFF" | |||
|width=10% style="background: #2F5D1C"|[[File:MKT 112-3CB.png|70px]]<br>[[File:MKT Icon GrandStar.png|15px]] [[File:MKT Icon GrandStar.png|15px]] | |||
|width=10% style="background: #2F5D1C"|[[File:MKT 112-1CB.png|70px]]<br>[[File:MKT Icon GrandStar.png|15px]] [[File:MKT Icon GrandStar.png|15px]] | |||
|width=10% style="background: #2F5D1C"|[[File:MKT 112CB.png|70px]]<br>[[File:MKT Icon GrandStar.png|15px]] [[File:MKT Icon GrandStar.png|15px]] | |||
|-style="color: #FFF" | |||
|style="background: #2F5D1C; border-top:1px solid #2F5D1C;"|''Play multiplayer 3 times.'' | |||
|style="background: #2F5D1C; border-top:1px solid #2F5D1C;"|''Play multiplayer 5 times.'' | |||
|style="background: #2F5D1C; border-top:1px solid #2F5D1C;"|''Play multiplayer 10 times.'' | |||
|-style="color: #FFF" | |||
|width=10% style="background: #2F5D1C"|[[File:MKT 130CB.png|70px]]<br>[[File:MKT Icon GrandStar.png|15px]] [[File:MKT Icon GrandStar.png|15px]] | |||
|width=10% style="background: #2F5D1C"|[[File:MKT 131CB.png|70px]]<br>[[File:MKT Icon GrandStar.png|15px]] [[File:MKT Icon GrandStar.png|15px]] | |||
|width=10% style="background: #2F5D1C"|[[File:MKT 129CB.png|70px]]<br>[[File:MKT Icon GrandStar.png|15px]] [[File:MKT Icon GrandStar.png|15px]] | |||
|-style="color: #FFF" | |||
|style="background: #2F5D1C; border-top:1px solid #2F5D1C;"|''Get 3rd place or higher in multiplayer.'' | |||
|style="background: #2F5D1C; border-top:1px solid #2F5D1C;"|''Get 3rd place or higher 3 times in multiplayer.'' | |||
|style="background: #2F5D1C; border-top:1px solid #2F5D1C;"|''Get 3rd place or higher 5 times in multiplayer.'' | |||
|} | |||
<br> | |||
{|class="wikitable" style="margin:auto; text-align:center" width=65% | |||
!colspan=2 width=30%|Total Points Challenge 1 | |||
|rowspan=8 style="border-top:1px solid #FFF; border-bottom:1px solid #FFF;" width=5%| | |||
!colspan=2 width=30%|Total Points Challenge 2 | |||
|- | |||
!Points | |||
!Rewards | |||
!Points | |||
!Rewards | |||
|- | |||
!400,000 | |||
|[[File:MKT Icon 1Ruby.png|20px]] [[Ruby|Rubies]] ×3<br> | |||
[[File:MKT Icon Point-boostticket1.png|30px]] [[Point-boost ticket]]s (driver) ×5<br> | |||
[[File:MKT Icon Point-boostticket2.png|30px]] Point-boost tickets (kart) ×5<br> | |||
[[File:MKT Icon Point-boostticket3.png|30px]] Point-boost tickets (glider) ×5 | |||
!999,999 | |||
|[[File:MKT Icon 1Ruby.png|20px]] [[Ruby|Rubies]] ×3<br> | |||
[[File:MKT Icon Point-boostticket1.png|30px]] Point-boost tickets (driver) ×5<br> | |||
[[File:MKT Icon Point-boostticket2.png|30px]] Point-boost tickets (kart) ×5<br> | |||
[[File:MKT Icon Point-boostticket3.png|30px]] Point-boost tickets (glider) ×5 | |||
|- | |||
!300,000 | |||
|[[File:MKT Icon Coins 3.png|30px]] [[Coin]]s ×1,000<br> | |||
[[File:MKT Icon ItemTicket.png|30px]] [[Item ticket]]s ×10<br> | |||
!900,000 | |||
|[[File:MKT Icon Coins 3.png|30px]] Coins ×1,000<br> | |||
[[File:MKT Icon ItemTicket.png|30px]] Item tickets ×10<br> | |||
|- | |||
!250,000 | |||
|[[File:MKT Icon Coins 3.png|30px]] Coins ×1,000<br> | |||
[[File:MKT Icon Points-capticket4.png|30px]] Points-cap ticket (Super driver) ×1 | |||
!800,000 | |||
|[[File:MKT Icon Coins 3.png|30px]] Coins ×1,000<br> | |||
[[File:MKT Icon Points-capticket7.png|30px]] Points-cap ticket (High-End driver) ×1 | |||
|- | |||
!200,000 | |||
|[[File:MKT Icon Coins 3.png|30px]] Coins ×1,000<br> | |||
[[File:MKT Icon Level-boostticket4.png|30px]] Level-boost ticket (Super driver) ×1 | |||
!700,000 | |||
|[[File:MKT Icon Coins 3.png|30px]] Coins ×1,000<br> | |||
[[File:MKT Icon Level-boostticket7.png|30px]] Level-boost ticket (High-End driver) ×1 | |||
|- | |||
!150,000 | |||
|[[File:MKT Icon Coins 3.png|30px]] Coins ×1,000<br> | |||
[[File:MKT Icon Points-capticket1.png|30px]] [[Points-cap ticket]] (Normal driver) ×1 | |||
!600,000 | |||
|[[File:MKT Icon Coins 3.png|30px]] Coins ×1,000<br> | |||
[[File:MKT Icon Points-capticket4.png|30px]] Points-cap ticket (Super driver) ×1 | |||
|- | |||
!100,000 | |||
|[[File:MKT Icon Coins 3.png|30px]] Coins ×1,000<br> | |||
[[File:MKT Icon Level-boostticket1.png|30px]] [[Level-boost ticket]] (Normal driver) ×1 | |||
!500,000 | |||
|[[File:MKT Icon Coins 3.png|30px]] Coins ×1,000<br> | |||
[[File:MKT Icon Level-boostticket4.png|30px]] Level-boost ticket (Super driver) ×1 | |||
|} | |||
==2-Player Challenge== | |||
{| class="wikitable" style="text-align:center" width=100% | |||
!rowspan=2|Name | |||
!colspan=3|Courses | |||
!colspan=7|Opponents | |||
|- | |||
!First | |||
!Second | |||
!Final | |||
! | |||
!6th | |||
!5th | |||
!4th | |||
!3rd | |||
!2nd | |||
!1st | |||
|- | |||
|rowspan=3|[[File:MKT Vs. Donkey Kong Team.png|200px]]<br>'''Vs. Donkey Kong Team''' | |||
|rowspan=3|[[File:MKT Icon Rome Avanti.png|150px]]<br>[[Rome Avanti]] | |||
|rowspan=3|[[File:MKT Icon Wii Moonview Highway.png|150px]]<br>[[Wii Moonview Highway]] | |||
|rowspan=3|[[File:MKT Icon Rome Avanti 2T.png|150px]]<br>Rome Avanti 2T | |||
!Driver | |||
|[[File:MKT Icon Birdo.png|37px|link=Birdo]] | |||
|[[File:MKT Icon MontyMole.png|37px|link=Monty Mole]] | |||
|[[File:MKT Icon DiddyKong.png|37px|link=Diddy Kong]] | |||
|[[File:MKT Icon DixieKong.png|37px|link=Dixie Kong]] | |||
|[[File:MKT Icon FunkyKong.png|37px|link=Funky Kong]] | |||
|[[File:MKT Icon DonkeyKongGladiator.png|37px|link=Donkey Kong|Donkey Kong (Gladiator)]] | |||
|- | |||
!Kart | |||
|[[File:MKT Icon TurboBirdo.png|37px|link=Turbo Birdo]] | |||
|[[File:MKT Icon ClankyKart.png|37px|link=Clanky Kart]] | |||
|[[File:MKT Icon DKJumbo.png|37px|link=DK Jumbo]] | |||
|[[File:MKT Icon DKJumbo.png|37px|link=DK Jumbo]] | |||
|[[File:MKT Icon BananaMaster.png|37px|link=Banana Master]] | |||
|[[File:MKT Icon ChainChompChariot.png|37px|link=Chain Chomp Chariot]] | |||
|- | |||
!Glider | |||
|[[File:MKT Icon PinkFlowerGlider.png|37px|link=Pink Flower Glider]] | |||
|[[File:MKT Icon QuestionMarkBlock.png|37px|link=? Block (glider)|? Block]] | |||
|[[File:MKT Icon TropicalGlider.png|37px|link=Tropical Glider]] | |||
|[[File:MKT Icon TropicalGlider.png|37px|link=Tropical Glider]] | |||
|[[File:MKT Icon BananaWingtip.png|37px|link=Banana Wingtip]] | |||
|[[File:MKT Icon RainbowFlappyWings.png|37px|link=Rainbow Flappy Wings]] | |||
|} | |||
==Gold Pipe== | |||
The Gold Pipe, including the All-Clear Pipe, randomly shoots out one of the following regular High-End items. The appearance rate can be viewed via the "Pipe content" link on the Gold Pass purchase screen. | |||
{|class="wikitable" style="margin:auto; text-align:center" | |||
!colspan=2|High-End items obtainable from Gold Pipes during the Night Tour | |||
!Rate (each) | |||
|- | |||
!High-End drivers | |||
|[[Dry Bowser]], [[Metal Mario]], [[Pink Gold Peach]], [[Cat Mario|Cat Peach]], [[Tanooki Mario]], [[Pauline]], [[Princess Peach|Peach (Explorer)]], [[Nabbit]], [[Captain Toad]], [[King Bob-omb]], [[Fire Mario|Fire Rosalina]], [[Tanooki Mario|Tanooki Rosalina]], [[Kamek]], [[Peachette]], [[Yoshi (species)|Black Yoshi]], [[Yoshi (species)|White Yoshi]], [[Princess Peach|Peach (Wintertime)]], [[Cat Mario|Cat Rosalina]], [[Chargin' Chuck]], [[Toadette|Toadette (Explorer)]], [[Cat Mario|Cat Toad]], [[Wario|Wario (Cowboy)]], [[Birdo|Birdo (Black)]], [[Birdo|Birdo (White)]], [[Roving Racers|Gold Koopa (Freerunning)]], [[Penguin Mario|Penguin Luigi]], [[Shy Guy|Shy Guy (Pastry Chef)]], [[Dixie Kong]], [[Funky Kong]], [[Mario|Mario (Aviator)]], [[Toad|Toad (Party Time)]], [[Pauline|Pauline (Party Time)]], [[Bowser Jr.|Bowser Jr. (Pirate)]], [[Mario|Mario (Classic)]], [[Baby Peach|Baby Peach (Cherub)]], [[Princess Daisy|Daisy (Swimwear)]], [[Luigi|Luigi (Classic)]], [[Ice Mario (Super Mario Galaxy)|Ice Mario]], [[Princess Daisy|Daisy (Farmer)]], [[Mario|Mario (Racing)]], [[Lakitu|Lakitu (Party Time)]], [[Pauline|Pauline (Rose)]] | |||
|rowspan=3|0.5319% | |||
|- | |||
!High-End karts | |||
|[[B Dasher]], [[Badwagon]], [[Carrot Kart]], [[Cat Cruiser]], [[Prancer]], [[Sneeker]], [[Sports Coupe]], [[Circuit Special]], [[Bruiser]], [[Wild Wing]], [[Bumble V]], [[Steel Driver]], [[Goo-Goo Buggy]], [[Macharon]], [[Black B Dasher]], [[Black Circuit]], [[Queen Bee]], [[Gold Train]], [[Black Turbo Yoshi]], [[White Turbo Yoshi]], [[Radish Rider]], [[Inferno Flyer]], [[Wildfire Flyer]], [[Red B Dasher]], [[Platinum Taxi]], [[Glam Bruiser]], [[Wild Black]], [[Wild Pink]], [[Apple Kart]], [[Gilded Prancer]], [[Choco Macharon]], [[P-Wing (kart)|P-Wing]], [[Black Turbo Birdo]], [[White Turbo Birdo]], [[Snow Skimmer]], [[Green Apple Kart]], [[Poison Apple Kart]], [[Dragonfly]], [[Firefly]], [[Dozer Dasher]], [[Clanky Kart]], [[Rose Queen]], [[Banana Master]], [[Offroader]], [[Dreamy Egg]], [[Head Honcho]], [[Pink Wing]], [[Red Taxi]], [[Blue Soda]], [[Dark Buggy]], [[Koopa King]], [[Cact-X]], [[Sushi Racer]], [[Pirate Sushi Racer]], [[Silver Bullet Blaster]], [[Green Circuit]], [[Gilded King]], [[Crawly Kart]], [[Black Dozer]], [[Sunset Cloud]], [[Iron Cucumber]], [[Rose Taxi]], [[Cact-Ice]], [[B Dasher Mk. 2]], [[Sakura Quickshaw]], [[Jet Cruiser]], [[Pink Dozer]], [[Grand Badwagon]], [[Lime Tea Coupe]], [[Sunny Surf Sailer]], [[Kamek's Zoom Broom]], [[Black Cat Cruiser]], [[Cream Cat Cruiser]], [[Vampire Flyer]], [[White Snow Skimmer]], [[Gray Cat Cruiser]], [[Jukebox Buggy]], [[Green Lightning]], [[Cupid's Arrow]], [[Prop Kart]], [[Tropical Truck]] | |||
|- | |||
!High-End gliders | |||
|[[Swooper (glider)|Swooper]], [[Cloud Glider]], [[Gold Glider]], [[Pink Gold Paper Glider]], [[Bullet Bill Parachute]], [[Royal Parachute]], [[Dry Bowser Umbrella]], [[Rainy Balloons]], [[Blizzard Balloons]], [[Sunset Balloons]], [[Chocolate Banana Crêpe]], [[Strawberry Crêpe]], [[Wicked Wings]], [[Wonderful Wings]], [[Starchute]], [[Rainbow Starchute]], [[Silver Starchute]], [[Daisy Glider]], [[Butterfly Wings]], [[Butterfly Sunset]], [[Butterfly Prism]], [[Banana Wingtip]], [[Blooper Wingtip]], [[Meteor Balloons]], [[Crimson Crane]], [[Springtime Crane]], [[Pink Gold Meteors]], [[Chocolate Donut]], [[Strawberry Donut]], [[Heart Balloons]], [[Fireworks Parachute]], [[Great Sail]], [[Blizzard Parasol]], [[Black Great Sail]], [[Planet Glider]], [[Dragon Wings]], [[Black Toe-Bean Balloons]], [[Toe-Bean Balloons]], [[Ship's Wheel (glider)|Ship's Wheel]], [[Tropical Glider]], [[8-Bit Star]], [[Manta Glider]], [[Silver Bells]], [[Treasure Map]], [[Flybrary Book]], [[Cheep Cheep Masks]], [[Pretzel Glider]], [[Vampire Wings]], [[Dream Glider]], [[Silver Manta Glider]], [[Calico Parafoil]], [[Cat Parafoil]], [[Rose Parasol]], [[Black Cat Parafoil]], [[Snow Crystals]], [[Surf Master]], [[Silver Surf Master]], [[Starry Great Sail]], [[Tanooki Parafoil]], [[Candlelight Flight (glider)|Candlelight Flight]], [[Piranha Plant Balloons]], [[Candlelight Flight Cake]], [[Luigi Parafoil]], [[Sky-High Flyer]], [[Wicked Topaz]] | |||
|} | |||
==Mii Racing Suit Shop== | |||
===Banner items=== | |||
{| align=center width=960px cellspacing=0 border=1 cellpadding=3 style="border-collapse:collapse; font-family:Arial; text-align:center" | |||
|-style="background: #ABC" | |||
!Name | |||
!Cost | |||
!Contents | |||
!Banner image | |||
|- | |||
|'''Light Green Mii Racing Suit''' | |||
|70 [[File:MKT Icon 1Ruby.png|20px]] [[ruby|rubies]] for 1st purchase;<br>100 rubies for 2nd and 3rd purchases respectively | |||
|[[File:MKT Icon LightGreenMiiRacingSuit.png|30px]]<br> [[Mii|Light Green Mii Racing Suit]] ×1 | |||
|[[File:MKT Tour99 LightGreenMiiRacingSuit.png|x150px]] | |||
|} | |||
===Other items=== | |||
{| class="wikitable" style="margin:auto; text-align:center" width=50% | |||
!colspan=3|Items available in Mii Racing Suit Shop (June 28, 2023 - July 11, 2023) | |||
|- | |||
|width=33%|[[File:MKT Artwork RockyWrenchMiiRacingSuit.png|80x80px]] | |||
|width=34%|[[File:MKT Artwork MontyMoleMiiRacingSuit.png|80x80px]] | |||
|width=33%|[[File:MKT Artwork DryBonesMiiRacingSuit.png|80x80px]] | |||
|- | |||
![[Mii|Rocky Wrench Mii Racing Suit]]<br>70 [[File:MKT Icon 1Ruby.png|20px]] [[ruby|rubies]] for 1st purchase;<br>100 rubies for 2nd and 3rd purchases respectively | |||
![[Mii|Monty Mole Mii Racing Suit]]<br>[[File:MKT Icon 1Ruby.png|20px]] 100<br>Amount: 3 | |||
![[Mii|Dry Bones Mii Racing Suit]]<br>[[File:MKT Icon 1Ruby.png|20px]] 100<br>Amount: 3 | |||
|- | |||
|[[File:MKT Artwork RosalinaMiiRacingSuit.png|80x80px]] | |||
|[[File:MKT Artwork RoaringRacerMiiRacingSuit.png|80x80px]] | |||
|[[File:MKT Artwork WhiteMiiRacingSuit.png|80x80px]] | |||
|- | |||
![[Mii|Rosalina Mii Racing Suit]]<br>[[File:MKT Icon 1Ruby.png|20px]] 100<br>Amount: 3 | |||
![[Mii|Roaring Racer Mii Racing Suit]]<br>[[File:MKT Icon 1Ruby.png|20px]] 100<br>Amount: 3 | |||
![[Mii|White Mii Racing Suit]]<br>[[File:MKT Icon 1Ruby.png|20px]] 100<br>Amount: 3 | |||
|- | |||
|[[File:MKT Artwork WarioMiiRacingSuit.png|80x80px]] | |||
|[[File:MKT Artwork YoshiMiiRacingSuit.png|80x80px]] | |||
|[[File:MKT Artwork NabbitMiiRacingSuit.png|80x80px]] | |||
|- | |||
![[Mii|Wario Mii Racing Suit]]<br>[[File:MKT Icon 1Ruby.png|20px]] 100<br>Amount: 3 | |||
![[Mii|Yoshi Mii Racing Suit]]<br>[[File:MKT Icon 1Ruby.png|20px]] 100<br>Amount: 3 | |||
![[Mii|Nabbit Mii Racing Suit]]<br>[[File:MKT Icon 1Ruby.png|20px]] 100<br>Amount: 3 | |||
|} | |||
==Token Shop== | |||
The limited-time event where [[event token]]s appear began on June 28, 2023 and ended on July 11, 2023. Event tokens could be earned by causing opponents to crash. | |||
{| class="wikitable" style="margin:auto; text-align:center" width=50% | |||
!colspan=3|'''Token Shop''' (June 28, 2023 - July 11, 2023) | |||
|- | |||
|width=33%|[[File:MKT Icon Launch Pipe Green.png|70px]] | |||
|width=34%|[[File:MKT Icon 1Ruby.png|55px]] | |||
|width=33%|[[File:MKT Icon Coins 2.png|80px]] | |||
|- | |||
!Pipe<br>[[File:MKT Icon Eventtoken.png|20px]] 20-500<br>Amount: 34 | |||
![[Ruby]] ×3<br>[[File:MKT Icon Eventtoken.png|20px]] 15<br>Amount: 5 | |||
![[Coin]] ×500<br>[[File:MKT Icon Eventtoken.png|20px]] 15<br>Amount: 5 | |||
|- | |||
|width=33%|[[File:MKT Icon BalloonCircleBanana.png|60px]] | |||
|width=33%|[[File:MKT Icon Level-boostticket3.png|70px]] | |||
|width=33%|[[File:MKT Icon Level-boostticket6.png|70px]] | |||
|- | |||
![[Banana]] Balloon<br>[[File:MKT Icon Eventtoken.png|20px]] 100<br>Amount: 1 | |||
![[Level-boost ticket]] (Normal)<br>[[File:MKT Icon Eventtoken.png|20px]] 25<br>Amount: 3 | |||
![[Level-boost ticket]] (Super)<br>[[File:MKT Icon Eventtoken.png|20px]] 50<br>Amount: 2 | |||
|} | |||
==Tier Shop== | |||
The shop features a variety of set and randomized items available for purchase. The item slots in the shop are unlocked based on the highest tier of players. | |||
{| class="wikitable" style="margin:auto; text-align:center" width=50% | |||
!colspan=3|Items available in Tier Shop (June 28, 2023 - July 11, 2023) | |||
|- | |||
|[[File:MKT Icon Level-boostticket1.png|80px]] | |||
|[[File:MKT Icon Level-boostticket2.png|80px]] | |||
|[[File:MKT Icon Level-boostticket3.png|80px]] | |||
|- | |||
![[Level-boost ticket]] (Normal)<br>[[File:MKT Icon Coin.png|20px]] 1,000<br>Amount: 3 per week | |||
!Level-boost ticket (Normal)<br>[[File:MKT Icon Coin.png|20px]] 800<br>Amount: 3 per week | |||
!Level-boost ticket (Normal)<br>[[File:MKT Icon Coin.png|20px]] 800<br>Amount: 3 per week | |||
|- | |||
|[[File:MKT Icon Level-boostticket4.png|80px]]<br>OR<br>[[File:MKT Icon Level-boostticket7.png|80px]] | |||
|[[File:MKT Icon Level-boostticket5.png|80px]]<br>OR<br>[[File:MKT Icon Level-boostticket8.png|80px]] | |||
|[[File:MKT Icon Level-boostticket6.png|80px]]<br>OR<br>[[File:MKT Icon Level-boostticket9.png|80px]] | |||
|- | |||
!Level-boost ticket (Super)<br>[[File:MKT Icon Coin.png|20px]] 4,000<br>Amount: 2 per week<br>OR<br>Level-boost ticket (High-End)<br>[[File:MKT Icon Coin.png|20px]] 15,000<br>Amount: 1 per week | |||
!Level-boost ticket (Super)<br>[[File:MKT Icon Coin.png|20px]] 3,000<br>Amount: 2 per week<br>OR<br>Level-boost ticket (High-End)<br>[[File:MKT Icon Coin.png|20px]] 13,000<br>Amount: 1 per week | |||
!Level-boost ticket (Super)<br>[[File:MKT Icon Coin.png|20px]] 3,000<br>Amount: 2 per week<br>OR<br>Level-boost ticket (High-End)<br>[[File:MKT Icon Coin.png|20px]] 13,000<br>Amount: 1 per week | |||
|- | |||
|[[File:MKT Icon Points-capticket1.png|80px]]<br>OR<br>[[File:MKT Icon Points-capticket2.png|80px]]<br>OR<br>[[File:MKT Icon Points-capticket3.png|80px]] | |||
|[[File:MKT Icon Points-capticket4.png|80px]]<br>OR<br>[[File:MKT Icon Points-capticket5.png|80px]]<br>OR<br>[[File:MKT Icon Points-capticket6.png|80px]] | |||
|[[File:MKT Icon Points-capticket7.png|80px]]<br>OR<br>[[File:MKT Icon Points-capticket8.png|80px]]<br>OR<br>[[File:MKT Icon Points-capticket9.png|80px]] | |||
|- | |||
![[Points-cap ticket]] (Normal)<br>[[File:MKT Icon Coin.png|20px]] 2,000<br>Amount: 1 per week | |||
!Points-cap ticket (Super)<br>[[File:MKT Icon Coin.png|20px]] 5,000<br>Amount: 1 per week | |||
!Points-cap ticket (High-End)<br>[[File:MKT Icon Coin.png|20px]] 20,000<br>Amount: 1 per week | |||
|- | |||
|[[File:MKT Icon Level-boostticket9.png|80px]] | |||
|[[File:MKT Icon Level-boostticket8.png|80px]] | |||
|[[File:MKT Icon Level-boostticket7.png|80px]] | |||
|- | |||
!Level-boost ticket (High-End)<br>[[File:MKT Icon Coin.png|20px]] 13,000<br>Amount: 1 per week | |||
!Level-boost ticket (High-End)<br>[[File:MKT Icon Coin.png|20px]] 13,000<br>Amount: 1 per week | |||
!Level-boost ticket (High-End)<br>[[File:MKT Icon Coin.png|20px]] 15,000<br>Amount: 1 per week | |||
|} | |||
==Gallery== | ==Gallery== | ||
<gallery> | <gallery> | ||
MKT Night Tour Landscape. | MKT Rome Tour artwork.png|Promotional artwork for the tour | ||
MKT Night Tour Landscape.png|Landscape version of the loading screen | |||
</gallery> | </gallery> | ||
| Line 154: | Line 903: | ||
{{MKT}} | {{MKT}} | ||
[[Category:Mario Kart Tour tours]] | [[Category:Mario Kart Tour tours]] | ||
[[it:Tour notturno]] | |||
Latest revision as of 15:59, March 16, 2024
| Night Tour | |
|---|---|

| |
| Start date | June 27, 2023 11:00 p.m. (PT) |
| End date | July 11, 2023 10:59 p.m. (PT) |
| Number of cups | 15 |
| Ranked cups | Donkey Kong Cup (week 1) Funky Kong Cup (week 2) |
| Coin Rush course | New York Minute |
| << List of tours >> | |
The Night Tour was the ninety-ninth tour of Mario Kart Tour, which began on June 28, 2023 and ended on July 11, 2023. This tour introduced Rome Avanti, a new city course set in Rome, Italy, as well as Moonview Highway from Mario Kart Wii, marking its first appearance in the series as a classic course. Fitting with Rome Avanti's theme, Donkey Kong in a gladiator outfit was introduced as a new driver, the first and only variant of a Kong character. The tour also includes other city courses set at night (hence its name), namely New York Minute, Vancouver Velocity, and Singapore Speedway. The inclusion of Vancouver Velocity may also reference Canada Day, which occurred during this tour on July 1, and New York Minute may also reference Independence Day, which also occurred during this tour on July 4. This was the first tour since the 2019 Paris Tour to introduce both a new city course and a classic course, and the second tour in a row to add three courses simultaneously. It was also the first tour to feature the normal variant of New York Minute since its debut in the New York Tour (the first tour of the game), the first tour to feature New York Minute 2R since its debut in the 2019 Holiday Tour (the seventh tour of the game), and the first tour to feature New York Minute B since its debut in the 2022 Autumn Tour. This tour saw GCN Waluigi Stadium's first reappearance immediately following its debut in the previous tour, making this the first tour to feature a course introduced in the previous tour since the second Peach vs. Bowser Tour. This tour marked the longest gap between appearances of a bonus challenge, as it marked the first appearance of the Vs. Mega Donkey Kong bonus challenge since the New York Tour.
This was the first tour to introduce a driver with the Banana Barrels special skill since the introduction of Funky Kong in the Jungle Tour eighty-one tours prior, being the Light Green Mii Racing Suit. Additionally, all Shy Guy colors from Mario Kart 8 have returned in Mario Kart Tour as of this tour. This was also the first tour since the Marine Tour, the 2019 Holiday Tour, and the Peach vs. Daisy Tour to give Monty Mole, Diddy Kong, and Pink Gold Peach a favorite course (being the normal variant of New York Minute, Rome Avanti R/T, and both the normal variant of New York Minute and Wii Moonview Highway R/T respectively).
This tour's Coin Rush course was New York Minute, which was reused from the New York Tour and the 2022 Autumn Tour. The menu's background featured the Colosseum as the tour's landmark.
The fourteenth set of Expert Challenges was introduced in this tour. This was the second set of Expert Challenges to last for seven tours instead of six (until the 2023 Anniversary Tour); the first was from the 2023 New Year's Tour to the 2023 Ninja Tour.
This was the final tour to introduce a new Wii course.
Spotlight Shop[edit]
| Week 1 banner items June 27, 2023, 11:00 p.m. (PT) – July 4, 2023, 10:59 p.m. (PT) | ||||
| Item type | Name | Cost | Contents | Banner image |
|---|---|---|---|---|
| Driver | Donkey Kong (Gladiator) | 105 150 rubies for 2nd and 3rd purchases respectively |
 Donkey Kong (Gladiator) ×1 |

|
| Kart | Chain Chomp Chariot | 70 100 rubies for 2nd and 3rd purchases respectively |
Chain Chomp Chariot ×1 |

|
| Glider | Rainbow Flappy Wings | 70 100 rubies for 2nd and 3rd purchases respectively |
Rainbow Flappy Wings ×1 |

|
| Week 2 banner items July 4, 2023, 11:00 p.m. (PT) – July 11, 2023, 10:59 p.m. (PT) | ||||
| Item type | Name | Cost | Contents | Banner image |
| Driver | Mario (Musician) | 105 150 rubies for 2nd and 3rd purchases respectively |
 Mario (Musician) ×1 |

|
| Kart | Yeehaw Wagon | 70 100 rubies for 2nd and 3rd purchases respectively |
Yeehaw Wagon ×1 |

|
| Glider | Mario Bros. Parafoil | 70 100 rubies for 2nd and 3rd purchases respectively |
Mario Bros. Parafoil ×1 |

|
Daily Spotlight[edit]
The Daily Spotlight contains a mixture of items themed around the tour, items that have ranked tracks as favorites, and gold items. The rates listed are specific for that type of item; drivers, karts, and gliders are selected separately. Items marked with an asterisk (*) do not appear in the Daily Spotlight during the week they are available as Spotlight Shop banner items.
Cups[edit]
Donkey Kong Cup Ranked cup (week 1) |
Rome Avanti |
Rome Avanti 2R |
Wii Moonview Highway |
Glider Challenge | ||||
 Vancouver Velocity 2 |
Waluigi | |||||||
Mii Cup |
DS Twilight House (Balloon Battle) |
New York Minute R |
Vancouver Velocity T |
Time Trial | ||||
 Singapore Speedway |
Luigi | |||||||
Funky Kong Cup Ranked cup (week 2) |
Wii Moonview Highway R |
Rome Avanti 2T |
Rome Avanti R/T |
Goomba Takedown | ||||
 Vancouver Velocity |
Donkey Kong | |||||||
King Boo Cup |
Singapore Speedway 2 |
Vancouver Velocity 2 |
New York Minute T |
Ring Race | ||||
 New York Minute 2 |
Rosalina | |||||||
Ice Bro Cup |
Vancouver Velocity R |
Wii Moonview Highway R/T |
Rome Avanti 2 |
Big Reverse Race vs. 100 | ||||
 Rome Avanti |
Funky Kong | |||||||
Pauline Cup |
New York Minute 2R |
GCN Waluigi Stadium R |
Singapore Speedway R |
Time Trial | ||||
 Singapore Speedway 2R |
Peachette | |||||||
Baby Rosalina Cup |
Rome Avanti R |
Singapore Speedway 2T |
Vancouver Velocity 2R |
Steer Clear of Obstacles | ||||
 Wii Moonview Highway |
Bowser Jr. | |||||||
Luigi Cup |
New York Minute |
Wii Moonview Highway T |
GCN Waluigi Stadium T |
Combo Attack | ||||
 Vancouver Velocity T |
Koopa Troopa | |||||||
Cat Peach Cup |
Rome Avanti 2R/T |
Vancouver Velocity 2T |
Singapore Speedway T |
Goomba Takedown | ||||
 New York Minute 2 |
Diddy Kong | |||||||
Peach Cup |
Singapore Speedway |
New York Minute 2R/T |
Vancouver Velocity R/T |
Vs. Mega Donkey Kong | ||||
 New York Minute |
Any character | |||||||
Fire Rosalina Cup |
GCN Waluigi Stadium |
Singapore Speedway 2R |
Rome Avanti T |
Time Trial | ||||
 Rome Avanti 2 |
Birdo (Yellow) | |||||||
Birdo Cup |
Vancouver Velocity |
Rome Avanti R/T |
New York Minute R/T |
Smash Small Dry Bones | ||||
 GCN Waluigi Stadium |
Pauline | |||||||
Diddy Kong Cup |
New York Minute 2 |
GCN Waluigi Stadium R/T |
Singapore Speedway 2R/T |
Do Jump Boosts | ||||
 New York Minute |
Yoshi | |||||||
Bowser Jr. Cup |
Vancouver Velocity 2R/T |
New York Minute B (Balloon Battle) |
Rome Avanti 2R/T |
Break Item Boxes | ||||
 Rome Avanti |
Lakitu | |||||||
Wario Cup |
New York Minute 2T |
Singapore Speedway R/T |
Wii Moonview Highway R/T |
Big Reverse Race | ||||
 Singapore Speedway 2 |
Any character | |||||||
Today's Challenge[edit]
Players' most recently used kart and glider are chosen, and favorite and favored ones have extra priority. Opponents are arranged randomly. On day 1 of this tour, players finish a balloon battle in DS Twilight House in the Mii Cup using the Light Green Mii Racing Suit for a free pipe launch. Starting from day 2, players have to finish a race in the earliest incomplete course that is not in any of the ranked cups using the driver shown on the course's thumbnail every day to obtain the corresponding reward in the table below. Once all of the courses are completed, the courses are selected at random.
| Day(s) | Reward |
| 1-13 | Free pipe launch |
|---|---|
| 14 |  Badge |
| Today's Challenge Pipe | |

| |
| Pipe contents | |
| Rubies, coins, driver (Normal/Super/High-End), kart (Normal/Super/High-End), glider (Normal/Super/High-End), item tickets | |
Rewards[edit]
Gold cells indicate rewards that are exclusive to Gold Pass members.
| Gold Fish Bone Ferry |
| Grand Stars | 15 | 20 | 25 | 30 | 35 | 40 | 45 | 50 | 55 | 60 | 65 | 70 | 80 | 90 | 100 | 110 | 120 | 130 | 140 | 150 | 160 | 170 | 180 | 190 | 200 | 210 | 220 | 230 | 240 | 250 | 260 | 270 | 280 | 290 | 300 | 310 | 320 | Total | Grand total | |
|---|---|---|---|---|---|---|---|---|---|---|---|---|---|---|---|---|---|---|---|---|---|---|---|---|---|---|---|---|---|---|---|---|---|---|---|---|---|---|---|---|
| Pipes | 10 | 26 | ||||||||||||||||||||||||||||||||||||||
| 16 | ||||||||||||||||||||||||||||||||||||||||
| Coins | 500 | 500 | 500 | 500 | 500 | 500 | 500 | 500 | 500 | 500 | 5000 | 15000 | ||||||||||||||||||||||||||||
| 5000 | 5000 | 10000 | ||||||||||||||||||||||||||||||||||||||
| Rubies | 10 | 5 | 3 | 3 | 21 | 56 | ||||||||||||||||||||||||||||||||||
| 15 | 10 | 10 | 35 | |||||||||||||||||||||||||||||||||||||
| Item tickets | 5 | 5 | 10 | 30 | ||||||||||||||||||||||||||||||||||||
| 10 | 10 | 20 | ||||||||||||||||||||||||||||||||||||||
| Star tickets | 2 | 3 | 5 | 5 | ||||||||||||||||||||||||||||||||||||
| 0 | ||||||||||||||||||||||||||||||||||||||||
| Quick tickets | 1 | 1 | 4 | |||||||||||||||||||||||||||||||||||||
| 3 | 3 | |||||||||||||||||||||||||||||||||||||||
| Point-boost tickets | 1 | 1 | 1 | 3 | 8 | |||||||||||||||||||||||||||||||||||
| 5 | 5 | |||||||||||||||||||||||||||||||||||||||
| 1 | 1 | 1 | 3 | 8 | ||||||||||||||||||||||||||||||||||||
| 5 | 5 | |||||||||||||||||||||||||||||||||||||||
| 1 | 1 | 1 | 3 | 8 | ||||||||||||||||||||||||||||||||||||
| 5 | 5 | |||||||||||||||||||||||||||||||||||||||
| Level-boost tickets | 3 | 22 | ||||||||||||||||||||||||||||||||||||||
(3) |
(3) |
(3) |
(2) |
(2) |
(2) |
19 | ||||||||||||||||||||||||||||||||||
New content[edit]
Drivers[edit]

Mii Racing Suits[edit]


Karts[edit]
Gliders[edit]
Balloon designs[edit]
Banana Balloon
Courses[edit]
Rome Avanti (N, R, T, R/T)
Rome Avanti 2 (N, R, T, R/T)
Wii Moonview Highway (N, R, T, R/T)
Paid banners[edit]
| Name | Availability | Cost | Contents | Banner image |
|---|---|---|---|---|
| Value Pack | June 27, 2023 – July 11, 2023 | US$1.99 |
|

|
| Driver Point-Boost Tickets 10 Ticket Set | June 27, 2023 – July 11, 2023 | US$3.99 | 
| |
| Celebrate the Night Tour with the Fish Bone Ferry! | June 27, 2023 – July 11, 2023 | US$3.99 | 
| |
| 70 Rubies and Ticket Pack | June 27, 2023 – July 11, 2023 | US$19.99 | 
| |
| 150 Rubies and Ticket Pack | June 27, 2023 – July 11, 2023 | US$39.99 |
|

|
Challenges[edit]
| Tour Challenges 1 | Tour Challenges 2 | Gold Challenges | ||||||||
|---|---|---|---|---|---|---|---|---|---|---|
| Completion reward: |
Completion reward: |
Completion reward: | ||||||||
 |
 |
 |
 |
 |
 |
 |
 |
 | ||
| Do 50 Jump Boosts. | Land 3 hits with Bob-ombs. | Get a Fantastic combo a total of 5 times. | Land 5 hits with Red Shells. | Land 3 hits with Green Shells. | Get 1st place 2 times in a row in 100cc or above. | Get a combo count of ×30 or higher. | Land 15 hits with Bananas. | Get 1st place 3 times in a row in 100cc or above. | ||
 |
 |
 |
 |
 |
 |
 |
 |
 | ||
| Get 1 item from the Daily Selects section of the Shop. | Get 3rd place or higher 30 times. | Cause an opponent to crash while gliding. | Use point-boost tickets 3 times. | Do 20 Jump Boosts using a driver wearing a tie. | Earn a score of 7,000 or higher on 3 T or R/T courses. | Use a points-cap ticket. | Earn a score of 7,000 or higher using a driver with a mustache. | Cause opponents to crash 3 times while gliding. | ||
 |
 |
 |
 |
 |
 |
 |
 |
 | ||
| Glide a total distance of 5,000. | Cause opponents to crash using a Mega Mushroom. | Finish every course of every cup, including bonus challenges. | Land a hit with a Blooper. | Earn a total score of 15,000 or higher in the Wario Cup. | Complete Coin Rush 1 time. | Use Lightning. | Earn a total score of 20,000 or higher in the Birdo Cup. | Send Greeting Coins to a friend. | ||
| Premium Challenges | Premium Challenges+ | Premium Challenges++ | ||||||||
|---|---|---|---|---|---|---|---|---|---|---|
| Cost: US$4.99 | Cost: US$9.99 | Cost: US$19.99 | ||||||||
| Three in a row reward: |
Three in a row reward: |
Three in a row reward: | ||||||||
| Completion reward: |
Completion reward: |
Completion reward: | ||||||||
| Pipe ×1 | Pipe ×1 | Pipe ×1 | Pipe ×1 | Gold Pipe ×1 | Coins ×5,000 | Gold Pipe ×1 | Rubies ×30 | Coins ×10,000 | ||
| Land 5 hits with Green Shells. | Land 5 hits with Bananas. | Land 3 hits with Bob-ombs. | Land 10 hits with Green Shells. | Land 10 hits with Bananas. | Use 10 Mushrooms. | Land 10 hits with Red Shells. | Start a new tour. | Land 20 hits with Bananas. | ||
| Coins ×3,000 | Rubies ×10 | Point-boost ticket (Kart) ×3 | Point-boost ticket (Kart) ×5 | Rubies ×20 | Points-cap ticket (High-end kart) ×1 | Level-boost ticket (High-End driver) ×2 | Level-boost ticket (High-End kart) ×2 | Level-boost ticket (High-End glider) ×2 | ||
| Do 20 Jump Boosts. | Start a new tour. | Do 50 Mini-Turbo boosts. | Do 50 Jump Boosts. | Start a new tour. | Do 100 Mini-Turbo boosts. | Land 5 hits with Bob-ombs. | Do 100 Jump Boosts. | Do 150 Mini-Turbo boosts. | ||
| Level-boost ticket (Normal kart) ×1 | Level-boost ticket (Super kart) ×1 | Level-boost ticket (High-End kart) ×1 | Level-boost ticket (High-End driver) ×1 | Level-boost ticket (High-End kart) ×1 | Level-boost ticket (High-End glider) ×1 | Points-cap ticket (High-end driver) ×2 | Points-cap ticket (High-end kart) ×2 | Points-cap ticket (High-end glider) ×2 | ||
| Get 1st place 3 times. | Get 1st place 5 times. | Get 1st place 10 times. | Get 1st place 5 times. | Get 1st place 10 times. | Get 1st place 15 times. | Get 1st place 10 times. | Get 1st place 15 times. | Get 1st place 20 times. | ||
| Tour Multiplayer Challenges | ||
|---|---|---|
| Three in a row reward: | ||
| Completion reward: | ||
 |
 |
 |
| Do 10 Jump Boosts in multiplayer. | Do 3 Rocket Starts in multiplayer[sic] | Land 3 hits with Green Shells in multiplayer. |
 |
 |
 |
| Play multiplayer 3 times. | Play multiplayer 5 times. | Play multiplayer 10 times. |
 |
 |
 |
| Get 3rd place or higher in multiplayer. | Get 3rd place or higher 3 times in multiplayer. | Get 3rd place or higher 5 times in multiplayer. |
| Total Points Challenge 1 | Total Points Challenge 2 | |||
|---|---|---|---|---|
| Points | Rewards | Points | Rewards | |
| 400,000 |
|
999,999 |
| |
| 300,000 |
|
900,000 |
| |
| 250,000 |
|
800,000 |
| |
| 200,000 |
|
700,000 |
| |
| 150,000 |
|
600,000 |
| |
| 100,000 |
|
500,000 |
| |
2-Player Challenge[edit]
| Name | Courses | Opponents | ||||||||
|---|---|---|---|---|---|---|---|---|---|---|
| First | Second | Final | 6th | 5th | 4th | 3rd | 2nd | 1st | ||
 Vs. Donkey Kong Team |
Rome Avanti |
Wii Moonview Highway |
Rome Avanti 2T |
Driver | ||||||
| Kart | ||||||||||
| Glider | ||||||||||
Gold Pipe[edit]
The Gold Pipe, including the All-Clear Pipe, randomly shoots out one of the following regular High-End items. The appearance rate can be viewed via the "Pipe content" link on the Gold Pass purchase screen.
Mii Racing Suit Shop[edit]
Banner items[edit]
| Name | Cost | Contents | Banner image |
|---|---|---|---|
| Light Green Mii Racing Suit | 70 100 rubies for 2nd and 3rd purchases respectively |
Light Green Mii Racing Suit ×1 |

|
Other items[edit]
| Items available in Mii Racing Suit Shop (June 28, 2023 - July 11, 2023) | ||
|---|---|---|
| Rocky Wrench Mii Racing Suit 70 100 rubies for 2nd and 3rd purchases respectively |
Monty Mole Mii Racing Suit Amount: 3 |
Dry Bones Mii Racing Suit Amount: 3 |
| Rosalina Mii Racing Suit Amount: 3 |
Roaring Racer Mii Racing Suit Amount: 3 |
White Mii Racing Suit Amount: 3 |
| Wario Mii Racing Suit Amount: 3 |
Yoshi Mii Racing Suit Amount: 3 |
Nabbit Mii Racing Suit Amount: 3 |
Token Shop[edit]
The limited-time event where event tokens appear began on June 28, 2023 and ended on July 11, 2023. Event tokens could be earned by causing opponents to crash.
| Token Shop (June 28, 2023 - July 11, 2023) | ||
|---|---|---|
| Pipe Amount: 34 |
Ruby ×3 Amount: 5 |
Coin ×500 Amount: 5 |
| Banana Balloon Amount: 1 |
Level-boost ticket (Normal) Amount: 3 |
Level-boost ticket (Super) Amount: 2 |
Tier Shop[edit]
The shop features a variety of set and randomized items available for purchase. The item slots in the shop are unlocked based on the highest tier of players.
| Items available in Tier Shop (June 28, 2023 - July 11, 2023) | ||
|---|---|---|
| Level-boost ticket (Normal) Amount: 3 per week |
Level-boost ticket (Normal) Amount: 3 per week |
Level-boost ticket (Normal) Amount: 3 per week |
OR |
OR |
OR |
| Level-boost ticket (Super) Amount: 2 per week OR Level-boost ticket (High-End) Amount: 1 per week |
Level-boost ticket (Super) Amount: 2 per week OR Level-boost ticket (High-End) Amount: 1 per week |
Level-boost ticket (Super) Amount: 2 per week OR Level-boost ticket (High-End) Amount: 1 per week |
OR OR |
OR OR |
OR OR |
| Points-cap ticket (Normal) Amount: 1 per week |
Points-cap ticket (Super) Amount: 1 per week |
Points-cap ticket (High-End) Amount: 1 per week |
| Level-boost ticket (High-End) Amount: 1 per week |
Level-boost ticket (High-End) Amount: 1 per week |
Level-boost ticket (High-End) Amount: 1 per week |
Gallery[edit]
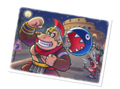
Promotional artwork for the tour
Landscape version of the loading screen


Names in other languages[edit]
| Language | Name | Meaning |
|---|---|---|
| Japanese | ナイトツアー Naito Tsuā |
Night Tour |
| Chinese (simplified) | 夜间巡回赛 Yèjiān Xúnhuísài |
Night Tour |
| Chinese (traditional) | 夜間巡迴賽 Yèjiān Xúnhuísài |
Night Tour |
| French | Saison nocturne |
Nocturnal Season |
| German | Nacht-Tour-Saison |
Night Tour Season |
| Italian | Tour notturno |
Nocturnal Tour |
| Korean | 나이트 투어 Naiteu Tueo |
Night Tour |
| Portuguese | Temporada noturna |
Nocturnal Season |
| Spanish | Temporada nocturna |
Nocturnal Season |