The 'Shroom:Issue 198/Strategy Wing
Director's Notes
Written by: Hooded Pitohui (talk)
Hello, all you readers of The 'Shroom, and welcome to a beefy September edition of Strategy Wing! We don't have extra sections this month or anything like that, but the sections we do have are on the longer side, so I'm going to try and keep these notes short so you can get right to them!
We have our usual slate of sections for you, covering everything from an ice level in Super Mario 63 to probably the most-consistent Pikmin type of all time, but I do have a few special things to highlight about multiple sections this month. File City Files has a whole ongoing story arc tied to a quest chain this month (and, thankfully, no horrible shopping minigame this time). Four Steps for a 3D World isn't covering a level from a Hayashida-directed game this month, and is instead looking at a level made in Super Mario Maker 2 by someone within the community.
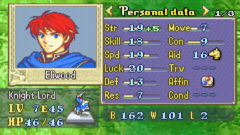
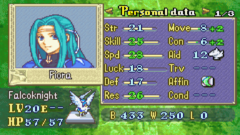
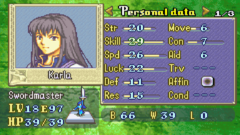
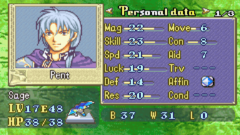
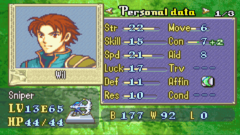
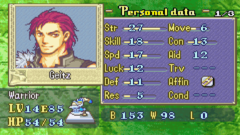
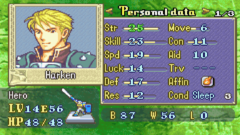
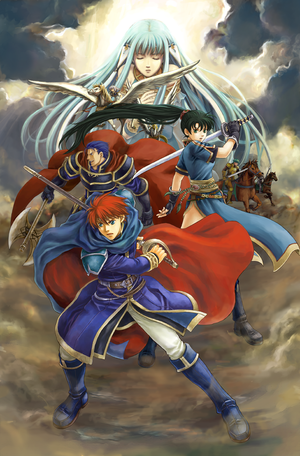
Last, but certainly not least, after setting out on this great campaign all the way back in issue 150, we reach the end of Fire Emblem: The Blazing Blade in Koops, Your Emblem is on Fire. Yes, we're at the grand finale, and, well, as you might expect from a grand finale, it is big. In fact, this edition features about three hours of video content, so you may want to stretch out watching and reading it, perhaps watch it in chunks between now and the next issue's release. Take your time with it, but do give it a look, and don't miss the final send-off to the cast we've come to know!
Speaking of next issue, we're at issue 199 already next month, aren't we? Well, the good news is that there's still time to get your special submissions in for issue 200! Head on over to the sign up page and send an application to our Statistics Manager, Meta Knight. We'd gladly you have you here in Strategy Wing for a special on a game you want to talk about in detail like File City Files or a more focused analysis of your favorite level in a game (perhaps in the style of Four Steps for a 3D World), but I encourage you to submit any ideas you have for issue 200, whether they're for Strategy Wing, for another team, or meant to be standalone!
Section of the Month
Tropical isles and mushroom-y secrets take Waluigi Time (talk) and Shine Get to first place in Section of the Month! A shorter, bite-sized guide to a few secrets around the castle made for a nice read, but you didn't leave out Shoey (talk) and his ever-entertaining and informative The Anatomy of a Pikmin. The Yellow Pikmin have undergone many changes over the four numbered games in the series, and he covered them all! Rounding out the top three was Koops (talk) and the penultimate chapter of his FE7 playthrough. We have more Super Mario 63, Blue Pikmin, and the finale this month, so please do keep voting to show your support to our writers!
| STRATEGY WING SECTION OF THE MONTH | ||||
|---|---|---|---|---|
| Place | Section | Votes | % | Writer |
| 1st | Shine Get | 8 | 42.11% | Waluigi Time (talk) |
| 2nd | The Anatomy of a Pikmin | 7 | 36.84% | Shoey (talk) |
| 3rd | Koops, Your Emblem is on Fire | 4 | 21.05% | Koops (talk) |
File City Files
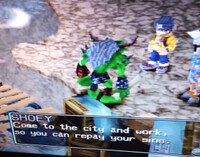
Hello again, and welcome back to File City Files, a Digimon World strategy guide written by me, Shoeymon, chairman of the official Iowa Digimon World fan club. Last month was just the worst, with a bad shop minigame and double time shenanigans. This month, things should be better, because this month, we're taking to the streets to track down and eliminate a dangerous criminal gang, thus finally making the streets safe again!
The Bandits of the Valley
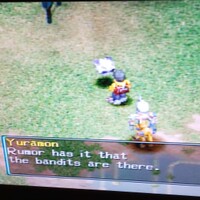
If you talk to Yuramon in File City, he'll tell you that he has heard rumors that there are bandits who ambush and rob travelers in the Great Canyon.
Being that we're on a mission to save the island, we naturally decide to investigate these claims, because, I don't know about you guys, but wiping out a gang of bandits sure sounds like something that would help the island to me! So we return to the Great Canyon Top Area, this time passing the Monochomon's shop and continuing to the right. Continuing down the road, we find a fork in the road with a sign. If you read the sign, it says to the left is a cliff and to the right is ___.
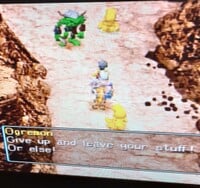
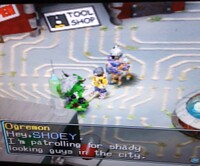
We're going to take the right path, where, suddenly, we're attacked by the gang of bandits. The gang consists of two Agumons and their leader, Ogremon.
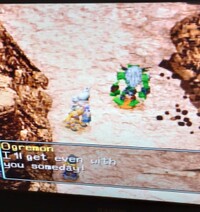
Ogremon demands that we drop our stuff and leave, but, damn it, we're tired of these criminals gangs running our streets, making people feel unsafe to even travel to Freezeland, AND IT'S TIME TO FIGHT BACK. This fight is really annoying! On their own, none of these Digimon are particularly tough, with Ogremon's best move being Magma Bomb and the Agumons' best move being Fire Tower. But there are three of them and they can kind of just spam attacks (enemies don't run out of MP unlike us), so you're going to want to turn off any moves with long wind-ups like Magma Bomb, because that's just a recipe for being hit while trying to cast your move. Instead, go for moves with quick winds-up, and, if you have any moves that can hit every enemy, use those. So, for instance, in my fight, I used the Moderation command, because that caused Vomm (Centaurmon) to use Heat Laser, which hits every Digimon on the field, and can cause the "Flat" effect. The Flat effect is a really cool effect, because it turns opponents temporarily into the virtual pet sprites and greatly reduces the damage they can do. Then, once the Agumon were taken out, I started using the Attack command, which caused Centaurmon to use his Magma Bomb. It's not a hard fight, per se, but it can be very annoying, especially if you only have access to a long wind-up move like Magma Bomb or something like Spit Fire, which activates very fast but does only a small amount of damage. Upon being defeated, Ogremon drops a HP Chip before fleeing while vowing to get even with us someday.
Determined to bring these criminals to justice, we take off in hot pursuit! Finding an elevator, we take it down, going into the Great Canyon Bot. (Bottom) Area. From here, continue going downwards and you'll get to the Fortress Entrance. The Fortress is guarded by a lowly Agumon, and, after we confront him, he runs off in terror to warn the rest of his criminal cohorts that justice has arrived!
Entering the Fortress, we are immediately confronted by a gang of three Gabumon running in patrol circles. It's possible to avoid them, but it's quite difficult because they run in erratic patterns. If you do fight them, they aren't particularly difficult, being rookie Digimon with only 1,000 HP, but do keep in mind that they will respawn if you leave the Fortress, and that's the same with all the enemies in this dungeon. So make sure you bring adequate items with you!
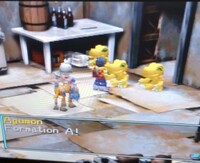
The next room also contains two guard Gabumon and one Agumon. Now, the Gabumons are very hard to avoid because they run at you the second you enter the room. It's possible to avoid them, but, to be honest, you might as well just fight them. There are only two and they know the move Tremar, which fires rocks in all directions, which will probably end up hitting their own guys as much as it hits you! The Agumon, on the other hand, is pretty easy to avoid, because he's later in the room and his fight won't trigger at the same time as the Gabumons' will because he'll be offscreen for that. The next room of this Fortress has a singular exit guarded by three Agumon. You can't avoid these guys; once you get too close, they initiate Formation A and surround you.
But we've fought worse odds, so we're totally prepared to rumble! This fight is the toughest so far because, not only do Agumon know the fast and annoying Spit Fire, but they also know the stronger Magma Bomb, and, since they're fast Digimon, they often spam moves, preventing you from doing anything. But like all fights, as long as you're adequately prepared, you should take care of them with no problem!
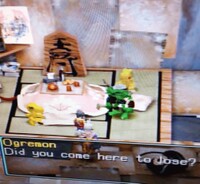
After defeating the Agumon, they scatter and we can finally enter boss Ogremon's "throne" room. "SURRENDER AND FACE JUSTICE," we proclaim!
Ogremon simply laughs. He has no desire to surrender. Instead, right here, right now, he proclaims that he's not going to hold back and that he and his Agumon flunkies will make us cry! This fight is actually a lot easier than most of the other fights in this Fortress, because Ogremon loves using Trema. He just loves throwing rocks! But that basically means that he ends up taking out his own flunkies, leaving us to deal with him one-on-one. Ogremon is nothing special as an opponent. He has got 4,000 health and, outside of Tremar, he also has Dynamite Kick and Magma Bomb. Once you defeat him, he again drops a HP Chip and his little minions immediately bolt! We attempt to arrest Ogremon once and for all to finally bring him to justice, but, just before we can cuff him, he throws a smoke bomb before taunting us as he escapes in an elevator out the back!
We give chase, but it's no use. He has already escaped! But we vow someday we'll catch him; someday he'll face the consequences of his actions!
The Shroom Writer Trapped in the Canyon
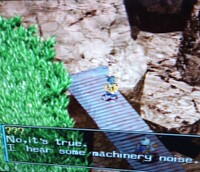
Attempting to pursue Ogremon, we enter his escape elevator and give chase! Following the metal bridges that connect the canyon, we come upon a Goburimon, who, unlike his cooler brethren, demands to fight us. Reluctantly, we agree to do so and, after defeating him, we come upon a small patch of grass where a voice weakly calls out from above. The voice cries out for help, telling us that the ground is bulging up, trapping them, that they heard some machine noises, and suddenly they were trapped in the ground… So… it turns out that when we used the elevator to pursue Ogremon… we kind of accidentally trapped this poor Digimon… Oops.
"Just hold on, we'll fix this," we call out as we slink back to Ogremon's Fortress to undo our unfortunate actions. After reentering Ogremon's Fortress through the back elevator, make your way back around Ogremon's Fortress and take the long way back to that spot. But something cool happens in Ogremon's Fortress! A hidden treasure room is now opened up! Inside this treasure room are:
- an Offense Chip
- a Defense Chip
- a sirloin
- a S. Off Disk (a super attack boost in battle).
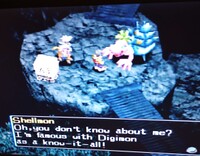
So we're just going to steal all of that stuff before making our way out of the Fortress, hitting the top option (not the rooftop) on the elevator before taking a left and going on the metal bridge into Freezeland. We're then going to take the first metal bridge immediately to the left back into the Great Canyon, and there sits the newly freed Shellmon and a PC with another Defense Chip in it! Shellmon then thanks you for freeing her before revealing that, before that mysterious accident that trapped in her in the ground, she was planning on going to the city.
She says she's a famous Digimon know-it-all, and then makes her way to the city as we ponder what exactly that means.
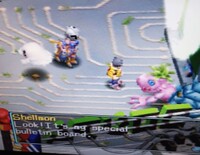
Purpose in the City: Shellmon is one of the most valuable Digimon to recruit, because she opens the File City 'Shroom Division. This print version of The 'Shroom, covering hot Digimon stories, gives the player numerous hints about different Digimon that can be brought into File City in the form of hot breaking news stories.
If you're ever stuck and can't figure out where to go next, check out the Shellmon newspaper, because it'll probably have something on a Digimon you haven't got yet.
The Hidden Treasure of Whamon's Cave
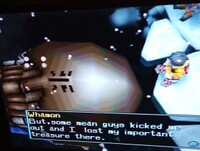
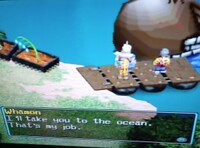
So, this next Digimon is kind of weird to recruit, only appearing after you defeat Ogremon for the first time. I think there's a Shellmon article that appears hinting at this, detailing how the treasure was stolen from Whamon's cave, but I'm not entirely sur.e I checked the bulletins I have right now and that wasn't one of them, so it's just as possible this is a classic Digimon World "fuck you, figure it out" Digimon. But luckily, I'm a Digimaster and I already know where to go! So head back the Freezeland and return to the part of the map where the ice is broken (for frame of reference, it's where we traded with Mojyamon. This time, however, instead of going to trade, we're instead going to take the leftmost path on the ice. This will lead us to the whale Digimon, Whamon. Whamon (who can't see, by the way) says he feels great power in us. He then tells us how he used to rest in a hidden beach cave far off the coast, but that, recently, some mean people showed up, kicked him out, and, worst of all, stole his treasure!
Not one to put up with mean guys kicking whales out of caves, we tell Whamon that, if he takes us to his cave, we'll set these mean guys straight!
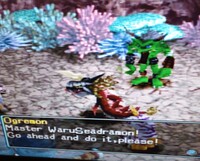
Entering the cave, we hear a familiar voice up ahead. Running through the cave, we find - GASP - it's that no good Ogremon and his minions! This time Ogremon is flanked by two Gabumons. Ogremon sarcastically admits that he's impressed we managed to find the new Ogremon Fortress before refusing our demands to surrender and vowing to keep committing crimes! He then declares that, this time, our fight will be different, and he has the Gabumons bring in his secret weapon. This time, not only is Ogremon going to fight with one of his flunky Gabumon (the other Gabumon just kind of disappears), he's also going to fight alongside the real boss of this criminal family, a powerful ultimate Digimon named WaruSeadramon!
This fight, like all the Ogremon fights, is kind of weird, because it's a legitimately tough fight. You're fighting all three stages of Digimon in this fight. WaruSeadramon has 5,200 HP and access to powerful moves Aurora Freeze, Giga Freeze, and Winter Blast. Ogremon has 4,400 HP and uses the same moves he was using before, Magma Bomb and Tremar. Even the Gabumon is stronger than the average gang member, having 1,800 HP, Megaton Punch, Warcry (a stat boosting move) and Dynamite Kick. So this fight can be very tough because these Digimon have a lot of health and can dish out a lot of damage. But once again, Ogremon loves using Tremar, which has just as much a chance of damaging his teammates as it does you. And WaruSeadramon's move Aurora Freeze is also an AOE move which damages everybody. Hell, the only one that's smart enough not to use a move that damages his own guys is the rookie Gabumon! Yes, this fight is tough, but, luckily, they spend a large portion of the fight hurting each other! Once again, I'd recommend using any AOE attacks if you have them, just to speed up the fight. Also, I wouldn't recommend using your finisher until you've taken out at least one of the enemies. Otherwise, you've got a pretty chance of getting hit after it's activated but before you actually get to use it.
After being defeated, the dastardly criminals scurry away, but, before they can escape, they're distracted by Whamon. This allows us to catch up to Ogremon before he can escape with the others. Once again, we attempt to convince Ogremon to surrender.
We tell him he can join the city, that he can cleanse his soul from his misdeeds by helping the island. Ogremon ponders for a second before agreeing to give in. He'll come to the city, he says, to work off the debt from his crimes! PSYCH! That was a trick! Ogremon instead laughs in our faces as he once again makes his getaway. The best part of this is that the game even plays the little "city recruit" jingle before Ogremon reveals his trick and makes his getaway. Despite being frustrated over our failure to apprehend Ogremon once again, we happily tell Whamon that his cave is safe along with his treasure. Whamon, however, decides that you should have the treasure, that your mixture of kindness and strength makes you the perfect person for such power. He tells us that it's in the back of the cave. Whamon then tells us that he's decided to join the city so he can work with all Digimon to save File Island!
Purpose in City: Whamon is basically a water taxi. He ferries us to places that are only accessible by sea.
The areas he can take us include his Secret Beach Cave, which we really only need to go to collect his hidden treasure, the Mystery Egg, a Digivoution item that turns any champion into a powerful Digitamamon. The other place he can take us to is a new area called Factory Town. Right now, this is the only way to enter Factory Town, a place ran by mechanical Digimon, but we'll be exploring that area in a future issue!
Siege of the Drill Tunnel!
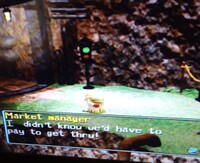
From here, we're going to return to the Drill Tunnel, where… What the hell? Who smashed up the sign outside the Drill Tunnel?! We decide we need to investigate this act of vandalism when, suddenly, one of the shopkeeps from the hidden shop shows up, complaining that there's now a toll to pass through the Drill Tunnel!
Not one to sit idly by and accept an unauthorized toll, we decide to go inside the Drill Tunnel and confront the fiends who did this! In a twist that will shock absolutely none of you, it turns out the culprits are Ogremon and his gang of thieves! Upon entering, Ogremon attempts to get us to pay his toll, but once we refuse, he decides to once again throw down, vowing to show us what happens when he gets serious!
This fight is considerably easier than the last one and is really the easiest fight of the Ogremon quest line, since this is only a singular fight with Ogremon and two Agumon as opposed to the previous fight which had a champion, ultimate, and a rookie. Compare it to the fight in Ogremon's Fortress, which, while not hard, was at least preceded by a potential three-screens' worth of fights, this is much easier. Not only are you only fighting Ogremon and two Agumon, but, by this point, Ogremon is so exhausted that he only has 3,600 HP and the two Agumon only have 500 HP each. This being the easiest fight, while somewhat anticlimactic, does make sense. I mean, Ogremon and his gang have been beaten time and time again, chased out of two different fortresses and reduced to simply pulling a fake toll scam. It makes sense that by this point in time Ogremon's gang is down to scraps.
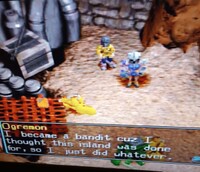
Following yet another loss, Ogremon drops an HP Chip before breaking down, asking why can't he beat us. We ask him if he's going to run away again, but, this time, Ogremon refuses, sadly saying that he's too tired. Ogremon then reveals that he only became a bandit because he believed the island was doomed, so he decided he was going to do whatever he wanted. Ogremon says he knew the island was in trouble before lamenting that it's too late to help you guys now, that he's gone too far and that the Digimon of the city won't forgive him.
We tell him that's not true, that the Digimon of the city will forgive him if he works in the city to help save the island. Touched by both our kindness and his newfound belief that not only can the city be saved but that the entire island still has hope, Ogremon decides to take us up on our offer and happily runs off to join the city! As for the rest of his gang, well, WaruSeadramon and the Gabumon never show up again, and we sort of just leave these Agumon knocked out on the floor. But at least we got Ogremon to change his ways, and that's what's really important. Also, I mean, we already have a Agumon and a Gabumon in the city. Do we really need more than one?
Purpose in City: So, after all that effort, what amazing service does Ogremon bring to the city? He patrols the city, just like Bakamon! He patrols the city during the day and Bakamon patrols the city at night.
That's right! The reward for completing this long multi-area sidequest is a Digimon who functionally brings nothing to the city except an aesthetic change! You might say that's a pretty disappointing reward for such a long sidequest, but you do have to think that, in the process of doing this sidequest, you open up so many more recruitment possibilities through Shellmon's newspaper and Whamon taking you to Factory Town. So, while, yes, the ultimate reward is a little lame, it's still worth doing it both for completion's sake and because of the useful Digimon you get in the process of doing the quest.
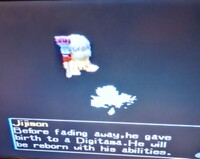
Unfortunately, shorty after defeating Ogremon and brining his gang to justice, Vomm, our brave and loyal Centarumon, passed away. He lived to the ripe old age of fifteen, devoting his life to the selfless cause of rebuilding File City and saving File Island, but thanks to a combination of old age and the wounds he has taken from our many battles, he has sadly passed on. Goodbye, my friend, you were a brave and honorable hero and every Digimon owes you a debt of gratitude. As Vomm passes on, he gives us one last favor.
Instead of scattering his data, Vomm has instead been reborn as an egg so that, while he might not have been able to save File Island, our next partner will have the tools they need to hopefully finish the job! Next month, for the first time, we shall begin the cycle of life, so join us at File City Files as we get our first fresh Digimon!
Shine Get
Written by: Waluigi Time (talk)
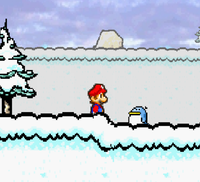
Hello there, 'Shroom readers! It may be the beginning of fall, but here in Shine Get we're jumping right into winter. It's time for the second main course of Super Mario 63, Snowman's Land! In Super Mario 64, Snowman's Land comes a lot later and Cool, Cool Mountain is the snow level at the beginning of the game, but here, we just get snowmen right away and Cool, Cool Mountain doesn't appear at all!
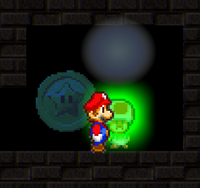
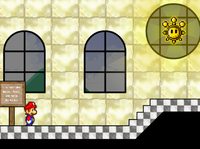
I head into the castle's main hall to the second leftmost door, where the portrait awaits. Before jumping in though, there's a Toad to talk to. He explains that this room makes him feel sad because his best friend Henry disappeared there over 9,000 years ago after going to get ice cream. It begs the question, do Toads live for thousands of years or are they just big fans of late 2000's memes and hyperbole? We may never know... Well, we can solve this mystery pretty quick. On the right side of the room, I jump into a secret passage, and break a block, opening a small room with a Star Coin and Henry inside. This is my tenth Star Coin, and I get a message saying I've unlocked the Grass Tileset in the Level Designer. Neat, still probably not covering that though! Talking to Henry wakes him up, and he too says that he's been trapped back there for over 9,000 years, then joyfully runs off. Sadly, Henry just completely ignores his best friend's existence and disappears into the void for now.
Well, enough Toad rescuing. What does this look like, The Origami King?
Mission 1: The Snowmans[sic] Head
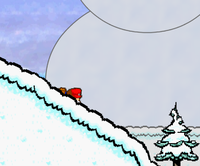
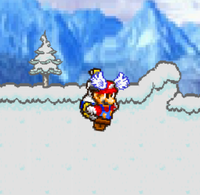
Ah, Super Mario 63 and your questionable grammar, never change... Our first objective is to find the giant snowman, because as the menu says, this entire level is named after it, so there must be a Shine Sprite in such an important location, right? I'm not sure about that logic, but I'm not going to argue. Snowman's Land is pretty interesting because unlike the levels we've seen so far which are all left-to-right, Snowman's Land actually loops! I don't remember which direction to go so I just go to the right. Luckily, after getting up onto a cliff, I find a sign with a map that shows me I picked right (haha). I mean, either way you go you're going to see the snowman eventually, but since I went to the right, there's only two notable landmarks between me and the snowman instead of three to the left! Little victories. And then I made a terrible mistake! There's a seesaw platform over a pit and I wanted to see if there was anything down there. Turns out the only thing down there is death. Whoops.
After coming back here and crossing the pit properly, I find a slippery hill that Mario automatically slides down facefirst. A little more platforming and I reach the next screen, officially entering the mountain area. Despite being at the ground level, it's a lot more precarious here with the amount of pits. Also, a Star Coin in the middle of a spinning circle of platforms! Once you collect a Star Coin, you have it for good (unless you quit without saving), so you don't have to worry too much about goofing this one up and dying. Which, uh, I did! Missed the platform and then ground pounded straight into the abyss while panicking. Respawning is quick and easy thankfully, so I get back, do some more platforming, and then fall into the pit and die again after getting messed up by spinning platforms. Now I'm only down to 1 life, so I should probably be careful. Either that, or I'm stopping back at The Secret of the Mushroom. Too bad 1-ups are reset between game sessions...
After redoing the platforming and not dying this time, I meet a Toad who complains about his house being buried, with a Sling Star on the roof. Moving on to the next screen, there's this icy patch with some enemies on it and a switch at the end. Pushing the switch makes a flashing star appear which transforms Mario into... something. His sprite becomes inverted, he's invincible, and touching enemies knocks them around or instantly defeats them. I guess this is probably just meant to be the Starman. Pressing the switch also makes a platform appear to the left, so I take it up and out of here, then take it a second time after getting knocked down by a Paratroopa... This just isn't my day. There's a circle of flying Bumpties up here protecting a Star Coin. They're really annoying and have larger hitboxes than you'd expect that are very bumpy! I fall down several times trying to get the darn thing, and only then do I end up realizing that's probably what the star down there is for, so I grab it and slice through those guys like butter. Doing some more platforming, I find a water bottle that reminds me I still don't have F.L.U.D.D., which I could've gotten if I took a detour up the mountain... There's also an igloo at the end of the screen, but that's for dealing with later.
And now I've finally reached the fabled snowman. At the start there's a platform with those ice sheets that keep coming at you like in Snowman's Land from 64, but they're not too difficult to deal with. The rest is fairly standard platforming, and part of the way up, I finally get the Hover Nozzle! F.L.U.D.D. makes the rest of this a cakewalk, though beware, landing on Bumpties doesn't reset the meter, and they're used as "platforms" a bit. I find a Sling Star but slip past it to grab another Star Coin. This one's my 13th, prompting a message that collecting 13 Star Coins has caused a time paradox to reappear, leaving me with -3 Shine Sprites! Luckily, the game assures me that it's just joking, but I've unlocked the Cave Tileset for the designer. Anyway, back into the Sling Star, across some more easy platforming, and the first Shine Sprite of the level is mine!
Upon returning to the room, Henry has re-emerged from the void and reunited with his friend! Henry thanks Mario for saving him from being "stuck in wall", lets me keep the Star Coin as a reward (you better!) and explains that they're used for the Level Designer. Before returning to Snowman's Land, I'm going to take a quick offscreen trip to The Secret of the Mushroom to counteract the unfortunate accidents.
Mission 2: The Iceblock Maze
Alright, back into it! The description says that there's an ice maze to the east of Snowman's Land with a Shine Sprite in it, so you'd probably think that you're supposed to head right, wouldn't you? Well, you can eventually get there by going right, but it's faster to go left. There's a cannon in the ground along the way, but that's for dealing with later. After a bit of hurling Mario through the snow and some platforming across ice blocks, I find an alcove with a platform going up and down with a Star Coin inside. The trick, of course, is to get in and get out without becoming a pancake! This is a task that I fail miserably at and die in the process of, but I got the Star Coin anyway!
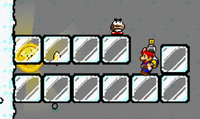
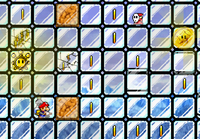
At this point, there's a fork in the road. Either continue left, or go up onto some platforms and back to the right. Luckily, there's a map posted here, and I take the platforms since that's where the maze is. I spin attack some blocks with coins in them to get in, and from here, it's basically trial and error. The blocks that you can walk through and the blocks that you can't all look exactly the same, as far as I can tell. Maybe there's a slight hue or pixel difference, I don't know. Some of them are obvious though, if you can see an object inside a block it's a good indicator you can pass through. Here's a tip, though - you reach the Star Coin from directly underneath it, and drop down on the Shine Sprite from above. The maze isn't too big, so stumbling through it won't take too long. Just keep those directions in mind.
Anyway, I got both of them, and it's back to the castle, where I get a message that the castle's backyard has opened. I'm pretty sure this means I'm working too far ahead, so I'm going to keep working too far ahead. Back into Snowman's Land!
Mission 3: Chief Chilly
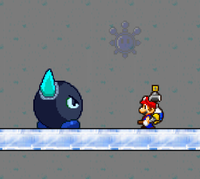
The objective for this mission is directly to the left of the fork in the road in the last mission, so I just hurl Mario across the screen until I get there and meet... Chief Chilly? Yeah, if you've played Super Mario 64 DS or Mario Kart DS (or read Mushroom Kingdom Smackdown a few issues back, shameless self-plug) it's pretty obvious that this guy looks nothing like Chief Chilly. It's just a Big Bully with its horns and feet recolored blue. I guess a Bully wanted to play chief and got into the paint. The fight with "Chief Chilly" is very easy, just knock him off three times with basically anything. Jumps, spin attacks and such will work, but the Hover Nozzle in particular makes this fight a joke. The fight's over as soon as it starts and I get another Shine Sprite!, but
Mission 4: Red-Coins of the Summit and Skies
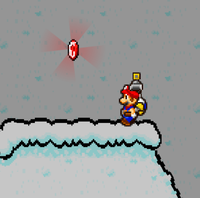
Red Coin time! I head left again, but this time I stop at the cannon and shoot it directly upward into the clouds. Unfortunately, we can't have nice things, because to the right is the Wing Cap again... In my attempt to cheese this with F.L.U.D.D., I jumped to the left and hovered while following a trail of coins to the first Red Coin. I'm able to do this again to the right past the Wing Cap and grab the second one, and unfortunately, that's as far as it's going to take me. Begrudgingly, I get back up in the clouds, take the Wing Cap, and fly to the right, missing the next Red Coin, but I am able to grab a Star Coin, the last one from this level. With 16 Star Coins, a special prize is unlocked in the Level Designer hallway, but we'll just have to find out what that is later. A few attempts later and I managed to get the third Red Coin.
Thankfully, that's all of the Wing Cap for this mission. The rest are in the mountain area to the right, so I hurl Mario over there and take the Sling Star on the Toad's roof this time. With F.L.U.D.D., traversing the mountain is very easy, and all of the Red Coins are in plain sight, pretty much. You'd probably have to go out of your way to miss them. I platform up the mountain and get the remaining Red Coins, and thankfully, the Shine Sprite spawns on the mountain instead of back over by the cannon. Another Shine for me!
Secret Course: The 16 Star Coin Prize
I decided to take a quick detour to the Level Designer room to grab the special prize. At the end of the hall, there's a series of doors unlocked as more Star Coins are collected. The first one has a Shine Sprite! There's a sign saying to go embrace the Shine Sprite, but as I walk forward, I fall in a hole. I don't get dumped in a Bowser level or anything, so my personal belief is that the castle architect just wanted to troll some poor sucker, and that poor sucker happens to be me. Anyway, I just jump out of the hole and grab the Shine Sprite.
Apparently, this room in the castle was an entire Secret Course. Neat? On the Star Map, this isn't part of Group A from last time, it's the second in its own group of Secret Courses helpfully labeled "???".
Mission 5: The Secret of the Igloo
Back to wrap up Snowman's Land! We saw the igloo back in Mission 1, so the name of the game is hurl Mario across the snowy wasteland as fast as his jumps/dives/F.L.U.D.D. will carry him. Once I reach the igloo, I break through the coin-filled ice block blocking the entrance, and enter into a sub-area.
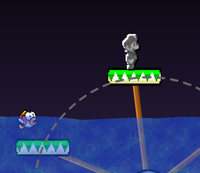
The only way to go is down, and as I fall through, F.L.U.D.D. disappears! Shadow Mario, is that you? But it gets replaced with something else, the Metal Cap! This area is underwater, but the platforming is no trouble for Metal Mario. Unfortunately, the form doesn't grant invincibility here, so I'm still vulnerable to the Cheep Cheeps swimming around. Fish... Everything was going fine until curiosity once again killed me and I sank down a hole I had no chance of getting out of in this form. Oh well. I get back to where I was pretty quickly, and this time I actually do what I'm supposed to do and grab the Vanish Cap, or as the game calls it, the Invisibility Cap. Grabbing this introduces a new problem, though. While I can swim again and therefore won't die trying to get the Shine Sprite, I can't actually reach it anymore because Vanish Mario passes through the metal grates used as platforms! Now I have to swim back to the start and to the left, finding a Sling Star. The Sling Star catapults me through the air until I hit another star, this time bringing back that invincible form from earlier but not inverted this time. Since I can actually swim and walk on everything now, it's an easy trip back to the right side (again!) to grab the Shine Sprite.
This is kind of a neat area, it's interesting to see the weaknesses of power-ups being leveraged here. As for why it's in Snowman's Land, your guess is as good as mine.
So that's a wrap for Snowman's Land! Between the first two courses and some secrets around the castle, things are looking good with a total of 14 Shine Sprites and 16 Star Coins. Next time we'll have a shorter issue, because I'm going to be covering the first mini course of the game! See you then.
(Also, despite my numerous deaths this issue, this game isn't as hard as I make it look! Usually it's just curiosity killing the Waluigi Time or me getting careless.)
The Anatomy of a Pikmin
Hello, and welcome back to The Anatomy of a Pikmin, the Shroom's number one informative Pikmin brochure. This month, we finish out the original three Pikmin types by covering the water-dwelling swimmers, the Blue Pikmin.
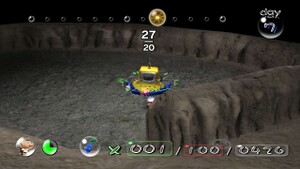
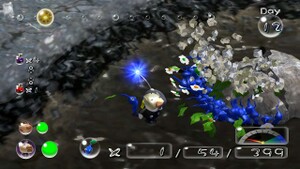
The last Pikmin type to debut in Pikmin 1, found in the third area, the Forest Naval, Blue Pikmin are the only Pikmin type to feature a mouth. Except it's not really a mouth; rather it's the Blue Pikmin's gills. Regardless, the gills, permanently fixed into a frown, make the Blue Pikmin look quite sad. I'm not really sure what they're so sad about. After all, these gills give Blue Pikmin their trademark ability. Thanks to their gills, Blue Pikmin are the only Pikmin who can breathe in water. Honestly, it's a good thing they have that, because they don't have anything else. Blue Pikmin only have one other power, that being the ability to rescue drowning Pikmin while idling. Other than that, they're mostly useless outside of water, having average attack power, average speed, and average throw height. Blue Pikmin truly only excel in water.
Luckily for Blue Pikmin, just having the ability to swim makes them easily the second-best Pikmin type. While there are only a few enemies they are really needed to kill, such as Water Dumples, the Pearly Clamclap protecting the Position Generator, and the optional Goolix, Blue Pikmin make up for their lack of combat requirement by having just so many ship parts that only they can get to. Again, only Blue Pikmin can enter water, so anything that involves water, only Blue Pikmin can get to.
Every map has water, so every map has something that only Blue Pikmin can do. Whether it's as simple as a black gate in the Forest of Hope in a pool of water, or the Perplexing Pool, which is at least 40% water, Blue Pikmin are required for many tasks. There are also a lot of tasks that, while they don't 100% require Blue Pikmin, having blues around makes them a lot easier. Blue Pikmin don't even have their own boss (outside of the optional Goolix), but just the fact that there is so much of the map only they can access makes them an easy second-best Pikmin,
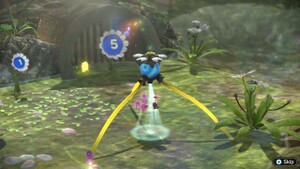
In Pikmin 2, Blue Pikmin are once again the last type of Pikmin discovered, being found in the second area, the Awakening Wood. This time, however, instead of being extinct, there is instead a small colony of blues living beyond an electric fence and just chilling out, chasing some Wogpoles. Blue Pikmin operate the exact same way as they did in Pikmin 1. They can breathe in water and idle blues will attempt to save drowning Pikmin. That's it. That's all the powers they have. But again, the mere fact that they can go in water, which no other Pikmin but the Bulbmin can do, still makes them either the second-or-third-best Pikmin type, because there are whole swaths of the map that no other Pikmin can access, making them mandatory for a number of things.
While the blues' powers might not have changed, the game does give Blue Pikmin a couple of new uses for their underwater prowess. For starters, there are now more enemies who produce water and can drown Pikmin on dry land. In Pikmin 1, the only enemy who could do that was the totally optional Goolix. But in Pikmin 2, we have the Caustic Dweevil, and Watery Blowhog, and one of the weapons of the Titan Dweevil. These enemies (or stage in the case of the Titan Dweevil) are perfect for the Blue Pikmin, who cannot be harmed by them.
In addition, littered on the maps are clogs, a new obstacle. These clumps of dirt and sediment appear in the water, and breaking them will reveal a hole which will drain the water away. This opens up new pathways or gives access to treasure, and only Blue Pikmin can break them, adding just another layer of usefulness for our little blue boys. But yeah, I mean, despite not being changed at all, blues are still great, because they have huge areas of the map only they can access. They even have a cave, the Submerged Castle, that, because it's in water, you cannot bring any other Pikmin type into, forcing you to use a squad of blues.
Unfortunately, Blue Pikmin take a huge step back in Pikmin 3. Let's start with the first thing. Blue Pikmin are the only original three types that have gone extinct in the time between Pikmin 2 and Pikmin 3. The reds might not have been doing great, being reduced to only a colony of three remaining in the Tropical Wilds, desperately trying to recover their Onion, but at least they were still somewhat stable. The yellows were initially doing great, with a huge colony in the Distant Tundra that sadly would be chopped down to only two Pikmin out of the ground and three planted thanks to the incompetency of Charlie's leadership. Blues, on the other hand, are completely extinct, with their Onion lying dormant in the Garden of Hope.
Blue Pikmin are once again the last Pikmin you find in the game; in fact, you don't find them until well over halfway through the game. Found in the Garden of Hope after Louie blows up a wall, revealing their dormant Onion, blues once again can breathe underwater! But there's actually a change to that mechanic this time. Before, the water was basically just puddles, but now it's full-on underwater, and the Blue Pikmin can even swim through it when fighting enemies. It's a pretty cool aesthetic change for the blues.
You might be thinking that, since blues are unchanged and since water is still, well, everywhere, blues must be one of the most useful Pikmin, right? Honestly, no, they're probably the worst. It boils down to two things. The first is that they are introduced so late. Most of the things that blues are required for basically boil down to "have blues get this underwater fruit or underwater bridge piece." The second thing is a new Pikmin type competing with the blues' niche. Winged Pikmin now exist, and they can fly over water. So it's no longer "if there's water, you need to use Blue Pikmin to tackle what's on the other side of the water". As long as whatever fruit or enemy you're targeting isn't actually underwater, you can use wingeds. Wingeds carry things the fastest and they take the most optimal routes, so if all you need to do is cross a body of water, just use Winged Pikmin. Yeah, they don't hit as hard, but, come on, the game just throws the berries needed to make Ultra Spicy Spray at you. So, yeah, sadly, because of how late they're introduced and the utility of the Winged Pikmin, blues are just kind of left with only a singular boring niche of grabbing things that are underwater.
Luckily for Blues, though, they return to great prominence in Pikmin 4. In Pikmin 4, and I know this is going to be a shocker, but, Blue Pikmin can breathe underwater! Now, you might think that Blue Pikmin shouldn't be very good in Pikmin 4. After all, not only are Winged Pikmin back, but Pikmin can now ride on Oatchi's back. And there are new Ice Pikmin that can freeze bodies of water, making Blue Pikmin worse than ever, right? Well, no!
So I'll kind of go in order, but, yes, Winged Pikmin return, but there are two reasons why that isn't as disastrous for blues as it was in Pikmin 3. For starters, in Pikmin 4, you can only have three types of Pikmin on the field, and, for a lot of the game, you're not even going to be able to have one-hundred Pikmin on the field at once. Because of that, you have to be a lot more selective in what you use. But the bigger reason is that you don't get the Winged Pikmin Onion until the last area of the game, so, by the time you get the Onion, you'll probably have most of the game done and you won't really need to build up a huge Winged Pikmin army.
Now as for Oatchi, yes, being able to swim with all the Pikmin on his back does take away some of the need for using Blue Pikmin to cross water, but the underwater sections in Pikmin 4 I found to be a lot more expansive. There are a lot more enemies and treasures, and each one of these underwater enemies or treasures can only be grabbed by a Blue Pikmin.
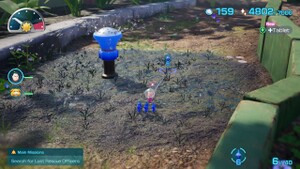
Finally, for the Ice Pikmin, there are two main reasons why Ice Pikmin don't render Blue Pikmin obsolete. The first one is simply the fact that, when Ice Pikmin freeze a body of water, they freeze that body of water. This means that if you freeze a body of water, you can't get any treasures that are in said body of water. The second and the more important reason is that, honestly, the whole freezing bodies of water thing is more of a gimmick than anything else. What I mean is that, for any big body of water, you need like thirty to eighty Ice Pikmin to freeze the water, and all those Pikmin have to stand in place or the ice will crack. Because of this, you aren't going to be using Ice Pikmin to freeze huge bodies of water. That means, once again, for underwater activities Blue Pikmin are the only game in town baaaaabyyyy. Blue Pikmin even get their own little bridge-like contraption. Scattered throughout the game are sprinklers, which, as sprinklers are wont to do, spray water, making them impassable by any type but blues.
Now, there is a way to turn these sprinklers off by using raw materials converted into valve pieces, which can then be turned by the Pikmin to shut of the sprinklers. But some of those valves require Pikmin to cross through the sprinkler. So, guess who is still needed! That's right, blues baaaaabyyyy. Blue Pikmin get a lot of utility in this game from both regular areas and cave, and thus rocket back into the top tier of Pikmin, because, once again, they have just so many things only they can do.
Blue Pikmin are in a very unique spot. Their powers have stayed the same in every game, barring a change to the water mechanics themselves. Yet Blue Pikmin have consistently been towards the top of the Pikmin leaderboards. It's as simple as the fact that, outside of Pikmin 3 where they're introduced just too late with a role that's somewhat been overtaken by Winged Pikmin, Blue Pikmin have always had large portions of maps that only they could access. They've always been important to use in a lot of situations, because you just didn't have any other options. With that, that'll conclude the original three Pikmin types. Join us next month as we examine the beefy Purple Pikmin from Pikmin 2.
Four Steps for a 3D World
Written by: Hooded Pitohui (talk)
Hello, all you readers of The 'Shroom, and welcome back to Four Steps for a 3D World, a section where we will cover a level from Super Mario Galaxy 2... eventually. For those who haven't been following the section, what we're doing here is taking levels from Super Mario games directed by Koichi Hayashida and seeing if we can successfully identify the four steps that, according to a design philosophy Hayashida has discussed in interviews, a Nintendo-made 3D Super Mario level should take a player through.
According to Hayashida, these levels are (in the games he has influenced, at least) designed around an introduction that lets a player learn a mechanic in a safe environment, further development that builds on what the player is learning and introduces more complicated aspects of a mechanic, a twist that adds some kind of significant wrinkle or challenge to force players to consider the mechanic from a new angle, and a conclusion which gives players one final satisfying chance to show they've mastered the mechanic. Knowing these four steps, we're going to dissect levels from games he directed and see if we can tease out all four steps. Hopefully, by breaking the levels down like this, we can also gain some insight as to when it's advantageous or disadvantageous to stray from these four steps, too.
Now, all that said, however, this month, we're going to do something slightly different. This month, we're not looking at a truly 3D level, and we're not looking at a level from a game directed by Hayashida. In fact, uniquely, this month, we know exactly who developed and oversaw the level we're going to analyze, because it's a Super Mario Maker 2 level in the Super Mario 3D World style made by our very own Reverse Input!
You see, for "M5 - Favorite Power-up" in our Awards ceremonies this year, Reverse Input presented the results by making a playable level highlighting the key features of this year's winner of the award, the Super Bell. Now, Reverse Input himself has stated that he didn't design the level with Hayashida's four steps in mind, saying that "it doesn't strictly follow the four steps but I tried to make it progress reasonably, it kind of just does it twice, almost." I think it has a well-crafted progression, myself, and those factors taken together are exactly why I would like to cover it in the section. Does its progression still resemble these four steps despite it not having been designed with them in mind?
Let's take a trip to Cat Spike Climb and find out for ourselves!
You could almost expect the warp box at this point in the level to lead to a final stretch with the flagpole. It would leave the level on the short side, and it would leave it quite the easy level, but I wouldn't say that the level would feel "incomplete" if it had gone this route. No, in fact, it would have gone the four steps pretty clearly, with a solid progression in its design. The level, however, doesn't end here, so let's continue on and see what structure the latter half of the level uses.
So, did this level ultimately end up following Hayashida's four steps? Even though it may not have been intentional on Reverse Input's part, I think it hewed fairly close to it, actually. Yes, we did see some sections repeated, but we've seen that in an official Nintendo-made level before, so it doesn't come as a surprise to me. As we discussed with Footlight Lane, there are times we see variations on the four steps formula, and it's not out of the ordinary for the Development and Twist steps to repeat together. That should make some sense, because a level designer wants to present players with something new to keep them engaged in the level and wants to present them with a challenge, but needs to ease them into new concepts and prepare them for a challenge.
Incidentally, I will say that I was surprised by the lack of red and blue spike blocks in the final stretch to the flagpole. I suppose one doesn't want that Conclusion stretch to be too challenging, since players should be celebrating getting through the main challenge of the level by that point and getting to feel proud while demonstrating their mastery of the level's major features. Still, though, with those being the major gimmick of the back half of the level, I thought maybe they would reappear in an easy-to-clear form so players ended off feeling they had mastered both halves of the level. Then again, though, Footlight Lane did the same thing, didn't it? Its Conclusion section really only called back to the Intro and Development I sections, not incorporating the Bullet Bills revealing the ground that were introduced in the Development II section. I suppose we should look out for that, and see if more levels stick to the initial challenge from their first Development section while foregoing the features added in the second (or beyond).
I think it speaks to the strength of this four-step structure that Reverse Input wasn't specifically aiming for it, but it can still be seen in his level because he was paying attention to the level's progression. It's not some magic formula that Nintendo level designers devised; it's just a natural flow for good level progression that all-audience accessible platforming levels, like those found in Super Mario games try to be, seem to converge upon.
As always, that's my takeaway, at least. Maybe you think I'm full of hot air, or would fold the section with the donut blocks into the "Development" step and consider the whole section beyond the warp box to be the "Twist" step. If so, I invite you to write your own level design analysis! I'd be interested in seeing it! For now, though, I think this was a nice change-up. In terms of progression, Cat Spike Climb feels like it could be an actual Nintendo-made level, and I think seeing a level converge on Hayashida's four-step structure without intentionally modeling itself on it provides some interesting insight into the strengths of the four steps.
Well, with four months that I've been meaning to do a Super Mario Galaxy 2 level, three colors of spike blocks, two different platforms across the two Twist sections, and one level not made by Nintendo officially covered, that's all for Four Steps for a 3D World!
Koops, Your Emblem is on Fire
Welp... looks like this is it. We're actually closing off our first playthrough on this section. Damn.
Within the bowels of the final chapter in the game, our newest and final recruit shows himself at last, and it's none other than...
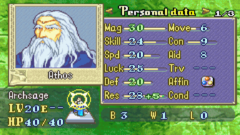
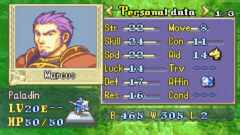
Santa Athos
An archsage. One of the eight legendary heroes.
Level 20 Archsage.
HP: 40
Mag: 30
Skl: 24
Spd: 20
Luck: 25
Def: 20
Res: 28
Con: 9
Move: 6
Weapon Ranks: S Anima, S Light, S Dark, S Staves.
Santa Claus finally joins the fray, and he is pretty much every bit the Living Legend (TM) he is said to be. Obviously him joining at the literal last map in the game should be a dock against him in terms of unit ranking, but Athos is really just here to make sure you have someone competent in case you're just bad at the game (And somehow failing in FE7 of all things). And competent he is, so you can't exactly measure his usefulness by the same metrics. For one, he can use literally any magical weapon/staff. Any at all. Forblaze and Aureola are also both locked to him exclusively, though they're really only here for the final boss/Nergal. His stats are also pretty damn good. His 20 speed at this point may be lacking, as he doesn't double most of the relevant enemies on the map, but he still doesn't really suffer from that as a result. And his capped magic at 30 means not only does he hit hard, but he also gets 15 spaces range with ranged staves, AND heals 40 HP with a single use of Fortify, which is an immensely helpful contribution for the final boss.
You really couldn't ask for a better Christmas.
We've come a long way with all our precious and valued friends (whom we barely know anything about 'cause the support mechanic is ass, but what can ya do).
And that... that was Fire Emblem: The Blazing Sword or Fire Emblem for short, otherwise known as FE7 or even The one with Lyn in it. Goofy-ass game. But it's MY goofy-ass game.
I got... very little more to say, really, pretty much all of my feelings on this have already been articulated in audio format. At this point all I can really say is... I'll see you later. We'll be playing another game soon enough, and judging by the ending scene, you can guess what it'll be about. Before then, though, we might just maaaaayyybe have another section for this game's bonus content, just to wrap up everything, any potential loose ends (Because we do need to see two idiots fall in love). Whether that'll be next issue or the one after, I couldn't tell you, or if we'll even do that at all before starting next playthrough. But know this. I will return.
And we will be having a good one when I do. Bye.
| The 'Shroom: Issue 198 | |
|---|---|
| Staff sections | Staff Notes • The 'Shroom Spotlight |
| Features | Fake News • Fun Stuff • Palette Swap • Pipe Plaza • Critic Corner • Strategy Wing |


