The 'Shroom:Issue 182/Strategy Wing
Director Notes
Written by: Hooded Pitohui (talk)
Hello, all of you readers of The 'Shroom, and welcome to the May 2022 edition of Strategy Wing. Upon reviewing last month's release, I noticed that a little... incident... in the Strategy Wing Director's office made its way into print. I'd like to assure all of you that this incident will not be repeated. That insubordinate Generalissimo Shoe has been demoted and has been reassigned to take stock of the building's inventory of power-ups. Maybe doing such menial work will instill a sense of discipline in him. I'll have to remember to check on his work. He should be somewhere around the Critic Corner offices, by now...
Unlike the generalissimo, your loyal Strategy Wing writers continue to work hard to deliver us their sections. From Strategy Wing regulars like Superchao and Waluigi Time to newer faces like Kinger, the writers here continue to do excellent work.
I should mention that Zelen has taken this month off, so there's no On the Origin of Species this month. Don't worry too much, though, because it is set to return! That's everything I have to report in terms of the news this month, so, rather than leave you reading my rambling, I'll leave you to go on and see what the Strategy Wing team has prepared for you this month. Go on and read, and when you've finished and you've voted in the poll at the bottom of this page, be sure to check out the information on the upcoming Blooper Race. If you're looking for something to do after you've done even that, consider heading on over to the sign-up page and sending in an application so you can join our team! Whether you're wanting to cover the history of a topic in detail, as Superchao does with Mach Speed Mayhem, or provide us with a guide to elements of your favorite games, as the wandering Shoestrel and Kinger do, we can find you a place on the team and would like to have you!
Section of the Month
Thank you all for voting Pitohui's Pokémon Academy last month. Just as much thanks go out to those of you who voted for Ray Trace's (talk) SIMulation and The Wandering Shoestrel's (talk) The Greatest Quest, and, well, really, for showing your support to our writers with your votes in general.
| STRATEGY WING SECTION OF THE MONTH | ||||
|---|---|---|---|---|
| Place | Section | Votes | % | Writer |
| 1st | Pitohui's Pokémon Academy | 7 | 41.18% | Hooded Pitohui |
| 2nd | SIMulation | 6 | 35.29% | Ray Trace |
| 3rd | The Greatest Quest | 2 | 11.76% | Mustard Machine |
Getting That Payday
Howdy partners, and welcome back to Getting That Payday, a Payday 2 strategy guide! With all the new westerned-themed weapons and outfits shipped out to you heisters recently, (I did not know this last issue, this was a complete coincidence) what better to talk about this month then the Gunslinger Skill Tree! Gunslinger makes your pistols lethally effective, with upgrades to damage and ammo, makes pretty much every part of using one faster, and gives you buffs for simply landing shots!
Info: For those of you who don't know, Payday 2 is a co-op first person shooter about robbing banks, warehouses, trains, and pretty much anywhere with something valuable inside using the most absurd arsenal of weaponry on earth.
It’s High Noon
Starting off, we have Equilibrium. The basic version decreases your pistol draw and holster speed by 33%. Not much to say about that. The aced version (aced skills are a second ability for that skill) gives pistols 8 extra accuracy, letting your shots be more reliable.
Next up is Gun Nut. The basic version gives most pistols an extra 5 bullets. Now, I originally believed that Gun Nut worked on revolvers, however my dreams had to be dashed, as it does not work with the revolver family of weapons. It still works with the Parabellum, however, which is the power of a revolver in the form of a pistol, so if you want the power you can still get it. I didn’t care about the power though, I wanted the concept, the idea of a revolver with 11 rounds, but of course the reasonable decision had to be made. *Sigh*, Not all dreams are meant to come true, I guess. Also, aced gives a 50% boost to firing speed. That's nice, I suppose. Useful with larger pistols that take longer to fire.
Alongside it is Akimbo, which is focused on, and you guessed it, akimbo weapons. This reduces the stability penalty for dual wielding guns by 8. Although this isn't very good for akimbo pistols and shotguns, as usually by the time you're able to fire again the recoil has reset, it is incredibly useful for smgs, with their high fire rate. Making it aced reduces your stability penalty by another 8, and ups akimbo ammo to 150%.
Afterwards is One Handed Talent. This is a simple but incredible skill, especially for full auto pistols. This increases the base damage of all pistols by 5, and by an extra 10 when aced, giving 15 extra damage to all pistols. For revolvers, this is nice, but not game changing. With a low damage pistol, however, this can become an insane upgrade turning your pistol into a hand cannon, taking out cop after cop.
Next, we have Desperado, a skill with a unique mechanic. The Basic version gives you a 10% accuracy increase for 10 seconds whenever you land a shot with a pistol. With it stacking up to 4 times, this makes each consecutive shot easier to make, helping you land all your shots (God knows I need it with my aim!). When Aced, it gives a 50% reload speed increase. This is especially useful with revolvers, as reloading them takes so long you could probably make some coffee and read a 'Shroom article before all the chambers are full.
The final skill is Trigger Happy. The Basic form makes it so each shot that hits gives you a 120% damage increase for 2 seconds, over doubling your damage. It can’t stack, but it does reset on hit. Combining this with Desperado makes landing hits easier and deadlier, leaving anyone who opposes you on the ground! Acing it increases the time to 4 seconds.
For builds, I would always take a Castigo .44 revolver, whose high damage and solid rate of fire gets amplified massively by the skills leaving it with 390 damage after the first shot with Trigger Happy, and being able to fire incredibly quickly, shredding through high health targets, like Bulldozers (Cops with massive armor, making them ridiculously tanky)! For more fun, add in an Akimbo Bernetti Auto, firing dozens of bullets per second with up to 88 damage a shot, able to match with the damage of lmgs! Finally, a useful alternative to the Castigo is the 5/7 AP, a pistol with armor piercing, making small and medium body armor rendered practically useless.
Now you know how to become a western lawbringer, even if the form of "law" you're interested in is a more… chaotic kind. With that, this is professional heister Kinger, signing off.
Pitohui's Pokémon Academy
Written by: Hooded Pitohui (talk)
Alright, alright, I know it's getting to that point in the term where you've settled into your routines and the work has started in earnest. I thought we might start an in-depth discussion of EV training this week, but I can see in your eyes - and your comments that come in with your submissions, and, yes, I can see those. That's what that box is for. - that perhaps it's better to spend a little time on a lighter topic. Some of you mentioned to me that you saw a lunar eclipse not long ago, so I thought this might be a good chance for us to cover the Moonlight Pokémon, Umbreon.
Before we can get to it, I'd like to remind any students who missed the previous lectures to pick up the condensed notes on the syllabus. If you aren't yet familiar with this class, do make sure you read up on these notes.
First, a Smogon University course, this course is not. No, this academy's lessons are designed to get trainers of any stripe thinking about how they can raise their Pokémon, and, as a result, aren't designed to keep up with the widely-accepted metagame for the series. In some cases, the way I've raised my Pokémon may even flies in the face of conventional wisdom. If you're looking for top-tier strategies, do check out Smogon, but if you merely want to get a little deeper into raising Pokémon while still doing things your own way, feel free to use this section as a reference.
Secondly, know that, unless otherwise noted, these builds assume these Pokémon were raised in the seventh generation of Pokémon games (Sun, Moon, Ultra Sun, and Ultra Moon). Generation VIII cut some moves out of the games, and I'm not keen on changing the movesets for Pokémon I raised a few years ago.
Please note, also, that I'm having to guess at the effort value (EV) spreads of some of these Pokémon. Again, I raised these years ago, so I'm using stat calculators and working backwards to figure out their EVs in some cases.
Finally, since we all know the importance of citing our sources, I need to credit the design of some of the tables used in these lectures to Crocodile Dippy, author of the Pocket Handbook which can be found in early editions of Strategy Wing.Those of you who need a refresher on some of the terms we'll be using, particularly as regards stats, will want to take a look at this second handout. If there's any confusion on terms not covered, let me know before our next session, and I'll update the handout to accommodate you.
Base Stats: Base stats are the values associated with a particular Pokémon species, and are the same across every individual Pokémon of a given species. You have no influence on them. You can think of them as traits tied to a species. A chimp isn't ever going to be able to get as good as digging as a mole will be, and, likewise, an Abra is never going to have the defensive prowess a Shuckle has.
Individual Values (IVs): Individual values, as their name implies, are associated with individual Pokémon. They range from 0 to 31 in each stat, with 31 being considered a "perfect" IV and higher numbers corresponding to different stats. Magikarp A and Magikarp B will have the same base stats, but they may very well have different IVs. To stick with the animal analogy, one mole may be born with larger claws than another mole, and that first mole is probably going to have an easier time digging through dirt than the latter. Individual values are set in stone, strictly speaking, but you can use Hyper Training (from Generation VII onwards) to functionally get a perfect IV in a stat.
Effort Values (EVs): Effort values are the one thing you can easily change. A Pokémon can earn, primarily through battling, but also through means like the use of certain items or mechanics like Super Training, up to a total of 510 effort values, with up to 252 in any given stat. To finish off the animal analogy, no matter what kind of claws a mole is born with, moles who have more experience digging are probably going to be better at digging than moles which have never dug.
Nature: A Pokémon's nature is, more or a less, a stat modifier with a name meant to make it sound like a Pokémon has some personality. Natures will raise one stat by ten percent and lower another stat by ten percent. Some natures raise and lower the same stat, canceling out the effect and leaving stats unchanged. Natures can be changed with the use of special mint items from Generation VIII onwards.
STAB: STAB stands for Same-Type Attack Bonus, and refers to the boosted power of moves that match the type of the move's user. To illustrate this, consider the case of a Lombre, a dual-type Pokémon which is both a Water-type and a Grass-type. Any Water-type moves Lombre uses will have their power boosted by 1.5x, and any Grass-type moves Lombre uses will, likewise, have their power boosted by 1.5x. (There are circumstances where this does not apply, and, while the 1.5x multiplier is typical, some games use other multipliers.)
Are we all prepared? Very well, then. I actually have fond memories of Umbreon. There were two trips to the Orre Region I recall in great detail, and if we had more time for our lecture, I might tell you more about them, but, we've no time to waste, so let's get right to it. If you're looking at raising an Umbreon, what do you want to consider?

|
Name: | Umbreon | Base HP: | 95 | |
| Species: | Moonlight | Base Attack: | 65 | ||
| Type: | Dark | Base Defense: | 110 | ||
| Abilities: | Synchronize | Base Special Attack: | 60 | ||
| Inner Focus | Base Special Defense: | 130 | |||
| Base Speed: | 65 | ||||
You should immediately realize, from a glance at its base stats, that Umbreon is a defensively-oriented Pokémon. If you want an Eevee evolution that can strike swiftly and strike hard, you might instead consider raising an Espeon, but if you're committed to Umbreon, don't fool yourself into believing for a moment those offensive stats are usable. With base attack and base special attack both coming in under 70, Umbreon is going to struggle to break dish out much damage against all but the frailest opponents. You might look at that base 65 speed and conclude that the dream of an offense-oriented Umbreon is hampered by its slowness, and you would be correct, but, as paradoxical as it may sound, Umbreon is also a tad too fast for its own good. A base speed of 65 falls into an odd place where a large number of Pokémon outspeed Umbreon, but where plenty of other Pokémon are slower than Umbreon, as well, preventing you from leveraging Trick Room to great effect.
It's abundantly clear that Umbreon's offensive stats give us little to work with, but, luckily, Umbreon has outstanding defensive stats. Defense and special defense both clearing 100 is a blessing, giving Umbreon a real chance to take a few hits and remain in battle, and HP nearly reaches 100. While it would work out even more nicely if that base HP was just a tad higher, Umbreon has all of its bases covered when it comes to defense.
Everything considered, Umbreon has the most clear-cut path forward of any Pokémon we've yet covered in this course. There's no question that you'll want to raise as sturdy an Umbreon as possible. The goal here is to allow Umbreon to take as many hits as possible, and, with that in mind, it's obvious that its Umbreon's HP that is most in need of investment. No matter what else you do, you should plan on pouring 252 EVs into HP and making sure your Umbreon has a HP IV of 31. After that, the only decision you need to make is how you want to split the remaining 258 EVs between Defense and Special Defense.
You can try to balance them between the two defensive stats, which is, in all honesty, likely unwise, or you can max out one of the two and allot the remaining EVs to the other. If you go this latter route, which I would recommend, you're likely to do better investing in Umbreon's special defense. It might sound counterintuitive, with Umbreon's special defense naturally higher, but, if you're already committed to specializing, you may as well take it all the way and maximize the defensive stat that can be raised the highest. Also a factor in this decision is Umbreon's weakness to Fighting-types, which generally have higher physical attack stats and powerful physical moves. If anything is going to break through Umbreon's defenses, regardless of investment, it's most likely going to be a Fighting-type, so there's some benefit to letting Umbreon stand up against special attackers while adopting a more conservative approach, and even switching out, when up against physical attackers. If you aren't going to be standing up against physical attackers, there's not much reason to invest more in defense than in special defense.
Whether you specialize or you try to raise a generally-defensive Umbreon, the choice of ability here is easy. Umbreon can have Synchronize, which will cause any opponent who burns, paralyzes, or poisons Umbreon to get burnt, paralyed, or poisoned themself, assuming they aren't, for some reason, immune to the status condition in question. This is the ability you want your Umbreon to have. Umbreon's other option is Inner Focus, which merely prevents Umbreon from flinching. Inner Focus is only useful situationally, and more useful for an offensively-oriented Pokémon than a defensively-oriented one, while Synchronize punishes opponents who think they can get around Umbreon's defenses with status conditions. There's no question that Synchronize is the ability you want.
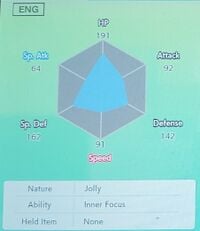
That all said, before we turn our attention to the Umbreon I raised, I should warn you that I did not exactly take my own suggestions here. Not only does my Umbreon have Inner Focus, but I've split the investment in its defensive stats and made a significant, unnecessary investment in its physical attack. I've always been the type to experiment, for better or for worse. We'll still take an in-depth look at my Umbreon, and I'll highlight those parts of my approach that should serve as a demonstration of what not to do.
I began with the right idea here, investing in HP, but I made a mistake right from the outset by not investing the full 252 EVs in HP that I could have. Why did I fail to make the full investment in HP? I mistakenly thought I would benefit from investing in Umbreon's attack. You might wonder why I chose attack over special attack, and that comes down, in part, to the fact that Umbreon has slightly higher base attack than base special attack. This was actually one of my better decisions. Most of Umbreon's effective offensive moves are physical Dark-type moves, so there's no harm in turning special attack into a dump stat where you can accept any IV. This should guide you in choosing a nature for Umbreon, too. Any nature that lowers special attack will do, though, you could do better than I did by choosing a nature that raises one of Umbreon's defensive stats rather than its speed. Impish or Careful are the natures you want to aim for.
Elsewhere, I once again did things halfway, investing an even amount into defense and special defense, which, while specializing is probably a better route go go, wasn't the worst move. My mistake here was, again, investing in attack at all. I should have taken those EVs that I put into attack and, at the least, have split them between defense and special defense. I can't even say, this time, that I compensated with Umbreon's moveset. There's mistakes all over here, and, when you raise your own Umbreon, I advise you, first and foremost, to forget about investing any EVs in Umbreon's offensive stats (though, if you can get a 31 IV in attack, you should still take that).
| Payback | Physical | The user stores power, then attacks. If the user moves after the target, this attack's power will be doubled. |
| Wish | Status | One turn after this move is used, the user's or its replacement's HP is restored by half the user's max HP. |
| Protect | Status | This move enables the user to protect itself from all attacks. Its chance of failing rises if it is used in succession. |
| Heal Bell | Status | The user makes a soothing bell chime to heal the status conditions of all the party Pokémon. |
Speaking of movesets, let's go over my Umbreon's moveset, shall we? You'll notice there's only one offensive move on this list, which is actually an example you'll want to follow. Umbreon has a great selection of status moves, and any number of offensive moves you include in an Umbreon's moveset that's greater than one will only serve to keep you from equipping Umbreon with much better move choices. As for what offensive move you want to include, well, I went with Payback. There are plenty Pokémon which outspeed Umbreon, meaning there are plenty Pokémon which are going to hit Umbreon before Umbreon can hit them, which is what makes Payback, which doubles in power if Umbreon moves after its opponent, useful. If you aren't interested in Payback, you might consider going with Foul Play, which has a respectable base power of 95 (which is slightly lower than Payback's 100 after doubling, but guaranteed regardless of movement order) and which runs off of your opponent's attack stat rather than Umbreon's. It's consistent and it sidesteps the problem of Umbreon's low attack stat, but it won't have much use of you face off against a Pokémon with an attack stat even lower than Umbreon's, so whether you want to go with Payback or Foul Play is a question of whether you want to gamble with the attack stat of your opponents or the speed stat of your opponents.
Wish is the most important move on Umbreon's moveset, and it goes a long way towards making Umbreon a flexible defensive Pokémon. That Umbreon can restore its HP at all gives it a nice advantage that allows it to extend its longevity, and that's why, if you absolutely cannot get Wish, you should at least include Moonlight on Umbreon's moveset, but it's that Umbreon can restore the HP of your other Pokémon that really makes it stand out. You can set up Wish and then switch out to another Pokémon, and the Pokémon you switch in will have its HP restored by an amount equivalent to half of Umbreon's HP. Umbreon being as strong defensively as it is, Umbreon can come out, stall out foes, and wait for an opportune moment to set up Wish and switch out so it can heal up one of its teammates. It has helped me plenty of times, allowing me to heal one of my offensively-oriented Pokémon, giving them a second chance to inflict major damage on the opposing team.
Protect, I've chosen to help Umbreon stall opponents. I make liberal use of status conditions, meaning, even though Umbreon doesn't have any means of poisoning or burning opponents, it's very likely Umbreon is going to be facing opponents that are already burnt or poisoned and are, thus, gradually losing HP. Using Protect lets Umbreon waste an opponent's turn (most of the time, albeit, because some moves can break through), letting their status conditions whittle away at their HP. If an opponent is having trouble breaking through Umbreon's defenses, you might even be able to set up a regular cycle of using Wish and then Protect, ensuring Umbreon takes no damage on the turn it heals up.
On the topic of healing, I've also included Heal Bell to help Umbreon stall out opponents. Even if an opponent takes the risk of afflicting Umbreon with a status condition (or if they realize my Umbreon has Inner Focus), Heal Bell can clear up Umbreon's condition and get it back in fighting shape. It goes a long way towards extending Umbreon's longevity, ensuring Umbreon can't be worn down by Pokémon throwing around moves than can poison and burn. Heal Bell also complements Wish, giving Umbreon the ability to heal the status conditions of all of its teammates at once. Once again, this can help a Pokémon get back out there and continue the fight after getting worn down during the early phases of a battle.
If there's any change you might make to the moveset I've presented (besides potentially trading Payback for Foul Play), you might consider swapping Heal Bell for Toxic, giving Umbreon a chance to badly poison its opponents and ensuring that its opponents are taking damage while it stall them out. I personally think that the increased longevity that comes with being able to clear away status conditions is even more useful to Umbreon's stalling than being able to poison foes, but, then, if you have few other Pokémon on your team positioned to hit your foes with status conditions, Toxic may be worthwhile for Umbreon.
All in all, my approach to raising Umbreon is, frankly, on the right track, but burdened by multiple mistakes. I have the wrong ability. I foolishly invested in attack instead of focusing on Umbreon's defenses. I didn't max out Umbreon's HP. Still, you can see the direction I was going, and you can see that core concept that Umbreon should be a defensively-oriented Pokémon that can stall out opponents and last long enough to heal up its teammates, too. If I can leave you with one main takeaway from today's class, it is that, as the old adage goes, the best offense is a good defense. Forget about offense when you raise an Umbreon, and focus entirely on its defenses, and you'll get a worthwhile addition to your team.
That all said, that's everything we have to discuss for today. Our time is about up, and you don't need to hear me go over the same point again and again. Shall we end today's lesson with a fun fact? Umbreon, you may know, has a poisonous sweat. Why, once upon a time, some researchers suggest it should be classified as a Poison-type, and there was even speculation, before Eevee's evolution methods were properly elucidated, that Eevee might evolve into Umbreon using a fanciful Poison Stone. Isn't that a quaint thought? If only it were that easy. Of course, none of these views ever did become accepted among mainstream researchers, but, if you're interested in that, I suggest you enroll in next semester's course on Pokémon classification. That's all - truly - for today, so study up and be ready for our next session, where we'll take a look at a Pokémon befitting the summer season!
The Greatest Quest
Written by: The Wandering Shoestrel (talk)
Welcome back, yon reader, to another edition of The Greatest Quest, the story of the gallant Sir Cucumber and his young squire Percy and their quest to defeat the evil Minister Pumpkin and save the beautiful Princess Tomato. In our last chapter, we learned how Sir Cucumber defeated the corrupt Sgt. Pepper and escaped from prison. This month, we return to where the story began, and Sir Cucumber and Percy continue their quest, hoping to finally join the resistance. But... Perhaps this would be better explained through song.
♪ Our brave vegetable heroes, ♪
♪ They escaped from the jail, ♪
♪ They've returned to the beginning, ♪
♪ The resistance they tail. ♪
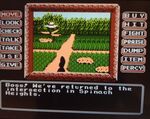
At the intersection of Spinach Heights, our heroes are presented with familiar scenes.
From the first screen, our heroes can move to the patch, town, or lake, or they can go back to where Sir Cucumber first met Percy. Sir Cucumber decides to move towards the lake, and, upon looking around, finds that the Fern birds are still flying around. Upon checking their nest, this time, however, instead of a gold coin there's just baby birds (and no, you can't take the baby birds, because apparently that's cruel or whatever).
Our brave hero, realizing that he's in a land of vegetables and that vegetables need water, decides to take some of the water from the lake, figuring that it might come in handy. Checking the bushes in the same area, our heroes discover a blue umbrella, which they of course take because, when life hands you free umbrellas, you take 'em! Sir Cucumber then decides to move ahead and return to the small apple shrine, the shrine still beaming from the offering they gave it back in the first chapter (it's all coming together). This time, however, Sir Cucumber checks with Percy, who tells him that the shrine spoke to him and told him that Saladron hates scissors... whatever that means. With water and advice from a deity, Sir Cucumber decides to return to the intersection.
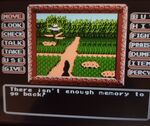
Returning to the intersection, Sir Cucumber first attempts to move towards the town before Percy reminds him that they're fugitives and that the guard is looking for them. Realizing that his squire makes a good point, Sir Cucumber attempts to go back, which causes Percy to tell Sir Cucumber they don't have enough memory to go back (this game is great).
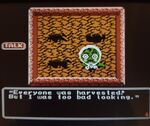
Realizing they only have one option, our heroes move to the Patch. Everything looks the same on the outside, with the same fence, same bushes, and no vegetables sign, but, upon going under the hidden passage, our heroes make a horrifying discovery. Only Wat Mel of the Melon family is left! Attempting to talk to Wat Mel only results in him wheezing. Ever compassionate, Sir Cucumber gives Wat Mel some of his water, and Wat Mel reveals the horrible truth. The rest of the Melon family was harvested by the farmies, and the only reason Wat Melon was spared was because the farmies deemed him too bad looking to be harvested.
Wat Mel also reveals that he saw Mr. Leek carrying a blue umbrella, but he appears to have lost it (wait a minute!). Hearing this Sir Cucumber solemnly swears to take down Minister Pumpkin and avenge the deaths of the Melon Family! Sir Cucumber then has Percy check the holes, learning that, while holes one and two are empty, hole three is very deep.
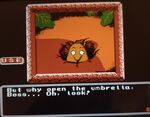
Checking hole three again, we find out that it's actually a mole hole, but it doesn't look like the mole is home... SUDDENLY, Sir Cucumber, in a moment of brilliance, realizes that moles dislike the sun and uses the umbrella they found to create shade, coaxing the mole out of his hole. Truly our hero is a man of brains and brawn.
Checking the mole, Percy informs Sir Cucumber that the mole is thirsty, and, never one to leave a soul in distress, Sir Cucumber happily gives the mole some water. Thanking our heroes, the mole then gives them a sweet lore dump, informing our heroes that deep within the Parsley Forest lies a monster named Saladron, who is guarding the legendary Yam Medallion. After talking to the mole twice more, the mole gives our heroes half of some instructions he found near a big tree, apologizing about not being able to find the other half. Talking to the mole again reveals that Sir Cucumber must seek out the forest guard and that Wat Mel can help us. Returning to Wat Mel, talking to him causes him to tell Sir Cucumber that Mr. Leek is the forest guard and that he has a shack "over there" (his words, not mine). After this conversation, Sir Cucumber now has access to the shack. allowing him to move to it.
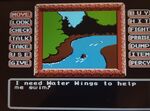
The shack, made of leeks, appears to be abandoned (although checking the vicinity twice will reveal a farmie that our heroes wisely decide not to fight). Not seeing anyone here, they decide to move forward, finding a beautiful stream behind Mr. Leek's shack.
Unfortunately, because Percy can't swim, our heroes must go back and attempt to find water wings for him. Returning to the shack, talking to Percy causes him to ask if anyone is home, which summons the forest guard Mr. Leek. Talking to Mr. Leek, the forest guardian informs us that he knows Percy can't swim and that he has something important to tell Sir Cucumber, but he forgot what it was (some help this guy is). Remembering that Wat Mel told him that Mr. Leek dropped his umbrella and being the pure hearted soul he is, Sir Cucumber gives Mr. Leek back his umbrella. Rewarding Sir Cucumber for his deed, Mr. Leek gifts Percy a set of water wings, allowing our brave heroes to cross the stream. But, then, suddenly, as soon as they cross the river they come face to face with a farmie! Unable to escape through stealth, Sir Cucumber resolves to fight his way out.
Drawing his sword, the mighty Sir Cucumber engages in the most sacred form of combat known to vegetables... ROCK PAPER SCISSORS! The combat in this game has two stages to it. First, you must defeat your opponent in rock paper scissors. You know, standard stuff.
Using the directional pad, our hero's options are Up and Down, which both do rock; left, which does scissors; and right, which does paper. After defeating the farmie in rock paper scissors, the vegetable warrior must then use the directional pad to predict the direction the farmie will face as they spin around. If you get both of these right, you will defeat your opponent. Opponents can have, I believe, between one and five points (points are the number of rounds you need to win to defeat them). Luckily, this fight only requires you to win one round, which the daring Sir Cucumber easily does, knocking away the farmie's weapon before slicing him in half with a mighty blow. After defeating the farmie, our heroes come face to face with their most terrifying foe yet... A MAZE!
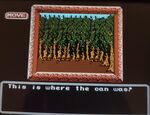
The way our heroes move in the maze is pretty cool. Hitting move gives you full control over the directional pad, allowing you to move in any direction the game will allow. I'll be honest, the maze is very confusing because all the screens look the same. It's just trees, corners with trees, and edges with trees. The goal is to get to the center of the forest, so taking paths that get you further into the forest is your best bet. Inside the forest, there are various items our heroes can collect, such as a pouch with a gold coin in it, an empty pouch, a tin can, and shovel. Important note: Before you leave the maze, you need the tin can and the shovel. One thing the game does is kind of helpful; it lets you know if you've already been to a part of the maze with an item in it by telling you that this is where you found the item. Like I said, my best tip is to constantly attempt to take paths that lead to deeper into the forest. Those are your best bet. Or you can look up an answer key, because the maze is horseshit!
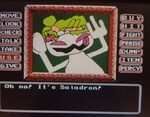
Eventually, with enough luck and perseverance, our heroes find the exit of this maze and find themselves staring down a spooky-looking evil tree. Checking the sign, Percy tells us it says "beware," but the valiant Sir Cucumber laughs in the face of danger and fearlessly prepares to enter the tree. Unfortunately, Percy says he hears something snoring inside the tree and tells us to throw something inside the tree instead. Rolling his eyes at his squire's cowardice, Sir Cucumber tosses the tin can inside the tree, awakening the terrifying Saladron.
Not wanting to end up the beast's dinner and seeing no other option, Sir Cucumber draws his sword and prepares to face down the monster. Locked in a terrible fight with the beast, Sir Cucumber remembers the words that the apple shrine told him. "Saladron dislikes scissors," he thinks to himself before realizing Saladron only ever draws paper. Exploiting his foe's weakness, Sir Cucumber draws scissors three times and successfully looks in his foe's direction three times, draining the monstrosity of its points. Striking down the foul beast with a mighty blow, Sir Cucumber then heads into the evil-looking tree.
The inside of the tree is very dark, and both Percy and Sir Cucumber can barely see a thing. One thing they can see is an altar. Checking it reveals that it's an altar to the legendary King Yam II. Checking the vicinity, we find a mound of dirt. Using the shovel on the dirt five times, Percy hits something hard! Checking it reveals that it's the Yam Medallion, the legendary treasure we're looking for! Taking the medal, Sir Cucumber and Percy leave the tree, finding Mr. Leek waiting for them. Sir Cucumber talks to Mr. Leek, who thanks him for defeating Saladron and agrees to take Sir Cucumber and Percy to the resistance base.
That will bring this chapter to an end. The gallant and brave Sir Cucumber defeated the man-eating Saladron and reclaimed the legendary Yam Medallion. Having reclaimed the Medallion and defeated the dreaded Saladron, our heroes have finally been invited to the resistance base, getting one step closer to saving Princess Tomato and ending Minister Pumpkin's reign of tyranny. But, of course, that will be for another month. Before we go, though, these great heroics have inspired another song.
♪ In search for the Medallion, ♪
♪ The Saladron they tailed, ♪
♪ They faced off in the forest, ♪
♪ Of course, Sir Cucumber prevailed! ♪
To Infinity and Beyond
Written by: Waluigi Time (talk)
Greetings space rangers, and welcome back to more Toy Story 2. Today's going to be another short section because it's time to tackle the third boss level of the game, Toy Barn Encounter! It requires 18 Pizza Planet Tokens to unlock.
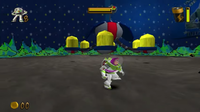
This time around, the boss arena is just a circle, in a giant space display similar to the room where we fought the Buzz Lightyear Buggy in Al's Space Land. The ground isn't flat though, as there's several craters, and four of them contain batteries, so if you're lacking on health, it's pretty generous. Anyway, as always, take a few steps forward and a giant Laser-Bot descends from the ceiling as the boss music kicks in.
For the first part of the fight, the giant Laser-Bot will just hover around and fire its laser, usually regardless of whether Buzz is in its line of fire or not. Unlike its smaller counterpart, it won't move around the room to re-adjust its laser, it just kind of does its thing and doesn't even really make an effort to chase Buzz all that much. Its size is actually somewhat of a disadvantage to it, as there's plenty of room to avoid its laser and not much else it can do about it. It has six pods, each containing some of the standard Zurg-Bot enemies we've seen in the levels prior. (The pods seem to be their own objects, as they won't damage you if you jump into them.)
The first six times you damage the giant Laser-Bot, one of the pods will open, releasing the Zurg-Bots inside. Since the giant Laser-Bot is flying above you, you'll either want to jump when you fire your laser, or use visor view. Once a pod has been opened, the giant Laser-Bot becomes invincible to all attacks until you defeat the Zurg-Bots, indicated by it glowing green. It's kind of a shame, since it would be cool if you could open all the pods at once for an extra challenge, but oh well.
For the most part, the enemies are the same as always, with one notable exception in that the Copter-Bots will now survive a single uncharged laser shot. Additionally, their range covers the entire arena, so there's no escaping them. The first pod contains a single Spring-Bot. A single charged shot will take it down as always, no problem. The second pod contains a single Laser-Bot of the normally sized variety. Once again, another charged shot does the trick. Beginning with the third pod, they'll start throwing two Zurg-Bots at you at once, and this one contains both a Spring-Bot and a Copter-Bot. Personally, I recommend dealing with the Spring-Bot first. The Spring-Bot will follow Buzz much faster than the Copter-Bot, so you can easily split them up and deal with them one at a time. Both will go down with, you guessed it, a single charged shot. The fourth pod contains another Laser-Bot and a Car-Bot, and once again I recommend splitting the two of them up and dealing with the Car-Bot first. They both take one charged laser shot. But the laser can only carry you so far, because the fifth pod contains yet another Spring-Bot and a Shield-Bot. If you take advantage of the Shield-Bot stopping in place while you use the laser, you can split them up easily and get a charged shot off on the Spring-Bot before defeating the Shield-Bot with two spins. The sixth and final pod contains a Laser-Bot and a Shield-Bot, nothing new here, you already know what to do with these. You can split these up in any order you want, whether you lure the Shield-Bot away from the Laser-Bot or use your laser to keep the Shield-Bot at bay and take out the Laser-Bot.
With all the pods taken care of, now the real fight begins against the giant Laser-Bot itself. The length of this phase depends how much damage you clocked on it while opening the pods. I would recommend getting as much damage with charged shots as you can during the first part, as that's easier to deal with. Anyway, the giant Laser-Bot becomes much more aggressive, more actively chasing Buzz in an attempt to deal damage. It can also now hover lower to the ground, allowing it to damage you if you try to stay underneath it. However, it won't become invincible anymore, so that's nice. Just keep your distance and fire that laser (or spin attack when it's in reach, if you prefer) until it runs out of health and explodes.
So that's, in my opinion, one of the more interesting boss levels of the game. Actually, this serves as a "last stand" of sorts for the Zurg-Bots, as the rest of the game phases them out and brings in new enemy types. The Laser-Bots and Shield-Bots appear one more time in the next level, but the other three don't appear again in the game, though we'll still be seeing some of them on our return trips to previous levels. Hope you weren't too attached.
Gameplay screenshots were taken from Nin's playthrough on YouTube.
Mach Speed Mayhem
Hello, 'Shroom readers! Welcome back to one of the last installments of Mach Speed Mayhem! I've said this before, but it feels almost unreal how close we are to the finish... and because we're close, you guys are finally throwing the anime characters at me! To my detriment. This month, we'll cover #31: Lucy Liberty, the first original character to appear besides our heroic protagonist!
GP Legend series
Debuting in the second episode, Lucy actually shows up in a very incidental way at first! She starts as a background character during the episode. Rick overhears her talking about superstar Jack Levin, and later on, sees her in a bus. Which is unlucky enough to be attacked by a bunch of random hooligans! Rick, already on the scene, tries to stop them, but it's Captain Falcon and his iconic Blue Falcon that really make an impression. Enough that Lucy and her friends show up at the race of the day, watching excitedly... and at the end of the episode, Lucy shows up, ready to apply as a member of the Mobile Task Force!
The third episode goes ahead and shows us all about Lucy's first days on the team. Her practice laps and initial tussle with Baba, her newfound love for engineering and work under Dr. Clash, and her drive to win and succeed! Even when the Dragon Bird is too much for her, she still goes all out to try and show off for the team, even when it results in a crash. Despite her hotheadedness, though, she's able to demonstrate her skills under pressure, being the one to ensure the Dragon Bird gets repaired in time for the race and to have a proper showdown that stops Zoda from winning. And that's how Lucy joins the Mobile Task Force, as an official and proud member!
After that, she mostly spends her time as a significant background character. She'll flip between the racetrack and the garage, putting her all into both. In fact, in episode 12, she's the surprise winner! Now, granted, the episode largely focused on Black Shadow's first time on the track, but thanks to track damage the race ends up cancelled, with Lucy the lucky lady leading the leaderboard at the lapse of the laps. Her next major role comes in episode 19, where Lucy has gained weight, and immediately develops a crushing complex about it. This lets the dastardly evil duo of Gomar and Shioh exploit her, using her current desperation to line their own pockets with scam item after scam item. Once Lucy finally snaps, she goes barging in and finds them building an F-Zero machine. A quick sob story convinces her to help build them an F-Zero machine, which she does with ease, creating a new two-person F-Zero machine!
Which Gomar and Shioh plan to use for EVIL, MWAHAHAHA. Unfortunately for them, they weren't listening to Lucy's tips, and they end up burning themselves out and losing. Still, Lucy's proved she can make a solid machine, and that's enough for her! Her next significant role is in the Ladies' Race, where like the other women of F-Zero, Lucy joins and gets into a ridiculous catfight. She ends up losing the race after she unleashes a firestorm of hidden missiles within her machine, trying to blast Miss Killer right out of the race. Unfortunately for her, it turns out that you're not allowed to use full-blown military warfare in F-Zero, so she ends up getting disqualified. Worth a shot. Lucy's final major role outside of support is in the Leon episode, where the new employee of the Falcon House coffee shop, Leon, quickly and thoroughly develops a crush on her. He's also very shy, and a werewolf, so he's unable to come up with the way to express his feelings... that is, until Lucy gets in trouble during the race, when her machine is flipped over and nobody can get her out of it. Leon goes full wolfman and flips it with ease, allowing Rick to rescue Lucy, but causing Leon to leave without ever saying anything. Lucy regrets it, but she's able to move on and never mention Leon again, so all is well.
Lucy does get one more moment of significance near the end of the series. She has an encounter with Miss Killer in one of the last episodes, isolating her on the side of the track and telling her to back off for all the harm she's done and heartbreak she's caused Rick. Miss Killer, to Lucy's surprise, agrees, and gives Lucy a datachip - this is after Miss Killer has been un-brainwashed, after all. Lucy is the one to deliver this vital info to the Mobile Task Force, helping them mobilize their final counterattack for the grand finale! And that's about it. After that, she just makes a few more group shots up through the end of the series. Like everyone who isn't Rick, Falcon, or Jody.
In the spinoff GBA games... well, not many people in Japan got to play as Lucy in F-Zero: GP Legend! You see, she was an e-reader exclusive, like The Skull, Silver Neelsen, and Miss Killer. The e-Reader crashed and burned, as we all know, and living in the USA allowed people to play as her as she and the other e-Reader only characters were added as normal unlockables. How nice! F-Zero Climax doesn't add anything interesting for her personal bio, but her machine bio adds that the Elegance Liberty is designed as a data-gathering machine, like Clash's Crazy Bear. But she's got high potential, as does her machine. Hit the course right and she's up there with the best of them!
That's all I've got on Lucy. This month is the second to last vote of them all, so go vote vote vote!
SIMulation
How To Feed Your Pit Beast Like a Good Pit Beast Owner
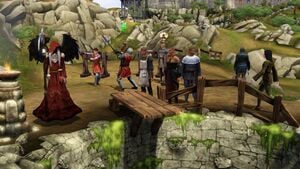
In this month, we will present necessary information on how to properly care for a pet Pit Beast, should you ever own one. This lovely creature originates from The Sims Medieval, a The Sims 3-styled spin-off dedicated to controlling a single Sim and quests in the medieval era, and this section is a departure from our normal helpful tips and instructions dealing with The Sims 4.[1] The game itself is quite a unique entry in the series, and of course, the pet described here is one of the animals exclusive to the game. Who needs cats and dogs when a gruesome Pit Beast will be just as lovable your endearing companion?
- Prerequisites
- The Sims Medieval: This is how you can buy yourself a Pit Beast for your kingdom, as every kingdom comes with a Pit Beast.[2][3]
- A Watcher[4]: You need someone who can guide your Sims towards the right direction, lest you want your kingdom be overwhelmed by dire chinchillas.[5][6] That person would be you.
- A Hero Sim: Any Hero Sim can feed the Pit Beast. Some, such as Knights and Spies, even require to feed it as part of their daily responsibilities.
- A Judgement Zone: Need to have one so your people don't dare commit crimes in your kingdom.[7]
There are two best methods to feed a Pit Beast.
Feed some meat to it (not recommended)
1.Obtain some meat.[8]
Any kind of meat will do, whether it comes from the land, sea, or air. Just as long as it came from a dead animal, the Pit Beast is not some kind of picky eater!
- One of the options is buying it at the market, either from your Merchant Hero Sim (as long as he's not sent to the stocks for any reason or if you're not him) or traveling to the Village Outskirts to buy from there.
- Another is to kill one of these animals yourself by taking a stroll in the Forest. Only Sims capable of combat (Knights, Monarchs, Spies, etc) can hunt in the forest.[9]
- Wimpy Sims who can't fight or are too poor can just fish an animal up from the lakes and ponds nearby.[10]
2.Go to the Pit of Judgement and select "Feed Beast".[11]
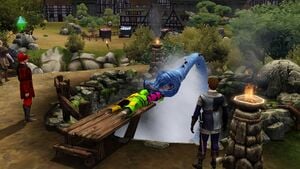
Your Sim will take out a chunk of meat and toss it in there, while your Pit Beast will happily eat it.[12][13]
- Your Sims are rewarded with a Fed The Beast buff (+5 focus for 24 hours). And your beast will be one happy beast.[14]
- In fact, your beast is so happy, you can jump down there and safely interact with it yourself! Err...not that you want to go down there. Pit Beasts aren't known to be very social creatures and need lots of solitude, if you know what we mean.
Sentence a Sim to the Pit of Judgement (recommended)
1.Be a Monarch, and find some criminal scum.[15]
When you're the Monarch of the kingdom, you can sentence anyone to the Pit of Judgement for any reason. Certain quests in the game even require that you send certain quest important characters to the Pit of Judgement.
- Of course, you can be sentenced to the Pit of Judgement yourself if you excessively shirk your duties or if you failed to complete a quest in time. Or if you poison Sims or cast harmful spells on others. However, all of those either take a long time or require that you be a specific hero Sim; sentencing someone as a Monarch is by far, the quickest way to send them to the pit.
- Besides, you don't want to be in the Pit of Judgement yourself, that's a given.
2.Watch the Pit Beast kick the crap out of that Sim.[16]
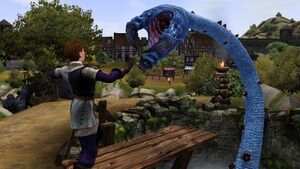
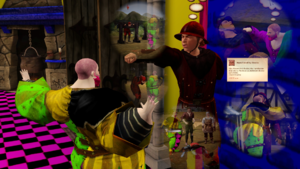
The ensuing thing that goes on is that it looks like the Sim is fighting the beast rather than the beast is devouring him.[17] Of course, the Sim will fight back however they can, and you see some fun battle animations that'll play out of it.[18]
- It's even possible that the sentenced Sim can survive this endeavor,[19] but fear not: just sentence him to the Pit of Judgement again once he has climbed out of the pit. The best chances of the Pit Beast eating the Sim are if his focus is especially low, and if the beast hasn't been fed beforehand...
3.See the Grim Reaper appear.
Next to the pile of bones that used to be the sentenced Sim. Man, he sure has a sense of fashion at this time! We really dig him in this game.
As it is written here, feeding a Pit Beast is quite low maintenance; all you need is some meat beforehand, either dead animal flesh, or alive human flesh. Maybe not everyone can own one in a kingdom for one reason or another, but once you get used to having your Mr. Snuggles around and hearing his sweet little shrieking piercing roars coming from the pit everyday, it's like meeting an old friend, a noise telling you that, hey, everything is okay and normal in this world.
References
- ^ But don't worry. We will talk about The Sims 4 in some future issue. Who knows what important tips we'll give out next?
- ^ It's buyable on Origin! Don't be confused with MySims: Kingdom, they are not the same game!
- ^ Your kingdom is already better than a certain mushroom variety of it.
- ^ A.K.A. "The Great Being That Watches Us" if you're part of a phony religion.
- ^ As quoted in the game's lore itself after the destruction of a prior kingdom, helpfully narrated by Patrick Stewart: "Reflecting on these events led you to an epiphany: people are dumb."
- ^ No I'm not kidding about the part with the Patrick Stewart narration and the dire chinchillas.
- ^ They probably will commit crimes anyway but hey, helps to have some sort of harmless preventative measure.
- ^ If you can eat meat, so can Pit Beasts.
- ^ Have you ever heard of a Physician beating up some boars in the forest? Yeah, thought so.
- ^ If you're short on §5 and are too lazy to visit merchants then this is perfect for you.
- ^ Don't select the other option, which is to jump down the pit! We heavily advise against this.
- ^ The meat will look like it came from bovine animal at the time, it's very difficult to tell.
- ^ When a Pit Beast is happy, it sounds threatening or angry, but that's just the Pit Beast's way of expressing itself, do not blame it.
- ^ Don't believe me? Go down for yourself, and you'll see the love flying in the air!
- ^ Being a Monarch is easy, just make one in Create-a-Sim, done. No need for merit, prestige, or being born right. You can even make anyone a Monarch with mods.
- ^ The Pit Beast is a tentacle monster, so "kick" is used in the loosest terms here.
- ^ Who else makes those stabbing swordy fighty noises down there, the beast? The beast doesn't even know how to wield a blade!
- ^ There's two animations, the one showcased in the image and another where they look like they're riding it, only to get slammed against the wall.
- ^ They climb out of the pit with either a tired or a triumphant stance.
Koops, Your Emblem is on Fire
HOFUOHIRHMOWR. Alright, we used up the keysmash intro. Time to cross it off my "random ways to start a section" list until they forget I used it.
This time we're going a little deeper into Bern, I guess.
We now have... three new units! And first off on the payroll...
Farina
A member of the 3rd Wing Ilia's Pegasus Knights.
Level 12 Pegasus Knight.
HP: 24 (75%)
Str: 10 (50%)
Skl: 13 (40%)
Spd: 14 (45%)
Luck: 10 (45%)
Def: 10 (25%)
Res: 12 (30%)
Con: 5
Move: 7
Weapon Ranks: A Lances.
Farina is the last of the Pegasus Knight trio of sisters to join the army. As a unit, her stats are pretty good, with all of them poking through the double digits. much like any other unit her class, her highest stats are skill and speed, but her base strength of 10 is largely sufficient, not to mention the 50% growth that comes with it. She is also obviously fast enough to double everything she needs to. Really, Farina doesn't even need any training to put in some work. That AND she comes with the ability of flight. Sure, she costs 20K to hire, but that number is a little irrelevant considering money grows on trees. Really, the only thing holding her back is a late join-time. She also has to contest for an Elysian Whip given that you aren't handed many of those, and all the other fliers are good candidates themselves. That is all you need to know.
With her here, the triangle attack is also available.
Taking the field at last, local man and his wife start to kill everything. Round of applause to the two.
Pent
Marquess of Reglay. Sole student of Archsage Athos.
Level 6 Sage.
HP: 33 (50%)
Str: 18 (30%)
Skl: 21 (20%)
Spd: 17 (40%)
Luck: 14 (40%)
Def: 11 (30%)
Res: 16 (35%)
Con: 8
Move: 6
Weapon Ranks: A Anima, A Staves.
After the stunts he's pulled back in the desert, I'd think this man needs no introduction. Unfortunately, the let's play curse has decreed that he wasn't acting like himself at the time.
Pent is god on Earth, or one of them at least. Not only are the man's stats very high, but he also is a sage, meaning he has access to magic (1-2 range), as well as A rank staves, giving him the ability to use any staff in the game, including of course, the physic staff he comes with. Pent is as good a staff-user as he is an attacker, which is no small feat. He's a pretty clear-cut unit. On to the woman now.
Louise
The wife of Marquess Reglay. A lethal beauty.
Level 4 Sniper.
HP: 28 (60%)
Str: 12 (40%)
Skl: 14 (40%)
Spd: 17 (40%)
Luck: 16 (30%)
Def: 9 (20%)
Res: 12 (30%)
Con: 6
Move: 6
Weapon Ranks: A Bows.
Louise is, much like her husband, a prepromote with good stats. However, she is plagued by one thing: Not having the same kit as her husband. As a sniper, there isn't much Louise can do that is all that special. She is probably the best user of the brave bow and silver bow given that it's easy to miss Geitz and she has A rank in bows, but being bow-locked is the main thing that keeps her from being great. That said, she still kills things, she has good stats, she does plenty fine on her own in player phase. She is nothing if not an extra round of combat every turn, if she manages to reach an enemy said turn that is. In any case, when the time comes where she has to fight, she'll be able to handle herself well enough. Her growths aren't half bad too, so she might gain a little bit of an edge over others in certain stats too. One thing is for sure, unless either is given extensive investment and resources, or you have Geitz, Louise is undoubtedly the best archer you can get, and is most likely ahead of even a trained Rebecca.
Fun Fact: Louise joins with an Elixir in Hector Hard Mode. Why? I have no clue [Laughing My Ass Off].
Next time, another chapter with two different versions. Later losers.
| The 'Shroom: Issue 182 | |
|---|---|
| Staff sections | Staff Notes • The 'Shroom Spotlight |
| Features | Fake News • Fun Stuff • Palette Swap • Pipe Plaza • Critic Corner • Strategy Wing |
| Specials | Blooper Race |


