|
|
| (137 intermediate revisions by 3 users not shown) |
| Line 1: |
Line 1: |
| {|class="notice-template" style="background:#AFEEEE;margin:.5em 2%;padding:0 1em;border:1px solid #000;width:95%" | | {|class="notice-template" style="background:#AFEEEE;margin:.5em 2%;padding:0 1em;border:1px solid #000;width:95%" |
| | | | | |
| It is requested that any part of this user's work page source is '''not copied and used''' on any another page. | | It is advised that any part of this user's own work is '''not copied and used''' on any other page. |
| |} | | |} |
| __TOC__
| |
|
| |
|
| =[[Golden Passage]]=
| | [[File:Wario Bucks.svg|x200px]] |
| [[File:WL4 Golden Passage symbol.png|150px|thumb|left|The level symbol for the '''Golden Passage'''.]] | | [[File:WL4 Art Blue Crystal.svg|100px]] |
| {{level
| |
| |title=Golden Passage
| |
| |image=[[File:WL4 gp.PNG|230px]]
| |
| |code=6-1
| |
| |game=''[[Wario Land 4]]
| |
| |difficulty=Easy
| |
| |notes=Unlike other levels in the game, the [[Frog Switch]] is at the beginning.
| |
| |before=<<
| |
| |after=>> | |
| }}
| |
| '''Golden Passage''' is the last level before the final boss, [[Golden Diva]] in the [[Game Boy Advance]] game, [[Wario Land 4]]. It is found in the [[Golden Pyramid]]. This level is very different and is made far more challenging than the others, because at the beginning, [[Wario]] is forced to jump on the [[Frog Switch]] upon entering the level (it is placed towards the end on every other level). The Frog Switch limits the time that the player can spend in the level. So in this case, with the Frog Switch being at the beginning of the level, the player must obtain the [[Keyzer]], along with all four [[Diamond Piece]]s within a strict time limit in order to progress to the next level.
| |
|
| |
|
| The time given to complete the level varies on the game mode.
| | ==Early iterations== |
| | While the [[Virtual Boy]] was still known by its development name VR-32, it was already being hinted that [[Wario]] was to have a major game appearance on the system. A [[Nintendo Power]] volume in December 1994 revealed computer-generated screenshots showing Wario in a virtual-reality atmosphere, with a caption asking ''"How would you like to meet Wario in person, face-to-face, eye-to-eye?"''<ref>Nintendo Power volume #67, December 1994, pg 87</ref> It is based on an artwork of Wario from ''[[Wario Land: Super Mario Land 3]]''. |
|
| |
|
| *On ''normal'' mode, the time given is 9:00 minutes.
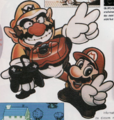
| | In early 1995 at the Winter {{wp|Consumer Electronics Show}} in Las Vegas, a single level demo of ''[[VB Mario Land]]'' was shown, demonstrating a side-scrolling game whith three-dimensional aspects such as moving from the background to the foreground and areas with a top-down view. A Wario head figure was shown within the demo.<ref>[[:File:VBML Tech Demo.ogv|Tech demo of ''VB Mario Land'' from Winter CES 1995]]</ref> Additionally, artwork of [[Mario]] and Wario holding a Virtual Boy was also shown at the Consumer Electronics Show. |
| *On ''hard'' mode, the time given is 6:00 minutes.
| |
| *On ''super hard'' mode (unlockable), the time given is 3:30 minutes.
| |
|
| |
|
| As with the [[Hall of Hieroglyphics]], there is no [[CD]] to collect in this level.
| | <center><gallery> |
| | | VR32 Wario Nintendo Power.jpg|Wario in a virtual reality atmosphere, as shown in early Virtual Boy concepts |
| ==Trivia==
| | VBMario.png|''[[VB Mario Land]]'' demo showing a Wario head as a villain |
| *The actual soundtrack of '''Golden Passage''' is unhearable, since [[Wario]] is not given a chance to listen to it. The usual fast-paced Frog Switch music will play thoughout the whole level. However, the hidden, unused soundtrack does exist, and can only be heard by avoiding landing on the Frog Switch, which can not be done during normal gameplay; only by using an Action Replay or another hacking device.
| | Wario Virtual Boy Artwork - Nintendo Power.png|Artwork of Wario and Mario with a Virtual Boy |
| | </gallery></center> |
|
| |
|
| =[[Deburina]]=
| | ''VB Mario Land'' was absent from {{wp|E3 1995}} in June and went unreleased. However, ''Virtual Boy Wario Land'' was first revealed at the E3 event under the title '''''Wario Cruise'''''<ref name="E3 catalogue">Nintendo products catalogue, May 1995, pg 34</ref>, and uses similar concepts to the ''VB Mario Land'' demo such as moving between the background and foreground of a level. The game was referred to as ''Wario Cruise'' very close to release, as shown in the upcoming game schedules of Nintendo Power issues up to a month before the United States release in November 1995.<ref>Nintendo Power volume #77, October 1995, pg 105</ref>. The logo for Wario Cruise was also printed on the back of the standard Virtual Boy system packaging as a 'coming soon' promotion, and the "WC" abbreviation remained in the game's final serial code. |
| {{Species-infobox | |
| |image=[[File:Deburina WL4.png]] | |
| |first_appearance=''[[Wario Land 4]]'' ([[2001]])
| |
| }}
| |
| [[File:Deburina dw.PNG|210px|thumb|left|A '''Deburina''' that has emerged from a picture in [[Doodle Woods]].]]
| |
| '''Deburina''' is one of the many enemies in the [[GBA]] platform game, [[Wario Land 4]]. They only appear in the level [[Doodle Woods]]. In some parts of this level, there are drawings of Deburinas on the wall, and some drawings come to life when [[Wario]] either gets near it or walks under it. Their in-game sprite seem to resemble a dancing, female hula-hooping pig. Deburina will slowly dance towards Wario, intending to damage Wario by grazing him with the seemingly dangerous edge of the hula-hoop. Deburina can not be attacked from the side while she is dancing, because the hula hoop would harm Wario. Wario can only defeat them by a ground pound on the head. | |
|
| |
|
| If the player does a standard jump and lands on a Deburina's head without doing a ground pound, then Deburina will fall to the ground, the hula-hoop will stop spinning and fall with her, and she will start to cry. She will then be completely defenceless, and she will be no longer immune to side attacks. However, if Wario leaves her alone for a while, then she will soon get back up, and start dancing again.
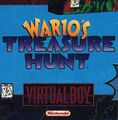
| | In an {{wp|EB Games|Electronics Boutique}} catalogue in late 1995, a prototype box art for the game gave it the title '''''Wario's Treasure Hunt'''''<ref>Electronic Gaming Monthly issue #76, November 1995, pg 182</ref>. This catalogue was also using images of the Virtual Boy packaging which contained the ''"Wario Cruise"'' title, which suggests that both pre-release titles were being used at the same time. |
|
| |
|
| =[[Smile]]=
| | <center><gallery> |
| [[File:Smile4u.PNG|200px|thumb|right|A '''Smile''' is a joke item. All you get is a smile. Nothing more.]]
| | VBWL-Beta Logo.png|''Wario Cruise'' logo |
| [[File:WL4_Item_Shop_Smile.png|thumb|left|The '''Smile''' in-game sprite.]]
| | VBWL-Beta Box Cover.jpg|''Wario's Treasure Hunt'' prototype boxart |
| The '''Smile''' appears in the Item Shop in [[Wario Land 4]]. This is the only thing in the item shop that is free, and it is designed to attract your attention immediatly, and then suddenly give your hopes up. Because this ''item'' is completly useless. It is a joke item, all you get is a smile from the shop-keeper; [[Mr. Game and Watch]].
| | </gallery></center> |
| | |
| All of the other items in the Item Shop, on the other hand, are there to assist you in defeating a boss. They all cost a certain amount of [[Frog Medal]]s, which is the currency that is used in the game.
| |
| | |
| =[[Golden Pyramid]]=
| |
| [[Image:PyramidWario.PNG|thumb|left|1- The Outer Side of the '''Golden Pyramid''' in a cutscene.]]
| |
| [[File:InnerGP.PNG|thumb|right|2- The Inner Pyramid.]]
| |
| '''Golden Pyramid''' can refer to two things, both from the [[GBA]] game [[Wario Land 4]].
| |
| | |
| 1. Is the '''Outer Pyramid''' that is raided by [[Wario]], which is seen in the opening cutsceen (refer to picture). Wario raids it because the in-game rumour is this pyramid has a large amount of treasure inside. He them gets stuck inside the pyramid after falling down a crevice.
| |
| | |
| 2. The '''Inner Pyramid''' is in the middle of the main room in the game. It is protected by five passages: the [[Entry Passage]], [[Emerald Passage]], [[Ruby Passage]], [[Topaz Passage]] and [[Sapphire Passage]]. Upon completing all five, Wario could enter the Golden Pyramid itself. It contains one level, the [[Golden Passage]], with the final boss, the [[Golden Pyramid]] following that.
| |
| | |
| ==Trivia==
| |
| *The Pyramid made a small minor appearance in ''[[WarioWare: Twisted!]]'', as a picture in the opening cutscene, along with the Music Box from ''[[Wario Land 3]]''.
| |
| | |
| =[[Blast Cannon]]=
| |
| [[File:Blastcannon ia.PNG|thumb|The Blast Cannon in action!]]
| |
| '''Blast Cannon''' is one of the items up for purchase from the Item Shop in the [[Game Boy Advance]] game, [[Wario Land 4]]. It appears as a multi-colored cannon. It is one of the weaker items in the game and can be purchased for only 2 [[Frog Medal]]s from the shop keeper, [[Mr. Game & Watch]]. The prices vary on the game mode. Items from the Item Shop are there to assist [[Wario]] in defeating one of the many challenging bosses in the game.
| |
| | |
| ===Effect===
| |
| The '''Blast Cannon''', when purchased, is wheeled to the Boss Room by [[Mr. Game & Watch]]. He then clicks his fingers, then the Blast Cannon fires a [[bomb-omb]] at the Boss, which causes 2 HP worth of damage. Mr. Game & Watch then leaves the room, leaving Wario to defeat a slightly weaker boss.
| |
| | |
| =[[Big Fist]]=
| |
| [[File:Big fist ia.PNG|thumb|left|The Big Fist throws a punch!]]
| |
| [[File:Big Fist.png|frame]]
| |
| The '''Big Fist''' is an item that [[Wario]] can purchase from the [[Wario Land 4#Item Shop|Item Shop]] in the [[Game Boy Advance]] platform game, ''[[Wario Land 4]]''. It can be bought off the Shop Keeper; [[Mr. Game & Watch]], for 10 [[Frog Medal]]s (depending on the game mode, it could cost more). All items from the Item Shop are used to assist Wario in defeating a boss by doing pre-damage at the battle's start.
| |
| <br> The Big Fist is the strongest item in the game, since it does the most damage to a boss. | |
|
| |
|
| ===Effect=== | | ==Early builds== |
| When purchased, Mr. Game & Watch will follow you to the Boss Room. He will transform into a big fist, which will then swing a powerful punch at the boss, taking a massive 10 HP worth of health. Mr. Game & Watch will then dissapear, leaving Wario to fight a greatly weakened boss.
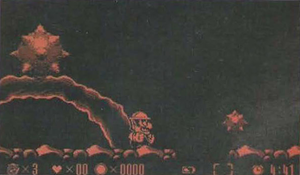
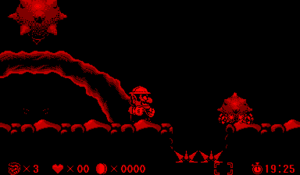
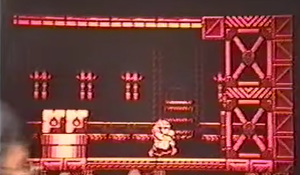
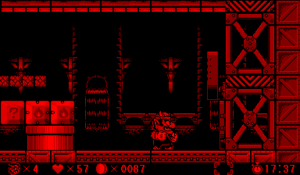
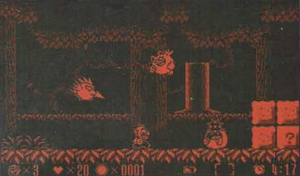
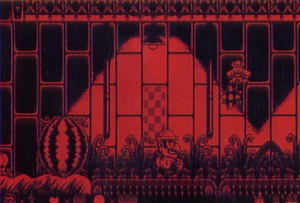
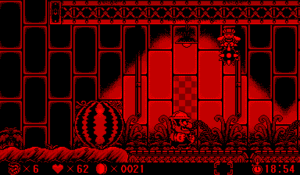
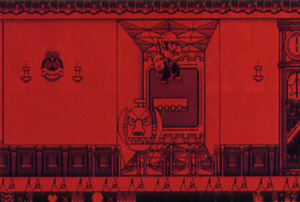
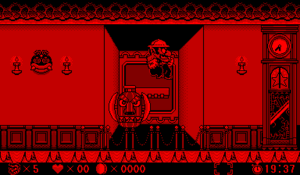
| | Four builds of the game are known to exist, which are most easily identified by the different designs of the heads-up displays (HUD) at the bottom of the screen. |
|
| |
|
| ==Trivia==
| | [[File:VBWL prerelease HUDs.png|center]] |
| *The '''Big Fist''' looks a lot like [[Master Hand]] and [[Crazy Hand]] from [[Super Smash Bros. Brawl]].
| |
|
| |
|
| =[[Frog Switch Block]]=
| | The earliest build seen in footage at E3 1995 show that stages originally didn't feature [[key]]s, and the elevator at the end of stages were already open. Wario's warp pipe animation was not yet functioning, and the screen instead faded to black between rooms. The animation when ground pounding enemies was different, with no explosion effect like the final game.<ref>P, Anthony (January 30, 2017). [https://www.youtube.com/watch?v=Op5EkC7GbxQ&t=9294s E3 1995]. ''YouTube''. Retrieved May 3, 2022.</ref> |
| {{tem|conjecture}}
| |
| [[File:Trasp.FSB.PNG|thumb|left|The transparent Frog Switch Blocks, preventing [[Wario]] in accessing an area.]]
| |
| [[File:Solid.FSB.PNG|thumb|The solid Frog Switch Blocks, after hitting the [[Frog Switch]], allowing Wario to access an area.]]
| |
| The '''Frog Switch Block''' appears in the [[Game Boy Advance]] game, ''[[Wario Land 4]]''. These Blocks have a frog face on it. They can either appear solid ([[Wario]] is not able to walk through them), or transparent (Wario is able to walk through them). Depending if Wario has hit the [[Frog Switch]] or not, they may switch around. Eg. All transparent Blocks will become solid, and all solid Blocks will become transparent. This would open up new areas only accessible by hitting the Frog Switch, so the player may have to find the rest of the [[Jewel Piece]]s or maybe even the [[Keyzer]] within a time limit. | |
|
| |
|
| =[[Puzzle Room]]=
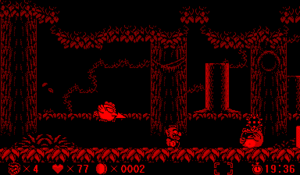
| | Screenshots of a second build seen in magazines around September 1995 first showed a space for the key in the HUD, and the coin counter was changed to four digits. A third build had a different coin design in the HUD, and used digits more resembling the in-game text. |
| [[File:WL4 GiantDiamond.jpg|thumb|A '''Puzzle Room''' in [[Palm Tree Paradise]].]]
| |
| A '''Puzzle Room''' in the [[Game Boy Advance]] game ''[[Wario Land 4]]'' is a room where [[Wario]] can collect a [[Giant Diamond]], or a combination of 1000pts.; but only if the player solves a puzzle before-hand. They are found in a [[Purple Pipe]], and there are two in each level, not including the [[Entry Passage]] and the [[Golden Passage]]. The puzzles vary in difficulty, depending on how far Wario is in the game. For each puzzle, Wario must work out a way to get to the Giant Diamond, or the 1000pts.
| |
|
| |
|
| For example, in the picture on the right, Wario must throw [[Dr. Arewo Stein]] to hit the [[! Switch]] and activate a set of stairs. Wario will then be able to reach his prize of a Giant Diamond.
| | In the November 1995 {{wp|Nintendo Space World|Famicom Spaceworld}} official guidebook, screenshots of both the third and final build were published together.<ref>Famicom Spaceworld official guidebook, November 1995, pg 10 & 28</ref> |
|
| |
|
| Solving these rooms is optional, and is not nessesary to completing the main game, but rather if the player wanted to gain a few extra points.
| | {|width=100% class="wikitable" |
| | | ! Pre-release |
| =[[PET Bottom]]=
| | ! Final |
| {{species-infobox
| | ! Notes |
| |title=PET Bottom
| |
| |image=[[File:PET Bottom WL4.png]]
| |
| |species_origin=Bottle
| |
| |first_appearance=''[[Wario Land 4]]'' ([[2001]])
| |
| }}
| |
| A '''PET Bottom''' is one of the many enemies that appear in the [[Game Boy Advance]] game, ''[[Wario Land 4]]''. They only appear in the [[Ruby Passage]], and resemble a bottle full of a pink liquid, which has a sharp spear attached to the front of the cap. They have legs, and they walk back and forth. The only threatening part of a PET Bottom is the spear.
| |
| | |
| [[Wario]] can defeat a PET Bottom by either [[Wario Land 4#Controls|ground pounding]] the top side of the enemy, [[Wario Land 4#Controls|body slamming]] the non-sharp side, or by doing a [[Wario Land 4#Controls|super ground pound]] nearby; the PET Bottom will flip upside down and Wario can attack the underside.
| |
| | |
| ==Trivia==
| |
| Even though the '''"PET"''' part of the word '''PET Bottom''' is in capitals, it doesn't seem to stand for anything.
| |
| | |
| =[[Bugle]]=
| |
| [[File:Bugle ia.PNG|thumb|left|The '''Bugle''' sends out music notes, which damage the Boss.]]
| |
| [[File:WL4 Item Shop Bugle.png|frame]]
| |
| The '''Bugle''' is one of the eight items (nine, if the [[Smile]] counts) that can be bought at the [[Wario Land 4#Item Shop| Item Shop]] in the [[Game Boy Advance]] game ''[[Wario Land 4]]''. The Bugle can be bought of [[Mr. Game & Watch]], the shop keeper, for 4 [[Frog Medal]]s (depending on the game mode, it could cost more). All items from the Item Shop can be purchased to assist [[Wario]] in defeating a [[Wario Land 4#Bosses|Boss]] by doing pre-damage at the battles start.
| |
| | |
| The Bugle varies from a real life bugle, since it has multicolored stripes on it.
| |
| | |
| ===Effect===
| |
| When purchased, [[Mr. Game & Watch]] will follow the player to the Boss Room, carrying the '''Bugle'''. He will then start playing the Bugle and many music notes will come out and damage do 4HP worth of damage to the boss. Mr. Game & Watch will then leave the room, Leaving Wario to fight a slightly weaker boss.
| |
| | |
| =[[Game & Watch Collection 2]]=
| |
| {{Infobox
| |
| |image=[[File:GAWC2 Box.png|250px|Game & Watch Collection 2 box art]]
| |
| |developer=[[Nintendo Entertainment Analysis and Development|Nintendo EAD]]
| |
| |publisher=[[Nintendo]]
| |
| |released={{releasedate|Japan|December 15, 2008|USA|March 31, 2010|Europe|September, 2010|Australia|September, 2010}}
| |
| |genre=Various
| |
| |modes=Single player
| |
| |ratings={{ratings|esrb=E|cero=A}}
| |
| |platforms=[[Nintendo DS]]
| |
| |input={{input|nds=1}}
| |
| }}
| |
| [[File:G&Wcollection2 screenshot.PNG|thumb|left|The main menu of '''''Game & Watch Collection 2.]]
| |
| '''''Game & Watch Collection 2''''' is a rare, limited edition [[Nintendo DS]] game that was originally only available exclusively to [[Club Nintendo (Customer Rewards Program)|Club Nintendo]] of Japan in [[2008]]. In USA, Europe and Australia as of April 2010, it was made available to those reigions. Like the Japenese service, it it only available to Club Nintendo. It is the sequel of ''[[Game & Watch Collection]]'', which was also released on the Nintendo DS. Like the original, it came with both Mode A and Mode B. The original alarm feature is also included.
| |
| | |
| It includes three games, two which are exact ports (copies) of the original [[Game & Watch]] titles.
| |
| *''[[Parachute]]''
| |
| *''[[Octopus (Game & Watch)|Octopus]]''
| |
| *''Parachute X Octopus''
| |
| | |
| Parachute X Octopus is a combination of the two, where the player must catch parachutes on the top screen and the [[Octopus (character)|Octopus]] can be seen on the bottom screen.
| |
| | |
| ''Game & Watch Collection 2'' is one of the most expensive items on each of the Club Nintendo stores in each reigion.
| |
| | |
| | |
| | |
| | |
| ==Character appearances in ''Game & Watch Collection 2''==
| |
| *Rower (playable in ''Parachute'')
| |
| *Shark (enemy in ''Parachute'')
| |
| *Scuba-diver (playable in ''Octopus'')
| |
| *[[Octopus (character)|Octopus]] (enemy in ''Octopus'')
| |
| | |
| ==Gallery==
| |
| <gallery><center>
| |
| File:GAWC2 Icon.png|Game & Watch Collection 2 game icon.
| |
| File:ParachuteXoctopus.PNG|Parachute X Octopus during gameplay.
| |
| </center></gallery>
| |
| | |
| =Wario Forms Table=
| |
| {|width=100% cellspacing=0 border=1 cellpadding=3 style="border-collapse:collapse;"
| |
| |-
| |
| !Image
| |
| !Name
| |
| !Description
| |
| |-
| |
| |align="center" |[[File:WL4 Wario1.png]]
| |
| |align="center" |[[Wario]] (normal form)
| |
| |Wario in his standard form. In this state, he can perform a [[Wario Land 4#Controls|ground-pound]], ram enemies or blocks, crawl to get through tight spaces and throw objects such as enemies or rocks.
| |
| |-
| |
| |align="center" |[[File:WL4 Wario2.png]]
| |
| |align="center" |[[Puffy Wario]]
| |
| |Wario after getting stung by a [[Beezley]], or getting hit by the arrow of a [[Bow Balloon]]. His cheeks puff up, and he is able to float continually upwards. The effect ceases once Wario hits a ceiling.
| |
| |-
| |
| |align="center" |[[File:WL4 Wario3.png]]
| |
| |align="center" |[[Flaming Wario]]
| |
| |Wario catches fire from a [[Torcher]]. He will run without stopping while the fire spreads, however, the player can still make Wario jump by pressing {{button|gba|A}}. He will run in the opposite direction when he hits a wall, and any [[Bonfire Block]]s he touches will turn into ash. Falling into water will return Wario to his normal form.
| |
| |-
| |
| |align="center" |[[File:WL4 Wario4.png]]
| |
| |align="center" |[[Flat Wario]]
| |
| |When Wario gets crushed by a [[Compressor]], he will transform into [[Flat Wario]]. His body will become flat and as light as a feather. If he leaves the ground, he will fall back to earth slowly, swaying side to side, like a feather. He can get into small spaces. Wario can transform back into normal form by entering a [[Decompressor]].
| |
| |-
| |
| |align="center" |[[File:WL4 Wario5.png]]
| |
| |align="center" |[[Fat Wario]]
| |
| |Wario, fatter than usual! It can be achieved by eating the [[apple]]s that is thrown by an [[Apple Monkey]]. Wario is invulnerable to enemy attacks, and just by touching an enemy will defeat it. However, Wario's weight has doubled, so he cannot jump very high and he walks very slowly. The effect will wear off once Wario walks a certain distance.
| |
| |-
| |
| |align="center" |[[File:WL4 Wario6.png]]
| |
| |align="center" |[[Bubble Wario]]
| |
| |When Wario touches a large [[Bubble]] underwater, he will enter that bubble and float upwards until he reaches the surface. This effect is useless unless there is a water current. The bubble resists these currents, so Wario can access areas which are otherwise in-accessible.
| |
| |-
| |
| |align="center" |[[File:WL4 Wario7.png]]
| |
| |align="center" |[[Snowman Wario]]
| |
| |When a mound of snow falls from the ceiling, Wario will collapse and re-emerge as Snowball Wario. Snow will stick to Wario around his belly area, and will be greatly weighed down. When Wario sets foot on a slope, he will turn into a huge snowball and start rolling, breaking any [[Snowman Block]]s that get in the way.
| |
| |-
| |
| |align="center" |[[File:WL4 Wario8.png]]
| |
| |align="center" |[[Frozen Wario]]
| |
| |When a [[Yukiotoko]] sneezes (yuck!), it will exhale a blast of cold air. It's so cold, that it will freeze Wario instantly. He will be immobile, and will slide backwards. The ice will crack once Wario hits a wall or object.
| |
| |-
| |
| |align="center" |[[File:WL4 Wario9.png]]
| |
| |align="center" |[[Bouncy Wario]]
| |
| |When a [[Hammer Warrior]] strikes Wario with his hammer, Wario will curl up into a spring and transform into Bouncy Wario! The player is able to make Wario bounce to incredible heights by pressing {{button|gba|A}}. If left alone, he will gain bounce power. After jumping, Wario will transform back into his normal form by hitting solid ground.
| |
| |
| |
| |-
| |
| |align="center" |[[File:WL4 Wario10.png]]
| |
| |align="center" |[[Zombie Wario]]
| |
| |When a [[Skeleton Bird]] chucks goo at Wario, he will become contaminated and turn into a fearsome Zombie. Zombie Wario is slow moving, and jumping above a thin platform will cause him to fall through the floor, reaching otherwise inaccessible places. Wario can transform back by either touching water, or being exposed to bright lights.
| |
| |-
| |
| |align="center" |[[File:WL4 Wario11.png]]
| |
| |align="center" |[[Bat Wario]]
| |
| |Contact with a [[Minicula]] will transform Wario into [[Bat Wario]]. In this form, Wario takes on the appearance of a [[Bat]], and is able to fly by repeatedly pressing {{button|gba|A}} in order to reach high places. Like Zombie Wario, returning to normal form can be achieved by touching water or being exposed to bright light.
| |
| |}
| |
| | |
| | |
| =Wario Land 4 Item Damage Table=
| |
| {|width=100% cellspacing=0 border=1 cellpadding=3 style="border-collapse:collapse;" | |
| |-
| |
| !Item
| |
| !colspan="6" |Boss / Damage taken by Item
| |
| |-
| |
| |
| |
| !align="center" |[[Spoiled Rotten]]
| |
| !align="center" |[[Cractus]]
| |
| !align="center" |[[Cuckoo Condor]]
| |
| !align="center" |[[Aerodent]] | |
| !align="center" |[[Catbat]]
| |
| !align="center" |[[Golden Diva]]
| |
| |-
| |
| !align="center" |[[Apple Bomb]] | |
| |align="center" |2
| |
| |align="center" |2
| |
| |align="center" |2
| |
| |align="center" |1
| |
| |align="center" |2
| |
| |align="center" |1
| |
| |-
| |
| !align="center" |[[Blast Cannon]] | |
| |align="center" |3
| |
| |align="center" |3
| |
| |align="center" |2
| |
| |align="center" |2
| |
| |align="center" |1
| |
| |align="center" |1
| |
| |- | | |- |
| !align="center" |[[Vizorman]]
| | |[[File:VBWL S1 prerelease.png|300px]] |
| |align="center" |6 | | |[[File:VBWL S1 final.png|300px]] |
| |align="center" |4 | | |The floor in [[Stage 1 (Virtual Boy Wario Land)|Stage 1]] used to be positioned lower, and spikes weren't visible at the bottom of pits. The low amount of time at this point in the level suggest that the time limit used to be five minutes rather than twenty. |
| |align="center" |3
| |
| |align="center" |3
| |
| |align="center" |3
| |
| |align="center" |2
| |
| |- | | |- |
| !align="center" |[[Bugle]]
| | |[[File:VBWL S2 prerelease.png|300px]] |
| |align="center" |8 | | |[[File:VBWL S2 final.png|300px]] |
| |align="center" |5 | | |The earliest known build of the game showed what was to become [[Stage 2 (Virtual Boy Wario Land)|Stage 2]]. Elevators previously lacked a door and were open by default without requiring a key. The positioning of background objects was changed and a [[? Block]] was added. |
| |align="center" |4
| |
| |align="center" |4
| |
| |align="center" |4
| |
| |align="center" |3
| |
| |- | | |- |
| !align="center" |[[Black Dog]]
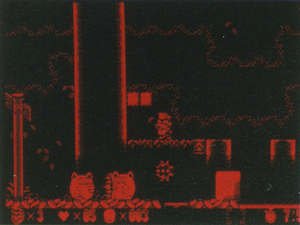
| | |[[File:VBWL S5 prerelease.png|300px]] |
| |align="center" |''NA'' | | |[[File:VBWL S5 final.png|300px]] |
| |align="center" |7 | | |In [[Stage 5 (Virtual Boy Wario Land)|Stage 5]], the [[Flying Fowl]] enemies had a different design with spikes. The position of blocks and [[Chippy]] enemies was also changed. |
| |align="center" |9
| |
| |align="center" |8
| |
| |align="center" |10
| |
| |align="center" |8
| |
| |- | | |- |
| !align="center" |[[Large Lips]]
| | |[[File:VBWL S5-2 prerelease.png|300px]] |
| |align="center" |''NA'' | | |[[File:VBWL S5-2 final.png|300px]] |
| |align="center" |9
| | |In a separate build of Stage 5, the [[Chippy]] enemies have a different design with more prominent eyebrows. The positioning of background objects and platforms was also changed and the floor is positioned lower. |
| |align="center" |8
| |
| |align="center" |14
| |
| |align="center" |7 | |
| |align="center" |5
| |
| |- | | |- |
| !align="center" |[[Big Fist]]
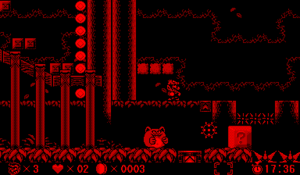
| | |[[File:VBWL S9 prerelease.png|300px]] |
| |align="center" |''NA'' | | |[[File:VBWL S9 final.png|300px]] |
| |align="center" |8 | | |An early build of [[Stage 9 (Virtual Boy Wario Land)|Stage 9]] featured a different conveyor belt design, lacking the arrow icons. The [[Honey-Bee]] enemies previously lacked antennas. |
| |align="center" |12
| |
| |align="center" |7
| |
| |align="center" |9
| |
| |align="center" |6
| |
| |- | | |- |
| !align="center" |[[Black Dragon]]
| | |[[File:VBWL S10 prerelease.png|300px]] |
| |align="center" |''NA'' | | |[[File:VBWL S10 final.png|300px]] |
| |align="center" |10 | | |An early build of [[Stage 10 (Virtual Boy Wario Land)|Stage 10]] showed a less detailed [[Blade-Face]] enemy, consisting of an outline without its usual pattern and shading. Some background details were removed and replaced with a simple black area in the final game. |
| |align="center" |7
| |
| |align="center" |9
| |
| |align="center" |8
| |
| |align="center" |7
| |
| |} | | |} |
|
| |
|
| =WL4 Story= | | ==Unused data== |
| On a dark and quiet night when everybody else is asleep, [[Wario]] starts the engine of his [[Wario Car]], and speeds through the city. A [[Black Cat]] is crossing the road but Wario makes no attempt to slow down, and he gains speed. Frightened, she covers her eyes with her paws, and the Car's wheels narrowly miss the her. A newspaper flies into the Cat's face. It reads ''"LEGENDARY PYRAMID DISCOVERED DEEP IN JUNGLE!!"''. The Cat takes a curious interest in the article.
| | {{multiframe |
| | | |align=right |
| [[File:WL4-falling.JPG|thumb|right|[[Wario]] falling down a precipice in the Pyramid]]
| | |1=[[File:VBWL unused level numbers.png]] [[File:VBWL level map.png]] |
| Meanwhile, Wario speeds out of the city and enters the desert. With his mind on the ancient treasure, he speeds full throttle toward the [[Legendary Pyramid]] mentioned in the newspaper article. After some time, he reaches the jungle, and Wario is forced to abandon his vehicle once it gets too thick. After much trekking through the jungle, he finally reaches the Pyramid. Unable to contain his excitement, he climbs it and without hesitation and finds an entrance. Inside the pyramid, he descends a set of stairs and comes across the Black Cat, which runs into the next room after catching sight of Wario. Curious, Wario follows. He and the Cat come across a precipice in the ground. The Cat jumps in and Wario, worried that he will be beaten to the treasure, jumps in after her.
| | |2=The unused stage map (left) with the final map (right). |
| | |
| He lands in a strange room somewhere near the center of The Pyramid. Here, Wario must clear the Pyramid's five [[Wario Land 4#Passages|Passages]]. A [[Wario Land 4#Bosses|Boss]] challenges Wario to a battle at the end of each passage. When Wario clears all five passages, the [[Golden Pyramid|Inner Pyramid]] is revealed. Inside lurks the [[Golden Diva]], final Boss and ruler of the Pyramid.
| |
| | |
| At the beginning of the battle, The Black Cat attacks the Golden Diva by scratching her face. The Golden Diva is unaffected, and she casually swallows the Cat. Wario then battles the Golden Diva. When defeated, the Cat is set free, the treasure is recovered, and Wario flexes his muscles in a not-at-all-modest way. At that moment, the Pyramid begins to shake and crumble. Scared, Wario gathers as much treasure as he can and escapes the Pyramid with the Black Cat leading the way out.
| |
| | |
| On the edge of the forest, Wario and the Black Cat watch the Pyramid crumble to the ground. They both laugh. The Golden Diva's jewelry flies out of the treasure sack, and The Black Cat absorbs them. Suddenly, she undergoes a transformation and turns into the legendary [[Princess Shokora]], true ruler of the Pyramid. She was defeated and transformed into a cat by the Golden Diva. The Princess gives Wario a kiss and says, ''"Thank you, Wario."'' Wario cannot believe his eyes, and he doesn't say a word as she is surrounded by four angels and flies up to heaven. Wario sits there for a while still making sense of it all.
| |
| | |
| | |
| =[[Pyramid Jewel]]= | |
| [[File:WL4-PyramidJewels.PNG|frame|The six kinds of '''Pyramid Jewels'''.]]
| |
| [[File:WL4-boss door.PNG|frame|left|The Boss Door, where the '''Pyramid Jewels''' fit.]]
| |
| | |
| The '''Pyramid Jewels''' are collectables in the [[Game Boy Advance]] game ''[[Wario Land 4]]''. Each one is made up of four [[Jewel Piece]]s, joined together. Each Jewel Piece is found in a [[Jewel Piece Box]]. Wario must collect these to proceed in the game, because at the end of each [[Wario Land 4#Passages|Passage]], there is a [[:File:WL4-boss door.PNG|Boss Door]] where the Pyramid Jewels fit. When all Pyramid Jewels in a passage are recovered, [[Wario]] gains access to the [[Wario Land 4#Bosses|Boss]]. Each passage has different colored Jewel Pieces to collect.
| |
| | |
| *[[Entry Passage]]: Purple
| |
| *[[Emerald Passage]]: Green
| |
| *[[Ruby Passage]]: Red
| |
| *[[Topaz Passage]]: Yellow
| |
| *[[Sapphire Passage]]: Blue
| |
| *[[Golden Pyramid]]: Gold
| |
| | |
| In the [[Entry Passage]] and the [[Golden Pyramid]], there is only one level. That means only one Jewel Piece to recover. All the other Passages have four.
| |
| <br clear=all>
| |
| | |
| =[[Wario Land 4/Staff]]=
| |
| ===Executive Producer===
| |
| *Hiroshi Yamauchi
| |
| | |
| ===Producer===
| |
| *Takehiro Izushi
| |
| | |
| ===Director===
| |
| *Hirofumi Matsuoka
| |
| | |
| ===Supervisor===
| |
| *Yoshio Sakamoto
| |
| | |
| ===Programmers===
| |
| *Katsuya Yamano
| |
| *Yoshinori Katsuki
| |
| *Nobuhiro Ozaki
| |
| *Kota Fukui
| |
| *Goro Abe
| |
| | |
| ===Designers===
| |
| *Hiroji Kiyotake
| |
| *Tomoyoshi Yamane
| |
| *Takehiko Hosokawa
| |
| *Masani Ueda
| |
| *Isao Hirano
| |
| *Shinya Sano
| |
| *Ryuichi Nakada
| |
| *Ko Takeuchi
| |
| *Takayasu Morisawa
| |
| | |
| ===Music===
| |
| *Ryoji Yoshitomi
| |
| | |
| ===Voice===
| |
| *[[Charles Martinet]]
| |
| *Junko Yoshitomi
| |
| *James Mesbur
| |
| *Ayumi Shimokawa
| |
| | |
| ===Artwork===
| |
| *Yasuo Inoue
| |
| *Sachiko Nakamichi
| |
| | |
| ===Special Thanks===
| |
| *T. Harada
| |
| *K. Nakamichi
| |
| *H. Momose
| |
| *F. Miyamoto
| |
| *H. Sugino
| |
| *K. Yoshimura
| |
| *M. Hattori
| |
| *Y. Mantani
| |
| *T. Morita
| |
| *W. Trinen
| |
| | |
| ===[[Mario Club Co., Ltd.|Super Mario Club]]===
| |
| *T. Hosio
| |
| *H. Katsui
| |
| *T. Nishizawa
| |
| *M. Syukutani
| |
| *M. Kawakita
| |
| *Y. Matsumoto
| |
| *T. Suganuma
| |
| *M. Fukushima
| |
| *Y. Eguchi
| |
| *H. Miyoshi
| |
| *H. Ookura
| |
| *Y. Ikeda
| |
| *M. Mori
| |
| *H. Takagi
| |
| *Y. Murata
| |
| *K. Ibata
| |
| *H. Takeda
| |
| *M. Mukai
| |
| *M. Hirose
| |
| *K. Miyake
| |
| *Y. Hashimoto
| |
| *S. Motou
| |
| *M. Takahashi
| |
| *H. Inaba
| |
| *N. Iwata
| |
| *R. Kodama
| |
| | |
| =[[Event Block (Wario Land 4)]]=
| |
| [[File:WL4-EventBlock.PNG|frame|left]]
| |
| [[File:TheBigBoard WL4.png|frame|[[The Big Board]]'s main feature is the many '''Event Blocks''' that appear in the level.]] | |
| {{articleabout|he object in [[Wario Land 4]]|the block in [[Mario Party]]|[[Event Block]]}}
| |
| The '''Event Block''' in the main feature in the ''[[Wario Land 4]]'' level [[The Big Board]]. It is a block with a constantly moving set of numbers from 1 to 6 on the face, and a blue button on the bottom where [[Wario]] can jump up and hit. It has many uses to help Wario make it through the level. When Wario stands below it, a ribbon appears, which shows what Wario could gain from a hit of the Event Block. The numbers stop rolling when hit, and then that number of spaces is counted on the ribbon. It can land on many things, including switching all dotted red lines to solid blocks and back again, giving Wario health, changing Wario to one of his [[Wario Land 4#Wario's Transformations|forms]], producing [[Dice Men]] (to throw), make lightning strike (damages Wario), drop a [[Giant Diamond]]. At the end of the ribbon, the [[Keyzer]] can be obtained, which opens the door to the next level. Wario can reach the end of the ribbon in a room in that is very colorful and decorative. It has the words ''Get a goal!'' written everywhere; the goal being the Keyzer.
| |
| | |
| =[[Black Cat]]=
| |
| {{character-infobox
| |
| |bg=
| |
| |border=#FF007F
| |
| |titlebg=#FF007F
| |
| |secbg=#FF007F
| |
| |image=[[File:WL4-Cat.PNG]]<br>The '''Black Cat'''
| |
| |full_name=Black Cat
| |
| |first_appearance= ''[[Wario Land 4]]'' ([[2001]])
| |
| |species=Feline | |
| |affiliation=[[Princess Shokora]]
| |
| |latest_appearance=
| |
| }}
| |
| {{Quote|Meow!|Black Cat|Wario Land 4}}
| |
| | |
| [[File:WL4-newspaper.PNG|400px|thumb|left|The Newspaper in the ''[[Wario Land 4]]'' opening cut-scene.]]
| |
| The '''Black Cat''' is one of the main characters in the [[Game Boy Advance]] game ''[[Wario Land 4]]''. But she is more than a Cat. Her true form is that of [[Princess Shokora]], ruler of a [[Legendary Pyramid]]. After her thousand year reign, the evil, power-hungry, money crazed [[Golden Diva]] was jealous of her power and beauty. So she defeated her in a magical duel and ascended to the throne. With her ancient powers, she transformed Princess Shokora into a being that lacked great beauty or power-an ordinary Black Cat-and banished her from the Pyramid forever. With nowhere to go, the Black Cat walked until she came across a city inhabited by modern humans. There, she lived on the streets with a group of stray animals and soon forgot about her exile. Many months later, the Pyramid was discovered by a group of archaeologists, but many strange occurrences, and even the disappearance of a [[Dr. Arewo Stein|group member]], caused all future investigations of the Pyramid to be cancelled, and a Newspaper Article was published. In the game's introduction, the Black Cat was crossing a steet whilst [[Wario]] speeds towards her in his [[Wario Car]]. Frightened, she covers her eyes with her paws, and the car's wheels narrowly miss her. A Newspaper flies into her face. It reads; ''"Pyramid discovered deep in jungle. [[Legendary Treasure]] nearly found, but accidents hindered findings."'' The Princess in her feline form remembers the once beautiful Pyramid that she once ruled in the hands of evil, and decides to try to steal it back.
| |
| | |
| [[File:WL4-BCpyramid.PNG|400px|thumb|The '''Black Cat''' and [[Wario]] in the [[Golden Pyramid]].]]
| |
| She journeys out of the city, through a desert, and deep into a jungle. She gets there before Wario, and deciding that a human accomplice may prove useful, shows him to the main room. With little power over the [[Wario Land 4#Bosses|Diva's guardians]], she persuades Wario to make his way through the Pyramid's [[Wario Land 4#Passages|Passages]], ridding the Pyramid of it's evil, and eventually entering the Golden Diva's stronghold. With no knowledge of the Black Cat's true form, Wario faces the challenge in the hope of a large amount of Treasure at the end of it all. When Wario and the Black Cat face the Golden Diva, the feline makes the first move by scratching the Diva's face. It has little effect, and the Diva swallows her whole. Wario challenges the Golden Diva to a duel. She accepts, and when Wario defeats her, she will spit out the Black Cat, and in a final wave of fury, she destroys the internal structure of the Pyramid. The Pyramid begins to crumble. With the Cat warning Wario to escape quickly, he gathers up as much treasure as he can (including the [[Legendary Treasure|Golden Diva's Jewelery]]). With the Black Cat leading the way out, they escape the Pyramid before it crumbles on top of them.
| |
| | |
| [[File:WL4-BCbattle.PNG|220px|thumb|left|The '''Black Cat''' challenging the [[Golden Diva]].]]
| |
| When they are at a safe distance, they watch the Pyramid fall to the ground. With the Cat contented about the defeat of the Golden Diva, and Wario satisfied with his haul of Treasure, they laugh. But suddenly, the Black Cat undergoes a transformation and turns into the beautiful [[Princess Shokora]], true ruler of the Pyramid. The crown, earrings, necklace and bracelets that Wario swiped from the Golden Diva return to their rightful owner. Wario cannot believe his eyes, with such a beautiful being standing before him. The Princess kisses Wario on the cheek and says, ''"Thank you, Wario..."'' With a wave of farewell, four angels surround her and lift her into heaven. Wario just sits there, trying to make sense of it all. He quickly dismisses it, and picks up the [[:File:WL4-Sack.PNG|sack]] of remaining Treasure, and drives back home. The ending cut scene is very similar to the opening one, except a '''White Cat''' crosses the road this time. The Newspaper that blows into this Cat's face is advertising a restaurant and it reads, ''"Steaks! Eat as much as you can!!"''.
| |
| <br clear=all>
| |
| ==Trivia==
| |
| [[File:Princessgameandwatch?.png|frame]]
| |
| The Black Cat can be seen in the rooms before the [[Wario Land 4#Bosses|Boss]] entering the [[Wario Land 4#Item Shop|Item Shop]]. But when Wario enters the Shop, the only other being there is [[Mr. Game & Watch]], the shop keeper. And if Wario purchases an item before facing the [[Golden Diva]], after the item's use concludes, Mr. Game & Watch will transform into the Black Cat. This implies that the Black Cat has an additional form as Mr. Game & Watch.
| |
| {{BoxTop}}
| |
| {{tem|WL4}}<br>
| |
| [[:Category:Wario Allies]]<br>
| |
| [[:Category:Wario Characters]]
| |
| =[[Legendary Treasure]]=
| |
| [[File:WL4-LegendaryTreasure.PNG|frame|The four '''Great Treasures''']]
| |
| [[File:WL4-newspaper.PNG|frame|left|The newspaper article about the '''Legendary Treasure''' that [[Wario]] reads.]]
| |
| The '''Legendary Treasure''' (or '''Great Treasure''') refers to the large amount of Treasure that [[Wario]] aims to steal from [[Golden Pyramid|An Ancient Pyramid]] in ''[[Wario Land 4]]''. He first hears about the Treasure when he read a [[:File:WL4-newspaper.PNG|newspaper article]], and he sets off towards the Pyramid in his [[Wario Car]] in the middle of the night; in the hope of having the Treasure all to himself. When speeding through the city, he almost runs over a [[Black Cat]]. The newspaper article flies into her face, and she seems to read it with a curious interest. At the Pyramid, the Black Cat guides Wario to the main room. Here, there are [[Wario Land 4#Passages|five passages]]. The four main ones ([[Emerald Passage]], [[Ruby Passage]], [[Topaz Passage]] and [[Sapphire Passage]]) each have a [[Wario Land 4#Bosses|Boss]] which guards a Great Treasure and three [[Treasure Chest#Wario Land 4|Treasure Chests]]. The boss [[Spoiled Rotten]] guards no Treasure. [[Cractus]] defends the Crown, [[Cuckoo Condor]] guards the Earrings, [[Aerodent]] wears the Necklace and [[Catbat]] protects the Bracelets. When each of these bosses are defeated, the Treasure Chests and the Great Treasure is collected, and stored into the [[Golden Pyramid]] on the main map.
| |
| [[File:GoldenDivaWL4.png|thumb|The [[Golden Diva]] wears all of the '''Legendary Treasure'''.]]
| |
| When all five bosses have been defeated, the Golden Pyramid will become accessible. This is the stronghold of the [[Golden Diva]], the game's final boss and the evil ruler of the Pyramid. The Golden Diva wears all of the Ancient Jewelry that was taken from the four bosses. There is also a wall with twelve treasure chests, three from each boss. If the Golden Diva is defeated, then in a final wave of fury, she will begin to destroy the internal structure of the Pyramid, causing it to begin crumbling to the ground. Panicking, Wario gathers up the Treasure and puts it into a sack, and makes an escape with the [[Black Cat]] leading the way out. When they reach a safe distance, they watch it crumble to the ground. Suddenly, the Black Cat transforms into [[Princess Shokora]], true ruler of the Golden Pyramid. The four Great Treasures that the Golden Diva was wearing fly out of the sack and return to their rightful owner. The Princess kisses Wario thank you and farewell. Four angels surround her, and they lift her into heaven. After sitting there for a while trying to make sense of it all, Wario grabs what remains of the Treasure, throws it into the back of his [[Wario Car]], and drives across the desert back home.
| |
| | |
| During the credits, various treasures fly out of the treasure sack and shown to the player. For each treasure, Wario remembers a scene from his childhood. To view the images of Wario's flashbacks, see [[Gallery:Wario Land 4#Wario's Flashbacks|here]].
| |
| <br clear=all>
| |
| | |
| =[[Heart Box]]=
| |
| [[File:WL4-HeartBox.PNG|frame]]
| |
| [[File:WL4-HBshot.PNG|frame|left||[[Wario]] opening a '''Heart Box'''.]]
| |
| The '''Heart Box''' in the [[Game Boy Advance]] game ''[[Wario Land 4]]'' is a box similar in shape and size to the [[Jewel Piece Box]] and the [[CD]] case. When opened, a [[500 Coin]] drops out, and a giant heart that changes color with a crown hovers above the open box. If [[Wario]] collects it, his health meter will be fully replenished. There are one of these to find in each level, except the [[Golden Passage]]. Their positions change with the [[Wario Land 4#Game Modes|Game Mode]].
| |
| | |
| =[[Super Mario 64/Media]]=
| |
| This is a list of all theme music from the [[Nintendo 64]] game ''[[Super Mario 64]]''.
| |
| | |
| ===Pre-game===
| |
| {{Media
| |
| |type9=audio
| |
| |name9=SM64-Title Theme
| |
| |pipe9=Pre-game theme
| |
| |description9=Title screen
| |
| |length9=3:32
| |
| | |
| |type10=audio
| |
| |name10=SM64-File Select
| |
| |pipe10=Pre-game theme
| |
| |description10=File select
| |
| |length10=1:09
| |
| }}
| |
| ===Stage themes===
| |
| {{media
| |
| |type1=audio
| |
| |name1=SM64-Main Theme
| |
| |pipe1=Stage theme
| |
| |description1=[[Bob-omb Battlefield]]
| |
| |length1=2:22
| |
| | |
| |type2=audio
| |
| |name2=SM64-Dire Dire Docks
| |
| |pipe2=Stage theme
| |
| |description2=[[Dire Dire Docks]]
| |
| |length2=5:01
| |
| | |
| |type3=audio
| |
| |name3=SM64-Snow Mountain
| |
| |pipe3=Stage theme
| |
| |description3=[[Cool, Cool Mountain]]
| |
| |length3=4:40
| |
| | |
| |type6=audio
| |
| |name6=SM64-Big Boo's Haunt
| |
| |pipe6=Stage theme
| |
| |description6=[[Big Boo's Haunt]]
| |
| |length6=4:52
| |
| | |
| |type7=audio
| |
| |name7=SM64-Lethal Lava Land
| |
| |pipe7=Stage theme
| |
| |description7=[[Lethal Lava Land]]
| |
| |length7=4:15
| |
| | |
| |type8=audio
| |
| |name8=SM64-Hazy Maze Cave
| |
| |pipe8=Stage theme
| |
| |description8=[[Hazy Maze Cave]]
| |
| |length8=5:48
| |
| | |
| |type5=audio
| |
| |name5=SM64-Slide Theme
| |
| |pipe5=Stage theme
| |
| |description5=[[The Princess's Secret Slide]]
| |
| |length5=4:34
| |
| | |
| |type11=audio
| |
| |name11=SM64-Bowser's Road
| |
| |pipe11=Stage theme
| |
| |description11=[[Bowser in the Dark World]]
| |
| |length11=3:57
| |
| }}
| |
| ===Boss===
| |
| {{Media
| |
| |type21=audio
| |
| |name21=SM64-Stage Boss
| |
| |pipe21=Boss theme
| |
| |description21=Level boss
| |
| |length21=2:10
| |
| | |
| |type19=audio
| |
| |name19=SM64-Boss Theme
| |
| |pipe19=Boss theme
| |
| |description19=Boss
| |
| |length19=4:35
| |
| | |
| |type20=audio
| |
| |name20=SM64-Final Boss
| |
| |pipe20=Boss theme
| |
| |description20=Final boss
| |
| |length20=4:00
| |
| }}
| |
| ===Around the castle===
| |
| {{Media
| |
| |type4=audio
| |
| |name4=SM64- Inside the Castle Walls
| |
| |pipe4=Castle
| |
| |description4=Inside the [[Princess Peach's Castle|Castle]] walls
| |
| |length4=3:04
| |
| | |
| |type17=audio
| |
| |name17=SM64-Looping Steps
| |
| |pipe17=Castle
| |
| |description17=Never ending staircase
| |
| |length17=0:36
| |
| | |
| |type12=audio
| |
| |name12=SM64-Merry Go Round
| |
| |pipe12=Castle
| |
| |description12=Merry-Go-Round
| |
| |length12=1:19
| |
| | |
| |type13=audio
| |
| |name13=SM64-Lullaby
| |
| |pipe13=Castle
| |
| |description13=[[Piranha Plant]]'s lullabye
| |
| |length13=2:43
| |
| }} | | }} |
| ===Transformations===
| | The game data contains an unused stage map showing a different arrangement to the final game. |
| {{Media
| |
| |type14=audio
| |
| |name14=SM64-Wing Cap
| |
| |pipe14=Transformation theme
| |
| |description14=[[Wing Cap]]
| |
| |length14=1:14
| |
|
| |
|
| |type15=audio
| | The stage numbers originally appeared to be reversed, beginning at 4-1 and ending at 1-Boss. The higher number may have indicated how deep Wario still remained under the ground, with the aim of the game being to climb higher. This early level map is also more consistent with the game's original product description at E3 1995, which indicated that ''"four dazzling, 3-D levels each feature 3 tough stages leading to the final confrontation"''.<ref name="E3 catalogue" /> The final game instead simply numbers the stages from 1 to 14. |
| |name15=SM64-Metallic Mario
| |
| |pipe15=Transformation theme
| |
| |description15=[[Metal Mario (form)|Metal Mario]]
| |
| |length15=1:22
| |
| }}
| |
|
| |
|
| ===Cut scene themes===
| | The skull graphic that indicates the boss stages was updated with shading for the final level map. Additionally, an arrow graphic stored next to the stage numbers suggests that there was a level select screen which went unused. A version number reading "/:Ver:BESTIM" can also be seen in the data. |
| {{Media
| |
| |type21=audio
| |
| |name21=SM64-Opening
| |
| |pipe21=Cut-scene themes
| |
| |description21=Opening
| |
| |length21=0:36
| |
|
| |
|
| |type18=audio
| | There are two unused sound files present in the game data. The first appears to be victory or stage clear music, and the other was likely used for a cutscene. |
| |name18=SM64-Game Over
| |
| |pipe18=Cut-scene theme
| |
| |description18=Game over
| |
| |length18=0:24
| |
|
| |
|
| |type16=audio | | {{media table |
| |name16=SM64-Staff Roll | | |file1=VBWL unused music.mp3 |
| |pipe16=Cut-scene theme | | |title1=Unused music |
| |description16=Staff roll | | |description1= |
| |length16=5:46 | | |length1=0:18 |
| | |file2=VBWL unused jingle.mp3 |
| | |title2=Unused music |
| | |description2= |
| | |length2=0:30 |
| }} | | }} |
| {{BoxTop}}
| |
| {{tem|SM64}}
| |
| {{tem|NavMedia}}
| |
|
| |
|
| |
| =[[Pig Head Statue]]=
| |
| {{species-infobox
| |
| |title=Pig Head Statue
| |
| |image=[[File:WL4-PigHead.PNG]]
| |
| |species_origin=Statue, pig
| |
| |first_appearance=''[[Wario Land 4]]'' ([[2001]])
| |
| }}
| |
| [[File:WL4-PigStatue.GIF|frame|left|A '''Pig Head Statue''' in [[Toy Block Tower]].]]
| |
| The '''Pig Head Statue''' is an object/enemy in the [[Game Boy Advance]] game ''[[Wario Land 4]]''. It appears in the level [[Toy Block Tower]], and some [[Puzzle Room]]s. It is a grey, pig-faced statue fixed on the level's background wall, and it will open it's mouth on regular intervals, spitting out [[fire]] which will smoulder on the ground below. If [[Wario]] touches or walks into the flames, he will transform into [[Flaming Wario]], which will allow him to break [[Bonfire Block]]s.
| |
| {{BoxTop}}
| |
| {{tem|WL4}}
| |
| {{tem|Pigs}}
| |
| [[:Category:Wario Land 4 Enemies]]
| |
| [[:Category:Wario Species]]
| |
| [[:Category:Pigs]]
| |
|
| |
| =[[Pearl Bird]]=
| |
| {{species-infobox
| |
| |title=Pearl Bird
| |
| |image=[[File:WL4-PearlBird.PNG]]
| |
| |species_origin=Bird
| |
| |first_appearance=''[[Wario Land 4]]'' ([[2001]])
| |
| }}
| |
| A '''Pearl Bird''' appears in the [[Game Boy Advance]] game ''[[Wario Land 4]]''. It is a strange, green bird with small wings, and a mouth that can expand to a large size. It is only seen once in a [[Puzzle Room]], in the level [[40 Below Fridge]]. It doesn't harm [[Wario]] in any way, but actually helps him by spitting out glass spheres which Wario can catch and [[Wario Land 4#Wario's Moves|throw]] at two [[! Switch]]es that would otherwise be out of reach. These ! Switches, when hit, will change corresponding colored blocks from solid to [[Dotted Line Block|transparent]], allowing Wario to pass through them to reach a [[Giant Diamond]]. The challenge is to make both colored blocks transparent at one time, so that Wario may reach the prize.
| |
| {{BoxTop}}
| |
| {{tem|WL4}}
| |
| [[:Category:Wario Land 4 Enemies]]
| |
| [[:Category:Birds]]
| |
|
| |
| =WL4 Table=
| |
| The passages, levels and bosses in the game are as follows:
| |
| ===[[Entry Passage]]===
| |
| This passage only has one level; the [[Hall of Hieroglyphs]], which, true to its name, uses hieroglyphics on the walls to teach Wario his basic moves. The boss of this passage is [[Spoiled Rotten]].
| |
|
| |
| {|width=100% cellspacing=0 border=1 cellpadding=3 style="border-collapse:collapse;"
| |
| |-
| |
| !Image
| |
| !Name
| |
| !Description
| |
| |-
| |
| |align="center" |[[File:WL4-Icon01.png|65px]]
| |
| |align="center" |[[Hall of Hieroglyphs]]
| |
| |
| |
| |-
| |
| |align="center" |[[File:WL4-Icon02.png|65px]]
| |
| |align="center" |[[Spoiled Rotten]] (boss)
| |
| |
| |
| |}
| |
|
| |
| ===[[Emerald Passage]]===
| |
| A nature-themed passage of low difficulty. The boss is a pot-plant called [[Cractus]].
| |
|
| |
| {|width=100% cellspacing=0 border=1 cellpadding=3 style="border-collapse:collapse;"
| |
| |-
| |
| !Image
| |
| !Name
| |
| !Description
| |
| |-
| |
| |align="center" |[[File:WL4-Icon03.png|65px]]
| |
| |align="center" |[[Palm Tree Paradise]]
| |
| |
| |
| |-
| |
| |align="center" |[[File:WL4-Icon04.png|65px]]
| |
| |align="center" |[[Wildflower Fields]]
| |
| |
| |
| |-
| |
| |align="center" |[[File:WL4-Icon05.png|65px]]
| |
| |align="center" |[[Mystic Lake]]
| |
| |
| |
| |-
| |
| |align="center" |[[File:WL4-Icon06.png|65px]]
| |
| |align="center" |[[Monsoon Jungle]]
| |
| |
| |
| |-
| |
| |align="center" |[[File:WL4-Icon07.png|65px]]
| |
| |align="center" |[[Cractus]] (boss)
| |
| |
| |
| |}
| |
|
| |
| ===[[Ruby Passage]]===
| |
| This passage is mechanical-themed. The boss is a giant cuckoo clock called [[Cuckoo Condor]].
| |
|
| |
| {|width=100% cellspacing=0 border=1 cellpadding=3 style="border-collapse:collapse;"
| |
| |-
| |
| !Image
| |
| !Name
| |
| !Description
| |
| |-
| |
| |align="center" |[[File:WL4-Icon08.png|65px]]
| |
| |align="center" |[[The Curious Factory]]
| |
| |
| |
| |-
| |
| |align="center" |[[File:WL4-Icon09.png|65px]]
| |
| |align="center" |[[The Toxic Landfill]]
| |
| |
| |
| |-
| |
| |align="center" |[[File:WL4-Icon10.png|65px]]
| |
| |align="center" |[[40 Below Fridge]]
| |
| |
| |
| |-
| |
| |align="center" |[[File:WL4-Icon11.png|65px]]
| |
| |align="center" |[[Pinball Zone]]
| |
| |
| |
| |-
| |
| |align="center" |[[File:WL4-Icon12.png|65px]]
| |
| |align="center" |[[Cuckoo Condor]] (boss)
| |
| |
| |
| |}
| |
|
| |
| ===[[Topaz Passage]]===
| |
| A toy-themed passage, the boss being a giant inflatable teddy-bear called [[Aerodent]].
| |
|
| |
| {|width=100% cellspacing=0 border=1 cellpadding=3 style="border-collapse:collapse;"
| |
| |-
| |
| !Image
| |
| !Name
| |
| !Description
| |
| |-
| |
| |align="center" |[[File:WL4-Icon13.png|65px]]
| |
| |align="center" |[[Toy Block Tower]]
| |
| |
| |
| |-
| |
| |align="center" |[[File:WL4-Icon14.png|65px]]
| |
| |align="center" |[[The Big Board]]
| |
| |
| |
| |-
| |
| |align="center" |[[File:WL4-Icon15.png|65px]]
| |
| |align="center" |[[Doodle Woods]]
| |
| |
| |
| |-
| |
| |align="center" |[[File:WL4-Icon16.png|65px]]
| |
| |align="center" |[[Domino Row]]
| |
| |
| |
| |-
| |
| |align="center" |[[File:WL4-Icon17.png|65px]]
| |
| |align="center" |[[Aerodent]] (boss)
| |
| |
| |
| |}
| |
|
| |
|
| ===[[Sapphire Passage]]===
| |
| This passage is horror-themed, with many ghosts and zombies appearing in the levels. The boss is [[Catbat]], a giant Cat with a [[Bat]] as an alliance.
| |
|
| |
| {|width=100% cellspacing=0 border=1 cellpadding=3 style="border-collapse:collapse;"
| |
| |-
| |
| !Image
| |
| !Name
| |
| !Description
| |
| |-
| |
| |align="center" |[[File:WL4-Icon18.png|65px]]
| |
| |align="center" |[[Crescent Moon Village]]
| |
| |
| |
| |-
| |
| |align="center" |[[File:WL4-Icon19.png|65px]]
| |
| |align="center" |[[Arabian Night]]
| |
| |
| |
| |-
| |
| |align="center" |[[File:WL4-Icon20.png|65px]]
| |
| |align="center" |[[Fiery Cavern]]
| |
| |
| |
| |-
| |
| |align="center" |[[File:WL4-Icon21.png|65px]]
| |
| |align="center" |[[Hotel Horror]]
| |
| |
| |
| |-
| |
| |align="center" |[[File:WL4-Icon22.png|65px]]
| |
| |align="center" |[[Catbat]] (boss)
| |
| |
| |
| |}
| |
|
| |
| ===[[Golden Pyramid]]===
| |
| The final area in the game. It only has one level, the [[Golden Passage]]. It's boss is the [[Golden Diva]], the last boss of the game.
| |
|
| |
| {|width=100% cellspacing=0 border=1 cellpadding=3 style="border-collapse:collapse;"
| |
| |-
| |
| !Image
| |
| !Name
| |
| !Description
| |
| |-
| |
| |align="center" |[[File:WL4-Icon23.png|65px]]
| |
| |align="center" |[[Golden Passage]]
| |
| |
| |
| |-
| |
| |align="center" |[[File:WL4-Icon24.png|65px]]
| |
| |align="center" |[[Golden Diva]] (boss)
| |
| |
| |
| |}
| |
|
| |
|
| |
| =[[Pinball Block]]=
| |
| [[File:WL4-PinballBlock.gif|frame|left]]
| |
| [[File:WL4-Pinball2.PNG|frame|[[Wario]] about to [[Wario Land 4#Wario's Moves|throw]] a [[Pinball]] into a '''Pinball Slot''', with a '''Pinball Block''' nearby.]]
| |
|
| |
| The '''Pinball Block''' is an object in the [[Game Boy Advance]] game ''[[Wario Land 4]]''. It only appears in the level [[Pinball Zone]]. It is a block that guards the door to the next room. Ithas a digital face that counts down how many '''Pinball Slots''' remain in the room. [[Wario]] must [[Wario Land 4#Wario's Moves|throw]] a [[Pinball]] in each of the four Pinball Slots. They have a mouth which opens and closes on regular intervals, determining whether or not the Pinball will enter the slot. If a Pinball is correctly placed in a Pinball Slot, the slot will disappear and it will drop a [[Coin (Wario Land 4)|50 Coin]]. With every Pinball Slot filled, the digital number on the Pinball Block will decrease by one, beginning from four. When it reaches zero it will flash briefly and disappear, dropping a [[Coin (Wario Land 4)|500 Coin]] and granting access to the door, which will lead to the next room in the Pinball Zone. There are a total of six Pinball Blocks amongst thirteen individual rooms in the level.
| |
| {{BoxTop}}
| |
| {{tem|Blocks}}
| |
| {{tem|WL4}}
| |
| [[:Category:Wario Objects]]
| |
|
| |
| =[[Karaoke (Medamayaki)]]=
| |
| __NOTOC__
| |
| [[File:WL4-Karaoke Album.gif|frame|left]]
| |
| [[File:Soundroom.PNG|thumb|230px|The Completed [[Sound Room]], with the '''Karaoke''' at the top.]]
| |
| The '''Karaoke''' (also known as '''Medamayaki''' or '''Sunny Side Up''' in English<ref>[http://www.animelyrics.com/game/warioland4/medamayaki.htm Medamayaki lyrics and it's translation]</ref>) is an unlockable song in the [[Game Boy Advance]] game ''[[Wario Land 4]]''. It can be played in the [[Sound Room]], which is a place within the [[Golden Pyramid]] where [[Wario]] can play tracks off [[CD]]s as they are collected in the [[Wario Land 4#Passages|levels]]. However, the Karaoke is obtained in a different way; the player must collect 10,000 or more points in each of the eighteen levels in order to unlock it. The song itself is an extended version of the [[Palm Tree Paradise]] theme. It features a female singing a song in Japanese over a catchy tune. The lyrics appear at the bottom of the screen in Romanized Japanese (Romaji), with the letters flashing red as they are pronounced. The vocals can be toggled on or off (with the exception of the introductory ''"Hello there!"'' at the song's beginning) by pressing L or R, while still leaving the backing track and lyrics. Whenever this is done, the album's cover changes from a pale orange with a sleeping cat to a green cover with a singing cat. The speed and pitch of the song can also be toggled using the D-Pad. All this control over the music gives a complete Karaoke feel to the player. The music video show contains a mix of sixteen different [[Sound Room|Wariograms]] seen in the videos of other [[CD]]s. The Karaoke plays in a recurring loop, unlike other tracks in the Sound Room.
| |
| {{br}}
| |
| ==Lyrics and Translation==
| |
| <!--Make a table, with Romaji lyrics on left, and the English translation on the right. Align lines in horizontal rows using {{br}} -->
| |
| {|width=100% cellspacing=0 border=1 cellpadding=3 style="border-collapse:collapse;"
| |
| !Original Romaji Lyrics
| |
| !English Translation
| |
| |-
| |
| |''Hello there!'' {{br}}
| |
| Ukurere mitaina tabiwo shiyo {{br}}
| |
| aruite iko {{br}}
| |
| tsukino kakerawo hiroinagara {{br}}
| |
| chizuno kawarini kyanbasu {{br}}
| |
| nijino shizukude {{br}}
| |
| (somemasho) {{br}}
| |
| hinodeni maniauyoni {{br}}
| |
| boyaketa tokeiwa oiteko {{br}}
| |
| umini tameiki tokashite {{br}}
| |
| inshini koewo kizamo {{br}}
| |
| teukiwo supuni ukabetara {{br}}
| |
| hyougarano kumonga warau {{br}}
| |
| |''Hello there!'' {{br}}
| |
| Let's go on a ukulele-like trip {{br}}
| |
| let's go on foot {{br}}
| |
| whilst finding a fragment of the moon {{br}}
| |
| a canvas for a map {{br}}
| |
| with a drop of a rainbow {{br}}
| |
| (let's color it) {{br}}
| |
| so we're in time for the sunrise {{br}}
| |
| let's leave the dim clock behind {{br}}
| |
| let a sigh dissolve in the sea {{br}}
| |
| and carve a voice into a stone {{br}}
| |
| when the moon floats on the soup {{br}}
| |
| the leopard-print cloud smiles {{br}}
| |
| |}
| |
|
| |
| ==Interpretation==
| |
| Two people are deeply in love with each other. They go for a walk in a fantasy place in the middle of the night, playing their favorite songs on a ukulele whilst taking inspiration from the moon. With only a canvas for a map, they paint their own colorful path. They reach the sea in time to watch the sunrise over the horizon. The long darkness of the night is quickly forgotten. They sigh in awe as they watch the beauty of the sunrise, and that moment will live in their hearts forever. The moon is still visible in the sky. A cloud is half in shadow, other half orange from the light of the rising sun, and it appears to be smiling at them.
| |
|
| |
| <small>*Interpertation based on an explication by [[User:YoshiKong|YoshiKong]]. If anyone wishes to challenge the current interpretation, or a more accurate explication is found; then please discuss the matter on the article's [[Talk:Karaoke (Medamayaki)|talk page]].</small>
| |
|
| |
| ==Media==
| |
| {{Media
| |
| |type17=audio
| |
| |name17=WL4-MEDAMAYAKI
| |
| |pipe17=Karaoke
| |
| |description17=Medamayaki
| |
| |length17=3:20
| |
|
| |
| |type18=audio
| |
| |name18=WL4 - Medamayaki Backing Track
| |
| |pipe18=Karaoke
| |
| |description18=Backing track
| |
| |length18=7:00
| |
| }}
| |
| ==References== | | ==References== |
| <references/> | | <references/> |
| {{BoxTop}}
| |
| {{tem|WL4}}
| |
| [[:Category:Music]]
| |
|
| |
| =[[Wario Land 4/Glitches]]=
| |
| This page contains a list of [[:Category:Glitches|glitches]] found in the [[Game Boy Advance]] game ''[[Wario Land 4]]''.
| |
|
| |
| ==Glitches==
| |
| ==={{conjecturaltext|Invisible Object}}===
| |
| Sometimes when Wario picks up an object (such as a rock or enemy), if it quickly gets knocked out of his hand, he may still appear to be holding something, even if nothing can be seen in his hand.
| |
|
| |
| ==={{conjecturaltext|No-ice Glitch}}===
| |
| No-ice glitch: If the player uses an action replay or other game hacking device and avoids hitting the Frog Switch in Fiery Cavern, the second half of the level won't be covered in ice.
| |
|
| |
| ==={{conjecturaltext|Unused Soundtrack}}===
| |
| Unused soundtrack: If the player uses an action replay or other game hacking device and avoids hitting the Frog Switch upon entering the level Golden Passage, the usual Frog Switch music will not play. Instead, a unique theme will replace it as the level's unused theme.
| |
|
| |
| ==={{conjecturaltext|Walk Through Walls}}===
| |
| Sometimes, but very rarely, if Wario jumps repeatedly
| |
|
| |
| ==References==
| |
|
| |
| {{BoxTop}}
| |
| {{tem|WL4}}
| |
| [[:Category:Glitches]]
| |
|
| |
| =[[List of Frog Switch times in Wario Land 4]]=
| |
| This page is a list of [[Frog Switch]] times given to complete levels in different [[Wario Land 4#Game Modes|game modes]] in the [[Game Boy Advance]] game ''[[Wario Land 4]]''. It also includes the times to defeat the in-game [[Wario Land 4#Bosses|bosses]].
| |
| {|width=100% cellspacing=0 border=1 cellpadding=3 style="border-collapse:collapse;"
| |
| |-
| |
| !Level
| |
| !colspan="3" |[[Frog Switch]] times given in different [[Wario Land 4#Game Modes|game modes]] to complete the levels
| |
| |-
| |
| |
| |
| !align="center" style="background: #48D1C9;" |Normal
| |
| !align="center" style="background: #FFCC07;" |Hard
| |
| !align="center" style="background: #E35148;" |S-Hard
| |
| |-
| |
| |
| |
| !colspan="3" |[[Entry Passage]]
| |
| |-
| |
| !align="center" |[[Hall of Hieroglyphs]]
| |
| |align="center" style="background: #48D1C9;" |1:00
| |
| |align="center" style="background: #FFCC07;" |0:15
| |
| |align="center" style="background: #E35148;" |2:30
| |
| |-
| |
| !align="center" |[[Spoiled Rotten]] (boss)
| |
| |align="center" style="background: #48D1C9;" |1:00
| |
| |align="center" style="background: #FFCC07;" |0:30
| |
| |align="center" style="background: #E35148;" |0:15
| |
| |-
| |
| |
| |
| !colspan="3" |[[Emerald Passage]]
| |
| |-
| |
| !align="center" |[[Palm Tree Paradise]]
| |
| |align="center" style="background: #48D1C9;" |1:30
| |
| |align="center" style="background: #FFCC07;" |0:45
| |
| |align="center" style="background: #E35148;" |4:30
| |
| |-
| |
| !align="center" |[[Wildflower Fields]]
| |
| |align="center" style="background: #48D1C9;" |2:30
| |
| |align="center" style="background: #FFCC07;" |1:29
| |
| |align="center" style="background: #E35148;" |0:50
| |
| |-
| |
| !align="center" |[[Mystic Lake]]
| |
| |align="center" style="background: #48D1C9;" |3:00
| |
| |align="center" style="background: #FFCC07;" |2:00
| |
| |align="center" style="background: #E35148;" |1:30
| |
| |-
| |
| !align="center" |[[Monsoon Jungle]]
| |
| |align="center" style="background: #48D1C9;" |4:00
| |
| |align="center" style="background: #FFCC07;" |2:45
| |
| |align="center" style="background: #E35148;" |2:00
| |
| |-
| |
| !align="center" |[[Cractus]] (boss)
| |
| |align="center" style="background: #48D1C9;" |4:00
| |
| |align="center" style="background: #FFCC07;" |3:00
| |
| |align="center" style="background: #E35148;" |2:00
| |
| |-
| |
| |
| |
| !colspan="3" |[[Ruby Passage]]
| |
| |-
| |
| !align="center" |[[The Curious Factory]]
| |
| |align="center" style="background: #48D1C9;" |3:30
| |
| |align="center" style="background: #FFCC07;" |2:50
| |
| |align="center" style="background: #E35148;" |2:30
| |
| |-
| |
| !align="center" |[[The Toxic Landfill]]
| |
| |align="center" style="background: #48D1C9;" |5:00
| |
| |align="center" style="background: #FFCC07;" |3:30
| |
| |align="center" style="background: #E35148;" |2:30
| |
| |-
| |
| !align="center" |[[40 Below Fridge]]
| |
| |align="center" style="background: #48D1C9;" |4:00
| |
| |align="center" style="background: #FFCC07;" |3:30
| |
| |align="center" style="background: #E35148;" |2:00
| |
| |-
| |
| !align="center" |[[Pinball Zone]]
| |
| |align="center" style="background: #48D1C9;" |6:00
| |
| |align="center" style="background: #FFCC07;" |5:15
| |
| |align="center" style="background: #E35148;" |3:30
| |
| |-
| |
| !align="center" |[[Cuckoo Condor]] (boss)
| |
| |align="center" style="background: #48D1C9;" |4:00
| |
| |align="center" style="background: #FFCC07;" |3:00
| |
| |align="center" style="background: #E35148;" |2:00
| |
| |-
| |
| |
| |
| !colspan="3" |[[Topaz Passage]]
| |
| |-
| |
| !align="center" |[[Toy Block Tower]]
| |
| |align="center" style="background: #48D1C9;" |4:00
| |
| |align="center" style="background: #FFCC07;" |2:30
| |
| |align="center" style="background: #E35148;" |2:00
| |
| |-
| |
| !align="center" |[[The Big Board]]
| |
| |align="center" style="background: #48D1C9;" |3:00
| |
| |align="center" style="background: #FFCC07;" |2:30
| |
| |align="center" style="background: #E35148;" |2:00
| |
| |-
| |
| !align="center" |[[Doodle Woods]]
| |
| |align="center" style="background: #48D1C9;" |6:00
| |
| |align="center" style="background: #FFCC07;" |5:15
| |
| |align="center" style="background: #E35148;" |4:00
| |
| |-
| |
| !align="center" |[[Domino Row]]
| |
| |align="center" style="background: #48D1C9;" |4:00
| |
| |align="center" style="background: #FFCC07;" |3:00
| |
| |align="center" style="background: #E35148;" |2:00
| |
| |-
| |
| !align="center" |[[Aerodent]] (boss)
| |
| |align="center" style="background: #48D1C9;" |4:00
| |
| |align="center" style="background: #FFCC07;" |3:00
| |
| |align="center" style="background: #E35148;" |2:00
| |
| |-
| |
| |
| |
| !colspan="3" |[[Sapphire Passage]]
| |
| |-
| |
| !align="center" |[[Crescent Moon Village]]
| |
| |align="center" style="background: #48D1C9;" |3:30
| |
| |align="center" style="background: #FFCC07;" |2:45
| |
| |align="center" style="background: #E35148;" |2:00
| |
| |-
| |
| !align="center" |[[Arabian Night]]
| |
| |align="center" style="background: #48D1C9;" |4:00
| |
| |align="center" style="background: #FFCC07;" |3:00
| |
| |align="center" style="background: #E35148;" |1:30
| |
| |-
| |
| !align="center" |[[Fiery Cavern]]
| |
| |align="center" style="background: #48D1C9;" |5:00
| |
| |align="center" style="background: #FFCC07;" |4:00
| |
| |align="center" style="background: #E35148;" |2:45
| |
| |-
| |
| !align="center" |[[Hotel Horror]]
| |
| |align="center" style="background: #48D1C9;" |4:00
| |
| |align="center" style="background: #FFCC07;" |3:15
| |
| |align="center" style="background: #E35148;" |2:00
| |
| |-
| |
| !align="center" |[[Catbat]] (boss)
| |
| |align="center" style="background: #48D1C9;" |4:00
| |
| |align="center" style="background: #FFCC07;" |3:00
| |
| |align="center" style="background: #E35148;" |2:00
| |
| |-
| |
| |
| |
| !colspan="3" |[[Golden Pyramid]]
| |
| |-
| |
| !align="center" |[[Golden Passage]]
| |
| |align="center" style="background: #48D1C9;" |9:30
| |
| |align="center" style="background: #FFCC07;" |6:00
| |
| |align="center" style="background: #E35148;" |3:00
| |
| |-
| |
| !align="center" |[[Golden Diva]] (boss)
| |
| |align="center" style="background: #48D1C9;" |6:00
| |
| |align="center" style="background: #FFCC07;" |5:00
| |
| |align="center" style="background: #E35148;" |4:00
| |
| |}
| |
|
| |
| =[[Princess Game & Watch]]=
| |
| {{Quote|Here's a [[Smile]] for you!|Princess Game & Watch|Wario Land 4}}
| |
| [[File:WL4-PG&W.PNG|frame|'''Princess Game & Watch''' artwork.]]
| |
| [[File:Princessgameandwatch.png|frame|left|In-game sprites of '''Princess Game & Watch'''.]]
| |
| '''Princess Game & Watch''' is the keeper of the [[Item Shop (Wario Land 4)|Item Shop]] in the [[Game Boy Advance]] game ''[[Wario Land 4]]''. As her speculated name suggests, she takes on an appearance that is closely related to [[Mr. Game & Watch]], having a similar figure and movement. It is believed that the basic shape and idea of this character was slightly redesigned and used in ''[[Super Smash Bros. Melee]]'', where the game features the first official appearance of Mr. Game & Watch. However, the main difference between the two cameos is the character has eyes in ''Wario Land 4''. Her use in the game is to sell [[Wario]] items, which can be purchased with [[Frog Medal]]s. These items can be used to assist Wario in defeating a [[Wario Land 4#Bosses|boss]] by inflicting damage at the battle's beginning.
| |
|
| |
| Princess Game & Watch is actually a being that is transformed from a [[Black Cat]], which in addition is [[Princess Shokora]] trapped in a feline's body. When Wario travels to the [[Golden Pyramid]] after hearing a rumour of [[Legendary Treasure]], he spots the Black Cat at the entrance. He sees the Cat again on many occasions, such as on the main map and in the corridor before a boss battle. When Wario enters this corridor, the Black Cat can be seen running into the Item Shop up ahead. But if Wario enters the shop, the only other being there apart from himself is Princess Game & Watch, who is the shopkeeper. When an item is purchased, the shopkeeper will go with Wario to the boss room. There, Princess Game & Watch will use the purchased item against the targeted boss. Once the damage has been dealt, the Princess will exit the room, leaving Wario to challenge a slightly weaker boss. For some items, the shopkeeper will even transform into various creatures to inflict damage. This applies to the items [[Black Dog]], [[Big Fist]], [[Large Lips]] and [[Black Dragon]].
| |
|
| |
| ==Trivia==
| |
| *When an item is used against the final boss [[Golden Diva]], instead of Princess Game & Watch leaving the room after the item has been used, she will stay and transform into the Black Cat, which in turn will confront the Golden Diva. The Black Cat will still appear if Wario does not purchase an item, she will just come in later after Wario.
| |
| **The fact that Princess Game & Watch transforms into the Black Cat is the only solid evidence in the game that the two characters are actually the same being.
| |
|
| |
| ==Gallery==
| |
| <gallery>
| |
| File:WL4-MGW.PNG|<center>Princess Game & Watch sprite</center>
| |
| File:WL4-Cat.PNG|<center>[[Black Cat]]</center>
| |
| File:WL4 Item Shop Logo.png|<center>Item Shop logo</center>
| |
| File:WL4-PG&W Unused.PNG|<center>Unused sprite of Princess Game & Watch</center>
| |
| File:WL4-PG&W Sound Room.PNG|<center>Princess Game & Watch in the [[Sound Room]]</center>
| |
| File:WL4-PG&W Sound Room2.PNG|<center>Princess Game & Watch in the Sound Room</center>
| |
| File:Smile4u.PNG|<center>Princess Game & Watch in the [[Item Shop (Wario Land 4)|Item Shop]]</center>
| |
| </gallery>
| |
| [[:Category:Wario Land 4]]
| |
| [[:Category:Wario Allies]]
| |
| [[:Category:Shapeshifters]]
| |
| [[:Category:Wario Characters]]
| |
|
| |
| =WL4 Table=
| |
| {|width=100% cellspacing=0 border=1 cellpadding=3 style="border-collapse:collapse;"
| |
| |-
| |
| !Image
| |
| !Name
| |
| !Description
| |
| |-
| |
| |align="center" |[[File:Apple Bomb.png]]
| |
| |align="center" |[[Apple Bomb]]
| |
| |
| |
| |-
| |
| |align="center" |[[File:WL4-Blast Cannon.PNG]]
| |
| |align="center" |[[Blast Cannon]]
| |
| |
| |
| |-
| |
| |align="center" |[[File:Vizorman.png]]
| |
| |align="center" |[[Vizorman]]
| |
| |
| |
| |-
| |
| |align="center" |[[File:WL4-Bugle.PNG]]
| |
| |align="center" |[[Bugle]]
| |
| |
| |
| |-
| |
| |align="center" |[[File:Black Dog.PNG]]
| |
| |align="center" |[[Black Dog]]
| |
| |
| |
| |-
| |
| |align="center" |[[File:WL4-LargeLipsSprite.PNG]]
| |
| |align="center" |[[Large Lips]]
| |
| |
| |
| |-
| |
| |align="center" |[[File:WL4-BigFistSprite.PNG]]
| |
| |align="center" |[[Big Fist]]
| |
| |
| |
| |-
| |
| |align="center" |[[File:WL4-BlackDragon.PNG]]
| |
| |align="center" |[[Black Dragon]]
| |
| |
| |
| |-
| |
| |align="center" |[[File:WL4-Smile.PNG]]
| |
| |align="center" |[[Smile]]
| |
| |
| |
| |}
| |
|
| |
| =[[List of Quotes in Wario Land 4]]=
| |
| This is a list of quotes found in the [[Game Boy Advance]] game ''[[Wario Land 4]]''.
| |
|
| |
| ==Quotes in the game==
| |
| *''"[[Golden Pyramid|Legendary Pyramid]] discovered deep in Jungle!!" [[:File:WL4-newspaper.PNG|Newspaper]] article seen in the game's opening cutscene.''
| |
| *''"Owww!" [[Dr. Arewo Stein]], when [[Wario]] hurts him.''
| |
| *''"Stop that, please!" Dr. Arewo Stein, when ???''
| |
| *''"Win [[Frog Medals|medals]] in mini-games." The [[Game Bot]]s in the [[Mini-Game Shop]].''
| |
| *''"Want to play some more?" Game Bots, after Wario finishes playing a mini-game.''
| |
| *''"Welcome to the [[Item Shop (Wario Land 4)|Item Shop]]." [[Princess Game & Watch]] welcoming Wario to the Item Shop.''
| |
| *''"Here's a [[Smile]] for you!" Princess Game & Watch, when Wario selects the Smile item in the Item Shop.''
| |
| *''"Meow!" The [[Black Cat]] in the corridor before a [[Wario Land 4#Bosses|boss]] battle.''
| |
| *''"Hurry up!" Wario, when he hits the [[Frog Switch]] in a [[Wario Land 4#Passages|level]].''
| |
| *''"Oh sorry!" Wario saying sorry to the player when no [[Wario Land 4#Controls|buttons]] are pressed in a while, and he starts [[:File:Cute Jumprope Land.gif|working out]].''
| |
| *''"Hello there!" English introduction to the Japanese vocal-covered [[Karaoke (Medamayaki)|Karaoke]].''
| |
| *''"Thank you, Wario…" Princess Shokora, after Wario rescues her from the [[Golden Diva]] and brings her to safety outside the [[Golden Pyramid|Pyramid]].''
| |
| *''"Steaks! Eat as much as you can!!" Newspaper article seen in the game's ending cutscene.''
| |
|
| |
| ==Quotes in the manual==
| |
| *
| |
| {|width=100% cellspacing=0 border=1 cellpadding=3 style="border-collapse:collapse;"
| |
| |-
| |
| |colspan="2" align="center" |'''Categorizing Notice Templates'''
| |
| |-
| |
| |Notice Templates
| |
| |{{tem|Abandoned}} • {{tem|Anotherlanguage}} • {{tem|Appeared}} • {{tem|Articleabout}} • {{tem|Cancelednom}} • {{tem|Collaborationnow}} • {{tem|Collaborationpast}} • {{tem|Conjecture}} • {{tem|Construction}} • {{tem|Damage}} • {{tem|Delete}} • {{tem|Diff}} • {{tem|Disambig}} • {{tem|Distinguish}} • {{tem|Expand}} • {{tem|fa-archive}} • {{tem|FATALK}} • {{tem|Hiatus}} • {{tem|Image}} • {{tem|Justreleased}} • {{tem|Linkentry}} • {{tem|MoreImages}} • {{tem|Multiple issues}} • {{tem|New stub}} • {{tem|Newsubject}} • {{tem|Newsubject-section}} • {{tem|Nomedia}} • {{tem|Partconjecture}} • {{tem|Partofpipe}} • {{tem|Proposal Notice}} • {{tem|Protect}} • {{tem|Protect}} • {{tem|Redirectshere}} • {{tem|Rename}} • {{tem|Rewrite}} • {{tem|Rewrite-expand}} • {{tem|Sectionstub}} • {{tem|ShroomStr
| |
| |-
| |
| |Image Notices
| |
| |{{tem|Aboutfile}} • {{tem|Image-quality}} • {{tem|Not-unused}} • {{tem|Requirescortado}}
| |
| |-
| |
| |→ Image copyright tags
| |
| |
| |
| |-
| |
| |Talk Notices
| |
| |{{tem|Adminmemo}} • {{tem|Archive}} • {{tem|Notforumtalk}} • {{tem|SettledTPP}}
| |
| |-
| |
| |→ Disciplinary Notices
| |
| |{{tem|Delete-reason}} • {{tem|Lastwarn}} • {{tem|New stub-reason}} • {{tem|Personal-image-warning}} • {{tem|Reminder}} •
| |
| |-
| |
| |User Notices
| |
| |{{tem|Vacation}}
| |
| |-
| |
| |''To be sorted''
| |
| |{{tem|AppealNotice}} • {{tem|Nosourcetake}} • {{tem|PAIRrequest}}
| |
| |}
| |
|
| |
| =Gallery:Golden Diva=
| |
| This is a gallery of all images which pertain to the boss [[Golden Diva]] from ''[[Wario Land 4]]''.
| |
|
| |
| ===Golden Diva===
| |
| <center><gallery>
| |
| File:GoldenDivaWL4.png|Golden Diva
| |
| File:WL4-SpikeRock.PNG|[[Spike Rock]]
| |
| File:WL4-BearBomb.PNG|[[Bear Bomb]]
| |
| File:WL4-DuckEgg.PNG|[[Black Duck]]
| |
| File:WL4-SpikeHammer.PNG|[[Spike Hammer]]
| |
| File:WL4-Lips.PNG|[[Diva's Lips]]
| |
| </gallery></center>
| |
|
| |
| ====Golden Diva's Masks====
| |
| <center><gallery>
| |
| File:Golden Diva-Mask1.PNG|Mask 1
| |
| File:Golden Diva-Mask2.PNG|Mask 2
| |
| File:Golden Diva-Mask3.PNG|Mask 3
| |
| File:Golden Diva-Mask4.PNG|Mask 4
| |
| File:Golden Diva-Mask5.PNG|Mask 5
| |
| File:Golden Diva-Mask6.PNG|Mask 6
| |
| File:Golden Diva-Mask7.PNG|Mask 7
| |
| File:Golden Diva-Mask8.PNG|Mask 8
| |
| File:Golden Diva-Mask9.PNG|Mask 9
| |
| File:Golden Diva-Mask10.PNG|Mask 10
| |
| File:Golden Diva-Mask11.PNG|Mask 11
| |
| File:Golden Diva-Mask12.PNG|Mask 12
| |
| File:Golden Diva-Mask13.PNG|Mask 13
| |
| File:Golden Diva-Mask14.PNG|Mask 14
| |
| File:Golden Diva-Mask15.PNG|Mask 15
| |
| File:Golden Diva-Mask16.PNG|Mask 16
| |
| </gallery></center>
| |
|
| |
| ===Legendary Treasure===
| |
| <center><gallery>
| |
| File:WL4-The Crown.png|[[Legendary Treasure|The Crown]], obtained from [[Cractus]]
| |
| File:WL4-The Earrings.png|[[Legendary Treasure|The Earrings]], obtained from [[Cuckoo Condor]]
| |
| File:WL4-The Necklace.png|[[Legendary Treasure|The Necklace]], obtained from [[Aerodent]]
| |
| File:WL4-The Rings.png|[[Legendary Treasure|The Rings]], obtained from [[Catbat]]
| |
| </gallery></center>
| |
|
| |
| ===Screenshots===
| |
| <center><gallery>
| |
| File:WL4-Diva Map.PNG|The Golden Diva on the map.
| |
| File:WL4-Golden Diva.PNG|The Golden Diva in the boss battle room
| |
| File:WL4-BCbattle.PNG|[[Wario]] and the [[Black Cat]] facing the Golden Diva.
| |
| File:BlackDragon.PNG|The [[Black Dragon]] in use.
| |
| </gallery></center>
| |
|
| |
| ===Other===
| |
| <center><gallery>
| |
| File:WL4-Icon24.png|Golden Diva map icon
| |
| File:WL4-Cat.PNG|[[Black Cat]]
| |
| </gallery></center>
| |
