The 'Shroom:Issue 210/Strategy Wing
Director's Notes
Written by: Hooded Pitohui (talk)
Well hello there, all you readers of The 'Shroom! The nights have been long here in the Strategy Wing offices, and not on account on the turn of the season! I've been burning the midnight oil trying to rein in this ballooning budget... You see, recently, Shoey graduated from this prestigious military academy, Ishchka, I believe, and now he's putting the expenses of an entire army on the Strategy Wing business expense! He's the Director. Surely these expenses need not pass through Strategy Wing's budget, no? Oh, I simply must resolve this before I have to submit this additional expenses form to Meta Knight... Ah, well, I suppose I'll just have to read about this army's first outing in Another Ogre Battle Section and hope Shoey begins collecting tribute soon.
At least Waluigi Time is continuing to rake in Shine Sprites. Those things sell for a fortune, you know. Ten Blue Coins a pop, I'm getting for them at current market rates. Although... I fear the easily-obtained supply may be dwindling. I understand he's venturing to some far-flung secret courses in Shine Get this month just to find more. Well, even if the Shine Sprite revenue falters, Sparks and MightyMario continue to acquire all these new, valuable weapons and items. I'm sure there will be some finds in this month's An Overly Detailed and Funny Walkthrough of Mega Man 2 that fetch a good price on the market.
In non-budget-related news, I'm happy to say that Four Steps for a 3D World is back this month! It's even finally covering a level from a game that Hayashida had nothing to do with, so if you've been waiting for that, be sure to give it a look. Additionally, we have a brand-new one-off section this month that's a little bit like Four Steps in that it takes a Mario level and examines it from a fairly particular perspective. I don't want you to have to read the explanation of the premise twice, though, so just keep an eye out for Setting the Stage if you want more Mario content this month.
Now, before we get into Section of the Month and you get to reading, I'll remind you that it's easy to sign up and become a part of the Strategy Wing team! Cover a popular game or cover an obscure one! Walk us through a game or analyze it through a focused lens! Make it short if you want (Shine Get is a great example to look at)! Tell us tricks and tips or give us some extra challenges. Trust me, we always have room in the budget for new writers.
Section of the Month
Oho, it seems Huntail smashed its way to the top with Shell Smash! I've always thought the Clamperl line to be a bit overlooked, so I was pleased to have the opportunity to highlight Huntail last month. Thank you for voting Pitohui's Pokémon Academy the section of the month, and may you enjoy this month's look at Clamperl's other evolution. My thanks go out to all of you who showed your support to our resident Robot Master battler, Sparks (with MegaMario), and our resident generalissimo, Shoey, as they embarked on new quests in sequels to their previous sections. There will be plenty of robo-platforming and marching to battle to come, so keep reading, keep voting, and maybe toss a Poochy's Pick at a writer who gives you some joy this month!
| STRATEGY WING SECTION OF THE MONTH | ||||
|---|---|---|---|---|
| Place | Section | Votes | % | Writer |
| 1st | Pitohui's Pokemon Academy | 5 | 33.33% | Hooded Pitohui (talk) |
| 2nd | An Overly Detailed and Funny Walkthrough of Mega Man 2 | 4 | 26.67% | Sparks (talk) and MightyMario (talk) |
| 2nd | Another Ogre Battle Section | 4 | 26.67 | Shoey (talk) |
Another Ogre Battle Section
Hello and welcome back to Another Ogre Battle Section, the hopefully upgraded and more interesting version of An Ogre Battle Section. Last month, we looked at a few basics of Ogre Battle 64: Person of Lordly Caliber. This month, we actually start playing the game! But first! A correction. Last month, while talking about liberating and capturing territories, I said that the towns provided tribute and that it cost money to raise an army. Well, that's not true. You see, I was thinking of the SNES Ogre Battle game, Ogre Battle: March of the Black Queen, where that is a mechanic. But in Ogre Battle 64: Person of Lordly Caliber, they decided to simplify things. Towns no longer pay direct tribute. They still do pay out a reward in a way, but we'll cover that at the end of the section. In addition, it no longer costs money to deploy units, but there is a maximum number of units you can deploy! So, with that correction out of the way, it's time to start Ogre Battle 64: Person of Lordly Caliber! The game starts with a cutscene of you, Magnus Gallant, son of the disgraced war hero Ankiseth Gallant, bidding farewell to Prince Yumil Dulmare as you're off to join the Ischka Military Academy so that you can fight in the Palatinus army.
Graduation and Initiation
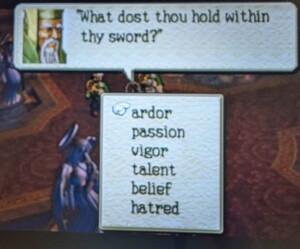
After that, the game skips six years to your graduation, where Archbishop Odiron leads you in an oath to Mother Berthe. He first asks you your name, which seems a little fucked up considering we've been here long enough to graduate! Come on, Archbishop, pay attention to your students! We're going to go ahead and keep the default name Magnus. He then asks you for your birthday, which is actually somewhat important, because if you play the game on your birthday, you get a birthday party! After this, he starts asking you the real questions!
Naturally, since we are an edgy teenager with a tragic backstory, we're going to select hatred! Accepting our answer and for some reason not sending us to the guidance counselor for answering hatred, the Archbishop asks the next question.
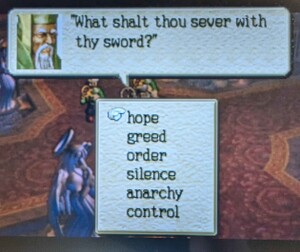
Now, you might think, since we're so edgy and tragic and not like other teens, we'd pick to sever hope. But actually, we're afraid of anarchy and hold a strong belief that a central government is the only way to prevent chaos, so we're going to plunge our sword against anarchy. Liking this answer a lot better, the Archbishop asks the next question!
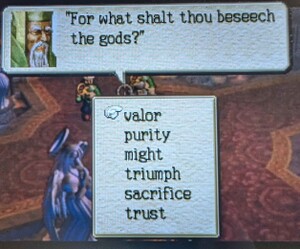
Now according to the dictionary, "beseech" means "ask (someone) urgently and fervently to do something", so we're going to beseech the gods for some triumph, because I'd rather be a winner than a loser! The Archbishop is apparently really into gods, 'cause the next question concerns them.
Some of these options don't really make sense. Like, what does "lust" mean in this context? Am I expected to fuck the gods? This is a Nintendo 64 game, not a Greek tragedy! Instead, I'll simply offer the gods the corpses of our enemies, so we'll go with glory. Slightly disturbed over our desires to cut through enemy after enemy, the Archbishop moves past it and asks his next question.
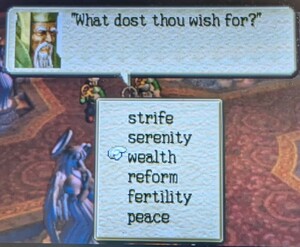
There are a lot of good options here. I mean, peace is a classic, can't go wrong with ending war and all. Serenity is pretty cool from a personal standpoint, but I'm not sure how useful it would be for a solider. Reform would be nice to smooth out the rough edges of the monarchy and grant more rights to the lower class. So naturally I picked wealth, 'cause we gotta make that cash money, yo. Next, we're asked a very odd question.
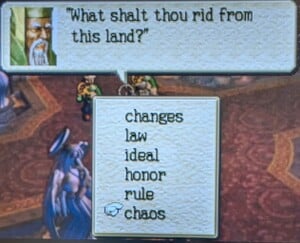
Some of these feel like traps. First of all, "law" and "rule" feel like the same thing. Also, I'm pretty sure if you told somebody during your initiation to the military that you wanted to get rid of law or honor that they wouldn't let you join. Smelling a rat and thinking this is just a trick to drum dumb soldiers out of the military, we choose chaos.
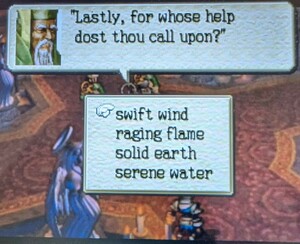
Finally, you're asked "Lastly, for whose help dost thou call upon?". Now, this is the only question that really matters! The others are a mixture of flavor questions and questions which determine the composition of the bonus units you get to start the game (we'll get into that in a second). This question determines what Elem Pedra you start out with. An Elem Pedra is a special elemental attack, and we'll get into that later.
This is the odd question out because you don't get any stats for these spells, but Swift Wind is the best one to pick because Magnus is a sword wielder and the Wind Element has the strongest sword. After finishing this exam, the Archbishop bestows upon you gifts. These gifts are given to you based on how you answer the questions, because they correlate to the units you'll start with. I received:
- Bastard Sword
- Rapier
- Leather Whip
- Rupture Rose (a fancy whip)
- Cloth Armor
- Leather Armor
- Hard Leather
- Chain Mail
- Bone Helm
- Jin-Gasa (a hat with a spike on top)
- The Pedra of Wind.
With that, Ogre Battle 64 begins! We're treated to a fun little opening movie detailing some adventures we have as a soldier in the army before we end up at a fortress.
First Engagement
We are welcomed by General Godeslas, who welcomes us to the Southern Division of the Palatinean army. We're stationed in Alba, the most rugged region in all of Palatinus! The good general expresses shock that somebody like us, who graduated from the top military academy in the central region, would enlist to fight in the backwoods dirt region that is Alba. Questioning that maybe we think we can just fuck off down here, he tells us not to expect any special treatment, telling us that all that counts is our ability. Which, considering this is a medieval-style army, is pretty progressive! Appointing and rewarding based on merit and not bloodline is pretty modern. He then dismisses us, telling us that we're going on a training exercise! But before we can do that, his second-in-command, Ariosh (dumb name), tells us we have to get organized. He lists out all the people who were chosen as potential unit commanders and, wouldn't you know who won the pony, we're on the list! He tells us to wait in the hall and we'll be interviewed for the position.
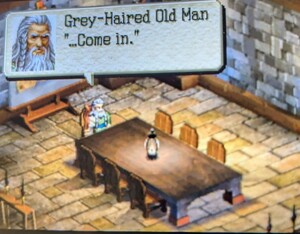
We're led into a room where a Grey-Haired Old Man sits, calling for us. Reporting for duty, we sit down as the old man reviews our file. He tells us that his name is Hugo Miller, our advisor. After looking us over and listing the fact that we graduated from a prestigious military academy, he dismisses us, telling us to go to the training exercise. Admittedly, we're a little shocked by this, but Hugo gives us that old bullshit line about how old people are good judges of character. "Yeah, whatever, grandpa," we think to ourselves as we leave.
We head to the Tenne Plains for our first mission, "Scene 1: The Southern Reaches". We're brought to Hugo in a conference room (get used to seeing that) alongside fellow newly-assigned officer Diomedes Rangue (Dio to his friends). For some reason, Hugo expresses surprise we arrived at the same time. Like, bro, this is a military, of course we came when summoned, idiot. Hugo really pisses off Diomedes, who demands he call him Dio (told you), which seems really unprofessional. Like, my guy, that's our superior officer, what are you doing??? He orders us to head towards Theodricus Mine in the west to clear out some bandits and wild beasts! Wait, I thought this was a training mission, not a practical mission??! Hugo then brings us to the battle board to go over strategy.
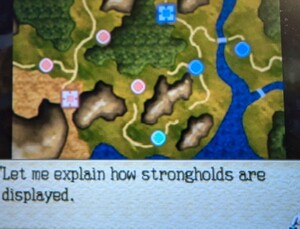
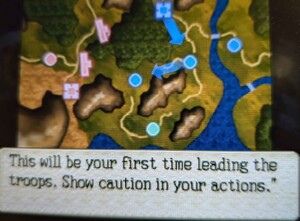
He explains to us how the strongholds work, but you read the previous issue so you already know! But just as a little refresher, blue are our Strongholds, red are the enemy, and green are neutral. Now, I don't exactly know why there are strongholds here that have been conquered, because I thought we were just here to clear out bandits and wild beats. Unless, I guess, they've been taken over by bandits? The most important thing Hugo says is to not let our headquarters fall! He also tells us to exercise caution, but that sounds lame. I'm more of a student of the Civil War, with big flashy battles where a lot of people die and nothing gets accomplished.
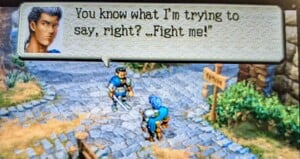
With that, it's time to take the field of battle! Naturally, as the high-born son of a famous war hero, we're given command over these lowly peasants, whose lives we command, as is the way god wants. Dio protests the fact that we've been chosen as commander, demanding some sort of merit-based system. How childish. I'm not surprised a commoner like him can't understand how our pure blue blood makes us the correct choice for commander. I mean, could you imagine a commoner such as Dio leading the troops? It would be madness! But then Dio tells us to meet him outside and he challenges us to a duel!
Now, obviously we're not going to back down against common gutter trash, so we draw our sword, but before we can open his insides, Hugo stops us just because we're about to disobey his orders and on account of some dueling is an illogical process that can only lead to talented officers getting killed liberal nonsense. Dio accuses of Hugo of picking us as commander just because we graduated from the academy. Hugo is all like "dude, the first time you were even the slightest bit slighted, you challenged somebody to a duel," before yelling at us for accepting the duel and ordering us to take down the beasts, godsdammit!
To Glorious Combat!
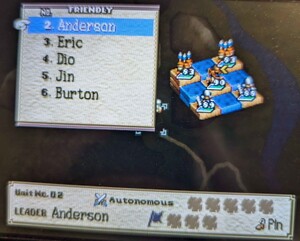
So now it's time to actually play the game. Remember, Ogre Battle plays quite differently than most games. So, first we're going to press the R Button on our Wii Classic controller to bring up the dispatch menu. This is going to show us what we've got at our disposal.
So we've got:
- Anderson, a Beast Tamer
- Two fighters at the front
- Two groups of bucket-headed child soldiers at the back.
- Eric, a Fencer
- Three groups of bucket-headed conscripts at the front
- One fighter at the back
- Dio
- Three fighters in the front
- One archer in the back
- Jin, a Valkyrie
- Two bucket-headed soldiers.
- Burton, a Phalanx
- A Clay Golem as his side kick.
So, right off the bat, I hate Jin and Burton's groups. Bucket-head soldiers are the lowest of the low in this game, only serving as early promotion fodder, so having a unit that mostly consists of that is horrible. And I just hate Golems. Golems are like the Shuckle of this game. Their gimmick is that they have very high regular defense but almost no magic defense, but they also have very low HP, so, like, without much HP, that high defense is worthless. Now, we're still going to deploy them, but they're going to play rearguard. What I mean is that they're going to sit at headquarters and defend it just in case any enemy manages to slip through our lines, because if an enemy manages to touch headquarters, it's game over!
For our main units, we're going to move in two thrusts. Dio and Eric will cut through the forest to liberate the town of Mulsuk with its 50 loyalty, while us and Anderson will take the main road to liberate Bourdeux with its 71 loyalty. We're also going to click on Eric and go to Unit Commands and, from there, Formation, and we're going to move all his bucket-heads back to the back row. This is because they're so weak that they can get wiped out easily, but if they win enough fights, they can upgrade to Fighters or Archers, which are always needed.
Now, Mulsuk is currently controlled by a Wizard named Bryan, along with his Knight Chipp and Hellhound Eithacos. Dio makes contact first, AND WE GET A CUTSCENE. Bryan the wizard expresses shock that the Southern Division is here already while a Beast Master known only as "Warrior" tells him it's not a big deal because their plan has already started! He then runs off, telling Bryan to sacrifice himself for a better cause as Dio arrives!
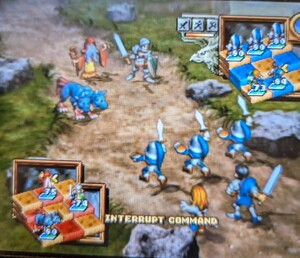
Now it's time to talk Ogre Battle combat. Each fights basically works automatically. What I mean is, each fight lasts three turns, but each character isn't guaranteed to make three moves per fight. How many moves you make per fight is determined by your placement on the grid. For example, a fighter can attack with two sword slices in the front row, but if it's in the back row, it will only do one sword slice. Same with an archer, who will fire two volleys of arrows in the back row, but only one in the front. So a lot of this game is just based on proper unit layout to give yourself the best chance to succeed. At the end of three turns, the game will decide which unit wins based on how much damage was caused and any deaths. Now that is not to say you, the player, doesn't play any role in the fight. Pressing any button allows you to bring up a menu with three options:
- Battle Strategy.
- Retreat
- Elem Pedra.
Now, those latter two operate based on a meter that chargers throughout the battle, but your most important option is the battle strategy page. This gives you four options:
- Autonomous: The CPU just kind of make moves.
- Attack Strongest: Your units will attack the character with the most health.
- Attack Leader: Your units will attack the leader/commander of the unit.
- Attack Weakest: Your units will attack the character with the least health.
I always default to Attack Leader if the leader isn't blocked. The reason I do this is because a unit with a dead leader will just wander around aimlessly and try to flee if you approach them, so killing a leader is an easy way to render an enemy unit helpless! Attack Weakest is also good, because the game's method of determining the winner of a skirmish is heavily influenced by deaths, so killing one of the enemy characters can greatly increase your chances of winning the battle.
Back to our battle, the battle is a slaughter; Bryan barely lives though the first turn before being felled by our fighter's blade! With that great victory, we're able to liberate Mulsuk. As this happens, a Witch named Amanda with a Phoenix under her command attempts to drive out Dio, so we send Eric to cut her off. Eric engages valiantly and, luckily for us, the enemy is an idiot and has put Amanda in the back where she can just cast poison cloud. Eric scores an easy initial win, but he doesn't actually kill anyone.
Let's talk about what happens when you don't kill. Winning a fight grants you an exp boost and knocks the unit you defeat back. We click on Eric and press the R button, setting Eric's command to only pursue Amanda. I like to do it like this, because sending units after weaker units is a good way to grind your weaker units. So, a lot of times, what I'll do is send my strongest units to liberate stronghold, then I'll just use less powerful units to do mop up duty. That way, they remain at least somewhat relevant!
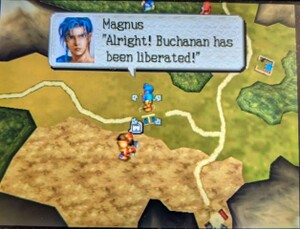
So as that all happens, us and Anderson liberate Bourdeux. We're going to go ahead and send Anderson to fight Bryan the wizard's remaining soldiers as Eric again engages Amanda, winning although nearly losing his little bucket hat man in the process. A knight named Presto approaches Molusk, which, by the way, it's important to note you don't get any special buffs or debuffs if you attack from a town. So we send Dio to meet him at the gate. Dio easily defeats Presto, who is sent flying right into Eric. Eric's unit easily slays Presto, who dies from a sword to the stomach while the Griffin he commands manages to escape. Shortly after this, Eric wipes out Amanda's unit completely. We head to Buchanan, which I hope isn't named after James Buchanan, worst president of the United States, and which is currently controlled by a level 3 Berserker named Fyre and a Hellhound named Erratau (all these people pick dumb names for their pets). I sent Eric after Presto's Griffin, hoping that defeating it would promote some of those bucket-head soldiers, but it didn't, and now I'm sad.
Now, our unit, as we are the commanding officer, is the most balanced unit of the early game. With two fighters at the front and two archers, we have a strong front and strong back. Now, our archers for some reason default to the middle row, which means they only fire one arrow per fight, so we're going to go into the formation menu and set them to the back row so that they fire ten arrows. This means that we're going to hit for ten attacks per fight, which means that Fyre picked a bad day to be a rebel at this mine, because he doesn't really stand a chance, although does land a super annoying critical hit to us personally, which does 20 damage. But regardless, Frye is no match for us and we force him to retreat and liberate Buchanan
But Frye isn't done yet. You see that little castle above his head? That means he's weak enough that he's looking to take a city so that he'll recover. So we're going to sit here and wait until he comes to us, then we'll get him! EXCEPT, INSTEAD, HE TRIES TO RUN TO THE MINES LIKE A COWARD! SO WE GIVE CHASE, AND DON'T WORRY, WE GET HIM! We kill Frye, but his hellhound escapes, but that's okay I guess. Anderson finally reaches Bryan, only to lose! It's probably because he has so many stupid bucket-head dudes. That means that he's probably going to get rearguard duty next mission. Since Anderson has failed, we task Dio with killing the rebels instead.
Unfortunately, our pursuit of Frye left us tired and we're forced to make camp. While we recuperate our tired feet, it's a good time to go over a few things.
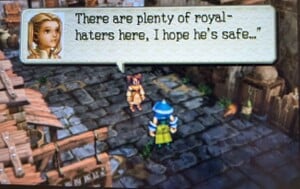
One of my favorite things about this game is that you can visit the towns you liberate or capture. Most of them don't have much to say, mostly filled with filler flavor text, but let's take a look at Bourdeux.
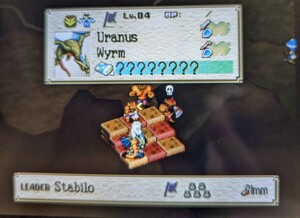
I love how cute this is! This little girl is expressing concern for Prince Yumil's safety during his visit to Alba. On the other side of the map, the other loyalist town of Jadd, opposite of the action, has a shop in it where we can spend money on things! Right now, we're going to buy heal packs. They heal 150HP to every member of a unit. One thing that is kind of annoying is that each unit has its own set of items. There isn't, like, a master set of items you can use. Instead, you have to give items to a unit, which can be annoying as you try to remember who you gave what. But that shouldn't matter that much this month. We'll go over items and shops in more depth next month, but now we're rested and it's time to liberate the Theodricus Mine, which is currently being held by that tyrant Berserker rebel leader Stabilo and his pet Wyrm Uranus.
Uranus being on the left side is really good for us, because all our fighters can hit Stabilo! Apparently Stabilo is controlling the beasts with, idk, magic or something? He says he's doing it for freedom or some other peasant folly. He then tells us to prepare for battle! But his unit is terrible! His Wyrm is to the left and he's back center, and that means he's got no cover! Boss fights like this end once you kill the leader, so we just wipe the floor with him! I mean, he barely makes it a turn and a half in before he's dead! With that, we liberate the mines and collect our spoils!
Victory and the Spoils of War
For winning a map, you are awarded Goth (money) and you get bucket-headed conscripts. This is based on a formula based on number of towns liberated and the time it takes you to complete a map. One thing that's odd is that you're always rewarded with bucket-head boys even well after bucket-head boys stop being at all useful (so, like, mission 3). We even steal - I mean, uh, confiscate, yeah, confiscate - Stabilo's axe, Francisca, which probably has better stats than a normal axe! After defeating Stabilo, we capture him and demand to know what his plans are!
BUT BEFORE HE CAN ANSWER, DIO TELLS US THAT THE PRINCE IS UNDER ATTACK, OH NO! THE LITTLE GIRL WAS RIGHT! OH GOD, IT TURNS OUT THIS WAS ALL A DIVERSION! THEY DIDN'T WANT THE STUPID MINE; THEY JUST WANTED TO DIVERT TROOPS SO THEY COULD KILL THE PRINCE, STARTING A REVOLUTION THAT WILL END THE ROYAL FAMILY. THOSE IDIOTS DON'T THEY REALIZE THEY COULD NEVER FUNCTION ON THEIR OWN? I MEAN, IMAGINE SOME SORT OF PEASANT-LED COUNTRY! I SHUTTER TO THINK OF ANYTHING MORE HORRIBLE! We decide we gotta rescue the Prince and command Dio to join. He starts asking all these questions like "where is the prince?" and "how big is the enemy?" which, you know, that's reasonable. But then Hugo shows up and is all, like, "the main regiment sucks. You, half-trained rookies, let's go rescue the prince". So that's exactly what we're going to do! Join us next month for mission number two, Prince rescue time!
Four Steps for a 3D World
Written by: Hooded Pitohui (talk)
Hello, all you readers of The 'Shroom, and welcome back to Four Steps for a 3D World, a section in which we look at levels from a selection of 3D Super Mario titles through the lens of a design philosophy Koichi Hayashida discussed in an interview.
In brief, 3D Mario game levels in certain titles are designed around an introduction that lets a player learn a mechanic in a safe environment, further development that builds on what the player is learning and introduces more complicated aspects of a mechanic, a twist that adds some kind of significant wrinkle or challenge to force players to consider the mechanic from a new angle, and a conclusion which gives players one final satisfying chance to show they've mastered the mechanic. We look at 3D Mario levels and see if they conform to this model while trying to get some insight on how a good level is constructed.
It has been a little bit since we've seen one another here! I would recommend swinging by the Archives if you want to see a typical edition of this section, because we're going to tackle a different type of level and a different type of game this month. You see, someone suggested that I cover "Ride Big Boo's Merry-Go-Round" from Super Mario 64, which means that we'll be covering for the first time a level from a true sandbox 3D Mario game and a game which Hayashida had no hand in making. Will we see at all the four-step philosophy which would begin to emerge much later on in Super Mario Galaxy 2, or will this mission's design totally eschew it? Let's find out!
Well, we did end up with four boxes, but these are a far cry from our four steps, aren't they? Yes, it's clear that, at least here, we can't apply Hayashida's four steps to an individual Super Mario 64 mission. That makes sense, honestly. Not only is it a much older game, meaning Nintendo may not have had a refined Mario level design philosophy (especially a 3D one, considering this was the first 3D Mario platformer), but the game's sandbox nature means it isn't guiding players through a linear mission. 3D World says "follow this path and learn" while Super Mario 64 says "go, wander, and figure it out". I do think you see a few good level design bits here, like using sound design to guide players in the basement, and I'm inclined to believe luring you into the mansion is an intentional trick given how ghost houses usually try to trick players, so I can't say this is a poorly-designed level.
Most interesting of all, though, has to be how you can see the rough outline of our four steps if you zoom out from the mission itself and include the previous mission and the means of accessing the level. As discussed, that looks a lot like our typical four step process, or at least three-quarters of it! I suppose that goes to show that these four steps are a natural way of easing players in as they discover new mechanics while ultimately delivering them a challenge once they have some experience. I wonder if the developers ever delineated that progression of learning to fight Boos in the safety of the courtyard to fighting them in cramped rooms to fighting them in a moving space, or if it just sort of popped into being serendipitously as they designed the level entry method and a few missions.
Well, we may never know, but it's interesting nonetheless. If you'd like to see a different approach to scrutinizing Super Mario level design, check out this month's one-off, Setting the Stage. For now, with over four Boos needing to be beaten, three hits needed to take down the Big Boo, two Stars obtained in Big Boo's Haunt, and one cool musical track, this has been Four Steps for a 3D World!
Pitohui's Pokémon Academy
Written by: Hooded Pitohui (talk)
Welcome back, class. I trust you're not feeling too poorly, what with the adjustment to the changing seasons and all, hm? Well, heavens-no-why, but I'm given to understand some of you lament the end of summer and its accursed heat. I have no such love lost for the dreadful season, but I understand your plight from my own experiences on the cusp of spring. So! So that you might fully immerse yourself in the waning summer, we will continue to focus on a Pokémon hailing from tropical regions this month. Yes, this month, let's discuss a method of raising Clamperl's alternative evolution, the graceful-but-deadly Gorebyss!
As always, for those of you just joining us, you can find our course policies and aims in the first box below and a refresher on frequently-used terms in the second box. By all means, skip them if you're already familiar, especially you poor mobile users (surely there will be a way to collapse boxes on mobile someday)!
First, a Smogon University course, this course is not. No, this academy's lessons are designed to get trainers of any stripe thinking about how they can raise their Pokémon, and, as a result, aren't designed to keep up with the widely-accepted metagame for the series. In some cases, the way I've raised my Pokémon may even flies in the face of conventional wisdom. If you're looking for top-tier strategies, do check out Smogon, but if you merely want to get a little deeper into raising Pokémon while still doing things your own way, feel free to use this section as a reference.
Since we all know the importance of citing our sources, I also need to credit the design of some of the tables used in these lectures to Crocodile Dippy, author of the Pocket Handbook which can be found in early editions of Strategy Wing.Base Stats: Base stats are the values associated with a particular Pokémon species, and are the same across every individual Pokémon of a given species. You have no influence on them. You can think of them as traits tied to a species. A chimp isn't ever going to be able to get as good as digging as a mole will be, and, likewise, an Abra is never going to have the defensive prowess a Shuckle has.
Individual Values (IVs): Individual values, as their name implies, are associated with individual Pokémon. They range from 0 to 31 in each stat, with 31 being considered a "perfect" IV and higher numbers corresponding to different stats. Magikarp A and Magikarp B will have the same base stats, but they may very well have different IVs. To stick with the animal analogy, one mole may be born with larger claws than another mole, and that first mole is probably going to have an easier time digging through dirt than the latter. Individual values are set in stone, strictly speaking, but you can use Hyper Training (from Generation VII onwards) to functionally get a perfect IV in a stat.
Effort Values (EVs): Effort values are the one thing you can easily change. A Pokémon can earn, primarily through battling, but also through means like the use of certain items or mechanics like Super Training, up to a total of 510 effort values, with up to 252 in any given stat. To finish off the animal analogy, no matter what kind of claws a mole is born with, moles who have more experience digging are probably going to be better at digging than moles which have never dug.
Nature: A Pokémon's nature is, more or a less, a stat modifier with a name meant to make it sound like a Pokémon has some personality. Natures will raise one stat by ten percent and lower another stat by ten percent. Some natures raise and lower the same stat, canceling out the effect and leaving stats unchanged. Natures can be functionally changed with the use of special mint items from Generation VIII onwards.
STAB: STAB stands for Same-Type Attack Bonus, and refers to the boosted power of moves that match the type of the move's user. To illustrate this, consider the case of a Lombre, a dual-type Pokémon which is both a Water-type and a Grass-type. Any Water-type moves Lombre uses will have their power boosted by 1.5x, and any Grass-type moves Lombre uses will, likewise, have their power boosted by 1.5x. (There are circumstances where this does not apply, and, while the 1.5x multiplier is typical, some games use other multipliers.)
Jumping right into an examination of Gorebyss's base stats, we find that Gorebyss has an unusual distribution. Not unlike Huntail, Gorebyss isn't skewed towards offense or towards defense, but instead has one strong offensive stat, one strong defensive stats, and then middling-to-poor stats across the board. Both Huntail and Gorebyss have high physical defense, but where Huntail pairs that with high physical attack, Gorebyss gets a high special attack stat. We're stuck with rather poor speed again, and, like Huntail, we don't have Trick Room as an option to overcome that. We do have Swift Swim, which may be usable if we put Gorebyss on a rain team, but we have an option for boosting Gorebyss' speed and helping it to hit as hard as possible independently of the rain.
Yes, once again, we turn to Shell Smash and make it the basis of our strategy for raising Gorebyss. Shell Smash, for those of you who were absent during our previous session together, raises a Pokémon's attack, special attack, and speed by two stages while dropping its defense and special defense by one stage each. For Gorebyss, we'll use Shell Smash to both reinforce Gorebyss' already-considerable special attack and to shore up its poor speed, ideally making it capable of outspeeding its foes and hitting them hard enough to knock them out, making the defensive drops a non-factor.
To get the most from Shell Smash, we'll want to maximally invest in speed and special attack, ensuring both stats have a 31 IV and 252 EVs. Ideally, we have 31 IVs in both defensive stats and HP, as well. We may be intentionally lowering those defenses, but we can't disregard them entirely. Before Gorebyss gets any Shell Smashes off, it will more than likely need to take a hit, so I suggest putting the leftover 6 EVs into defense, shoring up Gorebyss' naturally high defense just a bit. On the other hand, we can disregard attack entirely, so not only can we disregard its EVs and IV, but we can also choose an attack-lowering Nature. I recommend Timid, which will also raise Gorebyss' speed, but Modest (boosts special attack) is a reasonable choice, too. The way I see it, though, all that power means little if Gorebyss can't move first, especially after those defense drops, so it's best to prioritize a higher speed stat!

|
Name: | Gorebyss | Base HP: | 55 | |
| Category: | South Sea | Base Attack: | 84 | ||
| Type: | Water | Base Defense: | 105 | ||
| Abilities: | Swift Swim | Base Special Attack: | 114 | ||
| Hydration | Base Special Defense: | 75 | |||
| Base Speed: | 52 | ||||
With stats all worked out, before we proceed to working out a moveset for Gorebyss, we need to select an ability. Our options here are fairly similar to Huntail's options. We have Hydration, an ability that cures status conditions if it's raining, and Swift Swim, an ability which boosts speed if it's raining. With Huntail, we said that the status condition-related ability was the best choice, but Huntail's Water Veil prevented a burn in all circumstances while Gorebyss' Hydration only activates if it's raining. That changes the calculus here, putting Hydration and Swift Swim on more equal footing. After all, you have to use Gorebyss on a rain team to get reliable use out of either of them!
With the rain consideration, Swift Swim becomes the superior choice. If you're going to need the rain anyway, you may as well further bolster Gorebyss' strengths. Take that speed boost and let Gorebyss tear through its foes before they can set any status conditions on it, perhaps with a rain-boosted STAB Water-type move.
(You'll notice a different screenshot this month. Owing to Gorebyss being available only in Brilliant Diamond and Shining Pearl, I didn't have an opportunity to get a proper stats shot this month. I've subbed in a screenshot from the Pokémon Showdown online tool. Thanks go to Zarel and the others behind it!)
Now, with that said, let's begin crafting a moveset and look for a reliable STAB Water-type move, hm? Before even that, we can automatically slot Shell Smash in one of our four slots. From there, let's look out our options for a Water-type special move with a base power of... we'll say greater than 70, since our aim is to ensure that Gorebyss has knockout power. We have a choice of either Scald, Surf, or Hydro Pump. Hydro Pump is a decent choice, with a 110 base power, but it does come at the expense of 80% accuracy. You might be willing to tolerate a one-in-five chance of missing in exchange for that extra knockout power, but I'm not inclined to take that risk, myself. Surf is a very good choice, offering a base power (90) still high enough to get the KO with no tradeoff in accuracy. Myself, though, I've elected to go with Scald, taking an 80 base power in exchange for a high likelihood of burning the opponent. That base power is still good enough to get a KO, especially if it gets a rain boost, but, should it not, the burn will drop the opponent's physical attack, giving Gorebyss a slim chance of hanging on even through the defensive drops of Shell Smash. If those slim odds don't work out, then at least whatever Pokémon comes out after Gorebyss will be facing an opponent hobbled by a burn. I like Scald here because it lets me hedge my bets, but any of these three moves will work as a STAB move choice.
| Scald | The user shoots boiling hot water at its target. This may also leave the target with a burn. | |
| Shell Smash | The user breaks its shell, which lowers its Defense and Sp. Def stats but sharply boosts its Attack, Sp. Atk, and Speed stats. | |
| Ice Beam | The target is struck with an icy-cold beam of energy. This may also leave the target frozen. | |
| Psychic | The target is hit by a strong telekinetic force. This may also lower the target's Sp. Def stat. |
Unlike Huntail, Gorebyss has a coverage move it can actually use effectively. Ice Beam is not only a reliably powerful special move, but gives Gorebyss a means of dealing with pesky Grass-types. I wouldn't count on the freeze chance in any way, though. Even if you do freeze an opponent, take care, as using Scald will thaw them out.
For a final move, well, Gorebyss isn't well-suited for trickery, so it's best to go with another reliable and powerful special move of a type we don't already have represented. Our choices are Hyper Beam, Shadow Ball, and Psychic, and we can eliminate Hyper Beam right away on two counts. One, Normal doesn't offer many coverage benefits (in fact, it is super effective against no types!). Two, and more crucially, it locks Gorebyss into a recharge turn, giving an opponent ample opportunity to take advantage of its lowered defenses. Really, we're choosing between Shadow Ball and Psychic, two similar moves. Psychic is super effective against two types, and so is Shadow Ball. Shadow Ball has a power of 80 with a 20% chance of lowering the target's special defense; Psychic has a base power of 90 with a 10% chance of lowering the target's special defense. Ultimately, given the goal is for Gorebyss to tear through its foes before they can hit it back, I'd value KO power over the special defense drop chance. In light of that, we will go with Psychic!
Well, I should doubt you require a psychic to tell you what we should turn our attention to next! That's correct, it's nothing! With a moveset mapped out, we have completed our work for this session. I do hope you all enjoyed this last infusion of summer. Now, given that you're now well and familiar with both of Clamperl's evolutions, your new assignment is to go and find a Clamperl in the wild holding a Deep Sea Scale or Deep Sea Tooth! Consider it a field lesson on held items. I will see you at our next session!
Shine Get
Written by: Waluigi Time (talk)
Hello there, 'Shroom readers! Welcome back to Shine Get, the only 'Shroom section where the Flash-based apocalypse now being five months behind schedule may have something to do with stealing all of the magical artifacts from a clock. Today, I'm going to be collecting the remaining four Castle Secret Stars in Super Mario 63, including one that's been available since basically the beginning of the game! Whoops! In my defense, it's been several years since I last played this game in full.
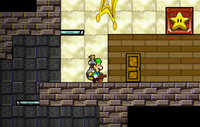
The elusive third Shine Sprite of Group A was in the elevator room with the Sling Star this whole time! Ride the elevator to the top, then jump off to the left towards the wall. You'll pass through the wall and get taken to a secret level.
Secret Course: Jolly Roger Bay
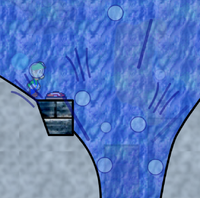
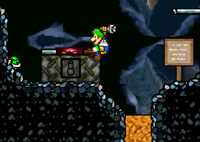
This level starts out with a big pool of water full of Cheep Cheeps. If you go all the way to the right, there's a brick wall blocking the path, so we'll have to do something about that first. The answer is a ? Switch at the bottom near the middle of the lake, but be careful because there's a whirlpool right next to it! It's very easy to get sucked into this if you're not careful. I died several times but mostly because I was trying to get a good picture of it and got pulled in by accident. Pushing the switch opens up the path which leads to the next screen.
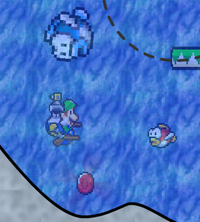
Over here, we can surface (which is good because I was running out of air - coins don't respawn if you die!) and grab the Hover Nozzle box to the left. Now the real mission of collecting Red Coins begins. The first one is just above the Hover Nozzle and can be reached by hopping on a couple sets of spinning platforms. To the right, the second and third Red Coins are in plain sight in the next pool of water. One is floating above a seesaw platform and the other is in the water. There's another pool of water just after that with basically the same thing, a Red Coin floating above the water and another in the water. After doing some platforming over a brief land section, the sixth Red Coin is in the water again. This one can be a little harder to spot if you just skim the surface, so make sure to keep the ground on your screen. The seventh Red Coin is found in a ring of coins just to the right of that at the end of the pool, so if you found that one first, you know you went too far! Surfacing one last time, the eighth Red Coin is found inside another coin ring, framed by spinning platforms.
Unfortunately the Shine Sprite spawns around the area of the fourth/fifth Red Coins, for some reason, so there's a little bit of backtracking required. It's not too bad, but I don't know why the level is designed this way when it's so linear.
If you've been with me for a while and you have a really good memory, you may remember way back in Issue 199 (one before 200? That feels so long ago...) that there was a secret passageway in the Shifting Sand Land room. When I first found it, there was a dead end sealed by Bowser. Well, at some point that path became unsealed, probably around completing the second Bowser fight. Technically, it's accessible even earlier - the castle has a bunch of secret passages outside the apparent boundaries that allow you to sequence break, if you know where to look for them.
Anyway, the new path leads to a secret room with a bunch of passageways and doors leading to various areas of the castle. Most of these are actually a good way to find these secret passages if you haven't discovered them already, but a few are only one-way. There's also Rocket and Turbo Nozzles on the right side of the room, and for some reason, a set of four Sling Stars that give you the weird inverted star power-up thing. I don't know what the purpose of this is. Most importantly, in the upper left corner of the room, there's a passageway that looks very cave-like. This is our next secret course!
Secret Course: The Magma Maze
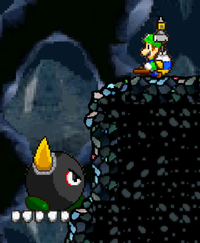
Yeah, this level acts like it's all tough, but it's actually not too bad. From the start, immediately head to the right and break through some boxes. Then keep going right and take the upper path, then follow this all the way to the right across some seesaws. At the end, there's an alcove with the Rocket Nozzle, which will be very important! Then, turn back around and cross over the seesaws again. Once you're back on solid ground, rocket onto the platform just up above. From here, you have two paths you can rocket up further. The one on the right leads to a higher area with a Star Coin all the way on the right side - the last one in the Castle Secret Stars category! The one on the left leads to another screen with a long pool of lava. Most of the time, you'll have to bounce off of Koopa shells to get across, which can be a little tricky, but at the end there's a Turbo Nozzle box! Otherwise, this is a dead end. Unfortunately, you can't dash over lava without getting hurt, but if you jump and rocket across on the way back, you should be okay.
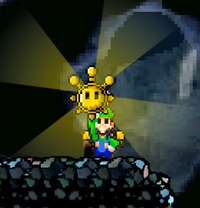
Once you get back to the first screen, go all the way to the left. There's multiple pathways that will get you there, and they all basically lead to the same place. I came in at the highest point which took me to an area with the Hover Nozzle box. Maybe it's helpful if you came here before getting the other nozzles, but at this point, it's basically worthless. From here, I dropped down past some Paratroopas into a chasm (entering at midlevel will just drop you off in a lower point of the chasm) with a lake at the bottom (entering at the lowest point will get you here). There's a current that you need the Turbo Nozzle to get through, and the Shine Sprite's at the end.
This next one is pretty easy to find, and there's a good chance you'll find it accidentally. In the room with the Tall Tall Mountain and Lethal Lava Land paintings, there's also a small painting with clouds on it. Just underneath this, there's an invisible crate. Break it with a ground pound, or just slam face first into it! That works too. Once it's broken, you can drop through the floor to get to the next secret level.
Secret Course: The Cave of Empuzzlement
This is another one that claims to be a lot worse than it is! According to the level description, it'll "twist and mutilate your mind beyond sanity". We'll see about that. First, make your way down from the starting point to the lake at the bottom. Both the Rocket and Turbo Nozzles are provided right away, so grab those. The level is full of switches that will raise and lower the water levels, so the first thing to do is get it as high as possible. Most of these can be found in the tunnels to the right, but the highest one is in the "main" area in an alcove to the left. Once it's up to the maximum level, you'll be able to reach the area over to the right. There's a cannon here floating on the water, but unfortunately, it's locked at the moment.
Now here's where things really get interesting! As far to the right as you can go, there's an Invisibility Cap. There's two cages on either side of this area, so use it to pass through both and lower the water as much as possible. Then, turn back around and pass back through the second cage to get to the right area again. With the water lowered, a box blocking further progress can now be broken with a ground pound. On the other end, there's a Metal Cap. Grab that and quickly go back to the original area and break one last box, opening up a small tunnel. Turbo through here and hit the ? Switch at the end, which activates the cannon. Now it's really just a matter of repeating the first half of the mission. Get the water back up to its max height, hop in the cannon, and shoot up and to the right to reach the area with the Shine Sprite!
The last one is even easier! Just to the right of the Tick Tock Clock entrance, take the Sling Star. Yep, that's it.
Secret Course: A Galaxy of Stars
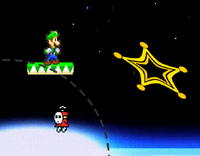
This one is thankfully a lot simpler! No mazes, puzzles, or Red Coins, just a good old Silver Star collecting mission. Also, the gravity in this level is slightly lower, so that's neat. The first Silver Star is just a little bit to the right. There's a Sling Star too, but we'll ignore that for a moment. There's a series of platforms moving horizontally, and the Silver Star is at the end of them. Just watch out for the Fly Guy. With that collected, now it's time for the Sling Star. After a bit of platforming, there's a second Sling Star, and then go ahead and stop on the floating castle-like platform before taking the third. There's two more Silver Stars to the left - one is up above in the top left corner of a waterfall, and the other one is down below after a short (but precarious!) platforming section. Getting back up is a little tricky, but thankfully there's ground below if you fall (like me...), just a little more backtracking. Then, take the third and final Sling Star to a set of rotating terrain. The last two Silver Stars are both here, one towards the top and the other towards the right side. Once you grab those, the Shine Sprite spawns in the center! Oh, and I also discovered that if you're spinning in midair when a Shine Sprite spawns, you can slightly move during the animation. Weird, isn't it?
And that covers all the Castle Secret Stars, with one exception that we'll be getting to later. I now have a total of 56 Shine Sprites and 54 Star Coins! That leaves only 8 Shine Sprites and 10 Star Coins left to find. Next time, I'll be heading to the final main course and making a big dent in those numbers. See you then!
An Overly Detailed and Funny Walkthrough of Mega Man 2
Written by: Sparks (talk) and MegaMario (talk)
Welcome back to the Mega Man 2 walkthrough! Today I'll be facing off against the four remaining Robot Masters: Air Man, Crash Man, Heat Man and Quick Man in that order! Without further ado, it's time to take on Air Man.
Air Man
High in the sky
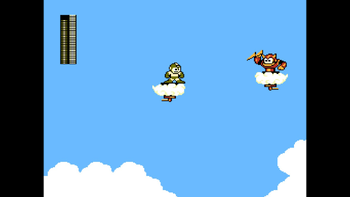
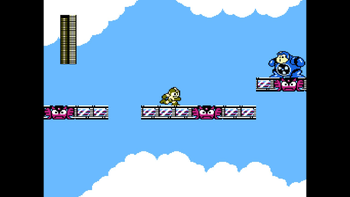
Upon starting the stage, we are greeted with a bright blue sky and some puffy clouds covering the edges of the screen. Strangely, there are angry platforms that give off an off-putting vibe. Why do you think they're mad? Do they not like Mega Man's presence? Let's not worry about that though - onwards!
(MegaMario: One thing to note going into this stage: there are no pickups of any kind, so you have to rely on the Pipis to restore health.)
The first section of this stage is a long "corridor" if you will. Basically, just a long trek to the far right of the level, jumping over many gaps. Along the way, these giant "blocks" appear out of thin air. We can use them as platforms, but they have drills at the edges that protrude and retract at regular intervals, deflecting all projectiles. Furthermore, whenever stood upon, they release these small, slow flying enemies that home in on Mega Man. One Mega Buster can take care of them. Metal Blade works very well too!
(MegaMario: The big blocks look like goblins, and they're even called Goblins!)
We then arrive at a point where it looks like the end of the road (or sky). But never fear! A robot on a moving cloud platform arrives. He attacks by throwing lightning bolts that curve downward, but if we defeat him, we can use his platform to move on! It doesn't end there though; there's more of them ahead. We must jump between several cloud platforms to reach solid ground on the other side. One cloud platform goes behind a cloud, reducing visibility. It's difficult to defeat these enemies with the Mega Buster, so I suggest using Metal Blade due to the many directions it can travel.
After reaching solid ground, we find more of those bird enemies from Wood Man's stage. Thankfully there is no platforming here, but the clouds may cover the birds, allowing for surprise attacks! At the far right is a hidden pitfall behind a cloud, allowing us to descend to a new area. This area contains two of those "noodle" enemies from Flash Man's stage. Take this chance to recharge some Metal Blade energy! Another pitfall at the bottom left leads us to another long corridor full of platforming.
Two of those big angry blocks are found here, both right next to each other. This could be unfair if their drills overlap. You may have to take some damage here, but it's better than falling right?
In the home stretch to Air Man's room, we have more birds to deal with. Not just them however; there are also large fan enemies that blow Mega Man away! There's only three of them though, and the third one has a bug; if he pushes Mega Man offscreen and he returns, the enemy might disappear completely. This section is tough due to the combination of the two enemies, plus the platforming involved. I recommend waiting for the birds to arrive and striking them down with Metal Blade before making a jump. They hide in the clouds here too, so be extra cautious. Well timed Metal Blades can get rid of them before they even drop their eggs!
After getting through that, we have finally made it to the end! Only Air Man remains before the stage is cleared.
I can defeat Air Man!
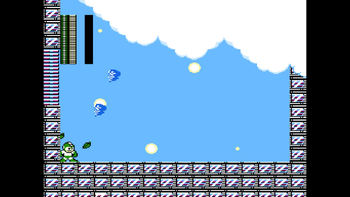
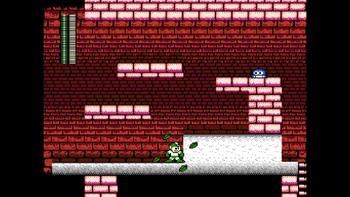
Air Man is rather stupid to fight. He sends out packs of tornados at random location of the battlefield before sending out wind to blow them and Mega Man to the other side of the screen. The problem is, the tornados can be arranged in such a way that they're flat-out impossible to avoid! Afterwards, he will jump to the other side of the screen and repeat, albeit the tornados will go in the opposite direction this time. After three attacks, he jumps again. I have a strategy for this fight: wait for him to jump to the other side of the screen, and stand directly behind him. He will be unable to reach you and you can spam Leaf Shield (his weakness) until he's done for. Be quick however, because he will push you out of safety and into the tornados! After a few Leaf Shield attacks, he will be defeated.
Mega Man gets a new weapon afterwards: Air Shooter. This weapon allows Mega Man to fire three tornados that curve upwards, making it a great weapon to attack airborne enemies. This weapon makes Mega Man dark blue, and the letter for Air Shooter is A. But wait, there's more! Defeating Air Man also gives us Item-2, which allows Mega Man to create a platform that speeds ahead! This allows for great travel over horizontal distances. All items make Mega Man Red and the icon for this one is 2. Up next is Crash Man!
Crash Man
How high can we get?
Crash Man's stage is a (mostly) fun one! We must climb to the very top of… whatever this place is. It also has my favorite music of the Robot Masters in the game!
(MegaMario: Not to be confused with Crash Bandicoot!)
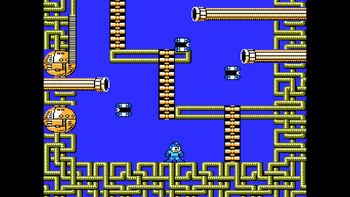
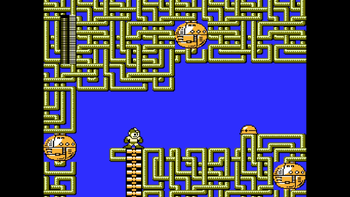
Here, we are introduced to a very annoying enemy - the Telly. Slow but numerous, they try to home in on Mega Man. They're really annoying without the Metal Blade, but because I have it, I can easily dispatch them, whether they're in groups or not. They spawn from these pipes here, replacing defeated Tellies almost instantly. Be quick and climb those ladders before you're overwhelmed!
After two rooms of climbing and avoiding Tellies, we encounter Mettaurs, returning enemies from the first game! They behave differently however - when approached, they fully reveal themselves, firing three bullets in a spread-like formation before the enemy itself charges forward! Like before, they can't be attacked while they're hiding. This section has three of them on "stairs", but they're positioned in such a way that Mega Man doesn't have to jump to avoid their bullets! Run close to them and then quickly jump and shoot at the same time to destroy them before they charge at you.
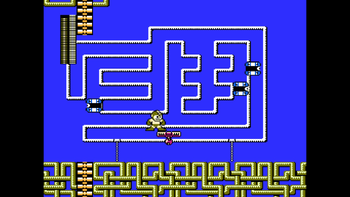
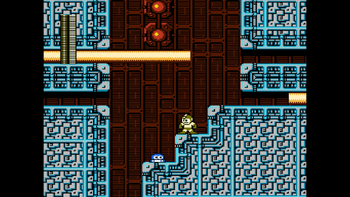
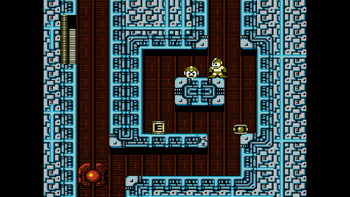
What follows the Mettaurs are three small areas that all have two things in common: Tellies and a platform that travels on lines. Tellies spawn from the edges of the screen instead of from pipes in these areas. Mega Man must ride the platform and then jump to the ladder while making sure he isn't knocked off by the roaming Tellies. The path the platform follows gets more complex with each room, starting with a simple rectangle before becoming a roller coaster-like ride. Pictured is the third roof of these rooms. One thing I haven't pointed out yet is that Tellies are a fantastic way to recharge life and weapon energy, so while they can be pesky, they can also be beneficial!
Afterwards, we traverse to the right side of a somewhat large room, with one of those block enemies from Metal Man's stage in the way. This one is more difficult to avoid when it breaks up because of the lack of stairs, so I took some damage by this one. Next, we climb a long ladder that extends for two more areas. The third area has a small platforming segment as well as a Mettaur blocking the next ladder. We must get this Mettaur to move out of the way, but there is a problem - it can actually "jump" to the next platform when it charges! This makes it easier to defeat however. Don't worry if you fall - there's no bottomless pit below you!
Entering into outer space
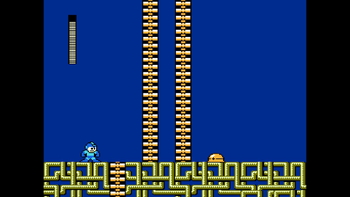
In the next area, the sky noticeably changes to a darker shade of blue. Additionally, there are two ladders to choose from, both leading ever higher. A Mettaur is also here. I decided to choose the ladder on the left side.
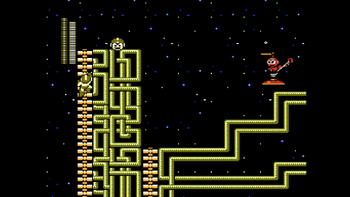
The sky fully becomes pitch black in the next section, and now there are five ladders to choose from! The left ladder leads to three while the right ladders have two. These next few sections also feature those bird enemies and they are terrible here. Because the birds drop the eggs on the platforms/walls, the hatchlings get released early and they will swarm you no matter what. You will probably take damage here. The best advice I can offer is to urgent rid of as many birds as you can with the Metal Blade before they reach you. Try not to fall to the room below you. I'll admit that I don't like this section because of its unfairness.
The room after this reveals that ladder 1 leads to ladder 2, while ladder 3 is a dead-end. Ladders 4 and 5 lead higher though! I have to use ladder 2 because I'm on the left side.
The area after this one shows that ladder 4 leads to a large health power-up, while 2 and 5 extend further. One of those shooting enemies from Flash Man's stage is found on a ledge pointing to the left, making for another obstacle for me. Thankfully, I can simply use Metal Blade to take it out. The background also has stars now, which implies that we are in outer space now! Pretty cool right?
Upon reaching the next room, the birds have finally stopped, and we reach another E Tank! It's also a dead-end for me because ladder 5 leads to the next area… or is it? Using Item-2, I can reach the higher ledge! I can also jump to a somewhat far-off ladder that leads to a 1-UP!
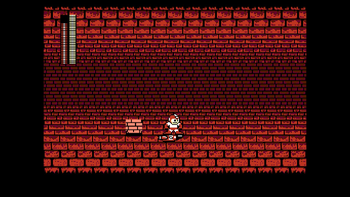
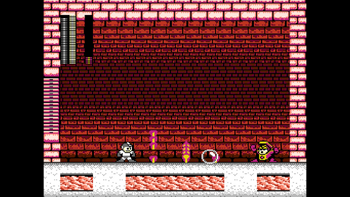
The final room before Crash Man has large red enemies that fall from the sky. After a second or two, they float up before jumping to Mega Man's location! They have a weakness, and it just so happens to be Metal Blade. Only one is needed to clear them out! This entire stage sounded so boring with all that text, right? But now, it's time to defeat Crash Man!
(MegaMario: These enemies are called Fly Boys.)
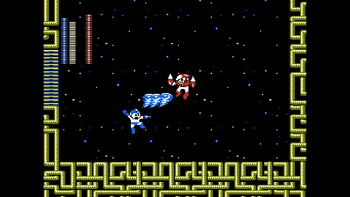
Without his weakness, Crash Man is one of the toughest Robot Masters in the game. Whenever you attack, he retaliates by jumping high and firing a lightning-fast Crash Bomb at your location, which explodes momentarily. All in all, he's very difficult to take down. With Air Shooter though, he's incredibly easy. Three shots of the weapon will defeat him! Just make sure you jump before you shoot so that you can hit him when he jumps.
We get a new weapon: the Crash Bomber! It allows Mega Man to fire a Crash Bomb that latches onto a wall before exploding several times. This weapon is capable of destroying thick walls in some stages, like in Flash Man's stage for example. When equipped, Mega Man becomes a salmon color (I think?) and the icon for the weapon is C. Only two Robot Masters left to go! I'll go after Heat Man next!
Heat Man
Good thing robots can't sweat
Heat Man's stage, as the name implies, is very hot. The first section of the stage is a long corridor that contains lots of platforming over lava. Obviously, lava is bad and will automatically KO Mega Man if contact is made. Don't let that happen!
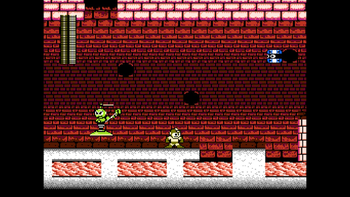
One of the enemies found in this corridor is a green reskin of those stomping enemies from Crash Man's stage. The openings in the ceiling signal where they'll fall from, so that makes them easier to predict. Metal Blade is still their weakness too! And then we have Tellies… but this time they spawn from holes in the background wall. Do not let them ruin your platforming; they're more dangerous here than they were in Crash Man's stage! We must jump across many small platforms while avoiding the darn things, AND make sure we don't fall into the lava (and eventually a bottomless pit) below!
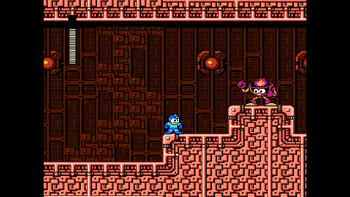
At the end of this hallway is a ladder leading downwards, but it's guarded by two of those ground patrollers from Metal Man's stage. We have an advantage however - the Leaf Shield! We can already defeat these enemies by attacking them with it! I also learned something new about the weapon; it stays on Mega Man until you move. Interesting!
Upon descending via the ladder, we enter a small room with another one of those ground enemies below a few scattered blocks. Additionally, those blocks that disappear and appear with unique sounds have returned! There are four total in this room, so we can easily navigate. Alternatively, you can use Item-3 to reach the next ladder. Now we descend even more!
Now we enter another long corridor (longer than the first one in this stage) and there's… no! More Tellies. And platforming. Forgot to mention that.
Those unique blocks are here as well, acting as support platforms to scale walls. There are 5 walls here that must be bypassed. Some of the walls have those thick walls that the Crash Bomber can destroy. I didn't use the weapon, but it can help reduce stress. Also, one Telly was kind to me by giving me a 1-UP! Hooray for kindness and generosity!
Now here we have one of the worst sections in the game: a long path consisting of those blocks with 3 instances of one being directly above another. Also, the majority of this section is over lava/bottomless pit. At the end of the lava segment, there is solid ground where a 1-UP lies. I land there, and wait for the right moment before using Item-2 to reach the end of the corridor! I do not recommend getting past this normally, but if you plan to do this without Item-2, just know that the third block above the pit has another one directly above it. Using another ladder, we descend some more.
The next room has a Sniper Mech from Flash Man's stage. We are high up, and the mech has to jump to our location, but I have a plan. I jump down immediately and use Air Shooter, instantly destroying the mech and leaving only the Sniper Joe. I dispose of him and climb down another room, leading us to Heat Man!
Dousing the flames
In battle, Heat Man attacks by throwing three spread-out flames that extend when they hit the ground. They then disappear, and Heat Man performs the attack again. When he is attacked, he will ignite before turning into flames and charging at Mega Man. He will then reform and resume his usual attacking method. The amount of time it takes for him to charge varies, so be on guard! Heat Man is invincible when he's about to charge, so don't bother attacking him when he is in that state. He's weak to Bubble Lead, so what I did was use it on him, a jump over his charge and immediately attack him once he reforms. This will prevent him from throwing flames, making the fight easier. With this strategy, I extinguished Heat Man!
After defeating Heat Man, we obtain his weapon - Atomic Fire. It is a heat-based weapon that fires projectiles straight ahead. What's unique about this weapon is that it can be charged, boosting the power of it at the cost of a higher energy usage. When equipped, Mega Man is red and yellow, and the icon for the weapon is H. We also get Item-1, which allows use to create platforms that rise for a few seconds before disappearing. Up to three platforms can be onscreen at a time. The icon for Item-1 is 1. Now all that's left is Quick Man!
Quick Man
The most brutal game of laser tag ever
Here we go! The final Robot Master stage in the game, and also the most difficult. Why is it so difficult you ask? More on that later!
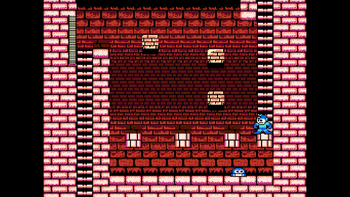
Starting off, we're at an area where there's only way to go - down. Atop a ledge to the left is a 1-UP, which we can obtain by using any of the Items. After descending, we're at an area where two of those noodle enemies are. They can't reach Mega Man unless he falls down to where they are. It's best to avoid them. The room after this is an empty section, but falling even more reveals the main hazard of the stage…
Yup. Giant lasers. They are "fired" from the walls and permanently stay on the screen. If contact is made with them, Mega Man will lose a life! The following two rooms also have these lasers, as well as ground enemies. Just fall and get through the gaps before the lasers reach you. Sounds simple right? Easier said than done.
A gap to the right of the third laser section leads to a room containing a 1-UP, E Tank and large weapon energy capsule. Try to get them! Something interesting to note: whenever the game was paused in this stage, the entire screen becomes dark. I find that cool!
The next room is a typical hallway, or so you think! After moving a small distance, everything darkens. There are 4 fire enemies scattered throughout this section. When encountered, they will light up the area, allowing you to see your surroundings. They sound like nice guys, but after a few seconds they will toss fireballs your way! If they leave the screen or if they're defeated, the room will darken again. Some Metal Blades will take care of them without issues. One segment of this area might seem endless, but there's actually a small step in the way. Simply jump and you'll notice progress is being made.
(MegaMario: The fire enemies are called Changkey Makers, and the flames they throw are the flame enemies from the first Mega Man game.)
Now this next section is horrible; it consists of several rooms filled with lasers while you descend! Throughout the way, there are large weapon capsules and other power-ups, but if I were to go into detail into each and every room, it'd be super boring. If you think you got the skills, you can try getting through this normally. Something else you could try though is using the Flash Stopper (Flash Man's weapon) and just run through the sections without having to worry about the lasers. Just make sure not to run out of weapon energy, as the large weapon capsules do not respawn unless you get a game over.
That was no doubt the hardest part of the stage, but there's more obstacles before Quick Man is reached - Sniper Mechs. Use Air Shooter to dispose of them easily. You don't want to lose a lot of HP here. There are only two of them, but they can still be troublesome. Now with that out of the way, it's time to take on Quick Man (without his weakness too)!
Faster than a speeding bullet
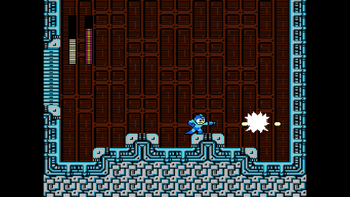
Quick Man is another difficult opponent because of his incredible speed. He runs, jumps around constantly and throws Quick Boomerangs that fly at you. Flash Stopper stops him and damages him during the duration, but because I used it all during the "laser descent" I have to battle him normally. It's also not a good idea to use Metal Blade on him - he's immune to it! Just keep firing at him and he'll go down eventually. If you happen to almost be defeated yourself, use an E Tank. I managed to beat him with 2 HP remaining!
With Quick Man defeated, we obtain the final weapon - the Quick Boomerang! It fires a boomerang that travels a short distance before returning to you. It also has lots of weapon energy. When equipped, Mega Man becomes pink, and the icon for the weapon is Q.
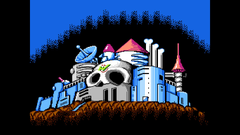
With all the weapons obtained, it's time to invade Dr. Wily's fortress and stop his evil plans! Come back next issue and we'll see how this ends!
(MegaMario: Until next time!)
Setting the Stage
Written by: Hooded Pitohui (talk)
Ask about the strengths of Super Mario platformers, and one answer you'll hear crop up fairly often is "intuitive game design." While there may be some obtuse secrets sprinkled throughout the games ("duck on this white block to go into the background", anyone?), it's not as though this statement is without merit. From all the way back in Super Mario Bros., Mario titles have been using thoughtful placement of stage elements and enemies to teach even first-time players their basic mechanics and objectives without bogging them down in slow-paced and text-heavy tutorials. The design principles of the game's famous World 1-1, in fact, have been elucidated and expounded upon over and over and over at this point. While Super Mario platformers have featured more text and more explicit tutorials over the years, they've maintained a reputation of handing the reins to the player as soon as possible and letting the design of their levels guide the player in through, well, gameplay.
If you ask me, that kind of reputation is an invitation to explore this aspect of Super Mario platformers in more detail. Well-trodden are the paths of breaking down and analyzing World 1-1, or the first level of Super Mario Bros. 3, or even the grounds of Peach's Castle and Bob-omb Battlefield in Mario's first 3D foray, but there are far, far more levels out there than these. I think it's high time we expand the range of our investigation and put a more diverse collection of levels, stages, and missions under the microscope. It's for that reason I write this new section, a section devoted to dissecting Mario levels and teasing out Nintendo's methods of guiding players to or through a particular objective, outcome, and/or mechanic. In other words, in this section, we're going to take a close look at how Nintendo sets the stage to gently move even a novice from point A to point B. This won't be entirely uncritical praise, though; on our way, we'll also take note of where they stumble and resort to a more heavy-handed approach.
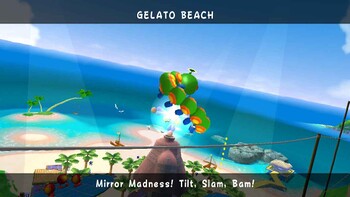
For our inaugural edition, I'm going to take you to Gelato Beach in Super Mario Sunshine. More specifically, we're going to turn our microscope onto the stage's second mission, "Mirror Madness! Tilt, Slam, Bam!".
Stage 01: Mirror Madness! Tilt, Slam, Bam!
Let's Talk About It
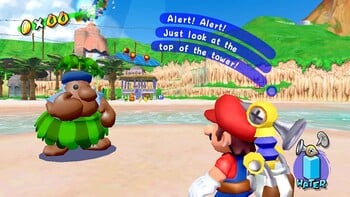
Now, for all we've just discussed about Mario games avoiding slowing things down to put text in your face, something peculiar happens when you first enter this mission. Immediately after Mario materializes on the starting islet off the coast of Gelato Beach, the game takes control away from you, forcing you into conversation with a panicked Pianta. This Pianta directs your attention to the three giant mirrors positioned around the Shine Tower, complete with a camera cutting to the mirrors to make it absolutely impossible to miss their tilting around as Plungelos tromp all over them. It's a short little sequence and doesn't take you out of the gameplay for long, but it still really struck me as I reflected - no pun intended - on this level. It's just so unorthodox for a Mario game! Usually, throughout Sunshine and all of the later 3D titles, you'll have a camera pan over the level and its objective before Mario appears, making it feel more like an extension of the level loading up rather than a gameplay interruption. In fact, this level even has that introductory pan! Yet, oddly enough, rather than pan over the mirrors and thus the mission's main objective, it pans over the Wiggler sleeping atop the Shine Tower which will become the main boss of the following mission!
I understand why they created this sequence, and, honestly, I don't dislike it. It doesn't overstay its welcome, it strengthens the bridge between this mission and the next, and it meshes well with Sunshine's more cohesive, lived-in setting. Having this Pianta running around like the world is coming to an end and sounding the alarm to the nearest passerby who just happens to show up reinforces the idea that Gelato Beach's residents and visitors are invested in the Sand Bird's hatching and that this is an emergency situation. Considering that Gelato Beach's first mission has you rushing off into a secret level in some kind of pocket dimension, it's arguably even a necessary safety net so that players who skipped out on talking to NPCs can follow the level's story arc.
That's all from a story perspective, though. If you asked me whether this introductory sequence works well from a gameplay perspective, I'd have to answer in the negative. It's not terrible. At least it goes by quickly. Even so, it's overly cautious and a clunky interruption, at odds with Nintendo's typical approach to Super Mario level design.
Moving Mirrors
Let's pretend this opening conversation didn't happen. What would draw a player to the level's objective in that case, if anything?
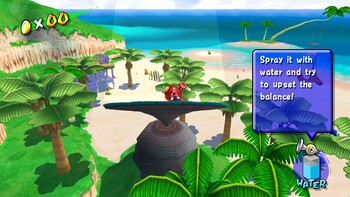
Well, in this case, I'd argue that the mirrors themselves do a lot of heavy-lifting. They're already large fixtures in the level, but, in most missions, they could escape your notice rather easily. After all, they have a somewhat uniform coloration when viewed at a distance and are just these three flat, duplicated surfaces. In other missions, I'd even say they're easy to miss compared to other fixtures of comparable sizes. What makes the crucial difference in this mission is that they're moving and tilting all around.
Not only does this movement draw your eye to the mirrors in and of itself, but it also plays a role in making them stand out by way of their reflectiveness. These mirrors do a remarkable job of reflecting different parts of the level geometry as they tilt around, making them look less uniform and adding another ever-changing element to them that's going to draw in the eye. Add onto that the big beams of reflected light coming off of them, which move with the mirrors, turning them into attention-grabbing pseudo-inverted spotlights.
I don't have the insight into Sunshine's development to say why they chose to put giant mirrors in Gelato Beach. Maybe they did it to facilitate the story of the level, or maybe they just wanted to show off the Gamecube's power with those reflections. It's not impossible, though, that there were gameplay considerations behind making these platforms into mirrors, or that gameplay considerations helped to solidify taking them in that direction. Regardless of how they came to be, mirrors strike me as an inspired choice for this mission. Their natural reflectiveness makes them quite eye-catching when they're moving all around (and it helps substantially that they move around exclusively in this mission). You see them waving around, shining their lights, and you're compelled to go investigate them and the creatures atop them.
Honestly, though, while the mirrors may be inspired choices for this level and while I may be able to see how they draw players to them, I don't think they're all that effective. Stand from far enough away (say, at the starting islet), and the shifting reflections are hard to make out. The big beams of light, while visible enough, also end up washed out against the bright, tropical island sky. The effectiveness of the mirrors as a draw ends up fairly diminished by these factors.
Overall, in terms of directing players on where to go to meet this mission's objectives, I'd say Nintendo did a so-so job of setting the stage in this level. That opening conversation, combined with the mission title, does practically ensure you'll know where to go (unless you're a four-year-old and mashing through text), but it does so in a clunky manner that's at odds with the reputation Mario platformers have for not taking control out of the player's hands.
That's the "what" and "where" of the mission's objective, though. Get on the mirrors and do something with the creatures walking around on them. We haven't yet considered the "how". Does this mission fare better in intuitively guiding players in actually dealing with the Plungelos?
A Plungelo Predicament
This might sound silly, but in a level that expects you to defeat a new creature like this, you do have to ask whether or not the Plungelos are actually presented as enemies in need of defeating! Remember, we're trying to consider these things from the perspective of novice players who may not be super familiar with videogame conventions, because Super Mario often serves as an early introduction to gaming. If you don't believe this part is important, go back and read some of those World 1-1 breakdowns and see how many of them discuss learning to distinguish between a Goomba (bad) and a Super Mushroom (helpful).
Honestly, here, Nintendo recovers a bit. It's not too hard to identify the Plungelos as enemies from a distance even if you've mashed through the text at the level's opening, and much of that is thanks to their resemblance to Cataquacks. While it may not be unlikely a player could dash through the first mission of Gelato Beach without talking to any NPCs, the structure of the first mission forces players to go through a mini-gauntlet of Cataquacks to reach the level's main platforming challenge. A player will have almost certainly been flung into the air by or bumped by a Cataquack, solidifying the player's perception of them as enemies. Looking at a Plungelo, that resemblance to a Cataquack signals to players that these are going to be enemies too. With the design of Plungelos, Nintendo builds from a lesson taught previously to nudge players into a battle. Plus, you know, if that's not enough, when you get on the mirrors with them, this sinister mini-boss theme starts playing, solidly identifying the Plungelos as threats.
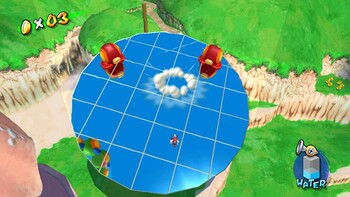
Come On And SLAM?
Finally, we get to the meat and potatoes of the level, engaging the Plungelos in battle. If you've played this level before, you know that the mission's title is a set of instructions for the battle. Push the Plungelos to the edge of the mirror with water to force them off-balance, and then ground pound the opposite side of the mirror to fling them off. If you don't pick up on this right away, FLUDD provides some hints through (unintrusive) dialogue boxes. Again, this kind of spelling out the strategy for a boss fight is unusual for a Mario level. Compare it to Gooper Blooper's first battle in Ricco Harbor, where instead you're taught that you can pull on Gooper Blooper by getting the chance to pull off a tentacle before the boss fight begins. This isn't as forceful of a shove as an NPC interrupting the gameplay to exposit at you, and feels more akin to a hint system than a disruption, but it's still at odds with the design philosophy that Mario games are usually praised for.
Let's say you aren't picking up on the mission's title and you're ignoring FLUDD because, again, you're a novice player. Is there anything which more intuitively suggests a battle strategy? Well, yes! First, given that you've had to beat a few Proto Piranhas and that spraying water tends to be the main method of interacting with everything in Sunshine, even a confused novice will probably try to spray the Plungelos. In a nice bit of sound design, they'll be rewarded with the Plungelos making these displeased warbling noises as they hunker down and get pushed back by the water. This tells players that the water is doing something, which incentivizes them to keep spraying until they notice that the Plungelo is being pushed back. If they persist, they'll get the Plungelo off-balance, hanging onto the mirror with just one of their plunger feet, signaling that it's time for some kind of finisher.
How is a player supposed to know that this occasion calls for a ground pound, though, as opposed to any other move in Mario's arsenal? Well, the big clue, so far as I can tell, is the sense of weight to the mirrors. They're actually fairly responsive to the movement of the Plungelos, tilting as you would expect based on where the Plungelos roam atop them. Mario isn't hefty enough compared to the Plungelos to make much of a difference on the movement of the mirror, but, given the responsiveness of the mirrors to weight and movement, you might try to ground pound to see what happens if Mario hits them with a little more oomph. If you do (or if you mash buttons enough to pull one off), you're rewarded with the mirror reacting to the ground pound, wildly tilting towards Mario and then bouncing in the other direction, slowly settling back into position. That's cue enough that ground pounds are hitting the mirror with enough force to rock and roil them, and, once you have a Plungelo barely hanging on the edge, it's not too difficult to put two and two together. Even if you don't quite get it at first, you'll see the Plungelos squat down and cling to the mirror with their suction cup feet when you ground pound, indicating that you're onto something, but need to do more to make it work.
Overall, when it comes to communicating the "how" of achieving the mission's objective, Nintendo did a… serviceable job. I don't know that I'd call it great work. I don't think it would have hurt to have some kind of an additional incentive to ground pound the mirrors. Even if their sense of weight and responsiveness to movement suggests a ground pound could be effective, I wouldn't call it particularly intuitive. Without factoring in the mission title, that doesn't pop right out from the movement of the mirrors. It's just a little too subtle.
A So-So Setting of the Stage
Everything taken into consideration, I return to the conclusion I drew earlier. With this mission, Nintendo did a middling job of gently guiding players to and through the main objective. The level isn't wholly devoid of elements that suggest where to go and what to do without saying it outright. The mirrors do stand out, after all. The problem is that they don't stand out all that well. You can see an attempt to nudge players into slamming the mirrors to defeat the Plungelos, but you can also understand why Nintendo put instructions in the mission's title. You can see that the developers tried to use the mirrors to lure players where they needed to go, but also see there are factors that diminish that effect which might have led the developers to give players a firmer shove through an NPC.
Ultimately, Nintendo created a level that players aren't going to get lost in, but through some less-than-graceful methods that don't quite match up with the franchise's reputation for intuitive lessons delivered through gameplay alone.
I think, amidst all the discussion of the brilliant design of Mario levels, it's worth remembering that usually only a few cherry-picked examples get covered in detail. I'm not here to dispute that World 1-1 or Bob-omb Battlefield are incredibly well-designed, because their praise is well-earned; my goal is to look at a broader set of levels and see where they stumble as well as what they do well. There are lessons to be learned in failures and botched attempts, after all! Likewise, I'm not here to say that "Mirror Madness! Tilt, Slam, Bam!" is a bad mission. In fact, it's one of my favorites in the game! That's why I wanted to look at it through another, more focused lens, though, and, looking through that lens, I have to say it doesn't hit high marks when it comes to intuitiveness.
That's all I have to say on it, but maybe you have a different perspective? Well, if you do, write it down and send it in as a one-off section! Or subject your own favorite levels to this kind of analysis. I might do more of these someday myself, but I have no immediate plans on that front, so it's a great time to jump in if you feel inspired!
An Octet Gazette
Written by: Museful Traveler (talk)
Daily I remind myself how fortunate I am to keep my good health. Passing through a port today, I witnessed a laborer hauling cargo off an arriving ship suddenly collapse. Had he merely overexerted himself, or did some underlying affliction choose in that moment to make itself known? I cannot say. Fortune favored him on this day; as shouts for help rose, an apothecary appeared as if out of nowhere to offer treatment. I could not linger to watch, but from what I was able to observe of the treatment, I have no doubt that the man's health returned to him. The apothecaries in my homeland are resourceful and skillful, and the apothecaries are the same. Nay, it may even be the case they are more skillful, for the methods of treatment I observed were certainly more efficient...
Welcome back to An Octet Gazette, readers of The 'Shroom! We're down to two job classes, now, both of which do the heavy lifting when it comes to healing the party. Of the two, first we're going to be focusing in on the Apothecary job class. Let's jump right in by looking at the weapons the job class makes available!
I'm A Healer, But...
It's been some time since we've seen a job class with access to just one weapon, but here we are. Apothecaries get axes and that's it. On the plus side, axes are a powerful class of weapon, and you can get a surprising amount of mileage out of the Apothecary job on physically-oriented characters, so your healers are probably going to be able to swing that axe hard.
That actually gets to the core of what the Apothecary job offers. It does emphasize healing above all else, but it's a fairly well-rounded job that's not without its offensive capabilities. It's not going to do the damage that, say, the Warrior job will do, but it isn't stuck as purely defensive/supportive. We'll see that reflected in the skills offered by the job, though, so let's get into looking at those!
What should strike you right off the bat is that this job has three skills directly related to healing. First Aid is restorative, Vivify revives, and Rehabilitate is curative and preventative. With those three moves, you have the full spectrum of healing capabilities, though, as a minor trade-off, these are all single-target abilities. If you're looking for a job that can offer full-party healing, you'll want to come back here next month. Although, if you're willing to do a little set-up, you can use an Apothecary to heal the whole party at once through Dohter's Charity, which will cause restorative and curative items to affect the whole party. I have to say that it's a clever idea for the class's ultimate skill, because it can certainly come in handy at times, letting you do one turn what could otherwise take up to four. When you add Dohter's Charity into the mix, a full half of the job's skillset is devoted to healing, so you can see why I say that it's the job's primary emphasis.
That is only half, though. You'll also see that the job comes with one standard elemental attack and one standard high-powered physical attack. Again, the job balances things out, creating a little bit of a "jack of all trades" situation outside of healing and high HP. Speaking of high HP, Last Stand attempts to connect a high HP pool to offense. I say "attempts" because under the hood, it's allegedly (if the Octopath Traveler Fandom wiki has it right) all percentage-based, so it really doesn't matter that the job provides a bonus to HP. It's a nice little gesture towards connecting the emphasis on high HP to offensive capabilities, though, and it has some use cases with the right Support Skills to back it up.
You have a four healing skills all with different niches and three offensive skills balanced between magic, physical offense, an ostensible tie to HP, so the Apothecary job is balanced overall. If anything is glaringly missing from the arrangement it's either some kind of defensive move or some kind of status move. As we'll find out next month, the defensive moves were saved for the other healing-focused class, but they did give the Apothecary job a status move, and it's a good one. Let's talk about Empoison.
On the surface, Empoison is simple, and, really, it's as straightforward as it appears in this first game. You poison an enemy with it, gradually chipping away at their health over time. It's thematically appropriate for an Apothecary, it's simple in its use, and, I cannot stress this part enough - it works on (most) bosses. That's right, in Octopath Traveler, we're not putting up with that contractual boss immunity. I was able to get so much use out of this in the first game, whittling down the HP of a boss by doing a max-boosted Empoison to poison them for nine turns. Considering a lot of the bosses in the first game have large HP pools, the gradual damage poison does adds up and speeds these fights up nicely. It might have been my favorite move in the first game outside of Leghold Trap.
I single Empoison out not out of favoritism, though. We've seen that Apothecaries in the first game emphasize healing while striking a sort of jack of all trades balance outside of that, so let's look at what changes the sequel makes to that arrangement.
Condensing The Medicine Cabinet
As you'll see below, the Apothecary job hasn't changed all that much. For the most part, it seems the main tweaks made to the job revolved around condensing and simplifying its list of moves... with one glaring exception, but we'll get to that.
More worthy of note first is that Vivify is gone! That's right, we lost a healing move, though we did gain one in its place. This is a pretty simple case of condensing some moves down. Healing Touch now exists to take on the roles of both First Aid and Vivify. This makes a lot of sense to me. Revival and HP restoration aren't that different and are linked closely together (typically you want to heal up a party member after reviving them, after all!). The SP cost is a little high than First Aid's was, but that's a worthwhile trade-off for folding revival into the move, and it makes reviving party members much less of an SP drain, helping apothecaries to more easily fulfill one of their roles as healers.
The skillset of the Apothecary job is still half-devoted to healing thanks to the restorative buff Replenish Health filling the now-open slot. I think this was a nice addition. I didn't use it often, but it does squeeze in while having its own niche as a gradual, passive healing method. It's not too redundant and while I don't think you need it and I could see it getting shuffled out in a future game, it's fine here.
Nothing else changed on the healing side of things, but the offensive side of things similarly collapsed two moves into one. The herd-hitting, HP-based gimmick-having Last Stand has been merged with the straightforward and powerful Amputation, becoming Sweeping Cleave. Sweeping Cleave reads to me as a simplification of Last Stand. Maybe they realized Last Stand being percentage-based meant it doesn't really gel as well with the HP-focus as they thought, maybe they had some reason to simplify it, or maybe this is just change for the sake of change, but I welcome it. I didn't get much use out of Last Stand, finding Amputation to be the superior choice, so basically taking Amputation and making it hit everyone works just fine for me.
It also frees up a slot, though, which might actually have been the developers' primary motivation, because things get interesting as we look at what fills that slot. You'll notice we no longer has Empoison. We now have Poison Axe, which deals axe damage and poisons the enemy. Now, this may seem like an upgrade, but there's been a subtle nerf to poison so that it's not as incredibly useful as in the first game. still is useful, In the first game, you could inflict poison for up to nine turns by spending BP. In this game, no matter how much BP you spend, poison will last for two turns (though the damage done will increase with a higher boost level). This means you will be reapplying poison regularly if you want it to help you chip away at a high-HP boss. This nerf makes sense. Even if I did enjoy how useful poison was in the first game, the second game's bosses aren't as big of damage sponges, so there's no need for poison to be as useful a tool here.
While poison has been nerfed, they've also given it a secondary use. Weak to Poison adds a special poison weakness to an enemy's list of weaknesses, allowing poison damage to whittle down their shield points. I... didn't get much out of this, honestly. It just ends up being too much to juggle when you're having to reapply poison so often. Still, I can see it being useful in the early game when you don't have a full party or sub-jobs and might not always have an enemy's weakness on-hand.
Overall, with the Apothecary job coming out of the first game with a pretty solid and well-rounded movelist, the second game mostly focused on condensing and simplifying some overlapping moves, but you can definitely see that the poisoning aspect took some reworking. Poisoning earned itself a nerf and an odd complement. That's the full skillset of the Apothecary job in both games examined, so let's look at the job's Support Skills now!
Support Skills
| Name | Effect |
|---|---|
| Inspiration | Restores SP equivalent to 1% of the damage dealt by your standard attacks |
| Hale and Hearty | Increases the equipping character's max HP by 500 |
| Resist Ailments | Gain increased resistance to acquiring various status conditions |
| Heightened Healing | Increases the effects of HP/SP restoration by 30 percent |
Well, these are all related to healing, aren't they? This is a thematic set of Support Skills if I've ever seen on! You have passive regeneration (of something that Apothecaries can't normally restore, no less), an HP boost, some extra shielding against status conditions, and an ability which nets you more bang for your buck when using healing skills or items. Just like with the Apothecary job's skillset, these Support Skills cover a wide spread of healing-related angles without much overlap. It's an effective set, and that makes it hard to say much about it without delving into specific character builds, so let's segue into seeing what, if anything, the second game changed.
| Name | Effect |
|---|---|
| Vigorous Victor | Get 30% of the equipping character's HP and SP restored after winning a battle |
| Hale and Hearty | Increases the equipping character's max HP by 500 |
| Inspiriting Break | Gain some SP when breaking an enemy |
| Preventative Measures | For the first three turns of battle, the equipping character will be immune to various negative status conditions |
I'd argue that three of the niches from the first game have remained unchanged. Hale and Hearty made it over completely unchanged, and Inspiriting Break falls in that same "gradually restore SP as you act" bucket that Inspiration did. What changed is the trigger. Inspiration was very incremental regeneration over longer periods, while Inspiring Break rewards you with a larger SP replenishment for strategically choosing who will break an enemy. I prefer it this way, myself. It adds a layer of strategy to it and makes it easier to use that SP boost. Similarly, Preventative Measures guards against status ailments in much the same way Resist Ailments did, but it has been made more predictable and easier to plan around. Now, it's immunity instead of simply a reduced chance, with the trade-off being that it lasts for only three turns. Even with the trade-off, I prefer that predictability over not really getting to see a Support Skill working because sometimes a status condition still slips through.
The only change in niche here is that, rather than a healing item-effectiveness booster, we now have a Support Skill that grants passive end-of-battle health regeneration. I appreciated not having to stop to top off my apothecary after random battles, though I do think this overlaps a little with Inspiriting Break. It doesn't wholly overlap because you get HP restoration, too, but I could see one of these two being shuffled out in a hypothetical third installment (though my real hope is a third installment gives us a larger setting update and new job classes...). Overall, though, outside of that swap, it seems that most of the changes to Support Skills were made to make them a little more predictable and to make it easier to strategize around them.
That's all there is to say about the Apothecary job for now, but when we get to discussing character-specific abilities and talk a little about Alfyn Greengrass and Castti Florenz, we'll have a very unique mechanic to cover. That's down the road, though. Come back next month, and we'll finish looking at the starting eight jobs!
| The 'Shroom: Issue 210 | |
|---|---|
| Staff sections | Staff Notes • The 'Shroom Spotlight • Poochy's Picks • Credits |
| Features | Fake News • Fun Stuff • Palette Swap • Pipe Plaza • Critic Corner • Strategy Wing |
| Specials | TV Tomorrow Commentary Tracks |
