Category:Mario & Luigi: Dream Team screenshots
From the Super Mario Wiki, the Mario encyclopedia
Jump to navigationJump to search
This category contains screenshots from Mario & Luigi: Dream Team.
Subcategories
This category has only the following subcategory.
Media in category "Mario & Luigi: Dream Team screenshots"
The following 200 files are in this category, out of 436 total.
(previous page) (next page) 3DS Mario&L4 scrn01 E3.png 400 × 240; 82 KB
 3DS Mario&L4 scrn02 E3.png 400 × 480; 183 KB
 3DS Mario&L4 scrn03 E3.png 400 × 240; 108 KB
 3DS Mario&L4 scrn04 E3.png 400 × 240; 97 KB
 3DS Mario&L4 scrn05 E3.png 240 × 320; 72 KB
 3DS Mario&L4 scrn06 E3.png 400 × 480; 166 KB
 3DS Mario&L4 scrn07 E3.png 400 × 240; 124 KB
 3DS Mario&L4 scrn08 E3.png 400 × 480; 190 KB
 3DS Mario&L4 scrn09 E3.png 400 × 240; 137 KB
 3DS Mario&L4 scrn10 E3.png 400 × 240; 97 KB
 3DS Mario&L4 scrn11 E3.png 400 × 240; 91 KB
 3DS Mario&L4 scrn12 E3.png 400 × 240; 126 KB
 3DS Mario&L4 scrn13 E3.png 400 × 240; 89 KB
 3DS Mario&L4 scrn14 E3.png 480 × 400; 149 KB
 3DS Mario&L4 scrn15 E3.png 400 × 480; 178 KB
 3DS MarioLuigi3DS 022013 Scrn01.png 400 × 240; 217 KB
 3DS MarioLuigi3DS 022013 Scrn02.png 400 × 240; 214 KB
 3DS MarioLuigi3DS 022013 Scrn03.png 400 × 240; 209 KB
 3DS MarioLuigi3DS 022013 Scrn04.png 400 × 240; 169 KB
 3DS MarioLuigi3DS 022013 Scrn05.png 400 × 240; 214 KB
 3DS MarioLuigi3DS 022013 Scrn06.png 400 × 240; 179 KB
 3DS MarioLuigi3DS 022013 Scrn07.png 400 × 240; 226 KB
 3DS MarioLuigi3DS 022013 Scrn08.png 400 × 240; 175 KB
 Antasma and Peach.png 400 × 240; 96 KB
 Antasma Screenshot - Mario & Luigi Dream Team.png 400 × 240; 44 KB
 Antasma Tutorial Battle.png 400 × 240; 120 KB
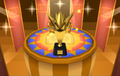 Antasma X Trophy.png 400 × 240; 86 KB
 AntasmaBattle.png 400 × 240; 238 KB
 Antasmunchie X.png 265 × 218; 140 KB
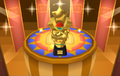 Battle Medley Trophy.png 400 × 240; 88 KB
 BeanishDreamTeam.png 400 × 240; 123 KB
 Big Massif X Trophy.png 400 × 240; 104 KB
 Bowser in Dream Team Bros.png 400 × 240; 158 KB
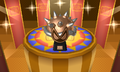 Bowser X & Antasma X Trophy.png 400 × 240; 106 KB
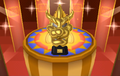 Bowser X Trophy.png 400 × 240; 101 KB
 Bowser X.png 218 × 202; 100 KB
 BowserandAntasmaX.jpg 156 × 138; 12 KB
 BowserJrDreamTeam.jpg 400 × 240; 24 KB
 Britta speaking as the Señor Barriga (Mr. Beliarge).jpg 400 × 240; 189 KB
 BroqueMadame DreamTeam.png 400 × 240; 112 KB
 Camera Block.png 31 × 39; 994 bytes
 Check-X Quiz.png 400 × 240; 73 KB
 CoinUpChallenge.png 400 × 240; 113 KB
 Creating Luiginoid Formation Stack Action Icons Air.png 96 × 96; 14 KB
 CrossplayKamek DreamTeam.png 400 × 240; 158 KB
 CTRP Mario&L4 scrn01 Ev04.png 400 × 240; 152 KB
 CTRP Mario&L4 scrn02 Ev04.png 400 × 240; 96 KB
 CTRP Mario&L4 scrn03 Ev04.png 400 × 480; 183 KB
 CTRP Mario&L4 scrn04 Ev04.png 400 × 240; 140 KB
 CTRP Mario&L4 scrn05 Ev04.png 400 × 240; 111 KB
 Dark Block.png 38 × 34; 2 KB
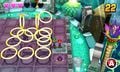 Ding-a-Ring.jpg 451 × 270; 58 KB
 DozingOre.png 251 × 154; 51 KB
 Dozite.png 57 × 49; 6 KB
 Dream Team Bros. Block.png 30 × 39; 1 KB
 Dream Team Dream World Attack Piece Block.png 30 × 33; 1 KB
 Dream Team Dream World L Block.png 31 × 33; 972 bytes
 Dream Team Dream World M Block.png 30 × 33; 2 KB
 Dream Team Dream World Question Block.png 31 × 33; 1 KB
 Dream Team Random Block.png 66 × 39; 1 KB
 Dream Team scene1.png 320 × 240; 84 KB
 Dream Team scene2.png 320 × 240; 126 KB
 Dream Team scene3.png 400 × 240; 88 KB
 Dream Team scene4.png 400 × 240; 138 KB
 DreamOrb.png 400 × 240; 249 KB
 DreamstoneSoul.png 400 × 240; 140 KB
 DreamTeamScreenshot.png 400 × 240; 131 KB
 DreamTeamStuckatStone.png 400 × 480; 205 KB
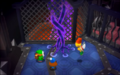 DreamVine0.png 687 × 432; 350 KB
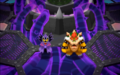 DreamVine1.png 687 × 432; 419 KB
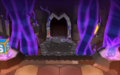 DreamVine2.png 687 × 432; 300 KB
 DreamVine3.png 687 × 432; 396 KB
 DreamVine4.png 687 × 432; 253 KB
 Dreamy Bowser.png 400 × 240; 133 KB
 Dreamy Bowser3.jpg 400 × 240; 197 KB
 Dreamy Driftwood Shore.png 400 × 240; 168 KB
 Dreamy Mario creating his clones.png 234 × 308; 157 KB
 Dreamy Mushrise Park.png 400 × 240; 200 KB
 Dreamy Somnom Woods.png 400 × 240; 234 KB
 DreamyBowserEnemies.png 400 × 240; 142 KB
 DreamyDozingSands.PNG 1,801 × 1,069; 1.85 MB
 DreamyNeoBowserCastle.png 1,803 × 1,072; 2.82 MB
 DreamyTeamy.jpg 400 × 240; 37 KB
 Drill Stomp Dream Team Battle Selection.jpg 689 × 912; 115 KB
 Drilldigger (MLDT).png 457 × 225; 220 KB
 Earthwake X Trophy.png 400 × 240; 87 KB
 Earthwake X.png 583 × 497; 281 KB
 Earthwake.png 328 × 410; 135 KB
 Elite Trio X Trophy.png 400 × 240; 104 KB
 Elite Trio X.png 104 × 86; 31 KB
 Elite Trio.png 400 × 240; 111 KB
 EliteTrioX.jpg 302 × 162; 23 KB
 Example of the beanhole (M&LDT).png 400 × 240; 107 KB
 Example of the Pi'illo (humanoid form).png 400 × 240; 130 KB
 Example of the Pi'illo (pillow form).png 400 × 240; 135 KB
 Finishing Bros.png 480 × 400; 176 KB
 FirstStrikeHammerM&LDT.png 400 × 240; 46 KB
 Giant Battle Medley Trophy.png 400 × 240; 93 KB
 Giant Dreamy Bowser.jpg 224 × 252; 31 KB
 GiantWeegee.jpg 134 × 234; 17 KB
 Gonzola.png 400 × 240; 136 KB
 Grobot X Trophy.png 400 × 240; 101 KB
 Grobot.battle.png 400 × 240; 47 KB
 HammerChop.jpg 190 × 236; 21 KB
 HoorawMedal DreamTeam.png 27 × 26; 17 KB
 KamekBlock.png 163 × 173; 62 KB
 KamekGreen.png 96 × 105; 19 KB
 KamekRed.png 110 × 129; 25 KB
 KamekWhite.png 123 × 138; 29 KB
 KoopaClown DreamTeam.png 400 × 240; 118 KB
 KylieKoopa DT.png 304 × 180; 87 KB
 LostCamera DreamTeam.png 32 × 28; 2 KB
 Luiginary Ice MLDT.png 400 × 240; 118 KB
 Luiginary Stache Tree (NBC).png 200 × 326; 137 KB
 Luiginary Stache Tree (PC).png 267 × 274; 171 KB
 LuigionLava MLDT.png 400 × 240; 142 KB
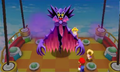 M&LDT - Antasma Fight.png 382 × 229; 102 KB
 M&LDT 3D Green Shell illustration.png 288 × 127; 37 KB
 M&LDT 3D Red Shell illustration.png 288 × 127; 36 KB
 M&LDT Badge Shop Dozing Sands.png 400 × 240; 67 KB
 M&LDT Badge Shoppe.png 400 × 240; 51 KB
 M&LDT Badgeport.png 400 × 240; 62 KB
 M&LDT Ball Hop.png 400 × 240; 133 KB
 M&LDT Bandit Fight.png 1,092 × 651; 524 KB
 M&LDT Bomb Derby illustration page 1.png 288 × 127; 32 KB
 M&LDT Bomb Derby illustration page 2.png 288 × 127; 41 KB
 M&LDT Brickle's Shop.png 400 × 240; 57 KB
 M&LDT Bye-Bye Cannon illustration page 1.png 288 × 127; 25 KB
 M&LDT Bye-Bye Cannon illustration page 2.png 288 × 127; 21 KB
 M&LDT Bye-Bye Cannon illustration page 3.png 288 × 127; 27 KB
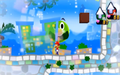 M&LDT Clock.png 400 × 240; 109 KB
 M&LDT DEF-Down.png 400 × 240; 148 KB
 M&LDT Dream Coin Appear.png 400 × 240; 30 KB
 M&LDT Dream Coin Crash.png 400 × 240; 51 KB
 M&LDT Dream Coin Explode.png 400 × 240; 103 KB
 M&LDT Dream Coin Form.png 400 × 240; 142 KB
 M&LDT Dream Coin Pierced.png 400 × 240; 27 KB
 M&LDT Dream Coin Rain.png 400 × 240; 147 KB
 M&LDT Dreampoint Battle Ring.png 400 × 240; 131 KB
 M&LDT Dreampoint Dozing Sands Dream Stone.png 400 × 240; 125 KB
 M&LDT Dreampoint Dozing Sands Mattress.png 400 × 240; 101 KB
 M&LDT Dreampoint Driftwood Shore 2.png 400 × 240; 103 KB
 M&LDT Dreampoint Driftwood Shore 3.png 400 × 240; 98 KB
 M&LDT Dreampoint Driftwood Shore 4.png 400 × 240; 82 KB
 M&LDT Dreampoint Driftwood Shore Madame.png 400 × 240; 125 KB
 M&LDT Dreampoint Mount Pajamaja Frame.png 400 × 240; 151 KB
 M&LDT Dreampoint Mount Pajamaja Peak.png 400 × 240; 89 KB
 M&LDT Dreampoint Neo Bowser Castle 1.png 400 × 240; 118 KB
 M&LDT Dreampoint Neo Bowser Castle 2.png 400 × 240; 119 KB
 M&LDT Dreampoint Neo Bowser Castle 3.png 400 × 240; 111 KB
 M&LDT Dreampoint Neo Bowser Castle 4.png 400 × 240; 112 KB
 M&LDT Dreampoint Neo Bowser Castle 5.png 400 × 240; 118 KB
 M&LDT Dreampoint Neo Bowser Castle 6.png 400 × 240; 113 KB
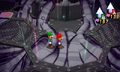 M&LDT Dreampoint Neo Bowser Castle 7.png 400 × 240; 133 KB
 M&LDT Dreampoint Pi'illo Castle Exhibit.png 400 × 240; 122 KB
 M&LDT Dreampoint Somnom Woods.png 400 × 240; 138 KB
 M&LDT Dreampoint Wakeport Inside.png 400 × 240; 127 KB
 M&LDT Dreampoint Wakeport Outside.png 400 × 240; 124 KB
 M&LDT Dreamy Bowser Airtub.png 400 × 240; 140 KB
 M&LDT Dreamy Bowser Chase.png 400 × 240; 105 KB
 M&LDT Dreamy Bowser Defeat.png 400 × 240; 94 KB
 M&LDT Drill Stomp Action Command.png 480 × 400; 218 KB
 M&LDT Drill Stomp End.png 480 × 400; 178 KB
 M&LDT Drill Stomp Great.png 480 × 400; 220 KB
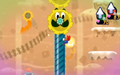 M&LDT Drill.png 400 × 240; 99 KB
 M&LDT Dropchopper illustration page 1.png 288 × 127; 25 KB
 M&LDT Dropchopper illustration page 2.png 288 × 127; 34 KB
 M&LDT Dropchopper illustration page 3.png 288 × 127; 42 KB
 M&LDT Earthwake Hammer form.jpg 667 × 822; 104 KB
 M&LDT Fire Flower illustration page 1.png 288 × 127; 40 KB
 M&LDT Fire Flower illustration page 2.png 288 × 127; 38 KB
 M&LDT First Strike Enemy.png 400 × 240; 37 KB
 M&LDT First Strike Jump Luigi.png 400 × 240; 40 KB
 M&LDT First Strike Jump.png 400 × 240; 43 KB
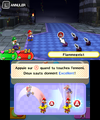 M&LDT Flammegeist.png 400 × 480; 148 KB
 M&LDT Gear Shoppe.png 400 × 240; 60 KB
 M&LDT Gold Shop Inventory.png 400 × 240; 109 KB
 M&LDT Gold Shop.png 400 × 240; 69 KB
 M&LDT Heavy Zest House.png 480 × 400; 220 KB
 M&LDT Home Menu.png 400 × 240; 67 KB
 M&LDT HP and BP.png 76 × 46; 6 KB
 M&LDT Inner Mammoshka.png 72 × 98; 2 KB
 M&LDT Item Shoppe.png 400 × 240; 59 KB
 M&LDT Item Town.png 400 × 240; 73 KB
 M&LDT Jet-Board Bash illustration.png 288 × 127; 38 KB
 M&LDT Last Mammoshka X.png 64 × 67; 2 KB
 M&LDT Last Mammoshka.png 45 × 59; 1 KB
 M&LDT Luiginary Ball illustration page 1.png 288 × 127; 39 KB
 M&LDT Luiginary Ball illustration page 2.png 288 × 127; 41 KB
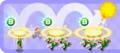 M&LDT Luiginary Flame illustration page 1.png 288 × 127; 32 KB
 M&LDT Luiginary Flame illustration page 2.png 288 × 127; 31 KB
 M&LDT Luiginary Flame illustration page 3.png 288 × 127; 36 KB
 M&LDT Luiginary Gravity Rotate.png 400 × 480; 184 KB
 M&LDT Luiginary Hammer illustration page 1.png 288 × 127; 51 KB
 M&LDT Luiginary Hammer illustration page 2.png 288 × 127; 57 KB
 M&LDT Luiginary Hammer illustration page 3.png 288 × 127; 50 KB
 M&LDT Luiginary Ice Cold.png 400 × 480; 212 KB
 M&LDT Luiginary Ice Hot.png 400 × 480; 202 KB
 M&LDT Luiginary Propeller Idle.png 400 × 480; 189 KB
 M&LDT Luiginary Speedometer Fast.png 400 × 480; 197 KB


