World A: Difference between revisions
LinkTheLefty (talk | contribs) mNo edit summary |
m (Text replacement - "\n\[\[Category:Unlockable([^\]\n]+)\]\]" to "") |
||
| (47 intermediate revisions by 22 users not shown) | |||
| Line 1: | Line 1: | ||
{{ | {{world infobox | ||
|title=World A | |title=World A | ||
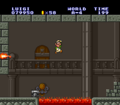
|image=[[File: | |image=[[File:SMAS LL World-A In Another Castle.png]] | ||
| | |game=''[[Super Mario Bros.: The Lost Levels]]'' | ||
| | |levels=4 | ||
|before=[[World 8 (Super Mario Bros.: The Lost Levels)|<]][[World 9 (Super Mario Bros.: The Lost Levels)|<]] | |before=[[World 8 (Super Mario Bros.: The Lost Levels)|<]][[World 9 (Super Mario Bros.: The Lost Levels)|<]] | ||
|after=[[World B|>>]] | |after=[[World B|>>]] | ||
}} | }} | ||
'''World A''' is the second secret world that was first featured in the game ''[[Super Mario Bros.: The Lost Levels]]'', coming after [[World 9 (Super Mario Bros.: The Lost Levels)|World 9]]. The [[Koopa Troopa]]s from this world on move faster than the normal ones. | '''World A''' is the second secret world and the tenth world that was first featured in the game ''[[Super Mario Bros.: The Lost Levels]]'', coming after [[World 9 (Super Mario Bros.: The Lost Levels)|World 9]]. The [[Koopa Troopa]]s from this world on move faster than the normal ones. | ||
In the Famicom Disk System version of ''Super Mario Bros. 2'', the player must beat the game eight | In the Famicom Disk System version of ''Super Mario Bros. 2'', the player must beat the game eight times and press the Start button while holding down the A button on the title screen in order to access World A, and in turn the other later worlds. In the ''Famicom Mini'' version for the Game Boy Advance, this was changed so that the B button must be held instead of the A button. However, in the ''[[Super Mario All-Stars]]'' version of the game, the player proceeds to the later worlds directly after completing World 8 (or World 9 if the player accesses it by beating Worlds 1 to 8 without using warp pipes). World 9 and the later worlds were left unused in the ''[[Super Mario Bros. Deluxe]]'' version of the game. | ||
==Level | ==Level information== | ||
{| style="text-align: center; width: 100%; margin: 0 auto 10px auto; border-collapse: collapse; font-family:Arial;" border="1" cellpadding="1" cellspacing="1" | {| style="text-align: center; width: 100%; margin: 0 auto 10px auto; border-collapse: collapse; font-family:Arial;" border="1" cellpadding="1" cellspacing="1" | ||
|-style="background: #ABC;" | |-style="background: #ABC;" | ||
!width="5%"|Level | !width="5%"|Level | ||
!width="1%"|Preview | !width="1%"|Preview | ||
!width="20%"| | !width="20%"|Summary | ||
|- | |- | ||
|World A-1 | |[[World A-1]] | ||
|style="background: #202020" |[[File:World A-1. | |style="background: #202020" |[[File:SMAS LL World A-1 Title Card.png]] | ||
|The | |The first level of World A has several [[Koopa Troopa]]s, [[Koopa Paratroopa]]s, [[Hammer Bro]]s., and [[Piranha Plant]]s. | ||
|- | |- | ||
|World A-2 | |[[World A-2]] | ||
|style="background: #202020" |[[File:World A- | |style="background: #202020" |[[File:SMAS LL World A-2 Title Card.png]] | ||
|The | |The second level of World A is an underground area with many small platforms and narrow passages. | ||
|- | |- | ||
|World A-3 | |[[World A-3]] | ||
|style="background: #202020" |[[File:World A- | |style="background: #202020" |[[File:SMAS LL World A-3 Title Card.png]] | ||
| | |The third level of World A takes place in the sky with long platforms and jumping [[Cheep Cheep]]s. | ||
|- | |- | ||
|World A-4 | |[[World A-4]] | ||
|style="background: #202020" |[[File: | |style="background: #202020" |[[File:SMAS Bowser Title Card.png]] | ||
|The | |The final level of World A is a [[castle]] with small platforms and fire enemies. | ||
|} | |} | ||
==Gallery== | ==Gallery== | ||
==Level maps== | ===Level maps=== | ||
<gallery widths="500px" heights="40px"> | |||
NES LL World A-1 Map.png|World A-1 | |||
NES LL World A-2 Map.png|World A-2 | |||
NES LL World A-3 Map.png|World A-3 | |||
NES LL World A-4 Map.png|World A-4 | |||
</gallery | </gallery> | ||
===Screenshots=== | ===Screenshots=== | ||
<gallery> | |||
SMBLL World A-1 Screenshot.png|World A-1 (original) | |||
SMAS LL World A-1 Screenshot.png|World A-1 (''All-Stars'') | |||
SMAS LL World A-2 Screenshot.png|World A-2 | |||
SMAS LL World A-3 Screenshot.png|World A-3 | |||
</gallery> | FirebarWorldA4.png|World A-4 | ||
SMAS LL World A-4 Screenshot.png|World A-4 | |||
</gallery> | |||
{{SMBTLL levels}} | |||
{{SMB}} | {{SMB}} | ||
[[Category:Grasslands]] | [[Category:Grasslands]] | ||
[[Category:Sky | [[Category:Sky areas]] | ||
[[Category:Secret | [[Category:Secret areas]] | ||
[[Category: | [[Category:Super Mario Bros.: The Lost Levels worlds]] | ||
Latest revision as of 12:18, December 23, 2022
| World A | |
|---|---|

| |
| Game | Super Mario Bros.: The Lost Levels |
| Level(s) | 4 |
| << List of worlds >> | |
World A is the second secret world and the tenth world that was first featured in the game Super Mario Bros.: The Lost Levels, coming after World 9. The Koopa Troopas from this world on move faster than the normal ones.
In the Famicom Disk System version of Super Mario Bros. 2, the player must beat the game eight times and press the Start button while holding down the A button on the title screen in order to access World A, and in turn the other later worlds. In the Famicom Mini version for the Game Boy Advance, this was changed so that the B button must be held instead of the A button. However, in the Super Mario All-Stars version of the game, the player proceeds to the later worlds directly after completing World 8 (or World 9 if the player accesses it by beating Worlds 1 to 8 without using warp pipes). World 9 and the later worlds were left unused in the Super Mario Bros. Deluxe version of the game.
Level information[edit]
| Level | Preview | Summary |
|---|---|---|
| World A-1 | 
|
The first level of World A has several Koopa Troopas, Koopa Paratroopas, Hammer Bros., and Piranha Plants. |
| World A-2 | 
|
The second level of World A is an underground area with many small platforms and narrow passages. |
| World A-3 | 
|
The third level of World A takes place in the sky with long platforms and jumping Cheep Cheeps. |
| World A-4 | 
|
The final level of World A is a castle with small platforms and fire enemies. |
Gallery[edit]
Level maps[edit]

World A-1

World A-2

World A-3

World A-4
Screenshots[edit]
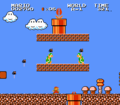
World A-1 (original)
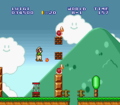
World A-1 (All-Stars)
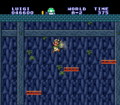
World A-2
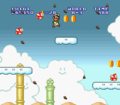
World A-3

World A-4
World A-4


