Tag: Disambiguation links |
|
| Line 1: |
Line 1: |
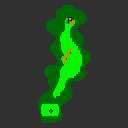
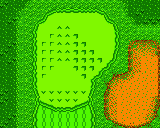
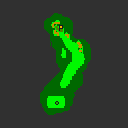
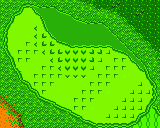
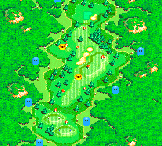
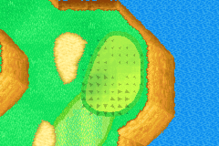
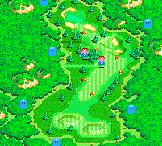
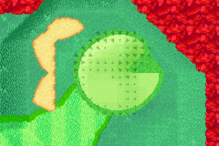
| ==Poké Ball Pokémon== | | ==Holes== |
| {| style="text-align: center; width: 100%; margin: 0 auto; border-collapse: collapse;" border="1" cellpadding="3" cellspacing="0" textalign="center"
| | ===Game Boy Color=== |
| |-style="background: #ABC;"
| | {|class="wikitable" style="text-align: center" |
| !width="10%"|Image
| |
| !width="10%"|Character
| |
| !width="2%"|''[[Super Smash Bros.|SSB]]''
| |
| !width="2%"|''[[Super Smash Bros. Melee|SSBM]]''
| |
| !width="2%"|''[[Super Smash Bros. Brawl|SSBB]]''
| |
| !width="2%"|''[[Super Smash Bros. for Nintendo 3DS / Wii U|SSB4]]''
| |
| !width="2%"|''[[Super Smash Bros. Ultimate|SSBU]]''
| |
| !width="70%"|Description
| |
| |- | | |- |
| |[[File:SSBU Abomasnow.png|x100px]]
| | !Hole |
| |[[bulbapedia:Abomasnow (Pokémon)|Abomasnow]]{{anchor|Abomasnow}}
| | !Map |
| |[[File:X_mark.svg|17px]]
| | !Green |
| |[[File:X_mark.svg|17px]]
| | !Par |
| |[[File:X_mark.svg|17px]]
| | !Yardage |
| |[[File:Check_mark.svg|17px]]
| | !Description |
| |[[File:Check_mark.svg|17px]]
| |
| |Abomasnow attacks by using [[bulbapedia:Blizzard (move)|Blizzard]], releasing a blast of freezing wind around itself that draws opponents towards it and deals minor damage, then charges across the arena with [[Bulbapedia:Ice Punch (move)|Ice Punch]], attacking the nearest opponent with a punch that freezes them in its path and deals severe damage if it hits.
| |
| |- | | |- |
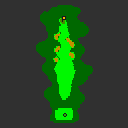
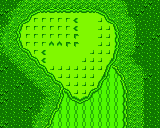
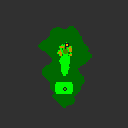
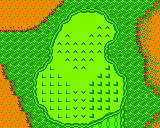
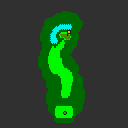
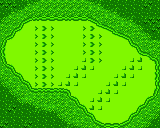
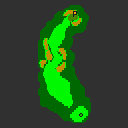
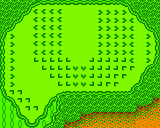
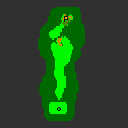
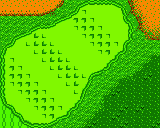
| |[[File:AbraUltimate.png|x100px]] | | |1 |
| |[[bulbapedia:Abra (Pokémon)|Abra]]{{anchor|Abra}}
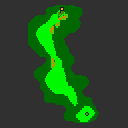
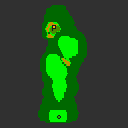
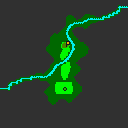
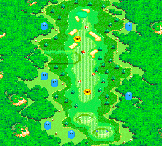
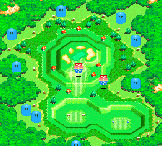
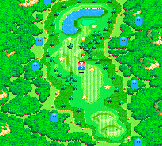
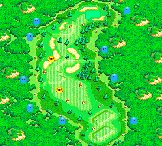
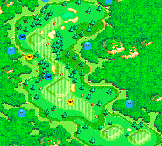
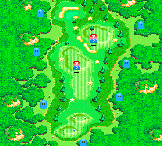
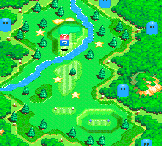
| | |[[File:MGGBC Marion Club Hole 1.png]] |
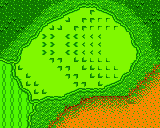
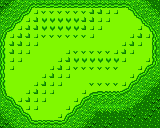
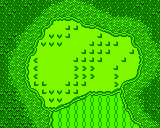
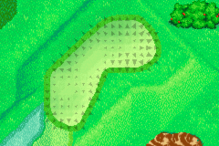
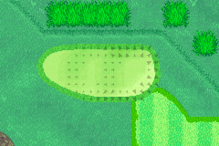
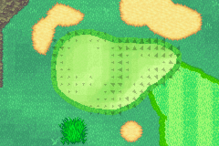
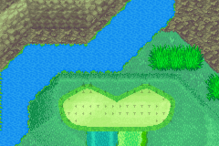
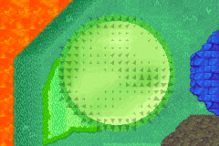
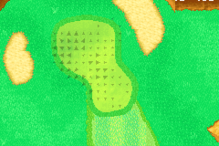
| |[[File:X_mark.svg|17px]] | | |[[File:MGGBC Marion Club Green 1.png]] |
| |[[File:X_mark.svg|17px]] | | |4 |
| |[[File:X_mark.svg|17px]] | | |374 yards |
| |[[File:X_mark.svg|17px]] | | | |
| |[[File:Check_mark.svg|17px]] | |
| |Abra uses [[bulbapedia:Teleport (move)|Teleport]], warping opponents to a random part of the stage.
| |
| |- | | |- |
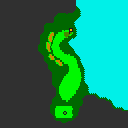
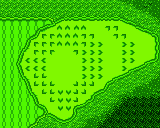
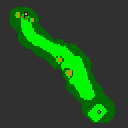
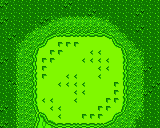
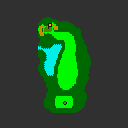
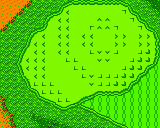
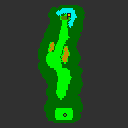
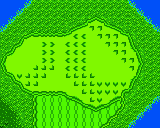
| |[[File:AlolanExeggutorUltimate.png|x100px]] | | |2 |
| |[[bulbapedia:Exeggutor (Pokémon)|Alolan Exeggutor]]{{anchor|Alolan Exeggutor}}
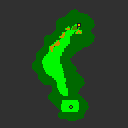
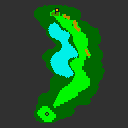
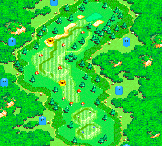
| | |[[File:MGGBC Marion Club Hole 2.png]] |
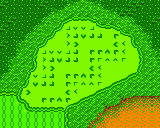
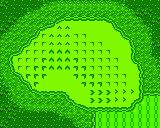
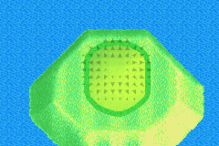
| |[[File:X_mark.svg|17px]] | | |[[File:MGGBC Marion Club Green 2.png]] |
| |[[File:X_mark.svg|17px]] | | |4 |
| |[[File:X_mark.svg|17px]] | | |318 yards |
| |[[File:X_mark.svg|17px]]
| | | |
| |[[File:Check_mark.svg|17px]] | |
| |Alolan Exeggutor acts as a stage barrier, preventing fighters from going through with its long neck, which also doubles as a wall. | |
| |- | | |- |
| |[[File:AlolanRaichuUltimate.png|x100px]] | | |3 |
| |[[bulbapedia:Raichu (Pokémon)|Alolan Raichu]]{{anchor|Alolan Raichu}}
| | |[[File:MGGBC Marion Club Hole 3.png]] |
| |[[File:X_mark.svg|17px]] | | |[[File:MGGBC Marion Club Green 3.png]] |
| |[[File:X_mark.svg|17px]] | | |3 |
| |[[File:X_mark.svg|17px]] | | |160 yards |
| |[[File:X_mark.svg|17px]]
| | | |
| |[[File:Check_mark.svg|17px]] | |
| |Alolan Raichu surfs across the stage, dealing electric damage to opponents it hits. | |
| |- | | |- |
| |[[File:AlolanVulpix SSBUltimate.png|x100px]] | | |4 |
| |[[bulbapedia:Vulpix (Pokémon)|Alolan Vulpix]]{{anchor|Alolan Vulpix}}
| | |[[File:MGGBC Marion Club Hole 4.png]] |
| |[[File:X_mark.svg|17px]] | | |[[File:MGGBC Marion Club Green 4.png]] |
| |[[File:X_mark.svg|17px]] | | |5 |
| |[[File:X_mark.svg|17px]] | | |480 yards |
| |[[File:X_mark.svg|17px]] | | | |
| |[[File:Check_mark.svg|17px]] | |
| |Alolan Vulpix attacks using [[bulbapedia:Frost Breath (move)|Frost Breath]], freezing opponents it hits.
| |
| |- | | |- |
| |[[File:SSBU Arceus.png|x100px]] | | |5 |
| |[[bulbapedia:Arceus (Pokémon)|Arceus]]{{anchor|Arceus}}
| | |[[File:MGGBC Marion Club Hole 5.png]] |
| |[[File:X_mark.svg|17px]] | | |[[File:MGGBC Marion Club Green 5.png]] |
| |[[File:X_mark.svg|17px]] | | |4 |
| |[[File:X_mark.svg|17px]] | | |308 yards |
| |[[File:Check_mark.svg|17px]] | | | |
| |[[File:Check_mark.svg|17px]] | |
| |Arceus creates a pulse of [[bulbapedia:Gravity (move)|Gravity]], a circular shockwave that smashes opponents downward if they are in the air, though it deals no damage.
| |
| |- | | |- |
| |[[File:Articuno.png|x100px]] | | |6 |
| |[[bulbapedia:Articuno (Pokémon)|Articuno]]{{anchor|Articuno}}
| | |[[File:MGGBC Marion Club Hole 6.png]] |
| |[[File:X_mark.svg|17px]] | | |[[File:MGGBC Marion Club Green 6.png]] |
| |[[File:Check_mark.svg|17px]] | | |4 |
| |[[File:X_mark.svg|17px]]
| | |321 yards |
| |[[File:X_mark.svg|17px]] | | | |
| |[[File:X_mark.svg|17px]] | |
| |Articuno releases a continuous wave of ice from its body using [[Bulbapedia:Icy Wind (move)|Icy Wind]], which freezes anyone close to it and deals moderate damage. This also launches them up, occasionally far enough off the screen for a KO. | |
| |- | | |- |
| |[[File:Beedrill.png|70px]] | | |7 |
| |[[bulbapedia:Beedrill (Pokémon)|Beedrill]]{{anchor|Beedrill}}
| | |[[File:MGGBC Marion Club Hole 7.png]] |
| |[[File:Check_mark.svg|17px]] | | |[[File:MGGBC Marion Club Green 7.png]] |
| |[[File:X_mark.svg|17px]] | | |5 |
| |[[File:X_mark.svg|17px]] | | |461 yards |
| |[[File:X_mark.svg|17px]] | | | |
| |[[File:X_mark.svg|17px]]
| |
| |[[Bulbapedia:Beedrill (Pokémon)|Beedrill]] attacks by using [[Bulbapedia:Take Down (move)|Take Down]], which involves a single Beedrill flying off the stage, followed by a swarm of Beedrill flying horizontally through the stage and damaging anyone who comes into contact with them. | |
| |- | | |- |
| |[[File:SSBU Bellossom.png|x100px]] | | |8 |
| |[[bulbapedia:Bellossom (Pokémon)|Bellossom]]{{anchor|Bellossom}}
| | |[[File:MGGBC Marion Club Hole 8.png]] |
| |[[File:X_mark.svg|17px]] | | |[[File:MGGBC Marion Club Green 8.png]] |
| |[[File:Check_mark.svg|17px]] | | |3 |
| |[[File:Check_mark.svg|17px]] | | |136 yards |
| |[[File:Check_mark.svg|17px]] | | | |
| |[[File:Check_mark.svg|17px]] | |
| |Bellossom uses [[bulbapedia:Sweet Scent (move)|Sweet Scent]] to put any nearby opponents to sleep.
| |
| |- | | |- |
| |[[File:BewearUltimate.png|x100px]] | | |9 |
| |[[bulbapedia:Bewear (Pokémon)|Bewear]]{{anchor|Bewear}}
| | |[[File:MGGBC Marion Club Hole 9.png]] |
| |[[File:X_mark.svg|17px]] | | |[[File:MGGBC Marion Club Green 9.png]] |
| |[[File:X_mark.svg|17px]] | | |4 |
| |[[File:X_mark.svg|17px]] | | |370 yards |
| |[[File:X_mark.svg|17px]] | | | |
| |[[File:Check_mark.svg|17px]] | |
| |Bewear slowly moves across the stage and uses [[bulbapedia:Hammer Arm (move)|Hammer Arm]] when it gets close to opponents, uppercutting them and sending them flying.
| |
| |- | | |- |
| |[[File:Blastoise.png|x100px]] | | |10 |
| |[[bulbapedia:Blastoise (Pokémon)|Blastoise]]{{anchor|Blastoise}}
| | |[[File:MGGBC Marion Club Hole 10.png]] |
| |[[File:Check_mark.svg|17px]] | | |[[File:MGGBC Marion Club Green 10.png]] |
| |[[File:Check_mark.svg|17px]] | | |4 |
| |[[File:X_mark.svg|17px]] | | |351 yards |
| |[[File:X_mark.svg|17px]] | | | |
| |[[File:X_mark.svg|17px]] | |
| |Blastoise attacks with [[bulbapedia:Hydro Pump (move)|Hydro Pump]], which has it firing blasts of water from the cannons on its shoulders that push away opponents. Despite not appearing as a Poké Ball Pokémon, it appears as a trophy in ''[[Super Smash Bros. for Wii U]]'', whereas a Mega Blastoise trophy appears in ''[[Super Smash Bros. for Nintendo 3DS]]''. According to a [[List of Super Smash Bros. Brawl pre-release and unused content#early ideas|datamine]], Blastoise was meant to be playable in the [[Pokémon Trainer]]'s trio, but it was replaced by [[Squirtle]] to balance the size and evolutionary stages of the Pokémon.
| |
| |- | | |- |
| |[[File:Bonsly Artwork.jpg|x100px]] | | |11 |
| |[[bulbapedia:Bonsly (Pokémon)|Bonsly]]{{anchor|Bonsly}}
| | |[[File:MGGBC Marion Club Hole 11.png]] |
| |[[File:X_mark.svg|17px]] | | |[[File:MGGBC Marion Club Green 11.png]] |
| |[[File:X_mark.svg|17px]] | | |5 |
| |[[File:Check_mark.svg|17px]] | | |479 yards |
| |[[File:X_mark.svg|17px]]
| | | |
| |[[File:X_mark.svg|17px]] | |
| |Bonsly acts like an item; it can be picked up and carried around like an item - although it is very heavy, and can only be carried around with ease when held by strong characters. When tossed, it doesn't go far, but it can deal damage exceeding 30%, and knockback comparable to a Home-Run Bat. It can be deflected, or used by players who did not summon it. After being thrown about three times, it disappears, or disappear after being unused for some time. | |
| |- | | |- |
| |[[File:Celebi Brawl screenshot.png|x100px]] | | |12 |
| |[[bulbapedia:Celebi (Pokémon)|Celebi]]{{anchor|Celebi}}
| | |[[File:MGGBC Marion Club Hole 12.png]] |
| |[[File:X_mark.svg|17px]] | | |[[File:MGGBC Marion Club Green 12.png]] |
| |[[File:Check_mark.svg|17px]] | | |3 |
| |[[File:Check_mark.svg|17px]] | | |149 yards |
| |[[File:X_mark.svg|17px]] | | | |
| |[[File:X_mark.svg|17px]] | |
| |In ''[[Super Smash Bros. Melee]]'', Celebi can only appear if every character and stage has been unlocked, every event has been cleared, and the score display has been unlocked. It has a one in 251 chance of appearing, and if it does the player earns an extra 8,000 points at the end of the match. In ''[[Super Smash Bros. Brawl]]'', Celebi can appear at any point without needing to unlock it, and when it appears it drops a [[Trophy (Super Smash Bros. series)|trophy]] before flying away; in this game it has a one in 493 chance of appearing.
| |
| |- | | |- |
| |[[File:Chansey.png|x100px]] | | |13 |
| |[[bulbapedia:Chansey (Pokémon)|Chansey]]{{anchor|Chansey}}
| | |[[File:MGGBC Marion Club Hole 13.png]] |
| |[[File:Check_mark.svg|17px]] | | |[[File:MGGBC Marion Club Green 13.png]] |
| |[[File:Check_mark.svg|17px]] | | |4 |
| |[[File:X_mark.svg|17px]] | | |368 yards |
| |[[File:X_mark.svg|17px]]
| | | |
| |[[File:X_mark.svg|17px]] | |
| |Chansey uses its [[bulbapedia:Signature move|signature move]] [[bulbapedia:Soft-Boiled (move)|Soft-Boiled]], in which it drops eggs that can either contain items, heal the player, or explode. It also appears in [[Saffron City]], where it can heal the player if they touch it (although its eggs no longer heal), and as one of the floats on the [[Poké Floats]] stage. | |
| |- | | |- |
| |[[File:Charizard.png|x100px]] | | |14 |
| |[[Charizard]]{{anchor|Charizard}}
| | |[[File:MGGBC Marion Club Hole 14.png]] |
| |[[File:Check_mark.svg|17px]] | | |[[File:MGGBC Marion Club Green 14.png]] |
| |[[File:Check_mark.svg|17px]] | | |4 |
| |[[File:X_mark.svg|17px]] | | |390 yards |
| |[[File:X_mark.svg|17px]]
| | | |
| |[[File:X_mark.svg|17px]] | |
| |Charizard attacks by turning from side to side while using [[bulbapedia:Flamethrower (move)|Flamethrower]]. In ''[[Super Smash Bros. Brawl]]'', Charizard became a playable fighter, both as a part of the [[Pokémon Trainer]] and (only in ''[[Super Smash Bros. for Nintendo 3DS / Wii U]]'') as an individual. | |
| |- | | |- |
| |[[File:SSBU Chespin.png|x100px]] | | |15 |
| |[[bulbapedia:Chespin (Pokémon)|Chespin]]{{anchor|Chespin}}
| | |[[File:MGGBC Marion Club Hole 15.png]] |
| |[[File:X_mark.svg|17px]] | | |[[File:MGGBC Marion Club Green 15.png]] |
| |[[File:X_mark.svg|17px]] | | |4 |
| |[[File:X_mark.svg|17px]]
| | |344 yards |
| |[[File:Check_mark.svg|17px]] | | | |
| |[[File:Check_mark.svg|17px]] | |
| |Chespin attacks by using Seed Bomb, releasing explosive seeds from its body. These moderately damage any opponents who are caught in the blast. | |
| |- | | |- |
| |[[File:SSBBchikorita.jpg|x100px]] | | |16 |
| |[[bulbapedia:Chikorita (Pokémon)|Chikorita]]{{anchor|Chikorita}}
| | |[[File:MGGBC Marion Club Hole 16.png]] |
| |[[File:X_mark.svg|17px]] | | |[[File:MGGBC Marion Club Green 16.png]] |
| |[[File:Check_mark.svg|17px]] | | |4 |
| |[[File:Check_mark.svg|17px]] | | |348 yards |
| |[[File:X_mark.svg|17px]]
| | | |
| |[[File:X_mark.svg|17px]] | |
| |Chikorita attacks using [[bulbapedia:Razor Leaf (move)|Razor Leaf]], flinging leaf blades at opponents to damage them. In ''[[Super Smash Bros. for Nintendo 3DS / Wii U]]'', Chikorita is replaced by [[#Snivy|Snivy]], which also attacks using Razor Leaf. It also appears as one of the [[Poké Floats]] floats. | |
| |- | | |- |
| |[[File:Clefairy.png|x100px]] | | |17 |
| |[[bulbapedia:Clefairy (Pokémon)|Clefairy]]{{anchor|Clefairy}}
| | |[[File:MGGBC Marion Club Hole 17.png]] |
| |[[File:Check_mark.svg|17px]] | | |[[File:MGGBC Marion Club Green 17.png]] |
| |[[File:Check_mark.svg|17px]] | | |3 |
| |[[File:X_mark.svg|17px]] | | |170 yards |
| |[[File:X_mark.svg|17px]] | | | |
| |[[File:X_mark.svg|17px]] | |
| |Clefairy attacks by using [[bulbapedia:Metronone (move)|Metronone]] In ''[[Super Smash Bros.]]'', this move involves copying and using the move of any other Poké Ball Pokémon at random. In ''[[Super Smash Bros. Melee]]'', Clefairy uses one of several attacks at random that cause various effects, including: [[bulbapedia:Explosion (move)|Explosion]], which hits any opponents caught in the blast; [[bulbapedia:Blizzard (move)|Blizzard]], which freezes any nearby opponents; [[bulbapedia:Fire Spin (move)|Fire Spin]], which creates a horizontal blast of fire that damages opponents; and [[bulbapedia:Whirlwind (move)|Whirlwind]], which traps opponents in a whirlwind and damages them.
| |
| |- | | |- |
| |[[File:Cyndaquil.png|x100px]] | | |18 |
| |[[bulbapedia:Cyndaquil (Pokémon)|Cyndaquil]]{{anchor|Cyndaquil}}
| | |[[File:MGGBC Marion Club Hole 18.png]] |
| |[[File:X_mark.svg|17px]] | | |[[File:MGGBC Marion Club Green 18.png]] |
| |[[File:Check_mark.svg|17px]] | | |5 |
| |[[File:X_mark.svg|17px]] | | |499 yards |
| |[[File:X_mark.svg|17px]] | | | |
| |[[File:X_mark.svg|17px]] | | |} |
| |Cyndaquil attacks by using [[bulbapedia:Flamethrower (move)|Flamethrower]], which involves it jumping up and releasing a small blast of fire from its back; the effect is similar to Charizard, but only in one direction. This deals constant weak damage to any opponent caught in it. Cyndaquil is one of the few Pokémon in ''[[Super Smash Bros. Melee]]'' that can be knocked off the stage.
| | |
| | ===Game Boy Advance=== |
| | {|class="wikitable" style="text-align: center" |
| | !Hole |
| | !Overview |
| | !Green |
| | !Par |
| | !width=80px|Front Tee |
| | !width=80px|Back Tee |
| | !Differences |
| |- | | |- |
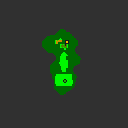
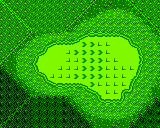
| |[[File:SSBU Darkrai.png|x100px]] | | |1 |
| |[[bulbapedia:Darkrai (Pokémon)|Darkrai]]{{anchor|Darkrai}}
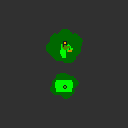
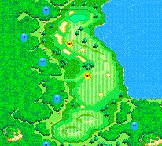
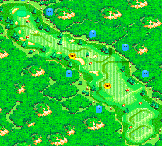
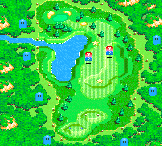
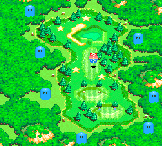
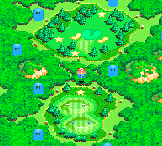
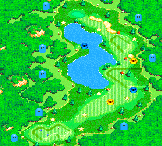
| | |[[File:MGAT Star Marion Course Hole 1.png]] |
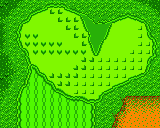
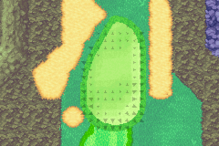
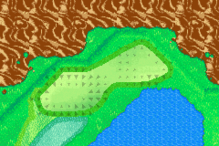
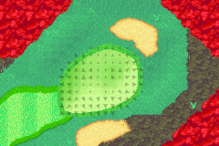
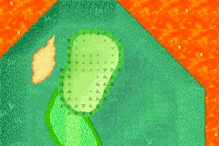
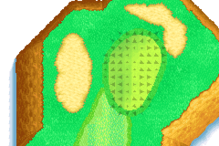
| |[[File:X_mark.svg|17px]] | | |[[File:MGAT Mushroom Course Green 1.png|219px]] |
| |[[File:X_mark.svg|17px]] | | |4 |
| |[[File:X_mark.svg|17px]] | | |??? yards |
| |[[File:Check_mark.svg|17px]] | | |??? yards |
| |[[File:Check_mark.svg|17px]] | | | |
| |Darkrai attacks by using its [[bulbapedia:Signature move|signature move]] [[bulbapedia:Dark Void (move)|Dark Void]], creating a large dark sphere around itself that puts any opponent that enters it to sleep and deals minor damage to them. | |
| |- | | |- |
| |[[File:SSBU Dedenne.png|x100px]] | | |2 |
| |[[bulbapedia:Dedenne (Pokémon)|Dedenne]]{{anchor|Dedenne}}
| | |[[File:MGAT Star Marion Course Hole 2.png]] |
| |[[File:X_mark.svg|17px]] | | |[[File:MGAT Mushroom Course Green 2.png|219px]] |
| |[[File:X_mark.svg|17px]] | | |4 |
| |[[File:X_mark.svg|17px]] | | |??? yards |
| |[[File:Check_mark.svg|17px]] | | |??? yards |
| |[[File:Check_mark.svg|17px]] | | | |
| |Dedenne attacks by using [[bulbapedia:Discharge (move)|Discharge]], which involves it hovering in the air and releasing electricity that rotates in four beams around it. The electricity hits opponents multiple times, and the final burst does medium knockback. | |
| |- | | |- |
| |[[File:SSBU Deoxys.png|x100px]] | | |3 |
| |[[bulbapedia:Deoxys (Pokémon)|Deoxys]]{{anchor|Deoxys}}
| | |[[File:MGAT Star Marion Course Hole 3.png]] |
| |[[File:X_mark.svg|17px]] | | |[[File:MGAT Mushroom Course Green 3.png|219px]] |
| |[[File:X_mark.svg|17px]] | | |3 |
| |[[File:Check_mark.svg|17px]] | | |??? yards |
| |[[File:Check_mark.svg|17px]] | | |??? yards |
| |[[File:Check_mark.svg|17px]] | | | |
| |Deoxys appears in its Attack Forme and attacks by using [[bulbapedia:Hyper Beam (move)|Hyper Beam]], which involves it floating into the air (smashing any opponent it touches as it does so) and firing a giant laser beam, dealing large damage and huge knock to anyone that it comes into contact with. | |
| |- | | |- |
| |[[File:Ditto Ultimate.png|x100px]] | | |4 |
| |[[bulbapedia:Ditto (Pokémon)|Ditto]]{{anchor|Ditto}}
| | |[[File:MGAT Star Marion Course Hole 4.png]] |
| |[[File:X_mark.svg|17px]] | | |[[File:MGAT Mushroom Course Green 4.png|219px]] |
| |[[File:X_mark.svg|17px]] | | |5 |
| |[[File:X_mark.svg|17px]] | | |??? yards |
| |[[File:X_mark.svg|17px]] | | |??? yards |
| |[[File:Check_mark.svg|17px]] | | | |
| |Ditto uses [[bulbapedia:Transform (move)|Transform]] to turn into its summoner and fights alongside them. Ditto copies the character's attributes and moveset, but keeps its purple hue. | |
| |- | | |- |
| |[[File:SSBU Eevee.png|x100px]] | | |5 |
| |[[bulbapedia:Eevee (Pokémon)|Eevee]]{{anchor|Eevee}}
| | |[[File:MGAT Star Marion Course Hole 5.png]] |
| |[[File:X_mark.svg|17px]] | | |[[File:MGAT Mushroom Course Green 5.png|219px]] |
| |[[File:X_mark.svg|17px]] | | |4 |
| |[[File:X_mark.svg|17px]] | | |??? yards |
| |[[File:Check_mark.svg|17px]] | | |??? yards |
| |[[File:Check_mark.svg|17px]] | | | |
| |Eevee uses [[bulbapedia:Take Down (move)|Take Down]] to slam itself into nearby opponents, making them take below average damage. Eevee does nothing if no opponents are nearby. | |
| |- | | |- |
| |[[File:SSBU Electrode.png|x100px]] | | |6 |
| |[[bulbapedia:Electrode (Pokémon)|Electrode]]{{anchor|Electrode}}
| | |[[File:MGAT Star Marion Course Hole 6.png]] |
| |[[File:X_mark.svg|17px]] | | |[[File:MGAT Mushroom Course Green 6.png|219px]] |
| |[[File:Check_mark.svg|17px]] | | |4 |
| |[[File:Check_mark.svg|17px]] | | |??? yards |
| |[[File:Check_mark.svg|17px]] | | |??? yards |
| |[[File:Check_mark.svg|17px]] | | | |
| |Electrode uses [[bulbapedia:Explosion (move)|Explosion]] to damage any fighters in its blast radius, including the player that summons it. Electrode can also be picked up and thrown like an item just before it explodes. Starting with ''[[Super Smash Bros. Brawl]]'', it may occasionally be a dud, failing to explode after having charged up for a few seconds, but exploding immediately after. In ''[[Super Smash Bros.]]'', Electrode does not appear as a Poké Ball Pokémon, but instead as a hazard in [[Saffron City]]. | |
| |- | | |- |
| |[[File:SSBU Entei.png|x100px]] | | |7 |
| |[[bulbapedia:Entei (Pokémon)|Entei]]{{anchor|Entei}}
| | |[[File:MGAT Star Marion Course Hole 7.png]] |
| |[[File:X_mark.svg|17px]] | | |[[File:MGAT Mushroom Course Green 7.png|219px]] |
| |[[File:Check_mark.svg|17px]] | | |5 |
| |[[File:Check_mark.svg|17px]] | | |??? yards |
| |[[File:Check_mark.svg|17px]] | | |??? yards |
| |[[File:Check_mark.svg|17px]] | | | |
| |Entei uses [[bulbapedia:Fire Spin (move)|Fire Spin]] ([[bulbapedia:Fire Blast (move)|Fire Blast]] in ''[[Super Smash Bros. Melee]]'') to create a large pillar of flame around itself that damages opponents. | |
| |- | | |- |
| |[[File:SSBU Fennekin.png|x100px]] | | |8 |
| |[[bulbapedia:Fennekin (Pokémon)|Fennekin]]{{anchor|Fennekin}}
| | |[[File:MGAT Star Marion Course Hole 8.png]] |
| |[[File:X_mark.svg|17px]] | | |[[File:MGAT Mushroom Course Green 8.png|219px]] |
| |[[File:X_mark.svg|17px]] | | |3 |
| |[[File:X_mark.svg|17px]] | | |??? yards |
| |[[File:Check_mark.svg|17px]] | | |??? yards |
| |[[File:Check_mark.svg|17px]] | | | |
| |Fennekin spits a fireball in front of it that creates a pillar of fire. If the fire hits an opponent, they become stunned and continuously take damage until the fire disappears. | |
| |- | | |- |
| |[[File:SSBU Fletchling.png|x100px]] | | |9 |
| |[[bulbapedia:Fletchling (Pokémon)|Fletchling]]{{anchor|Fletchling}}
| | |[[File:MGAT Star Marion Course Hole 9.png]] |
| |[[File:X_mark.svg|17px]] | | |[[File:MGAT Mushroom Course Green 9.png|219px]] |
| |[[File:X_mark.svg|17px]] | | |4 |
| |[[File:X_mark.svg|17px]] | | |??? yards |
| |[[File:Check_mark.svg|17px]] | | |??? yards |
| |[[File:Check_mark.svg|17px]] | | | |
| |Fletchling attacks by using [[bulbapedia:Peck (move)|Peck]], which involves it hopping across the stage and pecking any nearby opponents, dealing weak damage and knockback. It can fly back to the stage if it falls off. | |
| |- | | |- |
| |[[File:SSBU Gardevoir.png|x100px]] | | |10 |
| |[[bulbapedia:Gardevoir (Pokémon)|Gardevoir]]{{anchor|Gardevoir}}
| | |[[File:MGAT Star Marion Course Hole 10.png]] |
| |[[File:X_mark.svg|17px]] | | |[[File:MGAT Mushroom Course Green 10.png|219px]] |
| |[[File:X_mark.svg|17px]] | | |4 |
| |[[File:Check_mark.svg|17px]] | | |??? yards |
| |[[File:Check_mark.svg|17px]] | | |??? yards |
| |[[File:Check_mark.svg|17px]] | | | |
| |Gardevoir uses [[bulbapedia:Reflect (move)|Reflect]] to create a large circular barrier around itself and wanders around the battlefield. Despite being harmless, the shield can deflect projectiles back at the foes, although it does not affect those who summoned Gardevoir. | |
| |- | | |- |
| |[[File:SSBU Genesect.png|x100px]] | | |11 |
| |[[bulbapedia:Genesect (Pokémon)|Genesect]]{{anchor|Genesect}}
| | |[[File:MGAT Star Marion Course Hole 11.png]] |
| |[[File:X_mark.svg|17px]] | | |[[File:MGAT Mushroom Course Green 11.png|219px]] |
| |[[File:X_mark.svg|17px]] | | |5 |
| |[[File:X_mark.svg|17px]] | | |??? yards |
| |[[File:Check_mark.svg|17px]] | | |??? yards |
| |[[File:Check_mark.svg|17px]] | | | |
| |Genesect attacks by using its [[bulbapedia:Signature move|signature move]] [[bulbapedia:Techno Blast (move)|Techno Blast]], which involves it firing four small laser bursts before following it up with a large, continuous beam. The beam is significantly stronger than the bursts, and both attacks can pass through walls. | |
| |- | | |- |
| |[[File:SSBU Giratina.png|x100px]] | | |12 |
| |[[bulbapedia:Giratina (Pokémon)|Giratina]]{{anchor|Giratina}}
| | |[[File:MGAT Star Marion Course Hole 12.png]] |
| |[[File:X_mark.svg|17px]] | | |[[File:MGAT Mushroom Course Green 12.png|219px]] |
| |[[File:X_mark.svg|17px]] | | |3 |
| |[[File:X_mark.svg|17px]] | | |??? yards |
| |[[File:Check_mark.svg|17px]] | | |??? yards |
| |[[File:Check_mark.svg|17px]] | | | |
| |Giratina attacks by using [[bulbapedia:Dragon Breath (move)|Dragon Breath]], blowing a horizontal vortex that shoots across the entire stage, repeatedly dealing weak damage while stuck in the whirlwind. Coming in contact with Giratina deals slightly stronger damage with knockback. | |
| |- | | |- |
| |[[File:SSBU Gogoat.png|x100px]] | | |13 |
| |[[bulbapedia:Gogoat (Pokémon)|Gogoat]]{{anchor|Gogoat}}
| | |[[File:MGAT Star Marion Course Hole 13.png]] |
| |[[File:X_mark.svg|17px]] | | |[[File:MGAT Mushroom Course Green 13.png|219px]] |
| |[[File:X_mark.svg|17px]] | | |4 |
| |[[File:X_mark.svg|17px]] | | |??? yards |
| |[[File:Check_mark.svg|17px]] | | |??? yards |
| |[[File:Check_mark.svg|17px]] | | | |
| |Gogoat attacks using [[bulbapedia:Take Down (move)|Take Down]], represented as charging from one side of the stage to the other and ramming any opponents in its path. Anyone, whether its summoner or other fighters, can jump on top of it and attack from it as it is moving. If it runs into a wall, it becomes momentarily stunned. | |
| |- | | |- |
| |[[File:SSBU Goldeen.png|x100px]] | | |14 |
| |[[bulbapedia:Goldeen (Pokémon)|Goldeen]]{{anchor|Goldeen}}
| | |[[File:MGAT Star Marion Course Hole 14.png]] |
| |[[File:Check_mark.svg|17px]] | | |[[File:MGAT Mushroom Course Green 14.png|219px]] |
| |[[File:Check_mark.svg|17px]] | | |4 |
| |[[File:Check_mark.svg|17px]] | | |??? yards |
| |[[File:Check_mark.svg|17px]] | | |??? yards |
| |[[File:Check_mark.svg|17px]] | | | |
| |Goldeen uses [[bulbapedia:Splash (move)|Splash]], flailing around in one area with no effect on the battlefield. In the ''Pokémon'' franchise, Goldeen is actually unable to learn Splash, which is a move more commonly associated with [[bulbapedia:Magikarp (Pokémon)|Magikarp]]. Goldeen, alongside [[#Zoroark|Zoroark]], are the only non-legendary Pokémon that can be summoned from a [[Master Ball]] in ''[[Super Smash Bros. for Nintendo 3DS / Wii U]]'' (although it rarely appears). | |
| |- | | |- |
| |[[File:Groudon.jpg|x100px]] | | |15 |
| |[[bulbapedia:Groudon (Pokémon)|Groudon]]{{anchor|Groudon}}
| | |[[File:MGAT Star Marion Course Hole 15.png]] |
| |[[File:X_mark.svg|17px]] | | |[[File:MGAT Mushroom Course Green 15.png|219px]] |
| |[[File:X_mark.svg|17px]] | | |4 |
| |[[File:Check_mark.svg|17px]] | | |??? yards |
| |[[File:X_mark.svg|17px]] | | |??? yards |
| |[[File:X_mark.svg|17px]] | | | |
| |Groudon attacks by using [[bulbapedia:Overheat (move)|Overheat]]; after being summoned, it exerts a glowing aura around it, knocking back opponents and dealing light damage to them. Groudon's size prevents opponents from easily avoiding it, and it can occasionally turn to the other side of the stage. | |
| |- | | |- |
| |[[File:Gulpin.jpg|x100px]] | | |16 |
| |[[bulbapedia:Gulpin (Pokémon)|Gulpin]]{{anchor|Gulpin}}
| | |[[File:MGAT Star Marion Course Hole 16.png]] |
| |[[File:X_mark.svg|17px]] | | |[[File:MGAT Mushroom Course Green 16.png|219px]] |
| |[[File:X_mark.svg|17px]] | | |4 |
| |[[File:Check_mark.svg|17px]] | | |??? yards |
| |[[File:X_mark.svg|17px]] | | |??? yards |
| |[[File:X_mark.svg|17px]] | | | |
| |Gulpin sits stationary where it is released. If an opponent gets close, Gulpin [[bulbapedia:Swallow (move)|Swallow]]s them, causing damage as long as they are inside. Others can damage whoever is swallowed, but eventually Gulpin spits out the opponent and disappear. | |
| |- | | |- |
| |[[File:Hitmonlee.png|50px]] | | |17 |
| |[[bulbapedia:Hitmonlee (Pokémon)|Hitmonlee]]{{anchor|Hitmonlee}}
| | |[[File:MGAT Star Marion Course Hole 17.png]] |
| |[[File:Check_mark.svg|17px]]
| | |[[File:MGAT Mushroom Course Green 17.png|219px]] |
| |[[File:X_mark.svg|17px]]
| | |3 |
| |[[File:X_mark.svg|17px]]
| | |??? yards |
| |[[File:X_mark.svg|17px]]
| | |??? yards |
| |[[File:X_mark.svg|17px]]
| | | |
| |Hitmonlee jumps in the air and attacks by using [[bulbapedia:Jump Kick (move)|Jump Kick]]; this involves Hitmonlee extending its leg and leaping towards an opponent, dealing heavy damage and knockback if it connects. This jump has a large arc, which often leads to it simply jumping off the stage.
| |
| |-
| |
| |[[File:Ho-Oh Brawl screenshot.png|x100px]]
| |
| |[[bulbapedia:Ho-Oh (Pokémon)|Ho-Oh]]{{anchor|Ho-Oh}}
| |
| |[[File:X_mark.svg|17px]]
| |
| |[[File:Check_mark.svg|17px]]
| |
| |[[File:Check_mark.svg|17px]]
| |
| |[[File:X_mark.svg|17px]]
| |
| |[[File:X_mark.svg|17px]]
| |
| |Ho-Oh flies up into the background and attacks with its [[bulbapedia:Signature move|signature move]] [[bulbapedia:Sacred Fire (move)|Sacred Fire]], creating a massive burst of fire in the area where it was summoned and dealing massive damage to any opponents caught in it. It can also damage opponents as it flies up. In ''[[Super Smash Bros. for Nintendo 3DS / Wii U]]'', Ho-Oh occasionally appears in the background on the [[Kalos Pokémon League]] stage when it transitions to the Fire-type room. When the fire pillars are active, Ho-Oh causes them to rise even higher.
| |
| |-
| |
| |[[File:SSBU Inkay.png|x100px]]
| |
| |[[bulbapedia:Inkay (Pokémon)|Inkay]]{{anchor|Inkay}}
| |
| |[[File:X_mark.svg|17px]]
| |
| |[[File:X_mark.svg|17px]]
| |
| |[[File:X_mark.svg|17px]]
| |
| |[[File:Check_mark.svg|17px]]
| |
| |[[File:Check_mark.svg|17px]]
| |
| |Inkay attacks by using its [[bulbapedia:Signature move|signature move]] [[bulbapedia:Topsy-Turvy (move)|Topsy-Turvy]], which involves it flipping upside down before slamming into the ground, [[Trip|tripping]] any opponents in its vicinity.
| |
| |-
| |
| |[[File:Jirachi.jpg|x100px]]
| |
| |[[bulbapedia:Jirachi (Pokémon)|Jirachi]]{{anchor|Jirachi}}
| |
| |[[File:X_mark.svg|17px]]
| |
| |[[File:X_mark.svg|17px]]
| |
| |[[File:Check_mark.svg|17px]]
| |
| |[[File:X_mark.svg|17px]]
| |
| |[[File:X_mark.svg|17px]]
| |
| |Jirachi drops [[Sticker (Super Smash Bros. Brawl)|stickers]] for players to grab. It has as a 1 in 493 chance of being spawned from any given [[Poké Ball]], in line with the number of Pokémon that existed at the time of ''[[Super Smash Bros. Brawl]]''{{'}}s release.
| |
| |-
| |
| |[[File:SSBU Keldeo.png|x100px]]
| |
| |[[bulbapedia:Keldeo (Pokémon)|Keldeo]]{{anchor|Keldeo}}
| |
| |[[File:X_mark.svg|17px]]
| |
| |[[File:X_mark.svg|17px]]
| |
| |[[File:X_mark.svg|17px]]
| |
| |[[File:Check_mark.svg|17px]]
| |
| |[[File:Check_mark.svg|17px]]
| |
| |Keldeo emerges from the [[Poké Ball]] in its Resolute Form and attacks by using its [[bulbapedia:Signature move|signature move]], [[bulbapedia:Secret Sword (move)|Secret Sword]], by running around the stage and occasionally jumping to slash at opponents with its horn, dealing strong damage with each swipe.
| |
| |-
| |
| |[[File:Koffingssb.png|70px]]
| |
| |[[bulbapedia:Koffing (Pokémon)|Koffing]]{{anchor|Koffing}}
| |
| |[[File:Check_mark.svg|17px]]
| |
| |[[File:X_mark.svg|17px]]
| |
| |[[File:X_mark.svg|17px]]
| |
| |[[File:X_mark.svg|17px]]
| |
| |[[File:X_mark.svg|17px]]
| |
| |Koffing uses [[bulbapedia:Poison Gas (move)|Poison Gas]], which continuously damages any opponents near it. It also damages any opponents that touch it. While Koffing does not appear in ''[[Super Smash Bros. Melee]]'', it is replaced by its evolution [[#Weezing|Weezing]], which uses the same attack with the same effect.
| |
| |-
| |
| |[[File:SSBU Kyogre.png|x100px]] | |
| |[[bulbapedia:Kyogre (Pokémon)|Kyogre]]{{anchor|Kyogre}}
| |
| |[[File:X_mark.svg|17px]]
| |
| |[[File:X_mark.svg|17px]]
| |
| |[[File:Check_mark.svg|17px]]
| |
| |[[File:Check_mark.svg|17px]]
| |
| |[[File:Check_mark.svg|17px]]
| |
| |Kyogre attacks by using [[bulbapedia:Hydro Pump (move)|Hydro Pump]], which involves it floating into the air and shooting large bursts of water towards either side of the screen. The water does not do damage (though Kyogre itself has contact damage), but it pushes opponents off of the stage. Opponents can resist the water by shielding or rolling against it.
| |
| |-
| |
| |[[File:SSBU Kyurem.png|x100px]]
| |
| |[[bulbapedia:Kyurem (Pokémon)|Kyurem]]{{anchor|Kyurem}}
| |
| |[[File:X_mark.svg|17px]]
| |
| |[[File:X_mark.svg|17px]]
| |
| |[[File:X_mark.svg|17px]]
| |
| |[[File:Check_mark.svg|17px]]
| |
| |[[File:Check_mark.svg|17px]]
| |
| |Kyurem attacks by using [[bulbapedia:Icy Wind (move)|Icy Wind]], shooting spirals of cold on both sides that freeze any opponents that come into contact with them and deal moderate damage.
| |
| |-
| |
| |[[File:SSBU Latias & Latios.png|x100px]]
| |
| |[[bulbapedia:Latias (Pokémon)|Latias]] and [[bulbapedia:Latios (Pokémon)|Latios]]{{anchor|Latias}}{{anchor|Latios}}
| |
| |[[File:X_mark.svg|17px]]
| |
| |[[File:X_mark.svg|17px]]
| |
| |[[File:Check_mark.svg|17px]]
| |
| |[[File:Check_mark.svg|17px]]
| |
| |[[File:Check_mark.svg|17px]]
| |
| |Latias and Latios are summoned separately, but after one of them flies off-screen, both appear fly diagonally across the screen one at a time to strike opponents with [[bulbapedia:Steel Wing|Steel Wing]] multiple times.
| |
| |-
| |
| |[[File:SSBU Lugia.png|x100px]]
| |
| |[[bulbapedia:Lugia (Pokémon)|Lugia]]{{anchor|Lugia}}
| |
| |[[File:X_mark.svg|17px]]
| |
| |[[File:Check_mark.svg|17px]]
| |
| |[[File:Check_mark.svg|17px]]
| |
| |[[File:Check_mark.svg|17px]]
| |
| |[[File:Check_mark.svg|17px]]
| |
| |Lugia flies up into the background and attacks with its [[bulbapedia:Signature move|signature move]] [[bulbapedia:Aeroblast (move)|Aeroblast]], releasing large whirlwinds onto the stage to damage opponents. It can also damage opponents as it flies up.
| |
| |-
| |
| |[[File:LunalaUltimate.png|x100px]]
| |
| |[[bulbapedia:Lunala (Pokémon)|Lunala]]{{anchor|Lunala}}
| |
| |[[File:X_mark.svg|17px]]
| |
| |[[File:X_mark.svg|17px]]
| |
| |[[File:X_mark.svg|17px]]
| |
| |[[File:X_mark.svg|17px]]
| |
| |[[File:Check_mark.svg|17px]]
| |
| |Lunala enters its Full Moon phase and attacks with its [[bulbapedia:Signature move|signature move]] [[bulbapedia:Moongeist Beam (move)|Moongeist Beam]], in which it fires a beam from the background.
| |
| |-
| |
| |[[File:Manaphy Brawl artwork.png|x100px]]
| |
| |[[bulbapedia:Manaphy (Pokémon)|Manaphy]]{{anchor|Manaphy}}
| |
| |[[File:X_mark.svg|17px]]
| |
| |[[File:X_mark.svg|17px]]
| |
| |[[File:Check_mark.svg|17px]]
| |
| |[[File:X_mark.svg|17px]]
| |
| |[[File:X_mark.svg|17px]]
| |
| |Manaphy uses [[bulbapedia:Heart Swap (move)|Heart Swap]], its [[bulbapedia:Signature move|signature move]], which temporarily swaps the body of two players. The players' damage and stocks carry between stocks, and self-destruction causes the dying player to lose a life and not the opponent. Manaphy also occasionally appears as a stage hazard in the Flood Chamber of the [[Kalos Pokémon League]] stage in ''[[Super Smash Bros. for Wii U]]'', where it uses [[bulbapedia:Whirlpool (move)|Whirlpool]] to create one in the middle of the stage that sucks players down to the bottom of the stage.
| |
| |-
| |
| |[[File:Marill.png|x100px]]
| |
| |[[bulbapedia:Marill (Pokémon)|Marill]]{{anchor|Marill}}
| |
| |[[File:X_mark.svg|17px]]
| |
| |[[File:Check_mark.svg|17px]]
| |
| |[[File:X_mark.svg|17px]]
| |
| |[[File:X_mark.svg|17px]]
| |
| |[[File:X_mark.svg|17px]]
| |
| |Marill attacks by using [[bulbapedia:Tackle (move)|Tackle]], which involves it running in a single direction, launching back any opponent who gets in its way. Marill continues in the opposite direction if it hits a wall; if it ends up in an enclosed space, it continues to bounce back and forth until it disappears.
| |
| |-
| |
| |[[File:MarshadowUltimate.png|x100px]]
| |
| |[[bulbapedia:Marshadow (Pokémon)|Marshadow]]{{anchor|Marshadow}}
| |
| |[[File:X_mark.svg|17px]]
| |
| |[[File:X_mark.svg|17px]]
| |
| |[[File:X_mark.svg|17px]]
| |
| |[[File:X_mark.svg|17px]]
| |
| |[[File:Check_mark.svg|17px]]
| |
| |Marshadow hides under opponents, stuns them with shadows, and attacks using [[bulbapedia:Spectral Thief (move)|Spectral Thief]] to punch them.
| |
| |-
| |
| |[[File:SSBU Meloetta.png|x100px]]
| |
| |[[bulbapedia:Meloetta (Pokémon)|Meloetta]]{{anchor|Meloetta}}
| |
| |[[File:X_mark.svg|17px]]
| |
| |[[File:X_mark.svg|17px]]
| |
| |[[File:X_mark.svg|17px]]
| |
| |[[File:Check_mark.svg|17px]]
| |
| |[[File:Check_mark.svg|17px]]
| |
| |Meloetta attacks by using [[bulbapedia:Echoed Voice (move)|Echoed Voice]], shooting a pair of melodic projectiles that bounce from walls and reflect off the stage's perimeter, dealing moderate damage and knockback to any opponents that come into contact with them. In ''[[Super Smash Bros. for Nintendo 3DS]]'', it is unlocked by having the game on for at least eight hours, while in ''[[Super Smash Bros. for Wii U]]'', it can be unlocked by clearing All-Star mode with [[Lucario]] on Normal or Hard difficulty.
| |
| |-
| |
| |[[File:SSBU Meowth.png|x100px]]
| |
| |[[bulbapedia:Meowth (Pokémon)|Meowth]]{{anchor|Meowth}}
| |
| |[[File:Check_mark.svg|17px]]
| |
| |[[File:X_mark.svg|17px]]
| |
| |[[File:Check_mark.svg|17px]]
| |
| |[[File:Check_mark.svg|17px]]
| |
| |[[File:Check_mark.svg|17px]]
| |
| |Meowth attacks by using [[bulbapedia:Pay Day (move)|Pay Day]], shooting out coins that damage opponents. In ''[[Super Smash Bros.]]'', it shoots coins in four directions, whereas in ''[[Super Smash Bros. Brawl]]'' and ''[[Super Smash Bros. for Nintendo 3DS / Wii U]]'', it instead shoots coins to the left or right, turning to the direction of the nearest opponent when necessary.
| |
| |-
| |
| |[[File:SSBU Metagross.png|x100px]]
| |
| |[[bulbapedia:Metagross (Pokémon)|Metagross]]{{anchor|Metagross}}
| |
| |[[File:X_mark.svg|17px]]
| |
| |[[File:X_mark.svg|17px]]
| |
| |[[File:Check_mark.svg|17px]]
| |
| |[[File:Check_mark.svg|17px]]
| |
| |[[File:Check_mark.svg|17px]]
| |
| |Metagross attacks by using [[bulbapedia:Earthquake (move)|Earthquake]], in which it stomps its feet into the ground, causing any fighters near it to be buried and launching them with another stomp.
| |
| |-
| |
| |[[File:SSBU Mew.png|x100px]]
| |
| |[[bulbapedia:Mew (Pokémon)|Mew]]{{anchor|Mew}}
| |
| |[[File:Check_mark.svg|17px]]
| |
| |[[File:Check_mark.svg|17px]]
| |
| |[[File:Check_mark.svg|17px]]
| |
| |[[File:Check_mark.svg|17px]]
| |
| |[[File:Check_mark.svg|17px]]
| |
| |When Mew is summoned, it cries out its name and flies up off the screen. It gives the player a score bonus at the end of a match in ''[[Super Smash Bros.]]'' and ''[[Super Smash Bros. Melee]]'', and has a one in 251 chance of appearing. In ''[[Super Smash Bros. Brawl]]'', it drops a [[CD]] (or a [[Sticker (Super Smash Bros. Brawl)|Sticker]] if the player has every CD) and has a one in 493 chance of appearing. Finally, it drops a custom part or a [[Trophy (Super Smash Bros. series)|trophy]] in ''Super Smash Bros. for Nintendo 3DS / Wii U'', though it can also drop a CD in the [[Wii U]] version.
| |
| |-
| |
| |[[File:MimikyuUltimate.png|x100px]]
| |
| |[[bulbapedia:Mimikyu (Pokémon)|Mimikyu]]{{anchor|Mimikyu}}
| |
| |[[File:X_mark.svg|17px]]
| |
| |[[File:X_mark.svg|17px]]
| |
| |[[File:X_mark.svg|17px]]
| |
| |[[File:X_mark.svg|17px]]
| |
| |[[File:Check_mark.svg|17px]]
| |
| |Mimikyu uses its signature [[bulbapedia:Z-Move|Z-Move]] [[bulbapedia:Let's Snuggle Forever (move)|Let's Snuggle Forever]], grabbing opponents and trapping them inside its disguise. The captured opponents repeatedly take damage, and if they are at 100% damage or higher, they will be instantly KO'd.
| |
| |-
| |
| |[[File:SSBU Moltres.png|x100px]]
| |
| |[[bulbapedia:Moltres (Pokémon)|Moltres]]{{anchor|Moltres}}
| |
| |[[File:X_mark.svg|17px]]
| |
| |[[File:Check_mark.svg|17px]]
| |
| |[[File:Check_mark.svg|17px]]
| |
| |[[File:Check_mark.svg|17px]]
| |
| |[[File:Check_mark.svg|17px]]
| |
| |Moltres sits in place before flying away, damaging any players on contact. In ''[[Super Smash Bros.]]'', Moltres makes a cameo appearance flying in the background on the [[Saffron City]] stage.
| |
| |-
| |
| |[[File:BrawlMunchlax.jpg|x100px]]
| |
| |[[bulbapedia:Munchlax (Pokémon)|Munchlax]]{{anchor|Munchlax}}
| |
| |[[File:X_mark.svg|17px]]
| |
| |[[File:X_mark.svg|17px]]
| |
| |[[File:Check_mark.svg|17px]]
| |
| |[[File:X_mark.svg|17px]]
| |
| |[[File:X_mark.svg|17px]]
| |
| |Munchlax wanders around the stage, eating any items it comes across and removing them from play. Munchlax cannot eat [[Trophy (Super Smash Bros. series)|Trophies]], [[CD]]s, [[Sticker (Super Smash Bros. Brawl)|Stickers]], [[Poké Ball]]s or [[Smash Ball]]s.
| |
| |-
| |
| |[[File:Onix.png|70px]] | |
| |[[bulbapedia:Onix (Pokémon)|Onix]]{{anchor|Onix}}
| |
| |[[File:Check_mark.svg|17px]]
| |
| |[[File:X_mark.svg|17px]]
| |
| |[[File:X_mark.svg|17px]]
| |
| |[[File:X_mark.svg|17px]] | |
| |[[File:X_mark.svg|17px]] | |
| |Onix jumps to the top of the stage and uses [[bulbapedia:Rock Throw (move)|Rock Throw]] to drop many boulders in one area. Onix can damage opponents itself while dropping rocks, and the rocks launch away opponents if they hit. If opponents touch Onix before it rises upward, they also take damage. | |
| |-
| |
| |[[File:SSBU Oshawott.png|x100px]] | |
| |[[bulbapedia:Oshawott (Pokémon)|Oshawott]]{{anchor|Oshawott}}
| |
| |[[File:X_mark.svg|17px]]
| |
| |[[File:X_mark.svg|17px]]
| |
| |[[File:X_mark.svg|17px]]
| |
| |[[File:Check_mark.svg|17px]]
| |
| |[[File:Check_mark.svg|17px]]
| |
| |Oshawott attacks by using [[bulbapedia:Surf (move)|Surf]], riding a wave towards the stage's edge and beyond, dragging any opponents caught in the path with it.
| |
| |-
| |
| |[[File:SSBU Palkia.png|x100px]]
| |
| |[[bulbapedia:Palkia (Pokémon)|Palkia]]{{anchor|Palkia}}
| |
| |[[File:X_mark.svg|17px]]
| |
| |[[File:X_mark.svg|17px]]
| |
| |[[File:X_mark.svg|17px]]
| |
| |[[File:Check_mark.svg|17px]]
| |
| |[[File:Check_mark.svg|17px]]
| |
| |Palkia uses its [[bulbapedia:Signature move|signature move]], [[bulbapedia:Spacial Rend (move)|Spacial Rend]], which involves it slashing across the screen and flipping the camera. This affects nothing other than the player's viewpoint. Coming into contact with it does minor damage. Eventually, the screen tilts back to normal and Palkia disappears. Palkia also appears as a stage hazard within [[Spear Pillar]] in ''[[Super Smash Bros. Brawl]]''.
| |
| |-
| |
| |[[File:PiplupArtwork.jpg|x100px]]
| |
| |[[bulbapedia:Piplup (Pokémon)|Piplup]]{{anchor|Piplup}}
| |
| |[[File:X_mark.svg|17px]]
| |
| |[[File:X_mark.svg|17px]]
| |
| |[[File:Check_mark.svg|17px]]
| |
| |[[File:X_mark.svg|17px]]
| |
| |[[File:X_mark.svg|17px]]
| |
| |Piplup attacks by using [[bulbapedia:Surf (move)|Surf]]; when summoned, it slides across the ground on a wave of water, pushing any opponent that gets caught along with it. It moves in the other direction if it hits a wall, and does not stop moving even if it falls off the stage. In later games, [[#Oshawott|Oshawott]] occupies the same role with the same behavior.
| |
| |-
| |
| |[[File:Porygon2.png|x100px]]
| |
| |[[bulbapedia:Porygon2 (Pokémon)|Porygon2]]{{anchor|Porygon2}}
| |
| |[[File:X_mark.svg|17px]]
| |
| |[[File:Check_mark.svg|17px]]
| |
| |[[File:X_mark.svg|17px]]
| |
| |[[File:X_mark.svg|17px]]
| |
| |[[File:X_mark.svg|17px]]
| |
| |Porygon2 attacks by using [[bulbapedia:Tackle (move)|Tackle]]; as soon as it is spawned, it dashes a short distance horizontally before disappearing, dealing moderate damage and a huge amount of knockback, in the opposite direction of Porygon2's tackle, to any opponents caught by it.
| |
| |-
| |
| |[[File:PyukumukuUltimate.png|x100px]]
| |
| |[[bulbapedia:Pyukumuku (Pokémon)|Pyukumuku]]{{anchor|Pyukumuku}}
| |
| |[[File:X_mark.svg|17px]]
| |
| |[[File:X_mark.svg|17px]]
| |
| |[[File:X_mark.svg|17px]]
| |
| |[[File:X_mark.svg|17px]]
| |
| |[[File:Check_mark.svg|17px]]
| |
| |Pyukumuku uses [[bulbapedia:Counter (move)|Counter]] on an opponent who touches it. It can also be picked up and thrown like an item.
| |
| |-
| |
| |[[File:Raikou.png|x100px]]
| |
| |[[bulbapedia:Raikou (Pokémon)|Raikou]]{{anchor|Raikou}}
| |
| |[[File:X_mark.svg|17px]]
| |
| |[[File:Check_mark.svg|17px]]
| |
| |[[File:X_mark.svg|17px]]
| |
| |[[File:X_mark.svg|17px]]
| |
| |[[File:X_mark.svg|17px]]
| |
| |Raikou attacks with [[bulbapedia:Spark (move)|Spark]], releasing electricity around itself that shocks and deals multiple hits to opponents who are on the ground.
| |
| |-
| |
| |[[File:SSBU Scizor.png|x100px]]
| |
| |[[bulbapedia:Scizor (Pokémon)|Scizor]]{{anchor|Scizor}}
| |
| |[[File:X_mark.svg|17px]]
| |
| |[[File:Check_mark.svg|17px]]
| |
| |[[File:X_mark.svg|17px]]
| |
| |[[File:X_mark.svg|17px]]
| |
| |[[File:Check_mark.svg|17px]]
| |
| |Scizor attacks by using [[bulbapedia:Metal Claw (move)|Metal Claw]], which involves it running forward for a short while before jumping up and falling off the stage, dealing heavy damage to opponents and launching them towards the top of the stage. In ''[[Super Smash Bros. for Wii U]]'', Scizor makes a background appearance on the [[Kalos Pokémon League]] stage, appearing alongside various other Steel-type Pokémon in the Steel-type room.
| |
| |-
| |
| |[[File:SSBU Snivy.png|x100px]]
| |
| |[[bulbapedia:Snivy (Pokémon)|Snivy]]{{anchor|Snivy}}
| |
| |[[File:X_mark.svg|17px]]
| |
| |[[File:X_mark.svg|17px]]
| |
| |[[File:X_mark.svg|17px]]
| |
| |[[File:Check_mark.svg|17px]]
| |
| |[[File:Check_mark.svg|17px]]
| |
| |Snivy attacks by using [[bulbapedia:Razor Leaf (move)|Razor Leaf]], firing a stream of sharp leaves towards one side of the screen, dealing moderate damage to any opponent that it hits. In reality, Snivy cannot learn this move.
| |
| |-
| |
| |[[File:SSBU Snorlax.png|x100px]]
| |
| |[[bulbapedia:Snorlax (Pokémon)|Snorlax]]{{anchor|Snorlax}}
| |
| |[[File:Check_mark.svg|17px]]
| |
| |[[File:Check_mark.svg|17px]]
| |
| |[[File:Check_mark.svg|17px]]
| |
| |[[File:Check_mark.svg|17px]]
| |
| |[[File:Check_mark.svg|17px]]
| |
| |Snorlax leaps up into the air and attacks with [[bulbapedia:Body Slam|Body Slam]], falling down onto the battlefield at a larger size and smashing any opponents in its path, sending them flying. It can also attack opponents when flying up after being summoned. Snorlax also appears as one of the balloons in the [[Poké Floats]] stage in ''[[Super Smash Bros. Melee]]''.
| |
| |-
| |
| |[[File:SolgaleoUltimate.png|x100px]]
| |
| |[[bulbapedia:Solgaleo (Pokémon)|Solgaleo]]{{anchor|Solgaleo}}
| |
| |[[File:X_mark.svg|17px]]
| |
| |[[File:X_mark.svg|17px]]
| |
| |[[File:X_mark.svg|17px]]
| |
| |[[File:X_mark.svg|17px]]
| |
| |[[File:Check_mark.svg|17px]]
| |
| |Solgaleo enters its Radiant Sun phase and attacks with its [[bulbapedia:Signature move|signature move]] [[bulbapedia:Sunsteel Strike (move)|Sunsteel Strike]], in which it charges at opponents while encased in flames.
| |
| |-
| |
| |[[File:SSBU Spewpa.png|x100px]]
| |
| |[[bulbapedia:Spewpa (Pokémon)|Spewpa]]{{anchor|Spewpa}}
| |
| |[[File:X_mark.svg|17px]]
| |
| |[[File:X_mark.svg|17px]]
| |
| |[[File:X_mark.svg|17px]]
| |
| |[[File:Check_mark.svg|17px]]
| |
| |[[File:Check_mark.svg|17px]]
| |
| |Spewpa, if left undisturbed, sits unmoving for the entire duration of its summon. If attacked, however, it releases a [[bulbapedia:Stun Spore (move)|Stun Spore]] cloud which causes any opponent which comes into contact with the spores to become momentarily paralyzed.
| |
| |-
| |
| |[[File:Starmiessb.png|70px]]
| |
| |[[bulbapedia:Starmie (Pokémon)|Starmie]]{{anchor|Starmie}}
| |
| |[[File:Check_mark.svg|17px]]
| |
| |[[File:X_mark.svg|17px]]
| |
| |[[File:X_mark.svg|17px]]
| |
| |[[File:X_mark.svg|17px]]
| |
| |[[File:X_mark.svg|17px]]
| |
| |Starmie positions itself to the nearest foe and uses [[bulbapedia:Swift (move)|Swift]]; after being spawned, it hovers towards an opponent and shoots a barrage of stars at them, dealing minor damage but trapping them in the blast. Damage can also be taken by coming into contact with Starmie itself. Unlike [[#Staryu|Staryu]] in the later games, it lines up its attack on the opponent's position the moment it is released and will not follow opponents.
| |
| |-
| |
| |[[File:SSBU Staryu.png|x100px]]
| |
| |[[bulbapedia:Staryu (Pokémon)|Staryu]]{{anchor|Staryu}}
| |
| |[[File:X_mark.svg|17px]]
| |
| |[[File:Check_mark.svg|17px]]
| |
| |[[File:Check_mark.svg|17px]]
| |
| |[[File:Check_mark.svg|17px]]
| |
| |[[File:Check_mark.svg|17px]]
| |
| |Staryu attacks by using [[Bulbapedia:Swift (move)|Swift]], which involves it floating towards an opponent and firing a series of stars, dealing minor damage while locking them in the shots. Staryu itself deals direct contact damage as well.
| |
| |-
| |
| |[[File:SSBU Suicune.png|x100px]]
| |
| |[[bulbapedia:Suicune (Pokémon)|Suicune]]{{anchor|Suicune}}
| |
| |[[File:X_mark.svg|17px]]
| |
| |[[File:Check_mark.svg|17px]]
| |
| |[[File:Check_mark.svg|17px]]
| |
| |[[File:Check_mark.svg|17px]]
| |
| |[[File:Check_mark.svg|17px]]
| |
| |In ''[[Super Smash Bros. Melee]]'', Suicune uses [[bulbapedia:Blizzard (move)|Blizzard]], creating an icy whirlwind around itself that freezes any nearby opponents. In later games, Suicune attacks with [[bulbapedia:Aurora Beam (move)|Aurora Beam]]; Suicune fires a horizontal laser across the screen that heavily damages any opponents in its path.
| |
| |-
| |
| |[[File:SSBU Swirlix.png|x100px]]
| |
| |[[bulbapedia:Swirlix (Pokémon)|Swirlix]]{{anchor|Swirlix}}
| |
| |[[File:X_mark.svg|17px]]
| |
| |[[File:X_mark.svg|17px]]
| |
| |[[File:X_mark.svg|17px]]
| |
| |[[File:Check_mark.svg|17px]]
| |
| |[[File:Check_mark.svg|17px]]
| |
| |Swirlix attacks by using [[bulbapedia:Cotton Spore (move)|Cotton Spore]], releasing a continuous bunch of spores that heavily slow any opponents caught in the cloud. Swirlix is otherwise motionless.
| |
| |-
| |
| |[[File:TapuKokoUltimate.png|x100px]]
| |
| |[[bulbapedia:Tapu Koko (Pokémon)|Tapu Koko]]{{anchor|Tapu Koko}}
| |
| |[[File:X_mark.svg|17px]]
| |
| |[[File:X_mark.svg|17px]]
| |
| |[[File:X_mark.svg|17px]]
| |
| |[[File:X_mark.svg|17px]]
| |
| |[[File:Check_mark.svg|17px]]
| |
| |Tapu Koko surrounds itself with an electric field that stuns opponents, as well as shooting out electricity.
| |
| |-
| |
| |[[File:TogedemaruUltimate.png|x100px]]
| |
| |[[bulbapedia:Togedemaru (Pokémon)|Togedemaru]]{{anchor|Togedemaru}}
| |
| |[[File:X_mark.svg|17px]]
| |
| |[[File:X_mark.svg|17px]]
| |
| |[[File:X_mark.svg|17px]]
| |
| |[[File:X_mark.svg|17px]]
| |
| |[[File:Check_mark.svg|17px]]
| |
| |Togedemaru uses [[bulbapedia:Zing Zap (move)|Zing Zap]], surrounding itself with electricity after a bolt zaps it.
| |
| |-
| |
| |[[File:SSBU Togepi.png|x100px]]
| |
| |[[bulbapedia:Togepi (Pokémon)|Togepi]]{{anchor|Togepi}}
| |
| |[[File:X_mark.svg|17px]]
| |
| |[[File:Check_mark.svg|17px]]
| |
| |[[File:Check_mark.svg|17px]]
| |
| |[[File:Check_mark.svg|17px]]
| |
| |[[File:Check_mark.svg|17px]]
| |
| |Togepi attacks with [[bulbapedia:Metronome (move)|Metronome]], in which it uses a random attack that causes one of several various effects to occur, including [[bulbapedia:Magnitude (move)|Magnitude]], which causes an earthquake which traps opponents in the ground; [[bulbapedia:Night Shade (move)|Night Shade]], which covers the stage in darkness; [[bulbapedia:Hypnosis (move)|Hypnosis]], which puts opponents to sleep; [[bulbapedia:Leech Seed (move)|Leech Seed]], which causes a flower to sprout on opponents' heads, similar to [[Lip's Stick]]; and [[bulbapedia:Ice Beam (move)|Ice Beam]], which freezes opponents on contact.
| |
| |-
| |
| |[[File:Torchic.jpg|x100px]]
| |
| |[[bulbapedia:Torchic (Pokémon)|Torchic]]{{anchor|Torchic}}
| |
| |[[File:X_mark.svg|17px]]
| |
| |[[File:X_mark.svg|17px]]
| |
| |[[File:Check_mark.svg|17px]]
| |
| |[[File:X_mark.svg|17px]]
| |
| |[[File:X_mark.svg|17px]]
| |
| |Torchic attacks by using [[bulbapedia:Fire Spin (move)|Fire Spin]], which involves it engulfing itself in flames, trapping opponents in the fire while accumulating damage. At the end of the attack, the trapped opponents get launched back a far distance.
| |
| |-
| |
| |[[File:Unown.png|x100px]]
| |
| |[[bulbapedia:Unown (Pokémon)|Unown]]{{anchor|Unown}}
| |
| |[[File:X_mark.svg|17px]]
| |
| |[[File:Check_mark.svg|17px]]
| |
| |[[File:X_mark.svg|17px]]
| |
| |[[File:X_mark.svg|17px]]
| |
| |[[File:X_mark.svg|17px]]
| |
| |Unown attacks by using [[bulbapedia:Take Down (move)|Take Down]]; a single Unown is spawned and flies off-screen, dealing moderate knockback and damage if it hits an opponent. After it flies away, a swarm of Unown soon flies diagonally across the screen, juggling opponents who come into contact with them. The original Unown that was released cannot be blocked, but the Unown swarm can be blocked.
| |
| |-
| |
| |[[File:Venusaur SSBM.png|x100px]]
| |
| |[[bulbapedia:Venusaur (Pokémon)|Venusaur]]{{anchor|Venusaur}}
| |
| |[[File:X_mark.svg|17px]]
| |
| |[[File:Check_mark.svg|17px]]
| |
| |[[File:X_mark.svg|17px]]
| |
| |[[File:X_mark.svg|17px]]
| |
| |[[File:X_mark.svg|17px]]
| |
| |Venusaur attacks by using [[bulbapedia:Earthquake (move)|Earthquake]], which involves Venusaur stomping on the ground, creating shockwaves that do strong damage and knockback to any opponent caught in it.
| |
| |-
| |
| |[[File:SSBU Victini.png|x100px]]
| |
| |[[bulbapedia:Victini (Pokémon)|Victini]]{{anchor|Victini}}
| |
| |[[File:X_mark.svg|17px]]
| |
| |[[File:X_mark.svg|17px]]
| |
| |[[File:X_mark.svg|17px]]
| |
| |[[File:Check_mark.svg|17px]]
| |
| |[[File:Check_mark.svg|17px]]
| |
| |Victini does not directly attack when summoned, instead it temporarily makes the summoner immune to knockback and gives them a boost to their attacks. In ''[[Super Smash Bros. for Nintendo 3DS]]'', it is unlocked by playing 100-Man Smash for the first time, and in ''[[Super Smash Bros. for Wii U]]'', it is unlocked by clearing All-Star Mode for the first time. In ''[[Super Smash Bros. Ultimate]]'', it instead gives the summoner a Final Smash.
| |
| |-
| |
| |[[File:VulpixUltimate.png|x100px]]
| |
| |[[bulbapedia:Vulpix (Pokémon)|Vulpix]]{{anchor|Vulpix}}
| |
| |[[File:X_mark.svg|17px]]
| |
| |[[File:X_mark.svg|17px]]
| |
| |[[File:X_mark.svg|17px]]
| |
| |[[File:X_mark.svg|17px]]
| |
| |[[File:Check_mark.svg|17px]]
| |
| |Vulpix attacks using [[bulbapedia:Ember (move)|Ember]], burning opponents it hits.
| |
| |-
| |
| |[[File:Weavile.jpg|x100px]]
| |
| |[[bulbapedia:Weavile (Pokémon)|Weavile]]{{anchor|Weavile}}
| |
| |[[File:X_mark.svg|17px]]
| |
| |[[File:X_mark.svg|17px]]
| |
| |[[File:Check_mark.svg|17px]]
| |
| |[[File:X_mark.svg|17px]]
| |
| |[[File:X_mark.svg|17px]]
| |
| |Weavile performs [[bulbapedia:False Swipe (move)|False Swipe]]. It attacks foes by dashing back and forth in one defined area. Foes hit by this attack are stunned, as if their Shield has been broken. However, if the player is hit while in the air by Weavile (even though it stays on the ground), the player goes flying straight up.
| |
| |-
| |
| |[[File:Weezing.png|x100px]]
| |
| |[[bulbapedia:Weezing (Pokémon)|Weezing]]{{anchor|Weezing}}
| |
| |[[File:X_mark.svg|17px]]
| |
| |[[File:Check_mark.svg|17px]]
| |
| |[[File:X_mark.svg|17px]]
| |
| |[[File:X_mark.svg|17px]]
| |
| |[[File:X_mark.svg|17px]]
| |
| |Weezing attacks by using [[Bulbapedia:Smog (move)|Smog]], which involves it continuously emitting gas out of its body, dealing low damage and knockback to any opponents that comes into contact with it. If they end up at Weezing's center, they become stuck and steadily take damage.
| |
| |-
| |
| |[[File:Wobbuffet Brawl screenshot.png|x100px]]
| |
| |[[bulbapedia:Wobbuffet (Pokémon)|Wobbuffet]]{{anchor|Wobbuffet}}
| |
| |[[File:X_mark.svg|17px]]
| |
| |[[File:Check_mark.svg|17px]]
| |
| |[[File:Check_mark.svg|17px]]
| |
| |[[File:X_mark.svg|17px]]
| |
| |[[File:X_mark.svg|17px]]
| |
| |Wobbuffet uses [[Bulbapedia:Counter (move)|Counter]] during the battle, though it does not attack directly; it instead recoils due to being attacked. The stronger the attack, the faster Wobbuffet wobbles, and while it wobbles, both the summoner and their opponents takes reciprocal damage.
| |
| |-
| |
| |[[File:SSBU Xerneas.png|x100px]]
| |
| |[[bulbapedia:Xerneas (Pokémon)|Xerneas]]{{anchor|Xerneas}}
| |
| |[[File:X_mark.svg|17px]]
| |
| |[[File:X_mark.svg|17px]]
| |
| |[[File:X_mark.svg|17px]]
| |
| |[[File:Check_mark.svg|17px]]
| |
| |[[File:Check_mark.svg|17px]]
| |
| |Xerneas uses its [[bulbapedia:Signature move|signature move]], [[Bulbapedia:Geomancy (move)|Geomancy]], which involves it stepping on the ground and causing all players to glow. During this state, all of their attacks have increased knockback, though the summoner gets a bigger benefit from the move. In ''[[Super Smash Bros. for Nintendo 3DS]]'' it is unlocked after playing Target Blast for the first time, and in ''[[Super Smash Bros. for Wii U]]'' it is unlocked by destroying 200 blocks in one single player Trophy Rush game as [[Pikachu]]. In ''[[Super Smash Bros. Ultimate]]'', it instead turns the summoner gold, increasing their attack power and making them immmune to flinches.
| |
| |-
| |
| |[[File:Zapdos Melee.png|x100px]]
| |
| |[[bulbapedia:Zapdos (Pokémon)|Zapdos]]{{anchor|Zapdos}}
| |
| |[[File:X_mark.svg|17px]]
| |
| |[[File:Check_mark.svg|17px]]
| |
| |[[File:X_mark.svg|17px]]
| |
| |[[File:X_mark.svg|17px]]
| |
| |[[File:X_mark.svg|17px]]
| |
| |Zapdos attacks by using [[Bulbapedia:Thunder Shock (move)|Thunder Shock]], which involves Zapdos discharging sparks around it, dealing weak damage and knockback to opponents that end up near it. It is possible for them to get stuck in the sparks, racking up damage. In ''[[Super Smash Bros. for Nintendo 3DS]]'', Zapdos occasionally appears in the background of the [[Prism Tower]] stage.
| |
| |-
| |
| ||[[File:SSBU Zoroark.png|x100px]]
| |
| |[[bulbapedia:Zoroark (Pokémon)|Zoroark]]{{anchor|Zoroark}}
| |
| |[[File:X_mark.svg|17px]]
| |
| |[[File:X_mark.svg|17px]]
| |
| |[[File:X_mark.svg|17px]]
| |
| |[[File:Check_mark.svg|17px]]
| |
| |[[File:Check_mark.svg|17px]]
| |
| |Zoroark attacks by using [[Bulbapedia:Fury Swipes (move)|Fury Swipes]], grabbing a single opponent and launching them in the air, then swiping at them multiple times for moderate damage before smashing them back to the ground. However, the move fails if the targeted opponent is being grabbed by another fighter; instead Zoroark keeps slashing at the grabbed opponent until it disappears. Zoroark is one of only two non-Legendary or Mythical Pokémon who can be released from a [[Master Ball]], the other being [[#Goldeen|Goldeen]].
| |
| |- | | |- |
| | |18 |
| | |[[File:MGAT Star Marion Course Hole 18.png]] |
| | |[[File:MGAT Mushroom Course Green 18.png|219px]] |
| | |5 |
| | |??? yards |
| | |??? yards |
| | | |
| |} | | |} |
