World 6-Tower (New Super Mario Bros. Wii): Difference between revisions
mNo edit summary |
(→Layout) Tag: Mobile edit |
||
| (18 intermediate revisions by 12 users not shown) | |||
| Line 1: | Line 1: | ||
{{ | {{italic title|id=yes}} | ||
{{ | {{level infobox | ||
|title={{world|6|tower}} | |title={{world|6|tower}} | ||
|image=[[File:6- | |image=[[File:NSMBW World 6-T Screenshot.png|250px]] | ||
|code= | |code= | ||
|world=[[World 6 (New Super Mario Bros. Wii)|World 6]] | |world=[[World 6 (New Super Mario Bros. Wii)|World 6]] | ||
| Line 8: | Line 8: | ||
|limit=600 seconds | |limit=600 seconds | ||
|boss=[[Morton Koopa Jr.]] | |boss=[[Morton Koopa Jr.]] | ||
| | |before_alt= | ||
|before=[[World 6-4 (New Super Mario Bros. Wii)|<<]] [[World 6-3 (New Super Mario Bros. Wii)|<<]] | |before=[[World 6-4 (New Super Mario Bros. Wii)|<<]] [[World 6-3 (New Super Mario Bros. Wii)|<<]] | ||
|after=[[World 6-5 (New Super Mario Bros. Wii)|>>]] | |after=[[World 6-5 (New Super Mario Bros. Wii)|>>]] | ||
}} | }} | ||
'''{{world|6|tower}}''' is the [[Tower]] of [[World 6 (New Super Mario Bros. Wii)|World 6]] in ''[[New Super Mario Bros. Wii]]''. | '''{{world|6|tower}}''' is the [[Tower]] of [[World 6 (New Super Mario Bros. Wii)|World 6]] in ''[[New Super Mario Bros. Wii]]''. Upon completion of the level, the player unlocks [[World 6-5 (New Super Mario Bros. Wii)|World 6-5]] and a Red [[Toad House]]. | ||
==Layout== | ==Layout== | ||
This tower | This tower begins next to a giant [[Skewer]], and a [[? Block]] containing a power-up can be found next to it. The player then climbs up semi-solid platforms in the path of the Skewer, where a second ? Block can be found. The player encounters two [[Dry Bones]], followed by a group of [[lift]]s moving horizontally. The lifts are followed by section containing [[Note Block|Jump Blocks]]. The [[Checkpoint Flag|midway point]] follows, where the giant Skewer collides with the second giant Skewer coming from above. Another Dry Bones is found, along with another ? Block. A [[Red Ring]] is found, causing [[Red Ring]]s to appear throughout a section of semi-solid platforms. [[Pipe Cannon]]s are then used to reach platforms, two of which are moving. More horizontally-moving lifts are then encountered. After this section, the area with the red doors are reached, along with a ? Block. An [[Hidden Block|Invisible Block]] is above the ? Block, allowing the player to reach a hidden [[Warp Pipe]] that leads to an area with a [[POW Block]] that can be used to collect a large group of [[coin]]s. | ||
The player faces [[Morton Koopa Jr.]] | The player faces [[Morton Koopa Jr.]] behind the red doors in an arena with bodies of [[lava]] on either side. During the fight, Morton jumps and ground pounds (stunning any players not in the air when he lands). He also shoot pink blasts from his wand (Morton's casting speed is slow but the blasts are fast). Morton spins in his shell fast when hit. The attack can easily be avoided if players are on the raised ground on either side. However they must avoid Skewers that hit the ground. Morton is defeated once he is hit the third time. | ||
==[[Star Coin]]s== | ==[[Star Coin]]s== | ||
*'''Star Coin 1''': To the far left of the level's first [[Dry Bones]] is a hidden area inside the wall that contains the first Star Coin. | *'''Star Coin 1''': To the far left of the level's first [[Dry Bones]] is a hidden area inside the wall that contains the first Star Coin. | ||
*'''Star Coin 2''': The second Star Coin is right near the [[Checkpoint Flag]] and in between two walls. Mario and co. must walk kick to get it while the [[Skewer]]s are away. | *'''Star Coin 2''': The second Star Coin is right near the [[Checkpoint Flag|midway point]] and in between two walls. Mario and co. must walk kick to get it while the [[Skewer]]s are away. | ||
*'''Star Coin 3''': The third Star Coin is in between two close walls at the end of the level just before [[Morton Koopa Jr.|Morton]]'s door. Mario and co. must wall kick these walls to get | *'''Star Coin 3''': The third Star Coin is in between two close walls at the end of the level just before [[Morton Koopa Jr.|Morton]]'s door. Mario and co. must wall kick these walls to get it before the Skewer launches. | ||
==Enemies== | ==Enemies== | ||
{|border=2 cellspacing=0 cellpadding=3 style="border-collapse:collapse"style="text-align: center" | |||
|- | |||
!Name | |||
!Image | |||
{{NSMBW}} | !Number | ||
|- | |||
|[[Dry Bones]] | |||
|[[File:DryBones NSMBW.png]] | |||
|3 | |||
|- | |||
|Boss: [[Morton Koopa Jr.]] | |||
|[[File:NSMBW Morton Sprite.png|70px]] | |||
|1 | |||
|- | |||
|[[Skewer]]s | |||
|[[File:Pillar NSMBW.png]] | |||
|4 | |||
|- | |||
|} | |||
==Level map== | |||
[[File:NSMBW World 6-T Map.jpg|150px|thumb|left]] | |||
{{NSMBW levels}} | |||
[[Category:Towers]] | [[Category:Towers]] | ||
[[Category:New Super Mario Bros. Wii | [[Category:New Super Mario Bros. Wii levels]] | ||
Latest revision as of 13:10, May 5, 2024
| Level | |
|---|---|
| World 6- | |

| |
| World | World 6 |
| Game | New Super Mario Bros. Wii |
| Time limit | 600 seconds |
| Boss | Morton Koopa Jr. |
| << << Directory of levels >> | |
World 6-![]() Tower is the Tower of World 6 in New Super Mario Bros. Wii. Upon completion of the level, the player unlocks World 6-5 and a Red Toad House.
Tower is the Tower of World 6 in New Super Mario Bros. Wii. Upon completion of the level, the player unlocks World 6-5 and a Red Toad House.
Layout[edit]
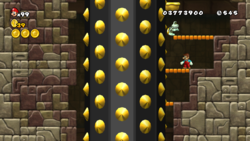
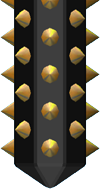
This tower begins next to a giant Skewer, and a ? Block containing a power-up can be found next to it. The player then climbs up semi-solid platforms in the path of the Skewer, where a second ? Block can be found. The player encounters two Dry Bones, followed by a group of lifts moving horizontally. The lifts are followed by section containing Jump Blocks. The midway point follows, where the giant Skewer collides with the second giant Skewer coming from above. Another Dry Bones is found, along with another ? Block. A Red Ring is found, causing Red Rings to appear throughout a section of semi-solid platforms. Pipe Cannons are then used to reach platforms, two of which are moving. More horizontally-moving lifts are then encountered. After this section, the area with the red doors are reached, along with a ? Block. An Invisible Block is above the ? Block, allowing the player to reach a hidden Warp Pipe that leads to an area with a POW Block that can be used to collect a large group of coins.
The player faces Morton Koopa Jr. behind the red doors in an arena with bodies of lava on either side. During the fight, Morton jumps and ground pounds (stunning any players not in the air when he lands). He also shoot pink blasts from his wand (Morton's casting speed is slow but the blasts are fast). Morton spins in his shell fast when hit. The attack can easily be avoided if players are on the raised ground on either side. However they must avoid Skewers that hit the ground. Morton is defeated once he is hit the third time.
Star Coins[edit]
- Star Coin 1: To the far left of the level's first Dry Bones is a hidden area inside the wall that contains the first Star Coin.
- Star Coin 2: The second Star Coin is right near the midway point and in between two walls. Mario and co. must walk kick to get it while the Skewers are away.
- Star Coin 3: The third Star Coin is in between two close walls at the end of the level just before Morton's door. Mario and co. must wall kick these walls to get it before the Skewer launches.
Enemies[edit]
| Name | Image | Number |
|---|---|---|
| Dry Bones | 3 | |
| Boss: Morton Koopa Jr. | 1 | |
| Skewers | 
|
4 |
