Trick Track Trek: Difference between revisions
No edit summary |
|||
| (46 intermediate revisions by 22 users not shown) | |||
| Line 1: | Line 1: | ||
{{ | {{DKC level infobox | ||
|image=[[File:Trick Track Trek SNES.png]] | |||
|image=[[File: | |||
|code=5 - 2 | |code=5 - 2 | ||
|game=''[[Donkey Kong Country]] | |game=''[[Donkey Kong Country]] | ||
| | |track=Life in the Mines | ||
|before2=[[Oil Drum Alley|<<]] | |before2=[[Oil Drum Alley|<<]] | ||
|after2=[[ | |after2=[[Elevator Antics|>>]] | ||
| | |before3=[[Oil Drum Alley|<<]] | ||
|after3=[[Poison Pond|>>]] | |||
}} | }} | ||
'''Trick Track Trek''' is the twenty-fourth level of | '''Trick Track Trek''', also spelled '''Trik Trak Trek''',<ref>''Nintendo Magazine System'' (UK) issue 28, page 59.</ref> is the twenty-fourth level of ''[[Donkey Kong Country]]'' and the second level of [[Kremkroc Industries, Inc.]] [[Donkey Kong]] and [[Diddy Kong]] must ride a platform on a rail from start to end. Upon reaching the end of a rail, the platform falls down, although this is not the case for the Japanese Super Famicom version. There are a few boardwalks that the [[Kong]]s can move across along the way. While the Kongs are on the platform, they must avoid several [[Necky]]s, [[Mini-Necky]]s, and [[Zinger]]s. The platform automatically slows down if the Kongs encounter a Mini-Necky on the track, or if a perched Necky throws nuts at them from above. During the second half, enemies such as [[Gnawty|Gnawties]] and [[Kritter]]s walk down from a boardwalk and onto the moving platform with the Kongs, attempting to knock them off track. | ||
==Layout== | |||
{{multiframe|[[File:TrickTrackTrek-GBC-1.png]] [[File:TrickTrackTrek-GBA-1.png|180px]]|Trick Track Trek's appearance in the Game Boy Color version, top, and the Game Boy Advance version, bottom|align=left|size=200}} | |||
The Kongs begin the level on a pathway of scaffolds with a Necky throwing eggs standing over them on a hanging platform. After climbing up a slanted scaffold, they reach a metallic platform connected to a long rail. Once they land on this platform, it is activated and begins to move, taking them up to a Necky with the level's first [[DK Barrel]] over it. The mobile platform then makes a few sharp turns, slowly heading downwards into an area with a Necky flying around in it. The platform then carries the heroes to a part of the rails that is higher up, where more Neckys are located. As the platform travels to the east, it comes under a Necky on a stationary platform and the letter K. It approaches another Necky as it moves up a rail leading to the north. It then leads the Kongs to the east, where the Kongs can find a trio of [[banana]]s and another pathway leading downwards for the platform to follow. As it moves down this area, a few Neckys fly in the Kongs' way. | |||
The mobile platform soon follows a rail leading to the east, where another Necky flies towards the two friends. After moving farther upwards, the moving platform carries the heroes past a DK Barrel and a few flying Neckys. Once it rides along a few 90 degree turns in the rails, it leads the heroes towards a Mini-Necky, who shoots eggs at them. More Neckys fly towards the duo as they are led east. The [[KONG Letters|letter O]] hovers above their heads. Eventually, the mobile platform begins to ride upwards again. Mini-Neckys shoot eggs at the Kongs as they rise. The platform then moves along a rail behind these enemies, so the Kongs must defeat them on the way down. After the moving platform makes its way to the bottom of the trail, it carries the heroes towards a slanted scaffold that they can climb to find a leveled platform with a Gnawty on it. The level's [[Star Barrel|Continue Barrel]] hovers to the right of here above another metallic platform, which begins to move after they land on it. | |||
The mobile platform soon follows a rail leading to the east, where another Necky flies towards the two friends. After moving farther upwards, the moving platform carries the heroes past a DK Barrel and a few flying | |||
The platform leads them under a scaffold holding a Gnawty, who drops down from the platform and lands near the Kongs. A Zinger is ahead of here with a DK Barrel above it. Before the moving platform makes its way north on the railway, it carries the primates under two more scaffolds that Gnawties drop from. After passing these foes and moving upwards, it moves to the east, where the duo is attacked by a Mini-Necky and a Zinger. After the Zinger is passed, the platform moves down to a lower part of the railway, where another scaffold holding two Gnawties is put into view. The Gnawties drop from it as the heroes approach. A Kritter hops from another scaffold ahead of here, followed by a heavy Klump on a separate scaffold. The platform soon heads slightly lower in the area, where a Mini-Necky stands in the Kongs' way. Once they pass it, they are led under a scaffold holding a Klump. They then approach the letter N, found under an egg-throwing Necky, who stands on a stationary platform. | The platform leads them under a scaffold holding a Gnawty, who drops down from the platform and lands near the Kongs. A Zinger is ahead of here with a DK Barrel above it. Before the moving platform makes its way north on the railway, it carries the primates under two more scaffolds that Gnawties drop from. After passing these foes and moving upwards, it moves to the east, where the duo is attacked by a Mini-Necky and a Zinger. After the Zinger is passed, the platform moves down to a lower part of the railway, where another scaffold holding two Gnawties is put into view. The Gnawties drop from it as the heroes approach. A Kritter hops from another scaffold ahead of here, followed by a heavy Klump on a separate scaffold. The platform soon heads slightly lower in the area, where a Mini-Necky stands in the Kongs' way. Once they pass it, they are led under a scaffold holding a Klump. They then approach the letter N, found under an egg-throwing Necky, who stands on a stationary platform. | ||
A scaffold holding a Klaptrap that drops off of it when the heroes are nearby is ahead. The letter G is soon after this, being orbited by a Zinger. Once the platform climbs into a slightly higher area from here, two Klaptraps are dropped on the duo from a platform hanging above them. A scaffold holding a Manky Kong is ahead, but instead of dropping from the platform, the ape enemy hurls barrels at the heroes as the move along the railway. After passing this enemy, the moving platform leads the primates under a scaffold that drops a mighty Krusha on them. If the heroes manage to pass this foe, they are led along several sharp turns up to a set of scaffolds. After they head down a slanted part of this area, they encounter a Manky Kong with a platform hanging above it. The exit sign stands here, and once they pass it, they level is completed. | A scaffold holding a Klaptrap that drops off of it when the heroes are nearby is ahead. The letter G is soon after this, being orbited by a Zinger. Once the platform climbs into a slightly higher area from here, two Klaptraps are dropped on the duo from a platform hanging above them. A scaffold holding a Manky Kong is ahead, but instead of dropping from the platform, the ape enemy hurls barrels at the heroes as the move along the railway. After passing this enemy, the moving platform leads the primates under a scaffold that drops a mighty Krusha on them. If the heroes manage to pass this foe, they are led along several sharp turns up to a set of scaffolds. After they head down a slanted part of this area, they encounter a Manky Kong with a platform hanging above it. The exit sign stands here, and once they pass it, they level is completed. | ||
{{ | |||
== | ==Enemies== | ||
The following enemies appear in the following quantities: | |||
<gallery> | |||
Gnawty.png|[[Gnawty]] (6) | |||
Klaptrap_DKC.png|[[Klaptrap]] (4){{footnote|main|a}} | |||
Klump DKC sprite.png|[[Klump]] (2) | |||
Kritter-DKC.png|[[Kritter]] (1) | |||
Krusha_DKC_blue.png|[[Krusha]] (1) | |||
Manky Kong DKC.png|[[Manky Kong]] (2) | |||
Mini_Necky_DKC.png|[[Mini-Necky]] (5) | |||
Necky.png|[[Necky]] (16) | |||
Zinger_DKC.png|[[Zinger]] (5) | |||
</gallery> | |||
{{footnote|note|a|Of the four Klaptraps, one of them is red}} | |||
==Items and objects== | |||
The following items and objects appear in the following quantities: | |||
<gallery> | |||
Banana DKC SNES.png|[[Banana]] (52) | |||
DK Barrel DKC.png|[[DK Barrel]] (4) | |||
Red Balloon DKC SNES.png|[[Red Balloon|Life Balloon]] (red) (1, in Bonus Level) | |||
Green Balloon DKC SNES.png|[[Green Balloon|Life Balloon]] (green) (1, in Bonus Level) | |||
Blue Balloon DKC SNES.png|[[Blue Balloon|Life Balloon]] (blue) (1, in Bonus Level) | |||
Winky Token Sprite SNES.png|[[Winky]] [[animal token|Token]]{{footnote|main|b}} | |||
</gallery> | |||
{{footnote|note|b|The Winky Token is on a hidden scaffold to the right of the third Bonus Barrel.}} | |||
===K-O-N-G Letters=== | ===K-O-N-G Letters=== | ||
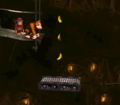
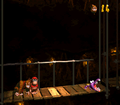
[[File:Trick Track Trek 5.png|thumb|The location of the letter K]] | |||
*O: Shortly after | *'''K:''' Under a platform with the second perched Necky. | ||
*N: | *'''O:''' Shortly after the first Mini-Necky, the Kongs must bounce on three Neckys to reach the letter O. | ||
*G: | *'''N:''' During the second half, after the second Klump drops onto the moving platform, the Kongs find the letter N hovering under a perched Necky. | ||
*'''G:''' Right after the letter N, the Kongs encounter a Klaptrap and then a Zinger that circles around the letter G. | |||
{{br}} | {{br}} | ||
==Bonus Levels== | |||
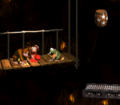
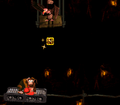
[[File:TrickTrackTrekBonus1.png|thumb|The first Bonus Level]] | |||
Trick Track Trek has three Bonus Levels, listed by their type in the Game Boy Advance version: | |||
*'''''Collect the Bananas!''''': When the first moving platform reaches the end of a track, right before the Continue Barrel, the Kongs must roll jump under the slanted pathway to land into a [[Bonus Barrel]]. In the [[Bonus Level]], the Kongs must jump on a platform that moves on an invisible track up and around the area. The Kongs can jump at several bananas arranged in a rectangular shape to collect them. They can exit the Bonus Level by either falling below or exiting to the right. | |||
*'''''Bash the Baddies!''''': After the first Mini-Necky from the Continue Barrel, the Kongs must pass a Zinger that vertically moves on the track. When the moving platform starts to move down, the Kongs must roll jump onto a platform with two Gnawties and then do another roll jump to enter a Bonus Barrel to the right. In the Bonus Level, the Kongs must jump on a purple Klaptrap to gain [[Banana|Banana Bunch]]es. Unlike the normal variant, the purple Klaptrapt jumps at the same time as the Kongs. After the Kongs jump on it ten times, the Klaptrap is defeated, and the Kongs are rewarded a [[Red Balloon|Life Balloon]]. After winning or losing the challenge, the Kongs return into the main level. | |||
*'''''Stop the Barrel!''''': At the very end of the level, the Kongs encounter a Manky Kong near the exit. They must defeat it and fall down onto a hidden scaffold with a [[Winky]] [[animal token|Token]]. The Kongs can jump left into the third Bonus Barrel. In the third and last Bonus Level, there are three barrels which alternate between all three [[Red Balloon|Extra]] [[Green Balloon|Life]] [[Blue Balloon|Balloon]]s. The Kongs must jump at each of the three barrels so that they depict the Extra Life Balloon of the same color. By doing so, the Kongs are awarded with the Extra Life Balloon of that color. The Kongs return into the main level after either winning or losing. | |||
==Warp Barrel== | |||
At the start of the level, instead of jumping to the metallic platform at the start, the Kongs must do a long roll-jump to jump up into a hidden [[Warp Barrel]] in the air. The Warp Barrel sends them to an arrow sign near the end of the level. The Warp Barrel does not appear in the [[Donkey Kong Country (Game Boy Color)|Game Boy Color version]]. | |||
==Gallery== | ==Gallery== | ||
<gallery> | |||
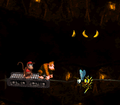
Trick Track Trek 2.png|The first moving platform is put in view | |||
Trick Track Trek 3.png|The Kongs stand near a Continue Barrel | |||
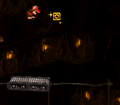
Trick Track Trek 4.png|The Kongs reach the end of the level | |||
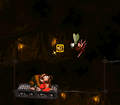
Trick Track Trek Zinger.png|The Kongs encounter a Zinger | |||
</gallery> | TrickTrackTrekLetterO.png|The location of the letter O | ||
TrickTrackTrekBonus2.png|The second Bonus Level | |||
TrickTrackTrekLetterN.png|The location of the letter N | |||
TrickTrackTrekLetterG.png|The location of the letter G | |||
TrickTrackTrekBonus3.png|The third Bonus Level | |||
TrickTrackTrek-GBA-2.png|A Red [[Klaptrap]] in the Game Boy Advance version | |||
</gallery> | |||
==Names in other languages== | ==Names in other languages== | ||
{{ | {{foreign names | ||
|Jap=トリックトラックリフト | |Jap=トリックトラックリフト | ||
|JapR=Torikku | |JapR=Torikku Torakku Rifuto | ||
|JapM=Trick Track Lift | |JapM=Trick Track Lift | ||
|Spa=Viaje con Truco | |Spa=Viaje con Truco | ||
|SpaM=Tricky Trip | |SpaM=Tricky Trip | ||
|Fre=Trajet Toc Toc | |||
|FreM=Crazy Route | |||
|Ger=Trick-Track-Treck | |Ger=Trick-Track-Treck | ||
|GerM=-- | |GerM=-- | ||
|Ita=Trekking di Trucchi | |||
|ItaM=Tricks of Trekking | |||
}} | |||
{{DKC | |||
[[Category: | ==References== | ||
<references/> | |||
{{DKC levels}} | |||
[[Category:Mines]] | |||
[[Category:Donkey Kong Island]] | [[Category:Donkey Kong Island]] | ||
[[Category:Donkey Kong | [[Category:Donkey Kong Country levels]] | ||
Latest revision as of 14:33, January 20, 2024
| Level | |
|---|---|
| Trick Track Trek | |

| |
| Level code | 5 - 2 |
| Game | Donkey Kong Country |
| Music track | Life in the Mines |
| << Directory of levels (SNES & GBC) >> | |
| << Directory of levels (GBA) >> | |
Trick Track Trek, also spelled Trik Trak Trek,[1] is the twenty-fourth level of Donkey Kong Country and the second level of Kremkroc Industries, Inc. Donkey Kong and Diddy Kong must ride a platform on a rail from start to end. Upon reaching the end of a rail, the platform falls down, although this is not the case for the Japanese Super Famicom version. There are a few boardwalks that the Kongs can move across along the way. While the Kongs are on the platform, they must avoid several Neckys, Mini-Neckys, and Zingers. The platform automatically slows down if the Kongs encounter a Mini-Necky on the track, or if a perched Necky throws nuts at them from above. During the second half, enemies such as Gnawties and Kritters walk down from a boardwalk and onto the moving platform with the Kongs, attempting to knock them off track.
Layout[edit]


The Kongs begin the level on a pathway of scaffolds with a Necky throwing eggs standing over them on a hanging platform. After climbing up a slanted scaffold, they reach a metallic platform connected to a long rail. Once they land on this platform, it is activated and begins to move, taking them up to a Necky with the level's first DK Barrel over it. The mobile platform then makes a few sharp turns, slowly heading downwards into an area with a Necky flying around in it. The platform then carries the heroes to a part of the rails that is higher up, where more Neckys are located. As the platform travels to the east, it comes under a Necky on a stationary platform and the letter K. It approaches another Necky as it moves up a rail leading to the north. It then leads the Kongs to the east, where the Kongs can find a trio of bananas and another pathway leading downwards for the platform to follow. As it moves down this area, a few Neckys fly in the Kongs' way.
The mobile platform soon follows a rail leading to the east, where another Necky flies towards the two friends. After moving farther upwards, the moving platform carries the heroes past a DK Barrel and a few flying Neckys. Once it rides along a few 90 degree turns in the rails, it leads the heroes towards a Mini-Necky, who shoots eggs at them. More Neckys fly towards the duo as they are led east. The letter O hovers above their heads. Eventually, the mobile platform begins to ride upwards again. Mini-Neckys shoot eggs at the Kongs as they rise. The platform then moves along a rail behind these enemies, so the Kongs must defeat them on the way down. After the moving platform makes its way to the bottom of the trail, it carries the heroes towards a slanted scaffold that they can climb to find a leveled platform with a Gnawty on it. The level's Continue Barrel hovers to the right of here above another metallic platform, which begins to move after they land on it.
The platform leads them under a scaffold holding a Gnawty, who drops down from the platform and lands near the Kongs. A Zinger is ahead of here with a DK Barrel above it. Before the moving platform makes its way north on the railway, it carries the primates under two more scaffolds that Gnawties drop from. After passing these foes and moving upwards, it moves to the east, where the duo is attacked by a Mini-Necky and a Zinger. After the Zinger is passed, the platform moves down to a lower part of the railway, where another scaffold holding two Gnawties is put into view. The Gnawties drop from it as the heroes approach. A Kritter hops from another scaffold ahead of here, followed by a heavy Klump on a separate scaffold. The platform soon heads slightly lower in the area, where a Mini-Necky stands in the Kongs' way. Once they pass it, they are led under a scaffold holding a Klump. They then approach the letter N, found under an egg-throwing Necky, who stands on a stationary platform.
A scaffold holding a Klaptrap that drops off of it when the heroes are nearby is ahead. The letter G is soon after this, being orbited by a Zinger. Once the platform climbs into a slightly higher area from here, two Klaptraps are dropped on the duo from a platform hanging above them. A scaffold holding a Manky Kong is ahead, but instead of dropping from the platform, the ape enemy hurls barrels at the heroes as the move along the railway. After passing this enemy, the moving platform leads the primates under a scaffold that drops a mighty Krusha on them. If the heroes manage to pass this foe, they are led along several sharp turns up to a set of scaffolds. After they head down a slanted part of this area, they encounter a Manky Kong with a platform hanging above it. The exit sign stands here, and once they pass it, they level is completed.
Enemies[edit]
The following enemies appear in the following quantities:

Gnawty (6)

Klump (2)

Kritter (1)

Krusha (1)

Manky Kong (2)

Mini-Necky (5)

Necky (16)

Zinger (5)


a - Of the four Klaptraps, one of them is red
Items and objects[edit]
The following items and objects appear in the following quantities:

Banana (52)

DK Barrel (4)

Life Balloon (red) (1, in Bonus Level)

Life Balloon (green) (1, in Bonus Level)

Life Balloon (blue) (1, in Bonus Level)


b - The Winky Token is on a hidden scaffold to the right of the third Bonus Barrel.
K-O-N-G Letters[edit]

- K: Under a platform with the second perched Necky.
- O: Shortly after the first Mini-Necky, the Kongs must bounce on three Neckys to reach the letter O.
- N: During the second half, after the second Klump drops onto the moving platform, the Kongs find the letter N hovering under a perched Necky.
- G: Right after the letter N, the Kongs encounter a Klaptrap and then a Zinger that circles around the letter G.
Bonus Levels[edit]

Trick Track Trek has three Bonus Levels, listed by their type in the Game Boy Advance version:
- Collect the Bananas!: When the first moving platform reaches the end of a track, right before the Continue Barrel, the Kongs must roll jump under the slanted pathway to land into a Bonus Barrel. In the Bonus Level, the Kongs must jump on a platform that moves on an invisible track up and around the area. The Kongs can jump at several bananas arranged in a rectangular shape to collect them. They can exit the Bonus Level by either falling below or exiting to the right.
- Bash the Baddies!: After the first Mini-Necky from the Continue Barrel, the Kongs must pass a Zinger that vertically moves on the track. When the moving platform starts to move down, the Kongs must roll jump onto a platform with two Gnawties and then do another roll jump to enter a Bonus Barrel to the right. In the Bonus Level, the Kongs must jump on a purple Klaptrap to gain Banana Bunches. Unlike the normal variant, the purple Klaptrapt jumps at the same time as the Kongs. After the Kongs jump on it ten times, the Klaptrap is defeated, and the Kongs are rewarded a Life Balloon. After winning or losing the challenge, the Kongs return into the main level.
- Stop the Barrel!: At the very end of the level, the Kongs encounter a Manky Kong near the exit. They must defeat it and fall down onto a hidden scaffold with a Winky Token. The Kongs can jump left into the third Bonus Barrel. In the third and last Bonus Level, there are three barrels which alternate between all three Extra Life Balloons. The Kongs must jump at each of the three barrels so that they depict the Extra Life Balloon of the same color. By doing so, the Kongs are awarded with the Extra Life Balloon of that color. The Kongs return into the main level after either winning or losing.
Warp Barrel[edit]
At the start of the level, instead of jumping to the metallic platform at the start, the Kongs must do a long roll-jump to jump up into a hidden Warp Barrel in the air. The Warp Barrel sends them to an arrow sign near the end of the level. The Warp Barrel does not appear in the Game Boy Color version.
Gallery[edit]
The first moving platform is put in view
The Kongs stand near a Continue Barrel

The Kongs reach the end of the level
The Kongs encounter a Zinger
The location of the letter O
The second Bonus Level
The location of the letter N
The location of the letter G
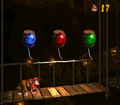
The third Bonus Level
A Red Klaptrap in the Game Boy Advance version


Names in other languages[edit]
| Language | Name | Meaning |
|---|---|---|
| Japanese | トリックトラックリフト Torikku Torakku Rifuto |
Trick Track Lift |
| French | Trajet Toc Toc |
Crazy Route |
| German | Trick-Track-Treck |
-- |
| Italian | Trekking di Trucchi |
Tricks of Trekking |
| Spanish | Viaje con Truco |
Tricky Trip |
References[edit]
- ^ Nintendo Magazine System (UK) issue 28, page 59.