The 'Shroom:Issue 203/Strategy Wing
Director's Notes
Written by: Hooded Pitohui (talk)
We... We ran out of rocks.
I didn't think this could happen. We were practically swimming in stones last month, and, no, it wasn't very comfortable, let me tell you. Still, what a surprise, huh? We even had to divert the order of Pikmin that were supposed to come here for The Anatomy of a Pikmin so they could go gather rocks! It turns out that rocks "aren't in the budget" and "buying a bunch of stones to give away for free isn't a productive use of 'Shroom resources", or something, so now I've got to gather a bunch to replace the ones we ordered and gave away...
Well, while I work on that, I can leave you with our usual selection of sections! This month, we have an entire arc in a single issue of File City Files. That's right! We're investigating - and most certainly not looting - the distant Factorial Town! From modern metal to ancient stone we then go as Four Steps for a 3D World breaks down the progression of the Clockwork Ruins Galaxy, a place I definitely did not go to in search of boulders...
Waluigi Time, meanwhile, travels down into the basement as his quest for Shine Sprites continues! Hopefully it's less musty down there than in that Luigi's Mansion basement... and less haunted, for that matter. Aftet that, we take a look at a Pokémon befitting Valentine's Day! Finally, to wrap up the month, we let Marcus singlehandedly eliminate every single horse in Laus after we recruit a guy in, like, the most awkward possible position on the map. Ah, that bit about the horses might make more sense when you watch Koops, Your Emblem is on Fire (welcome back, chief tactician!).
I've got rocks to go collect, and you've got sections to read, but before I go, let me remind you that we're always open to new writers joining our team! Whether you want to take us through an obscure or nostalgic game like Shoey and Waluigi Time do in their sections, you want to break down the design of a level, share your knowledge of a hobby with us (we're not limited to videogames!), or want to take us on a deep dive into a subject, we're ready to welcome you!
Section of the Month
It looks like we had a three-way tie last month! It's easy to see why the detailed notes from Shoey (talk) on Rock Pikmin were well-received, what with him taking the time to pick apart and explain all the ways that Pikmin 4 rendered Rock Pikmin less useful than they were in their debut. Thank you for showing your appreciation for last month's look at the Boulder Bowl Galaxy and Minior, as well! Your votes are appreciated, so please keep casting them at the bottom of the page!
Don't forget that you can also tell us what you like about a section by nominating it for a Poochy's Pick, too.
| STRATEGY WING SECTION OF THE MONTH | ||||
|---|---|---|---|---|
| Place | Section | Votes | % | Writer |
| 1st | Pitohui's Pokémon Academy | 5 | 25.00% | Hooded Pitohui (talk) |
| 1st | The Anatomy of a Pikmin | 5 | 25.00% | Shoey (talk) |
| 1st | 4 Steps for a 3D World | 5 | 25.00% | Hooded Pitohui (talk) |
File City Files
Hello, and welcome back to File City Files, the Midwest's best source for information on the madness palace that is Digimon World on the original PlayStation. Last month, we scoured the ends of File Island to collect some odds-and-ends Digimon for File City. This month, we're going to be exploring a brand-new area, the mechanical Factorial Town. There's something important to note if you're playing a European copy of Digimon World. If that's you, you might as well skip this section because you can't beat Ogremon's fortress, which means you have no way to access Factorial Town, so you might as well skip ahead to Koops, Your Emblem is on Fire.
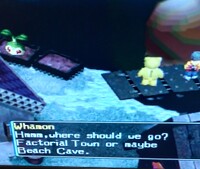
In order to enter Factorial Town, you have to talk to Whamon in File City. He'll give you two areas he can take you to, those being Factorial Town and Beach Cave. Since we already stole and sold the treasures that existed in Beach Cave, we're going to be taking him up on his other offer and entering the mysterious Factorial Town.
Factorial Town, as the name suggests, is a giant factory full of gears and machines. The Digimon in this area are mostly either machines who patrol during the day or products of industrial waste who patrol during the night. That means that if you have a Digimon who can learn Virus-type moves, this is the best place to try and learn them due to ease of access. The enemies here are very powerful, so you'll want to stock up on lots and lots of healing items before you come here. Luckily, if you come unprepared, you can either use an Auto Pilot or simply talk to Whamon, who will take you back to File City. One thing to note is that, because all the Digimon in Factorial Town are either machines or piles of sludge, there is no toilet in Factorial Town, so you'll need to bring Portable Potties if you want to avoid care mistakes. Also, there's going to be a little bit of a format change this month. Everything that happens in Factorial Town is part of one continuous quest, so, sadly, there won't be special headers this month.
Stepping off the dock, you can either avoid the enemies guarding the first room or fight and defeat them. This leads to a second area guarded by either Guardromon in the day or Geromon in the night. It's important to note that this room can also contain Metal Mamemon, one of the three roaming Ultimate Digimon, but we'll come back to that! Make your way north into the next room, which is guarded by a Platinum Sukamon and a Guardromon. This room has three points of interest: a sewer opening, what looks like a little hut, and another exit just past the hut.
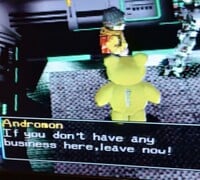
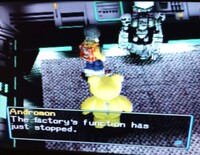
We're going to enter the hut, where we come face-to-face with Factorial Town's Data Master, Andromon. Unfortunately, Andromon is a very rude robot who tells us that we don't have any business in Factorial Town and that we need to leave. Not one to stick around and get yelled at by a robot, we decide to leave!
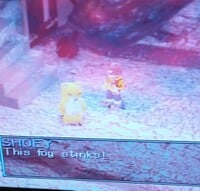
Tired of getting yelled at by stupid robots, we decide we're going to hang out in the sewer, which won't have any robots in there. But entering the sewer, we immediately notice something is wrong. The air is covered in a dense red fog, which seems less than ideal!
Continuing our way into the sewer, our poor Monzaemon begins to get lightheaded within the fog. Continuing our investigation, we find a Numemon freaking out in the sewer. Talking to him, he tells you that he's not feeling well, that he feels sick and he doesn't have any energy. Which, I don't know, maybe it's because he lives in the sewer??? But what do I know!?
Noting that this Numemon looks awful, we tell the poor pile of sludge that we're going to figure out where all this poison is coming from. Deciding to delve deeper into the factory, we return from the sewer and decide to take the final path we hadn't taken yet, coming face-to-face with two Guardromon. Realizing that the factory must be draining its waste into the sewer (where else would it go, though?), we attempt to convince the Guardromons to let us pass. But they refuse to let us pass without a permit and tell us only the Digimon in charge of the factory can issue us a permit. Which means… Goddammit, we have to go talk to that snooty jerk Andromon again, don't we?
Returning to Andromon's master control room, Andromon again asks us how we got into town, but we don't have time for his shit! We gotta stop all this waste from draining into the sewer! We tell him that this is a life-and-death situation and that he needs to give us the permit to explore the rest of the factory, dammit! But he, uh, refuses… We try telling him that there are Digimon at risk of death because of the factory's wastewater.
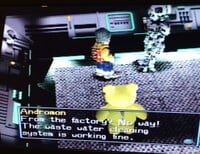
But don't worry, because he informs us that we're, in fact, wrong. The wastewater cleaning system is working perfectly fine! He tells us that if something was wrong, the Net Keeper would simply shut down the system. When we question whether or not the Net Keeper will always function correctly, Andromon informs us, to our horror, that the Net Keeper is in fact another DIgimon named Giromon, an Ultimate-level Digimon whose judgment is perfect. Realizing that Giromon must be another Digimon who has been impacted by the ongoing crisis on File Island, we again beg Andromon to give us a permit to pass, but he again refuses, demanding that we leave immediately. Realizing that this machine's rigidity is going to kill us all, we decide we need to take action, permit or no permit!
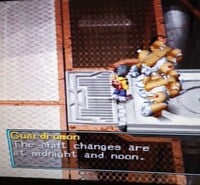
Returning to the guards, we decide to try and bluff them by telling them that it's time for shift change! They inform us that it is, in fact, not time for shift change. When we ask them what time shift change is, they tell us that shift changes are at noon and midnight. Hearing this, we come up with a cunning plan! We're going to be back for shift changeover, and we're going to be the ones that take advantage of these robots' rigid programming!
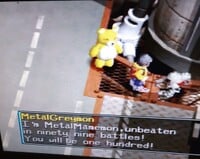
But… what to do while we wait for it to be noon (or midnight if you got a late-night Digimon)? Well, I like to take this time to try and get MetalMamemon to spawn. MetalMamemon, like all the roaming Ultimates, only has a 3% chance of spawning. He appears on the screen just past the docks, and you'll know he's there if the Guardromon isn't there when you enter from the top. Luckily, I got really lucky and he decided to spawn! Talking to MetalMamemon, he'll tell you that he's an undefeated fighter with 99 wins and 0 losses.
He then challenges you to a fight! One thing to note is that, due to one of Digimon World's classic errors, for some reason MetalMameon's name comes up as "MetalGreymon" despite the two having almost no similarities outside of both being metal. MetalMamemon, like all Ultimates, is a very challenging boss. He knows three attacks: Pulse Laser, Metal Sprinter, and All-Range Beam. Of the three, All-Range Beam is the most dangerous, with a base power of 573 and being nearly impossible to damage cancel. The other two moves, while less powerful, are quite fast attacks. But on the plus side, none of MetalMamemon's attacks can cause status effects, so that's nice. I would say MetalMamemon is probably the easiest of the three roaming Ultimates. He seems to have the least powerful attacks and he can't cause any status affects, so, as long as you have either a high-level Champion or an Ultimate, you shouldn't have any real problem defeating him.
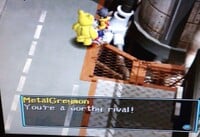
Upon being defeated, MetalGreyMamemon or whatever his name really is drops a Defense Chip before acknowledging our strength and declaring us a worthy rival. He then runs off to join the city, declaring that he'll defeat us someday.
Purpose in City: MetalMamemon joins the curling arena, replacing Penguinmon after you defeat Penguinmon with a perfect score. MetalMameon offers a better challenge and, as such, gives better prizes upon being defeated, but I've never actually gotten a perfect score in curling because I don't have that kind of time. That's why we don't have a photo of MetalMamemon curling, but trust me that's what he does!
With MetalMamemon defeated and the clock striking noon, we return to where the Guardromon were. Our plan was to trick them into thinking we were there to take over for them, but luckily for us, we didn't even need to do that! Instead, noon hit and they just left! Because I guess their programming told them that their replacements would be there, so, much like Andromon, they assumed their programming was 100% correct and just left! Which, hey, works for me! With them gone we can sneak into the rest of the factory without one of those stupid permits! The first additional room is guarded in the front by a PlatinumSukamon. Continuing forward, the room leads to a branching path, with a narrow strip to the left and an exit at the top. Both of these are guarded by two Guardromon, but it's pretty easy to split the two in a way that makes it so you can pass them without fighting them. Keeping straight takes you to the next room, but taking the narrow leftwards path takes you to two PCs.
One of these PCs contains an HP Chip and the other contains a MP Chip, so you definitely want to take this path. The next room contains passages which are much narrower. The first Digimon is a Geremon, and he's pretty much impossible to pass without fighting because the room is just too narrow. Luckily, he's just a single Champion Digimon, so he shouldn't be too much trouble.
Just past the Geremon is another branching path. To the left is a door with an arrow on it, but ignore that for now. Instead, keep going in this room until you find the second door with an arrow on it. Enter that door and defeat the two Guardromon, then you can raid the three PCs in this room. One has a Brain Chip in it, one has an Auto Pilot (which is pretty lame, honestly), and the last one has a Defense Chip in it. That's a lot of stat increases for very little effort!
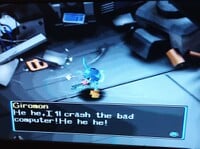
Returning to the first door, we proceed by approaching it, and pressing X opens the door. Inside this room, we find a chainsaw-wielding Digimon just going to town on the computers, bragging about how he'll destroy all the bad computers. This is the Net Keeper, and my personal favorite Digimon, Giromon. Giromon is an Ultimate-level Digimon who is supposed to be making sure everything in Factorial Town is operating correctly, but it appears something is causing his programming to go haywire.
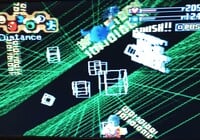
We attempt to stop him from causing any more damage, but he turns on us and vows to destroy us. Giromon is a very tough opponent with 5,700 HP. He uses three attacks: Delete Program, Reverse Program, and DG Dimension (which has one of the coolest battle animations in the game). DG Dimension is easily his best attack, hitting for an astounding 722 base power, but Delete Program is still pretty powerful with 430 base power. Finally, Reverse Program hits for a comparatively weak 256 damage.
Delete Program and Reverse Program also cause the dreaded Flat effect, turning your Digmon into a weak 8-bit form of itself. Giromon even has the most powerful finisher in the game, the Deadly Bomb. But luckily, while it's the most powerful in terms of raw power, it's honestly kind of worthless. Deadly Bomb has a different mechanic than any other finisher (except Digitamamon's). While every other finisher just hits the Digimon it's launched against, with Deadly Bomb, Giromon just hucks a bomb onto the arena, and it doesn't go off until a Digimon steps on it. Giromon can even throw it offscreen, making it completely worthless! So, while in theory Giromon has the best finisher in the game, in reality it's a such a crapshoot whether or not it will actually do anything that it's not a major threat. Giromon is a very difficult fight, probably the most difficult to this point. If you come unprepared, you could very well lose.
Upon being defeated, Giromon drops a Defense Chip before collapsing out of exhaustion. Unfortunately, Giromon collapsing causes the factory to start losing power, forcing us to return to… ugh Andromon to ask him to stop the factory's wastewater system.
We return to yell at Andromon over his incompetency and, surprisingly, he apologizes! …Well that's no fun! He then listens to our demands to shut down the factory, and we're like "totes, tight, dude! Well we're gonna check the sewers, brah," which I think is an odd reaction to this, personally, but whatever, to the sewer we go!
Back in the sewer, we immediately notice that the red mist is gone, leaving only scenic regular sewer. We continue into the depths of the sewer to see if Numemon is okay. With the mist gone and Numemon hopping about happily, we pat ourselves on the back, declaring that we've solved the problem and everything is going to be okay. Then, suddenly, Numemon attacks us! And this isn't just some normal Numemon! No, he's been super-empowered by the pollution and, oh wait… he's dead already.
Yeah, despite officially being a boss and dropping a super-helpful MP Chip, Numemon only has 200 HP, so you're probably going to beat him in one hit! Numemon then blathers at us stupidly before rambling on about completely worthless nonsense and getting mixed up and offering us a blood debt for saving his life. Not wanting to be followed around by this stupid idiot, we tell him to join the city instead, which he agrees to do! So great, he's Jijimon's problem now!
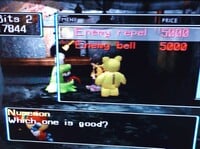
Purpose in City: Despite being a blithering idiot (or maybe because?), Numemon actually knows quite a bit about commerce. Opening his own stall in the secret store, Numemon sells items that are completely worthless!
He sells two items, these being the Enemy Bell and the Enemy Repel. The Enemy Bell makes enemies come to you, whereas the Enemy Repel basically operates as Repels in Pokémon do, making enemies avoid you. Of the two, the Enemy Repel is way more useful. There's really no reason you'd want an item that would bring enemies to you. It's not like enemies are difficult to encounter here! You just touch them and they throw down! At least the Enemy Repel drives enemies away, making areas less annoying!
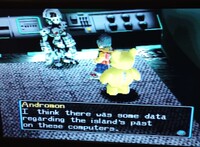
With Numemon safe and, I guess, sound, we decided to talk to Andromon again. He tells us that the factory will be closed for a while. Telling him that we think somebody is controlling Giromon and yelling at him over his incompetency (what with computers destroyed and waste leaking into the water), Andromon concurs with our "Giromon being controlled" theory and reveals that the these computers contained data on File Island's past.
He tells us that that data has been destroyed by Giromon's attacks. He then informs us that he's going to try to restore the data and that we should come back in a little bit. He also informs us that he will be opening the gate to Factorial Town, giving us a new entrance to Factorial Town in the Gear Savana. So now if we need to enter Factorial Town while running about, we no longer need to use an Auto Pilot to get back to File City and ride a whale. Andromon tells us that it will take a while to recover the data, but what he really means is that it will take until the next day. So take a day do something else, like maybe some training or maybe something like the Toy Town quest. I decided to do a little training because, you know, 'Shroom efficiency and all that.
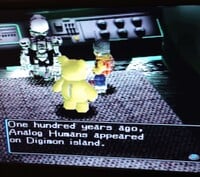
Return the next day, and Andromon will tell you that the data repair is complete. The data reveals that, 100 years ago, humans invaded the digital world and fought a war against the native Digimon. The war lasted ten years before the humans fled in defeat, but in the aftermath of the war, File Island doubled in size.
Andromon then apologizes, telling us that's all the data he could recover. We thank him for this lore dump and tell him that what's happening to the island is probably caused by the humans who fought against the Digimon. Andromon is skeptical that humans can live 100 years, so we inform him that time in the digital world seems to move slower for humans who are in the digital world than it does in the human world. Hearing this, Andromon offers to help and tells us that he'll join the city, going back and forth between the factory and the city whenever he has a chance.
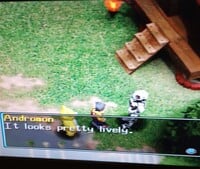
Purpose in City: Andromon occasionally takes time out of his busy day down at the ol' factory to relax outside of Birdramon's hut.
Expressing our concern that he's missing work, he scoffs and informs us that his scheduling programing is working just fine.
With the sewers safe, the data recovered, and Andromon joining the city, we decide to check in with the Net Keeper, Giromon, who, as you'll recall, we last saw passed out after being corrupted by a cyber-attack from the human world.
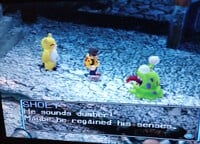
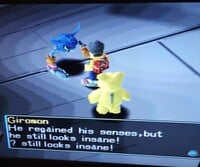
So, based on that, yeah, we should probably check and see if he's okay. Returning to his little Net Keeper room, Giromon tells us that he was waiting for us. We ask if he has returned to his senses, and, luckily, with the computer being fixed, Giromon is fixed, too. Giromon tells us that, with the factory shutting down, he's going to help us. Then a truly incomprehensible text box appears, and Giromon runs off to join the city.
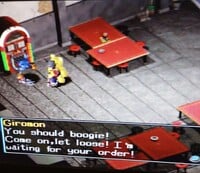
Purpose in City: Giromon takes a job in the restaurant. But he's no cook! Instead, Giromon reveals himself as a lover of hot tunes and creates a jukebox we can use to boogie down. This jukebox lets us listen to any of the game's tunes for free. It's a pretty cool little feature… OR AT LEAST IT SHOULD BE!
Unfortunately, while the programming in Factorial Town might be fixed, the programming of Digmon World is as bad as ever. The jukebox is glitched and cannot be used! Trying to use it will cause the game to freeze. So, sadly, one of the coolest things in the game is completely unusable thanks to Digimon World's shoddy programming.
With that, Factorial Town is finished and we shouldn't have to go back there. Well, unless we get a metal Digimon and need to learn some Metal-type moves. But other than that, we'll never have to go there again. That's all for this month's File City Files! Join us again next month when we do my least favorite thing in the entire game!
Four Steps for a 3D World
Written by: Hooded Pitohui (talk)
Hello, all you readers of The 'Shroom, and welcome back to Four Steps for a 3D World, a section we look at levels from a selection of 3D Super Mario titles through the lens of a design philosophy Koichi Hayashida expounded upon in an interview.
In brief, 3D Mario game levels in certain titles are designed around an introduction that lets a player learn a mechanic in a safe environment, further development that builds on what the player is learning and introduces more complicated aspects of a mechanic, a twist that adds some kind of significant wrinkle or challenge to force players to consider the mechanic from a new angle, and a conclusion which gives players one final satisfying chance to show they've mastered the mechanic. We look at 3D Mario levels and see if they conform to this model while trying to get some insight on how a good level is constructed.
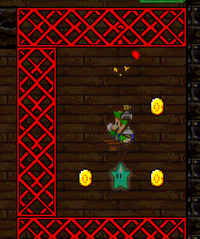
This month, we're checking out another Super Mario Galaxy 2 level, reaching into the sixth world of the first game on which Hayashida was credited as the director to arrive at the Clockwork Ruins Galaxy. Now, I picked the Clockwork Ruins Galaxy specifically because my impression of it going in was that it doesn't follow these four steps in the slightest. I have been wrong before, though! You may recall that, last month, I picked the Boulder Bowl Galaxy thinking it would stray from these four steps, only to find that it followed them relatively closely.
Did the Clockwork Ruins Galaxy's first mission surprise me? It didn't, actually, which means that this month is going to require a bit of a format change. Instead of four steps, I'm going to divide the level into five "stages", providing a brief overview of each stage and some commentary on how it connects or fails to connect with the previous stage(s). Then, after we look at them all, we'll pull back out to a broader view and briefly discuss the level as a whole. Let's get started, because it's Time for Adventure!
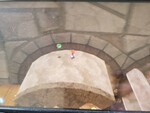
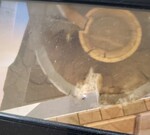
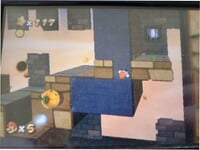
This stage doesn't have much consistency with the first. Besides the general underlying concept of "stone obstacles far larger than Mario/Luigi that must be navigated around/on in time with their movements," in fact, it doesn't match up with the first stage at all. It's an odd, abrupt change, and, as we'll see going forward, it doesn't fit the remainder of the level, either.
The next three stages all take place on the same planet, with players climbing a path that wraps around two faces of a tower-like structure.
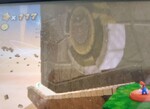
What's interesting here is that, throughout stage three and stage four, the level flirts with having a thread more coherent than "timing challenges with large structures". Stage three isn't all that like the stages that came before it, but, I'd argue, it could have been. If there were some incentive to climb on top of the millstones rolling down, it would have connected back nicely to the first stage. The player would have already learned to use large, rotating stones as platforms at the beginning of the level, so you add a little more to that by disconnecting those platforms from the wall (making them mobile) and adding potential crushing danger. It could have been a classic development step! Since the level never tasks you with climbing the millstones or using them as platforms at all, though, their presence feels... mechanically disconnected from the previous stages. Standing under cuts in a rock doesn't have much to do with using rotating rocks as platforms.
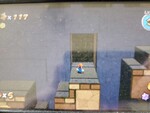
Then, however, comes stage four, asking players to wall-jump through (wall-bound) millstones. Now that's an interesting evolution of the rotating rock platforming being done at the start of the level! It's not a massive leap, but it is something new that builds on the core idea introduced earlier. Unfortunately, though, this segment is short and smushed together with some other random level elements. The spikes can at least be excused as being part of the level's general timing challenges, but why are the pegs involved at all? They don't add anything to the level, and distract from the thread that's beginning to form here.
This stage is clearly an evolution of the level's third stage, with a good dose of stage one thrown in. We have the return of the crushing millstones, and once again players are exploiting the cuts in their sides, and we have some platforming on a rotating millstone, using the various surfaces as different floors at different points. Here, the level actually brings some of its previous ideas together. It still has nothing to do with the spikes and pegs from stage four or the moving wall and plane shift from stage two, but it's finally something returning and being expanded upon. Interestingly enough, if the level had followed the four steps more closely, this could be a strong conclusion step; it does make for a pretty satisfying capstone of the level's ideas where the player gets to show mastery of platforming around rotating millstones.
Now that we've broken the level down, though, let's step back and ask a broader question. Did not adhering to the four steps actually weaken this level, or was it even, perhaps, stronger for it? Well, I'm going to rule out it being stronger for not following them. The level feels like a mishmash of ideas at times. I'm speculating here, and I have no insight as to how this level was created, but it feels almost as though stages three and five were the core concept of the level, with stage four partially being in the mix by way of the millstones the players jump through, while the first two planets (corresponding to stages two and one) were tacked on to make the level longer. In particular, stage two feels to me like it could be a case of "we have this cool idea for a planet with a pushing wall where the gravity switches, so we'll just stick it in this galaxy since this level needs to be longer". Meanwhile, the starting planet feels like it could have been added solely for coins. It's like they realized that the final planet didn't have anywhere great to stick the purple coins, so they fashioned a whole planet to scatter them around, then realized they could also stick some regular coins around it, add a Hungry Luma, and thus justify having another planet unrelated to everything else in this galaxy to fulfill the mission quota.
There's an apparent lack of coherency. While everything is painted with the ancient ruins theme, the first two planets in the level and the spikes-and-pegs portion of the last planet aren't mechanically coherent with the rest of the level, and it dings the level's overall memorability. Without a natural mechanical progression, it misses an opportunity to hook the player and get burned into their memory.
All of that said, though... is the level less fun? Is it completely unmemorable? Well, I'd say no. It does have a neat theme. You don't get a lot of ancient ruins in Super Mario games, so it sticks out, and the gravity switch on planet two (complete with partial collapse of the back wall) makes for a pretty neat moment that, I, at least, remember clearly. Plus, there's that wide shot of the slope at the end of the level and the gigantic millstones rolling down it, evoking an Indiana Jones-style feeling. The level's theme and a few key moments within work to offset that gap left by the lack of natural progression. Meanwhile, I mean, as far as fun goes, it's not an exhilarating level and it's slowed down by some waiting around, but I never find myself groaning when I get to it. It never gets so slow that it impedes the usual Super Mario platforming. While it's not the most fun, it's not a bad level at all.
The takeaway? Following the four steps we've looked at in this section is a good way to ensure you have a solid progression of mechanics and ideas within a level (though it's not flawless on its own, as last month showed), but you aren't necessarily dooming a level to be bad if you approach structuring it some other way. In fact, sometimes those out-of-place portions can become one of the most memorable parts of the level!
Anyway, with four types of Goombas in this mission, three planets visited, two SMG2 levels back-to-back, and one inexplicable addition to this level (seriously, what's with the pegs?), this has been Four Steps for a 3D World!
Shine Get
Written by: Waluigi Time (talk)
Hello there, 'Shroom readers! It's Shine Get time again, the number one 'Shroom source of Super Mario 63 goodness. So remember three months ago when I covered the battle with Goomboss, among other things? Well that's finally going to be important, because that weird green Shine Sprite unlocks the next door in the basement. There's a few more options to cover in here, but I'll be starting with Boo's Mansion this month! (Nope, not Big Boo's Haunt.) I have a very good reason for this - it's the closest thing to the door so I saw it first. It hasn't been October for a while, but let's get our spooky on anyway. Unlike the Toad paralyzed with fear just from looking at the painting, I ain't afraid of no ghosts!
Mission 1: Big Boo's Balcony
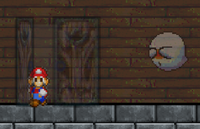
First of all, shoutout to Runouw for using Waltz of the Boos from Galaxy instead of the original Big Boo's Haunt theme, because it's way better! Anyway, this mission is simple enough, just get to the top of the mansion and fight Big Boo. Unfortunately, he locked all the doors (and even has the nerve to taunt me about it when I enter the mansion!), so it's going to be tricky to get up there. Also, if you want to exit the mansion again, you can, but the door is actually in front of the screen rather than on the wall behind Mario, so you have to press down to enter it instead of up. It's hung on the fourth wall, basically. I just find this weird because as far as I remember, it's the only door in the whole game like this! (If it's not, I'll be sure to make fun of my past self when we get there. Unless I forget.)
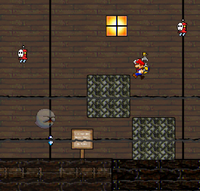
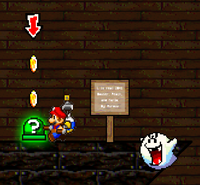
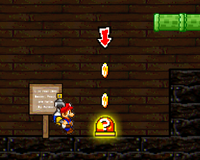
Right inside the door, there's a sign with a completely legitimate map of the place on it, because these particular Boos didn't get the memo on how to run a good ghost house, I guess. They couldn't have maliciously mislabeled some things or drawn on paths that don't exist? I ought to report these guys to King Boo, they're really dropping the (Boo) ball. (Random tangent count: Two.) Anyway, uh, gameplay! There's four other doors to check out, but one is needs a key to unlock and another is just locked forever, I guess. The only door that's useful is the one all the way to the right. There's a few teetering platforms over a chasm to jump across, although it's not death, just basement. Since the goal of this mission is to get to the top of the building though, I'd rather not go down there. After that there's another room which, for some reason, has Turbo F.L.U.D.D. in it, even though this is mainly a vertical platforming segment. I'm going to label that one Boo trickery. It's pretty straightforward, I just keep going up and at the top there's a glowing purple key.
I head back to the first room and open the locked door, taking the stairs to another room with more doors to pick from. There's a Hover Nozzle box which I'll gladly take, and once again, only the middle door appears to be useful right now. There's more platforming in here which is really easy with F.L.U.D.D., and an Invisibility Cap which I don't think is important right now so I just ignored it. At the end is another purple key, so I grab that, turn back around, head out and unlock the door right next to it to head into the Cable Room. One of the signs in here warns that there's heavy machinery in use and that they're not liable for any injuries. Makes you wonder, how many times have Boos been sued for all the tricks and traps in those ghost houses?
Anyway, this is basically just a lot of vertically moving blocks that you have to platform on to get to the top. This went horribly for me and I ended up falling through a trapdoor to the basement instead. Whoops. Thankfully, the Turbo Nozzle makes it easy enough to get back in a short time, just dash to the left and take a Sling Star out of here, then zip back through the mansion. On the way, I discovered that Mario unlocks the doors each time instead of just leaving them unlocked, so my new headcanon is that the Boos lock the doors behind Mario every time to troll him, but can't be bothered to just steal the keys from him I guess. The second time up went much better (despite a near-death experience), and I also grab a Star Coin in the top left corner of the room. Quickly moving across to the top right, there's a door that just exists to waste approximately two seconds of your time - it doesn't open because there's nothing on the other side - and the other door leads to what I guess is the attic. You can actually jump on the windows here, but there's nothing besides coins. The door in the center leads to the balcony though, and that's what we want!
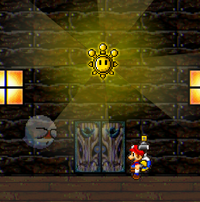
So, fans of Super Mario 64 know that once you get to the top of Big Boo's Haunt, you fight the Big Boo for a Power Star! Here... you don't do that! There's just two regular Boos hanging out here, and the Shine Sprite's out in the open. I guess Big Boo figured a whopping two locks were a sufficient security mechanism. Before grabbing the free prize though, each of the towers on the roof have doors, so better check those out. The one on the left has a Star Coin and the Rocket Nozzle, which we can use to get up to the center tower. There's another Star Coin here above the door, but the room itself isn't too interesting, only having three 1-Ups in it. The one on the right is locked for now, so it's time to grab that Shine and move on.
Just like Hazy Maze Cave, the Toad scared of this level has disappeared again. I'm convinced this game just has quirky Toad programming.
Mission 2: 'Switch' to the Secret Room
The objective this time around is to find a secret room! I've actually found it already, it's the door all the way to the right in the room that leads to the balcony. Unfortunately, it's locked until green and golden switches are pushed, and I haven't found those. Luckily, since this isn't Mission 1 anymore, everything in the mansion is unlocked, including some doors that weren't accessible at all before. I start with the door all the way to the left in the entrance, leading to a room with some platforming across rotating platforms. Past that there's a door leading to... another room with some platforming across rotating platforms! The green switch is at the top, accompanied by a sign telling Mario not to push it or else bad things will happen to him. Finally, actual non-headcanon ghost trickery in this ghost house! Anyway, I'm not falling for that, and even if I did I like to be a contrarian in video games, so I push it. An unseen ghost with a big mouth complains that we might be able to get the secret Shine Sprite now instead of keeping up the "ooh spooky bad things" narrative.
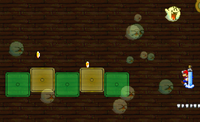
Next, I head up the staircase. Another thing that green switch does is create a bunch of spooky-looking translucent green platforms, allowing you to access places you couldn't before. A lot of this is completely unrelated to finding the other switch, but you'll need it for other missions. I spent a little time wandering around and getting tricked by platforms I don't need, but the place we're looking for is the middle door on the second floor again, the same place we found the second purple key. There's a lot of new platforms here from the green switch, so I platform across these with some help from F.L.U.D.D. and find the golden switch! Once again, a sign tries to convince Mario not to push it, which isn't gonna happen. The unseen ghost freaks out again and quickly orders Ghost Squad to the eastern tower. There's a little bit of extra platforming past this which leads to a Star Coin! This one is my 32nd, marking the halfway point! This achievement unlocks a new door in the Level Designer room which contains a special prize, but we'll have to finish this mission first.
So I head up to that secret room, and, er, it's still locked. Whoops, fuzzy memory! Turns out, the answer is pretty simple. Rather than going up to the balcony, the answer is to exit that room with the golden switch and head to the rightmost door instead. There's green and golden platforms created by the switches to jump up on. The Ghost Squad that has assembled here is, well, pretty much a joke! There's lots of Boos, but Boos are absolute pushovers in this game that you can knock around with F.L.U.D.D., so basically just hover through any Boos and you're probably fine. Also, there's another Star Coin in the top right of this room. Only one left to find in this level! At the end of the platforming, there's two doors, and only the one to the right has something on the other side. There's a Rocket Nozzle in here if you didn't find the one from Mission 1, so from here I just rocket up to the spinning platforms, ruin the day of several Boos, and grab the Shine Sprite.
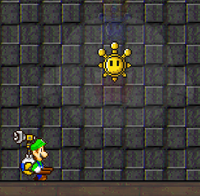
So let's check out that special prize, shall we? I head over to the Level Designer and enter the second door at the end, and... come back out as Luigi! What a time to unlock him, huh? Luigi jumps higher and runs faster than Mario, but unlike most games where he's more slippery to balance the two of them out, the man in green stops on a dime in Super Mario 63. Unless you really, really like Mario, there's not much of a reason to use him over Luigi, and you can even cheese certain things that require F.L.U.D.D. thanks to his extra jump height. The only "downside", if you can call it that, is that you start as Mario every time you load the game, so you'll have to head back to the Level Designer every time. It's not really a big deal since you start on the Castle Grounds anyway, so it shouldn't be too much of a detour to wherever you're going.
With half of the Star Coins collected, there's only two more extra prizes left. A much younger WT, unlocking Luigi for the first time and having some knowledge of Super Mario 64 DS, thought that the other two doors would let you play as Yoshi and Wario. Spoiler: They don't, unfortunately. Luigi's the only unlockable playable character in this game. Anyway, let's torture the poor guy by sending him into a haunted house. What will his first mission be?
Mission 3: Basement Shine Sprite
Oh. This one.
So, there's a Shine Sprite in the basement, just sitting there for anyone to collect! Definitely not a trap or anything. You've got this Luigi, it's fiiine...
While there's multiple pits you can fall down in the mansion to get down here, I'm going to take the easy path and drop in through the side building to the left. On the way down, Luigi does Mario's falling yell! Yeah, Luigi's a little glitchy and sometimes uses Mario's voice clips and sprites. Talk about living in your brother's shadow... Anyway, try to land in the Sling Star to avoid taking fall damage. I switch to the Turbo Nozzle and dash to the right, and eventually, hey look a Shine Sprite! Just sitting out there in the open. What an easy Shine Sprite, guess we can move on to Mission 4 now!
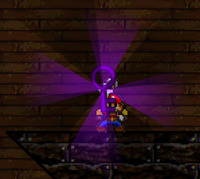
Sike! When you try to grab the Shine Sprite, King Boo appears and starts chasing you! He's partially invisible and impervious to damage, but he can sure still deal damage... Once the fight starts, the windows shut and two switches appear (they're not underwater! Don't go down there!), along with some blocks just to make it a little harder on you. Each switch reopens one of the windows, and once they're both open and light is pouring in (even though it's nighttime outside) King Boo is vulnerable to being rammed by the Turbo Nozzle. Luckily, there's one provided for you here if you haven't unlocked it in this level. Once he's hit, he shuts both windows again. This fight is actually pretty easy and I didn't have much trouble with it. There's nothing to switch (heh) up the fight, like the positions moving or more getting added as the fight goes on, and King Boo himself is kind of a joke. It's a pretty spacious room and the Turbo Nozzle outspeeds King Boo, so he's easy to maneuver around. Anyway, hit him three times and he's done, and the real Shine Sprite spawns this time.
Still a pretty short mission all things considered, and Luigi's first Shine get! (He uses Mario's voice here too... I guess Super Mario Galaxy sound rips were harder to come by in 2009.)
Mission 4: Hunting for Red-Coins
Time for the standard Red Coin mission! This is going to be interesting because they're scattered all over the mansion, so hopefully I remember them. First, I head back down to the basement and dive into the water. There's two paths down here and each one has a Red Coin. That's all down here, and I don't really want to fight King Boo again, so I Sling Star back out of here and head into the mansion proper. Now it's time to comb the place for spare change.
Starting with the rightmost door, at the platforming segment at the end where the first key was in Mission 1, the third Red Coin is near the top left corner of the room. Back to the entrance, and the fourth Red Coin is at the end of the leftmost door, kind of in the middle-ish right section. While I'm in here, I also push the green switch for the extra platforms. On the staircase, there's green blocks moving up and down creating an elevator through a secret passageway. (I got tricked by this while doing Mission 2...) The fifth Red Coin is at the top, guarded by a Fly Guy, which there's actually a lot of in here. Continuing up the staircase, there's a sixth Red Coin on a platform pretty close to the ground in the cable room. There's no more Red Coins after this point, so don't go up any farther! I did while checking, so you don't have to.
Next is the middle doorway where the golden switch was. I mentioned the Invisibility Cap the first time I came here, but now it's actually useful! I grab it while hovering with F.L.U.D.D. to not fall through the cage below, and continue to the right to drop through another cage with the seventh Red Coin inside. Rocketing back up from the bottom is pretty easy, thankfully. I also activate the golden switch just in case those platforms come in handy later. Then it turns out it doesn't! The eighth Red Coin is in the rightmost door all the way to the right, with no bonus platforming needed. I head back out and the Shine Sprite conveniently spawns right outside the door. Neat! And Luigi does his Mario impression again.
After returning to the castle, I get a message that I only need one more Shine Sprite to break the Endless Staircase spell. I may be overachieving...
Mission 5: The Secret of the Library
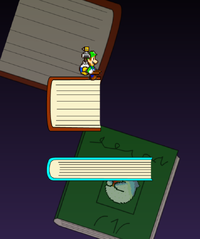
All the way at the top of the main room, there's a secret library, but it's behind a cage. Luckily, there's an Invisibility Cap to the right outside the mansion. I grab that, run inside, and rocket up to the top with plenty of time to spare. They weren't kidding, it sure is a library, complete with giant books as platforms. The books are funny because they're clearly just MS Paint drawings. One of them is open and stepping on it causes it to shut itself and squish you, which makes you lose Booksquirm. But hey, it's the only way to access the secret area!
There's not much to say about it without getting boring, it's straightforward platforming on books. The Rocket Nozzle is going to be key here. Eventually, because this is Boo's Mansion, you start encountering Mad Pianoish books that will clamp down and squish you when you step on them, but they're not too bad. I get to the end without much issue, but I ignore the Shine Sprite and walk past it, dropping off the right side of the platform to grab the last Star Coin for the level. This eats a bit of progress, but thankfully, the Rocket Nozzle makes it very easy to get back up to the end quickly. Actually, you could easily cheese the level this way if you knew about it and wanted to.
Anyway, that's Boo's Mansion completed! And the Endless Staircase curse broken, even though we're not anywhere near getting close to seeing that! With a total of 32 Shine Sprites, 34 Star Coins, and 1 Luigi, we're officially at the halfway point of the game! Next month, we'll be making more progress through the basement. Hopefully I'll see you then!
Pitohui's Pokémon Academy
Written by: Hooded Pitohui (talk)
Welcome back, class! Now, I understand Valentine's Day recently passed us by. Did any of you do anything romantic? Gift a bouquet of Gracidea flowers, perhaps? Or maybe you shared one of Mistralton's famous Sweet Hearts? Or did you give a Heart Scale to someone you fancy?
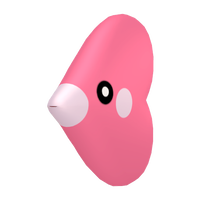
Heart Scales have quite the reputation as a collector's item and a romantic gift. Their sheen and their recognizable shape make them a rather in-demand alternative to jewelry around anniversaries and certain holidays. I'm curious to know, though. How many among you know the source of Heart Scales? One prominent source of Heart Scales is the so-called Rendezvous Pokémon, Luvdisc. Although, you may be familiar with Luvdisc for... less glamorous reasons. It's commonly remarked that Luvdisc is one of the weakest Pokémon out there, and, well, its base stat totals do support that assertion.
Nevertheless, here, we are open to raising any Pokémon species without exception! So, this month, shall we put heart into raising a Luvdisc?
As you ponder that question, if you need a refresher on our course policies before we begin, open up the first box below. If you need to review the most commonly-used terms in this class, open up the second box below.
First, a Smogon University course, this course is not. No, this academy's lessons are designed to get trainers of any stripe thinking about how they can raise their Pokémon, and, as a result, aren't designed to keep up with the widely-accepted metagame for the series. In some cases, the way I've raised my Pokémon may even flies in the face of conventional wisdom. If you're looking for top-tier strategies, do check out Smogon, but if you merely want to get a little deeper into raising Pokémon while still doing things your own way, feel free to use this section as a reference.
Since we all know the importance of citing our sources, I also need to credit the design of some of the tables used in these lectures to Crocodile Dippy, author of the Pocket Handbook which can be found in early editions of Strategy Wing.Base Stats: Base stats are the values associated with a particular Pokémon species, and are the same across every individual Pokémon of a given species. You have no influence on them. You can think of them as traits tied to a species. A chimp isn't ever going to be able to get as good as digging as a mole will be, and, likewise, an Abra is never going to have the defensive prowess a Shuckle has.
Individual Values (IVs): Individual values, as their name implies, are associated with individual Pokémon. They range from 0 to 31 in each stat, with 31 being considered a "perfect" IV and higher numbers corresponding to different stats. Magikarp A and Magikarp B will have the same base stats, but they may very well have different IVs. To stick with the animal analogy, one mole may be born with larger claws than another mole, and that first mole is probably going to have an easier time digging through dirt than the latter. Individual values are set in stone, strictly speaking, but you can use Hyper Training (from Generation VII onwards) to functionally get a perfect IV in a stat.
Effort Values (EVs): Effort values are the one thing you can easily change. A Pokémon can earn, primarily through battling, but also through means like the use of certain items or mechanics like Super Training, up to a total of 510 effort values, with up to 252 in any given stat. To finish off the animal analogy, no matter what kind of claws a mole is born with, moles who have more experience digging are probably going to be better at digging than moles which have never dug.
Nature: A Pokémon's nature is, more or a less, a stat modifier with a name meant to make it sound like a Pokémon has some personality. Natures will raise one stat by ten percent and lower another stat by ten percent. Some natures raise and lower the same stat, canceling out the effect and leaving stats unchanged. Natures can be functionally changed with the use of special mint items from Generation VIII onwards.
STAB: STAB stands for Same-Type Attack Bonus, and refers to the boosted power of moves that match the type of the move's user. To illustrate this, consider the case of a Lombre, a dual-type Pokémon which is both a Water-type and a Grass-type. Any Water-type moves Lombre uses will have their power boosted by 1.5x, and any Grass-type moves Lombre uses will, likewise, have their power boosted by 1.5x. (There are circumstances where this does not apply, and, while the 1.5x multiplier is typical, some games use other multipliers.)
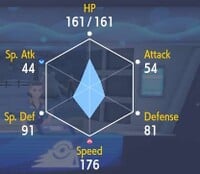
We will begin where we always begin, with a close examination of Luvdisc's base stats, and... oh dear. Luvdisc's attack and special attack, as well as its HP, are abysmal. Its defenses are barely scraping into the middling category, and its speed is the only decent stat it has. Luvdisc is neither going to be able to do useful amounts of damage nor hunker down as a long-term nuisance, so we'll need to rethink our approach. What we need at this stage is some kind of gimmick, a more unique plan drawing upon Luvdisc's moveset or abilities.
So let's turn to Luvdisc's abilities, first. Luvdisc has one standard ability in the form of Swift Swim, which doubles its speed when its raining. That's not exactly bad, since, with Luvdisc's high base speed, a Luvdisc in the rain will outspeed the vast majority of its opponents (assuming they aren't boosted in some way). Luvdisc also has a hidden ability, however, and that's Hydration, which allows Luvdisc to cure its status conditions in the rain. When we compare the two, we see that Hydration outclasses Swift Swim. While the speed boost isn't bad, it's better to avoid poisoning or burning chipping away at Luvdisc's health or paralysis reducing its speed while sometimes preventing it from acting. Due to Luvdisc not functioning all that well as a defensive Pokémon, it isn't a great loss if you settle for Swift Swim (which I, in fact, did, because I didn't want to use an Ability Patch on a Luvdisc), but Hydration is the better option if you can get it.
Both of these abilities are linked to rain, which naturally leads to one avenue we could pursue with Luvdisc. Do we try and equip it with Rain Dance and have Luvdisc set up rain for us? It's a fair question to ask, but the answer is "no". It simply doesn't make sense to use a team slot for a Pokémon that will only use Rain Dance one time and then, most likely, quickly get knocked out. It's far better to bring a Pelipper with Drizzle than to waste a team slot and a moveslot. No, if you plan to use Luvdisc, putting it on a team that can set up and take advantage of rain is a smart call, but don't rely on Luvdisc itself to set up the rain.
|
Name: | Luvdisc | Base HP: | 43 | |
| Species: | Rendezvous | Base Attack: | 30 | ||
| Type: | Water | Base Defense: | 55 | ||
| Abilities: | Swift Swim | Base Special Attack: | 40 | ||
| Base Special Defense: | 65 | ||||
| Hydration | Base Speed: | 97 | |||
So, since base stats failed us and abilities did no better in giving us a direction in which to take Luvdisc, we'll turn to Luvdisc's movepool! What we should take immediate note of is Wish being included in Luvdisc's movepool. Wish is an incredibly useful, relatively uncommon move that allows the user to heal itself or to heal another Pokémon. A Pokémon uses Wish, and at the end of the next turn, whatever Pokémon is in its place on the battlefield gets its HP restored. That's something we can work with! Even better, Luvdisc's relatively high speed gives it a decent chance of getting at least one use of Wish in.
However, we aren't all that interested in healing Luvdisc. We can let it heal itself if it's convenient, but what we really want is for Wish to heal another Pokémon. Unfortunately, to achieve that, we have to switch Luvdisc out, losing a turn and making it so that the incoming Pokémon has to eat an attack before Wish takes effect. It would be nice if we could do something with this turn, and, it turns out that we can! You see, Luvdisc can learn the move Flip Turn, a Water-type attack that allows it to get a hit in and then switch out. Now, this isn't ideal, because Luvdisc's high speed still means it will likely act before its opponent, so our incoming Pokémon will take a hit regardless, but at least we do a small bit of damage during our switching turn this way!
With that, we have a direction! We want a Luvdisc that can get in, use Wish, and use Flip Turn to get out of the battle. That means that maximizing Luvdisc's speed is most important and that we'll be favoring attack over special attack. That said, Luvdisc isn't really going to be doing significant damage, more uses of Wish benefits us more than what little extra damage we could wring out by investing in attack, and Wish heals for half of the user's total HP, so we're going to reinforce Luvdisc's poor HP. In the end, we want to put max EVs into speed and HP, with only the leftovers going into attack. We'll choose a Jolly Nature, since we aren't using special attack at all and, again, our goal is to maximize speed.
Now, some might argue this isn't optimal. After all, Luvdisc's special attack is higher than its attack, and Luvdisc is too fast to go after most opponents take their turn when using Flip Turn, so wouldn't just eating a switch out turn and using special moves at least let it do a tiny bit more damage? That reasoning is sound, and I don't have any critiques of it. My thinking, however, is that both Luvdisc's attack and special attack are so low that it doesn't make enough of a difference for me to care. Either way, all Luvdisc is doing is a negligible amount of damage, with its main purpose being transferring Wish.
Now, with stats and abilities set, we can properly turn our attention to a moveset. Since we've built Luvdisc's stats around using Wish and Flip Turn, we'll naturally include them both, which fills out half of our moveset and conveniently gives us a STAB move! With those taken care of, I recommend considering what parting shots Luvdisc can offer. It is likely that, at some point, Luvdisc will be knocked out, and if for some reason you won't be able to get one final Wish off before that happens, at least Luvdisc can do something to soften up the opponent. For this purpose, I chose Charm, since Luvdisc's high speed makes it likely that it can get it off and two stages of attack reduction can make the battlefield a bit safer for an incoming Pokémon. Baby-Doll Eyes is strictly inferior here since its a one-stage reduction and a swift Pokémon doesn't benefit much from the increased priority, but you could also consider Sweet Kiss to leave the opponent confused. I opted for Charm over it because Sweet Kiss misses 25% of the time, and I would rather guarantee Luvdisc does something to disrupt its opponent before fainting.
For a fourth move, you could consider a parting gift to your own team, like Safeguard to block status conditions, but I imagine you'll have another Pokémon on your team better suited for setting up Safeguard. With that in mind, I went for an alternative parting shot in the form of Flail. Is it particularly effective? No, but it's fun. If you know your Luvdisc is on the way out with low HP, might as well get a powerful Flail in, no? If you're interested in something that is basically the same (contact-making physical Normal-type move) but more effective, you could also go with Endeavor. It will at least bring your opponent's HP low rather than doing a paltry amount of damage.
| Flip Turn | 
|
After making its attack, the user rushes back to switch places with a party Pokémon in waiting |
| Flail | 
|
The user flails about aimlessly to attack. The less HP the user has, the greater the move's power. |
| Wish | 
|
One turn after this move is used, the user's or its replacement's HP is restored by up to half the user's max HP. |
| Charm | 
|
The user gazes at the target rather charmingly, making it less wary. This harshly lowers the target's Attack stat. |
With four moves filled in and some alternatives discussed, that wraps up our examination of Luvdisc! That wasn't so bad, was it? Perhaps you've found some new affection for a Pokémon commonly mocked, hm? I would advise you that you won't find much success if you attempt to use Luvdisc competitively, but, all the same, sometimes it's simply fun to raise a favorite regardless of their competitive viability, and today's lesson should show that it's possible to raise any Pokémon!
Well then, that's enough for today, but returning to the matter we discussed at the beginning of class... For our next meeting, I want you to do a little research on Heart Scales. I expect you all to be able to tell me what other species, if any, are known to produce them. That'll be all. You're dismissed!
Koops, Your Emblem is on Fire
Uh. That's two months that I skipped I believe OOPS!
So uh, Merry Christmas, Happy Valentines, also I turned 21 during this time so that's something. Anyway, last time we did stuff this time we're gonna do stuff. Let's begin.
Heavy stuff. And I'm not just talking about the graphic imagery of horses getting torn apart but also the amount of new people we have! Significantly less than last issue though thankfully.
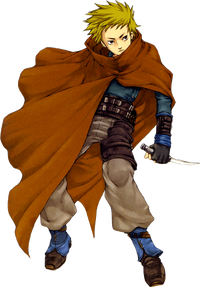
Chad
An orphan from the Lycian border to Bern.
Level 1 Thief.
HP: 16 (85%)
Str: 3 (50%)
Skl: 3 (50%)
Spd: 10 (80%)
Luck: 4 (60%)
Def: 2 (25%)
Res: 0 (15%)
Con: 5
Move: 6
Weapon Ranks: E Swords.
Chad is our first thief for the game, and well, he performs about as well as you would expect. Swords means he can keep axe users distracted if on terrain, which is nice, and 10 speed will ensure he doesn't get doubled by anything yet, so that's also kinda nice. Lockpicking is always a useful ability, especially in a game where resources are a bit more scarce than in FE7. That said, notice something weird about this spreadsheet? Usually, I would follow Con and Move stats with "Upon promotion", as those are stats you don't gain using growth rates. And well. Thieves. Don't promote in this game. Chad's bases are only just the bare minimum, though his growths are good, but that said, they can only elevate him so much. So yeah. That's about all you need to know about him. Not terrible, just not exactly good when it comes to combat either, but an extra attack is an extra attack.
Lugh
A young mage. Grew up in an orphanage destroyed by Bern.
Level 1 Mage.
HP: 16 (50%)
Mag: 4 (40%)
Skl: 5 (50%)
Spd: 6 (50%)
Luck: 5 (35%)
Def: 3 (15%)
Res: 5 (30%)
Con: 4 (+1 Upon promotion)
Move: 5 (+1 Upon promotion)
Weapon Ranks: D Anima.
And next up we have Lugh! ... Who also isn't very good. His bases are all pretty low, and his growths aren't all that high. 40% magic and 50% speed aren't bad, but certainly not enough for him to comfortably make use of in the tight window he has to level up before becoming obsolete. Knowing all that, you would think he's in fact a horrible unit. However, Lugh is more or less a better Wolt. Lugh hits on resistance, unlike Wolt, and most enemies don't really have that. His base speed is also higher, though that doesn't really prevent some enemies from doubling him (namely nomads, which is a problem given bows). The real advantage however, is his class. Or more specifically, weapon type. Anima magic is very accurate. This gives Lugh the ability to provide accurate chip damage from a safe distance, something no one else on the team really has, so far, given how unreliable physical 1-2 range is in the hands of mortals who are not Marcus. The Sage promotion also gives Lugh a whopping +4 magic. Then, he'll be able to uses staves and provide some pretty good chip damage as opposed to small chip damage. You can't go wrong with him, but you'd best temper your expectations, because though he may be useful, he's still very much not a unit I'd call good or self-sufficient.
Clarine
A self-centered lady of Etruria. Commander Klein's younger sister.
Level 1 Troubadour.
HP: 15 (40%)
Mag: 2 (30%)
Skl: 5 (40%)
Spd: 9 (50%)
Luck: 8 (65%)
Def: 2 (10%)
Res: 5 (40%)
Con: 5 (+1 Upon promotion)
Move: 7 (+1 Upon promotion)
Weapon Ranks: D Staves.
Mounted healer. That's the unit. That's what she does. She heals while being on a horse. She's extremely frail, and her magic stat isn't very high so even after promotion her offense won't be anything to gawk at, but she heals and has a horse. That's what's important. She's fast too, and has a lot of luck, so I guess you could use her as a dodgetank too though that's ill-advised considering her bulk. She gets pretty good support bonuses in that regard though, so I guess it could be viable? Whatever. Horse Healer.
Rutger
A young man seeking revenge on Bern.
Level 4 Myrmidon.
HP: 22~26 (80%)
Str: 7~9 (30%)
Skl: 12~15 (60%)
Spd: 13~16 (50%)
Luck: 2~4 (30%)
Def: 5~6 (20%)
Res: 0~1 (20%)
Con: 7 (+1 Upon promotion)
Move: 5 (+1 Upon promotion)
Weapon Ranks: C Swords.
Rutger. Oh boy, Rutger.
After three units ranging from mediocre to decent, we finally have an actual fucking god. Rutger is widely considered to be one of the Big 3 when it comes to best units in the game. And for damn good reason. First of all, good bases. He's pretty good as is on Normal mode, but his Hard mode stats are where he truly shines. 9 Strength at base, as well as 15 to 16 speed. Doubles everything with good damage to boot, especilly with that Killing edge he starts with. Not to mention he's also surprisingly durable for a myrmidon. And of course that's only the tip of the iceberg, because if you think this makes him really good already, then man do I have news for you.
Rutger's biggest boon by far is being the primary candidate for the first hero crest, which we will get pretty soon. This will allow him to promote into a Swordmaster. Now I know what you're thinking. Those were. Pretty bad last game. Well guess what, they're pretty good here. Fast units who do respectable damage. And that's not all. Swordmasters in this game get access to a whopping +30% crit at all times. You heard that right. A whole. 30%. At all times. No strings attached. Add to that some weapons having crit to begin with and some pretty good support bonuses and Rutger can VERY easily hit 100% crit on pretty much any attack where he's using a killing edge/wo dao, on top of his already pretty decent damage. His speed will also no doubt allow him to simply double things with heavy weapons too, and high skill means he doesn't suffer from much of an accuracy issue, nevermind the fact he uses swords already. This makes him by far the most reliable boss killer in the entire game, and probably the single best offensive unit you'll get.
Kneel.
Phew. I think I can rest now. See you guys next month, maybe. Or the month after. Or after that. I dunno.
| The 'Shroom: Issue 203 | |
|---|---|
| Staff sections | Staff Notes • The 'Shroom Spotlight • Poochy's Picks • Poll Committee Chairperson Election • Credits |
| Features | Fake News • Fun Stuff • Palette Swap • Pipe Plaza • Critic Corner • Strategy Wing |
| Specials | The 'Shroom's Special Saga |


