The 'Shroom:Issue 202/Strategy Wing

Director's Notes
Written by: Hooded Pitohui (talk)

STRATEGY WING, LET'S ROCK THIS NEW YEAR!
All throughout Strategy Wing this month, we have sections that'll rock your world! You're just a stone's throw away from a gneiss slate of rock-related gaming guides and analysis that wasn't that tuff for our writers to cobble together! You won't be between a rock and a hard place once you read the tips our writers have for you!
...alright, that's enough of that. In all seriousness, it accidentally ended up being rock month here! Be it through rock music, wordplay, or featuring stones themselves, all of the sections here this month have something to do with "rock". Shoey gets us rolling with the king of rock-and-roll himself, the coolest cat in all of File City... but you'll have to read on to find out who it is! We'll rocket up to the sky in Shine Get, blast through the atmosphere to explore a boulder-filled world with stone fungi in Four Steps for a 3D World, swing by another planet during our travels to find out all about some pebble-like critters in The Anatomy of a Pikmin, and come back down to earth alongside a falling meteor in Pitohui's Pokémon Academy.
Now, before I wrap this up, I'd like to give a special shout-out to our new Director and Sub-Director, Shoey (talk) and Meta Knight (talk). The both of them are Strategy Wing staples, Meta Knight serving as my predecessor and Shoey being a long-time champion of the team, writing an assortment of sections here! I know they're both passionate when it comes to the paper, so let's wish them the best! Still, though, even if he's in the big chair, you won't catch me graveling - er, groveling - to Shoey!
Anyway, as they say, a rolling stone gathers no moss, so you'd better get rolling along and read what we've got for you this month! Oh, and if you feel inspired when you finish up, check out the sign-up page and join us! Welcoming more writers to Strategy Wing? Why, that would rock!
Section of the Month
A big congratulations to Shoey (talk) and his examination of the parasitic Bulbmin last month! Not only were we treated to an adorable critter, but Shoey took the time to really analyze the role Bulbmin were intended to play in Pikmin 2, what role they played in practical terms, and how they could have been incorporated into Pikmin 4. Realizing that Bulbmin worked well in the Submerged Castle and might have found a gameplay niche in similarly-restricted dungeons, those are the kinds of insights that make The Anatomy of a Pikmin a must-read! Let's not forget Waluigi Time (talk) and the light read he provides in Shine Get, either, though. Once again, he kept things concise and fun as we explored Hazy Maze Cave with him last month!
If you like what the Strategy Wing team has on offer, be sure to let our writers know by voting in the poll at the bottom of this page, and maybe toss a Poochy Pick nomination at a section while you're at it.
| STRATEGY WING SECTION OF THE MONTH | ||||
|---|---|---|---|---|
| Place | Section | Votes | % | Writer |
| 1st | The Anatomy of a Pikmin | 10 | 50.00% | Shoey (talk) |
| 2nd | Shine Get | 7 | 35.00% | Waluigi Time (talk) |
| 3rd | File City Files | 3 | 15.00% | Shoey (talk) |
File City Files
Hello again, and welcome to File City Files, Southwest Cedar Rapids' best source for Digimon World strategies. So, originally I was going to spend this month exploring the newly-unlocked Factory Town, but then I decided I didn't actually want to do that! Instead, after a series of aborted plans brought on by a multitude of factors, we're going to be playing a little mop-up duty this month, picking up a few straggler Digimon from previously explored regions we haven't recruited yet.
The King of the Forest
If you go to the screen right below Kunemon's bed in the Native Forest, you'll find a tree house (you can tell it's a house, because it's got a door!). Now, for most of the game, if you go to the front door, nothing will happen. But once you hit 50 prosperity points, you're in for a real surprise, uh-huh!

Knock on the front door and a cool voice calls out "even monkeys fall from trees". Then, suddenly, from the trees, a flying knee drop, and you're face-to-face with the King of Rock, the cock of the walk, the coolest cat in town, the king of the Digiverse himself, Etemon. And, brother, compared to him, you ain't nothing but a hound dog. That's right! You're too square to hang with Etemon, uh-huh. He's trying to take you to the heartbreak hotel, uh-huh. Etemon, the King of the Digiverse, is a powerful Ultimate-level Digimon. His flying knee drop does quite a bit of damage. It did 1,466 HP in damage to me. I'm pretty sure it's based on a set percentage of your max health, but I don't know that for sure.

Etemon has 5,600 HP and he's got three attacks to give you the blues. He's got the buffing technique War Cry to make him even cooler than he already is. Then, to use that power and coolness, he's got Buster Dive and Dynamite Kick. Honestly, while he is powerful, Etemon isn't the toughest Ultimate out there. The sneak attack does quite a bit of damage, but his actual moves aren't great. Dynamite Kick is a mid-level move, and, while Buster Dive is very powerful, it has a really long charge time, so it's easy to knock Etemon out of it. You could probably beat Etemon with a pretty good Champion as long as you have enough healing items.
Upon being defeated, Etemon drops a Brain Chip and like 8,000 bits!!! Etemon, the king of rock, the cock of the walk, the coolest cat in town, dismisses us as not being so tough, to which we point out that he did a sneak attack and lost. Enraged over this, Etemon declares that he's going to join our stupid little city and show us just how tough he is!
Purpose in City: If you talk to Jijimon, he'll tell you that Etemon came by the city talking about opening up a cool shop, although Jijimon thinks this sounds suspicious. I don't know why he thinks that, since Etemon is the coolest cat on all of File Island! But here's the thing, no matter how hard you look, you'll never find this supposed cool shop. Instead, if you go to the Digimon Bridge, you'll find Etemon sulking.
He tells you that he got kicked out of File City just because he tried to start his own harem. Removed from the city, Etemon sits on Digimon Bridge. If you have 50,000 bits, he'll offer to sell you a Golden Banana. The Golden Banana can be used to Digivolve any Champion-level Digimon into an Etemon. While you won't get the stat or lifespan increase like you would with a natural Digivolution, you do get an Etemon! So, you know, totally worth it!
The Wandering Ultimate of Mt. Panorama
The next Digimon we're going looking for is another real treat. We're going to target Mamemon, the second of three Wandering Ultimate Digimon, and more specifically, the one can be found at the top of Mt. Panorama. Much like Piximon, there's only a 3% chance of finding him! This can take forever, but, luckily, it's really easy to know if Mamemon is there or not.

The area usually has three Mudfrigimon running about, but if Mamemon is there, he prevents the Mudfrigimon from spawning. So what you do is the following. You go to the Mt. Panorama Spore Area where we found Vademon, and you just keep coming up from that screen, going back and forth. You can immediately see a Mudfrigimon and know Mamemon isn't there, and thus immediately turn back and try again.
Mamemon is a small metal Digimon that looks kind of like a bowling ball on legs. But don't let his tiny demeanor fool you; Mamemon is an incredibly powerful Ultimate-level Digimon. I would say do not fight Mamemon unless you have your own Ultimate. I tried to fight Mamemon one time with just a Champion, and I was doing less than 100 HP in damage each attack! Talking to Mamemon causes him to challenge you to a fight and to accuse you of being chicken.

We've got two options! We can either throw down or be the bigger person, but obviously we're not about to let some bowling ball call us chicken, so it's throw down time! In battle, Mamemon can be a very dangerous opponent. While he's a little lacking on health for an Ultimate, with only 4,800 HP, he makes up for it by having very high speed as well as access to Full Potential, the strongest self-boosting move in the game. Mameon loves spamming Full Potential and will be at max stats in no time. Mamemon attacks with Megaton Punch and Buster Dive. While, much like Etemon, it is pretty easy to knock Mamemon out of Buster Dive, if he manages to hit it after all his Full Potentials he can do devastating damage. For instance, I was getting hit for almost 800 HP in damage per hit when facing him. You really don't want to fight Mamemon unprepared, which sucks, because odds are, unless you're specifically seeking him out, you'll probably find him unprepared!

Upon being defeated, Mamemon drops a rarely seen Quick Chip. Then he declares that we're nice and says that he wants to join us! Confused about this, we instead tell him that he should join the city, which he agrees to do!
Purpose in City: Mamemon is one of the Digimon that can work in the Secret Item Shop, located in the basement of the Item Shop. Although, in our case, Mamemon is actually opening the Secret Item Shop. Being an Ultimate Digimon in tip-top physical shape, Mamemon sells upgraded in-battle Stat Boosting items.

Specifically, he sells Omni Disks (which boost all your stats in battle by 20 points) for 3,000 bits. Then he sells upgraded Offense Disks, Defense Disks, and Speed Disks. These upgraded versions boost their respective stat by 50 points in battle, and each one costs 4,000 bits a piece! These are incredibly useful items, because they basically operate as the X items in the Pokémon games. I think the Omni Disks are probably the best value. While they only boost stats by 20 points and not 50, that's a 20 point in-battle increase across the board, and they cost 1,000 bits less (not that money really matters that much with all the fishing exploits we've done).
A Challenger from the Ninja Village
Now that the Secret Item Shop is opened up and we have more than 40 Prosperity points, we're going to head to Digimon Bridge again. Don't cross the bridge; instead, head down to Native Forest. Near the exit, we're suddenly stopped by a voice. Then we get a pretty cool little scene as a whirlwind suddenly appears. When the whirlwind subsides, a Digimon stands before us. He introduces himself as Ninjamon.

Somewhat surprisingly, he knows who we are. He tells us that word of our legend has spread even to the Ninja Village, and that he's here to challenge us to a fight. Without any hesitation, we of course accept this fight. To be honest, for a Digimon that gets his own unique entrance, requires 40 Prosperity Points, and requires access to the Secret Item Shop, Ninjamon really isn't a threat. He's only a Champion-level Digimon, and he only has 3,800 health. His attacks aren't very good either. Dynamite Kick and Magma Bomb are mid-level moves, and, while Charm Bomb can cause confusion, as long as you bring in a half-competent Champion you should mop the floor with Ninjamon.
Upon being defeated, Ninjamon drops a Quick Chip (hey, two in one section!). He then marvels at our strength and asks to become our disciple.


But we're like, "sorry dude, not taking disciples at the moment," and instead tell him that he should help us make the city. Thinking it over for a second, Ninjamon decides that building a city is good training too. Then he creates another whirlwind and scurries off to take his job in the city.
Purpose in City: Ninjamon takes up a "job" in the Secret Item Shop. Now, I use "job" in the very loosest sense possible. Ninjamon doesn't provide a service. Instead, Ninjamon tells you all about items!
Ninjamon has two different item lessons. In the first, he tells you how many different items there are in the game, of which 32 are food! This first lesson is mostly useless, with the only real "useful" information you can gleam from it being that there are specific rare foods found only in certain regions. The other "service" he provides is telling you about Digivolution items. This is kind of helpful if you didn't know how they work, mostly because he lets you know that you won't get bonuses from Digivolution items and that you can only use Digivolution items to turn into the next Digimon level (e.g., Rookie to Champion and Champion to Ultimate) All in all, for as much build up as Ninjamon gets, he's not really that useful!
On that disappointing note, that's all for this month. Join me next time when we start exploring the mechanical Factory Town (real).
Four Steps for a 3D World
Written by: Hooded Pitohui (talk)
Hello, all you readers of The 'Shroom, and welcome back to Four Steps for a 3D World, a section where I over-apply a particular level design philosophy that Koichi Hayashida talked about, like, a couple times!
In brief, 3D Mario game levels are designed around an introduction that lets a player learn a mechanic in a safe environment, further development that builds on what the player is learning and introduces more complicated aspects of a mechanic, a twist that adds some kind of significant wrinkle or challenge to force players to consider the mechanic from a new angle, and a conclusion which gives players one final satisfying chance to show they've mastered the mechanic. We look at 3D Mario levels and see if they conform to this model while trying to get some insight on how a good level is constructed.
This month, we have a rocky road before us, because we're going back to Super Mario Galaxy 2, the very first game on which Hayashida was credited as the director. At a cursory glance, many levels in this game seem to eschew this four-step philosophy entirely, possibly because Hayashida hadn't yet solidified the model, though that's speculation.
Among those levels that, at a glance, seem to stray from our established four steps? We have the Boulder Bowl Galaxy, which is where we'll be casting our gaze this month. Specifically, we'll be looking at the mission "Rock and Rollodillo," an introduction to the Rock Mushroom power-up that ends in something we haven't seen before in this section – a boss fight!
| Step | Notes |
|---|---|
Introduction 
|
The level begins on a flat-topped, roughly circular planetoid with wooden fences at its boundaries, a few boulders sticking up, a large crystal off to the side, a bridge stuck in an upright position, and a trio of Elite Octoombas guarding a Rock Mushroom. Once the trio is defeated, the Rock Mushroom can be accessed, and the player can relatively safely experiment with the Rock Mushroom, learning it can break some obstacles and learning how to control it, with the only risk being jumping over the wooden fences or rolling through a gap after breaking the fences. Ultimately, the player learns the Rock Mushroom can knock down upright bridges and can bowl over enemies when they go to leave the planetoid by crossing the bridge and bowling over some Pinheads. All in all, it's a pretty safe environment which lets a player learn a new mechanic, making this a classic case of the Introduction step. |
Development 
|
The next planetoid the player arrives at is bowl-shaped planetoid with, again, breakable wooden walls, a Rock Mushroom, and some Elite Octoombas. In addition, this planet has rolling boulders than can be broken by Rock Mario/Luigi and is swarming with Octoguys. Proceeding through the level is locked off until all Elite Octoombas and Octoguys are defeated. The enemies can actually damage the player here, teaching players that the Rock Mushroom is lost with damage. This planetoid seems to be designed to impress on the player the utility of using the Rock Mushroom to defeat enemies while, with its breakable walls and greater danger, teaching players to take care not to hastily roll out into the void. It does build on what the player is learning by explicitly putting the Rock Mushroom in a combat-focused environment, so it's a fairly typical Development section. |
So far, the level has defied my expectations and hewed fairly closely to the four steps. We'll see if it continues to do so in a moment. First, I want focus a little more on the Development step's planetoid, because I find that the level fumbles here. The goal of the Development step appears to be teaching players how to carefully use the Rock Mushroom in a somewhat chaotic, risk-filled environment, but the set-up of the planet makes it just as likely that the player is going to choose to eschew the Rock Mushroom.
I, at least, found this little "kill all the enemies" planet easier to do without the Rock Mushroom than with it. The Octoguys are densely-packed and can put the player into a cycle of getting hit, recovering, and getting hit, but there being so many of them also means it's easy to just go and jump on them. It's likely that, at some point early on, the player will take a hit and lose the Rock Mushroom. Then the player may want to get a coin, which is easier to do by jumping on an Octoguy without the Rock Mushroom, and at that point, there's a good chance they'll just thin out the enemies before picking up a spare power-up or will even kill all of them without it. The chance is even higher if, as happened to me while writing this section, like half of the Octoguys walk into the path of the rolling boulders and die on their own!
It just seems to me that this planet is constructed in such a way that it's easier and safer to avoid using the Rock Mushroom, rendering moot the lesson it's supposed to teach the player. I found it odd, but, then again, perhaps I only see it that way because of my circumstances. Maybe a young child would find it easier and safer to use the Rock Mushroom, because they don't have the dexterity to avoid rocks from and jump on a swarm of Octoguys. Regardless, I think this might have been improved by making it so that the enemies you have to defeat to proceed can only be defeated by the Rock Mushroom. Keep the Octoguys to create some pressure and to trip up some players, but make it that the player has to destroy some prickly plants scattered on the planet or something, to incentivize use of the Rock Mushroom.
That was a long enough aside, though, so let's proceed with the level!
| Step | Notes |
|---|---|
Twist 
|
Proceeding, the player lands on a spherical planet featuring prickly plants, rolling boulders, some large upright stones, and Elite Octoombas, with all of these obstacles being nothing that they haven't encountered or don't know how to deal with. However, this planet also brings in large muddy trails that slow the player unless the Rock Mushroom is used to roll across them (or the player long jumps over them) and Chomps, which cannot be defeated by the Rock Mushroom and will even damage a rolling Mario/Luigi. Players must make it from one side of the planet to the other with the Rock Mushroom and break a giant crystal to access a Launch Star. Arguably, this could be considered the Twist stage, since it now requires the player to take what they've learned about the power-up and apply it to a 3D, spherical surface over the flat-topped planetoids they've used it on before. That, along with using the Rock Mushroom to cross dangerous terrain, is an evolution of the mechanic that forces the player to consider it from a new angle. |
I'd like to take a moment to point out that this section accomplishes its core goal much more effectively. While a player could long-jump over the mud and avoiding the obstacles without the Rock Mushroom is an easy task, by simply encasing the Launch Star in a crystal that can only be broken by the Rock Mushroom, this portion of the stage requires the player to master using the Rock Mushroom on a full sphere and to use the Rock Mushroom to get across obstacles.
| Step | Notes |
|---|---|
Interlude 
|
There is a checkpoint and a chance to get an item before the boss battle. |
Conclusion 
|
The player is dumped onto an obstacle-free metal sphere and battles Rollodillo for a Power Star. After getting accustomed to controlling the Rock Mushroom in the Introduction step, getting accustomed to using the Rock Mushroom for combat in the Development step, and learning both that some large, rolling objects still pose a danger in boulder form and how to control the Rock Mushroom on a sphere, the player puts all of that together to battle Rollodillo. All of these elements come together in this battle, giving a player a chance to show they've mastered the Rock Mushroom, just as Hayashida's four steps ought to! |
Well, honestly, I'm shocked. I really didn't think, back when I was choosing this level for this month, that it would follow the four steps. In fact, though, interlude excepted, it followed them so closely that there was a one-to-one correspondence between planets and steps. Or maybe all I have is a hammer and I'm seeing everything as nails! That's for you to decide. I'd call this a pretty textbook example of the four steps, though.
Whether you agree with that assessment or not notwithstanding, there's one additional lesson to take from Boulder Bowl. While following these four steps can and generally do lead to an effective level, you have to consider more than just the presence of all four steps! It's not enough for a step to be present; you need to consider the goal of the step and ask if the level design is lending itself to achieving that goal. That's where I find the Development step here fails. The goal is clearly to teach the player that the Rock Mushroom is useful for combat, but by not tying progress to using the Rock Mushroom, that step instead sometimes teaches the lesson that it's easier to forego the power-up! That's not inherently bad. In fact, you could build an interesting level around the concept of deciding whether or not it's better to take a power-up or leave it behind, but that's not what this level is doing. This level builds up to the player using the Rock Mushroom for combat, but undermines itself at the point it introduces that lesson.
On the flipside, the Twist stage here does much better in that regard and successfully forces the player to learn how to use the Rock Mushroom on a spherical planet while navigating past obstacles that can damage them, preparing them to avoid Rollodillo's rolling attacks. So, remember, when designing a level around the four steps, keep in mind the goal of each step, and scrutinize your level to ensure it's actually achieving those goals! It sounds obvious when I put it like that, though...
Oh well. With four planets with Rock Mushrooms on them, three strikes scored while playing through this level for this section, two galaxies sharing this funky music, and one boss battle now under our belts, this has been Four Steps for a 3D World!
Shine Get
Written by: Waluigi Time (talk)
Hello there, 'Shroom readers! Welcome back to Shine Get, the best 'Shroom section about Super Mario 63 written by me specifically that you'll ever read. (And probably the only one. That's beside the point.) This is going to be a short edition this month because I want to tackle two secret levels in the basement!
Secret Course: Secret of the Sky

One of the secret courses is accessible from a set of two Sling Stars hidden in the ceiling next to the Hazy Maze Cave painting. It's pretty low, and a double jump is sufficient to get inside of it. They launch you to the Secret of the Sky, and right away I'm dropped onto a Rocket Nozzle box. According to the nearby sign (and pause menu) it's a Red Coin collecting level, so I guess I better get started!
The first Red Coin is one you can't really miss unless you try. Heading to the right for just a little bit, it's on a cloud right next to a cliff that you have to rocket over or use the clouds for some fancy platforming work. A little bit further to the right is an upward wind gust with the second Red Coin and a Star Coin in it. The Red Coin is an easy grab, but the Star Coin is trickier since you have to fight the wind for it. I tried diving into it a few times which didn't work, but then I was able to get it by ground pounding just above it. Thankfully, the wind makes it so you won't fall into the bottomless pit by doing this. That's pretty much all the ground down here, so I went a little bit back to the left and rocketed up into the sky.

Going to the right first, there's some pretty easy platforming with another wind gust pushing back. It doesn't really do much, I actually stopped just to make sure it had any effect at all and wasn't just visual. Cheesing this with the Rocket Nozzle makes it especially easy - despite that I ended up having a falling mishap the first time. Anyway, the third Red Coin is at the end. Going back to the left, the fourth Red Coin is tucked into an alcove that's easy to Rocket into.
Next, I went for the wind gust going further up and rocketed through it. The fifth Red Coin is hidden in a trail of several regular coins, so make sure you don't miss that one. To the left is a much more effective wind gust pushing Mario back than the one a little earlier, but Mario's running speed is enough to overcome that and grab the sixth Red Coin. To the right is yet another upward wind gust - Mario's really moving up in the world! The last two Red Coins can be found by going in both directions here. The right one is on a simple tilting platform, and the left one requires some jumps across spinning platforms. Rocket F.L.U.D.D. makes this really easy as always, just make sure to spin on the way down because it's a long fall if you miss! The Shine Sprite spawns in between the two of these at the top of, you guessed it, an upward wind gust! Rocketing to the top of that (you don't have to use F.L.U.D.D., but it's stylish!) adds another Shine to our total.
Secret Course: Frosty Fludd

The other secret in this room, hinted at by one of the Toads here, is a door camouflaged against the wall. The doorframe is still visible, so it's pretty easy to find if you're looking for it. This one leads to a snowy level, and since the last one was Rocket Nozzle-based, this one is Turbo Nozzle-based! I don't know if that was intentional to have both secrets in this room revolve around one of the unlockable nozzles, but if it was, that's pretty neat. Also, yeah, that wasn't a typo, it's called Frosty Fludd. I'm only just now noticing that several other places in the game spell F.L.U.D.D. that way, and now I'm questioning if it's consistent across the game but I'm not concerned enough to go back and check. Sorry. Maybe you can if you decide to play this game.

Unlike last time, we have to earn Turbo! It's just some simple platforming across ice blocks with water below to catch your fall, but it's something, at least. At the end is the Turbo Nozzle box and, for some reason, a sign that explains how Turbo Fludd[sic] works even though it's already unlocked, which strongly implies we completed the Turbo Nozzle tutorial! The rest of the level... doesn't use the Turbo Nozzle in any interesting ways, unfortunately. There's a straight shot across some snowy ground, then down through a linear water tunnel. At the end of that there's some platforming across ice blocks and later clouds, but most of it doesn't require Turbo at all. In fact, there's some vertical platforming which is Turbo's weakest point! It's not until the last two jumps that they're so far away you need Turbo to cross them. Speaking of the second jump though, there's a Star Coin in it! This is my 28th which unlocks the Desert Tileset. On the other end there's some ice blocks, and one of them can be ground pounded to get inside and grab the Shine Sprite!
So yeah. That was a level, I guess. It's fun, don't get me wrong, the Turbo Nozzle usually makes for a good time because you get to blast through everything. I just don't feel like this level really used it in much of a meaningful way since you can do most of the level without it. It's more of a playground than a puzzle. Or maybe it all balances out? After all, Rocket trivialized a lot of the level design of Secret of the Sky...
Anyway, next time I'll check out more of the basement and (spoilers) we'll be back to full-sized levels! See you then!
The Anatomy of a Pikmin
Hello, and welcome back to The Anatomy of a Pikmin, The 'Shroom's biological profile of the various adorable types of Pikmin. Well, we've officially covered Pikmin types for half of the games! We're moving on from Pikmin 2-introduced Pikmin to start covering the additions in Pikmin 3. Pikmin 3, being, of course, an underrated masterpiece that didn't break out like it should have because it was stuck on the Wii U, the Pikmin types it introduced tend to be a little underrepresented. For our first Pikmin 3'-introduced' type, we have the bulky Rock Pikmin.
Rock Pikmin, much like the Bulbmin, aren't your average Pikmin type. According to Olimar's notes, Rock Pikmin are actually a subtype of parasitic Pikmin called Hermikmin, which… infect stones, I guess? Rock Pikmin were originally going to have a more unique design; there were going to be various shapes of Rock Pikmin, since, you know, there are different kinds of rocks. But Nintendo decided that sounded like too much work and not enough gain, so they decided to, wisely, just use one design.
Being part rock, the Rock Pikmin are one of the most defensive Pikmin types. In Pikmin 3, they cannot be crushed or stabbed. Because of this, enemies like the Wollyhop, Joustmite, and even the Plasma Wraith's main attacks cannot kill a Rock Pikmin. What this means is that, while Rock Pikmin don't have their own elemental that they resist, they make up for it with this boosted defensive ability.
Now, while Rock Pikmin don't have their own elemental hazard, per se, they still have something that only they can destroy. Throughout Pikmin 3, there are piles of crystal and crystal walls. These can only be destroyed by throwing Rock Pikmin at them until they shatter, giving Rock Pikmin some limited puzzle utility.
Rock Pikmin have probably the most unique offensive capabilities of any Pikmin type. Being that they are essentially sentient rocks, the Rock Pikmin do instant damage as soon as they land on an enemy, much like Purple Pikmin in Pikmin 2. But unlike Purple Pikmin, the Rock Pikmin do not attach to the enemy; instead, they bounce off the enemy initially.

After this bounce, they begin charging at the enemy and attacking by bouncing into them. I think this is actually a pretty good tradeoff for a pretty useful power. Unlike the Purple Pikmin who were just absolutely busted, the Rock Pikmin are pretty well-balanced. Yes, they do initial damage upon landing, but they don't keep attacking. Instead, it takes them a moment to go back on the attack. Because of this, there's an incentive to not just use Rock Pikmin in combat. In fact, one thing I like to do when possible is to rotate between Rock and Red Pikmin during fights so that I can use both the increased damage capabilities of Red Pikmin and the impact damage of the Rock Pikmin.
Rock Pikmin are even given some creative enemies that take advantage of the Rock Pikmin's impact damage. For instance, take the Peckish Aristocrab, whose claw is shattered by the weight of Rock Pikmin. Or take the Calcified Crushblat, whose thick armor needs to be destroyed by Rock Pikmin to reveal its soft insides.
All in all, while Rock Pikmin don't have great puzzle use, they make up for it with interesting defensive capabilities and are the most useful Pikmin in most combat situations. Because of this, Rock Pikmin are in the top three of most useful Pikmin in Pikmin 3.
Unfortunately, nothing goes right for our poor rocky boys in Pikmin 4. Rock Pikmin in Pikmin 4 are near useless in 90% of situations. Let's start with the first problem. The Rock Pikmin Onion is not obtainable until the second-to-last area. For most of the game, you are only going to have the sparing amount of Rock Pikmin found in caves. As a result of this design constraint, almost none of the aboveground areas and very few caves have anything specific for Rock Pikmin to do, giving you very little reason to use them since you're now restricted to only using three Pikmin types at one time.
But surely their combat potential justifies using them, right? Well, to be honest, no. Rock Pikmin are almost useless in combat for one simple reason. Purple Pikmin are back! Not only are Purple Pikmin back, but, in combat, they basically operate as super Rock Pikmin. Unlike Rock Pikmin, the Purple Pikmin instantly latch onto the enemy, and while they've been nerfed to attacking at only 1.5 times the power a normal Pikmin as opposed to the 2 times power they had in Pikmin 2, Purple Pikmin also do impact damage. In fact, not only do they do impact damage, but they do double the damage that a Rock Pikmin does on impact. Because of this, there's just no situation where you would use Rock Pikmin over Purple Pikmin in combat.

So the combat capabilities of Rock Pikmin have taken a hit, but at least they've got their defensive advantages, right? Well, yes and no. So, yes, they are still immune to stabbing in all situations. But as for crushing, they actually got nerfed. In Pikmin 3, Rock Pikmin couldn't be crushed at all in any circumstances, but in Pikmin 4, if Rock Pikmin are on a hard surface such as a rock, they can be killed by crushing attacks! This sounds like a downgrade, and it is, but not as much as you might think. I would argue that, from a practical standpoint, the ability to not be crushed is pretty much worthless in Pikmin 4. In Pikmin 4, you along with all of your Pikmin, can ride the space dog Oatchi. Because of this, unlike in previous games where your army of Pikmin was this spread out mass of Pikmin and one mistake could get all of your Pikmin crushed, your Pikmin are tightly packed and rarely at risk of being crushed.
In Pikmin 4, you can fight whole fights mounted on a dog, either charging mass charges at enemies or throwing Pikmin at an enemy and then recalling them back to the dog at the first sight of trouble. Because of this, crushing just isn't that big of a deal. You just no longer really have to worry about large spread-out portions of your army getting crushed because they can easily be on the safety of the vastly more mobile Oatchi.
What happens to Rock Pikmin in Pikmin 4 is just weird. They go from this pretty good Pikmin to maybe the worst in the game. Everything that was special about them gets taken away from them. Their increased damage potential pales in comparison to the might of the Purple Pikmin and their main secondary ability is rendered mostly worthless thanks to the ability to ride a dog. The even have a few weird nerfs like the fact that they're no longer needed to destroy the claws of Peckish Aristocrabs. They really are a Pikmin that had unique ideas that were just rendered moot thanks to the different game design from Pikmin 3 to Pikmin 4.
That's all for Rock Pikmin. Join me next month as I go over the flying Winged Pikmin.
Pitohui's Pokémon Academy
Written by: Hooded Pitohui (talk)
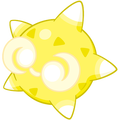
Welcome back and a happy new year to all of you, class! I take it the holiday break was a nice rest for all of you, yes? Or perhaps it involved some awkward family gatherings. Well, regardless of what may have transpired, we're in a new year, a year which we must aspire to make better than the last. When it comes to improving the year, however, we could all use a little bit of good fortune, yes? Well, I've long held a belief - not very scientific of me, and not even rooted in tradition, but I digress - that encountering a Minior falling from the skies is a sign of good fortune to come! Minior is a rare Pokémon, only known to fall to the earth from high up in the ozone layer in a few regions, so finding one is quite the lucky encounter!
So that we might all have a little extra luck on our side as we start this year, I've brought a Minior for us to examine this month!
Before we begin, if you need a refresher on our course policies, open up the first box below, and if you need to review the most commonly-used terms in this class, open up the second box below.
First, a Smogon University course, this course is not. No, this academy's lessons are designed to get trainers of any stripe thinking about how they can raise their Pokémon, and, as a result, aren't designed to keep up with the widely-accepted metagame for the series. In some cases, the way I've raised my Pokémon may even flies in the face of conventional wisdom. If you're looking for top-tier strategies, do check out Smogon, but if you merely want to get a little deeper into raising Pokémon while still doing things your own way, feel free to use this section as a reference.
Since we all know the importance of citing our sources, I also need to credit the design of some of the tables used in these lectures to Crocodile Dippy, author of the Pocket Handbook which can be found in early editions of Strategy Wing.Base Stats: Base stats are the values associated with a particular Pokémon species, and are the same across every individual Pokémon of a given species. You have no influence on them. You can think of them as traits tied to a species. A chimp isn't ever going to be able to get as good as digging as a mole will be, and, likewise, an Abra is never going to have the defensive prowess a Shuckle has.
Individual Values (IVs): Individual values, as their name implies, are associated with individual Pokémon. They range from 0 to 31 in each stat, with 31 being considered a "perfect" IV and higher numbers corresponding to different stats. Magikarp A and Magikarp B will have the same base stats, but they may very well have different IVs. To stick with the animal analogy, one mole may be born with larger claws than another mole, and that first mole is probably going to have an easier time digging through dirt than the latter. Individual values are set in stone, strictly speaking, but you can use Hyper Training (from Generation VII onwards) to functionally get a perfect IV in a stat.
Effort Values (EVs): Effort values are the one thing you can easily change. A Pokémon can earn, primarily through battling, but also through means like the use of certain items or mechanics like Super Training, up to a total of 510 effort values, with up to 252 in any given stat. To finish off the animal analogy, no matter what kind of claws a mole is born with, moles who have more experience digging are probably going to be better at digging than moles which have never dug.
Nature: A Pokémon's nature is, more or a less, a stat modifier with a name meant to make it sound like a Pokémon has some personality. Natures will raise one stat by ten percent and lower another stat by ten percent. Some natures raise and lower the same stat, canceling out the effect and leaving stats unchanged. Natures can be functionally changed with the use of special mint items from Generation VIII onwards.
STAB: STAB stands for Same-Type Attack Bonus, and refers to the boosted power of moves that match the type of the move's user. To illustrate this, consider the case of a Lombre, a dual-type Pokémon which is both a Water-type and a Grass-type. Any Water-type moves Lombre uses will have their power boosted by 1.5x, and any Grass-type moves Lombre uses will, likewise, have their power boosted by 1.5x. (There are circumstances where this does not apply, and, while the 1.5x multiplier is typical, some games use other multipliers.)
Now, typically we'll begin our discussion with an examination of a Pokémon's base stats, but we can't begin there with Minior. Instead, we're going to jump ahead to discussing Minor's sole ability, Shields Down. In battle, either at the very start of the battle or at the end of a turn, Minior may change its form if its HP is above or below 50% of its maximum. If it has over half of its HP, it will change into its Meteor Form, and if it has less than half of its HP, it will change into its Core Form.
As you'll see in the table below, in its Meteor Form, Minior has strong defenses and poor offensive capabilities (further augmented by Shields Down protecting Minior from status conditions while in its Meteor Form), while its Core Form swaps those around and gives it a major boost to its Speed. In both forms, it has lackluster HP. Now, at a glance, you might think this would make it difficult to raise Minior, since it has a split emphasis on both its offenses and defenses and, unlike, say, Aegislash, it can't change between its forms at will. On the contrary, this arrangement works fairly well for Minior and lets it focus almost exclusively on its offenses. Minior has no way of recovering HP on its own except via Rest, so what you've really got here is a straight progression from a well-shielded Pokémon to, after taking a hit or two, a speedy and powerful striker. Once you begin to think of Minior this way, the benefit of Shields Down becomes apparent. By giving it strong defenses and protection from status conditions when it comes out onto the field, the ability gives Minior a chance to boost its stats so it can hit even harder as soon as its form changes.
So Minior has a niche thanks to its ability, but that's not all Minior is equipped with. It has access to a move that synergizes with its niche extremely well, and that move is Shell Smash. Shell Smash drops Minior's defenses in exchange for raising its attacking stats and speed. The standard ideal flow of battle with a Minior goes something like this. Your opponent outspeeds your Meteor Form Minior, attacking it and dropping its HP to half or less, but not knocking it out thanks to its defenses. Acting second in the same turn, Minior uses Shell Smash, sacrificing its now-unnecessary defenses for offensive boosts. The turn ends, and Minior changes into its Core Form, swapping its stats around. Now with Core Form's base stats and the boosts from Shell Smash, Minior outspeeds its opponents and wreaks havoc.
That's what we'd like to achieve, so, knowing that, let's talk Nature, IVs, and EVs.

|
Name: | Minior | Base HP: | 60 (Meteor & Core) | |
| Species: | Meteor | Base Attack: | 60 (Meteor) / 100 (Core) | ||
| Type: | Rock | Flying | Base Defense: | 100 (Meteor) / 60 (Core) | |
| Abilities: | Shields Down | Base Special Attack: | 60 (Meteor) / 100 (Core) | ||
| Base Special Defense: | 100 (Meteor) / 60 (Core) | ||||

|
Base Speed: | 60 (Meteor) / 120 (Core) | |||
First off, Minior is a Pokémon that you'd really like to get five 31 IVs on. This is the one part of the process Shields Down makes tricky. Even though we're primarily concerned with raising Minior's offenses, we are using its defenses to give it time to use Shell Smash, so we need them to be as high as possible without investment, even more than we usually need for a Pokémon. That's tricky but achievable (and not so tricky with Hyper Training), but we still need one stat we can disregard. Speed is essential, so we have to choose one of attack and special attack to focus on and then disregard the other.
Which do we focus on? Well, honestly, they're equal, so you can go whichever route you prefer. I chose to invest in attack because Minior gets no Flying-type special moves, meaning it can only take advantage of STAB on its Flying-type moves by going the physical route. On the whole, I'd say the physical route has better coverage and move options, but you won't lose a lot going the special route. We'll continue with the physical route in this lecture, but I'll provide an alternative moveset in case you want to go the special route.
So, we've decided to focus on attack and we know we need to focus on maximizing Minior's offenses so it can hit hard and fast when its shield drops. That means we'll do the maximum (252) EV investment in attack and speed, putting our leftover six EVs into HP since it serves both Meteor Form and Core Form equally well. Since we aren't using special attack, we go with an Adamant nature to boost attack (we could boost speed, but Minior's speed stat is already higher than its attack). If you take the special around, flip this around and choose a Modest nature to drop attack and raise special attack.
With that, stats are all set! Let's get into moves to finish things off.
| Level: 75 | HP IV | 31 | HP EVs: | 6 | HP: | 199 | ||

|
Attack IV | 31 | Attack EVs: | 252 | Attack: | 247 | ||
| Defense IV | 31 | Defense EVs: | 0 | Defense: | 118 | |||
| Special Attack IV | 21 | Special Attack EVs: | 0 | Special Attack: | 153 | |||
| Special Defense IV | 31 | Special Defense EVs: | 0 | Special Defense: | 118 | |||
| Nature: Adamant | Speed IV | 31 | Speed EVs: | 252 | Speed: | 255 | ||
Obviously, we are starting off with Shell Smash. With one slot filled, we turn our attention to STAB moves. Looking at Minior's physical Rock-type moves, our choices are Rollout, Rock Tomb, Rock Blast, Rock Slide, and Stone Edge. The highest accuracy any of those moves has is 95%, and so we're going to have to swallow some risk of missing here no matter what. With that in mind, we narrow this down to Rock Slide with its power of 75 and accuracy of 90% versus Stone Edge with its power of 100 and accuracy of 80%. If Minior misses a move or fails to KO an opponent after setting up, there's a good chance it will get knocked out itself, so, since we have to accept missing some of the time either way, I recommend Stone Edge. At least with it you have the better chance of scoring KOs when it hits.
After that, looking at physical Flying-type moves, we have exactly one option, and that's Acrobatics! Is Acrobatics, with its base 55 power, worthwhile here? Yes, actually, and it's once again thanks to Shell Smash! See, while it's not likely that Minior will take a hit and keep battling once it's in Core Form, it at least has a chance if the defense drops from Shell Smash can be removed. Enter the White Herb, a held item which will, one time in battle, restore a Pokémon's lowered stats before being consumed. Have Minior use Shell Smash, and the White Herb will activate, letting it preserve the offensive boosts while ridding it of the defense drops. The White Herb will be consumed, leaving Minior holding nothing... which doubles Acrobatics' power. A base power of 110 plus STAB is very respectable.
To round out Minior's moveset, let's eliminate some other physical move options. Tackle is too weak, Take Down and Double-Edge come with unwelcome recoil damage, Facade likely won't be helpful since Meteor Form protects against status moves and Core Form should be knocking out opponents before they can use them, U-turn would reset the Shell Smash stat boost and Minior would struggle to get it in a second time, Bulldoze is outclassed by Earthquake, Self-Destruct is outclassed by Explosion, and Gyro Ball is weaker because of Core Form's high speed.
This leaves us choosing between Explosion, Zen Headbutt, Iron Head, and Earthquake. Of those four, I recommend Earthquake, because Ground has the best coverage options of the four types we're choosing from. That said, Explosion is a decent alternative and can surprise an opponent and maybe score an extra KO if Minior's other moves wouldn't have been able to KO an opponent and Minior was set to faint anyway.
With that, we have our physical moveset. Take a look at it in summarized form, and we'll move onto discussing options for a special-oriented Minior.
| Stone Edge | 
|
The user stabs the target with sharpened stones. This move has a heightened chance of landing a critical hit. |
| Acrobatics |
|
The user nimbly strikes the target. This attack does massive damage if the user isn't holding an item. |
| Earthquake |
|
The user sets off an earthquake that strikes every Pokémon around it. |
| Shell Smash | 
|
The user breaks its shell, which lowers its Defense and Sp. Def stats but sharply boosts its Attack, Sp. Atk, and Speed stats. |
Should you go the special route, you'll still begin with Shell Smash, and you'll still want a STAB Rock-type move. In this case, your best option is Power Gem, which has a reliable 100% accuracy but only a... sufficient, we'll say, base power of 80. This, along the lack of any Flying-type move to use in the special route and no moves synergizing as well with the White Herb, is another reason I'd recommend the physical route. Now, you might be tempted by the 120 base power Meteor Beam, but that requires a turn to charge, and Minior does not have that luxury. It will most likely be defeated while charging the attack.
A Ground-type move is still worthwhile for coverage, and here, Earth Power is the best choice. As for a final move, Dazzling Gleam and Psychic are both in the running, but Psychic has higher power, so it's the best pick. If you really wanted to try something different, you could consider Scorching Sands over Psychic. It doesn't have KO power, but if Minior is unlikely to KO a foe anyway, you have a 30% chance of leaving them with a Burn as a parting shot.
| Power Gem | 
|
The user attacks with a ray of light that sparkles as if it were made of gemstones. |
| Psychic |
|
The target is hit with a strong telekinetic force to inflict damage. This may also lower the target’s Sp. Def stat. |
| Earth Power |
|
The user makes the ground under the target erupt with power. This may also lower the target's Sp. Def stat. |
| Shell Smash |
|
The user breaks its shell, which lowers its Defense and Sp. Def stats but sharply boosts its Attack, Sp. Atk, and Speed stats. |
With that, we have raised a Minior and even provided an alternative route for anyone who would prefer a special attack-oriented Minior... though, once again, I must suggest you go the physical route. Now, then, we're a bit ahead of schedule, so shall we finish this session off with a bit of fun trivia? It's not apparent until Minior's shell has fallen away to reveal its core, but Minior actually come in multiple colors, coming in the traditional seven colors of the rainbow!

Red

Orange
Yellow

Green

Blue

Indigo

Violet


When you encounter a wild Minior, you won't know what color it is until you trigger Shields Down! It's a fun little surprise every time! Additionally, each form can be Shiny, as well, though there are no visual differences between, say, a Shiny Red Core Minior and a Shiny Blue Core Minior. They all appear as black with multicolored markings!
So then, that's all for today! For next time, continue your studies of Pokémon with multiple forms by... Ah, what's that? You'd like to know what form of Minior I've brought? Well, I suppose that surprise could end class on a good moment of levity. Polari, if you would please...

Well now, I did say Minior bring good fortune, didn't I? Alright, then. Class is dismissed. May your encounter with a Minior today bring you good fortune in this new year!
| The 'Shroom: Issue 202 | |
|---|---|
| Staff sections | Staff Notes • The 'Shroom Spotlight • Directorial Address |
| Features | Fake News • Fun Stuff • Palette Swap • Pipe Plaza • Critic Corner • Strategy Wing |