The 'Shroom:Issue 197/Strategy Wing
Director's Notes
Written by: Hooded Pitohui (talk)
Hello, all of you readers of The 'Shroom! As you've probably seen stated multiple times in this issue (unless you like Strategy Wing so much that you always start here - in which case, I encourage you to join the team!), we wrapped up our annual Awards ceremonies a little over a week ago. As a result, a lot of us are taking it easy this month after we worked on presentations over the past couple weeks and partied together. It's been quieter than usual in the Strategy Wing offices this month... although maybe that's just because I've been over at the Awards theater more this month... With issue 200 just three months out, though, I suspect that things will begin ramping up soon regardless!
This month, in addition to Waluigi Time (talk) bringing more nostalgic 2D Shine-hunting and Koops (talk) bringing Fire Emblem action, Strategy Wing's professional crime instructor, Kinger (talk), and long-time writer of humorous guides, Shoey (talk), bring you their sections on Payday 2, Pikmin, and Digimon World. We're reaching some significant moments in Getting that Payday and File City Files. I'll let Kinger explain why this is quite the occasion for the former, but, for the latter, we've finally reached the worst thing in our favorite held-together-by-duct-tape-and-poor-documentation game! What could be so bad that it's the worst thing in Digimon World? Read on to find out!
Speaking of significant milestones, as unbelievable as it may be, it seems we've reached the penultimate moment in Koops, Your Emblem is on Fire! We're nearing the end, and you can be certain there will be resistance as we close in on Nergal, but we might have to face an even greater enemy before we get there...
When you finish, if you're feeling inspired, you can join the Strategy Wing team at any time by going over to the sign up page and sending an application to our Statistics Manager, Meta Knight. Perhaps you'd like to take us through a game you know well, as File City Files does, or maybe you want to cover a subject in great detail, like The Anatomy of a Pikmin does. Maybe you'd rather give us bite-sized tips on a game like Getting that Payday. Either way, we'll find you a place on the team, so apply today and make your debut next month as more of our regular sections (in other words, my own sections) return!
Section of the Month
The Wing Cap couldn't hinder nostalgia for Bob-omb Battlefield or the writing of Waluigi Time (talk) in Shine Get! Treating us to a guide on a 2D take on the iconic first level of Super Mario 64, he nabs first place alongside several Silver Stars. Meanwhile, our first set of logs from Shoey (talk) on Red Pikmin and their fall from the top of the heap takes a joint second with a feature on Slowking. Discover more about a new Pikmin type this month, and don't forget to vote to show our readers your support!
| STRATEGY WING SECTION OF THE MONTH | ||||
|---|---|---|---|---|
| Place | Section | Votes | % | Writer |
| 1st | Shine Get | 9 | 42.86% | Waluigi Time (talk) |
| 2nd | The Anatomy of a Pikmin | 5 | 23.58% | Shoey (talk) |
| 2nd | Pitohui's Pokémon Academy | 5 | 23.58% | Hooded Pitohui (talk) |
File City Files
Hello and welcome to File City Files, Linn County's number one Digimon World strategy guide. Last month, we learned lore and recruited artists. This month, buckle up, because we're going to spend this month covering the worst things Digimon World has to offer!
The Worst Shop Minigame in any Video Game
We're going to start out this months' section by heading back to the Great Canyon. From there, we're going to pass over the invisible bridge and into the Great Canyon Top Area.
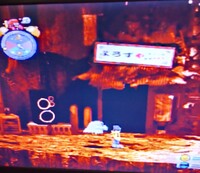
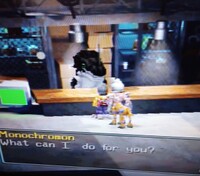
Now, next to the bathroom, you'll see a light-up sign, with Japanese writing, for some sort of business. We're going to go ahead and enter that building. This building is the shop of dinosaur Digimon, Monochromon (one little detail that I like is that this shop does have unique music).
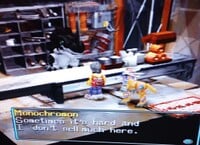
Monochromon expresses the classic plight of the small business owner. Sales are down and customers no longer show up like they used to (probably unrelated to this whole File Island calamity).
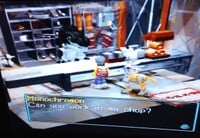
Desperate, he asks you to work in the shop, realizing that only the expertise of a ten-year old with zero sales training is the only thing that can save his once-proud business. He even offers to compensate you for your time! Agreeing to work in the shop sets off the worst thing in the game!
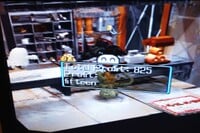
So at its core, this is a simple shopkeeping minigame. You work for eight in-game hours, and a maximum of twenty customers will enter, each asking for a specific item. Your job is not only to make the sale, but to also try and upsell the customer as much as possible by offering higher prices. But one thing that is weird about the system is that you don't actually set the price. Instead, you click on "raise price" and it generates a price, always in figures of ten. The way you judge if a customer is willing to to pay that price is through the thought bubbles that appear above their head. The happier the thought bubble, the better chance they'll pay the price. There are four types of thought bubbles:
- An ecstatic face, which you get from either offering at the base price or if you lower the price.
- A slight smile appears if you raise the price, and it meant to convey to the player what kind of price increases are most likely to work.
- A sad face, which is supposed to convey that the raised price you've picked is too high for the Digimon.
- An angry face, which only appears if you try and offer the item at its maximum price.
So, for example, the max price you can charge for a Medicine is 1,500 bits. If you try and charge that, the Digimon will always have an angry face, but be warned, and this is my least favorite part of the minigame, just because a Digimon has a really happy face that does not mean they will pay the price. There is still a chance, no matter what face you see, that they'll get really angry and storm out! And if a customer storms out, you not only lose that customer, but the game skips the next potential customer. The goal is to make 3,072 bits worth of profit (profit is a portion of the sale, not the full sale), and the three items Monochromon sells are:
Meat - 50 bits: This is the cheapest item in the shop. I'd recommend not trying to upsell these at all; just get the meat customers out of there as easily as possible. The margins on Meat aren't very high, so even at a big price increase you're only looking at a maybe 20 bit profit. So it's not worth it to haggle over Meat when that could cause a customer to storm out, costing you the next customer for such a small gain.
Portable Potty - 300 bits: This is the medium-priced item in the shop. This one is going to be a little more worthwhile to try and raise the price on. Because of its higher price, you can actually make a decent little profit on it. So this one is a little bit more customer specific, because each Digimon type has its own personality (and we'll get into that). But as a rule of thumb, the two best Digimon to raise the price on are Goburimon and Gotsumon.
Medicine - 1000 bits: Here we have the most expensive item in the shop and the one that's really going to determine whether you make the goal or not. This is the one that's most worth haggling over, because this one's margins are going to determine if you make the goal or not. You're going to want to try and sell this in the 1,100 to 1,200 hundred bit range. But if the thought bubbles aren't working out on any Digimon that's not Goburimon, don't be afraid to sell it at regular price. Medicine has high enough margins to where that'll be fine!
The shop has four different types of customers, each with their own personalities. Those customers are:
Weedmon: The absolute worst of all the customers, Weedmon are cheapskate little bargain hunters who mostly ask for Meat. Weedmon are the most belligerent of any customer and have the highest chance of storming out over a higher price. My tip for them is, if they ask for a Portable Potty, if you can sell it at sticker price, do that, but, if not, lower it. And if they ask for Meta, lower that price, because it's just not worth the chance of losing the next customer, who could be asking for something higher-priced like Medicine.
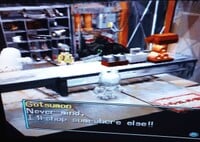
Gostumon: These little rock guys are probably the second-best customer. These guys typically respond well to slight price increases, and they hardly ever storm out on the first price, so you can usually make a pretty decent increased profit with these guys. Also, they're always willing to, at worst, pay sticker price, so you never have to worry about selling things at a loss with them. I have noticed something kind of weird with them, and I'm not sure if this is actually a thing or I was just getting lucky, but, on Portable Potties, it seemed kind of random whether they'd storm out of not. On Medicine, by contrast, I found that they seemed to always be willing to pay at least 1,200 bits for the Medicine, so use that as your baseline.
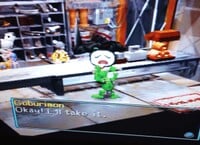
Goburimon: God's angels! Don't let their thug-like look fool you, these guys are by far the best customers! Goburimon will basically pay anything! As long as their faces aren't completely enraged, they'll pay it. With Goburimon, you always wanna raise to the second-highest price available. Because, while it is possible that they could storm out on a frowning face, in my experience, even if they initially balk at the price, they will almost always end up paying. 90% of the time, they will only storm out if they have an angry face above the price (highest price). So, for instance, if they're trying to buy Medicine, you can always sell them it at 1,400 bits, but they'll always walk out at 1,500.
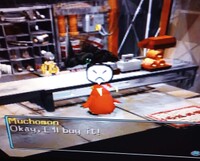
Muchomon: The rarest of all the customers, these guys are total wildcards! Typically, when they enter, they're trying to buy Medicine ,the big ticket item, but they can also attempt to buy Meat or Portable Potties. Muchomon have a very strange mechanic. They tend to walk out on slight price raises, and, as well, walk out on even the initial price. But, to compensate for that, they have the highest chance to purchase at maximum price. So they're kind of like Weedmon in the sense that, if they ask for Portable Pottyies or Meat, it's best just to get rid of them and not risk them leaving, but, if they ask for Medcine, it's best to push your luck and see if you can sell it in that 1,400 to 1,500 bit range.
So you might be saying "this doesn't sound so bad". You might be asking why I think it's the worst thing in videogame history. Well, you see, as neat as it sounds on paper, literally none of its systems work! The whole thing is supposed to be about haggling and finding the right price. That is supposed to be conveyed through the thought bubbles, right? Well, here's the thing! Those thought bubbles literally mean nothing! Like, take a Weedmon, for example. Offering them Meat at the base price will produce the happiest possible thought bubble, and you still have a better-than-not chance that they will just storm out or reject it. Or take the example I had on my many, many, many different runs trying to beat this piece of shit. I'd hit raise price, I'd get a smiley face and I'd go "oh, cool, that's an acceptable price."
I would then hit "offer" at that price, and the Digimon would go "FUCK YOU! FUCK YOUR STORE! I'M OUT OF HERE!" and leave. This cost me a run, because my second-to last-Digimon, a Muchomon, stormed out, with the game giving me no indication that would happen. So the information that the game conveys (that's supposed to determine what you do!) doesn't mean anything! Not only that, but it's random every time. What Digimon show up, what they'll ask for, how many of each, it's all random every time, so there's no actual strategy you can use! It's completely RNG-based, except the game insults you with mechanics that quite simply don't work.
Also, the goal of 3,072 bits is a super tight window. You basically have to sell every item at a raised profit and hope you get enough Medicine sales to get you by. Like, if you lose a customer, you might as well reset unless you can convince a Goburimon to buy a Medicine at a super high price. It's not worth it to just play it out if you can't win, because this takes eight in-game hours, so you're basically going to use up a full in-game day on this fucking piece of shit minigame. And, again, you're not guaranteed to even get the items that would make it possible to win. Like, I had a run where, at the halfway point, I had over 1,900 bits, having gotten three Medicine sales on the first half. In the second half, I got one Medicine, two Portable Potties, and seven Meat. And the customer I got the most was Weedmon, so my run was just completely screwed!
The big problem with this is that it's so heavily based on RNG. Like, you can understand the character profiles of the customer Digimon, but that doesn't matter at all if you aren't getting the items you need to succeed. On my successful run, I got two different Medicine requests from Weedmon, which is awful, because that means I'm going to sell my big ticket item at a smaller profit because I'm terrified of them walking out.
The only reason I won was that, in the first half, I got two Medicine requests from Goburimon, so I was already at 2,300 bits before even starting the second half. I think a lot of the problems would be mitigated if, like, the Digimon couldn't walk out on the first offer with a smiley face thought balloon, because that just makes it totally unfair, because how's the player supposed to know they'd storm out if the game is telling them that the offer is reasonable? I just think there's such a knowledge barrier, because, like outside of the Muchomons, I knew the characteristics of every customer Digimon coming into this, and it still took me over two hours to beat it. And remember, Digimon World doesn't have free saving, and each attempt takes eight in-game hours. So rather than waste eight in-game hours, I would simply reset the game, which means that every time I rebooted, I had to make my way back to the shop to do the minigame. Also, and this is just because of my copy, but it takes between 2-4 resets to even get the game to run, because copies of Digimon World are made from sticks and discarded napkins. Also, I'm a seasoned Digimon World player. I've done this awful minigame a bunch of times, so I understood at least the bare minimum of the customer characteristics. But the game tells you none of this! You just kind of have to figure it out on your own, and, to be honest, beating it even with this knowledge is really luck-based. There's no strategy; the only strategy is "hope you get a lot of Medicine-wanting Goburimon and very few Meat-wanting Weedmon". But, when you finally meet the goal of 3,072 bits, Monochromon reveals that this was all a test of character, and now that you've passed, he's closing up shop and moving to File City! Interesting note, you can return to the shop building anytime you want, but there won't be anything in there!
Purpose in City Monochromon brings his years of retail experience to the Item Shop. Using his vast connections in the world of supply chains, he's able to snap shipments of Restores, which revive your Digimon if they lose all their health in battle. It's probably the best of the shopkeep-exclusive items ,which is good because he was a pain in the ass to get!
A Strange Commotion in the Area Between Time
For our next objective, we are going to return to the Amida Forest from issue 192. Once we get there, we're just going to keep going up until we enter the Ancient Dino Region, a vast region only unlocked after recruiting Centarumon.
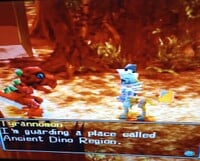
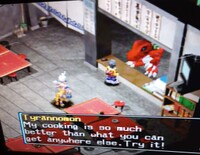
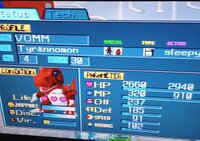
After only a few steps in this strange new region, we are confronted by its "guardian," Tyrannomon. Despite us giving him our totally legitimate hero credentials, he refuses to believe us and tells us to get lost. Now, obviously, we're not gonna take that from some dinosaur, so it's throwdown time, baby! Tyrannomon is no joke, with three damaging moves, a stat-boosting move, and 3,100 HP. His most powerful move is Buster Drive, but that moves does tend to miss quite a bit. Watch out anyways, because it can paralyze if it hits. Tremor spreads rocks throughout the arena, doing okay damage. Megaton Punch is just an okay attack but nothing to worried about. Finally, he has Warcry, which boosts all of his stats, and he tends to spam that move quite a bit. If you aren't prepared, this can be quite the tough fight, but with a decent Champion and some healing items, you should be able to defeat him. Once defeated, he drops a sweet, sweet HP chip and pays you 2,500 bits!
After being defeated, Tyrannomon finally accepts that you're the great hero destined to save the island! He says he only attacked you because he got excited because he just started his job as the guardian of the Ancient Dino Region. The Ancient Dino Region is an interesting area that's split into two sections. The first, the one we're at right now, is the Glacial Time Zone, where time flows at half speed. The other is the Speedy Time Zone, where time flows at double speed! The Speedy Time Zone is bigger than the Glacial Time Zone and, because of the double speed factor, it's much more dangerous, with Digmon just dropping like flies! After telling us all this, Tyrannomon runs off, telling us that he won't let us into the Speedy Time Zone even though he lost, and telling us to ask the residents of the Glacial Time Zone if we have any questions.
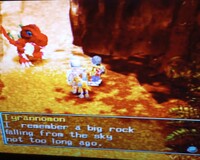
Now, naturally, we aren't going to listen to a goddamn Tyrannomon, so we chase him down to the gates (so to speak) of the Speedy Time Zone and we're like "listen here! I'm a hero! I'm gonna save this island! Get outta my way!" Still being belligerent, Tyrannamon is like "what's that got to do with me and this region? I don't know about island danger," before being like "oh, except for that this big rock that fell from the sky into the Speedy Time Zone."
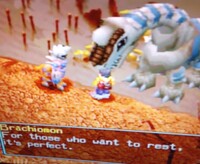
Then we're like "Big space rock!? That sounds mysterious! let us pass!" and, finally, Tyrannomon is like "fine, whatever, try not to die or something" and he lets us pass to find this mysterious space rock! So, before we get into the Speedy Time Zone, I have to say that I really like the concept of the Glacial Time Zone. It's only three screens long and the second screen does have enemies to fight/avoid, but the third screen is just full of chill old NPCs living their best life. There's a Brachiomon who fully explains the region's mechanics and tells you that it's perfect for Digimon like him that want to rest. There's a Saberdramon (basically a palette-swapped Birdramon), and, if you talk to him, he tells you about different regions he's seen in the sky, which is pretty cool.
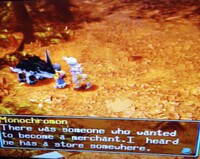
But my favorite is probably the Monochromon, who tells you that there was once somebody here that wanted to be a merchant and that he has a store somewhere. That's such a cool little hint to be on the lookout for a Digimon running a store in the wild, AKA the other Monochromon who we just recruited!
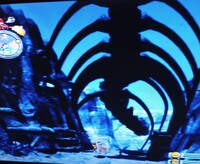
Conversely, I don't really like the Ancient Speedy Region, because it's just kind of annoying. Like, you only get your Digimon for so long, and now you're in a region that speeds up death. And it's not like the Ancient Glacial Region and the Ancient Speedy Region balance out to where you're not actually losing time. The Ancient Speedy Region is bigger, so you're guaranteed to lose more time than you'd gain. Also as cool of a concept as I find the Ancient Glacial Region, there really isn't anything to do. There's no training you can do there and, other than fighting those two enemies to farm victories, there really isn't any point to go back there once you've finished this quest. It's a shame, because I really like that as, like, a location concept! Now, then, the Ancient Speedy Region, unlike the Ancient Glacial Region, is full of enemies, probably because they're slowly going insane because of the effects of time moving so fast. You don't want to spend too much time in this region, but, luckily, I'm here to help! So start by heading to the top left, avoiding any enemies, and enter into what looks like a bone tunnel. Once you're inside the bone, you have two options. The first option is the Digimon World-approved fun way, where you go all the way down the tunnel and, in the next room, there's a Saberdramon just chilling out. Beat her up and she'll reveal the existence of a hidden passage in the bone tunnel. But I don't have time for riddles, so we're going to do it the real way. That's where we just instinctively hug the left side of the wall as we go until we find the hidden passage easily!
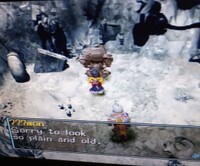
This will take you to the next area, where there will be two roaming enemies that you'll either want to avoid or defeat (I prefer to avoid unnecessary combat, personally). From there, you'll go top right, which will take you to the final room, where a rock-like Digimon is at the top of it. Clicking on it, you'll declare that it looks like a regular meteorite. You then have the option to either crack it open or leave it alone.
Obviously, as great heroes, we're going to crack this open! After this, you still think it looks old and plain. This offends the meteorite (whose name is the very clever Meteormon), and then this causes an argument which naturally spirals into Meteromon telling us to throw down!
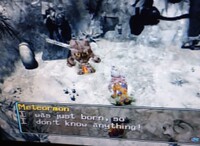
An Ultimate level Digimon, Meterormon is very fairly strong. Having 3,700 HP as well as the moves Meltdown, Magma Bomb, Megaton Punch and Tremar, he presents a real threat This can be a difficult fight if you're not prepared, but, once again, a good Champion Digimon should be all you need defeat him. After you defeat him, he reveals that he has no knowledge of what's happening to the island... Turns out, uh, he was just born, so he, in fact, has nothing to do with anything.
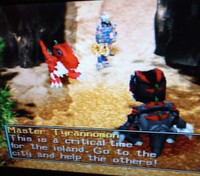
Yeah, as it turns out, he's from the meteor tribe, and, when they fall to the planet, they're supposed to sleep for a long time, but we kind of woke him up early... oops. So this seems like a big waste of time, right? After all, we sacrificed precious time with our Digimon on a false lead. The answer is "yes, but no," because, while we didn't find any leads on the island's danger, when we return to the Ancient Glacial Region and report back to Tyrannomon, we meet his master, the creatively-named Master Tyrannomon (original DigiOC, do not steal). And it turns out Master Tyrannomon is a jerk! He just shows up and starts yelling at poor Tyrannomon, who is, again, doing his job guarding the Ancient Speedy Region.
But Master Tyrannomon tells him to stop guarding the entrance to the Ancient Speedy Region and to instead go to File City and help the others. He tells him that he, Master Tyrannomon, will watch the entrance. Now, why Master Tyrannomon isn't going to the city is never explained, but who are we to argue with a new File City recruit?
Purpose in City Tyrannomon uses his experience guarding the Ancient Speedy Region from those who wish to do it harm by... working in the restaurant as a cook! Tyrannamon serves three dishes, those being:
- Dragon Noodle (400 bits): Eating these spicy noodles raises your Digimon's Defense and Speed. It also raises Happiness and reduces Tiredness.
- Zaurus Pizza (1,000 bits): This age-old recipe from the Ancient Dino Region raises Defense and Speed while also increasing Happiness and reducing Tiredness.
- J. Burger (2,500 bits): Eating this giant five-pound, deluxe woolly mammoth burger raises Defense and Speed, while at the same time bringing Happiness up, bringing Discipline up, and reducing Tiredness.
Now, before we close the book on the Ancient Speedy Region, there's one last thing of interest there. Luckily, Master Tyrannomon tells us we can enter the death zone whenever we want. So what we're going to do is make our way back to the area where Meteromon was.
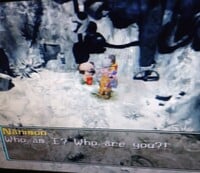
Now if we enter there, there's a new Digimon making it his home. We ask him who he is and he responds with questions of his own before running off and dropping something very important. He drops the Dimensional Key Chain, which now gives us the ability to hold 20 items. With that, we can leave the Ancient Dino Region for good, but, you know, as we leave, I can't help but think that mysterious Digimon will play a role in the File City Files to come...
Digivolution Items are Stupid and Bad
If you remember back in Issue 189 (the one where we covered Digivolution), I briefly mentioned the existence of Digivolution items, but said that those were for a different day. Well today's the day! It's time we talk about one of the biggest wasted concepts in the whole game, Digivolution items. So, at their core, Digivolution items are pretty simple. Every Champion and Ultimate Digivolution has an item associated with them. If you have one of them and feed it to a Digimon that's one stage below them, your Digimon will then Digivolve into that Digimon. So, to give an example, if you feed a Penguinmon a Scissor Jaws, it would Digivolve into a Kuwagamon even though Penguinmon cannot Digivolve into a Kuwagamon naturally. So, basically, if you give a Rookie Digimon the Digivolution item of a Champion Digimon, it will become that Digimon. If you give that Champion one that correlates to an Ultimate, it will become an Ultimate. The Digimon must always be one stage below said Digimon, so if you give a Gabumon the Golden Banana and transform it into a Etemon, doing that will just waste your item. In essence, Digivolution items are just ways to ensure you get the Digimon you want no matter what.
So you're probably thinking these sound pretty good. After all, the actual process of understanding how Digivolution works is a nightmare. So what's wrong with taking a little shortcut? Well, here's the thing. Digivolutions gained via Digivolution items don't gain stat boosts or lifespan boosts. So using them just gets you a worse Champion or Ultimate than if you'd have just trained naturally! Basically, they're worthless in every respect other than, yes, it does allow you to get the Digimon you want (if you have the item) and allows you to bypass that awful Digivolution system. But, like, outside of having a specific item for a Digimon you really like, there's no reason to use these because you're just making weaker Digimon.
It's especially bad for the ones that turn you into Ultimates, because you're going to have a super weak Ultimate that will die at the same time it would have died if it was a Champion. So you're not getting any gain from this. The wild thing is that it's not like these items are common or you can just buy them with Bits. No, almost all of them are rewards from things like Arena Tournaments, or winning curling matches with Penguinmon, or trading in cards for points at the Volume Villa. So they're rewards for things that are hard to do. Getting a Digivolution item is supposed to be this cool moment where, suddenly, through your own efforts, you've been granted this awesome power, but it just falls flat once you realize you're quite literally worse off than if you had trained naturally. The Champion ones can be alright if you had a bunch of stat-boosting items, because then you're really just getting a shortcut for a Digimon you really want, but the Ultimate ones are complete garbage because you'll never get the benefits of that Ultimate, and Ultimate Digivolution items are the rarest kind! So you get this item and you're thinking "wow, a free Ultimate," because, remember ,it's hard to get Ultimates in this game, especially if you're - god forbid - not an expert on Digimon World. So you use one and then, bam, you have a worthless Ultimate. It's baffling to me that this is how they did it, because they took something that should be this really cool reward and made it worthless. Now there is technically one exception to this rule. The first is the Munzemon costume in Toy Town, and we'll go over that in a later issue. That is the only Digivolution item that is actually helpful to player. The rest, especially in the Ultimate category, are worthless because all they do is give you a worse version of the next stage of Digimon.
With that, we bring the worst parts of Digimon World to a close. Join us next time in File City Files, where we hopefully cover some better stuff.
Getting that Payday
Hello everyone, and welcome to Getting That Payday, the Payday 2 strategy guide... for the last time. Why? Because next time it'll be October, and we'll be deep into Payday 3! Now, what could possibly be important enough to be the final article about the game? Masks! More specifically, mask customization! What do masks do? They look cool on your face and only other players can see them except for like two seconds while putting it on! Their designs can range from looking cool to adding to the amount of felonies that the Payday Gang have committed, so truly, the art of a mask maker is a noble one. Without further ado, let's go ahead and get started on this lesson of mask making etiquette.
First Impressions
Payday? I Like Money
That's good, because in this game, you'll get millions upon millions of dollars via tons of crime. As a heister in this co-op horde shooter, there will be a couple hundred cops headed your way whenever you decide that the monthly income of a random bank should drop into the negatives. To help in this endeavor, you'll have plenty of guns, tools, and skills to aid you on your journey to become the world's richest man through the least legal means.
First off, we need a base mask. Payday 2 has a large variety of default masks that are, on their own, plenty usable. Of course, we're here to make something unique, so these are just the general shape of the mask. As far as choices, we have... Uh, 424 masks? So a few. Take your choice. We've got an anime girl, pig girl, police helmet, the one that will have everyone think you're a Cloaker, a solid dozen varieties of skulls, really anything you can think of! Even redo any default mask with your own changes! Put a British flag on Dallas' mask and make him London! How would you do that, though? Well...
We have three things to customize on each mask. The material is the easiest, as it's simply the basic color and texture of the mask. Don't let the simplicity fool you, though. The material is sometimes the most important part. Then there's the interesting stuff. You can pick a pattern to put on your mask which ends up as the main part, since it's what gives contrast to the default mask and the material you put on it. Along with that, you get a primary and secondary color, letting the pattern blend in better with the rest of the mask, or pop out as something interesting. Simple enough, right? Of course, with hundreds of patterns, colours, and materials, there's no shortage of choices when making your new face.
Finally, you should know how to obtain mask materials. The main way is getting the semi-titular Offshore Payday. Here, you're shown three random cards and have to pick one. Each one has a solid chance to be a mask component of some kind, however, they're random. You get Offshore Paydays through completing heists, or by spending money from your Offshore account, the place where 80% of your heist money goes to keep suspicion off you, where you can optionally secure certain cards to be a certain kind of loot, up to guaranteeing you get a mask piece. For a more controlled way, some achievements give masks customization on unlock, and you can see which ones do on the in-game achievement menu. Basically, either grind or gamble your way to stardom. Payday 2 mask creation - my favorite gacha game! Don't worry, you start with enough basic materials that it's not too hard to create something even when you open the game for the first time.
Now, as an example of the nightmares you can make, let's go with a mask from my own collection, the Sans Undertale. Yep, that is a mask that I made and I use. We use the Death mask as a base, providing a nice, boney start. Then, a solid white material, anything from High School Teacher Chalk to The Moon Is Actually Made Of Parmesan will work here*. Then, for the pattern, you'll want the Pumpkin Grin or Howl, but there are probably plenty of other ones that work just as well, if not better. Make the primary colour the same or at least close to the original colour, with some kind of blue as the secondary. If all is well, then you, too, can cosplay as Sans and become the Funny Guy (TM).
(*Note: Neither of these are actual colours, sadly.)
With that, you can now make a face that everyone will soon fear. Oh, and congratulations, everyone, you have officially passed Heisting 101. You are now all qualified to rob banks and casinos to your heart's desire... Or, you can come back here on October 14th in The 'Shroom issue 199 to enroll in Heisting 102, as Payday 3 is a whole different beast entirely. Trust me, judging from the beta, only the core mechanics carry from 2 to 3. Also mask customization, meaning that this guide isn't outdated in a month! So, have a good day, and I'll see you soon. Until then, this has been professional heister Kinger, signing off.
Shine Get
Written by: Waluigi Time (talk)
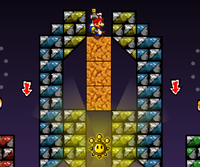
Hello there, 'Shroom readers! Welcome back to more Super Mario 63 adventures in Shine Get. This is going to be a shorter issue than usual, tackling some stuff around the castle that opened up last time, including Secret Courses!
Before doing anything else, I want to make a brief stop in the Level Designer room that got unlocked last time, because there's one thing to do in here for now - besides talk to a Toad who gets a paper cut when I talk to him. I triple jump off of the platform below the Level Designer paintings, reaching a secret hallway behind the wall! Following it to the other end nets me another Star Coin. Yep, there's Star Coins in the Castle.
Next, I head to one of the doors on the right side of the main hall. In here is a Toad who asks if we've been to the Tidal Isles, and no, we haven't, but the painting is in here! You may be wondering what the Tidal Isles are, and uh, I guess it's this game's version of Sunshine Isles from the DS remake? Also, there's a "secret" passageway to the right with a 1-Up in it.
Secret Course: The Tidal Isles
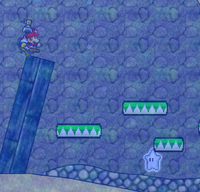
This is probably the most poorly hidden secret of all time, but it's still apparently secret nonetheless. Waves periodically sweep from the right side of the screen to the left in this level, which can push you back a bit, but they're not too bad. The strategy when you get caught in these is just press right. Not too difficult, right? The goal here is collecting five Silver Stars, and the first one is just right there out in the open. There's a pool of water nearby, and I sink to the bottom and go to the left for the second Silver Star. Also, the tide has no effect while you're underwater, so that's nice. There's some cliffs after this with platforms to get to the top, where the third Silver Star awaits, along with a F.L.U.D.D. Hover Nozzle.
Nearby is another underwater section, with a couple things of note. To the bottom left is, importantly, the fourth Silver Star! There's some platforms above and below it that will quickly go to the right if you land on them to get in your way, but it's a pretty easy swim through the middle. Nearby, there's also a somewhat tricky Star Coin nestled underneath another one of those platforms. This one goes up, and you have to step on it to move it out of the way and reach the Star Coin. It will soon respawn though, so the key is to get off as quickly and get underneath it before it respawns to grab the Star Coin. I was able to do this without too much trouble either. Finally, to the right is the fifth Silver Star, with, you guessed it, more platforms trying to ruin your day. There's ones that go up when you step on them and another quickly going around in a circle. Just have to navigate around those, and all five Silver Stars are collected!
...And now I have to go all the way back to the beginning of the level for the Shine Sprite. ALL THE WAY BACK! Runouw's lucky that movement is fun and quick in this game.
Secret Course: The Secret of the Mushroom
The next secret course is better hidden, so kudos. In the main hall, I jump on top of the highest middle doorway and press up. This reveals a 1-Up Mushroom on the wall that Mario jumps right into! Based on the method for getting in, I would guess that this is the counterpart to the Tower of the Wing Cap. Thankfully, no Wing Caps are involved.
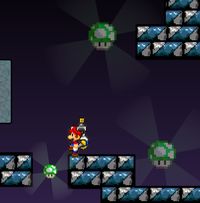
This level is instead a platforming challenge filled with 1-Up Mushrooms, as a nearby sign says. It also says "Pokeshroom! Gotta Catch 'Em All! Pokeshroom!" which just feels very of the era for some reason. There's no reward for getting all the 1-Ups besides the 1-Ups themselves, you don't need them to get the Shine Sprite or anything. The level makes use of branching paths and throws all the stops at you, including seesaws, rotating blocks, and of course, enemies. Luckily, the Hover Nozzle is provided immediately. I'm not going to go into super crazy detail about the whole thing, it's just fairly standard platforming after all and I don't really want to make this section overly long and boring. Go down paths, platform, find 1-Ups and blue coins, easy!
At one point, I arrive at a crossroads with two signs noting hard and easy paths. Well, I'm not going to shy away from a challenge, so I go left onto the hard path. All the way at the end is a spinning platform with a Star Coin on it, so I grab that and hover back, then continue upwards. Some more platforming and I find the Shine Sprite! ...Then I ignore it and jump back down to do the easy path. You have to do both to see what's on them, of course! The easy path doesn't have anything significant besides a 1-Up, and I arrive back at the Shine Sprite following more platforming. Unless you want to "catch 'em all" you don't need to do the easy path at all for completion. The hard path is also not very hard, really, so just do that! I ground pound through some crates and get the Shine Sprite. Wahoo!
Back at the castle, I receive a message that I can open another door now that I have eight Shine Sprites, and it just might lead to Bowser. So I'll tackle that... Several next times from now, because I'm stubborn!
For now, that's two of three Secret Stars in Group A collected. I don't think the third one is accessible right now, but also, I can't even remember what it is off the top of my head, so... I'm just going to say it's not, we'll get there when we get there! Next time I'll be going through one of the main levels again, so expect a beefier issue. Just remember to bring your winter coat. See you then!
The Anatomy of a Pikmin
Hello and welcome back to The Anatomy of a Pikmin, a 'Shroom section dedicated to covering those beloved little worker plants, the Pikmin. Last month, we looked at the unfortunate rise and fall of the first-ever discovered Pikmin, the Red Pikmin. This month, we're going to take a look at the second-ever discovered Pikmin, the high-flying Swiss army knife of the Pikmin series, the Yellow Pikmin.
Yellow Pikmin make their debut in Pikmin, where they are found in the second area, The Forest of Hope. Yellow Pikmin stand out not just because of their yellow coloring, but also because of their distinct large ears. The only Pikmin type to have ears, their large floppy ears give Yellow Pikmin greater aerodynamics, allowing them to be thrown higher than any other Pikmin. This ability to be thrown higher is the Yellow Pikmin's trademark ability. It's the one they're most known for and the one that appears in every game. But like I said in the intro, Yellow Pikmin are kind of the Swiss army knife of the Pikmin. What I mean by that is, perhaps more than any other Pikmin, Yellows consistently get new abilities or have their powers changed in some way.
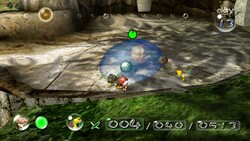
Unlike Red Pikmin, who are immune to fire, or Blue Pikmin, who can swim in water, Yellow Pikmin do not have a unique elemental resistance in Pikmin. Instead, Yellow Pikmin have the exclusive power to throw the explosive bomb rocks. Bomb rocks are the only way to destroy the large stone walls which come in three varieties. White walls require three bomb rocks to blow up. Grey walls require six to blow up. Finally, black walls require nine to blow up. Bomb Rocks can also be used to damage or even kill enemies, and are very useful against the dreaded Emperor Bulblax, who can be tricked into eating one, both damaging him and stunning him.
Despite having the highest throw height and the ability to throw the powerful Bomb Rocks, I actually think Yellow Pikmin are the worst Pikmin in the first Pikmin. They aren't necessarily bad; they're just highly situational. Let's start with their signature power, the high throw. Out of thirty parts, it's only needed to obtain three of them, those being the Libra, the Chronos Reactor, and the UV Lamp. The last of which isn't even needed to beat the game! That's not to say the high throw is worthless, because it's not, and there are two bosses that it is almost needed for. The first is the Beady Long Legs. Yellow Pikmin are perfect against this strange spider because, if you stand under it and throw yellows at them while it stomps around, they'll always land on its... head? I think it's a head? Whatever it is, it's easier for yellows to reach, where reds and blues can only hit it when it comes down a little bit. The other boss that yellows help with is the Burrowing Snagret, where yellows can be better against but they aren't required. Burrowing Snagrets are long birds that burrow underground. Because of how tall they are, only yellows can be really safely thrown at them. But they also have animation where they are burrowing out of the ground, and, when they're doing that, you can swarm them with any Pikmin. So you can see how yellows are useful against them but, unlike the Beady Long Legs, they aren't exactly required.
Let's talk about their other power, the ability to throw Bomb Rocks. I don't like this power! The first benefit of this power is that it can destroy stone walls. Yes, that is a fine bit of utility, but it's kind of boring and it really means you only need to bring as many yellows as there are stone gates. As for the combat effectiveness of Bomb Rocks? Well, they're very finicky because yellows don't just throw them a lot of times; instead, they try to get in position and then throw them. This can cause them to throw them late and end up killing your own Pikmin or end with them being open to attack. In addition, in the original Gamecube version and the later Wii port of Pikmin, it was very easy for your yellows to accidentally drop the Bomb Rocks in a group of Pikmin, causing it to explode, killing your Pikmin. This is fixed in the Switch port, but in a way that make Bomb Rocks more annoying to use. Now, when you throw them and you try to recall them, they come back to the group instead of dropping their Bomb Rocks, making it very hard to stack Bomb Rocks on top of each other to destroy gates quickly. So because the high throw isn't really used a whole lot and the Bomb Rocks are kind of finicky and boring, I think it's fair to say yellows are, sadly, the least useful of the original three Pikmin types.
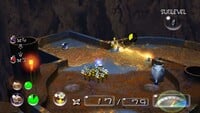
Pikmin 2 would turn out to be a boon for Yellow Pikmin. But first, some bad news... if you want to call it that. Yellow Pikmin can no longer lift Bomb Rocks because Bomb Rocks are no longer in the game outside of being a hazard in some levels. While I guess you could say it's sad to lose such any ability, the ability they get to compensate is way better! Yellow Pikmin finally get an elemental hazard! They are now immune to electricity and, in fact, have electricity flowing through their veins! Now, on its surface, this doesn't seem that impressive. After all, every Pikmin type outside of Purple Pikmin and Bulbmin get their own hazard that they can deal with. But there is a difference. Those hazards are not one-hit kills! You can easily put those other hazards out with your whistle. Then, while yes, no Pikmin other than blues can travel in water, if a non-blue Pikmin falls in water, it's not a one-hit kill either. You can still save them with your whistle. Electricity, on the other hand, is a one-hit kill. If any Pikmin other than Yellow Pikmin touch electricity, they die!
Because of this, Yellow Pikmin are easily the second best Pikmin in the game. There's a hazard that only they can deal with. It's a pretty common hazard, too. There are electrical gates, electrical wires, and an enemy that produces electrical shocks when two meet, the Anode Beetle. All of these things can only safely dealt with by Yellow Pikmin.
On the subject of the electrical gates and electrical wires, yes, it's true only White Pikmin can destroy the poison gas pipes, the difference is that if a non-white Pikmin touches poison, it scatters, and if a non-yellow Pikmin touches electricity, it dies! You get the picture by now, right? This mean that if something involves electricity at all, you have to have your yellows deal with it in order to make sure nothing gets caught in the crossfire. Because of how powerful electricity is, even something like the final boss, the Titan Dweevil, becomes child's play with Yellows. You see, the Titan Dweevil has one treasure that correlates to every hazard, so your best best is to use yellows until you knock off the electricity-firing Shock Therapist. Until you do that, you'll always be at risk of it instakilling your non-yellows.
The electrical stuff alone is enough to make Yellow Pikmin, at worst, the third-best Pikmin in the game. You could still argue Blue Pikmin get second since there are landmasses only they can traverse, but yellows still have their high throw, which gets a bit more use since there are more treasures and a ton of caves. There are just more places for it to be used. In addition, all the enemies the high throw was good against in the first game, from the flying Shearwigs to the Beady Long Legs, are back. There are also a couple more enemies introduced in this game that yellows useful against. First, you've got electric enemies like the Anode Beetle and the Anode Dweevil, but you've also got a new enemy, the captain-stealing Bumbling Snitchbug, that Yellows are good against because their high throw makes it easier to hit the flying bugs. They're also best choice against the new version of the Snagret, the Pileated Snagret, because, again, this new roaming Snagret is only weak on its head, and so the high-flying yellows are your best bet. While purples can do more damage, it's easier to land hits with yellows.
In Pikmin 3, yellows would get a symbolic boost by technically being the first type of Pikmin to be discovered, first found by Charlie and briefly usable in the prologue. Unfortunately for yellows, this would be their high point, because Pikmin 3 would not prove to be as good for them as Pikmin 2 was. For starters, a new type of Pikmin, the Winged Pikmin, make their debut on the scene. These little flying guys steal some of the thunder from yellows, because there are now scenarios where fruit that only yellows could have reached can now be grabbed by Winged Pikmin, their AI letting them fly up and get it. In addition, Bomb Rocks return as a grabbable item in Pikmin 3, but now they can be grabbed by all the Pikmin, not just yellows. The Beady Long Legs battles that Yellows used to excel at have also been changed. In the past, Pikmin thrown off the Beady Long Legs would simply ineffectively attack its feet if not recalled. Well, now they instead climb the spider's legs, where, if they aren't shaken off, they will reach the spider's head and start attacking it. In fact, all of the Beady Long Legs in this game have hair now, as well as joints on their legs that have to be destroyed before the head is vulnerable. Because of this, yellows, though still good for the Beady Long Legs once they've been shaved, are no longer as required as they were in previous games.
But all of that pales in comparison to the real reason yellows take a step back. Electricity no longer one-hit kills other Pikmin. It now just stuns them! See, I think the fact that electricity killed Pikmin in one-hit was always more of an oversight than an intended feature, and it does make sense that it was removed. Yellow Pikmin are still required to do things such as destroying electrical gates and taking down enemies like Bearded Amprat, but, unlike in Pikmin 2, merely coming into contact with electricity will not kill Pikmin. Instead, it stuns them and they can be saved through the whistle, making electricity more like other elemental hazards.
It's not all doom and gloom, though, because they do get a few new abilities to make up a little bit for what was taken from them. First, they are now the fastest diggers in the game thanks to their long ears being used as shovels. Whenever you find something buried, yellows are going to be the best thing to use, because they'll dig it up the fastest. But the more important power comes from the fact that the game now does something with the fact that yellows canonically conduct electricity. Certain levels have incomplete circuits that generate electricity, and yellows can be used to complete these circuits!
These completed circuits oftentimes causes Bloominous Stemples to bloom, which serve as platforms giving you access to new areas in levels. Doing this also causes your Pikmin to bloom into their flowered form thanks to the electrical current running through them. This power is also required against a boss, the Vehemoth Phosbat, who hates light and gets weakened when the light from circuits shines in a room. One boss the yellows used to excel against, the Burrowing Snagret, they're no longer needed for, because the Burrowing Snagret can't eat Winged Pikmin, so you just need to use them instead. Because of this, Yellows are used more for puzzle solving in this game, a lot like they were in Pikmin, where they were mostly needed to destroy stone gates. This game even manages to have an interesting puzzle based around their high throw ability, with a series of elevator platforms in the Garden of Hope that Yellows have the easiest time reaching. Yet, I think even with the electricity nerf, Pikmin 3 treats yellows better than Pikmin when it comes to puzzle solving. The circuits and high throw puzzles are more interesting puzzle-solving powers because they open up levels in a more creative way, and they use powers that are at least logically exclusive to yellows, unlike the Bomb Rocks which always felt arbitrarily locked to yellows.
Unfortunately, it only gets worse for Yellow Pikmin in Pikmin 4 thanks to the new restriction of only having three Pikmin types out in the overworld at once. Now levels are built with the gimmicks of those specific Pikmin in mind, unlike the previous games, where levels often had puzzles or enemies based on all the types. Because of this, yellows feel like the least useful of all the types of Pikmin. This is because, with electricity being less potent than in Pikmin 2 and Bomb Rocks being items you can purchase with raw materials (and which you use with your captain, not the Pikmin), all that's really left for Yellow Pikmin is demolishing electrical gates. Even their faster digging ability is rendered less useful, because White Pikmin return and, with their infrared eyes, they have not only the fastest digging speed, but the fastest running speed to go along with it. Yellow Pikmin even lose powers because, unlike Pikmin 3, there are no puzzles that require connecting large groups of Yellow Pikmin together to light up areas.
Yellow Pikmin still have their high throw ability, but I would argue that, for combat purposes, it's been rendered worse than ever. You see, until Pikmin 3 Deluxe on the Switch, the Pikmin games always have had an interesting system for throwing Pikmin. You kind of just threw them at enemies, but there wasn't anything that locked you on. Instead, you had to hover cursors over the enemies. This could lead to mistake like throwing the Pikmin in the wrong spot. But this gave Yellow Pikmin an advantage. Because they could be thrown higher, they required less precise throwing. But Pikmin 4 has an auto lock-on system, so there's now no need to be precise, because the game locks on to the enemies (for better or for worse). This means Yellow Pikmin don't really get any extra benefit in combat unless you're facing something only they can reach. In the past, things like Shearwigs and Swooping Snitchbugs would be great for yellows to fight, because, when you're in that mad dash, throwing Pikmin wildly, their higher throws would give them better odds of hitting them, but that doesn't apply anymore because the game just locks on. There's not a whole lot of enemies that really need the high throw. There's only one boss that it really helps with, and that's the Baldy Long Legs.
Other than that, the yellows just don't have any extra combat benefit outside of the two or three enemies that use electricity. But you don't even really need them for that, because, unlike the poison or fire enemies, none of the electric enemies are permanently electrified, so you can take them out easily with other Pikmin types, especially if you just use the Oatchi charge on them.
The problem in Pikmin 4 is that yellows aren't really used in any creative ways. They basically have just two niches, being needed to reach high up objects and being used to destroy electric gates. Because of this, you never really need more than twenty-five yellows at any given time. Their lack of combat ability means that they just can't stand up in a fight, not in a game that has Purple, Rock, and Red Pikmin. Yellows have always suffered from a problem where they're a puzzle-oriented Pikmin type, but the puzzles they're involved in have never been great. As a result, they come off as one of the more boring types of Pikmin. Honestly, outside of Pikmin 2, where they were great because they had a hazard that they could destroy and that you had to use yellows against because anything else got instakilled, and Pikmin 3, where their powers were actually used for some at least interesting-in-appearance puzzles, they've just always been one of the least interesting types and one of the hardest to justify using in large quantities.
That's all for this month's Anatomy of a Pikmin. Join us next month when we finish the original trilogy of Pikmin types and look at the Blue Pikmin.
Koops, Your Emblem is on Fire
Man... we've come a ways. It's been like, what, two years since we started this? More? three years? I dunno. We'd be a ways into FE6 by now if my upload schedule was anything consistent, but it is what it is. *Checks content tab on YT* ALMOST FOUR YEARS?!?!
Karla
A dedicated swordfighter. Cool and detached.
Level 5 Swordmaster.
HP: 29 (60%)
Str: 14 (25%)
Skl: 21 (45%)
Spd: 18 (55%)
Luck: 16 (40%)
Def: 11 (10%)
Res: 12 (20%)
Con: 7
Move: 6
Weapon Ranks: A Swords
Karla! ...is arguably the worst unit in the game. Or second worst. Nino exists. I don't think I need to go into gruesome detail as to why. She joins two chapters before the end of the game, locked not only behind Hector Mode, but also behind training up Bartre (another bad unit) to level 5 after promotion, AND also specifically deploying him on this one specific OPTIONAL map. The surviving a round of combat part is, as I've demonstrated, not an issue at all provided Bartre has the Iron Rune on him, as there is no way in hell he's killing Karla by accident unless you're actively trying to do it. But be that as it may, it's still a very arbitrary and obscure requiring for a unit who isn't even good. Her stat line isn't bad, but not only is she a Swordmaster (sword-locked, foot unit, etc.), but even then, she is outclassed by her brother (Karel) who joins long before this. Unless you're really desperate for a second Wo Dao (which is a weapon exclusive to her class line anyway), she's really not worth all the effort. Unless you like her or something.
Which I do.
Renault
A cleric wandering Valor. Shrouded in mystery.
Level 16 Bishop.
HP: 43 (60%)
Str: 12 (40%)
Skl: 22 (30%)
Spd: 20 (35%)
Luck: 10 (15%)
Def: 15 (20%)
Res: 18 (40%)
Con: 9
Move: 6
Weapon Ranks: A Light, A Staves.
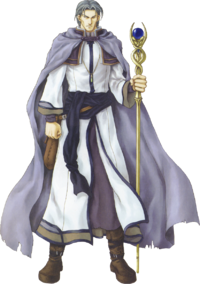
Ask anyone who's one of the weirdest characters/units in all the series and chances are a lot of them will respond with this guy, and for good reason. Renault is a pretty funny unit with the pretty funny distinction of having a really complicated backstory to piece together barely two maps before the end of the game, so you kinda NEED to get his supports every single opportunity you have. That said, we're not here to talk about his character, we're here to talk numbers. And talk numbers we shall.
Renault is a high level Bishop, and as you may have guessed, his best use is probably as a staff bot. And you wouldn't be wrong. A-rank staves at base means he can use literally all of them, since this game doesn't even have an S-rank staff. Unfortunately, we still are getting one even better staffer, so his Fortify might be delegated to someone else, but I digress. Stat-wise, he's super durable for a bishop. 43 HP and 15 defense is pretty damn good, and he also has 18 res to boot, making him a good mixed tank. He also sports high speed and skill stats, at 20 and 22 respectively. His only really mediocre stat is Magic, but even 12 magic can do a decent job when absolutely needed. He doesn't have much room to grow but he won't really need to grow much at all anyway. I suppose giving him one or two energy rings isn't a bad idea if you're seriously considering using him for combat, given if you have one at this point it's probably because no one else needs it. And 9 con is higher than the other potential Bishops in the army, if I remember correctly, so he's better at using the heavy light tomes like Aura and such. Overall a very solid unit, just also barely available.
And that does it for this issue... next one will be the last. We are taking down both Limstella and Nergal, and whatever else stands in our way. Get ready for a big one.
I'm hanging this up on a wall.
| The 'Shroom: Issue 197 | |
|---|---|
| Staff sections | Staff Notes • The 'Shroom Spotlight • Issue 200: Open Reminder |
| Features | Fake News • Fun Stuff • Palette Swap • Pipe Plaza • Critic Corner • Strategy Wing |


