The 'Shroom:Issue 196/Strategy Wing

Director's Notes
Written by: Hooded Pitohui (talk)

Hello, all you readers of The 'Shroom, and welcome back to the Strategy Wing offices! It's July, and, if you're a regular reader, you probably can already guess that I'm not too thrilled about that. I'm not one for the heat that July brings. I suppose it's not all bad, though. After all, it makes this a good time of year to splash around in some water, which makes this the perfect time to strap on F.L.U.D.D. and go exploring! Maybe that's why I keep seeing Waluigi Time returning from exotic locals soaking wet and carrying a bundle of Shine Sprites...
Between the warmth and the plentiful sunlight, this is also the best time of year to grow crops in the field and veggies in the garden, which might go a way towards explaining why Shoey asked if we had the budget for a whole bunch of dirt and some "Pellet Posies". I think he's planning to garden, at least... Although, on second thought, maybe he wanted those supplies for his new section, The Anatomy of a Pikmin, where he covers the many color variety of Pikmin in detail, explaining all of their attributes through the games of the Pikmin series. I suppose that would make more sense, but it probably means that I won't be eating those onions he was talking about...
On that note, I suppose I should leave all of you to reading this edition of Strategy Wing! Our writers are always putting in the effort to make fun and interesting sections, so go see what they've put together for you this month! Then, if you're feeling inspired, you can join the Strategy Wing team at any time by going over to the sign up page and sending an application to our Statistics Manager, Meta Knight. Perhaps you'd like to take us through a game with a lot of nostalgia for you, as Shine Get does, or maybe you want to cover a subject in great detail, like The Anatomy of a Pikmin does. Either way, we'll find you a place on the team!
You go read, vote in our Section of the Month poll to show your support for our writers, and soak in the sun (or enjoy the cool air, if you're on the other side of the equator). As for me, well... I think I'll be off to purchase a bag of onions, now.
Section of the Month
Coming in like a flash with a Flash blast from the past, Waluigi Time (talk) takes first this month with his introduction to Super Mario 63. Be sure to check out the new edition down below, moving on from the tutorial to the first full level! Not far behind, apparently curling is everyone's favorite sport, seeing as how File City Files and Shoey (talk) took second last month with an edition featuring curling, shopping, and a fight for a street sign. Thank you all for showing our writers support with your votes!
| STRATEGY WING SECTION OF THE MONTH | ||||
|---|---|---|---|---|
| Place | Section | Votes | % | Writer |
| 1st | Shine Get | 12 | 70.59% | Waluigi Time (talk) |
| 2nd | File City Files | 4 | 23.53% | Shoey (talk) |
File City Files
Welcome back to File City Files the Corn Belt's number one source for Digimon World information. Last month, we had an exciting time defending street signs, curling, and digging through trash. This month, though, we shall be exploring a new region as we set out for the mysterious Misty Trees region.
For this month, we're primarily going to be using these Prima guide maps:
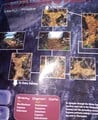
The Swamps of the Gekomon Tribe
The Vast Misty Forest


The Sage Hidden in the Mist
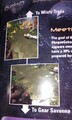
After leaving Trash Mountain and the end of the Gear Savannah, if you keep going right, you'll end up in Geko Swamp, home of the Gekomon clan. During the day, the dragonfly-like Yanmamon buzz around, while during the night, the horn-wearing frog Gekomon patrol the swamp. Continue to the right and up to go to the next screen of Geko Swamp. Here, you will find Geko Swamp's toilet, as well as the entrance to Geko Swamp. If you're lucky, you will also find the tadpole Digimon, Otamamon, who naturally does not appear every time you enter this screen, because that would be convenient and helpful to the player and, damn it, Digimon World couldn't stand for that! Anyways, talk to him and he just starts laying insults at you! Now, obviously, we aren't gonna sit here and be insulted by some punk-ass tadpole, so it's time to throw down!


Being a rookie DIgimon, Otamamon isn't particularly strong, having only two moves, Tear Drop and Water Blitz, and only 1,000 HP. He can be a little annoying, though, since Tear Drop causes the Pixelated status effect. So, anyways, we teach this little welp a lesson and, sure enough, like most kids, he runs off crying that we aren't nice...
Then, uh, a gang of Gekomon show up looking for vengeance, but instead of fighting, they take us to their leader, ShogunGekomon.
The Gekomon drag us to Volume Vila for an audience with the swamp lord ShogunGekomon. Luckily for us, ShogunGekomon doesn't care at all about what happens to one little Otamaon, because he has bigger things to worry about. He tells us that he hears we've been working hard to save the island and expresses his gratitude, then he offers to help us, telling us about the Misty Tree region and about how foggy it is, warning us that the fog may make the region difficult to explore. He tells us that we should seek out Cherrymon, the chief of the forest, who has created the fog to protect the forest from danger.


Finally, he tells us that while only Cherrymon can lift the fog, he will provide us a spell that will allow us to see even in the densest fog. With that, we make our way towards the Misty Trees, but before we go, there is a technical-but-not-really recruit for us to make! If you talk to the Gekomon at the bottom of the screen, near the exit, he will tell you he wants to see the city!
Purpose in City: So this one is a little weird, because it's not technically a recruitment and you don't get Prosperity Points for it, but this Gekomon expresses his desire to fight in the arena to bring honor to the Gekomon Tribe, who he claims is looked down upon by other Digimon as simple country rubes.
Gekomon specifically joins the arena and not the city, and, to be honest, I'm not actually sure if he actually joins the arena. This is mostly because I don't do a lot of tournaments, but I believe it is possible to fight a Gekomon in one of the tournaments, which I guess would mean that it is canonically this guy fighting for the pride of the Gekomon Tribe!

Now that we have been blessed with ShogunGekomon's protective spell, we can venture into the mist. If you don't have this spell, the Misty Trees operate the same way as the Lost Woods from the Legend of Zelda, and you will eventually just be returned to the start. Finding Cherrymon is not particularly hard. At the first fork, take a right turn. Then on the next screen, there will be another fork on the road, and you'll want to go up this time. This will lead to a trail guarded by two Sabirdramon (palette swapped Birdramons). You can either fight them or avoid them, it doesn't really matter. The exit to this path looks like blinding mist. Go into the mist and that will take you to an open area of the forest with extra thick mist. Going up and to the left, you will meet the forest chief, Cherrymon.

Cherrymon welcomes you to his forest before asking why you're here. Before granting your request, he tells you to listen to what he has to say. This is one of the coolest parts of the game, as Cherrymon begins to tell you the history of the island. He tells you how the island changed eighty years ago, when the northeastern parts of the island suddenly appeared.
Since then, Digimon have been slowly breaking away from each other as they spread out into these new parts of the island, then, as the Digimon tribes broke apart, the common language of the Digimon started to fade as new languages cropped up. File City itself lost most of its population to these changes, and then the Digimon started losing their memories. Even Cherrymon, one of the oldest and wisest Digimon, has been affected by this change, for he ends the story telling you that he has something important he needed to tell you...
...but, sadly, he has forgotten what it was. He ends his speech by warning that time is running out for the Digimon and that soon they will begin to think what is happening is normal. He then reminds you that the only thing that can stop this is unifying the Digimon in File City. Finally, he agrees to get rid of the fog, clearing up the Misty Trees significantly. He then lets you know the fog was not there to protect the trees, but, rather, it was present so that we would seek him out so he could reveal us this sweet ass lore. He ends by letting you know that there are others that know about the past, with some of them living deep within in the forest. He then opens a path in the trees that leads to a place called Toy Town, but that will be for another section! After this, you can talk to Cherrymon to hear his story again, or you can have him train your Digimon in both brains and MP by having him tell the history of the island.
The Timid Digger Hidden in the Mist
Return to the entrance of the Misty Trees and this time go left at the fork. This will take you to an isolated cliffside. Peeking out of the left side is a Gabumon who is desperately trying to hide.


Talking to him startles him and he begins another throwdown. Another rookie Digimon, Gabumon has 2000 HP and attacks with Dynamite Kick and Megaton Punch. He also knows the stat-boosting move War Cry. After you defeat him, Gabumon breaks down, saying he doesn't want to fight and explaining that's why he was hiding. After telling him to run away instead then, which he turns down for pride reasons or whatever, you then invite him to the city. Then, after a little hesitancy on his part, you say exasperatedly that you won't force him to go. This unintentional reverse psychology works, and he runs off to join the city while you're left pondering about how odd of a Digimon he was.
Purpose in City: Gabumon takes up the job as an assistant to Drimogemon, telling you that his claws make him good at digging.
More specifically, while Gabumon is never seen joining Drimogemon on his expeditions, he increases the chances of the rarer items being found.
The Scatterbrained Early Bird
Deep within the Misty Trees, during the wee hours of the morning, you'll find a large rooster Digimon just running into the trees like the big stupid bird he is.


If you talk to him in an attempt to figure out what the hell he's doing, he wordlessly begins to attack you because he's a jerk! This is Kokatorimon, a champion level Rooster Digimon, and he's quite tough! He has 4,200 HP and he has three total techniques. First, he has the stat-boosting War Cry. Second, he has Dynamite Kick, which isn't very strong and has a tendency to miss. Finally, he has the powerful and scary Megalo Spark, a super fast electrical attack that cannot be stopped and hits like a brick. Despite being a dumb bird, Kokatorimon is no joke. If you come unprepared, you will lose, so make sure you have plenty of recovery items, both MP and HP. After a grueling battle, Koatorimon is defeated, dropping a Defense Chip. Kokatorimon then praises you for being so strong even though it's so early in the morning. A very chippy conversation ensues, with our character being very annoyed over having to talk with this bird (I understand).
Finally, in frustration, we snap, yelling at this frustrating bird to go work in the city. The bird then seems to get it and then, after annoying our character one last time by getting the saying "the early bird gets the worm" wrong (he says that the early bird gets the bug), Kokatorimon finally agrees to join the city, running off as our character wonders out loud if it was a good idea to recruit him.
Purpose in City: Kokatorimon fancies himself quite the artist, so he creates a statue of the person he admires most: us! I don't really see the resemblance. It looks more like a scarecrow to me.
If you talk to Kokatorimon (who appears by the statue, only in the morning), he'll assume you're making fun of him, but, still, I'm sure this city could benefit from some added culture!
Fishing Completely Breaks this Game!

So, let's talk about fishing. Fishing plays a very interesting role in this game. Primarily it's there to turn stuff like Digimushrooms and regular Meat into bigger meals by using them as bait to catch fish. There's also some other uses, like catching Digiseabass to extend a Digimon's life or another secret thing that we won't talk about until later. But due to an oversight, fishing in Digimon World completely breaks the game. Before we get into that, first, let's talk about how fishing works, because it's really quite simple. There are a couple places in this game where you can fish, such as Dragon Lake Pond and a spot in the Native Forest where there's a beach. Fishing itself is very simple. You pick out your bait, which can be anything from a simple Digimushroom found on the ground to a prime Sirloin, then you simply cast off by finding a spot and pressing the X button to cast. You can press it again during the casting motion for more power.
Then you simply get your bait in front of one of the fish. If they like it, they'll bite it, then you once again press X once they take the bait. Then, to reel them in, you simply mash X to reel while watching the pressure on the line (because if it gets too high, the line will snap). See? It's a real easy mechanic, and, importantly, time does not move forward while you are fishing.

Now, back to the matter at hand, how does fishing break Digimon World wide open, you might ask? Well, it's all because of what is presumably an oversight on the developer's side (I know, an oversight in Digimon World?! I'm shocked!). You see, in the icy Freezeland region, there are three yeti-like Mojyamon. These Mojyamon are item collectors and each man their own trading post. They each have different items that they are willing to trade. This is where the oversight comes into the play. You see, one of them will trade you a Special Offense Disk for a Digianchovy, which is the smallest fish in the game. What I think was supposed to happen is, once you trade an item, it completes that part of the quest, and you can no longer make that specific trade. Due to what I assume is an oversight, however, you can just keep making the same trade with him.
So what you do is this. You keep catching Digianchovies and you trade them for Special Offense Disks, because each Disk sells for 2,000 bits. Basically, you can make infinite money with just a little bit of patience. I say you need patience because, not only do you have to catch these fish, with a maximum of 99 at any given time, but you also can't trade in bulk. You have to trade each one individually, so that's a pain. Also, you need to make sure to bring an Autopilot with you, because, thanks to another glitch, it's possible to get stuck in the Mojyamon, which prevents you from moving. But still, with infinite money this game becomes a cakewalk. Now, you might think this is cheating, but, like... Fid you not read about how you earn moves in this game in the last issue? This game doesn't deserve to be played properly!
Now that you know how you can become infinitely rich, that's all for this month. Come back next month and we'll keep working towards restoring File City!
Pitohui's Pokémon Academy
Written by: Hooded Pitohui (talk)
Welcome back, class. I trust you all are doing well after having class period where all we did was watch a video and having a class period off, and all. Some of you may still be wondering where I was last month, so allow me to clear that up for you. Last month, us faculty members were told we should strive to make our courses more culturally-relevant by including tie-ins to the film industry, so I was off last month doing research so we could have a real star of the silver screen in class. Unfortunately, I was preoccupied with that research a tad too long... No matter, though, because, this month, we're going to be discussing a Pokémon famous for its appearance in film, Slowking!
What's that? You're asking what Slowking has to do with film? Don't tell me that you young ones in class don't know about Slowking's famous role in the smash hit silver screen retelling of the battle of the Legendary Birds over Shamouti Island! It's not that old of a film, is it...? No wonder you all gave me such a Chilly Reception...
You get it? You gave me a "Chilly Reception", you see the joke, don't you? No? Well... We'll call that an early demonstration, then... Let's... let's get on with business as usual. Before we get much further, I'll remind anyone just joining us to peek at the syllabus below for an overview of what it is we do in this course.
First, a Smogon University course, this course is not. No, this academy's lessons are designed to get trainers of any stripe thinking about how they can raise their Pokémon, and, as a result, aren't designed to keep up with the widely-accepted metagame for the series. In some cases, the way I've raised my Pokémon may even flies in the face of conventional wisdom. If you're looking for top-tier strategies, do check out Smogon, but if you merely want to get a little deeper into raising Pokémon while still doing things your own way, feel free to use this section as a reference.
Since we all know the importance of citing our sources, I also need to credit the design of some of the tables used in these lectures to Crocodile Dippy, author of the Pocket Handbook which can be found in early editions of Strategy Wing.In addition, if you find yourself struggling to remember the terminology we use in this course, please open the box below for a cheat sheet on the most common terms we'll discuss.
Base Stats: Base stats are the values associated with a particular Pokémon species, and are the same across every individual Pokémon of a given species. You have no influence on them. You can think of them as traits tied to a species. A chimp isn't ever going to be able to get as good as digging as a mole will be, and, likewise, an Abra is never going to have the defensive prowess a Shuckle has.
Individual Values (IVs): Individual values, as their name implies, are associated with individual Pokémon. They range from 0 to 31 in each stat, with 31 being considered a "perfect" IV and higher numbers corresponding to different stats. Magikarp A and Magikarp B will have the same base stats, but they may very well have different IVs. To stick with the animal analogy, one mole may be born with larger claws than another mole, and that first mole is probably going to have an easier time digging through dirt than the latter. Individual values are set in stone, strictly speaking, but you can use Hyper Training (from Generation VII onwards) to functionally get a perfect IV in a stat.
Effort Values (EVs): Effort values are the one thing you can easily change. A Pokémon can earn, primarily through battling, but also through means like the use of certain items or mechanics like Super Training, up to a total of 510 effort values, with up to 252 in any given stat. To finish off the animal analogy, no matter what kind of claws a mole is born with, moles who have more experience digging are probably going to be better at digging than moles which have never dug.
Nature: A Pokémon's nature is, more or a less, a stat modifier with a name meant to make it sound like a Pokémon has some personality. Natures will raise one stat by ten percent and lower another stat by ten percent. Some natures raise and lower the same stat, canceling out the effect and leaving stats unchanged. Natures can be functionally changed with the use of special mint items from Generation VIII onwards.
STAB: STAB stands for Same-Type Attack Bonus, and refers to the boosted power of moves that match the type of the move's user. To illustrate this, consider the case of a Lombre, a dual-type Pokémon which is both a Water-type and a Grass-type. Any Water-type moves Lombre uses will have their power boosted by 1.5x, and any Grass-type moves Lombre uses will, likewise, have their power boosted by 1.5x. (There are circumstances where this does not apply, and, while the 1.5x multiplier is typical, some games use other multipliers.)
Are we all well and set, then? No other revelations that will make me feel old and out of touch? Very well, then, let's start off, as we typically do, by looking at Slowking's base stats. What should jump out immediately is that Slowking's stats are tilted towards its special stats over its physical stats, and, to a lesser extent, tilted towards defenses over offenses. Now, I won't lie; I see a decent number of directions you could go with this stat spread. I'm not going to cover every possibility, though, in the interest of time. Instead, I'm going to focus in on Slowking's high special defense, because, combined with the bulk its decent HP provides, Slowking's abilities, and a move we're going to be incorporating into Slowking's moveset, that's where I see the most potential. In particular, I see the opportunity to make Slowking into not only a defensively-strong Pokémon in general, but specifically a strong special-focused, slow pivot Pokémon.
In other words, we're going to raise a Slowking that, confronted with a foe that another Pokémon is better equipped to face, can switch out after its opponent moves, sparing the incoming Pokémon from damage. It's a tough role, considering that Slowking will have to be able to take attacks for its teammates and keep its HP up as much as possible, but Slowking has a few advantages in this regard.

|
Name: | Slowking | Base HP: | 95 | |
| Species: | Royal | Base Attack: | 75 | ||
| Type: | Water | Psychic | Base Defense: | 80 | |
| Abilities: | Oblivious | Base Special Attack: | 100 | ||
| Own Tempo | Base Special Defense: | 110 | |||

|
Regenerator | Base Speed: | 30 | ||
Before we get further along with that discussion, let's return to Slowking's stats and finalize them. Obviously, we want to prioritize special defense and HP, so we want IVs of 31 in both these stats, and we want to invest the maximum of 252 EVs in each stat, as well. Defense and special attack, you don't necessarily need 31 IVs in, but the higher your IVs are in these stats, the better your Slowking is going to do, since it's far from a guarantee that your Slowking will only be hit by special moves and you want Slowking to be capable of chipping away at your opponent's health as quickly as possible. Of defense and special attack, you can reasonably put your leftover EVs in either, though I personally recommend putting them in special attack, since it's a bit risky for my tastes to put Slowking up against physical attackers, with or without those extra defense EVs.
We always like it when we have a stat we can ignore entirely, and, this time around, we have two! Or so it might appear at first. See, we do want to give attack and speed some attention here, especially speed. We want Slowking to be able to switch out after its opponent moves, which requires that Slowking is slower than its opponent. In light of that, we want as slow a Slowking as possible. It's ideal, if at all possible, to go even further than I did and have an IV of 0 in speed. Attack isn't as important, but, with moves like Foul Play given consideration (a particular concern for Slowking, since Psychic is weak to Dark), it's better to aim for a low attack stat if possible. Again, if you can make it happen, aim for an IV of 0 here, but, if you just don't have the time to hatch a Slowpoke with all six of the IVs you want, you can get away with taking anything for Slowking's attack stat.
Now, you might not realize it, but, through this discussion, we have also narrowed down the possible natures for Slowking! We want to lower speed, and we know that we don't want to raise attack, so we want a Slowking with a Relaxed, Quiet, or Sassy nature. Accept nothing else! As for which of these three natures is the best, most likely, Sassy is the best choice, given that it boosts Slowking's special defense and makes it even better able to take attacks before switching out. That said, I think any of these three natures will do, and, as you can see, I settled for a Relaxed nature, getting a little boost to Slowking's defense.
| Level: 58 | HP IV | 31 | HP EVs: | 252 | HP: | 232 | ||

|
Attack IV | 29 | Attack EVs: | 0 | Attack: | 108 | ||
| Defense IV | 31 | Defense EVs: | 0 | Defense: | 126 | |||
| Special Attack IV | 31 | Special Attack EVs: | 6 | Special Attack: | 139 | |||
| Special Defense IV | 31 | Special Defense EVs: | 252 | Special Defense: | 187 | |||
| Nature: Relaxed | Speed IV | 3 | Speed EVs: | 0 | Speed: | 36 | ||
All stat-related matters are decided upon, now, so let's turn our attention to the question of Slowking's ability. We have three possible options, and, well, in this case, there is a clear winner. As a rule of thumb, if a Pokémon has access to the ability Regenerator, that's the ability you should run on it. Be it through a move or through an ability, a Pokémon that can restore its HP is a Pokémon with an extremely valuable tool. Regenerator does wonders for Slowking, too, as it synergizes with our goal of turning Slowking into an effective pivot. Restoring its health by 33% whenever it switches out, Slowking should be able to effectively offset the damage it will take while protecting its incoming teammate. You see what I was saying earlier, now, yes? Being a pivot is a tough job, but Slowking has an easier time of it thanks to its ability to heal every time it switches out!
Now, with an ability picked out, we can move on and begin building Slowking's moveset. There's no debate over what move we want to add first; we need to run Chilly Reception on Slowking. The longtime trainers among you may have been asking, up until now, how exactly Slowking was going to switch out after its opponent moved. You might be familiar with the concept of "priority," which allows some moves and actions to happen before or after others no matter the relative speed stats of the Pokémon facing off in battle, and you might know that recalling a Pokémon takes a higher priority than most moves, meaning that, with some exceptions, a Pokémon will be recalled before the opponent moves, and the incoming Pokémon will be hit by the opponent's attack. This is an astute observation, but there is a way around this. Certain moves, such as U-turn and Volt Switch, allow the user to attack and then immediately switch out. These moves have no increased or decreased priority, so whether they are executed before or after your opponent moves is based entirely on the relative speed stats of your Pokémon and your opponent's Pokémon (assuming your opponent doesn't choose a move with increased or decreased priority!).
What this means is that, by having a slow Pokémon use a move like U-turn or Volt Switch against a faster opponent, the Pokémon can take the opponent's attack, and then switch in with a teammate. Chilly Reception works like these moves. It has no increased or decreased priority, so, if Slowking uses it against a faster opponent, Slowking will move after its foes, allowing it to take its foe's attack and protecting the Pokémon that is switching in. It's crucial for turning Slowking into an effective pivot, so we're going to teach it to Slowking!
As an aside, Chilly Reception also changes the weather to snow, which can disrupt your opponent's strategies if they're relying on another form of weather, such as rain or sunlight. Combine that with Chilly Reception activating Regenerator, and this move is a real boon to Slowking! Incidentally, as of this course, Slowking (including its Galarian variant) is the only Pokémon that can learn Chilly Reception.
| Surf | Special | The user attacks everything around it by swamping its surroundings with a giant wave. |
| Psychic | Special | The target is hit with a strong telekinetic force to inflict damage. This may also lower the target’s Sp. Def stat. |
| Chilly Reception | Status | The user tells a chillingly bad joke before switching places with a party Pokémon in waiting. This summons a snowstorm lasting five turns. |
| Slack Off | Status | The user slacks off, restoring its own HP by up to half its max HP. |
Having put Chilly Reception at the center of Slowking's moveset, and remembering the value of moves and abilities that let a Pokémon restore its own HP, we'll add Slack Off to Slowking's moveset. If Slowking ends up staying on the battlefield for an extended period, say, to put the block on a special attacker for a bit, then Slowking has a means by which it can heal itself. In addition, any damage that Regenerator can't passively heal, Slack Off can take care of.
Now that we have multiple options for healing Slowking, for the last two slots in its moveset... well, truth be told, there are a lot of directions you could go. With access to moves like Amnesia, Chilling Water, and Curse, Slowking is quite a flexible Pokémon. I encourage you to experiment with its stat spread and moveset, and to have fun trying different options and finding out what works best for you. In this particular case, though, I'll finish raising my Slowking by adding two reliable STAB moves in the form of Surf and Psychic.
Would you look at that? We finished already, well before the the end of our time together, even. Maybe some of Slowking's intellect and skillfulness in front of an audience rubbed off on me, eh? Ah, I see I'm getting a demonstration of Chilly Reception from all of you again... Well, perhaps my jokes don't land, and perhaps nobody remembers when Slowking was a star, but I suppose that's why I'm your instructor rather than a comedian or a talent scout...
That's all for this class period, then. If you'd like to leave early, you're free to go, but if you'd like to stay for a spell, why not step up and see Slowking's intellect for yourselves? Go on, ask it math problem, or pose a riddle!
Shine Get
Written by: Waluigi Time (talk)
Hello there, 'Shroom readers! Welcome back to Shine Get, the best 'Shroom section about a 2009 Flash fangame that you'll read in this issue. Probably. Today we're going to tackle the first level of Super Mario 63, Bob-omb Battlefield!

Heading to the left side of the castle's main hall, the leftmost door is now accessible (and helpfully illuminated to show where to go) thanks to the whole one Shine Sprite I collected last time. Inside is a painting and a sign that explains that the painting contains an entire world that can be accessed by jumping into it. I see no reason not to, mostly because it's literally the only thing to do in the game right now besides replaying the tutorial level over and over. Let's-a go!
On the mission select screen, it shows how many Shine Sprites there are in the level and which ones you've collected - and there's no hidden Shine shenanigans, what you see is what you get. There's even some flavor text about each mission. It also says how many Star Coins have been collected and which F.L.U.D.D. nozzles have been unlocked in that level, and you can select one to start the level with. Sadly I don't have any of them since this is my first time coming here on this save file. Although you can only select the first incomplete mission from the screen, you can really just grab Shine Sprites in any order you want if you already know about the other ones or accidentally stumble across them. I'll be attempting to complete them in the intended order, but if I do happen to get lost and find another Shine Sprite by accident, well... I'm not going to say no to that!
Mission 1: Battle with King Bob-omb
Goomba's[sic] and Bob-Ombs[sic] have been always rivals in Bob-omb Battlefield according to the mission text, since the Bob-omb Buddies just don't exist in this game. King Bob-omb awaits a challenger at the top of the mountain, but the Goombas have always been too weak to fight him, so it's up to Mario to take him down! This just leaves me with more questions, though. Is Mario siding with the Goombas? If Mario wins does he become the new king? Whatever the case may be, King Bob-omb has a Shine Sprite so it's time to go beat him up.
Right away there's a cannon and a sign that helpfully says to jump in the cannon and blast off. Not so helpfully, it doesn't actually explain how to operate the cannon (it's just the arrow keys to aim and the spacebar to fire, but still!). It also says that there's a secret directly above the cannon, and uh, I think our definitions of "secret" are a little different. The secret in question is the first Star Coin of the playthrough! They're collectibles that will be helpful later, but for now they don't do anything. (The game doesn't explain this, either...) Nearby there's a map of Bomb-Omb[sic] Battlefield. Yeah, if you couldn't tell yet, there's plenty of writing quirks and inconsistencies throughout the game. I find it strangely endearing, it adds to the late 2000's charm.

Despite the transition to 2D, the main levels of this game do a pretty good job at keeping the sandbox feel of 64. It's a pretty easy walk from point A to point B, and there's lots of stuff that I can just ignore for now on my way to the other end of the level. My favorite method of getting around fast is holding a direction and then jumping, diving, and immediately jumping again after hitting the ground. Basically I'm hurling Mario across the level like he's stuck inside of a dryer, and it's a lot of fun! Having F.L.U.D.D. makes it even faster, and what do you know, the Hover Nozzle is right there on the right edge of the first screen. Now we can zip around at mach speed while listening to Scatman John just like the good old days. It's not quite time to just ignore everything yet though, Chomp Rock is here on the next screen. It's the same place from the original Behind the Chain Chomp's Gate mission, complete with the post and the cage - but lacking the actual Chomp (or a Shine Sprite). Spoiler alert, this is pretty much just scenery, there's no mission here. There is a Star Coin above it though, and I think you might be intended to get it from higher up, but a triple jump combined with the Hover Nozzle is enough to reach it from the ground. Okay, now it's time to mindlessly head right.
The last screen is the bottom of Mount Bob-omb, so the only thing left to do is scale it! The journey is a bit treacherous though, as iron balls keep hurling down the mountainside to squish Mario. Is Donkey Kong up there, or something? They're a lot faster than the ones in 64, so watch out! All the way to the right on the second "level" of mountain, there's yet another Star Coin floating in the air. I'm able to grab it and get back onto the mountain with F.L.U.D.D., which is nice because now I don't have to climb the whole way up again. On the next "level" there's a heart and a sign explaining that it refills your health when you run into it, and that it never runs out. Good for me, because I may have been flattened by more than a few of those iron balls. Oops. Dropping down off the left edge leads to a fourth Star Coin on a ledge. Another triple jump/hover combo is enough to get back up, thankfully.

Just a bit more climbing (and only minimal getting squashed) and I'm now face to face with King Bob-omb! He remembers Mario, so apparently Super Mario 64 is canon and already happened despite the similarities, and says that Mario can't grab and throw him this time. Which, yeah, that's true, but how does he know that? Was Mario involved in a highly publicized accident that left him unable to lift heavy things? Or did King Bob-omb peek at the game's code and see that Mario isn't programmed to pick things up at all? Yes I'm overthinking a 14-year old Flash game, it's more fun that way.
The fight is pretty similar to the first one in Super Mario 64 DS. He follows you and throws Bob-ombs, and you have to knock them back at him with a spin attack or F.L.U.D.D. He also has an attack where he'll jump and cause a shockwave, and if you get too close, he'll pick Mario up and toss him away. By the way, you can't back out of this fight! Once the fight is triggered, the map cuts off a few levels below and turns into a bottomless pit. (I died testing this. It's for science, so it doesn't count as the first death yet!) I'm not sure if this was intentionally done to make the fight inescapable, or if it's just so you die if King Bob-omb chucks you off the side of the mountain. You can go down onto the ledge below though, where King Bob-omb is completely powerless since none of his attacks can reach you. It's tough, but possible, to knock back the Bob-ombs from down there and cheese the fight.
Anyway, pretty simple fight if you don't mess around like I did. Three hits and he's down. He vows that he'll be stronger and next time and explodes, but spoiler alert again, he doesn't show up again in the game. Long live the king. The Shine Sprite appears, but if you decide you don't want it for some reason, the bottomless pit thing is no longer in effect so you can leave again. But I do want it, therefore, yoink.
Upon returning to the castle, there's a message that the room on the far right side of the castle has been unlocked already. But who needs that, I have more Shine Sprites to grab here! There's also a Toad hanging out in the room now, who congratulates Mario for "pwning" King Bob-omb. Sure is 2009!
Mission 2: Island in the Sky

The premise of this mission is that there's an island, and it's in the sky. Checking the map shows that it's above the first screen, and what you're supposed to do is go all the way past Chomp Rock to start climbing high enough, but instead of doing that I ran around and figured out a bunch of different ways to cheese it! On the first screen alone, you can blast straight up out of the cannon while using F.L.U.D.D., ride on Goonies, or triple jump and hover off of a box which gets you just high enough to transition to the screen above it. I decided to settle on the cannon method because it's probably the coolest.
So now I'm up in the clouds, and it's just a bunch of jumping around on platforms. Not very interesting to write about frankly, just keep jumping around and moving up and to the left as much as possible. Eventually, there's a ledge, and...

OH NO IT'S THE WING CAP
Yeah, the Wing Cap is unfortunately in this game. Although it looks more like a star than a cap. Anyway, we don't have any choice but to use it, and unfortunately, it sucks basically just as much as it does in Super Mario 64. At least we have F.L.U.D.D. to supplement, I guess. Anyway, I fire myself out of the cannon nearby and collect the fifth Star Coin - I ended up overshooting and having to circle back around, whoops - and the Star Coins finally do something! Getting five of them prompts a message that you unlocked the game's Level Designer, which is actually a complete lie! The Level Designer is available by default under the Extras button on the main menu, even if you don't have any save data at all. What it actually does is unlock a room in the castle where you can access the Level Designer from in-game. The Designer is pretty neat, but I probably won't be covering it in this section.
Anyway, back to flying around with this stupid thing. Pushing to the right through a gust of wind, I land on the floating island and grab the Shine Sprite. For all my complaining, the Wing Cap isn't actually too bad here.
I get another message on my return to the castle, saying that a door leading to a frosty new course has been unlocked. Once again, I'm going to ignore it because I'm stubborn. I'm pretty sure this happened to me in my playthrough of Super Mario 3D All-Stars too, I kept getting messages about new stuff that I ignored because I wanted to focus on completing as much of a course as possible.
Mission 3: The Five Silver Stars

According to the mission text, sometimes a Shine Sprite can break down into five Silver Stars. That's happened in Bob-omb Battlefield, so we have to go get them to fix it. We'll need to go past Chomp Rock to where I should've gone last time before I cheesed it, so I hurl Mario across the stage! Woo! There's a newly-added Sling Star here in this mission to launch up into the clouds with. They're all pretty close by, actually. I grab three right away, one just above where I landed from the Sling Star, one above another Sling Star just next to that one, and one over to the right with the Hover Nozzle (this can also be easily gotten with the cannon below). I can already see another one to the left on some falling logs, so that makes four. A bit of simple platforming to the left leads to number five, and with that, we're done already! I head back to the right, and... get knocked down by a Bob-omb on the falling log bridge. Thanks for that. Anyway, it's not too hard to hover back up, and that's another Shine collected.
Mission 4: Collect the 8 Red Coins

The mission text says that bringing eight Red Coins together makes a Shine Sprite appear, and also tells me twice that nobody knows why this happens. Now that's some intricate lore. This is a lot of going to places I've already been, but one thing that's nice is that the map near the beginning of the level roughly shows where all the Red Coins are when this mission is selected. Three are on the first screen, two at Chomp Rock, one at Mount Bob-omb, and two in the sky. Unfortunately, they do stay on the map even after you collect them, so better remember which ones you picked up!
There's one behind some breakable blocks, another up on the cliff, and the last one just sitting a rock, so that's one area cleaned out. At Chomp Rock, one is on the Chomp's post, and I remember from the sign that the second one is higher up, so naturally I just do some acrobatic shenanigans to get up there instead of going the intended way. Except I probably shouldn't have done that because it was close to the intended way to get up anyway. Oh well. The one at Mount Bob-omb is all the way to the right side of the screen. Now it's time to backtrack to get up in the sky, and this actually isn't a bad play because the Shine Sprite spawns near the start of the level anyway. There's one on a cloud, so I now have 7/8 Red Coins. The last one is also on a cloud, and I grab it, and... nothing happens. This can be a little confusing, but there's no indication that the Shine Sprite has spawned unless you're on the screen where it appears. No problem, I just throw Mario out of the sky and grab the Shine Sprite after I land.
And another message saying another room has opened in the castle... No really, that's all it says, verbatim. It may as well say "Something has happened!" because it's not very descriptive.
Mission 5: The Secret of the Mountain

The mountain holds a secret, but the mission description just rambles on about it being a secret, so no help there. Actually, when it says "the mountain", that's a little misleading because it's not actually Mount Bob-omb. That is where I'll be going though, so it's once again time to roll Mario through the dirt all the way to the complete opposite end of the level. There's a pretty obvious "hidden" entrance in the mountain to the right of Mount Bob-omb. Going inside reveals a Sunshine style secret level, though thankfully no one shows up to nab F.L.U.D.D. from me. And despite the comparison to Sunshine, it's pretty tame. Even the bottomless pit below isn't death, and just dumps you back outside.
It's fairly standard platforming and nothing that we didn't see back in the tutorial, stuff spins, stuff moves around, you get the idea. After hopping up a set of those green platforms from Yoshi's Island, the game clearly wants you to go to the right, but I'm going to take a detour to the left instead, because the sixth and final Star Coin of the level is hidden over here. Turning back around, I'm almost at the end now. There's a neat part at the end where blocks move around vertically and you have to jump around on them to get up to the Shine Sprite. F.L.U.D.D. is your friend here!
With the fifth Shine Sprite collected, that's everything to do in Bob-omb Battlefield! Or, uh, as the Star Map calls it, Bob-Omb Battle Field. Close enough. With a total of six Shine Sprites and Star Coins each, I can finally attend to some of those other doors the game keeps bugging me about, but I'm going to save that for next time. Hope to see you then!
Four Steps for a 3D World
Written by: Hooded Pitohui (talk)
Hello, all you readers of The 'Shroom, and welcome back, after I missed last month, to Four Steps for a 3D World. For those who haven't been following the section, what we're doing here is taking levels from Super Mario games directed by Koichi Hayashida and seeing if we can successfully identify the four steps that, according to a design philosophy Hayashida has discussed in interviews, a Nintendo-made 3D Super Mario level should take a player through.
According to Hayashida, these levels are (in the games he has influenced, at least) designed around an introduction that lets a player learn a mechanic in a safe environment, further development that builds on what the player is learning and introduces more complicated aspects of a mechanic, a twist that adds some kind of significant wrinkle or challenge to force players to consider the mechanic from a new angle, and a conclusion which gives players one final satisfying chance to show they've mastered the mechanic. Knowing these four steps, we're going to dissect levels from games he directed and see if we can tease out all four steps. Hopefully, by breaking the levels down like this, we can also gain some insight as to when it's advantageous or disadvantageous to stray from these four steps, too.
Now, at the end of this section's last edition, I mentioned the possibility that, in this edition, we'd be looking to the heavens to see if we might find a level in a Hayashida-directed game which strayed far from these four steps. By that, I meant that we would look at a mission from Super Mario Galaxy 2. Unfortunately, that didn't work out for this month, but I did the next best thing I could do. While we aren't jumping all the way back to the first Super Mario game Hayashida directed, we're still going back to a game that came before Super Mario 3D World, before Hayashida codified this design philosophy. This month, we're looking at a late-game stage from the 3DS title Super Mario 3D Land!
Let's jump right into World 8-1 and see if we see the seeds of Hayashida's four steps emerging even back in this portable title!
| Step | Notes |
|---|---|
Introduction
|
To be honest, it took a few playthroughs of the level for me to settle on claiming that the level has a proper introduction. The immediate start of the level fits the first step, confronting the player with three spiked ball cannons on a little stairstep-like structure. It quickly establishes that spiked balls, sometimes rolling over uneven terrain, are going to be a major mechanic in this level, and it's not a very dangerous section. That makes for a serviceable introduction to the level, and fits this step, but shortly afterwards, in the rest of the stretch to the first pipe, the level starts to lose its focus. It suddenly adds in rising and falling platforms, an alcove with Fuzzies, a larger spiked ball rolling across a couple Donut Blocks, and a short challenge with an "! Block" that leads to a Star Medal. I would have expected some of these elements to be used again later in the level, but with more danger, like a longer stretch of outrunning a spiked ball on Donut Blocks, or maybe using alcoves to duck out of danger while spiked balls rolled by, but these never came up again. It felt out of place and made me doubt if this was a true introductory section, but, I do think the three spiked ball cannons at the start serve as en effective enough safe introduction to the level. |
Development
|
Now, the development section was clearer to me. After getting through the first pipe, the level has players navigate a few horizontally-moving platforms and travel up an escalator-like structure while avoiding spiked balls. This is a decent evolution of the spiked ball cannon trio in the introduction section, and I can see a clear line of progression here. It gradually ramps up the difficulty and adds the tasks of avoiding a couple enemies while avoiding the spiked balls and minding the spiked balls on shifting ground. This section even ends pretty clearly, wrapping up with the checkpoint flag. |
Twist
|
This section is a little clearer than the introduction, but not as clear as the development stage. After the checkpoint flag, the player encounters a short sequence of red-and-blue platforms that flip with every jump, and a spiked ball cannon launching spiked balls across them. It's a very short section, though I could generously say it adds a twist on the level by actively tasking the player with managing the shifting of the ground while avoiding the spiked ball. I thought it was odd how easy it was to bypass this section entirely by jumping up the walls and walking over it (which the game rewards you for) combined with how short the section is and how abruptly it ends. I'm all for rewarding players for exploring and taking different paths through a level, but it feels strange to bypass the level's only real challenge. |
Conclusion
|
Now I'm being extra generous, perhaps at the expense of the twist step. See, the level ends with the option to either take a Warp Pipe to the flagpole and jump on it, or, for those who want to reach the top of the pole, to launch Mario or Luigi at the flagpole. It's a final challenge, I suppose, but one that doesn't have anything to do with the rest of the level and that doesn't give players a chance to show their mastery of any skills within the level. There is, however, a segment of the level between the end of the flipping platforms segment and the cannon and Warp Pipe segment, that being a portion of the level where the player has to outrun multiple spiked balls rolling down a long slope. After avoiding a few crates near the top of the slope, there isn't a lot of danger, and the whole sequence is pretty memorable, so this could arguably be an attempt to leave players feeling like they've mastered avoiding spiked balls on slopes and uneven terrain. |
Did World 8-1 of Super Mario 3D Land follow Hayashida's four steps, then? Was he already using this to design levels before 3D World? Well... Maybe? It depends on how you look at it and how you choose to interpret some pieces of this level. I'd say I can see the outline of the four steps in this level. The general principles are there, and if I'm generous, I can divide the level up into our expected four steps, but it's more muddied than in a typical 3D World level. Frankly, I could probably say the final dangerous segment, where the player has to outrun the spiked balls going down the slope, is part of the twist section, and that would make me significantly more confident in saying that the level has a clear twist component. If I do that, though, then it's unavoidably true that this level just doesn't incorporate the conclusion step.
When I take that and add in the messiness of the introduction section, I'm not sure I would say this level entirely follows the four steps we expect in a level, but it's getting there, clearly. I don't know what Hayashida and the team who worked on the game were thinking, but if I had to guess just going off this level, I'd think 3D Land represented a transition for Hayashida, a point at which he was just beginning to figure out his approach to level design but hadn't yet solidified it yet. You can almost see the four steps in this level, but they're not that clearly-defined.
That's my takeaway from this level, at least. Of course, these boundaries are unclear, and you might play the level and think "the four steps sure seem clear to me". If you do, let me know! I'd be interested in hearing your thoughts on the level's design. Better yet, you could also write your own analysis of the level and share it with all of us. Either way, that's all I have to say this month, so with three Hayashida-directed games to examine, Super Mario Galaxy 2 sometime in the future, and (hopefully) only one month missed this year, that's all for Four Steps for a 3D World!
The Anatomy of a Pikmin
Hello readers, and welcome to the brand-new Strategy Wing section, The Anatomy of a Pikmin. I've always loved the Pikmin series. It's probably pound-for-pound my favorite game series (it's definitely in competition with Mario and Pokémon). I'd been kicking the idea of a section that covers the various Pikmin types for a while now, and I figure with Pikmin 4 just around the corner and Pikmin 1 and Pikmin 2 having hit the Switch, it was finally time to start it. Just note that, for the purposes of this section, we will not be covering anything related to Hey Pikmin!, since that game has a distinct style entirely. We also won't be covering Pikmin 4 yet since it's not out and I have no need to play the demo! In the future, Pikmin 4 will be covered, but this first section will just be about the first three games.
What better way would there be to start this brand new Pikmin-covering section than by covering the first-ever Pikmin type discovered, the Red Pikmin? The first Pikmin type found in each game (while, technically, yes, you control yellows first in Pikmin 3, that's only in a brief prologue portion), Red Pikmin feature a vibrant red color as well as pointed noses. Red Pikmin sport two main abilities, the first being that they are immune to fire. Their second main trait is that they are the second-strongest Pikmin type, attacking at 1.5x the strength of a regular Pikmin. Because of this, in the first Pikmin game, Red Pikmin are the workhorse of the game. Their extra attack makes them the best Pikmin for scenarios that don't require the powers of yellows (high throw) or blues (breathing water). Because they hit harder than the other Pikmin, they are by far the most useful in combat and should make up the bulk of your forces in most combat situations. In addition, with Red Pikmin being immune to fire, Red Pikmin have their own specific enemy and hazard they are best at dealing with. The Fiery Blowhogs in the Forest Navel are no match for even a few Red Pikmin, and, in fact, can't even damage them outside of bucking them in water.

The immunity of Red Pikmin to fire also makes them the best for crossing Fire Geysers, which shoot out fire on a timer. The geyser, which is one of only two elemental hazards in the game (along with water), are a lot trickier to deal with than water. Water tends to be in big open areas, making it much more difficult for Pikmin to drown in it, but Fire Geyers, on the other hand, tend to appear in narrower pathways and they fire on a timer. Any non-reds who are hit scatter and have to be whistled to be blown out, but because they scatter in a panic (unlike drowning, where they stay in one spot as you recall them back), it's more difficult to save Pikmin who are set ablaze. So while you can do fire-based puzzles without Red Pikmin (unlike water, which can only be done with Blue Pikmin), it would be foolish to try it and you'll probably end up losing quite a few Pikmin. Because of their higher attack power and their unique elemental resistance, Red Pikmin are the best of the three Pikmin in Pikmin 1 and should be the bulk of your forces in the majority of combat scenarios.
Unfortunately for Red Pikmin, the sequel, Pikmin 2, is less than kind to them. But first, let's talk about some things the game added that were good for Red Pikmin. First, there are now two new fire-based enemies, those being the treasure-snatching Fiery Dweevil and the Pikmin-devouring Fiery Bulblax. Of the two, the Fiery Bulblax, with its back covered in flames, is the one where Red Pikmin shine the most, because only Red Pikmin can even attack them without burning up. Red Pikmin also gained a little utility because, unlike in Pikmin 1, the Fire Geysers can now be destroyed, so Red Pikmin can be used to clear hazards rather than just avoid them. Unfortunately, this does serve to underline a wider point, and that is that Red Pikmin just aren't as useful as they were in the previous game.

Since Fire Geysers can be destroyed outright, you only need to bring a few reds with you to destroy them. Unlike in the previous game, where you needed them just to safely pass them, you now only need the reds to remove them and you can take any type with you after that. In addition, since fire isn't an instant kill (like electricity), and the Fire Geysers don't constantly shoot fire like the Gas Pipe (which spits poison), it's possible to destroy Fire Geysers without even using reds!
But where Red Pikmin really suffer is in the game's combat. Reds have been reduced to only the second-strongest type in the game, which you'd think sounds great! The problem is the gap between strongest and second-strongest is very wide. Pikmin 2 introduces a new type of Pikmin, the Purple Pikmin. The Purple Pikmin are as strong as ten Pikmin and attack for more damage than the reds do. Making matters worse for the reds is that Purple Pikmin are so heavy that they not only cause damage to the enemy, but they also stun many of them. Because of this, reds are just completely outclassed by Purple Pikmin. Now, the downside to purples is that they don't get thrown very far, so they aren't great against enemies like Beady Long Legs or something like the Pileated Snagret, but those enemies aren't great for reds either, and are better suited for yellows. Worst still, the one enemy that reds are supposed to be the most effective Pikmin against, the Fiery Bulblax, can still be beaten by purples since purples cause damage on impact. There's just no advantage to using to using reds over purples, so the thing that they really excelled at in Pikmin 1, they've now been completely outclassed in.
Believe it or not, it really kind of gets worse. You see, Purple Pikmin and the other new Pikmin, the White Pikmin, can only be grown in specific Candypop Buds inside caves. Because of this, you have to sacrifice a type of Pikmin to make either a purple or a white, and, unfortunately for reds, they're the best type to sacrifice. The problem reds have is that they're sort of stuck in a jack-of-all-stats, master-of-none situation. Unlike the other types (outside of purples), they really don't have anything that only they can do. Yellows have higher throws and electricity immunity (which is an instakill for some reason), blues are the only Pikmin that can breath underwater, and, finally, White Pikmin are immune to poison and are the only Pikmin that can detect buried treasure. Reds, unfortunately, are only immune to fire and the problem with that is that, while that makes them the best-suited for destroying Fire Geysers, it's perfectly possible to destroy them with other Pikmin. Because of this, reds really only serve as the perfect fodder to make the Pikmin you can't get outside of caves. It's kind of sad, because they go from being the best Pikmin in Pikmin 1 to the worst Pikmin in Pikmin 2.

Pikmin 3 is a mixed bag for Red Pikmin. Let's start with the bad. The fire immunity is now less useful than ever. While Fire Geysers are back to being indestructible, which should be good for Red Pikmin, the problem is that Fire Geysers are now rarer than ever, only appearing in two of the four levels in Pikmin 3. This is compared to three levels in Pikmin 1 and seven caves in Pikmin 2. In addition, the number of fiery enemies drops from three to two, with the Fiery Dweevil and the Fiery Bulblax being dropped and a new fire enemy, the Pyroclasmic Slooch, a flaming slug, being introduced. Because of this, the fire immunity is probably the most worthless of the abilities, with almost no real utility.
But luckily for Red Pikmin, while their fire immunity is mostly worthless, they make up for it by getting their combat mojo back, because Pikmin 3 drops the Purple Pikmin and replaces them with the much more balanced Rock Pikmin. You see, the Rock Pikmin have somewhat similar abilities to purples in the sense that they damage enemies when they bounce on them. The difference is, unlike purples, who latch onto enemies and keep attacking them, Rock Pikmin, on the other hand, bounce off and instead have to charge back at the enemies. Because of this, while Rock Pikmin are great for the initial attack, they aren't as good for standard attacks. So Red Pikmin, by nature, are the best standard attacking Pikmin in the game. There's even some bonus utility! Since Pikmin 3 lets you switch Pikmin on command, you can easily switch from Rock Pikmin to reds, allowing you to take advantage of both Pikmin types' attack powers. Because of this, while reds don't capture the heights of the first game, they're no longer the worst Pikmin and they no longer serve as mostly fodder to make other Pikmin!
Red Pikmin history is strange. They go from the best, to the worst, then to the middle. The real problem for Red Pikmin is that, since the fire element isn't really used a lot, they really only have their extra attack power to boost them. So if there's a situation like Pikmin 2 where a Pikmin gets introduced that is better than them in combat, reds just become, sadly, obsolete.
That's all for this month. Join us next month when we cover the wild history of the Yellow Pikmin.
| The 'Shroom: Issue 196 | |
|---|---|
| Staff sections | Staff Notes • The 'Shroom Spotlight |
| Features | Fake News • Fun Stuff • Palette Swap • Pipe Plaza • Critic Corner • Strategy Wing |