Tyrant Twin Tussle: Difference between revisions
LinkTheLefty (talk | contribs) mNo edit summary |
LinkTheLefty (talk | contribs) mNo edit summary |
||
| Line 13: | Line 13: | ||
==Layout== | ==Layout== | ||
The levels begins with the Kongs passing a small alcove to meet the first Kuff 'n' Klout. Once they dodge these enemies fully, finding their attacks patterns, the monkeys will hit a [[DK Barrel]] to rescue a lost monkey and jump over more Kuff 'n' Klouts. With the help of some bananas, they should get away from the enemies and move over to another set a Kuff 'n' Klouts, running towards the monkeys. The heroes should dodge them both and grab the letter K. Farther on, the group will walk along the straight path and find more Kuff 'n' Klouts. Again, with some bananas laid out to mark where the enemies will not land can help the Kongs avoid the foes and be able to travel to the next set of charging Kuff 'n' Klouts. In a gap in this area, they will find the letter O. After they pass the Kuff 'n' Klouts in their way, they will walk across a rather straight path and soon find the [[Star Barrel]]. | The levels begins with the Kongs passing a small alcove to meet the first Kuff 'n' Klout. Once they dodge these enemies fully, finding their attacks patterns, the monkeys will hit a [[DK Barrel]] to rescue a lost monkey and jump over more Kuff 'n' Klouts. With the help of some bananas, they should get away from the enemies and move over to another set a Kuff 'n' Klouts, running towards the monkeys. The heroes should dodge them both and grab [[KONG Letters|the letter K]]. Farther on, the group will walk along the straight path and find more Kuff 'n' Klouts. Again, with some bananas laid out to mark where the enemies will not land can help the Kongs avoid the foes and be able to travel to the next set of charging Kuff 'n' Klouts. In a gap in this area, they will find the letter O. After they pass the Kuff 'n' Klouts in their way, they will walk across a rather straight path and soon find the [[Star Barrel]]. | ||
About halfway into the level, the heroes will have to dodge another Kuff 'n' Klout, whom will charge at them as they finish hopping through the long cavern. Shortly after passing these foes, the monkeys will find more Kuff 'n' Klouts to dodge and then the letter N in a small gap found in the ceiling. Again, they will meet more Kuff 'n' Klouts, hopping along the rigid ground. While avoiding a few red Buzzes in their way, the apes should avoid all these foes and blast through a barrel to reach a lower area. In this area, they will pass more Kuff 'n' Klouts and soon find the letter G. Traveling a little more into the level, [[Dixie Kong]] and [[Kiddy Kong]] will pass another Kuff 'n' Klout. The [[Level Flag]] is shortly after, and by pulling it, the Kongs complete the level and acquire the third [[cog (Donkey Kong Country 3: Dixie Kong's Double Trouble!)|cog]] for [[Boomer (Donkey Kong Country 3: Dixie Kong's Double Trouble!)|Boomer]]'s machine. | About halfway into the level, the heroes will have to dodge another Kuff 'n' Klout, whom will charge at them as they finish hopping through the long cavern. Shortly after passing these foes, the monkeys will find more Kuff 'n' Klouts to dodge and then the letter N in a small gap found in the ceiling. Again, they will meet more Kuff 'n' Klouts, hopping along the rigid ground. While avoiding a few red Buzzes in their way, the apes should avoid all these foes and blast through a barrel to reach a lower area. In this area, they will pass more Kuff 'n' Klouts and soon find the letter G. Traveling a little more into the level, [[Dixie Kong]] and [[Kiddy Kong]] will pass another Kuff 'n' Klout. The [[Level Flag]] is shortly after, and by pulling it, the Kongs complete the level and acquire the third [[cog (Donkey Kong Country 3: Dixie Kong's Double Trouble!)|cog]] for [[Boomer (Donkey Kong Country 3: Dixie Kong's Double Trouble!)|Boomer]]'s machine. | ||
==Enemies== | ==Enemies== | ||
{|class="dktable-brown" width=10% | {|class="dktable-brown"width=10% | ||
|- | |- | ||
!Name | !Name | ||
!Count | !Count | ||
|- | |- | ||
|align="center" |[[File:Kuff Klout DKC3.png]]<br>[[Kuff 'n' Klout]] | |align="center"|[[File:Kuff Klout DKC3.png]]<br>[[Kuff 'n' Klout]] | ||
|13 pairs | |13 pairs | ||
|- | |- | ||
|align="center" |[[File:Krimp DKC3.png]]<br>[[Krimp]] | |align="center"|[[File:Krimp DKC3.png]]<br>[[Krimp]] | ||
|4 | |4 | ||
|- | |- | ||
|align="center" |[[File:Buzz DKC3 red.png]][[File:Buzz DKC3 green.png]]<br>[[Buzz (enemy)|Buzz]] | |align="center"|[[File:Buzz DKC3 red.png]][[File:Buzz DKC3 green.png]]<br>[[Buzz (enemy)|Buzz]] | ||
|5 (red)<br>1 (green)<br>'''Total''': 6 | |5 (red)<br>1 (green)<br>'''Total''': 6 | ||
|- | |- | ||
|align="center" |[[File:Bazuka DKC3.png]]<br>[[Bazuka]] | |align="center"|[[File:Bazuka DKC3.png]]<br>[[Bazuka]] | ||
|1 | |1 | ||
|- | |- | ||
|align="center" |[[File:Booty Bird DKC3.png]]<br>[[Booty Bird]] | |align="center"|[[File:Booty Bird DKC3.png]]<br>[[Booty Bird]] | ||
|1 | |1 | ||
|} | |} | ||
==Items and objects== | ==Items and objects== | ||
{|class="dktable-brown" width=15% | {|class="dktable-brown"width=15% | ||
|- | |- | ||
!Sprite | !Sprite | ||
| Line 51: | Line 51: | ||
|- | |- | ||
|[[File:Bear Coin.png]] | |[[File:Bear Coin.png]] | ||
|[[Bear | |[[Bear coin]] | ||
|6 | |6 | ||
|- | |- | ||
| Line 73: | Line 73: | ||
!Location | !Location | ||
|- | |- | ||
| align="center" |[[File:Tyrant Twin Tussle DKC3 K.png]] | |align="center"|[[File:Tyrant Twin Tussle DKC3 K.png]] | ||
|Found above some running Kuff 'n' Klout | |Found above some running Kuff 'n' Klout | ||
|- | |- | ||
| align="center" |[[File:Tyrant Twin Tussle DKC3 O.png]] | |align="center"|[[File:Tyrant Twin Tussle DKC3 O.png]] | ||
|In a hole in the ceiling above a Kuff 'n' Klout charging | |In a hole in the ceiling above a Kuff 'n' Klout charging | ||
|- | |- | ||
| align="center" |[[File:Tyrant Twin Tussle DKC3 N.png]] | |align="center"|[[File:Tyrant Twin Tussle DKC3 N.png]] | ||
|Near the top of the ceiling after the second Bonus Barrel | |Near the top of the ceiling after the second Bonus Barrel | ||
|- | |- | ||
| align="center" |[[File:Tyrant Twin Tussle DKC3 G.png]] | |align="center"|[[File:Tyrant Twin Tussle DKC3 G.png]] | ||
|Above a Krimp proceeding a fork in the path | |Above a Krimp proceeding a fork in the path | ||
|} | |} | ||
| Line 96: | Line 96: | ||
|} | |} | ||
== Bonus Levels == | ==Bonus Levels== | ||
{|class="dktable-brown" width=70% | {|class="dktable-brown"width=70% | ||
|- | |- | ||
!Image | !Image | ||
| Line 103: | Line 103: | ||
|- | |- | ||
|[[File:Tyrant Twin Tussle DKC3 Bonus Area 1.png]] | |[[File:Tyrant Twin Tussle DKC3 Bonus Area 1.png]] | ||
|'''Collect 40 Stars!'''<br>After getting the DK Coin, Squitter must pass the nearby Bazuka and fall into a small gap with a [[Bonus Barrel]] at the bottom. Alternatively, the Kongs can enter it themselves if Kiddy throws Dixie up into a ceiling gap just before the No Animal Sign. In the [[Bonus Level]], Squitter or the Kongs have 40 seconds to collect 40 [[Star (Donkey Kong Country series)|star]]s in a flat area with some Kuff 'n' Klouts. In the Game Boy Advance remake, the stars were relocated in the path that the twins are running on instead of above. Once every star is collected, a [[Bonus Coin]] appears at the end. | |'''Collect 40 Stars!'''<br>After getting the DK Coin, Squitter must pass the nearby Bazuka and fall into a small gap with a [[Bonus Barrel]] at the bottom. Alternatively, the Kongs can enter it themselves if Kiddy throws Dixie up into a ceiling gap just before the No Animal Sign. In the [[Bonus Level]], Squitter or the Kongs have 40 seconds to collect 40 [[Star (Donkey Kong Country series)|star]]s in a flat area with some Kuff 'n' Klouts. In the Game Boy Advance remake, the stars were relocated in the path that the twins are running on instead of above. Once every star is collected, a [[Bonus Coin (Donkey Kong Country 3: Dixie Kong's Double Trouble!)|Bonus Coin]] appears at the end. | ||
|- | |- | ||
|[[File:Tyrant Twin Tussle DKC3 Bonus Area 2.png]] | |[[File:Tyrant Twin Tussle DKC3 Bonus Area 2.png]] | ||
| Line 120: | Line 120: | ||
Tyrant Twin Tussle DKC3 Squitter Barrel.png|The Kongs sit next to the Squitter Barrel | Tyrant Twin Tussle DKC3 Squitter Barrel.png|The Kongs sit next to the Squitter Barrel | ||
Tyrant Twin Tussle DKC3 second Bonus Barrel.png|The Kongs reach the second Bonus Barrel | Tyrant Twin Tussle DKC3 second Bonus Barrel.png|The Kongs reach the second Bonus Barrel | ||
Tyrant Twin Tussle DKC3 Bear Coins.png|The Kongs find two | Tyrant Twin Tussle DKC3 Bear Coins.png|The Kongs find two bear coins in an area with two jumping Kuff 'n' Klouts | ||
Tyrant Twin Tussle DKC3.png|The level tinted red after the reveal of the [[Knautilus]] | Tyrant Twin Tussle DKC3.png|The level tinted red after the reveal of the [[Knautilus]] | ||
</gallery> | </gallery> | ||
Revision as of 14:54, December 17, 2021
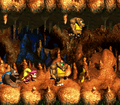
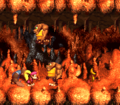
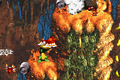
Template:Levelbox Tyrant Twin Tussle is the thirty-eighth level in Donkey Kong Country 3: Dixie Kong's Double Trouble! It is also the third area of the lost world, Krematoa. In the game's Game Boy Advance remake, the level is instead the forty-fourth level, due to the addition of Pacifica. It is the last level to take place in a cavern, and it prominently features Kuff 'n' Klouts, which are twins who always appear together as a pair. They either run across the cavern floors or alternate in jumping from one side to the other. Dixie and Kiddy can defeat Kuff 'n' Klouts with a TNT Barrel, although in most instances, the Kongs must avoid these enemies. They can avoid the jumping Kuff 'n' Klouts by walking between them as they jump, or the running ones by jumping over them. A few Krimps and Buzzes appear in the level, and a Booty Bird and a Bazuka each appear in a hidden area.
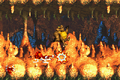
During the first half, the Kongs can use a team up throw to enter an Animal Barrel and transform into Squitter the Spider. This Animal Friend is required to reach a Bonus Level and a Koin before the Star Barrel, and he can defeat Kuff 'n' Klouts with his web projectiles. By taking damage, Squitter makes a different sound than in other levels. His No Animal Sign is just before the Star Barrel.
Layout
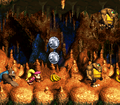
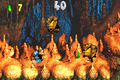
The levels begins with the Kongs passing a small alcove to meet the first Kuff 'n' Klout. Once they dodge these enemies fully, finding their attacks patterns, the monkeys will hit a DK Barrel to rescue a lost monkey and jump over more Kuff 'n' Klouts. With the help of some bananas, they should get away from the enemies and move over to another set a Kuff 'n' Klouts, running towards the monkeys. The heroes should dodge them both and grab the letter K. Farther on, the group will walk along the straight path and find more Kuff 'n' Klouts. Again, with some bananas laid out to mark where the enemies will not land can help the Kongs avoid the foes and be able to travel to the next set of charging Kuff 'n' Klouts. In a gap in this area, they will find the letter O. After they pass the Kuff 'n' Klouts in their way, they will walk across a rather straight path and soon find the Star Barrel.
About halfway into the level, the heroes will have to dodge another Kuff 'n' Klout, whom will charge at them as they finish hopping through the long cavern. Shortly after passing these foes, the monkeys will find more Kuff 'n' Klouts to dodge and then the letter N in a small gap found in the ceiling. Again, they will meet more Kuff 'n' Klouts, hopping along the rigid ground. While avoiding a few red Buzzes in their way, the apes should avoid all these foes and blast through a barrel to reach a lower area. In this area, they will pass more Kuff 'n' Klouts and soon find the letter G. Traveling a little more into the level, Dixie Kong and Kiddy Kong will pass another Kuff 'n' Klout. The Level Flag is shortly after, and by pulling it, the Kongs complete the level and acquire the third cog for Boomer's machine.
Enemies
| Name | Count |
|---|---|
Kuff 'n' Klout |
13 pairs |
Krimp |
4 |
Buzz |
5 (red) 1 (green) Total: 6 |
Bazuka |
1 |
Booty Bird |
1 |
Items and objects
| Sprite | Name | Count |
|---|---|---|
| DK Barrel | 2 | |
| Bear coin | 6 | |
| TNT Barrel | 1 | |
| Green Balloon | 1 | |
| Animal Barrel | 1 (Squitter) |
K-O-N-G Letters
| Letter | Location |
|---|---|

|
Found above some running Kuff 'n' Klout |

|
In a hole in the ceiling above a Kuff 'n' Klout charging |

|
Near the top of the ceiling after the second Bonus Barrel |

|
Above a Krimp proceeding a fork in the path |
DK Coin
| Image | Location |
|---|---|

|
When the Kongs encounter the first Krimp, Kiddy must use team up and throw Dixie up to a banana in a gap in the ceiling, causing her to land onto a hidden area above. The area has an Animal Barrel of Squitter and a Booty Bird. The Kongs must transform into Squitter and continue in the level. After the letter O, Squitter must create web platforms to go up a gap in the ceiling. The Koin is on a platform beneath a Bazuka, who blasts Steel Barrels at a wall on the left. Squitter must create a few more web platforms to guide the Steel Barrel to Koin. He must go above the Koin so that it faces up, causing the Steel Barrel to bounce into Koin from behind, defeating it and rewarding the DK Coin to the Kongs. |
Bonus Levels
| Image | Type and description |
|---|---|

|
Collect 40 Stars! After getting the DK Coin, Squitter must pass the nearby Bazuka and fall into a small gap with a Bonus Barrel at the bottom. Alternatively, the Kongs can enter it themselves if Kiddy throws Dixie up into a ceiling gap just before the No Animal Sign. In the Bonus Level, Squitter or the Kongs have 40 seconds to collect 40 stars in a flat area with some Kuff 'n' Klouts. In the Game Boy Advance remake, the stars were relocated in the path that the twins are running on instead of above. Once every star is collected, a Bonus Coin appears at the end. |

|
Find the Coin! Just before the letter N, the Kongs can find a gap in the ceiling. They must use team up to throw a Kong into a Barrel Cannon above. They must blast up to a platform on the left side and pick up a TNT Barrel to the very left while avoiding a Kuff 'n' Klout. With the TNT Barrel, the Kongs must jump across the gap and onto a platform to the right. With the TNT Barrel, the Kongs must defeat two red Buzzes to access the Bonus Barrel above. If the Kongs accidentally hit the Kuff 'n' Klout with a TNT Barrel, the only other way for them to enter the Bonus Barrel is by performing a precisely angled team up throw. In the Bonus Level, the Kongs have 35 seconds to collect the Bonus Coin on the other side. The Kongs must avoid a pair of Kuff 'n' Klout twins running in the path, by jumping at gaps in the ceiling. In the Game Boy Advance remake, there is only one pair of Kuff 'n' Klout running between the left and right ends of the room. |

|
Grab 15 Bananas! At the end of the level, the Kongs must jump at a banana to the right of a Level Flag to land into a hidden Bonus Barrel. In the Bonus Level, the Kongs have 50 seconds to collect 15 green bananas while moving between a Kuff 'n' Klout that jump back and forth. This Bonus Level has the longest time limit of the others. The bananas appear in one of three locations; two are in a safe spot where the Kuff 'n' Klout do not land on the Kongs, and the third is in the middle of the room where the Kuff 'n' Klout eventually jump at. When the Kongs collect all 15 green bananas, the Bonus Coin appears to the right. |
Gallery
Super Nintendo Entertainment System
The Kongs move between a jumping Kuff 'n' Klout
The Kongs sit next to the Squitter Barrel
The Kongs reach the second Bonus Barrel
The Kongs find two bear coins in an area with two jumping Kuff 'n' Klouts
The level tinted red after the reveal of the Knautilus


Game Boy Advance
Squitter defeats a Kuff 'n' Klout twin with a web projectile
Squitter stands on the Koin
Kiddy in the third Bonus Level


Names in other languages
| Language | Name | Meaning |
|---|---|---|
| Japanese | さいきょうのふたご Saikyou no futago |
The Strongest Twins |
| German | Zwillings-Zerwürfnis |
Twin Dispute |
| Italian | Siamesi Disastrosi |
Disastrous Simease |
| Spanish | Pelea Doble de Tiranos |
Double Tyrant Tussle |