Lava Lagoon (Donkey Kong Country 2: Diddy's Kong Quest): Difference between revisions
Fawfulfury65 (talk | contribs) m (→Secrets) |
m (Text replacement - "<br />" to "<br>") |
||
| (76 intermediate revisions by 41 users not shown) | |||
| Line 1: | Line 1: | ||
{{ | {{italic title|id=yes}} | ||
| | {{level infobox | ||
|image=[[ | |image=[[File:Lava Lagoon.png]] | ||
|code=2 - 3 | |code=2 - 3 | ||
|game=''[[Donkey Kong Country 2: Diddy's Kong Quest | |world=[[Crocodile Cauldron]] | ||
| | |game=''[[Donkey Kong Country 2: Diddy's Kong Quest]]'' | ||
|before=[[Kannon's Klaim|<<]] | |track=Lockjaw's Saga | ||
|before=[[Kannon's Klaim (Donkey Kong Country 2: Diddy's Kong Quest)|<<]] | |||
|after=[[Red-Hot Ride|>>]] | |after=[[Red-Hot Ride|>>]] | ||
}} | }} | ||
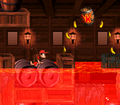
'''Lava Lagoon''' is the eighth level of ''[[Donkey Kong Country 2: Diddy's Kong Quest]]'' and | '''Lava Lagoon''' is the eighth level of ''[[Donkey Kong Country 2: Diddy's Kong Quest]]'' and the third level of [[Crocodile Cauldron]]. It is the second level set inside a cargo hold of a shipwreck, the first being [[Lockjaw's Locker (Donkey Kong Country 2: Diddy's Kong Quest)|Lockjaw's Locker]]. It is full of bright red [[lava]], though a few [[Invincibility Barrel|Exclamation Point Barrel]]s along the way can make them temporarily immune to the lava's harmful effects. Several [[Clapper]]s appear throughout Lava Lagoon, and the Kongs can jump on them to temporarily cool the lava into water. The Kongs must quickly swim through the water before it turns back to lava, and they can escape from it by either returning on land or swimming onto the next Clapper. This level introduces an underwater pufferfish enemy, [[Puftup]]s. While on land, the Kongs encounter a few enemies like [[Klampon]]s and [[Click-Clack]]s. There is a hidden [[animal crate]] containing [[Enguarde]] just after the Star Barrel. Just like Lockjaw's Locker, there are certain parts of the walls which the Kongs can optionally swim through; doing so is required for the Kongs to reach Enguarde. | ||
==Layout== | |||
[[File:Lava Lagoon DKC2 GBA.png|thumb|left|Lava Lagoon in the Game Boy Advance version]] | |||
The Kongs begin the stage on some large crates and barrels with a small pit ahead of them that is full of hot water. A [[DK Barrel]] and some [[banana]]s float above this pit. After the heroes pass a nearby Neek and climb over a pile of crates, barrels, and other objects, they can find a Clapper and a large pool of water. By jumping on the seal, they can cool down the hot water so that they can swim through it. In the water, they can find a Flotsam, some [[banana]]s, and a single [[Banana Bunch]]. Some large crates float on top of the water, and a Klampon walks along them. If the heroes continue to the east from here and make their way to the other side of the water area, they come along some more large crates and past a lone Klampon. Soon, they discover another Clapper next to a pool of water, which they must cool down with the seal buddy. As they swim through the wide, underwater area, they come past a few Flotsams and some bananas. A [[Banana Coin]] is also hidden in this area in an alcove that is guarded by one of the Flotsams. Once the primates make their way to the other end of the water area, they reach a few more large boxes that they can walk on. They can find a Clapper with a DK Barrel above it in this area near a pool of water. As they travel through the water, with the help of the Clapper who can cool it down, they approach the letter K and some bananas in a few small alcoves. One of the alcoves, which contains several bananas, is guarded by a Flotsam that moves back and forth in a horizontal path. After the Kongs pass this Flotsam and another alcove that contains a Banana Bunch, they head up a passage leading to the north with an additional Flotsam in it. If they continue upwards from here, they reach the surface of the water, where they can find two large barrel platforms with a [[Blast Barrel]] on one of them. | |||
The Blast Barrel can blast them upwards into a higher area with another Blast Barrel in it, which can then shoot them onto some crates. As they shoot through the barrels, the water level quickly rises. Additionally, after shooting out of the first of the Blast Barrels, the primates can move along the left side of the wall to head through a crate and into a thin area that contains another Blast Barrel, which can blast them onto the higher crates and to a Banana Coin. After the heroes reach the top of the area with either of the two paths, they can find a Klampon and another Clapper next to an area of water. Once the seal cools down the water, they can safely swim through to find some bananas along the ground. Some Flotsams and two Lockjaws also swim through the water, which the letter O is located above in an alcove. A small gap is also placed at the top of the underwater area, and if the primates jump through it, they can find an area above the water that contains an [[Invincibility Barrel|Exclamation Point Barrel]]. If they continue through the water from here, they soon reach a Banana Bunch in a small alcove and a passage leading upwards, where the heroes can find some large crates above the surface of the water that hold a Klampon. A [[Star Barrel]] is located above these crates. | |||
Two small gaps full of water are ahead of here, and a Kaboing jumps on the thin platform between them. There is a Clapper placed after the pits, and the heroes can bounce on the helper to cool down a nearby area of water. As they swim through this water, they come up to a DK Barrel and a few crates in the bottom-right corner of the area that they can swim through to find a hidden room with an [[animal crate]] containing Enguarde in it. A Banana Bunch is also located next to this crate. If the primates head west through the underwater area, they make their way past some bananas and Puftups. After they pass the foes, they make their way up a passage that take them to some large crates and barrels positioned above the surface of the water. A Clapper is on these objects, and once the heroes approach it, the water level rises. After the water rises, the heroes must make their way through a passage that is placed above a group of bananas that form an arrow pointing upwards. If they follow the arrow and head upwards, they make their way into a large area full of Lockjaws. | |||
[[File:Lava Lagoon DKC2 shot 3.png|thumb|Dixie drops into a gap located under a DK Barrel]] | |||
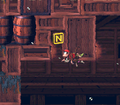
A hidden passage over some crates is in the top-left corner of this wide room, and it leads the heroes to many collectibles, including bananas, two Banana Coins, and the letter N. As they head through the passage, they can also, in the Game Boy Advance version only, find a hidden room with a Lockjaw in possession of a [[photograph]] in it. If the primates do not travel through this hidden path, they must instead head through a wide room full of Lockjaws. Some bananas and another letter N are located around the area for the heroes to grab. Eventually, the Kongs make their way to the surface of the water, where they can find some large crates and barrels that they can walk on. A [[No Animal Sign]] is in this area; once it is passed, Enguarde disappears, and the heroes are awarded with a red [[Extra Life Balloon]]. There are some large crates, one of which that holds a [[barrel]], ahead of the sign, and the heroes must climb over it while dodging a single Click-Clack to reach a small gap and a DK Barrel. | |||
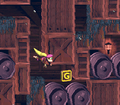
Once they drop into the gap, they can find a thin passage leading to the west that is full of Click-Clacks. At the end of the passage, they can find a Clapper next to a pool of water. As they swim through this water, they come past several Puftups that rise and fall in the water. Alcoves are also scattered throughout the area, and they contain bananas and a Banana Bunch. Soon, they Kongs make their way into a thin passage that leads to both a small area with the letter G in it and another room with a Clapper in it. A hidden area can be accessed if they swim through the crates to the right of the Clapper, and it holds several bananas, an Exclamation Point Barrel, and a [[DK Coin|Video Game Hero Coin]]. A Blast Barrel is also located at the end of this hidden room to blast the heroes out of the water before it burns them. If the primates do not take this hidden path, they must instead swim upwards through a narrow passage to reach the surface of the water, where they can find some large crates and barrels with a Klobber on them. The [[End of Level Target]] is just ahead, and the Kongs can use [[team up]] to enter a [[Barrel Cannon]] (or [[Dixie Barrel]] in the Game Boy Advance version) to land on the target for a prize. The prizes include either a Banana Bunch, Banana Coin, or a Red Balloon. | |||
==Enemies== | |||
The following enemies appear in the following quantities: | |||
<gallery> | |||
Click Clack DKC2.png|[[Click-Clack]] (3) | |||
Flotsam DKC2 blue.png|[[Flotsam]] (blue) (14) | |||
Flotsam DKC2 green.png|Flotsam (green) (4) | |||
Kaboing DKC2 gray.png|[[Kaboing]] (gray) (1) | |||
Klampon DKC2.png|[[Klampon]] (5) | |||
Klobber DKC2 green.png|[[Klobber]] (green) (1) | |||
Lockjaw DKC2.png|[[Lockjaw]] (5) | |||
Neek DKC2.png|[[Neek]] (1) | |||
Puftup DKC2.png|[[Puftup]] (14){{footnote|main|a}} | |||
</gallery> | |||
{{footnote|note|a|Of the 14 Puftups, eight of them appear in the main level, while the other six are in the Bonus Level.}} | |||
== | ==Items and objects== | ||
The following items and objects appear in the following quantities: | |||
=== | <gallery> | ||
*After the Kongs | Banana Coin.png|[[Banana Coin]] (10) | ||
DK Barrel.png|[[DK Barrel]] (5) | |||
Invincibility Barrel.png|[[Invincibility Barrel|Exclamation Point Barrel]] (2) | |||
NoAnimalSign-Enguarde-DKC2.png|[[No Animal Sign]] (2){{footnote|main|b}} | |||
Red Extra Life Balloon DKC2.png|[[Red Balloon]] (2) | |||
</gallery> | |||
{{footnote|note|b|There are two [[No Animal Sign]]s in the level: one appears just outside the Bonus Level entrance while the other appears at the end of the Bonus Level. Both of them reward a [[Red Balloon]] if crossed with Enguarde.}} | |||
===KONG Letters=== | |||
[[File:Lava-Lagoon-SNES-O.png|thumb|The letter O]] | |||
*'''K:''' After jumping on the third Clapper, the Kongs must swim all the way down in the water. The letter K appears in an alcove on their left. | |||
*'''O:''' In the third section of water, the Kongs encounter a group of Flotsam. They must swim above the first Lockjaw and collect the letter O overhead. | |||
*'''N:''' Lava Lagoon, unlike most other levels, there are two letter N's: One of them is in an alcove above the third Lockjaw from the Star Barrel, and the other one is placed in a vertical, narrow passage just before the Lockjaw, also featuring two Banana Coins and 14 bananas. | |||
*'''G:''' After the Bonus Level, Diddy and Dixie must swim past a few Puftups. Afterwards, they must go down a vertical gap. The letter G appears in an alcove to the right. | |||
{{br}} | |||
=== | ===Key items=== | ||
The [[DK Coin]] | [[File:Lava-Lagoon-SNES-DKCoin.png|thumb|The location of the Video Game Hero Coin]] | ||
*'''[[DK Coin|Cranky's Video Game Hero Coin]]:''' After the letter G, the Kongs must continue swimming up to find the last Clapper of the level. To the right of Clapper is a gap which Diddy and Dixie can pass through. It leads into a large, enclosed space with an [[Invincibility Barrel|Exclamation Point Barrel]], followed by a [[DK Barrel]]. The Kongs must continue swimming up, as they follow a trail of bananas, to find the Video Game Hero Coin, which appears in the center of the area. The Kongs can exit the area by swimming into a Blast Barrel at the top-left. | |||
*'''[[Golden feather]] (Game Boy Advance version only):''' After the Bonus Level, the Kongs must continue into an area with four Puftups. Between the second and third Puftup,the Kongs must swim upward to a small gap. From here, Diddy and Dixie can jump out the water to collect the golden feather floating in the alcove above. | |||
*'''[[Photograph]] (Game Boy Advance version only):''' When the Kongs and Enguarde (who is required to be with them) encounter the first Lockjaw after the Star Barrel, they must swim to the gap at the top-left, pass through the small crates overhead, and continue up the narrow, vertical path; it is the same path that leads to the second letter N. At the top, when the Kongs and Enguarde turn right, there is an alcove above that has a Lockjaw with a photograph icon. Enguarde must defeat the Lockjaw for the Kongs to obtain its photograph, which, once obtained, appears in the fourth page of the [[Scrapbook (Donkey Kong Country series)|Scrapbook]]. | |||
{{br}} | |||
== | ==Bonus Level== | ||
The [[ | [[File:Lava Lagoon Bonus Area.png|thumb|The Bonus Level of Lava Lagoon]] | ||
There is only one [[Bonus Level]], listed by its type: | |||
*'''Destroy them All!''': After the Star Barrel, and swimming past some Lockjaws, Diddy and Dixie appear in front of the No Animal Sign. They must pick up the nearby barrel, then jump down, and run it into the wall located directly right from the No Animal Sign. A lone banana appears just before the wall as a hint of its location. This creates an opening for them to enter into. The object is to defeat ten enemies within 35 seconds: six of them are Puftups and four are Flotsam. Enguarde appears at the start of the Bonus Level for the Kongs to ride, because they cannot defeat the enemies without Enguarde. Afterwards, they must continue forward through the narrow maze, set between large crates and barrels, and defeat the underwater enemies with Enguarde as they go along. At the end of the path, the Kongs and Enguarde stumble upon a Puftup blocking the entrance into an enclosed space with the No Animal Sign and level exit. After defeating the Puftup, the [[Kremkoin]] appears in the enclosed area, past the No Animal Sign but before the exit. After collecting the Kremkoin, the Kongs swim through the opening to exit the Bonus Level. | |||
{{br}} | |||
== | ==Warp Barrel== | ||
[[File:Lava Lagoon Warp Barrel location GBA.png|thumb|left|The location of the Warp Barrel in the Game Boy Advance version]] | |||
At the start of the level, the Kongs must go onto the platform with the first Klampon. From the right corner of the platform, the Kongs must perform [[team up]] and throw the other Kong straight up to enter the [[Warp Barrel]]. This leads them into a single-screen, narrow area. The Kongs must walk down the two large barrels, then pass the bananas arranged in an exclamation mark shape, and exit from the right. This takes them back into the main level, where they appear just before the End of Level Target. | |||
{{br|left}} | |||
== | ==Gallery== | ||
<gallery> | |||
Lava Lagoon DKC2 start.png|The start of the level | |||
Lava-Lagoon-SNES-K.png|The letter K | |||
Lava Lagoon DKC2 shot.png|Diddy jumps over a gap at the start, with lava appearing below | |||
Lava Lagoon DKC2 Flotsams.png|The Kongs swim between Flotsams | |||
Lava Lagoon DKC2 shot 2.png|The Kongs swim through an underwater area and avoid a Flotsam | |||
Lava Lagoon DKC2 Star Barrel.png|The Kongs encounter a Klampon and find the Star Barrel | |||
Lava Lagoon DKC2 Enguarde Crate.png|The location of the Enguarde Box | |||
Lava Lagoon DKC2 No Animal Sign.png|The Kongs and Enguarde swim to the No Animal Sign | |||
Lava-Lagoon-SNES-N2.png|One of the letter N's of Lava Lagoon | |||
Lava-Lagoon-SNES-G.png|The letter G | |||
Lava Lagoon DKC2 end.png|The Kongs appear before the End of Level Target and a Barrel Cannon | |||
Lava Lagoon GBA Lockjaw.png|The Kongs encounter a Lockjaw in the water in the Game Boy Advance version | |||
Lava Lagoon GBA Invincibility Barrel 2.png|The Kongs find an Exclamation Point Barrel on the path to the DK Coin in the Game Boy Advance version | |||
Lava Lagoon GBA end.png|Dixie performing on her guitar on the End of Level Target after hitting it from the Dixie Barrel in the Game Boy Advance version | |||
</gallery> | |||
==== | ==Names in other languages== | ||
{{foreign names | |||
<br | |Jap=しゃくねつダイビング | ||
|JapR=Shakunetsu Daibingu | |||
|JapM=Red-Hot Diving | |||
|Spa=Charco de Lava | |||
|SpaM=Lava Pool | |||
|Fre=Lagon de Lave | |||
|FreM=Lagoon of Lava | |||
|Ger=Lava Lagune (SNES)<br>Lavalagune (GBA) | |||
|GerM=Lava Lagoon | |||
|Ita=Lapilli e Zampilli | |||
|ItaM=Lapilli and Zampilli | |||
}} | |||
{{DKC2}} | {{DKC2}} | ||
[[Category:Pirate areas]] | |||
[[Category: | [[Category:Volcanic areas]] | ||
[[Category:Aquatic areas]] | |||
[[Category:Crocodile Isle]] | [[Category:Crocodile Isle]] | ||
[[Category | [[Category:Donkey Kong Country 2: Diddy's Kong Quest levels]] | ||
Latest revision as of 12:28, April 1, 2024
| Level | |
|---|---|
| Lava Lagoon | |

| |
| Level code | 2 - 3 |
| World | Crocodile Cauldron |
| Game | Donkey Kong Country 2: Diddy's Kong Quest |
| Music track | Lockjaw's Saga |
| << Directory of levels >> | |
Lava Lagoon is the eighth level of Donkey Kong Country 2: Diddy's Kong Quest and the third level of Crocodile Cauldron. It is the second level set inside a cargo hold of a shipwreck, the first being Lockjaw's Locker. It is full of bright red lava, though a few Exclamation Point Barrels along the way can make them temporarily immune to the lava's harmful effects. Several Clappers appear throughout Lava Lagoon, and the Kongs can jump on them to temporarily cool the lava into water. The Kongs must quickly swim through the water before it turns back to lava, and they can escape from it by either returning on land or swimming onto the next Clapper. This level introduces an underwater pufferfish enemy, Puftups. While on land, the Kongs encounter a few enemies like Klampons and Click-Clacks. There is a hidden animal crate containing Enguarde just after the Star Barrel. Just like Lockjaw's Locker, there are certain parts of the walls which the Kongs can optionally swim through; doing so is required for the Kongs to reach Enguarde.
Layout[edit]

The Kongs begin the stage on some large crates and barrels with a small pit ahead of them that is full of hot water. A DK Barrel and some bananas float above this pit. After the heroes pass a nearby Neek and climb over a pile of crates, barrels, and other objects, they can find a Clapper and a large pool of water. By jumping on the seal, they can cool down the hot water so that they can swim through it. In the water, they can find a Flotsam, some bananas, and a single Banana Bunch. Some large crates float on top of the water, and a Klampon walks along them. If the heroes continue to the east from here and make their way to the other side of the water area, they come along some more large crates and past a lone Klampon. Soon, they discover another Clapper next to a pool of water, which they must cool down with the seal buddy. As they swim through the wide, underwater area, they come past a few Flotsams and some bananas. A Banana Coin is also hidden in this area in an alcove that is guarded by one of the Flotsams. Once the primates make their way to the other end of the water area, they reach a few more large boxes that they can walk on. They can find a Clapper with a DK Barrel above it in this area near a pool of water. As they travel through the water, with the help of the Clapper who can cool it down, they approach the letter K and some bananas in a few small alcoves. One of the alcoves, which contains several bananas, is guarded by a Flotsam that moves back and forth in a horizontal path. After the Kongs pass this Flotsam and another alcove that contains a Banana Bunch, they head up a passage leading to the north with an additional Flotsam in it. If they continue upwards from here, they reach the surface of the water, where they can find two large barrel platforms with a Blast Barrel on one of them.
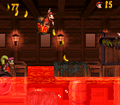
The Blast Barrel can blast them upwards into a higher area with another Blast Barrel in it, which can then shoot them onto some crates. As they shoot through the barrels, the water level quickly rises. Additionally, after shooting out of the first of the Blast Barrels, the primates can move along the left side of the wall to head through a crate and into a thin area that contains another Blast Barrel, which can blast them onto the higher crates and to a Banana Coin. After the heroes reach the top of the area with either of the two paths, they can find a Klampon and another Clapper next to an area of water. Once the seal cools down the water, they can safely swim through to find some bananas along the ground. Some Flotsams and two Lockjaws also swim through the water, which the letter O is located above in an alcove. A small gap is also placed at the top of the underwater area, and if the primates jump through it, they can find an area above the water that contains an Exclamation Point Barrel. If they continue through the water from here, they soon reach a Banana Bunch in a small alcove and a passage leading upwards, where the heroes can find some large crates above the surface of the water that hold a Klampon. A Star Barrel is located above these crates.
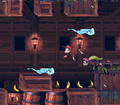
Two small gaps full of water are ahead of here, and a Kaboing jumps on the thin platform between them. There is a Clapper placed after the pits, and the heroes can bounce on the helper to cool down a nearby area of water. As they swim through this water, they come up to a DK Barrel and a few crates in the bottom-right corner of the area that they can swim through to find a hidden room with an animal crate containing Enguarde in it. A Banana Bunch is also located next to this crate. If the primates head west through the underwater area, they make their way past some bananas and Puftups. After they pass the foes, they make their way up a passage that take them to some large crates and barrels positioned above the surface of the water. A Clapper is on these objects, and once the heroes approach it, the water level rises. After the water rises, the heroes must make their way through a passage that is placed above a group of bananas that form an arrow pointing upwards. If they follow the arrow and head upwards, they make their way into a large area full of Lockjaws.

A hidden passage over some crates is in the top-left corner of this wide room, and it leads the heroes to many collectibles, including bananas, two Banana Coins, and the letter N. As they head through the passage, they can also, in the Game Boy Advance version only, find a hidden room with a Lockjaw in possession of a photograph in it. If the primates do not travel through this hidden path, they must instead head through a wide room full of Lockjaws. Some bananas and another letter N are located around the area for the heroes to grab. Eventually, the Kongs make their way to the surface of the water, where they can find some large crates and barrels that they can walk on. A No Animal Sign is in this area; once it is passed, Enguarde disappears, and the heroes are awarded with a red Extra Life Balloon. There are some large crates, one of which that holds a barrel, ahead of the sign, and the heroes must climb over it while dodging a single Click-Clack to reach a small gap and a DK Barrel.
Once they drop into the gap, they can find a thin passage leading to the west that is full of Click-Clacks. At the end of the passage, they can find a Clapper next to a pool of water. As they swim through this water, they come past several Puftups that rise and fall in the water. Alcoves are also scattered throughout the area, and they contain bananas and a Banana Bunch. Soon, they Kongs make their way into a thin passage that leads to both a small area with the letter G in it and another room with a Clapper in it. A hidden area can be accessed if they swim through the crates to the right of the Clapper, and it holds several bananas, an Exclamation Point Barrel, and a Video Game Hero Coin. A Blast Barrel is also located at the end of this hidden room to blast the heroes out of the water before it burns them. If the primates do not take this hidden path, they must instead swim upwards through a narrow passage to reach the surface of the water, where they can find some large crates and barrels with a Klobber on them. The End of Level Target is just ahead, and the Kongs can use team up to enter a Barrel Cannon (or Dixie Barrel in the Game Boy Advance version) to land on the target for a prize. The prizes include either a Banana Bunch, Banana Coin, or a Red Balloon.
Enemies[edit]
The following enemies appear in the following quantities:

Click-Clack (3)

Flotsam (blue) (14)

Flotsam (green) (4)

Kaboing (gray) (1)

Klampon (5)

Klobber (green) (1)

Lockjaw (5)

Neek (1)


a - Of the 14 Puftups, eight of them appear in the main level, while the other six are in the Bonus Level.
Items and objects[edit]
The following items and objects appear in the following quantities:

Banana Coin (10)

DK Barrel (5)

No Animal Sign (2)b

Red Balloon (2)


b - There are two No Animal Signs in the level: one appears just outside the Bonus Level entrance while the other appears at the end of the Bonus Level. Both of them reward a Red Balloon if crossed with Enguarde.
KONG Letters[edit]

- K: After jumping on the third Clapper, the Kongs must swim all the way down in the water. The letter K appears in an alcove on their left.
- O: In the third section of water, the Kongs encounter a group of Flotsam. They must swim above the first Lockjaw and collect the letter O overhead.
- N: Lava Lagoon, unlike most other levels, there are two letter N's: One of them is in an alcove above the third Lockjaw from the Star Barrel, and the other one is placed in a vertical, narrow passage just before the Lockjaw, also featuring two Banana Coins and 14 bananas.
- G: After the Bonus Level, Diddy and Dixie must swim past a few Puftups. Afterwards, they must go down a vertical gap. The letter G appears in an alcove to the right.
Key items[edit]

- Cranky's Video Game Hero Coin: After the letter G, the Kongs must continue swimming up to find the last Clapper of the level. To the right of Clapper is a gap which Diddy and Dixie can pass through. It leads into a large, enclosed space with an Exclamation Point Barrel, followed by a DK Barrel. The Kongs must continue swimming up, as they follow a trail of bananas, to find the Video Game Hero Coin, which appears in the center of the area. The Kongs can exit the area by swimming into a Blast Barrel at the top-left.
- Golden feather (Game Boy Advance version only): After the Bonus Level, the Kongs must continue into an area with four Puftups. Between the second and third Puftup,the Kongs must swim upward to a small gap. From here, Diddy and Dixie can jump out the water to collect the golden feather floating in the alcove above.
- Photograph (Game Boy Advance version only): When the Kongs and Enguarde (who is required to be with them) encounter the first Lockjaw after the Star Barrel, they must swim to the gap at the top-left, pass through the small crates overhead, and continue up the narrow, vertical path; it is the same path that leads to the second letter N. At the top, when the Kongs and Enguarde turn right, there is an alcove above that has a Lockjaw with a photograph icon. Enguarde must defeat the Lockjaw for the Kongs to obtain its photograph, which, once obtained, appears in the fourth page of the Scrapbook.
Bonus Level[edit]

There is only one Bonus Level, listed by its type:
- Destroy them All!: After the Star Barrel, and swimming past some Lockjaws, Diddy and Dixie appear in front of the No Animal Sign. They must pick up the nearby barrel, then jump down, and run it into the wall located directly right from the No Animal Sign. A lone banana appears just before the wall as a hint of its location. This creates an opening for them to enter into. The object is to defeat ten enemies within 35 seconds: six of them are Puftups and four are Flotsam. Enguarde appears at the start of the Bonus Level for the Kongs to ride, because they cannot defeat the enemies without Enguarde. Afterwards, they must continue forward through the narrow maze, set between large crates and barrels, and defeat the underwater enemies with Enguarde as they go along. At the end of the path, the Kongs and Enguarde stumble upon a Puftup blocking the entrance into an enclosed space with the No Animal Sign and level exit. After defeating the Puftup, the Kremkoin appears in the enclosed area, past the No Animal Sign but before the exit. After collecting the Kremkoin, the Kongs swim through the opening to exit the Bonus Level.
Warp Barrel[edit]

At the start of the level, the Kongs must go onto the platform with the first Klampon. From the right corner of the platform, the Kongs must perform team up and throw the other Kong straight up to enter the Warp Barrel. This leads them into a single-screen, narrow area. The Kongs must walk down the two large barrels, then pass the bananas arranged in an exclamation mark shape, and exit from the right. This takes them back into the main level, where they appear just before the End of Level Target.
Gallery[edit]
The start of the level
The letter K
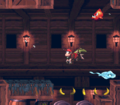
Diddy jumps over a gap at the start, with lava appearing below
The Kongs swim between Flotsams
The Kongs swim through an underwater area and avoid a Flotsam
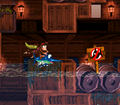
The Kongs encounter a Klampon and find the Star Barrel
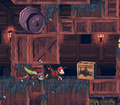
The location of the Enguarde Box
The Kongs and Enguarde swim to the No Animal Sign
One of the letter N's of Lava Lagoon
The letter G
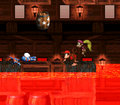
The Kongs appear before the End of Level Target and a Barrel Cannon
The Kongs encounter a Lockjaw in the water in the Game Boy Advance version
The Kongs find an Exclamation Point Barrel on the path to the DK Coin in the Game Boy Advance version
Dixie performing on her guitar on the End of Level Target after hitting it from the Dixie Barrel in the Game Boy Advance version


Names in other languages[edit]
| Language | Name | Meaning |
|---|---|---|
| Japanese | しゃくねつダイビング Shakunetsu Daibingu |
Red-Hot Diving |
| French | Lagon de Lave |
Lagoon of Lava |
| German | Lava Lagune (SNES) Lavalagune (GBA) |
Lava Lagoon |
| Italian | Lapilli e Zampilli |
Lapilli and Zampilli |
| Spanish | Charco de Lava |
Lava Pool |