The Dark Prison & the Dangerous Trap
| Level | |||
|---|---|---|---|
| The Dark Prison & the Dangerous Trap | |||

| |||
| World | BF | ||
| Game | Princess Peach: Showtime! | ||
| Primary power-up | Dashing Thief Peach | ||
| Music track | Into The Darkness | ||
| |||
| << Directory of levels >> | |||
The Dark Prison & the Dangerous Trap is a stage in Princess Peach: Showtime!, located in the second-from-left in the bottom section of BF. After completing The Stolen Statue, the player will get the opportunity to play this stage. The Dashing Thief Sparkla is trapped in this stage.
Layout[edit]
Upon entering the stage, Princess Peach is already in her Dashing Thief transformation. Stella comments that she knows the Dashing Thief Sparkla is here. Not far into the stage, a hatch opens up, leading downward. Upon falling down it, Peach finds the Dashing Thief Sparkla trapped in an electric cage. Upon seeing Peach, the Sparkla becomes relieved and asks her to disable four locks to the cage, all found in separate paths leading to different obstacles:
- The top left path contains rotating platforms.
- The top right path contains round laser gates that are tilted in various angles. Some of these laser gates can be moved by activating switches.
- The bottom left path contains floating doors that lead Peach to many different areas. One section has two doors that can moved around by activating switches. These two doors only open if they are at a specific spot.
- The bottom right path has lasers that turn on and off, as well as platforms that start to fall if stood on.
After all four locks are disabled, the Dashing Thief Sparkla is free, but the vicinity starts to fall apart. The dashing thieves jump up through the hatch back to the starting area and make their escape.

The two come across an area where there are two levels of elevation. A laser gate blocks the lower path, so the Sparkla jumps up and deactivates the lock, turning off the lasers. Dashing Thief Peach takes the lower path, while the Sparkla takes the higher path. The Dashing Thief Sparkla runs into lasers, which Peach deactivates. While making more progress, horizontal lasers activate, which the thieves must avoid. Once they reach to a certain area, the ground moves, and the two swap elevations. Two robotic search enemies appear on Peach's elevation, which must be defeated to allow more progress. There is then a point where the thieves must deactivate two locks at the same time to remove lasers blocking the way. The paths connect, reuniting Peach and the Sparkla. Afterwards is a wide gap that must be grappled across while avoiding lasers. After the two reach the other side, the escape continues.
The next area has Peach and the Sparkla zip-lining across several zip-lines while avoiding enemies. The end of this area has an updraft, which the two use to jump high and then hang glide to the exit, ending the stage.
Sparkle Gems[edit]
- Found in the top left path. To obtain this Sparkle Gem, Peach must obtain all eight Sparkle pieces found in the area.
- Found in a sub-area in the bottom left path. To access this area, Peach must strike a pose at a specific spot. This sub-area has Peach grappling upwards to reach the Sparkle Gem.
- Found in the top right path. Peach must use blue hooks to launch herself to the right and then up to reach the Sparkle Gem.
- Found in the bottom right path. There is a part where it looks like lasers are blocking an area to the lef, but these lasers are in the foreground and background. The Sparkle Gem is behind these lasers.
- Obtained after jumping across a wide gap while grappling hooks to propel to the other side.
Stella ribbon[edit]
Multicolored Dashing Thief Ribbon: Taking the bottom left path among the four near Dashing Thief Sparkle's cage, the third section has two doors that can be moved around. When one door is at the top right, it will open, providing access to a room where the Ribboner is. He is trapped behind lasers however, so Dashing Thief Peach must activate a switch with her whip to deactivate the lasers. Once they are deactivated, the Ribboner vows to not touch any more buttons and rewards Peach the ribbon.
- Help request: "It closed even though I didn't press anything!"
- Rescue message: "I'm not touching any more buttons."
[edit]
The hidden Theet is found on the bottom level right after the part where both Dashing Thief Peach and the Dashing Thief Sparkla deactivate locks at the same time.
Gallery[edit]
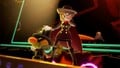
The stage's album picture

Names in other languages[edit]
| Language | Name | Meaning |
|---|---|---|
| Japanese | ヤミの Yami no Rōgoku to Kiken na Wana |
Dark Prison and Dangerous Trap |
| Chinese (simplified) | 黑暗的牢狱与危险的圈套 Hēi'àn De Láoyù Yǔ Wéixiǎn De Quāntào |
Dark Prisons and Dangerous Trap |
| Chinese (traditional) | 黑暗的牢獄與危險的圈套 Hēi'àn De Láoyù Yǔ Wéixiǎn De Quāntào |
Dark Prisons and Dangerous Trap |
| Dutch | De valstrik in de duistere kerker |
|
| French | Prison sombre et guet-apens |
Dark prison and ambush |
| German | Fiese Fallen im dunklen Kerker |
|
| Italian | La prigione oscura e la trappola |
The dark prison and the trap |
| Russian | Темница мрака и ловушка Temnitsa mraka i lovushka |
|
| Spanish | Entre rejas de malguria |
Behind the darkle bars |