The 'Shroom:Issue 193/Strategy Wing
Director's Notes
Written by: Hooded Pitohui (talk)
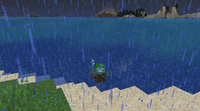
Hello, all of you readers of The 'Shroom! April showers will not hamper the Strategy Wing team! That statement holds especially true thanks to Waluigi Time (talk) providing some tips for hunkering down through rainstorms (in Minecraft) this month. Yes, through rain, snow, and even the release of The Super Mario Bros. Movie, those of us in the Strategy Wing offices were never deterred from our duties! Of course, it helps that half of those duties are playing games...
It's not all fun and games over here, though! No, that's in Fun Stuff. This month, our chief strategist is off attending to his troops, so Koops, Your Emblem is on Fire will be off this month. I'm pretty sure he's off with his troops because he's relieving Generalissimo Shoe of duty for the month so that the generalissimo can focus on submitting power-up reviews to Critic Corner. On the other end of the discipline spectrum, we have crime in Strategy Wing again this month, as it's an on-month for Getting That Payday! We have all of our other usual offerings, too, from your number-one newspaper-published guide for Digimon World to Super Mario 3D World level dissection! It's all there, so I'll let you go forth and read it in a moment.
Before I do, though, I want to encourage you, once you're done reading the team this month, to join the Strategy Wing team by going over to the sign up page and sending an application to our Statistics Manager, Meta Knight. Perhaps you're eager to play some Super Mario after seeing The Super Mario Bros. Movie, or perhaps there's an obscure gem you'd like to cover like File City Files does, we'll find a place for you!
Section of the Month
Four Steps for a 3D World didn't need to nab a Double Cherry and step on a platform emblazoned with a conspicuous number to rise up, apparently! Thank you all for voting it section of the month! Thank you all as well for spreading your appreciation around Strategy Wing last month! Whether it was the commentary in Koops, Your Emblem is on Fire, the balance between instructing readers on how to set up a challenge and giving readers tips for completing the challenge in Digging Deeper, or the thoroughness and sense of humor in File City Files, it looks like there's something for everyone to enjoy! Please do keep the voting up and let our writers know you enjoy what they make!
| STRATEGY WING SECTION OF THE MONTH | ||||
|---|---|---|---|---|
| Place | Section | Votes | % | Writer |
| 1st | Four Steps for a 3D World | 8 | 47.06% | Hooded Pitohui (talk) |
| 2nd | Pitohui's Pokémon Academy | 3 | 17.65% | Hooded Pitohui (talk) |
| 3rd | Koops, Your Emblem is on Fire | 2 | 11.76% | Koops (talk) |
| 3rd | Digging Deeper | 2 | 11.76% | Waluigi Time (talk) |
| 3rd | File City Files | 2 | 11.76% | Shoey (talk) |
Digging Deeper
Written by: Waluigi Time (talk)
Hello there, 'Shroom readers! Welcome back to Digging Deeper, where I'll be covering the thing I was going to do last month but didn't. But you know what they say, April showers bring May flowers, so I guess this is fitting. This month's challenge is going to be a little different, as it's focused more on the world around you than your own actions. I call this one the Supercell Challenge! For this to work, you'll need to be in a world with cheats enabled, and if you're playing on Java Edition, you'll need to be on version 1.11 or later.
The perfect storm
The gist of this challenge is that we're going to put the world into a permanent thunderstorm! This is basically like an endless night, but with a couple of advantages. It doesn't mess up the daylight cycle, and more importantly, thunderstorms are just more interesting than plain nighttime!
Outside of properly lit areas, you'll have to contend with hostile mobs always being able to spawn on the surface. Unless you're willing to put in some work to make areas safer, you'll always be dealing with a hostile landscape. The upside of this is that it actually makes mining a bit safer. There's a cap on mob spawning, so if mobs can spawn on the surface, that spreads them out more so there's less of them spawning in caves. (That's why it's safest to mine at nighttime, despite how the old song goes.)
Thunderstorms bring lightning with them, of course, which can hurt entities that it strikes and start fires. If it strikes something flammable, well... watch out! Lightning strikes can also transform some mobs instead of hurting them. Creepers hit by lightning will be charged and deal more damage with a bigger blast radius, villagers become witches, and pigs become zombified piglins. Lightning strikes can also spawn skeleton traps, a group of four skeletons riding horses.
In most biomes, you'll also have rain, which is probably going to be most notable for neutralizing fire. That does counter the lightning to some extent, but it means you won't be able to use it to your advantage out in the open. The fire itself won't be put out if it's on netherrack or magma blocks, but mobs won't stay on fire regardless, which also rules out the use of Fire Aspect and Flame enchantments. Drowned will be able to walk onto land during rain, so be wary of that if you're near a body of water, and endermen will be harder to find since they teleport out of the rain. Rain is absent in hot biomes, and replaced by snow in cold biomes and at higher elevations, which is basically negligible for the challenge.
Also, this only applies to the Overworld. The Nether and End don't have any weather, but they have their own share of challenges to deal with!
Getting set up
To get things started, you'll want to run two commands, /gamerule doWeatherCycle false to disable the weather cycle, and /weather thunder to start the storm. With the weather cycle disabled, the storm won't stop ever! Even using a bed to sleep through it won't make it stop.
Whenever you want to do this is a matter of personal preference. You might want to start the storm immediately once you create the world, or maybe you'll want to give yourself a grace period of a day or so to collect supplies and get started on a base. You could even wait until you reach a certain point in game progression, and then start the storm once you reach that goal. It's all up to you!
Shelter in place
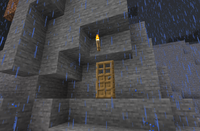
As with most Minecraft worlds, you're probably going to want a base sooner than later, especially since there's not much relief from the conditions out there. You'll need to plan things a little more carefully though, as lightning is going to be a constant threat. Your two courses of action are to avoid using flammable materials like wood, or to build in a way that your base is naturally protected, like building into the side of a hill or underground where you're not vulnerable to lightning strikes. (Your third option is to just disregard both of these, and wait for lightning to burn down your wood house. I don't know why you'd want to do that, though.) Personally, I prefer taking the second option. Digging out a base inside of a hill or underground will get you a net gain of resources, and in the very early game, the only non-flammable materials you'll probably have access to in decent amounts are dirt and cobblestone, which aren't that great if you care at all about making a visually appealing base. Also, digging those up will probably set you up with a nice little hidey-hole anyway.
(Tip for players on hard difficulty: Zombies will only attempt to break down "closed" wooden doors. A closed door is one that's in the position you originally placed it in. So, if you place a door in such a way that it closes the entrance to your base when it's "opened", zombies won't try to break it down even if it's blocking their path.)
Early on in the game, you should be able to craft a lightning rod. These are crafted using only three copper ingots, and copper is a pretty common resource that's not used for much else. These will be helpful for protecting your base, as all lightning strikes in a fairly large radius will be redirected to them (as long as there's no other blocks above the lightning rod). Keep in mind that the strikes will still damage entities and start fires, so make sure to keep your lightning rods somewhere safe and out of the way. You may want to consider building towers to hold them. To be honest though, I feel like lightning rods are a little bit cheap to use in this challenge considering how useful they are and how easy they are to craft in decent quantities. If you want a little extra challenge in your challenge, consider imposing limits on how many lightning rods you can use, or ban them altogether.
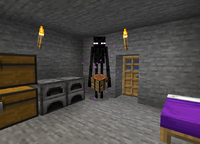
You may also want to consider building defenses against endermen. In a thunderstorm, they'll always be able to spawn, but they'll also be trying to teleport out of the rain, making it more likely that they'll find their way into your base, if you let them. They can be a nuisance at best if they're picking up and placing blocks, and dangerous at worst if you happen to look at one funny. Endermen need an empty space of at least three full blocks vertically to teleport to, so in an area with a three block high ceiling, you can prevent them from teleporting in by placing blocks like carpet on the floor. However, while this does prevent endermen from teleporting in, it doesn't prevent them from walking in normally. A single layer of snow in a three block high area will prevent them from teleporting in, and two layers or higher will keep them out completely. The easiest option when you're starting out though is to build a ceiling 2.5 blocks (by using slabs or stairs) or lower. If you need more vertical space, consider building some iron golems to guard the area instead. You may want to create an area in your base that endermen can teleport into for farming ender pearls, however. I would recommend separating it from the rest of your base by at least four blocks filled with water to prevent the endermen from taking blocks out of it.
Storm survival tips
When it comes time to leave your base, you might be better off staying below ground. If you're ready and willing to do some digging, consider digging tunnels while exploring the world. Make sure to bring plenty of torches and pickaxe materials! If you find anything particularly important, you might want to set up an underground minecart track for faster travel. (To save on resources, you could explore on the surface and only dig minecart tunnels for areas you think you'll want to use more often.) Later on, you can try traveling through the Nether if you understand how portals work well enough, although I'm not sure I'd consider the Nether less dangerous than a stormy Overworld.
The other big tip is torches, torches, torches! They're the only way you'll be able to keep hostile mob spawning in check, so make sure to keep plenty of them on hand to light up key areas, especially around the exterior of your base.
You might also want to consider trying to acquire a trident, because some of their unique enchantments function best in these weather conditions. Channeling only works during thunderstorms, and usually strikes mobs with lightning when you hit them with a thrown trident (with a few exceptions). Riptide lets you fly through the air in the direction you throw the trident, but it only works when you're in water or in the rain. (Unfortunately, you can't have both of these on the same trident.) Getting these is a pain though, as the only way to get them is by killing drowned that spawn with tridents, which is already a low chance, and then there's an even lower chance that they'll actually drop the trident. (For Bedrock Edition players, your odds are a lot better than in Java Edition.) I strongly recommend getting a Looting III sword to increase your odds a bit, or looking up how to build a trident farm if that's more your style.
Also worth noting that living in the Nether to avoid the storms is feasible thanks to the Nether Update, but at that point, I'm not really sure why you'd be attempting this challenge!
Okay I'm going inside now
And that's about it, really. I hope you enjoy the challenge if you decide to try it out, and remember to stay safe out there! Fighting against the world itself is no easy task.
I'll be back next month with another challenge that involves less risk of becoming crispy via lightning strike than this one. Not none, but less. Until then, feel free to let me know if you have any other challenge ideas you'd like me to write about, or consider writing your own version of this section if you want!
File City Files
Hello again, 'Shroom readers, and welcome back to File City Files, the number one Iowa-written Digimon World strategy guide. Last month, we actually ended on a bit of a cliffhanger, having helped finish the Drill Tunnel only to find a volcano on the inside! This month, we're going to be exploring the volcano, checking it to see if there's any savvy Digimon looking to buy or rent real estate in the small-but-growing File City. This month, we'll primarily be using these Prima maps:
The Lord of the Volcano
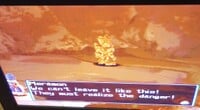
Inside the volcano is a sea of hot lava, so obviously this place is really hot, so keep in mind that there are Digimon that can get sick if they stay in here too long. Luckily, you're going to be here on your first Digimon, which means it'll be from either the Agumon or Gabumon line. Luckily, the only one of the Digimon in these lines to be affected by heat is Garuramon, which only Gabumon can digivolve into. The heat isn't really going to be an issue. There's only one way to go, which is up, so just keep following the trail until it leads you to Meramon, the flame Digimon who's having just a teeny-tiny mental breakdown. So, I actually think that, from a narrative standpoint, Meramon is one of the more interesting characters. So far, Digimon we've recruited can be broken down into two categories. They're either Digimon who have already forgotten the city and have become feral or they're Digimon that still remember the city and join once we ask. Meramon, however, is the first that realizes something is wrong. He realizes that the island is falling apart and that Digimon society is starting to fracture beyond repair.
Not only that, but he realizes that he's starting to lose his sanity. He realizes that it's only a matter of time before he loses himself and becomes a mindless savage, so, as a last resort, he starts to create earthquakes in a desperate last attempt to make the Digimon realize the island is in danger. Seeing this, you attempt to stop him from destroying the island. Unfortunately, by this point Meramon is too far gone and you're left with no choice but to try snap him back to reality... with violence!
Meramon is probably going to be the first real boss you face. He's not super powerful, he only has 2600 HP, and his best move that's not his finisher is Magma Bomb, which is decently powerful but also has a bit of a windup and can be blocked with your moves. He also has Heat Laser and Dynamite Kick. Unlike some bosses, Meramon doesn't have any unique moves, so you don't have to worry about which Digimon you use against him or save scumming (we'll talk about how you learn moves someday, but let's just say that it sure is a system!). If you have a Digimon like Centaurmon, it is possible for him to learn every move Meramon uses, and, if you wanted and you were playing on either the PC or a better working copy than I have, you could save scum until you learn at least one of those moves. Of the three, I think Heat Laser is the most useful, because it creates a large amount of flames and it'll damage every enemy on the field. Like I said, the fight is not particularly hard, because, despite being made of fire, Meramon is still weak to the only move my Centaurmon currently knows: Spit Fire. You can beat Meramon with a rookie if you have enough healing items, but it won't be too hard with just a regular champion and a few items.
After you knock a little sense into Meramon, you convince him that destroying the island isn't the way. Instead, you convince him to join File City and to work with other Digimon to save the island. He also drops an Offense Chip and one of the PCs in the same room also contains a second Offense Chip.
Purpose in City: Meramon opens a restaurant! Or, if you already have the restaurant, he simply goes to work there!
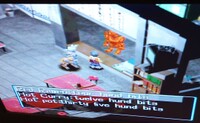
Using his flames for heat, Meramon is the perfect short order cook specializing in spicy food. His menu is a little limited, though. He only has three specials, those being:
- Red Ramen - 400 bits
- Hot Curry - 1,200 bits
- Hot Pot - 3,500 bits
This might sound a little limited for a restaurant, but you know what they say. It's better to have a menu of a few items you excel at than a large menu of things you're just okay at! Now, you might be asking "why would I spend all this money on this fancy food when meat grows in the ground for free?"
Well here's the thing. The food you buy at the restaurant provides stat boosts! For instance, the Red Ramen increases offense, brains, happiness, and discipline, and decreases tiredness too. However, unlike regular food, you can only eat at the restaurant when your Digimon is hungry. Because I guess Meramon is "morally opposed" to force feeding your Digimon for stat boosts... Jerk. But here's the thing. I don't think Meramon is super useful, because the stat boost you get from him isn't that great. Other chefs that you can recruit obviously serve different things with better stat boosts, but Meramon himself really isn't worth it unless you have a lot of money.
A Path Through the Tunnel
After Meramon leaves the lava in Lava Cave cools, and you can now explore the now-hardened sea of Lave. There isn't a whole lot down there. There's some PCs with items in them and some DemiMeramons (basically tiny little baby Meramons) running around. Only one of the DemiMeramons does anything, and all he does is offer you 1,500 bits for a Meramon card (more on those later!). The real meat of Lava Cave is, if you take the trail all the way down, you'll find Drimogemon digging away at another cave. Technically, this is jumping the gun, because this hasn't happened on the save file I use for this section yet, buuuuutttttt, three days after you defeat Meramon, Drimogemon will finish the tunnel, creating a shortcut between Native Forest and a new area called Gear Savanna. Once this is complete, you'll no longer need to travel into Drill Tunnel (the game will prompt you if you want to go into Drill Tunnel or use the shortcut). In addition, if you talk to Drimogemon you'll find that, now that his work is done in the Drill Tunnel, he happily agrees to join the city!
Purpose in City: Drimogemon digs through the rocks near the Meat Farm and opens a Treasure Hunt game!
So this is actually one of my favorite upgrades to the city. Drimogemon, using his super digging skills, offers two plans. A regular plan costs 1,000 bits and sends him on a three-day expedition while the second plan, a special plan, costs 5,000 bits and sends him on a ten-day expedition. Once he returns, he gives you any treasure he finds. It's only a single item, but you can get some pretty cool things. With a regular plan, you can get items like Super Recoveries, Large MP recoveries, and Restores, along with a small chance to get Digivolution items. But with a Special Plan, you have a very small chance to get any of the stat-boosting chips as well as the other items. It's very costly, but I love doing it. Like I said, it's probably one of my favorite upgrades to File City.
An Injured Salesman Sails Through
Meramon might not have destroyed File Island, but he did manage to destroy the giant boulder blocking the path to Mt. Panorama. With that out of the way, we can now explore the mountains of File Island, and we're in luck, because the first recruitable Digimon lies waiting for us in the Mountain Spore Area (or Mt. Panorama's second screen). This one is a little wonky, though, because he will only appear if you have talked to Centarumon in Centaur Clinic. It's not enough just to have the clinic in File City; you have to talk to Centarumon. Once you talk to Centarumon, if you enter the Mountain Spore Area, you'll see Unimon the Unicorn Digimon, who is lying on the fork in the road, injured.
If you talk to him, he'll ask you for something to help his wings, and, of course, being the hero you are, and because if we help this guy he'll clearly owe us, you agree to give him some medicine for his wings. Now, there's actually a common misconception with this, because a lot of people think you have to give him a bandage, but that's not true. You can give Unimon any health healing item and he'll recover, so I always give him a cheap Small Recovery. With this, his wings are now just healthy enough to fly, but not healthy enough to fly far. So, naturally, we inform him of our nationally-ranked Centaur Clinic and he agrees to go there, promising to help us for our help. With that, Unimon joins File City for the equivalent of 100 bits! This guy joined the city for the equivalent of the reward for defeating a single ModokiBetamon! Pffft! Sucker.
Purpose in City: Unimon opens a real store! Or, if you already have the store, he takes a shift as a worker. But, still, a real store guys! No more Podunk sales stand for us! We're in the big leagues now!
With our new 24 Big Box store, we can now buy the following:
- Small Recovery - 100 bits
- Medium Recovery - 500 bits
- MP Floppy - 300 bits
- Various - 300 bits
- Super Restore - 9500 bits
- Off.Disk - 500 bits
- Def.Disk - 500 bits
- Hispeed Disk - 500 bits
- Auto Pilot - 300 bits
- Portable Potty - 300 bits
- Meat - 50 bits
As you can see, this new shop is quite a bit of an upgrade from the previous sales stand. Probably the biggest addition is the Portable Potty, because now you don't need to worry about pooping on the ground.
The disks are pretty cool, because they boost stats in battle, but you're probably not going to be using them all that much unless you have a lot of money. This selection might seem a little underwhelming, but, don't worry, as there's a lot more salesman to recruit and each one has their own unique item that gets added to the list of items sold. For example, Unimon's item that would be added if you recruited him after the store was already open is the Super Recovery. It's important to note these aren't items that are unique to this specific Digimon when they work in the shop. Rather, they are items added to what the shop sells once that specific Digimon joins the city. One last thing you might notice is that I said Unimon is the only salesperson at our new big box store. You might be thinking "but what about Betamon and Coealmon? Aren't they working at this upgraded store?" That's a good question, and you'd think that they'd naturally end up in the new shop, but nope! Instead, having sold their sales stand to Unimon, the two instead pursued different interests. Betamon used his proceeds to fully retire and now spends his day lounging in the fountain that now exists in the center of the business district. Now, did he build it? Or was it just built to celebrate the town growing up? I don't have an answer to that question. Coealmon, on the other hand, appears to have used his proceeds to buy an interest in the Centaur Clinic, and he now spends his days hanging out at the clinic as its managing partner.
Death as a Benefit?
So losing a battle, horrible thing, right? After all, you not only lose a life and get a care mistake, but you're probably going to get a bunch of your items jacked by some mean bandit Digimon. Then, to top it all off, your Digimon's happiness and discipline is going to go down, just because your uppity Digmon can't take an ass kicking! Well, what if I told you there were a couple of times where dying is actually either somewhat beneficial or fairly beneficial? Now, you might think it's weird that there could be a benefit of losing a battle, but it's entirely because there are actually Digimon that can Digivolve via death. It's rare and there's only three Digimon you can get via death, and those are:
- Bakemon - The ghost Digimon. Any time a rookie Digimon falls in battle, they have a 10% chance of Digivolving into Bakemon.
- Devimon - The Devil Digimon. If you have an Angemon that falls in combat, it has a 50% chance of turning into a Devimon.
- Skullgreymon - The, uh, Skull Greymon Digimon. If you have either a MetaGreymon or a Megadramon and they lose a battle, they have a 10% chance of becoming Skullgreymon.
Now, none of these Digimon are exclusive to death. All three of them can be obtained by following their respective lines. Of the three, Bakemon is by far the best for the simple reason that you can acquire a champion Digimon before the regular three days it would take.
In addition, it's not like you're punished for getting a Bakemon this way. He's still gonna live just as long as a well-maintained Bakemon, and he's going to have the same stat boost from Digivolving that he would have if he were acquired the natural way (about 25%). This is especially useful if you do it to the very first Digimon you get, because that's a rookie that starts at age one instead of age two, and then digivolves three days later. So by getting Bakemon early, you're getting all that extra time with a champion already acquired. You're basically getting three extra days with a champion. The Bakemon rookie death system can still be useful outside of the first Digimon, since you're still getting booster stats and more days with a champion. Also since one of Bakemon's ultimate forms is Skullgreymon, you don't even need to worry about that care mistake since Skullgreymon requires ten care mistakes anyways. There is a caveat that, since it's only a 10% chance after each battle death (and you only get three deaths before you have to restart with a fresh Digimon), if you're going to do this, you're probably going to want to save scum and make sure you place any valuable items into the item bank. When you lose a life, remember, bandits will steal a random amount of items from your inventory.
Angemon to Devimon on the other hand is quite a bit different, because that's really more of a lateral move since both Digimon are champions. There won't be a stat boost, but there will be something that can make completing the game easier. You see, Angemon is a vaccine type Digimon and Devimon is a virus type Digimon, and there are two dungeons, the Ice Sanctuary and Grey Lord's Mansion, that require a vaccine type and virus type respectively. That means, if you went from Angemon to Devimon, you could complete both of those dungeons with a single line. So, like I said, it's really a lateral move, but there is utility in it. Now as for MetalGreymon and Megadramon to Skullgreymon, that's going from ultimate to ultimate and all three are virus types, so there's no real utility to it. Outside of the minor benefit that it will help fill up your Digivolution chart (which is kind of like a Pokédex but way more annoying because to fill because you have to obtain every Digivolution, which as you can imagine, requires quite a few different Digimon life cycles to complete), there's not really a reason to do this.
As you can see, while you shouldn't strive to lose fights, there can be some benefits to doing it with specific Digimon. That's all for this month! Join us next month as we continue to scale Mt. Panorama in File City Files.
Getting That Payday
Welcome, heistys and heisterinos, to Getting That Payday, a Payday 2 strategy guide! So you know the phrase "April showers bring May flowers"? Well, hopefully that's true for you, because as I write this, it's currently snowing outside. No idea what flowers bloom from snow, but who knows, maybe I'll get one of those weird game flowers that only appear in snow biomes for whatever reason. Now, onto the topic of the article, today we're talking about the Ex-President perk deck, allowing you to take bold risks with your brothers-and-sisters-in-arms like the titular gang once did! The perk deck lets you store health per kill while your armor is up, and, once it falls, you regain all the health you stored, giving you a burst playstyle of hitting hard for a while, then falling back to recover. Fun but risky, though isn't all crime like that? (THIS IS A JOKE!)
Payday 2? What?
Payday 2, a decade old co-op shooter, features the Payday Gang in their variety of heists and jobs, most of which are contracted by lunatics. They pull these of using guns, skill trees, throwables, armor, equipment, and, most importantly here, Perk Decks, groups of skill obtained by spending perk points, which are obtained by doing jobs. There are nine tiers, with tiers 2, 4, 6, and 8 being the same for all decks. Keep in mind, though, you can only have one Perk Deck at a time.
The Founding Fathers (Of Crime)
At tier 1, we get Point Break. This is the core of the perk deck, and will be what gives us our edge. For every enemy you kill while armor is up, you store four health. When your armor breaks and starts regenerating, you heal by the amount of all the health you have stored up. Basically, chuck some health in a bottle when you kill things, and break open that bottle when you regenerate your armor. This is a core mechanic that lets you ignore healing in exchange for more time in fights, with skipping out on grabbing medkits being an incredibly useful feature, as health is not a resource you want to waste, and this lets your allies grab them while having charges to spare.
Tier 3 and 7, The Emerging Force and Awakening Earth, are the same, with tier 3 granting 10% extra health and an extra four health per kill. Tier 7 also grants another four health per kill, but gives 20% more health, for a total of 30% extra. A classic for most health-based perk decks, this provides some extra juice for the weird car this build is now an analogy of. The extra health gain is super useful, though, halving and then thirding the amount of kills needed to get health. It's ammo efficient, too. Try out our brand new Ex-President-O's! Now with added ammo savings! Mail in 10 boxes, and we'll send you a better perk deck for free! Yeah, in all honesty, the fact that you have to lose your armor to activate the deck makes it pretty bad in higher difficulties, but if you're getting your Payday know-how from a Mario themed newsletter, then you're clearly a massive shitter in the game and not playing seriously in the slightest. I mean, I am an incredibly reliable source and you should come to me for all Payday 2 and/or crime related inquiries.
Going up/down to tier 5, we've got Life of Ice. This allows you to store 50% more health (max stored health is determined by armor, by the way), gives you an extra 10% more health, for a total of 40% (though since this is between TEF and AE, that means the health progression is 10%, 20%, and then 40% extra max), and gives 15% extra dodge chance (even though it says 10%, for some reason?). Life of Ice is a grab bag of random bonuses, with two working really well in tandem, and one being really weird? Like, dodge? Something that completely conflicts with how the rest of the deck works? It's almost as weird as the amount of parentheses in this paragraph.
Finally, we're up to tier 9, with The Perfect Line. On enemy kill, your armor recovery speed increases, with higher armor increasing it less. When your armor recovers, the recovery rate resets to normal. This is what really sends the perk deck into overdrive, as it removes the down time in between bursts, plus incentivizes using weaker armor, giving a rather weird combo of "I need to keep my armor for as long as possible" and "I need to use lower-end armor to keep my armor recovery time low".
However, I do believe we've been looking at the perk deck from an incorrect angle. For you see, high health means we can abuse the total a ton, before falling back for seconds and getting up good as new. So, let's get interesting with a new build...
Run n' Gun!
Step 1: Yoink a shotgun. Even better, take dual shotguns. Load them up with all the most ridiculous modification options. Personally, I'm a fan of full-auto, AP Slugs, the Kings Crown Compensator, and the LED Combo, for long-ranged anti-shield shells being pumped out constantly, enough to classify as an anti-aircraft gun. Did you know that my personal favorite part of the game is making stupid-as-hell weapons?
Step 2: Besides that, we take Bulletstorm aced from the Ammo Specialist skill tree to pump out shells without a care in the world (ammo wise, at least) for a short time, and pretty much all of Shotgunner to squeeze out every last bit of value. Grab most of Artful Dodger to maximize our movement, and Second Wind to get behind cover easier after losing the armor. Take an Ammo Bag to be able to activate Bulletstorm, the Javelin throwable because it's funny, and finally take a grenade launcher as a secondary to throw out damage from behind cover, and ignore the ammo problem with them via our ammo bag. Armor-wise, we'll be taking anything from the suit to the ballistic vest for minor armor and quick recovery.
And there you have it! The Ex-Presidents were a hell of a gang, and now you, too, can join their ranks as hardcore risk takers. Now, if you'll excuse me, I've got to get back to Final Fantasy XIV. I picked it back up recently and it is addicting. So as always, this has been professional heister Kinger, signing off.
Four Steps for a 3D World
Written by: Hooded Pitohui (talk)
Hello, all you readers of The 'Shroom, and welcome back to Four Steps for a 3D World. For those who haven't been following the section, what we're doing here is taking levels from Super Mario games directed by Koichi Hayashida and seeing if we can successfully identify the four steps that, according to a design philosophy Hayashida has discussed in interviews, a Nintendo-made 3D Super Mario level should take a player through.
According to Hayashida, these levels are (in the games he has influenced, at least) designed around an introduction that lets a player learn a mechanic in a safe environment, further development that builds on what the player is learning and introduces more complicated aspects of a mechanic, a twist that adds some kind of significant wrinkle or challenge to force players to consider the mechanic from a new angle, and a conclusion which gives players one final satisfying chance to show they've mastered the mechanic. Knowing these four steps, we're going to dissect levels from games he directed and see if we can tease out all four steps. Hopefully, by breaking the levels down like this, we can also gain some insight as to when it's advantageous or disadvantageous to stray from these four steps, too.
For now, though, let's keep our focus on levels that are still likely to hew closely to this four-step structure. After all, this is only the second edition of this section, and we can't start breaking patterns until we establish them solidly! For that reason, we're going to stay in the realm of Super Mario 3D World, where, because Hayashida had prior experience directing two other games, this four-step approach is the most refined.
Now, last month, we chose a level from early into the game so that there was less of a risk that mechanics returning from other parts of the game would obscure our analysis. This month, we're going to go a little deeper into the game and look at a level from the fourth world, Piranha Creeper Creek! Is the four-step structure apparent, or does the sludge flowing through this creek muddy the waters?
I have to say, while I tried to pick a level where the four-step structure would be apparent, I wasn't expecting it to be clearly delineated by the level itself! Piranha Creeper Creek not only follows the four-step model closely, but breaks its level into four distinct areas, joined by Warp Pipes, with each area corresponding to one of the steps. The way the level works to familiarize you with Piranha Creepers before presenting you with a more challenging segment where you don't have the luxury of staying still is abundantly clear.
It's a success as far as designing a level around these four steps goes, though I couldn't help but feel it was a little barren compared to even Double Cherry Pass, which never strayed from the same four steps, but had more going on. Not including the central feature of the two levels, Double Cherry Pass had crates, Blocksteppers, two kinds of switches, a Fire Brother, and clear pipes, while Piranha Creeper Creek really only had Stingbies and moving platforms. Maybe breaking from the four-step structure some would have helped it? Or perhaps I'm speaking as someone who has played these games for years, and not realizing that adding more to this would make it too difficult for a young child to pick up the game and learn how to deal with Piranha Creepers. If I were to make a tweak, though, I'd maybe shorten the introduction by moving the sleeping Piranha Creeper in the pipe to coming just past the Piranha Creepers slinking around the edges of the starting platform. You still learn the dangers Piranha Creepers pose and how to defeat them, but you can get to the development step more quickly, which means there might be room in the level to, say, add a Hop-Chop you can use to jump over a Piranha Creeper in your path, or to reach a Piranha Creeper that retreats high up.
Regardless of my thoughts on whether the level had enough elements in it or not, Piranha Creeper Creek makes for another great case study for this section. We see Hayashida's four steps clearly in the level's design, perhaps even more clearly than we did in Double Cherry Pass, since the pipes breaking up the level match up with the transitions between the four steps. Even in the middle of the game, we see the four-step structure, though we're also seeing that, for better or worse, it tends to prevent Super Mario Galaxy situations where a given level will have a bunch of mechanics thrown together at once. Will late-game levels move away from the four-step structure? Will they retain it while bringing in more mechanics at one time? With four steps in mind, three Piranha Creepers on the level's last set of rotating platforms, two editions of this section so far, and one outro that certainly won't get strained anytime soon, we'll find out next month!
Pitohui's Pokémon Academy
Written by: Hooded Pitohui (talk)
Welcome back once again, class. I'm pleased to see that the majority of you elected to attend your courses rather than, as even some of your professors have done, I'm led to assume based on its ticket sales, skipping class to go and see that new Super Mario movie in theaters. I take it that those of you attending today are among the most dedicated to your studies, so I do believe it's time we cover a more advanced topic today.
Yes, this month, I believe we'll talk about a battlefield-altering move that has been mentioned before in this course but which we have not yet explored in detail. Prepare yourselves for twisted dimensions, as, with the help of the Pokémon Torkoal, we learn more about the move Trick Room, the effects it has on battle, and why you should give it your consideration as you raise your teams.
Now, considering you all are the most dedicated among your peers, I'm certain you'll hardly need this, but if you something to remind you of this course's purpose, please consult our condensed syllabus in the box below.
First, a Smogon University course, this course is not. No, this academy's lessons are designed to get trainers of any stripe thinking about how they can raise their Pokémon, and, as a result, aren't designed to keep up with the widely-accepted metagame for the series. In some cases, the way I've raised my Pokémon may even flies in the face of conventional wisdom. If you're looking for top-tier strategies, do check out Smogon, but if you merely want to get a little deeper into raising Pokémon while still doing things your own way, feel free to use this section as a reference.
Since we all know the importance of citing our sources, I also need to credit the design of some of the tables used in these lectures to Crocodile Dippy, author of the Pocket Handbook which can be found in early editions of Strategy Wing.In addition, should you need a refresher on terms commonly used in this class, you'll want to take a look in this second box. If you ever find yourself lost during class, feel free to message me, and I can update this handout with additional terms.
Base Stats: Base stats are the values associated with a particular Pokémon species, and are the same across every individual Pokémon of a given species. You have no influence on them. You can think of them as traits tied to a species. A chimp isn't ever going to be able to get as good as digging as a mole will be, and, likewise, an Abra is never going to have the defensive prowess a Shuckle has.
Individual Values (IVs): Individual values, as their name implies, are associated with individual Pokémon. They range from 0 to 31 in each stat, with 31 being considered a "perfect" IV and higher numbers corresponding to different stats. Magikarp A and Magikarp B will have the same base stats, but they may very well have different IVs. To stick with the animal analogy, one mole may be born with larger claws than another mole, and that first mole is probably going to have an easier time digging through dirt than the latter. Individual values are set in stone, strictly speaking, but you can use Hyper Training (from Generation VII onwards) to functionally get a perfect IV in a stat.
Effort Values (EVs): Effort values are the one thing you can easily change. A Pokémon can earn, primarily through battling, but also through means like the use of certain items or mechanics like Super Training, up to a total of 510 effort values, with up to 252 in any given stat. To finish off the animal analogy, no matter what kind of claws a mole is born with, moles who have more experience digging are probably going to be better at digging than moles which have never dug.
Nature: A Pokémon's nature is, more or a less, a stat modifier with a name meant to make it sound like a Pokémon has some personality. Natures will raise one stat by ten percent and lower another stat by ten percent. Some natures raise and lower the same stat, canceling out the effect and leaving stats unchanged. Natures can be functionally changed with the use of special mint items from Generation VIII onwards.
STAB: STAB stands for Same-Type Attack Bonus, and refers to the boosted power of moves that match the type of the move's user. To illustrate this, consider the case of a Lombre, a dual-type Pokémon which is both a Water-type and a Grass-type. Any Water-type moves Lombre uses will have their power boosted by 1.5x, and any Grass-type moves Lombre uses will, likewise, have their power boosted by 1.5x. (There are circumstances where this does not apply, and, while the 1.5x multiplier is typical, some games use other multipliers.)
Are we prepared, then? Excellent. Before we begin discussing Trick Room, let's begin, as we always do, by looking at Torkoal's base stats. What you'll notice right away is that Torkoal excels when it comes to physical defense, has two equally respectable offensive stats, has quite middling bulk outside of its defense, and has truly abysmal speed (out of over one thousand Pokémon, only thirty-three, as of the time of this writing, have a base speed less than or equal to Torkoal's). Looking at this, there's a good chance Torkoal will puzzle you if you're not particularly familiar with raising Pokémon. You might surmise that the best approach is to double down on Torkoal's great defense, pick an offensive stat to focus on, and to have a Torkoal that specializes in coming out against physical attackers while avoiding special attackers at all costs. It's certainly not impossible to make that work, and there are some options if you want to go that route.
That said, Torkoal is a more versatile Pokémon than a glance at its base stats might suggest. While Torkoal has only middling bulk outside of its physical defense, it also has access to Amnesia, which allows it to boost its special defense quickly (two stages per turn, out of a total of six stages). Considering that Torkoal also has access to Curse, which will raise its attack and defense in exchange for lowering its speed (again, not much of a downside since over 95% of Pokémon will outspeed it anyways). Combining these two moves, you can raise a Torkoal as a wall, finding a chance to let it set up its stat boosts to make a Pokémon that is difficult to dislodge and can hit hard. The main downside of this route is that Torkoal has no access to healing moves, so your opponent can simply deal massive damage before Torkoal can set up, and chip away at what little remains of its HP once it has retreated into its metaphorical shell. With Torkoal's low speed, there's a good chance that this is exactly what's going to happen, too.

|
Name: | Torkoal | Base HP: | 70 | |
| Species: | Coal | Base Attack: | 85 | ||
| Type: | Fire | Base Defense: | 140 | ||
| Abilities: | White Smoke | Base Special Attack: | 85 | ||
| Drought | Base Special Defense: | 70 | |||
| Shell Armor | Base Speed: | 20 | |||
Another move that makes Torkoal fairly versatile is Shell Smash. Shell Smash is a much-coveted mood, because, in exchange for a one-stage drop in defense and special defense, it boosts both attacking stats and speed by two stages. A Pokémon that can take one or two hits (or find a good opportunity to come in and set up) can quickly become a powerhouse barreling through anything in its way. Unfortunately for Torkoal, though, this strategy is undermined by its middling special defense, which lets a special attacker come in and KO Torkoal before it can set up, and by its low speed. Even with Shell Smash, Torkoal is going to struggle to outspeed many opponents, and all of its power will do nothing to save it from an opponent exploiting its lowered defenses. You can try raising a Torkoal with Shell Smash, but I strongly advise against it.
So, while both options we've discussed can be made to work decently, Torkoal's low speed keeps both approaches from working well. Is there any way to get around that? Does Torkoal, perhaps, have another move in its arsenal that will help? As it turns out, it does not, but there are other Pokémon that do, and those Pokémon can be on a team with it. The aforementioned Trick Room is a move that, for five turns, makes the slowest Pokémon move first and the fastest Pokémon move last. Factoring this in, Torkoal's low speed flips from being detrimental to being an asset, and, suddenly, the first approach we mentioned is much more viable. Not only that, but Trick Room opens up an entirely new possibility. With Trick Room making it move before the vast majority of Pokémon, we can now entertain the possibility of focusing on Torkoal's offenses and making it possible for Torkoal to hit as hard as possible, hopefully knocking out its foes before they can exploit its weakness in its special defense.
So, now that we've decided what route we're going to take, we'll decide on our stat distribution. What we know right away is that we want to have as low a speed as possible. What you'll want is to breed a Torkoal with a zero IV in speed (which I did), to give it no EVs in speed (an instruction which I also followed), and to give it a nature that lowers its speed (I failed to do this, but we'll discuss what I did do in a moment). Now, with Torkoal's speed as low as possible to take advantage of Trick Room, we want to choose one of Torkoal's offensive stats to focus on. Now, Torkoal actually has a decent selection of physical moves and special moves, so you could conceivably choose attack or special attack. I went with special attack, and I recommend doing the same on account of Torkoal's STAB options. Torkoal's two most powerful STAB moves, Eruption (special) and Flare Blitz (physical) both have their own downsides related to Torkoal not being able to restore its HP, but Eruption at least doesn't actively damage Torkoal and shorten the time it can remain in battle. In addition, if you want a second STAB move that is more consistent and reliable, you can add the special Flamethrower. Regardless of your choice here, whichever offensive stat you choose not to focus on can be treated as a secondary dump stat. This is where I settled for a less-than-optimal Nature, and picked a Nature that lowered attack rather than speed.
Once you've picked an offensive stat, put 252 EVs in it, and then begin looking at the three defensive stats. At this point, the choice is easy. Rather than trying to double down on Torkoal's outstanding physical defense or shore up its special defense, we'll give Torkoal the greatest chance of weathering any hard hit by investing 252 EVs into its HP. With our leftover six EVs, we'll just slightly add to Torkoal's special defense, and, from there, we're done distributing EVs.
Now all that's left before getting to Torkoal's moveset is deciding on an ability. Of Torkoal's three abilities, it's easiest to begin by looking at Shell Armor and ruling it out. Having protection from critical hits isn't particularly helpful when we're hoping Torkoal can take out foes before they can hit and when any hit from a special attack will do significant damage anyways. Choosing between White Smoke and Drought is only marginally more difficult. While White Smoke may be useful if you go with one of the alternative plans for Torkoal we discussed before, stat reductions aren't likely to hinder a Trick Room-boosted, hard-hitting Torkoal that much. It may be possible an opponent tries to lower Torkoal's special attack over a few turns to create an opening to strike back, but Torkoal will get to inflict significant damage as they work on that, so it's not a huge loss. Drought, our last option, weakens Water-type moves that threaten Torkoal and boosts the power of Torkoal's Fire-type moves, so it far and away works the best with for the hard-hitting Torkoal we're raising.
| Eruption | Special | The user attacks opposing Pokémon with explosive fury. The lower the user's HP, the lower the move's power. |
| Solar Beam | Special | The user gathers light on the first turn, then blasts a bundled beam on the next turn. |
| Earth Power | Special | The user makes the ground under the target erupt with power. This may also lower the target's Sp. Def stat. |
| Amnesia | Status | The user temporarily empties its mind to forget its concerns. This sharply boosts the user's Sp. Def stat. |
Moving onto the moveset I've given my Torkoal, we'll start by looking at my choice of STAB move. There's two good options for a powerful, special STAB move for Torkoal. There's the reliable Flamethrower, with a consistent 90 base power, and there's Eruption, which starts with a whopping 150 base power. Now, unlike many other powerful moves, Eruption doesn't have low accuracy. Instead, it's balanced by, along with low PP, its base power decreasing as the user's HP decreases. Torkoal will start the battle with 150 base power Eruption, but, as it takes damage, that base power will fall. I don't consider this much of a problem, since, once Torkoal gets hit once, it's on shaky ground anyways, so, in the interest of making it possible for Torkoal to hit as hard as possible, I chose Eruption.
For a second move, I chose a coverage move. Torkoal is weak to Water-type moves, Rock-type moves, and Ground-type moves, but the Grass-type Solar Beam is supereffective against all three of those types. Normally, I'd think twice before adding a two-turn move like Solar Beam to a moveset, but, since Torkoal has Drought to cause the sunlight to intensify as soon as it enters battle, Torkoal will be able to fire off the move in a single turn. Now, if the opponent changes the weather to something else after Torkoal comes out, or Drought's effect runs out and you can't find an opportunity to withdraw Torkoal and bring it back out, Solar Beam is going to be far less useful. I'd say that it's worth the risk, though.
For a third move, I suggest the Ground-type Earth Power. Ground is a great offensive type, hitting five types for supereffective damage, so, while Earth Power may not get any boost from Drought, it will still help Torkoal quickly knock out a wider variety of foes.
The fourth moveslot is where there are a number of options. Myself, I've decided to go with Amnesia to boost Torkoal's special defense, just in case an opportunity to spend a turn buffing Torkoal should present itself. I admit that this may not be the wisest option, given the focus on hitting quickly and hitting hard and the fact that, to make the most of Drought and Trick Room, Torkoal may have to switch out and reset its stats. One option I suggest is, instead, putting Flamethrower in this slot, so that, even if Torkoal weathers an attack with only a little bit of HP, it can still get one more powerful hit in. I also suggest considering Rapid Spin, which, while a physical move, gives Torkoal the ability to clear entry hazards that may pierce its defenses and chip away at its health (Stealth Rock in particular) when it has to switch back out to reactivate Drought or after a retreat. Sludge Bomb can be put here to give Torkoal another reliable special move and to expand its coverage to include Fairy-types. I might even suggest giving Torkoal Stealth Rock, though, like Amnesia, it might be hard to justify taking a turn to use it outside of rather specific circumstances. You have some options for the fourth move, at the end of the day.
With Torkoal's moveset covered, I do believe we've reached the end of today's class, and with hardly any time to spare. Somewhat of a shame, that is. I even went and purchased a sack of coal so that we could watch Torkoal feed. Though, on second thought, perhaps the ventilation system in here isn't adequate for the job. Torkoal releases large amounts of smoke as it burns the fuel it eats, you see. Well, never mind all of that. You're all free of this course for the month. I have no assignments for you, so go off and do as you will, and I will try and come up with a demonstration that won't anger the facilities staff and the fire department.
| The 'Shroom: Issue 193 | |
|---|---|
| Staff sections | Staff Notes • The 'Shroom Spotlight |
| Features | Fake News • Fun Stuff • Palette Swap • Pipe Plaza • Critic Corner • Strategy Wing |
