
Course-3
| Course-3 | |||
|---|---|---|---|

| |||
| Information | |||
| Appears in | Famicom Grand Prix II: 3D Hot Rally (1988) | ||
| |||


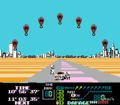
Course-3 is one of the three courses in Famicom Grand Prix II: 3D Hot Rally. It is generally the most difficult of the three.
Segment informationEdit
| Start to check point 1 | ||
|---|---|---|
| Distance: | 238km | 
|
| Environment: | Grassland Dark green | |
| Road: | Pavement Gray | |
| Time: | Day Blue | |
| Background: | City Lavender | |
| Obstacles: | Jamadatō | |
| Check point 1 to check point 2 | ||
| North/left | ||
| Distance: | 266km | 
|
| Environment: | Grassland Dark green | |
| Road: | Grass Green and orange | |
| Time: | Day Light blue | |
| Background: | Spotted hills Yellow and orange | |
| Obstacles: | Nanisuruki | |
| South/right | ||
| Distance: | 242km | 
|
| Environment: | Grassland Light green | |
| Road: | Pavement Gray and green | |
| Time: | Day Light blue | |
| Background: | Spotted hills Yellow and pink | |
| Obstacles: | Abunaiwa Nanisuruki | |
| Check point 2 to check point 3 | ||
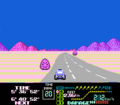
| Northmost/leftmost | ||
| Distance: | 244km | 
|
| Environment: | Grassland Light green | |
| Road: | Grass Green and brown | |
| Time: | Day Light blue | |
| Background: | Spotted hills Olive and dark blue | |
| Obstacles: | Nanisuruki Abunaiwa | |
| Middle | ||
| Distance: | 254km | 
|
| Environment: | Desert Tan | |
| Road: | Pavement Gray and yellow | |
| Time: | Day Light blue | |
| Background: | Spotted hills Pink and magenta | |
| Obstacles: | Abunaiwa | |
| Southmost/rightmost | ||
| Distance: | 260km | 
|
| Environment: | Desert Pink | |
| Road: | Sand Pink and orange | |
| Time: | Day Blue | |
| Background: | Smooth hills Pink | |
| Obstacles: | Abunaiwa | |
| Check point 3 to check point 4 | ||
| Northmost/leftmost | ||
| Distance: | 278km | 
|
| Environment: | Desert Tan | |
| Road: | Sand Orange and magenta | |
| Time: | Day Blue | |
| Background: | Smooth hills Tan | |
| Obstacles: | None | |
| Middle | ||
| Distance: | 220km | 
|
| Environment: | Desert Orange | |
| Road: | Sand Brown and black | |
| Time: | Day Blue | |
| Background: | Jagged mountains Brown and black | |
| Obstacles: | Pillar | |
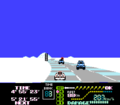
| Southmost/rightmost | ||
| Distance: | 260km | 
|
| Environment: | Snowscape White | |
| Road: | Pavement Gray and cyan | |
| Time: | Day Blue | |
| Background: | Spotted hills White | |
| Obstacles: | Sign Pillar | |
| Check point 4 to check point 5 | ||
| North/left | ||
| Distance: | 264km | 
|
| Environment: | Desert Tan | |
| Road: | Pavement Gray | |
| Time: | Day Blue | |
| Background: | Spotted hills Purple and pink | |
| Obstacles: | Abunaiwa Nanisuruki | |
| South/right | ||
| Distance: | 230km | 
|
| Environment: | Snowscape White | |
| Road: | Snow Cyan | |
| Time: | Day Blue | |
| Background: | Jagged mountains White and cyan | |
| Obstacles: | Abunaiwa | |
| Check point 5 to check point 6 | ||
| North/left | ||
| Distance: | 258km | 
|
| Environment: | Grassland Dark green | |
| Road: | Dirt Brown | |
| Time: | Evening Magenta | |
| Background: | Spotted hills Light pink and light indigo | |
| Obstacles: | Pillar | |
| South/right | ||
| Distance: | 250km | 
|
| Environment: | Desert Orange | |
| Road: | Sand Brown | |
| Time: | Evening Orange | |
| Background: | Smooth hills Magenta | |
| Obstacles: | Nanisuruki | |
| Check point 6 to check point 7 | ||
| Northmost/leftmost | ||
| Distance: | 200km | 
|
| Environment: | Snowscape Dark cyan | |
| Road: | Snow Dark green and dark cyan | |
| Time: | Evening Dark blue | |
| Background: | Spotted hills Black and dark blue | |
| Obstacles: | Abunaiwa | |
| Middle | ||
| Distance: | 264km | 
|
| Environment: | Desert Orange | |
| Road: | Pavement Olive | |
| Time: | Evening Dark orange | |
| Background: | Clouds Black | |
| Obstacles: | Sign | |
| Southmost/rightmost | ||
| Distance: | 202km | 
|
| Environment: | Desert Orange | |
| Road: | Sand Brown | |
| Time: | Evening Brown | |
| Background: | Jagged mountains Brown and black | |
| Obstacles: | Pillar Abunaiwa | |
| Check point 7 to check point 8 | ||
| North/left | ||
| Distance: | 222km | 
|
| Environment: | Grassland Dark green | |
| Road: | Dirt Brown | |
| Time: | Night Dark green | |
| Background: | City Black | |
| Obstacles: | Jamadatō | |
| South/right | ||
| Distance: | 220km | 
|
| Environment: | City Black | |
| Road: | Pavement Blue | |
| Time: | Night Teal | |
| Background: | City Black | |
| Obstacles: | Jamadatō Pillar | |
| Check point 8 to goal | ||
| Distance: | 180km | 
|
| Environment: | City Blue | |
| Road: | Pavement Gray | |
| Time: | Day Blue | |
| Background: | City Lavender | |
| Obstacles: | Jamadatō | |
| Goal | ||
| Environment: | City Tan |

|
| Road: | Pavement Gray | |
| Time: | Day Light blue | |
| Background: | City White | |
GalleryEdit
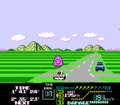
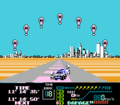
Second section, south

Third section, north
Fourth section, south
Fifth section, north
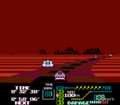
Seventh section, south

Eighth section, south
Finish line
Finish line


| Famicom Grand Prix II: 3D Hot Rally | ||
|---|---|---|
| Characters | Mario • Luigi | |
| Vehicles | Kattobi • Yonque • Monster | |
| Obstacles | Abunaiwa • Nanisuruki • Jamadatō | |
| Courses | Course-1 • Course-2 • Course-3 | |
| Other | 3D Hot Rally (album) • Check Point • Gallery • Hot Dot • Repair Point • Staff | |