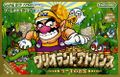
Wario Land 4
- This article is about the game. For the book of the same name, see Wario Land 4 (book).
Wario Land 4, known in Japan as Wario Land Advance: Yōki no Otakara (ワリオランドアドバンス ヨーキのお宝, meaning Wario Land Advance: The Treasure of the Golden Diva)[1], is a platform game released for the Game Boy Advance in 2001. It was later re-released for the Nintendo 3DS system on December 16, 2011 via the Nintendo 3DS Ambassadors program, just after its ten year anniversary as well as the downloadable Virtual Console game for the Wii U on May 8, 2014. It is the fifth game overall in the Wario Land series, which is a spin-off of the Super Mario Land series. It is also the final Wario Land game to be released on a handheld system and the last Wario Land game for seven years until Wario Land: Shake It!. In the game, Wario travels to the Golden Pyramid after reading a newspaper article about a rumor of a Legendary Treasure hidden inside. His intention is to rob the Pyramid, but he accidentally goes on a quest to save the legendary Princess Shokora from the money-crazed Golden Diva, evil ruler of the Golden Pyramid. The game features 2-D graphics with linear transformations (similar to Super Mario World and Super Mario World 2: Yoshi's Island). Wario Land 4 has received very positive reviews from websites and game critics alike, enjoying praise for its soundtrack, collectibles throughout the game, and level design.
Story

Does Wario smell treasure again? Oh yes he does! Whilst reading his morning paper and picking his nose, he reads about the legendary Pyramid of Shokora! With no delay, and even forgetting to take his mid-morning nap, Wario hops into his fantastic car and heads off to find the Golden Pyramid.
– Story from the official European Wario Land 4 website
The story begins in the ruins of the Golden Pyramid, where Princess Shokora, who once ruled the area, had been put into a cursed sleep by the selfish, money-crazed Golden Diva. Princess Shokora was transformed into a Black Cat, and banished from the Pyramid. The Black Cat soon came across a city inhabited by modern humans. There she lived on the streets with a group of stray animals. The Pyramid was later discovered by a group of archaeologists. Many undisclosed accidents hindered the findings of any treasure. Arewo Shitain-hakase, a robotic engineer, heard the rumors of the Golden Pyramid and set off on his own expedition. However, he is believed to have gone missing.
One morning, Wario was reading the morning paper, when an article caught his eye. The headline of the article says that a legendary pyramid had been discovered. With his mind on the treasure, he leaves early in the morning in his prized Wario Car and speeds through the city. The Black Cat is seen crossing a road, but Wario makes no attempt to slow down and he gains speed. Frightened, she covers her eyes with her paws, and the car's wheels narrowly miss her. A newspaper flies into the Cat's face. It reads "Pyramid discovered deep in jungle. Legendary Treasure nearly found, but accidents hindered findings." She seems to take an interest in the article.
Meanwhile, Wario speeds out of the city and enters the desert. With his mind on the ancient treasure, he speeds full throttle toward the Golden Pyramid mentioned in the newspaper article. After some time, Wario's vehicle runs out of gas, and he is forced to push the car to the nearest gas station. He soon comes across a jungle, where he leaves his car. After much trekking through the jungle, he finally reaches the Pyramid. Unable to contain his excitement, he climbs it without hesitation and soon finds an entrance. Inside the pyramid, he descends down a set of stairs and comes across the enigmatic Black Cat, who leads Wario into the next room. Wario and the Black Cat come across a precipice in the ground. The Black Cat jumps in and Wario jumps in after her.
He lands in a room somewhere near the center of the Pyramid. Here, Wario must clear the Pyramid's five Passages. A boss challenges Wario to a battle at the end of each Passage. When Wario clears all five Passages, the Inner Pyramid is revealed. Inside lurks the Golden Diva, the final Boss and the evil ruler of the Pyramid.
At the beginning of the battle, the Black Cat attacks the Golden Diva by scratching her face. The Golden Diva appears unscathed, and she swallows the cat. Wario then battles the Golden Diva himself. When defeated, the Black Cat is set free and the treasure is recovered. Wario flexes his muscles, and after this, the Pyramid begins to shake and crumble. Scared, Wario gathers as much treasure as he can and escapes the Pyramid with the Black Cat leading the way out. Climbing up the ladder on the way out, Arewo Shitain-hakase, who is also frantic to escape, pushes past Wario and exits the pyramid, and Wario and the Black Cat follow.
On the edge of the forest, Wario and the Black Cat watch the Pyramid crumble to the ground. They both laugh. The Golden Diva's Jewelry suddenly flies out of the treasure sack, and the Black Cat takes possession of them. Suddenly, she undergoes a transformation and turns into Princess Shokora, true ruler of the Pyramid. The Princess gives Wario a kiss and says, "Thank you, Wario...♥" Wario cannot believe his eyes, and he doesn't say a word as she is surrounded by four angels and flies up into heaven. Wario sits there for a while trying to making sense of it all. He soon dismisses it, grabs the remaining treasure and gets back into his car. With the treasure in the boot, he drives through the desert back the way he came, while the staff credits roll.
A few days later... the ending cut scene shows Wario speeding through the city once again. Like the beginning, Wario narrowly misses another cat, a white one this time. After Wario drives off, a newspaper flies into the White Cat's face. It reads; "STEAKS! EAT AS MUCH AS YOU CAN!!" The game ends with gold bars forming the words THE END.
Gameplay
Template:WL4 Golden Pyramid Map
Upon creating a new save file, the player can select a game mode to play as. There are Normal, Hard and S-Hard. The most difficult mode, S-Hard, is unlocked upon completing Hard mode. Gameplay begins in the Entry Passage which includes one level and a boss, Spoiled Rotten. On completion, the next four areas of the game are revealed. This consists of four more Passages, each with four levels relating to a different theme with a boss at the end. The four Passages are the Emerald Passage, Ruby Passage, Topaz Passage and Sapphire Passage. These can be completed in any order. Once each boss of the five Passages have been cleared, an inner pyramid, (the Golden Pyramid) is revealed on the main map. This includes one last level, (the Golden Passage) and the final boss; the Golden Diva.
Unlike previous installments in the series, Wario is given a Heart Meter, which contains a total of eight hearts. Wario can collect hearts throughout the stages. Collecting one will replenish one heart to the meter. Wario will lose a heart by touching a threatening part of an enemy, spikes, etc. He can also fully replenish his meter by opening a Heart Box. Below the Heart Meter is the Heart Gauge. Most enemies drop a Little Heart when defeated. Each Little Heart collected will fill the gauge by an eighth. Filling it will give Wario an extra heart, and the gauge will then be emptied.
Each of the eighteen levels contains four Jewel Pieces, found within boxes, that need to be collected. When four Jewel Pieces are joined, they form a Pyramid Jewel. The color of the Jewels varies on the Passage they are collected in. The player must collect all Jewel Pieces in a Passage to gain access to the boss. A Keyzer must be collected to unlock the next level. Without the Keyzer, the four Jewel Pieces in that level can still be collected, but the door to the next level will remain locked.
When Wario enters a level, he enters through a vortex, which will close behind him. The only way to open it again is to find the switch somewhere in the level. This will re-open the vortex and will allow Wario to return to the map screen. A time limit is given to return to the vortex. The player should focus on finding the four Jewel Pieces and the Keyzer before hitting the switch. However, there are some areas that can only be accessed by hitting the switch. This is achieved through the Frog Blocks. The Frog Blocks can be found either solid or transparent. When the switch is hit, all transparent blocks will become solid, while all solid blocks will become transparent. This opens up new areas that can only be accessed when the switch is hit, so there may be some other Jewel Pieces or maybe even the Keyzer to find in that new area. As soon as the switch is hit, a timer will appear on screen. The amount of time given to reach the vortex varies on the level and game mode. If the time runs out, the player's score will quickly decrease and the level will become black and white. When the score reaches zero, Wario is sent back to the main map and must start the level again. In the Golden Passage (the last level of the game), the switch is placed at the beginning directly under the vortex, so Wario lands on it upon entering the last level. This can make the last level more difficult, as he must recover all four Jewel Pieces and the Keyzer within a time limit.
There are two Puzzle Rooms in each level (excluding the Entry Passage and Golden Passage). Each one is found in a Purple Pipe, and will contain either a Diamond worth 1000pts., or an amount of coins that are worth roughly 1000 points when combined. Wario must solve some sort of puzzle to obtain these points, usually using Arewo Shitain-hakase as an object to throw. Completing these rooms is optional and is not necessary to complete the game, but rather if the player wants to earn a few extra points. Likewise, the player will never see a Jewel Piece or a Keyzer is a Puzzle Room, but a Heart Box can be seen in some rooms.

There is also an additional bonus challenge to complete. In every level except for the Entry Passage and the Golden Pyramid, there is a hidden CD that can be collected and played in the Sound Room, each containing a different soundtrack. There is a total of sixteen CDs to collect. A Karaoke can also be unlocked, a full song with Japanese vocals. It can be unlocked by getting 10,000 or more points in each of the eighteen levels.
The game records the player's best score (points collected) in each level. The amount of points obtained in a level will affect what icon will appear on the map screen when standing at the entrance of that level, next to the best score. A score of above 10,000 will show a Gold Crown. 8000 to 9990 will show a Silver crown, and a score of 6000 to 7990 will show a Bronze Crown. A score of below 6000 will show no crown.
There are a total of twelve Treasure Chests in Wario Land 4. Three of them found in each of the four main boss rooms, embedded into the wall in the background. They cannot be touched by Wario at this point. During the boss battle when the time starts to run low (usually under a minute), the Treasure Chests in the background will begin to disappear, one by one. Once Wario defeats the boss, the Treasure Chests that are left over are collected and stored in the Golden Pyramid for the final boss against the Golden Diva. The amount of Treasure Chests collected does not affect the main game, but the ending. The more Treasure Chests Wario has on the game's completion, the more beautiful Princess Shokora will appear in the game's ending cut-scene.
Mini-Game Shop
- “Have some fun, why don’t cha! Play mini-games!”
- —Wario, Wario Land 4 instruction manual
Prior to the boss room of each passage, there is a Mini-Game Shop where Wario can play one of three mini-games. If Wario receives a certain amount of points in each of the mini-games, he can earn Frog Medals which can be spent at the Item Shop for items to assist him to defeat the boss of that Passage. The three Game Bots run the shop, each hosting a different mini-game. Each mini-game costs 5000 points to play (not including the Entry Passage, which is discounted to 2000.) Points can be earned during normal gameplay.
There are three three mini-games, and they are;
There are three different colored Game Bots, each hosting a different mini-game.
| Image | Name | Description |
|---|---|---|
| File:WL4-Blue Game Bot.PNG | Blue Game Bot | The Blue Game Bot runs the mini-game Wario's Homerun Derby. When selected, it will bring out a pair of baseball bats and will skillfully begin to juggle two baseballs up in the air. The symbol on the Bot’s screen is the shape of a baseball pitch, similar to the one found in the mini-game. |
| File:WL4-Red Game Bot.PNG | Red Game Bot | The Red Game Bot is in charge of The Wario Hop. When the cursor selects this Bot, it will immediately begin jumping up and down excitedly. Speakers will appear on its sides and white musical notes will appear above the speakers. The symbol on the Bot’s screen is also a musical note. The music theme reflects the funky tunes and sound effects heard in The Wario Hop. |
| File:WL4-Yellow Game Bot.PNG | Yellow Game Bot | The Yellow Game Bot owns the mini-game Wario's Roulette. When selected, the Bot’s screen will divide into three different colored sections. With the scrolling movement similar to a slot machine, the pictures will change while showing a different set of eyes, noses and mouths. |
Item Shop
- “You thought you could just FIND items? The world doesn't work that way, kid!!”
- —Wario, Wario Land 4 instruction manual
The Item Shop in Wario Land 4 is a place where Wario can spend his Frog Medals in exchange for items. These items assist him in defeating a boss by dealing pre-damage at the battle's start. The shopkeeper is a form of the Black Cat. This character is very similar to the later-occurring Mr. Game & Watch. However, a major difference between the two characters is the Item Shopkeeper has eyes in Wario Land 4.
A table of the nine items and their descriptions is shown below.
| Image | Name | Description |
|---|---|---|
| Apple Bomb | The Apple Bomb is an apple with colored stripes across the bottom half. It disguises a bomb that is concealed inside. When purchased, the Item Shopkeeper will drag the apple to the boss room. She then raises the apple, which will then break open to reveal a ticking bomb. She throws the bomb at the boss to inflict a small amount of damage. | |
| File:WL4-Blast Cannon.PNG | Blast Cannon | The Blast Cannon is a grey cannon with multicolored stripes along the barrel. When purchased, it is wheeled to the boss room by the Item Shopkeeper. She will then snap her fingers, causing a bomb to be blasted as a projectile out of the cannon. It will hit the boss to inflict a small amount of damage. |
| Vizorman | The Vizorman is a seemingly inanimate being that wears a vizor with a white suit with a cape. There is a letter "V" on its chest, with legs bearing multicolored stripes. The Item Shopkeeper will drag the Vizorman to the boss room. She will then start charging a laser which is projected from the vizor and hits the boss, dealing a small amount of damage. | |
| File:WL4-Bugle.PNG | Bugle | The Bugle is a golden bugle with multicolored stripes across the lower half of the tube. It is carried to the boss room by the Item Shopkeeper. She will then start playing a tune on the Bugle, releasing many music notes which will fly around the room, eventually hitting the boss and inflicting an average amount of damage. |
| File:Black Dog.PNG | Black Dog | The Black Dog is a dog with a huge jaw and bright yellow eyes. It is one of the four items where the Item Shopkeeper will transform into the actual item. When purchased, she will follow Wario to the boss room, where she will transform into the Black Dog. The dog will bite the boss several times, inflicting a large amount of damage. |
| File:WL4-LargeLipsSprite.PNG | Large Lips | The Large Lips is a being with oversized lips, which replace the whole head. The Item Shopkeeper will follow Wario to the boss room. She will then transform into the Large Lips, which will violently kiss the boss and deal a large amount of damage. |
| File:WL4-BigFistSprite.PNG | Big Fist | The Big Fist is a large fist that wears a white glove. It resembles Master Hand and Crazy Hand from the Super Smash Bros. series. The Item Shopkeeper will transform into the Big Fist which throws a powerful punch at the boss and deals a large amount of damage. |
| File:WL4-BlackDragon.PNG | Black Dragon | The Black Dragon is a large dragon with a huge jaw and bright yellow eyes, with wings on its back that allows it to fly. When purchased, the Item Shopkeeper will follow Wario to the boss room. There, she will transform into the fearsome Black Dragon, which breathes fire on the boss to deal a large amount of damage. |
| File:WL4-Smile.PNG | Smile | The Smile is the only item in the Item Shop that is free. However, it is a joke item. Selecting it will only cause the Item Shopkeeper to smile and make a sound effect towards the player. |
The more effective the item has on damaging a boss, the more Frog Medals it is likely to cost. The price of the items also varies on the game mode, e.g. an item in hard mode would be more expensive than the same item in normal mode. All items and prices are as follows:
| Item | Price in Frog Medals | ||
|---|---|---|---|
| Normal | Hard | S-Hard | |
| Apple Bomb | 2 | 3 | 4 |
| Blast Cannon | 2 | 3 | 4 |
| Vizorman | 4 | 6 | 8 |
| Bugle | 6 | 9 | 12 |
| Black Dog | 10 | 15 | 20 |
| Large Lips | 10 | 15 | 20 |
| Big Fist | 10 | 15 | 20 |
| Black Dragon | 10 | 15 | 20 |
| Smile | N/A | N/A | N/A |
Each item deals a fixed amount of damage to each boss. All damage totals are shown below. The last four items are not available for purchase against the first boss of the game, Spoiled Rotten.
| Item | Boss / Damage taken by Item | |||||
|---|---|---|---|---|---|---|
| Spoiled Rotten | Cractus | Cuckoo Condor | Aerodent | Catbat | Golden Diva | |
| Apple Bomb | 2 | 2 | 2 | 1 | 2 | 1 |
| Blast Cannon | 3 | 3 | 2 | 2 | 1 | 1 |
| Vizorman | 6 | 4 | 3 | 3 | 3 | 2 |
| Bugle | 8 | 5 | 4 | 4 | 4 | 3 |
| Black Dog | N/A | 7 | 9 | 8 | 10 | 8 |
| Large Lips | N/A | 9 | 8 | 14 | 7 | 5 |
| Big Fist | N/A | 8 | 12 | 7 | 9 | 6 |
| Black Dragon | N/A | 10 | 7 | 9 | 8 | 7 |
Sound Room
- “When you find the CDs thrown around the stages, you'll be able to hear some weird music! Collect 'em all and maybe people will like you!”
- —Wario, Wario Land 4 instruction manual
The Sound Room is a place found on the main map of the Golden Pyramid, where the player can listen to any CD that they have collected within the sixteen main passage levels. Each of the sixteen CDs have a unique track recorded on it. A bonus Karaoke can be unlocked by getting 10,000 or more points (a gold crown) in all eighteen levels. The Karaoke may also be temporarily unlocked by pressing Start, Select, Up, L and R together at the same time, while in the Sound Room.
Many of the CDs features remixed audio which was originally elsewhere in the game, such as the Switch sound effects in the So Sleepy CD.
Game modes
Upon creating a file, the player will be asked which game mode they prefer to play. The available game modes are as follows:
- File:WL4-Normal Mode Sprite.PNG
- File:WL4-Hard Mode Sprite.PNG
- File:WL4-S-Hard Mode Sprite.PNG (unlockable, by completing Hard mode)
The chosen game mode affects the location of the Jewel Pieces, how many enemies are seen in the levels, and the health the player begins with upon entering the level. For example, on S-Hard mode Wario enters the level with only one health point. The game mode also affects the time given to get back to the vortex after the player hits the switch (refer to table in the section below). In a few levels on some difficulties, the switch even changes its location. Purchasing items from the Item Shop will cost more Frog Medals on more difficult modes. The difficulty of Mini-Games are generally unchanged across difficulty levels. However, on S-Hard mode, the baseball mini-game uses a cheerleader who throws very difficult pitches, compared to the lower level modes.
List of Time Limits
- “This switch has an ignorant little frog face!! Once you step on it, hurry up and get back to the vortex!”
- —Wario, Wario Land 4 instruction manual
This table is a list of switch times given to complete levels in different game modes. It also includes the times to defeat the in-game bosses.
| Level | Time limits given in different game modes to complete the levels | ||
|---|---|---|---|
| Normal | Hard | S-Hard | |
| Entry Passage | |||
| Hall of Hieroglyphs | 1:00 | 0:15 | 2:30* |
| Spoiled Rotten (boss) | 1:00 | 0:30 | 0:15 |
| Emerald Passage | |||
| Palm Tree Paradise | 1:30 | 0:45 | 4:30* |
| Wildflower Fields | 2:30 | 1:20 | 0:50 |
| Mystic Lake | 3:00 | 2:00 | 1:30 |
| Monsoon Jungle | 4:00 | 2:45 | 2:00 |
| Cractus (boss) | 4:00 | 3:00 | 2:00 |
| Ruby Passage | |||
| The Curious Factory | 3:30 | 2:50 | 2:30 |
| The Toxic Landfill | 5:00 | 3:30 | 2:30 |
| 40 Below Fridge | 4:00 | 3:30 | 2:00 |
| Pinball Zone | 6:00 | 5:15 | 3:30 |
| Cuckoo Condor (boss) | 4:00 | 3:00 | 2:00 |
| Topaz Passage | |||
| Toy Block Tower | 4:00 | 2:30 | 2:00 |
| The Big Board | 3:00 | 2:30 | 2:00 |
| Doodle Woods | 6:00 | 5:15 | 4:00 |
| Domino Row | 4:00 | 3:00 | 2:00 |
| Aerodent (boss) | 4:00 | 3:00 | 2:00 |
| Sapphire Passage | |||
| Crescent Moon Village | 3:30 | 2:45 | 2:00 |
| Arabian Night | 4:00 | 3:00 | 1:30 |
| Fiery Cavern | 5:00 | 4:00 | 2:45 |
| Hotel Horror | 4:00 | 3:15 | 2:00 |
| Catbat (boss) | 4:00 | 3:00 | 2:00 |
| Golden Pyramid | |||
| Golden Passage | 9:30 | 6:00 | 3:30 |
| Golden Diva (boss) | 6:00 | 5:00 | 4:00 |
| *Switch position changes | |||
Wario's Reactions
- “Even the powerful Wario gets into some embarrassing situations in this game! I eat too much and get all chubby, a bee stings my face and makes it swell like a balloon, my body catches fire, and all kinds of other bad things happen to me!!”
- —Wario, Wario Land 4 instruction manual
All of Wario's reactions return from the last two games. Wario has a total of ten different reactions in the game, all having a different purpose to assist Wario in progressing through the level. This can include turning into a Bat to reach a high place, or catching fire to break certain blocks. All of the reactions have been based on previous games in the series, but they are put to more use in Wario Land 4. Wario is invincible in all forms, but touching an enemy will merely knock it aside and not destroy it.
Below is a table describing all of the reactions (exception: normal Wario).
| Image | Name | Description |
|---|---|---|
| Wario | Wario in his standard form. He can perform a ground-pound, ram enemies or blocks, crawl to get through thin spaces and throw small objects like enemies or rocks. | |
| Puffy Wario | Wario after getting stung by a Beezley, or getting struck by the arrow of a Bow Balloon. His cheeks puff up in a supposed allergic reaction, and he is able to float continually upwards, until Wario hits a ceiling, at then Wario will turn back into his normal form. | |
| Flaming Wario | Wario after catching fire from a Kaentsubo. He will run without stopping while the fire spreads but the player can still make Wario jump by pressing | |
| Flat Wario | Wario after being crushed by a Compressor. His body will become flat light. If he leaves the ground or jumps, he will fall back slowly, swaying side to side, just like a feather. He can get into small spaces. Wario can turn back into his normal form by entering a Decompressor. | |
| Fat Wario | Wario, only fatter. He can turn into this form by eating Apples thrown by a Ringosukī. Wario is invulnerable to enemy attacks, enemies will be killed by only touching them. Due to Wario's increased weight he cannot jump high and he walks slow until Wario walks a certain distance. | |
| Bubble Wario | Wario after touching an underwater bubble. He can float upwards until he reaches the surface. This effect is useless unless there is a water current. Wario can access areas that are otherwise inaccessible because the bubble is unaffected by these currents. | |
| Snowman Wario | Wario after a mound of snow falls on him from a ceiling. Snow will stick to Wario around his belly area and he will be greatly weighed down. Wario will turn into a huge snowball and start rolling, breaking any Snowman Blocks that get in his way if he starts walking from a slope. | |
| Frozen Wario | Wario after getting hit by a Yeti's sneeze. He will become immobile and start sliding backwards. The ice will break once Wario hits a wall or object. | |
| Bouncy Wario | Wario when a Menhanmā strikes him with his hammer. He will curl up into a spring and transform into Bouncy Wario. The player is able to make Wario bounce to incredible heights by pressing | |
| Zombie Wario | Wario when a Skeleton Bird throws him goo. He moves slow, and jumping above a thin platform will cause him to fall through the floor by pressing | |
| Vampire Bat Wario | Wario after being hit by a Minicula. In this form, Wario takes on the appearance of a Bat, and is able to fly by repeatedly pressing |
Controls
- “So these are my basic controls! You got a problem with that?”
- —Wario, Wario Land 4 instruction manual
| Controls | Purpose |
|---|---|
| Opens pause menu/confirm | |
| Jump/swim/confirm | |
| Ram (attack), throw (hold to build power) | |
| Left/right to move. Up to look up | |
| Throw upwards | |
| Ground pound (break blocks below or defeat enemies, ends when player releases the d-pad), roll on 45 degree slope, S-ground pound (break stronger blocks, hold d-pad down for more than a second while falling. Does not end if the player releases the d-pad) | |
| Slide down ladder | |
| Crawl | |
| S-ram (ram with more power) |
Wario's moves
- “How 'bout it? You can even do this stuff!”
- —Wario, Wario Land 4 instruction manual
Wario has several different moves in Wario Land 4. Mastering each one of them is essential for progressing in the game.
| Image | Name | Description |
|---|---|---|
| File:WL4-ram.PNG | Attack | Wario can shift his body weight to ram into objects. He can hit the weak spot of enemies to destroy them, or break blocks to make a path. He also runs a tad faster than normal. |
| File:WL4-S-ram.PNG | Dash Attack | Just like the regular Attack, but with more power. Wario must run for a short distance to build up momentum. Once he does, he runs at terrific speed and is able to break stronger, more solid blocks. |
| File:WL4-GroundPound.PNG | Smash Attack | A stronger version of the classic move that is mainly used in the Mario series can be used in Wario Land 4. Wario can use it to break blocks below, or defeat enemies. |
| File:WL4-S-GroundPound.PNG | Smash Attack (powered) | Similar to the normal Smash Attack but with more strength. Triggered by continuously ground pounding for a certain amount of time without hitting the ground. Wario can break the more solid blue blocks by performing this move. The move won't cancel until he hits the ground. |
| File:WL4-Roll.PNG | Roll | On a 45º degree slope in the floor, Wario can begin to roll. He can jump while moving, destroy blocks and defeat enemies by using this move. He will stop rolling if he either hits something solid or fall into water. |
| File:WL4-Swim.PNG | Swim | Wario is able to swim when he is in a body of water. He can move forward, as well as upward and downward. However, he is unable to swim against water currents. |
| File:WL4-Crawl.PNG | Crawl | When Wario has a small space to squeeze through, he can crawl to pass through. He can also jump while crawling. |
| File:WL4-Throw.PNG | Throw | If Wario picks up an enemy, rock or Pinball, he is able throw it upwards or sidewards. He can also break blocks from a long distance away. |
Passages and levels
This section is under construction. Therefore, please excuse its informal appearance while it is being worked on. We hope to have it completed as soon as possible.
- “My game unfolds inside a pyramid made up of six passages!”
- —Wario, Wario Land 4 instruction manual


Allies
Within the Golden Pyramid, there are a few characters who are willing to help Wario. They all have different purposes and their personalities and traits may differ, but they all have the same goal; to rid the Pyramid of the money crazed Golden Diva and to restore it to its former glory.
| Image | Name | Description |
|---|---|---|
| Wario | The game's main character and protagonist and is the only playable character in the game. Wario found out about the Pyramid while reading a newspaper article. In the dead of night, he hops into his Wario Car and drives off across the desert and through a jungle to reach the Pyramid. He soon falls down a precipice and gets trapped inside. | |
| File:WL4-Cat.PNG | Black Cat | While Wario is speeding through the city in his Car, he almost runs over a Black Cat. A copy of the newspaper that Wario read about the Pyramid flies into her face. The Cat takes a curious interest in the article, and she decides to take a trip to the Pyramid herself. The cat seems to already know her way around the Pyramid, because she leads Wario to the main room. |
| File:WL4-Keyzer2.PNG | Keyzer | Keyzers seem neither alive or dead. They always seem quite jaded, as they love to sleep. Eighteen Keyzers are found in the game, one for every level. They unlock the door to the next level in a Passage and will disappear as soon as they do so. Yūrei tries to steal Keyzer off Wario in the level Crescent Moon Village. |
| Arewo Shitain-hakase | Arewo Shitain-hakase is the detective that was exploring the Pyramid before Wario came and raided it. He also appears in the newspaper in the opening cut-scene. While always minding his own business, Wario is polite enough to usually use him as an object to throw in a Puzzle Room. | |
| File:WL4-MGW.PNG | Item Shopkeeper | The shopkeeper of the Item Shop is found in the corridor before the boss. She sells Wario items that assist in defeating the boss of that Passage. Frog Medals are used as currency, which are earned by achieving a good score in the Mini-Game Shop. The Item Shopkeeper is actually a form of the Black Cat, as she transforms in the final battle against the Golden Diva. |
| File:WL4-Shokora Angels.PNG | Princess Shokora | After the Golden Diva is defeated, Wario and the Black Cat escape the Pyramid before it crumbles on top of them. Outside, Wario and the cat laugh. But then something unexpected happens. The treasures that Wario stole of the Diva are taken in by the Black Cat, and she undergoes a transformation and turns into Princess Shokora, rightful ruler of the Pyramid. She kisses Wario thank you, and gets lifted into heaven by four angels. |
Bosses
Each of the six bosses guards a different Passage in the Pyramid. Items can be purchased with Frog Medals to weaken bosses at the battle's beginning. Defeating Spoiled Rotten will unlock the four main Passages, and clearing a main Passage boss will store its Legendary Treasure and collected Treasure Chests into the Golden Pyramid.
| Image | Name | Treasure | Description |
|---|---|---|---|

|
Spoiled Rotten | None | The boss of the Entry Passage is a purple, eggplant-like creature called Spoiled Rotten. It seems quite young, as it carries a blanket and toy. Accompanying it are two Eggplant Warriors that act as body guards. They behave exactly like Totsumen and they can be defeated the same way. Spoiled Rotten is, at first, defenseless on its own. But after Wario damages it a few times, it will reach a point where its health is quite low. Spoiled Rotten will then throw a temper-tantrum, bearing teeth that harm Wario on contact. He will then need to attack its behind. Defeating Spoiled Rotten will grant access to the four main Passages. |

|
Cractus | The boss of the Emerald Passage is Cractus, a possessed venus flytrap with a huge head and claws that can skewer Wario and drool a poisonous liquid, turning him into Zombie Wario. After taking a certain amount of damage, Cractus will stand upright, making it more difficult for Wario to inflict damage on the creature. He will then have to climb a vine above the plant. Defeating Cractus restores the Crown to the Golden Pyramid. | |
| File:Cuckoocondor.gif | Cuckoo Condor | The boss of the Ruby Passage is Cuckoo Condor. It is what appears to be a giant cuckoo clock. He can grab Wario and shoot cogs and electricity at him. After taking a fair amount of damage, the cuckoo clock's structure falls apart, revealing a giant bird (presumably a condor), underneath. In this form, Cuckoo Condor can lay eggs that hatch into self-destructing chicks which Wario can counter by throwing the eggs back at the Condor's head. Defeating Cuckoo Condor restores the Earrings to the Golden Pyramid. | |

|
Aerodent | The boss of the Topaz Passage is Aerodent, a rat that hides in a giant inflatable teddy bear. It throws down Tack Soldiers, which Wario can throw to counter-attack and deflate the teddy bear. This will cause it to flip upside down and expose the rodent, its weak spot. Once Aerodent has taken a considerable amount to damage, the Teddy will drop flames. These flames not harm Wario, but instead turns him into Flaming Wario. He will catch fire and run around the screen for a while, wasting valuable time. Defeating Aerodent restores the Necklace to the Golden Pyramid. | |

|
Catbat | The boss of the Sapphire Passage is Catbat. It is essentially a large, ghostly-like cat with a statue of a bat on his head, which is his weak spot. Catbat has ears that act as bat wings, and likewise he is able to fly during the battle. There is a pool of water below the unstable flooring where a Mechanical Fish patrols by swimming back and forth. The drill on the creature's head will harm Wario if he is to make contact. Catbat creates waves which must be jumped over. In retaliation to any damage, Catbat spits out orange and purple spikes, which either damage Wario or turn him into Puffy Wario, respectively. The latter's purpose is to waste time. Defeating Catbat restores the Bracelets to the Golden Pyramid. | |

|
Golden Diva | All | The game's final boss and the ruler of the Golden Pyramid. She wears all four pieces of the Legendary Treasure collected from previous bosses. At the beginning of the battle, the Black Cat is brave enough to confront the Diva, but she swallows the feline whole and Wario is left to battle by herself. The Golden Diva casts several different enemies into the battle, at one after the other but later on, several at once. Wario can counter attack these enemies to inflict damage on the Golden Diva. They are the Green Enemy, the Big Ball, the Black Duck and the Tonkachi. A few sequences of these enemies will bring the Golden Diva to a low point in her HP. She then unleashes her final phase, where her head grows to a fearsome size and she starts destroying the ground. On the last point, simply none but her Lips will remain. A simple attack to these Lips will free the swallowed Black Cat. The ending cut-scene follows. |
Enemies and other characters
- “Taking care of most of my enemies is easier than taking candy from babies – which I highly recommend, by the way!!”
- —Wario, Wario Land 4 instruction manual
During his adventure, Wario encounters more than three dozen kinds of enemies. While some can be found in more than one passage, many enemies are only unique to a certain passage. The enemy's characteristics usually go by the passage theme. Each enemy also drops an assigned value of Coins.
- An asterisk (*) next to the enemy name signifies that they transform Wario in some way.
- N/A under "Coins dropped" signifies that the enemy cannot be defeated.
Common enemies
The following enemies may be found in multiple passages. No enemy appears in all six passages.
| Image | Name | Coins dropped | Description | Passages |
|---|---|---|---|---|
| File:Bouncers.png | Marumen | 20 points |
A weak walking enemy which can be found in most Passages. They are unable to hurt Wario in any way. Marumen change from purple to red whenever Wario ground pounds near one. | |
50 points | ||||
| Spear-Mask | 10 points |
A common enemy wielding a spear as a weapon. They may be found as yellow, blue or red, and will change between these colors whenever Wario pounds the ground nearby. The yellow Spear-Masks are slow moving, the blue Spear-Masks will spin spin the spear it holds before it starts to walk or when it changes direction, and the red Spear-Mask will charge at Wario whenever they catch sight of him. | ||
50 points | ||||
100 points | ||||
| Totsumen | 50 points |
An aggressive creature wearing a mask with a knife attached to it. It charges at Wario at high speed when he comes near it. If its attack misses and it hits a wall or object, it will flip over. They can then be safely ground pounded. Totsumen behave in a similar way to Eggplant Warriors. | ||
| Harimen | 100 points |
An enemy that is protected by a pink spiked shell. A ground pound will cause it to flip over, exposing its vulnerable underside. | ||
| Harimenzetto | 200 points |
A stronger version of a Harimen with a black shell. An S-ground pound is required to flip it over. | ||
| Goggley-Blade | 10 points |
The most common aquatic enemy found in the game. It charges at Wario when it catches sight of him. Goggley-Blade's belly is its weak spot. | ||
| Spiked Head | None | An immobile spiked creature that is seen more often in difficult game modes. They may be defeated if Wario throws another enemy at them. | ||
| File:Shieragutchi WL4.png | Shieragutchi | 10 points |
A spiked clam found in bodies of water. It quickly moves upwards when Wario comes near. Shieragutchi can be defeated with a hit from below. | |
| Ringosukī* | None | A monkey that throws Apples which transforms Wario into Fat Wario upon contact. If defeated, they don't produce any Coins. | ||
| Beezley* | None | A Bee which flies down and stings Wario, causing his head to swell to a ridiculous size and transform him into Puffy Wario. They also pollinate Money Flowers. | ||
| File:Archer.PNG | Bow Balloon* | None | An archer that shoots arrows at Wario, which have the same effect as a Beezley's sting. They don't produce any coins when defeated. | |
| Menhanmā* | None | A hammer-wielding creature that tries to flatten Wario. A hit won't harm Wario, but will turn him into Bouncy Wario. | ||
| Yeti* | 50 points |
A yeti that tries to freeze Wario with its icy sneeze, turning him into Frozen Wario. | ||
| Kaentsubo* | None | A walking flame jar which tips over when Wario approaches, spreading flames which will transform him into Flaming Wario on contact. | ||
| File:WL4-PigHead.PNG | Pig Head Statue* | N/A | A Pig Head Statue which appears in the level Toy Block Tower, as well as some Puzzle Rooms. It drops flames out of its mouth, which transforms Wario into Flaming Wario, allowing him to break Bonfire Blocks. | |
| Skeleton Bird* | None | A skeletal, ghost-like bird that drops green goo that turn Wario into Zombie Wario. He can then harm the Skeleton Bird by touching it in his zombie form. | ||
| File:Vampire Bat.PNG | Minicula* | N/A | An invincible bat flying in circles that transforms Wario into Vampire Bat Wario upon contact. | |
| Men'ono | 50 points |
A hooded creature armed with an axe. It charges at Wario when it sees him and swings its weapon with the intention to harm him. It can be defeated by a ground pound or a ram from behind. | ||
| File:WL4-PearlBird.PNG | Pearl Bird | N/A | A bird-like ally that is found in some Puzzle Rooms. It spits out glass orbs on regular intervals, and they smash when they hit the ground. Wario can catch and throw it at colored ! Switches to clear a path to a Giant Diamond. |
Entry Passage enemies
| Image | Name | Coins dropped | Description |
|---|---|---|---|
| Eggplant Warrior | None | An eggplant-like creature wearing a headband with a knife. It assists the boss Spoiled Rotten. Eggplant Warriors tend to act in the same way as Totsumen. |
Emerald Passage enemies
| Image | Name | Coins dropped | Description |
|---|---|---|---|
| Imomushi | 10 points |
A harmless, slow moving caterpillar. They mostly appear in Wildflower Fields, eating the many large leaves in the level. | |
| Moguramen | 50 points |
A mole-like creature wearing a mask with a drill that harms Wario. Some of them dig through the ground. | |
| Utsuboankō | N/A | A giant sea monster that hides in a hole in the background. When Wario comes near, they will emerge in surprise, damaging Wario if they make contact. They cannot be defeated. | |
| Togenobi | N/A | A large octopus with four rotating tentacles that hold maces. Wario is not able to defeat them. | |
| Tobawani | 10 points |
A crocodile enemy that swims near the water's surface. It jumps up and tries to bite Wario once he is above it. They only appear in the level Monsoon Jungle. | |
| File:WL4-Firefly Sprite.PNG | Hotaru* | N/A | An enemy that accompanies the boss Cractus. If Wario is to touch the toxic drool of Cractus, he will transform into Zombie Wario, which would waste valuable time. Hotaru will then appear on the screen, which will reverse the effects if touched. |
Ruby Passage enemies
| Image | Name | Coins dropped | Description |
|---|---|---|---|
| Togerobo | 200 points |
A heavy robot with spikes on its back. It has a spiked head that it drops when they catch sight of Wario. The head rolls along the ground, damaging Wario if it hits him. Togerobo will grow back a new head if the other one is gone. A ram from behind will defeat it. | |
| PET Bottom | 50 points |
A bottle walking on four legs. It is armed with a spear on its front, which retracts if it is disturbed. It can be defeated by a ground pound or a ram from behind. | |
| File:Drill Bat.PNG | Robo Bird | None | A robotic bird that attacks by flying in a straight line as soon as soon as it spots Wario. It will inflict damage if it makes contact with Wario. It only appears in the Hard and S-Hard game modes. It can be defeated by a standard ground pound or ram. |
| File:WL4-Spike Cannon.gif | Spike Cannon | N/A | An enemy that only appears in the level Pinball Zone, mostly around wire mesh that Wario must climb. They shoot out spikes out of the top of their heads at regular intervals, harming Wario if they make contact. The top of its head acts as a platform, where Wario can stand. However, he can only do this while no spikes are being released, otherwise they will harm him. The Spike Cannon cannot be defeated. |
| File:WL4-Yellow Duck.PNG | Hiyoko | None | An enemy that is produced by the condor form of the boss Cuckoo Condor. The boss lays eggs which will hatch Hiyoko as soon as they hit the ground. They will start to flash bright orange and blow up, harming Wario if he is nearby. Wario can catch the eggs before they break and throw them as a projectile. |
Topaz Passage enemies
| Image | Name | Coins dropped | Description |
|---|---|---|---|
| Toy Car | 10 points |
A tiny Wario driving a mini Wario Car with a spike on the front. They slowly drive along the ground, harming Wario if the spike touches him. | |
| File:Spear Bot.PNG | Dice | None | A walking dice wielding a spear. They emerge from a chance wheel when the appropriate space on the ribbon is struck. |
| File:Doodle.PNG | Hoggus | N/A | A floating pig-like artist that doesn't harm Wario. He draws Dendens and Butatabis, which come to life shortly after he draws them. |
| Denden | None | A pig in a spiked shell created by Hoggus. It rolls along the ground when Wario comes near (similar to a Togerobo). | |
| File:Butatabi WL4.png | Butatabi | None | A pig with a spike on its head created by Hoggus. It glides from right to left. |
| Deburina | 50 points |
A drawing of a dancing pig that has come to life. She has a hula-hoop around her body that rotates while Deburina dances. The edge of the hoop harms Wario. | |
| File:Tack Soldier1.PNG | Pin Enemy* | None | A hopping creature with a spike on the bottom assisting the boss Aerodent. They have to be thrown by Wario at the bear balloon to defeat the boss. |
Sapphire Passage enemies
| Image | Name | Coins dropped | Description |
|---|---|---|---|

|
Yūrei | N/A | A pirate-like ghost that doesn't harm Wario, but follows him and tries to pick every coin before Wario can do so. He also tries to steal the Keyzer off Wario. He cannot be touched by Wario and likewise, he cannot be defeated. |
| Mayu Bird | None | A bat-like creature that only flies within a small area, but can be found in large groups. They have fangs on their underside which harm Wario. They can be defeated by a ground pound or a ram. If they are tapped on the side, they will mysteriously fly away. | |
| Onomī | 50 points |
A mummified enemy wielding an axe. It uses the same attack as Men'onos, and can be defeated in the same way. | |
| Iwao | 100 points |
A burly creature that throws rolling rocks at Wario. They turn into Yetis when the switch is hit in the level Fiery Cavern. It can only be defeated with a ground pound on the head. | |
| Mechanical Fish | None | A mechanical fish with a drill patrolling the pool of the boss Catbat. An S-ground pound is the only way to defeat it. | |
| File:WL4-Cough Virus.PNG | Toge* | None | An enemy that accompanies the boss Catbat. Whenever Catbat takes damage, he coughs out small spiked balls as projectiles which will float in the air. If Wario is to make contact with the purple ones, he will transform into Puffy Wario, wasting valuable time. The red Toge appear later in the battle. They will harm Wario instead of transforming him. |
Golden Pyramid enemies
The last part of the game doesn't introduce new enemies, aside from the creatures created by the Golden Diva. Some enemies that are otherwise exclusive to the Sapphire Passage reappear in the Golden Passage, the last level before the final boss. This includes Skeleton Birds, Men'ono and Miniculas.
| Image | Name | Coins dropped | Description |
|---|---|---|---|
| File:WL4-SpikeRock.PNG | Green Enemy | N/A | A creature produced by the Golden Diva. It flies down from the sky, the movement similar to a Butatabi. When it hits the ground, or if Wario throws Tonkachi upwards at it, it loses the spikes and Wario can throw it at the Diva to inflict damage. |
| File:WL4-BearBomb.PNG | Big Ball | None | The Big Ball is dropped by the Golden Diva. It is a blue ball with a bear that looks like Aerodent on it. Wario can ram it to send it flying, bouncing off the walls and possibly hitting the Diva, causing her damage. The ball will explode by itself if left alone. |
| File:WL4-DuckEgg.PNG | Black Duck | None | The Golden Diva can throw black eggs at Wario, which crack open on impact on the ground to reveal a time-bombed duck. They walk back and forth across the stage, flashing faster and faster, until they explode. Wario can catch the eggs before they hit the ground, and then throw it at the Golden Diva to inflict damage. |
| File:WL4-SpikeHammer.PNG | Tonkachi* | N/A | A spiky Hammer which is thrown by the Golden Diva. Shortly after hitting the ground, it will lose its spikes. Wario can then throw it up in the air with the intention of it landing on him, transforming him into Bouncy Wario. He can then use this reaction to damage the Diva. |
| File:WL4-Lips.PNG | Diva's Lips | None | When the Golden Diva has been defeated, her Lips will remain wiggling helpless across the stage. Wario must merely ground pound or ram to destroy them. Once done so, the Black Cat is freed (since the Diva swallowed her), and the game ends. |
Reception
The game received generally positive reviews. The "portable masterpiece" received praise and excellent review scores on its soundtrack, collectibles throughout the game and its general thrill of satisfaction. One gaming website commented about even on its ten year anniversary, it "still remains the best portable Mario game to date".[2] IGN gave Wario Land 4 a nine out of ten, or "Outstanding", citing its well thought out level design and replayability, and how the game "puts a lot more emphasis on action" compared to its predecessors.[3] Praise was also given to how much attention the developers paid to the sounds and music. It was not given a full ten because the game does not necessarily push the performance power of the Game Boy Advance in regards to animation design. The website quoted that "it's a little disappointing to see that Wario isn't much of a step beyond his GBC adventure in terms of art and animation...other than the sprite effects, it could have been done on the 8-bit handheld".
Media
- For a complete list of media for this subject, see List of Wario Land 4 media.
Audio
Video
References in other games

- Wario makes a guest appearance in Densetsu no Stafy 3, where Wario helps Starfy throughout the Undersea Ruins by using some of his reactions from Wario Land 4. Wario and Starfy arrive at a vortex, where they must enter to locate the switch and four Jewel Pieces in order to unlock the boss's door. Wario can transform into Bubble Wario, Flaming Wario and Puffy Wario respectively.
- Metroid Fusion's unused game data shows various assets from Wario Land 4, including large blocks and crystals, which suggests that the game was based on the same engine as Wario Land 4.[4]
- Wario's voice clips in Wario Land 4 were later reused for the WarioWare games. Additionally, the music and other sound effects in this game were also reused in WarioWare, Inc.: Mega Microgame$!.
- The Wii game WarioWare: D.I.Y. Showcase features a Microgame titled "Wario Land", which features sprites and concepts taken from Wario Land 4. In the microgame, Wario must use dash to break through a block and defeat a yellow Spear-Mask. The attack must be timed to successfully strike the Spear-Mask while its spear is facing away from Wario.
WarioWare, Inc.: Mega Party Game$!
WarioWare, Inc.: Mega Party Game$! contains a seemingly complete set of instrumental sounds used for the soundtrack of Wario Land 4 within the game's files, and may be assembled together manually to recreate each of the individual tracks.[5] Various theme songs and sound effects from Wario Land 4 are also heard during normal gameplay:
- The theme of the Item Shop is used as Mona's theme melody. The music can also be heard in WarioWare, Inc.: Mega Microgame$! in a less modified form when the Gelateria is seen from the inside during Mona's story.
- The song that plays whenever a character's story is cleared and all the other employees are shown at the Gelateria is a shortened version of "Mr. Ether & Planaria".
- A slightly sped up version of Palm Tree Paradise's theme can also be heard in the microgame Balancing Act.
- The whispering heard in the Sound Room's "The Short Futon" was used for the microgame Right in the Eye.
- One of the songs available for Jump Forever is the theme for Pinball Zone.
- Additionally, part of Crescent Moon Village's theme can be heard during the epilogue of Wario's second set of microgames in Mega Microgame$!.
Gallery
- For this subject's image gallery, see Gallery:Wario Land 4.
Japanese box art
Wario striking a victory pose

Wario reading the newspaper
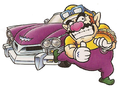
Wario with his Wario Car
- Keyser.jpeg
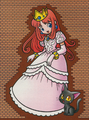
Princess Shokora and the Black Cat


Pre-release and unused content
- Main article: List of Wario Land 4 pre-release and unused content

Wario Land 4 was first announced at E3 2001. The first released screenshots were very different from the final game. Wario had a darker, more orange skin tone. A lot of the enemies were also shown to have a different color scheme. A notable difference from the final game is how Wario originally had a Garlic meter, which would have replaced the heart gauge below the heart meter. The Mini-Game Shop was going to be called the Game Corner, and Wario originally needed a Key to unlock a Jewel Piece Box.
Staff
- Main article: List of Wario Land 4 staff
Nintendo R&D1 developed Wario Land 4, with the executive producer being Hiroshi Yamauchi. Hirofumi Matsuoka (who had previously co-directed Virtual Boy Wario Land) directed the game. The game was among the first Nintendo projects for Goro Abe and Ko Takeuchi, who would both become key figures of the WarioWare series.
Wario Land 4 is the last active development credit of Wario's creator, Hiroji Kiyotake. Following the release of the game, Kiyotake assumed a supervisor role inside Nintendo SPD.
Glitches
- Main article: List of Wario Land 4 glitches
There are currently three known glitches in Wario Land 4. The player is able to fly vertically, hold an invisible object and walk through walls. All of these can be encountered during normal gameplay.
Quotes
- Main article: List of quotes in Wario Land 4
In Wario Land 4, there is not a large amount of quotes within the game itself. But there are many notable quotes within the game's instruction manual, where Wario describes to the reader many aspects of gameplay and a few enemy descriptions. Some of the most notable are shown below.
Quotes found in the game;
- "Legendary Pyramid discovered deep in Jungle!! Legendary Treasure nearly found, but accidents hindered findings." – Newspaper article seen in the game's opening cut-scene.
- "Welcome to the Item Shop." – The Item Shopkeeper welcoming Wario to the Item Shop.
- "Oh no, no! Hurry up!" – Wario, when he hits the switch in a level.
Quotes found in the game's manual;
- "I ain’t normal! And I don’t mean that I’m stupid! I can do aaalllll kinds o’ stuff that normal humans can’t, you know what I mean? How ‘bout that? Amazing, huh?" – Wario informs the reader of his skills.
- "Rumour has it that no one who’s entered the Golden Passage have ever come out alive! Scary!"– Wario warning the player of the dangers found in the Golden Passage.
- "Yeahhhhh, that’s ME!!! More gorgeous than any Hollywood star! Get a good look at me while you can!!" – Wario describing himself.
- "I don’t always speak so crudely, you know. I’m just worried about you because you play so badly!! Why do I care? Because I’m the one that feels it when you screw up, that’s why!!! So just try to get better at this game, OK?! I’m begging you!" – Wario, worried that the player will lead Wario into some danger.
- "Haven’t you kids ever done something that made you look stupid? Oh, is that right? Well, FINE then! But even the powerful Wario gets into some embarrassing situations in this game! I eat too much and get all chubby, a bee stings my face and makes it swell like a balloon, my body catches fire, and all kinds of other bad things happen to me!! But I’m a tough guy, so I keep coming back for more! You wimps could learn something from me!" – Wario gives examples of his tough times.
Trivia
- Part of the vocals used in the game's title track were taken from the first track of Zero-G's Vocal XTC audio sample compilation. The specific vocal lines in question are "Your time is over, I've had enough! Here I come! Look out, here I come!", sung by British session singer Helen Binding.[6][7]
Names in other languages
| Language | Name | Meaning |
|---|---|---|
| Japanese | ワリオランドアドバンス ヨーキのお宝 Wario Rando Adobansu: Yōki no Otakara |
Wario Land Advance: The Treasure of the Golden Diva |
| Chinese | 瓦力欧寻宝记 Wǎlìōu xúnbǎo jì |
Wario Treasure Finding |
References
- ^ http://themushroomkingdom.net/games/wl4
- ^ Why Wario Land 4 remains the best portable Mario game
- ^ IGN Wario Land 4 review
- ^ The Cutting Room Floor's page for Metroid Fusion
- ^ Forum post by "Weario" at warioforums.com (retrieved September 5, 2016)
- ^ Zero-G Vocal XTC product page (accessed on September 24, 2016)
- ^ Vocal XTC CD booklet (accessed on September 24, 2016)
External links
- North American website
- North American gamepage
- North American Virtual Console page
- European microsite
- European Virtual Console page
- Japanese website
- Japanese Virtual Console page