User:Scrooge200/Sandbox: Difference between revisions
Scrooge200 (talk | contribs) |
Scrooge200 (talk | contribs) No edit summary |
||
| Line 1,356: | Line 1,356: | ||
Violet Isles, Fortune Island... On the rock wall after the spewing smoke disappears... | Violet Isles, Fortune Island... On the rock wall after the spewing smoke disappears... | ||
---- | ---- | ||
The '''Hint Block''' is a [[Command Block]] that appears in ''[[Mario & Luigi: Dream Team]]'' and actually I'm not sure what else. Huh. I think it was in Paper Jam too but I'll have to double check. Here are the Dream Team hints. Warning, big text dump! | |||
Snuff the Flames | Snuff the Flames | ||
Dodge all ghostly flames, and the foe's flames will extinguish, allowing you to jump on it! It will reignite if you leave it alone, so concentrate on attacking while the ghostly flames are out. | Dodge all ghostly flames, and the foe's flames will extinguish, allowing you to jump on it! It will reignite if you leave it alone, so concentrate on attacking while the ghostly flames are out. | ||
| Line 1,924: | Line 1,586: | ||
Mecha Column | Mecha Column | ||
When | When Mechakoopa numbers drop, they'll all line up in one column. If they hop before charging out, they'll fly over Mario's head. Let them pass by without jumping. For broken Mechakoopas, the tell is reversed. If broken Mechakoopas hop, they'll charge straight at you! Incidentally, if you stomp a broken Mechakoopa, it'll run the other way. Make it collide with other Mechakoopas for easy damage! | ||
Mechakoopa | |||
they'll all line up in one column. | |||
If they hop before charging out, | |||
they'll fly over | |||
Mario's | |||
Let them pass by without jumping. | |||
For broken | |||
Mechakoopas | |||
, the | |||
tell | |||
is reversed. If broken | |||
Mechakoopas | |||
straight at you! | |||
Incidentally, if you stomp a broken | |||
Mechakoopa | |||
, it'll run the other | |||
way. Make it collide with other | |||
Mechakoopas | |||
Break the Chains | Break the Chains | ||
Before an | Before an Antasman moves, it'll heal itself and those cohorts who are bound to it with magic. Use jumping attacks first to pick them off one by one! | ||
Antasman | |||
heal itself and those cohorts who | |||
are bound to it with magic. | |||
Use jumping attacks first to pick | |||
them off one by one! | |||
Defeat Lakitu R | Defeat Lakitu R | ||
Whenever a | Whenever a Lakitu R attacks, it'll have Spinies R in tow. If you can't thin out the Spinies R, try defeating the Lakitu R first. Using a Taunt Ball to enrage it might help defeat a Lakitu R quickly. It'll attack you without fail, so counter for big damage! | ||
Lakitu R | |||
have | |||
Spinies R | |||
in tow. | |||
If you can't thin out the | |||
Spinies R | |||
try defeating the | |||
Lakitu R | |||
Using a | |||
Taunt Ball | |||
might help defeat a | |||
Lakitu R | |||
quickly. It'll attack you without | |||
fail, so counter for big damage! | |||
Beat the Real Kamek | Beat the Real Kamek | ||
Kamek | Kamek will make doppelgangers. He'll recover health if you hit his copies, so make sure not to miss the real Kamek! | ||
will make | |||
doppelgangers. | |||
He'll recover health if you hit his | |||
copies, so make sure not to miss | |||
the real | |||
Remember the Shapes | Remember the Shapes | ||
The | The spells from Kamek's magic move in specific directions depending on their shape. | ||
[Square]: Comes from the front. | |||
Kamek's | [Circle]: Comes from the rear. | ||
magic move in specific directions | [Triangle]: Comes from the right. | ||
depending on their shape. | [Upside-down triangle]: Comes from the left. | ||
: Comes from the front. | Be careful! It's tricky to distinguish [triangle] from [upside-down triangle]! | ||
: Comes from the rear. | |||
: Comes from the right. | |||
: Comes from the left. | |||
Be careful! It's tricky to | |||
distinguish | |||
Beat the Real Kamek | Beat the Real Kamek | ||
Kamek | Kamek will make doppelgangers. He'll recover health if you hit his copies, so make sure not to miss the real Kamek. | ||
will make | |||
doppelgangers. | |||
He'll recover health if you hit his | |||
copies, so make sure not to miss | |||
the real | |||
Remember the Shapes | Remember the Shapes | ||
The | The spells from Kamek's magic move in specific directions depending on their shape. | ||
[Square]: Comes from the front. | |||
Kamek's | [Circle]: Comes from the rear. | ||
magic move in specific directions | [Triangle]: Comes from the right. | ||
depending on their shape. | [Upside-down triangle]: Comes from the left. | ||
: Comes from the front. | Be careful! It's tricky to distinguish [triangle] from [upside-down triangle]! | ||
: Comes from the rear. | |||
: Comes from the right. | |||
: Comes from the left. | |||
Be careful! It's tricky to | |||
distinguish | |||
Use the Dry Bones | Use the Dry Bones | ||
| Line 2,021: | Line 1,620: | ||
Defeat Kamek (Green) | Defeat Kamek (Green) | ||
In the | In the third battle with Kamek each of the 4 Kamek copies has a different role! The green one boosts the group's stats, so defeat that one first! | ||
battle with | |||
Kamek | |||
each of the | |||
4 Kamek copies | |||
has a different role! | |||
The | |||
green one | |||
boosts the group's | |||
stats, so defeat that one first! | |||
Remember the Shapes | Remember the Shapes | ||
The | The spells from Kamek's magic move in specific directions depending on their shape. | ||
[Square]: Comes from the front. | |||
Kamek's | [Circle]: Comes from the rear. | ||
magic move in specific directions | [Triangle]: Comes from the right. | ||
depending on their shape. | [Upside-down triangle]: Comes from the left. | ||
: Comes from the front. | Be careful! It's tricky to distinguish [triangle] from [upside-down triangle]! | ||
: Comes from the rear. | |||
: Comes from the right. | Keep in mind that the enemy's SPEED stat gets faster with the green Kamek copy's magic! | ||
: Comes from the left. | |||
Be careful! It's tricky to | |||
distinguish | |||
Keep in mind that the enemy's | |||
SPEED | |||
the | |||
green Kamek copy's | |||
magic! | |||
Giant-Broom Service | Giant-Broom Service | ||
Focus on the giant broom's | Focus on the giant broom's moves to foresee its attack! When it sweeps on the same spot, that's its tell! It's going to attack Mario! Slide the Circle Pad at the right time to escape from the broom's trajectory. | ||
moves to foresee its attack! | |||
When it sweeps on the | |||
same spot, that's its | |||
tell | |||
It's going to attack | |||
Mario | |||
Slide the | |||
Circle Pad | |||
at the right | |||
time to escape from the broom's | |||
trajectory. | |||
Escape the Nightmare | Escape the Nightmare | ||
If you get hit by | If you get hit by Antasma and fall asleep, you'll be caught in an endless nightmare. Jump out through the exit hole, or remain trapped forever! There is only one exit. All other holes are decoys. Jump through a hole to discover its nature. Find the exit, hurry! | ||
Antasma | |||
fall asleep, you'll be caught in an | |||
endless nightmare. Jump out | |||
through the exit hole, or remain | |||
trapped forever! | |||
There is only | |||
one | |||
All other holes are decoys. | |||
Jump through a hole to discover | |||
its nature. Find the exit | |||
hurry! | |||
Get In the Ring! | Get In the Ring! | ||
When Antasma throws a ring, make sure you get inside it. If you stay outside of the ring, you'll always get hit by the shock wave...and that'll hurt badly! When Antasma raises his hand, the direction where the ring falls will change, so move toward the side where he raised his hand. It's easier if you stay in the middle to prepare yourself! | When Antasma throws a ring, make sure you get inside it. If you stay outside of the ring, you'll always get hit by the shock wave...and that'll hurt badly! When Antasma raises his hand, the direction where the ring falls will change, so move toward the side where he raised his hand. It's easier if you stay in the middle to prepare yourself! | ||
| Line 2,089: | Line 1,648: | ||
Bye, Dreamy Bowser! | Bye, Dreamy Bowser! | ||
Dreamy Bowser | Dreamy Bowser will block attacks to his body with his right arm. Defeat the right arm first to be able to damage his body. If Mario or Luigi gets caught, attack the left arm to free him. | ||
to his body with his | |||
right arm | |||
Defeat the | |||
right arm | |||
able to damage his body. | |||
If | |||
Mario | |||
Luigi | |||
attack the | |||
left arm | |||
Minion Mop-Up | Minion Mop-Up | ||
| Line 2,116: | Line 1,660: | ||
Gold Beanie's Tell | Gold Beanie's Tell | ||
Watch the | Watch the Gold Beanie after countering its running attack. If it stumbles on its way back, it'll jump for its next attack! The timing of when it hits Mario will be slightly late, so wait a beat before swinging the hammer! | ||
Gold Beanie | |||
countering its running attack. | |||
If it stumbles on its way back, | |||
it'll jump for its next attack! | |||
The timing of when it hits | |||
Mario | |||
will be slightly late, so wait a | |||
beat before swinging the hammer! | |||
Creeping Beanie | Creeping Beanie | ||
Be extra careful if the | Be extra careful if the Gold Beanie calls a crowd of buddies! It'll hide behind its buddies to sneak up on Mario. Stomp on the enemies concealing the Gold Beanie to counter! While the Gold Beanie is hiding, it'll keep changing its position, so keep an eye on it! | ||
Gold | |||
Beanie | |||
calls a crowd of buddies! | |||
It'll hide behind its buddies to | |||
sneak up on | |||
Mario | |||
Stomp on the enemies concealing | |||
the | |||
Gold Beanie | |||
While the | |||
Gold Beanie | |||
it'll keep changing its position, | |||
so keep an eye on it! | |||
Mix It Up | Mix It Up | ||
| Line 2,148: | Line 1,669: | ||
Watch and Learn | Watch and Learn | ||
When you eat a | When you eat a Boo Biscuit, you won't be able to attack for a while but you won't take any damage either! Use those moments of peace to | ||
Boo Biscuit | observe enemy attacks and plan your defense! | ||
, you | |||
won't be able to attack for a | |||
while but you won't take any | |||
damage either! | |||
Use those moments of peace to | |||
observe enemy attacks and plan | |||
your defense! | |||
Slow and Steady | Slow and Steady | ||
Mess up an | Mess up an attack a few times, and you'll unlock Slow Attack Mode. In Slow Attack Mode, time will slow down mid-attack to make it easier. Practice makes perfect! | ||
attack | |||
and you'll unlock | |||
Slow Attack Mode | |||
In Slow Attack Mode, time will slow down mid-attack to make it easier. Practice makes perfect! | |||
Bros. Attacks | Bros. Attacks | ||
| Line 2,173: | Line 1,682: | ||
Use Luiginary Attacks | Use Luiginary Attacks | ||
The quicker you defeat monsters, | The quicker you defeat monsters, the fewer attacks you'll endure! Use Luiginary Attacks to deal big damage and get it over with! | ||
the fewer attacks you'll endure! | |||
Use | |||
Luiginary Attacks | |||
damage and get it over with! | |||
Restore Your BP! | Restore Your BP! | ||
Using | Using Luiginary Attacks uses BP. If you run out of BP, you can't use Luiginary Attacks, so restore it by drinking syrup. Buy Syrup Jars from item shops or pick up any dropped by enemies you defeat. | ||
Luiginary Attacks | |||
If you run out of | |||
, you can't use | |||
Luiginary Attacks | |||
, so restore | |||
it by drinking | |||
syrup | |||
Buy | |||
Syrup Jars | |||
item shops | |||
or pick up any dropped by | |||
enemies you defeat. | |||
Level Up! | Level Up! | ||
Revision as of 23:41, January 12, 2020
Welcome to my sandbox!
In Paper Mario: Color Splash, every level (besides Black Bowser's Castle and the Roshambo Temples) has colorless spots that Mario can fill in with his Paint Hammer. The percentage of colorless spots that have been painted in a level can be seen on the map, and if Mario paints every spot in a level, that level's record becomes available in the Prisma Museum.
The Shy Bandit appears on the map randomly, and can suck all the color out of a level. If Mario does not catch the Shy Bandit in time, that level's colorless spots must be painted in again.
Colorless spot locations
Port Prisma
| Port Prisma | |
|---|---|
| In the Yellow District, Toad has his colors drained and must be repainted. This spot must be painted to progress. | 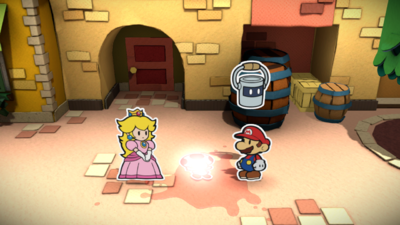
|
| In the Yellow District, the Prisma Cardware shopkeeper Toad has had his colors drained. This spot must be painted to progress. | 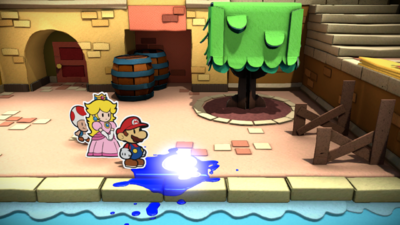
|
| In the Fountain District, on the leftmost post. | 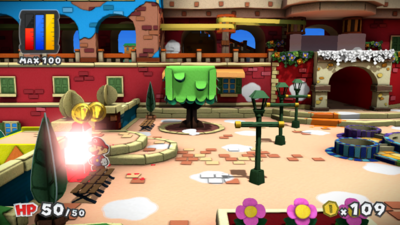
|
| In the Fountain District, east of the lower leftmost potted plant. | 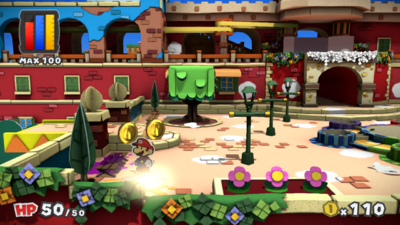
|
| In the Fountain District, west of the leftmost flag. | 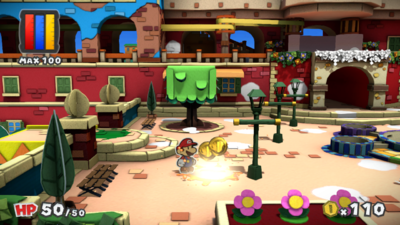
|
| In the Fountain District, on the first step leading to the Red District. | 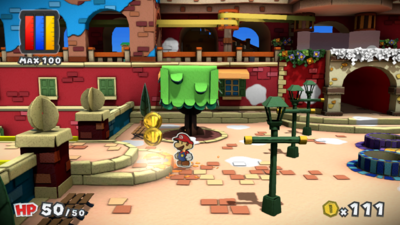
|
| In the Fountain District, south of the upper leftmost bench. | 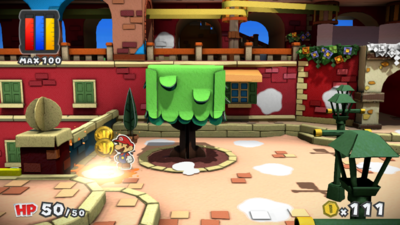
|
| In the Fountain District, east of the upper leftmost potted plant. | 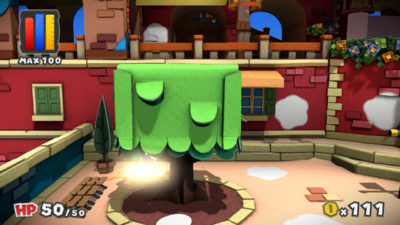
|
| In the Fountain District, east of the steps leading to the Red District. | 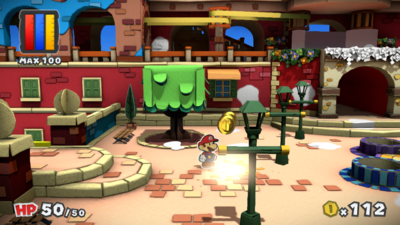
|
| In the Fountain District, northeast of the left flower bed. | 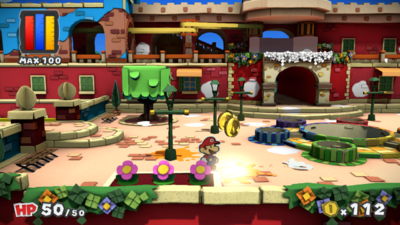
|
| In the Fountain District, south of the left window. | 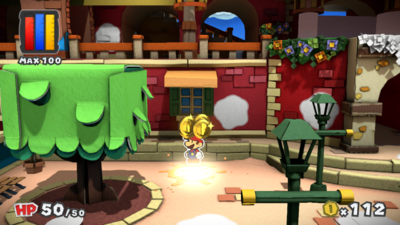
|
| In the Fountain District, east of the left window. | 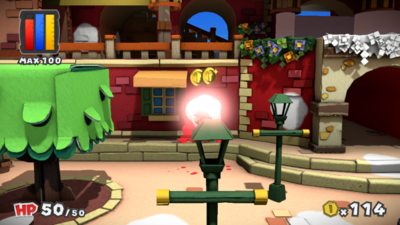
|
| In the Fountain District, further south of the left window. | 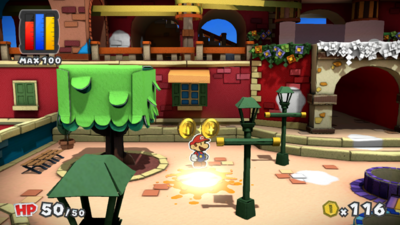
|
| In the Fountain District, south of the blue Big Paint Star's spot. | 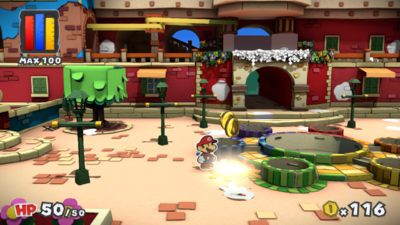
|
| In the Fountain District, north of the blue Big Paint Star's spot. | 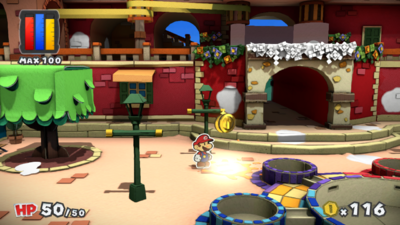
|
| In the Fountain District, on the wall near the left arch. | 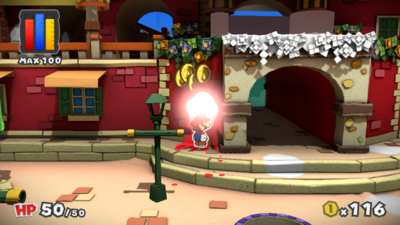
|
| In the Fountain District, on the steps leading to the exit. | 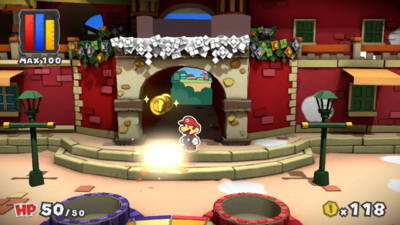
|
| In the Fountain District, south of the right arch. | 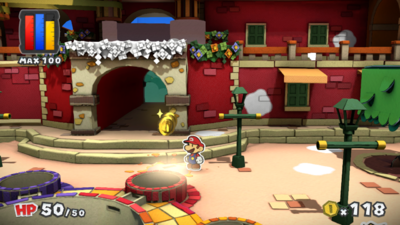
|
| In the Fountain District, on the floor east of the right arch. | 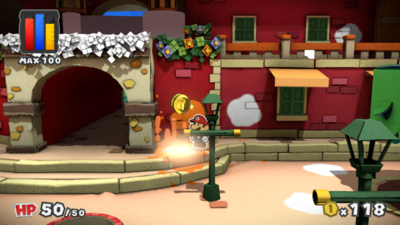
|
| In the Fountain District, west of the right window. | 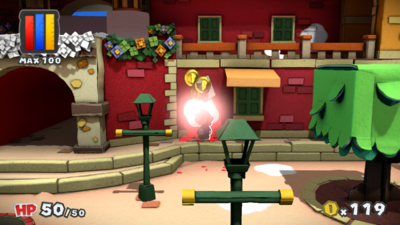
|
| In the Fountain District, between the yellow and orange Big Paint Stars' spots. | 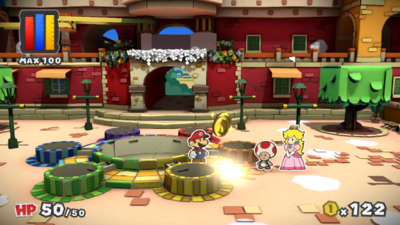
|
| In the Fountain District, east of the entrance. | 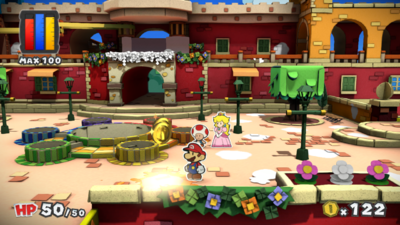
|
| In the Fountain District, east of the yellow Big Paint Star's spot. | 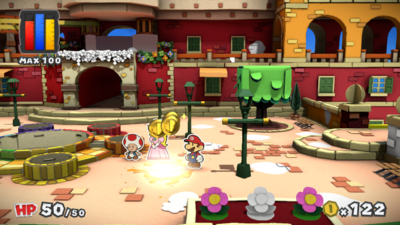
|
| In the Fountain District, east of the orange Big Paint Star's spot. | 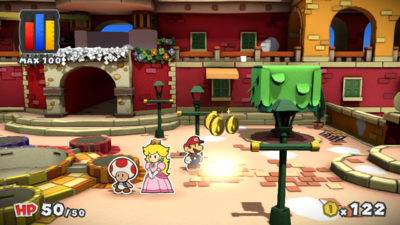
|
| In the Fountain District, east of the northeast flagpole. | 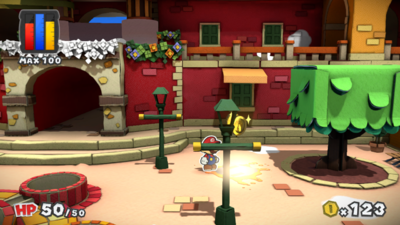
|
| In the Fountain District, south of the eastmost window. | 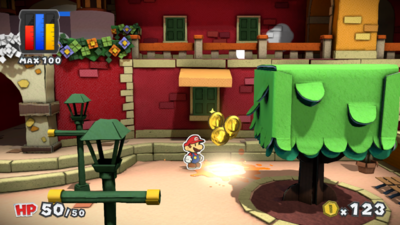
|
| In the Fountain District, the middle flower on the east flower bed. | 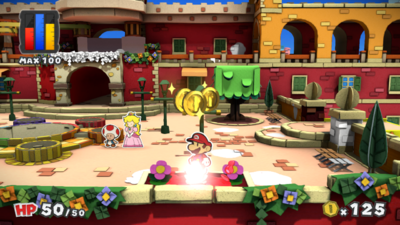
|
| In the Fountain District, east of the eastmost flagpole. | 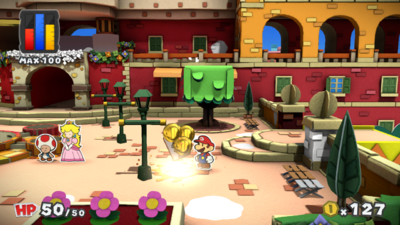
|
| In the Fountain District, east of the second-eastmost flagpole. | 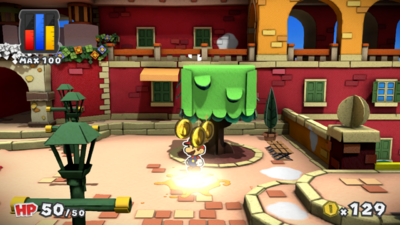
|
| In the Fountain District, east of the east flower bed. | 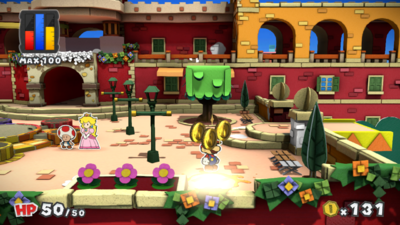
|
| In the Fountain District, on the first step leading to the Yellow District. | 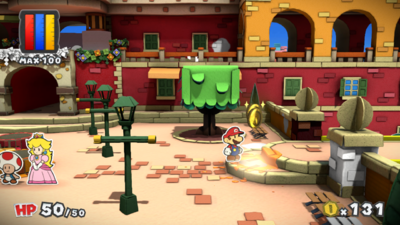
|
| In the Fountain District, north of the steps leading to the Yellow District. | 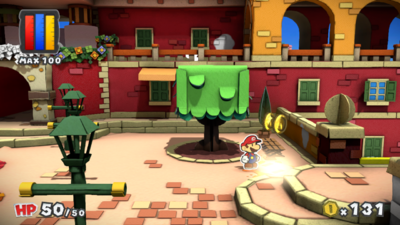
|
| In the Fountain District, on the southeast bench. | 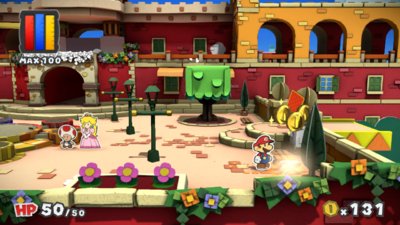
|
| In the Fountain District, on one of the posts next to the steps leading to the Yellow District. | 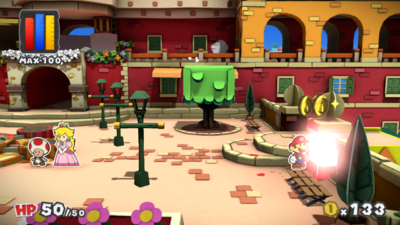
|
| In the Fountain District, on the eastmost wall. | 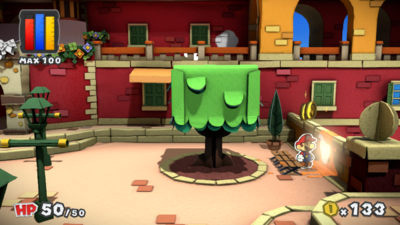
|
| In the Fountain District, the Toad under the west tree. | 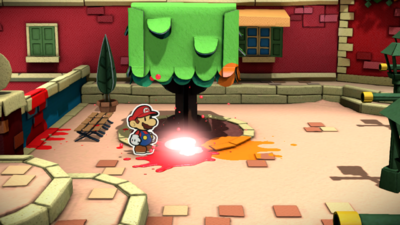
|
| In the Fountain District, the Postmaster Toad, who is near the fountain. | 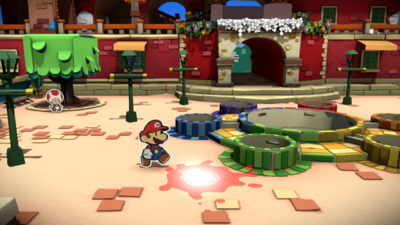
|
| In the Fountain District, the Toad near the east flower bed. | 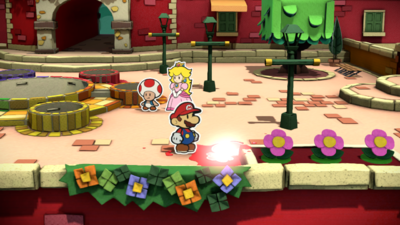
|
| In the Harbor District, on the sign east of the trash can. | 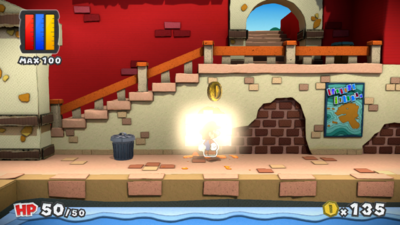
|
| In the Blue District, on the green gate. | 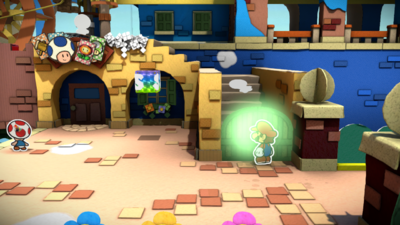
|
| In the Blue District, on one of the flowers. | 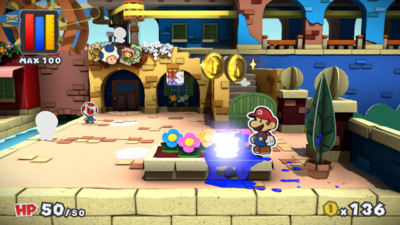
|
| In the Blue District, west of the flower bed. | 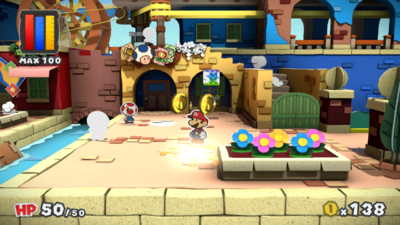
|
| In the Blue District, south of Prisma Cardware. | 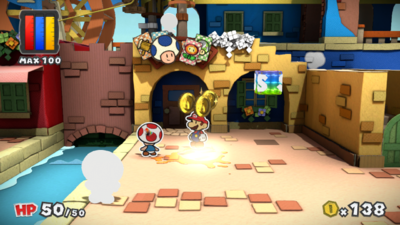
|
| In the Blue District, the Toad standing near the bridge. | 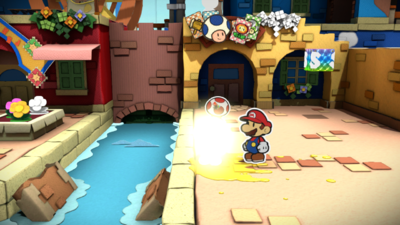
|
| In Prisma Cardware, the Toad at the west end of the shop. | 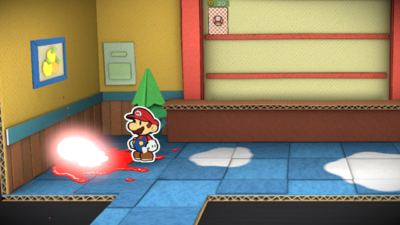
|
| In Prisma Cardware, north of the entrance. | 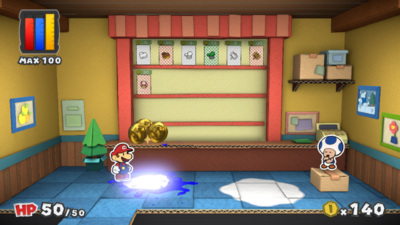
|
| In Prisma Cardware, west of the shopkeeper Toad. | 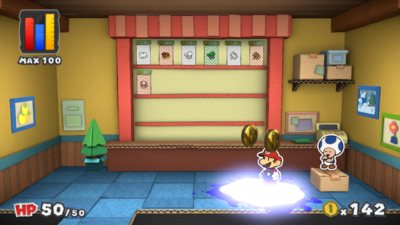
|
| In the Blue District, a Toad on the stairs. | 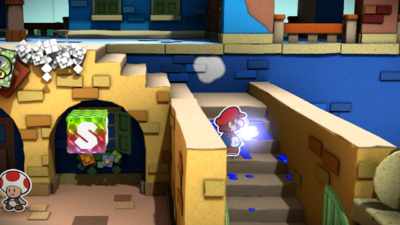
|
| In the Blue District, on a wall north of the gate. | 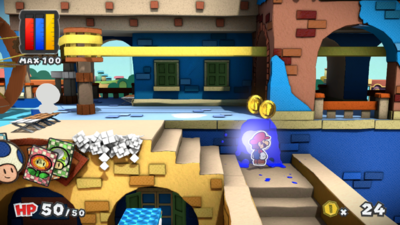
|
| In the Blue District, on the ground beneath two windows. | 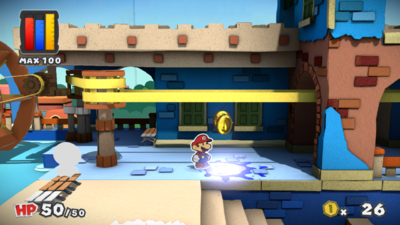
|
| In the Blue District, the plants next to the Prisma Cardware sign. | 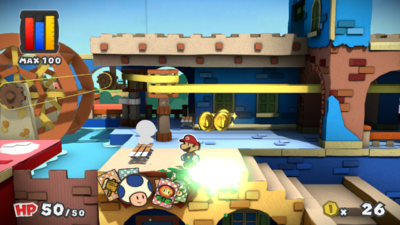
|
| In the Blue District, on the south part of a bench. | 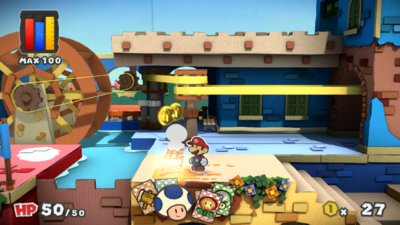
|
| In the Blue District, a Toad sitting on the bench. | 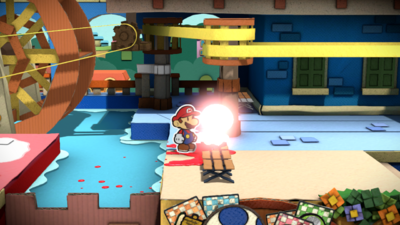
|
| In the Blue District, on the south part of a bench. | 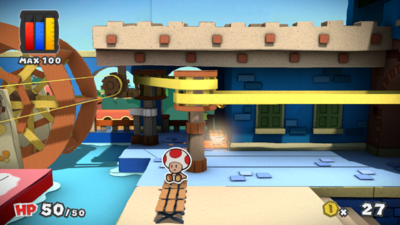
|
| In the Blue District, on the waterwheel structure. | 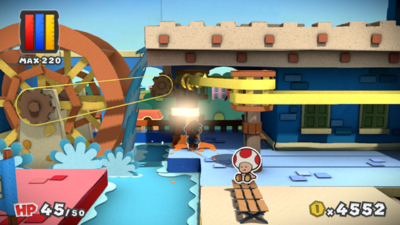
|
| In the Fountain District, on the wall to the west. | 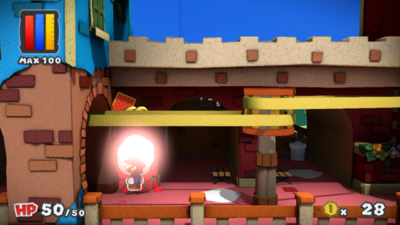
|
| In the Fountain District, south of a bench. | 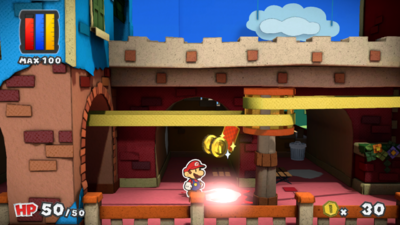
|
| In the Fountain District, on the wall in the westmost alcove. | 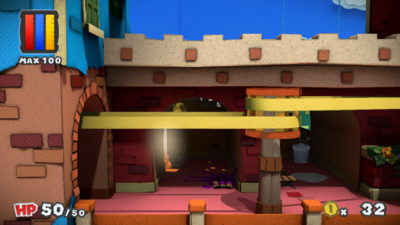
|
| In the Fountain District, on the floor in the alcove with the trash can. | 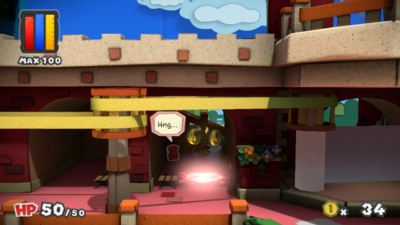
|
| In the Fountain District, on the floor near the toilet paper. | 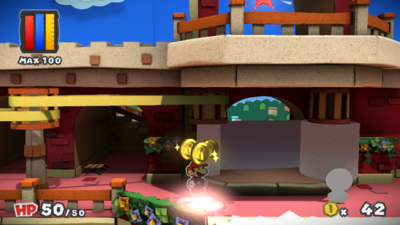
|
| In the Fountain District, on the overhang of plants. | 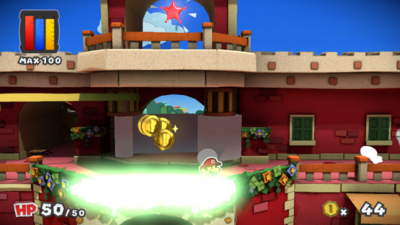
|
| In the Fountain District, a Toad near the toilet paper. | 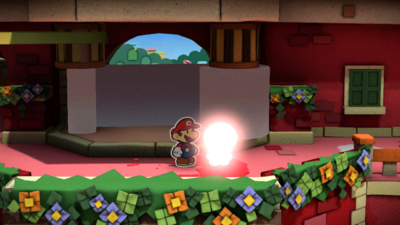
|
| In the Fountain District, on the ground east of the toilet paper. | 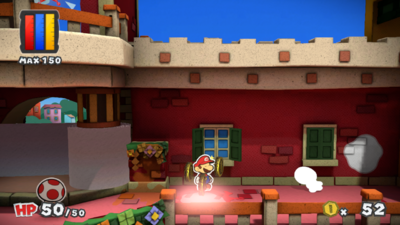
|
| In the Fountain District, a Toad at the east end. | 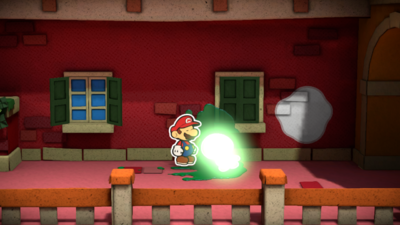
|
| In the Fountain District, on the wall to the east. | 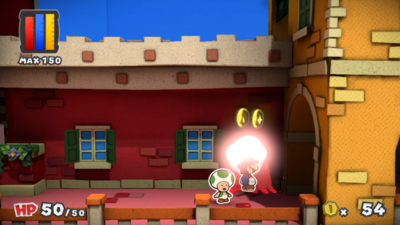
|
| In the Yellow District, a Toad that is initially being held by a Shy Guy. | 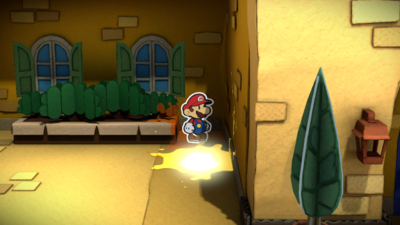
|
| In the Yellow District, on the roof of Peach's and Toad's guest quarters. | 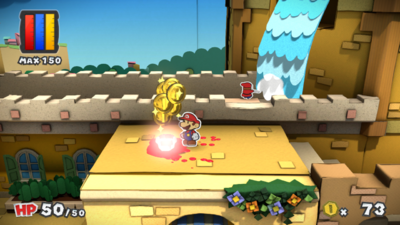
|
| In the Yellow District, on the waterfall. | 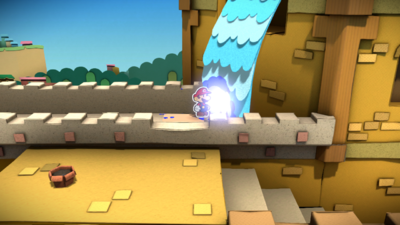
|
| In the Fountain District, on the west wall in the area leading to the Mini Paint Star. | 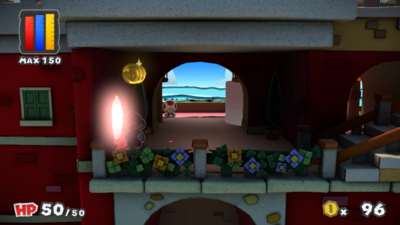
|
| In the Blue District, on the ground shortly after the bridge. | 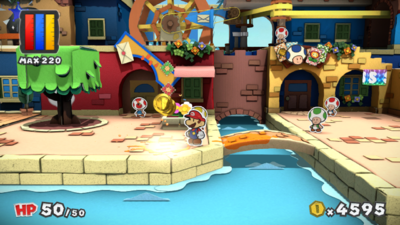
|
| In the Blue District, on a flower after the bridge. | 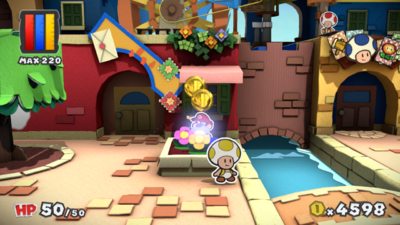
|
| In the Blue District, on the wall of Prisma Postal Toad. | 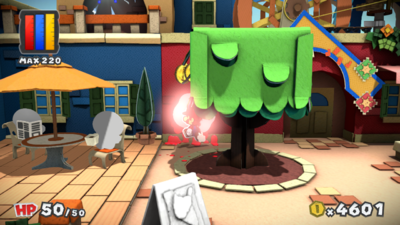
|
| In the Blue District, on the sign outside the cafe. | 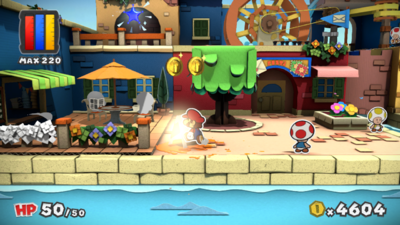
|
| In the Blue District, on the westmost overhang. | 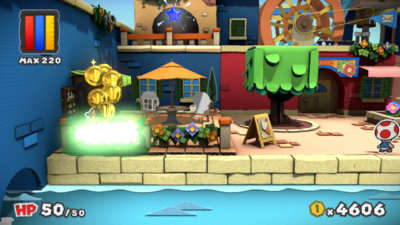
|
| In the Blue District, on the Toad to the right of the Toad with the newspaper. | 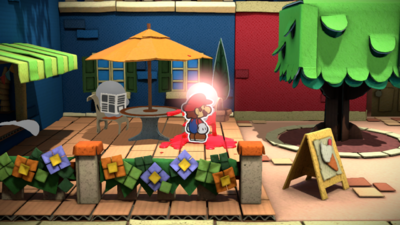
|
| In the Blue District, on the Toad with the newspaper. | 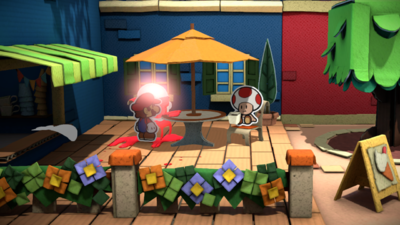
|
| In the Blue District, on the Toad in the cafe. | 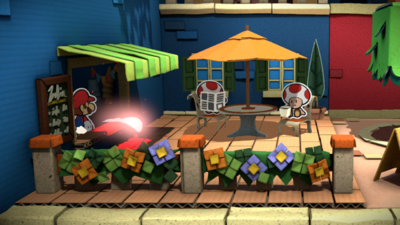
|
| In the Blue District, on the roof of Prisma Postal Toad. | 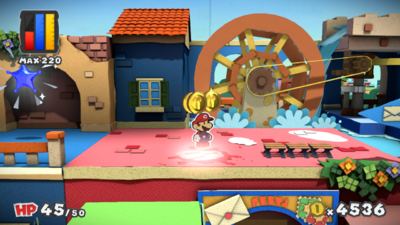
|
| In the Blue District, on the roof of Prisma Postal Toad. | 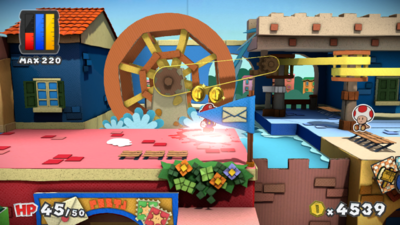
|
| In the Blue District, on a Toad on the roof of Prisma Postal Toad. | 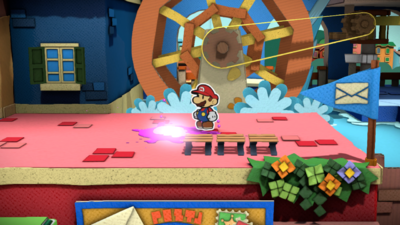
|
Ruddy Road
| Ruddy Road | |
|---|---|
| In the first area, on the ground. | 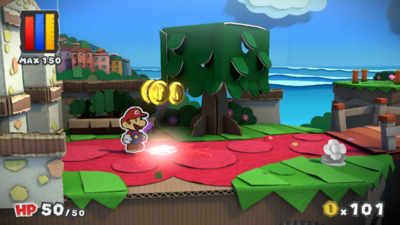
|
| In the first area, on the second flower. | 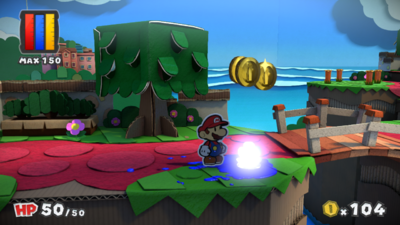
|
| In the first area, on the first flower after the bridge. | 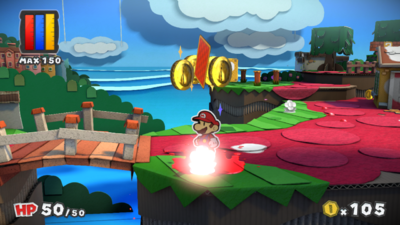
|
| In the first area, on the ground east of the bridge. | 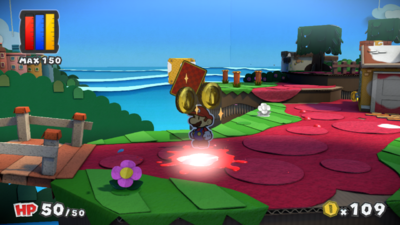
|
| In the first area, on the flower west of the house. | 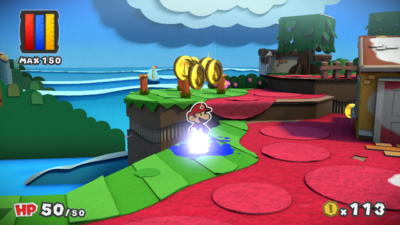
|
| In the first area, on the ground southwest of the house. | 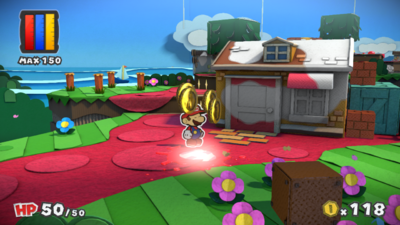
|
| In the first area, on the house. | 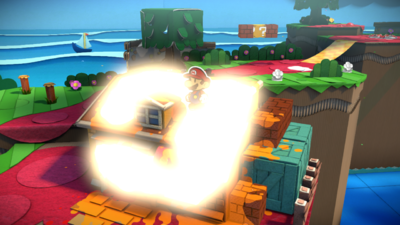
|
| In the first area, on the wall. | 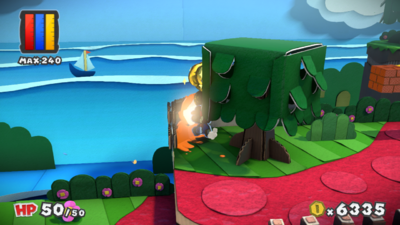
|
| In the first area, on a flower south of a ? Block. | 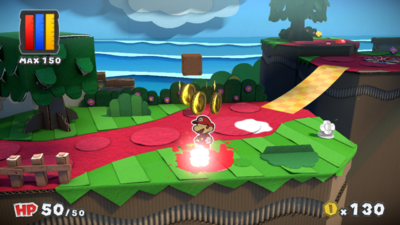
|
| In the first area, on the ground southeast of a ? Block. | 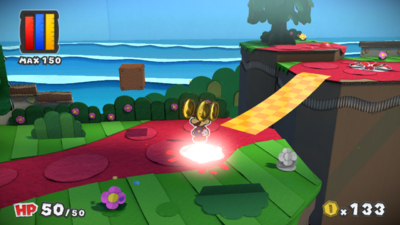
|
| In the first area, on the flower before the bridge. | 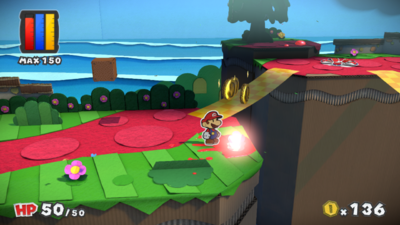
|
| In the first area, on the ground. Five Slurp Guys can be seen sucking the color out of this spot. | 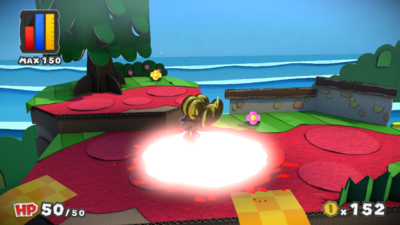
|
| In the first area, on the ground. A Slurp Guy is sucking the color out of this spot. | 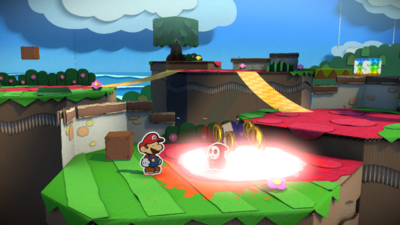
|
| In the area with the blue Mini Paint Star, in the second circle on the ground. | 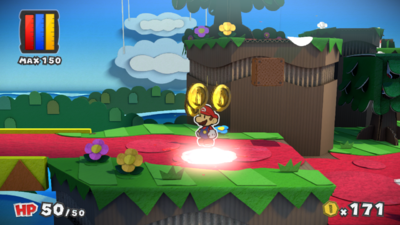
|
| In the area with the blue Mini Paint Star, on the ground. | 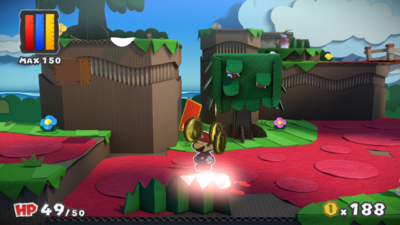
|
| In the area with the blue Mini Paint Star, on the fifth flower. | 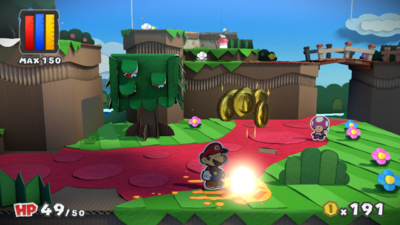
|
| In the area with the blue Mini Paint Star, on the eastmost flower on the lower area. | 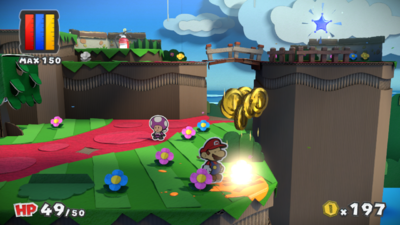
|
| In the second area, on the ground near the sign. | 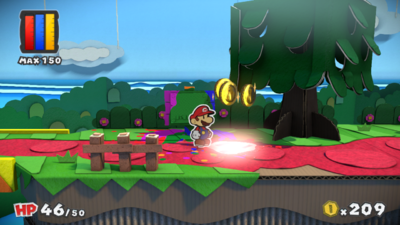
|
| In the second area, on the first flower. | 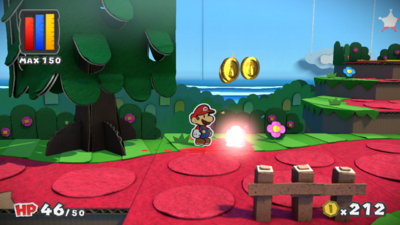
|
| In the second area, on a flower. | 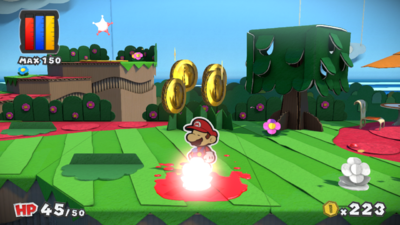
|
| In the second area, on a flower. | 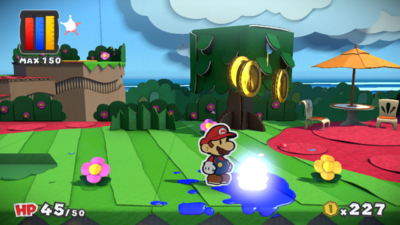
|
| In the second area, on the ground after the café. | 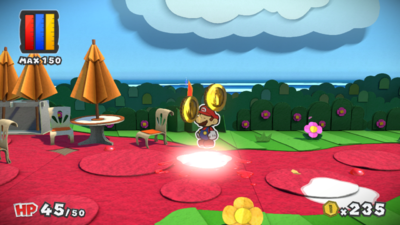
|
| In the second area, on the ground. | 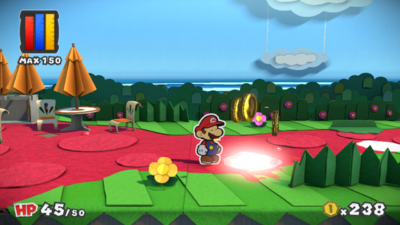
|
| In the second area, on the ground. | 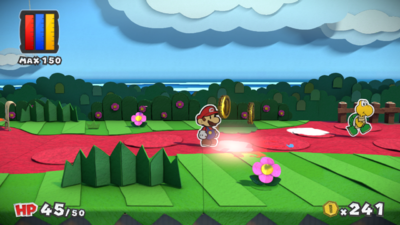
|
| In the second area, on the ground. | 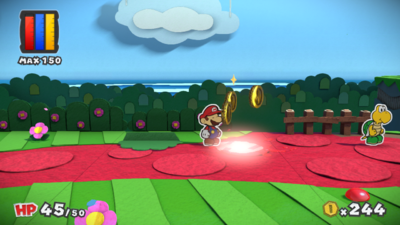
|
| In the second area, on the ground behind a bush. | 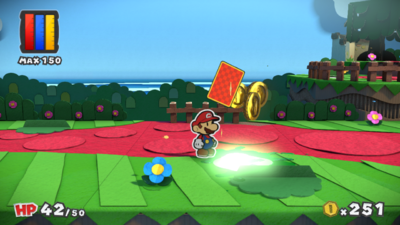
|
| In the second area, on the ground. | 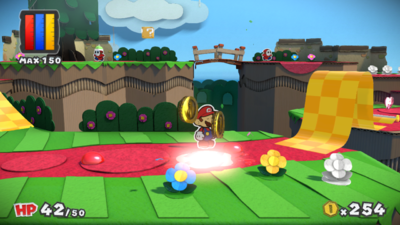
|
| In the second area, on a flower near the rolled-up platform. | 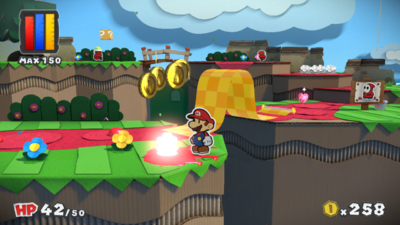
|
| In the second area, on the ground on a raised platform. | 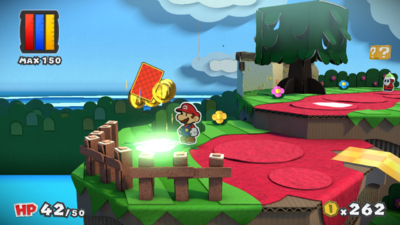
|
| In the second area, on the ground south of a tree. | 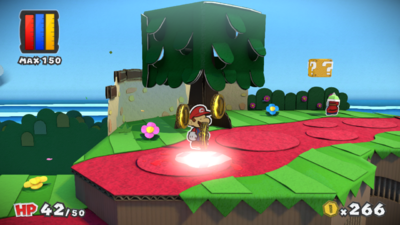
|
| In the second area, on a flower in a six-flower circle. | 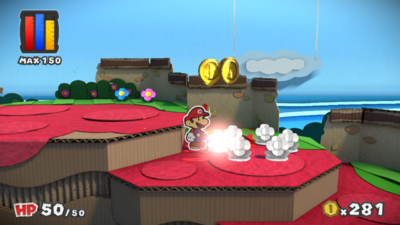
|
| In the second area, on a flower in a six-flower circle. | 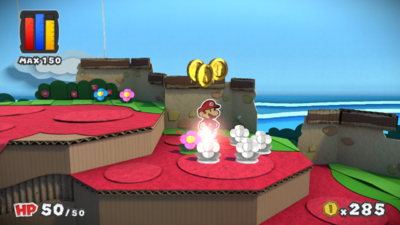
|
| In the second area, on a flower in a six-flower circle. | 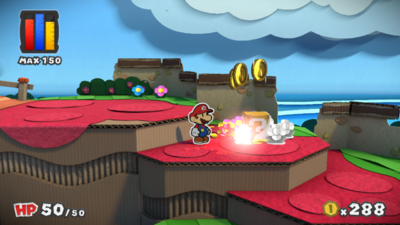
|
| In the second area, on a flower in a six-flower circle. | 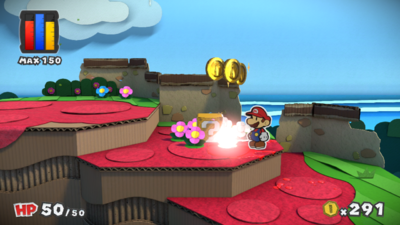
|
| In the second area, on a flower in a six-flower circle. | 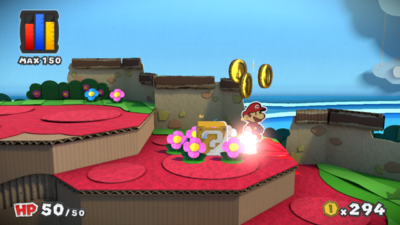
|
| In the second area, on a flower in a six-flower circle. | 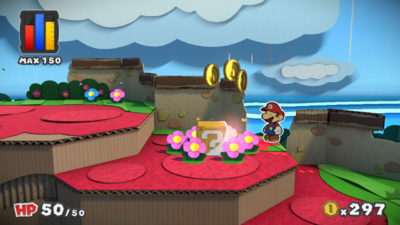
|
| In the second area, on an invisible ? Block surrounded by flowers. | 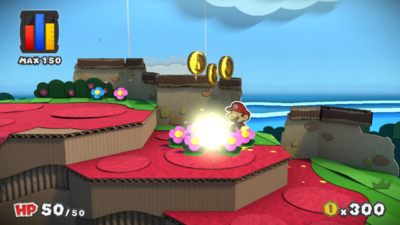
|
| In the area with the blue Mini Paint Star, on a Toad who can be reached by jumping from a tree. | 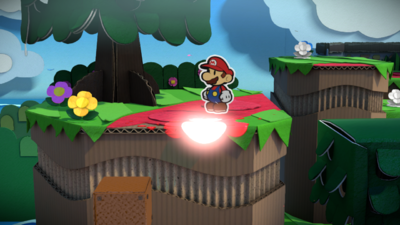
|
| In the area with the blue Mini Paint Star, on a flower. | 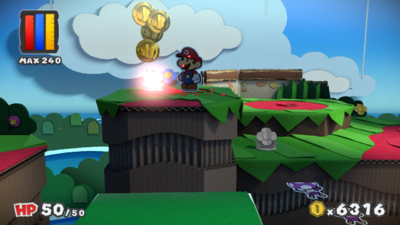
|
| In the area with the blue Mini Paint Star, on a flower. | 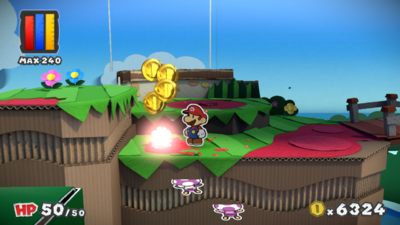
|
Cherry Lake
| Cherry Lake | |
|---|---|
| In the second area, behind a bush. | 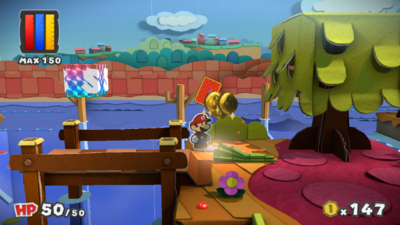
|
| In the second area, south of the tree after the bridge. | 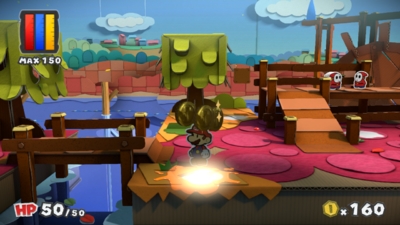
|
| In the second area, southeast of a tree. | 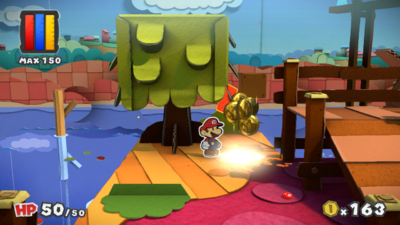
|
| In the second area, near some stairs. | 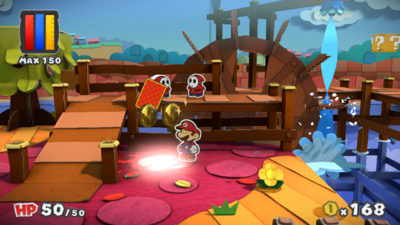
|
| In the second area, south of Justice Toad's shoes. | 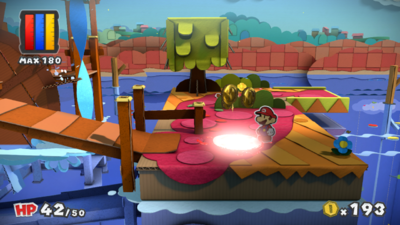
|
| In the second area, north of Justice Toad's shoes. | 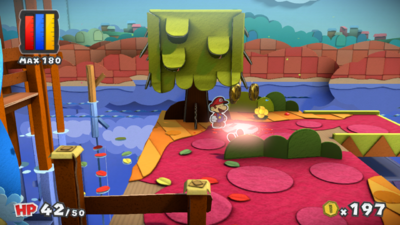
|
| In the third area, south of a Brick Block. | 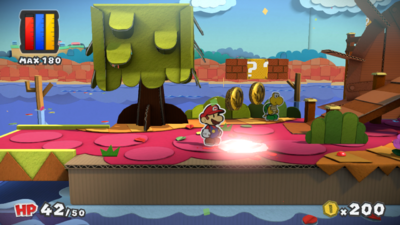
|
| In the third area, on a post near the waterwheel. | 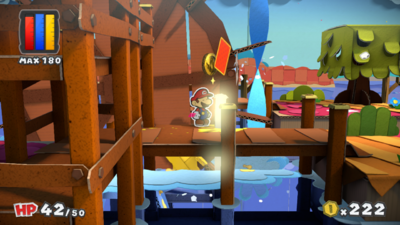
|
| In the third area, near the tree with Justice Toad's pants. | 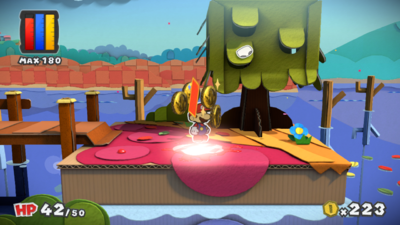
|
| In the third area, south of the tree with Justice Toad's pants. | 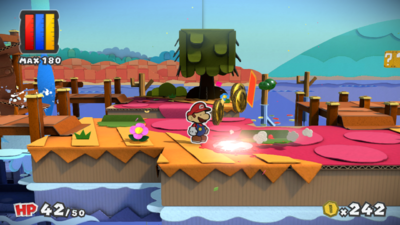
|
| In the third area, near the Inner Cherry Lake sign. | 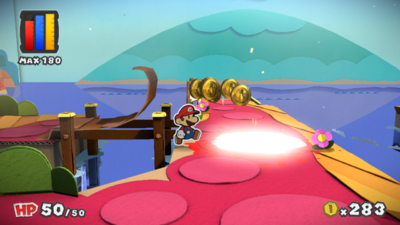
|
| In the third area, south of the Fan Thing. | 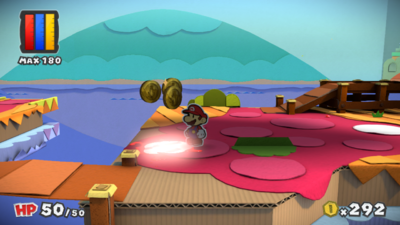
|
| In the third area, on the ground south of the steps. | 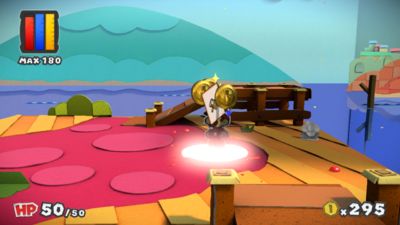
|
| In the third area, on a flower near the steps. | 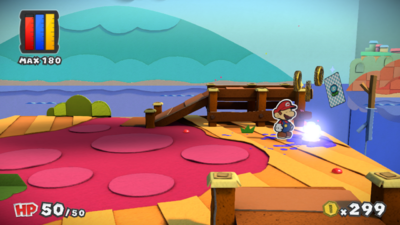
|
| In the third area, on a ? Block. | 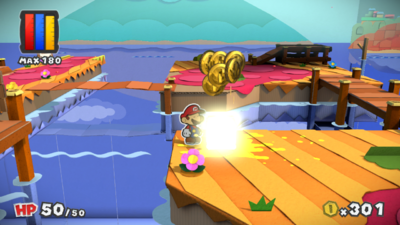
|
| In the fourth area, on the ground in a large crescent moon shape. | 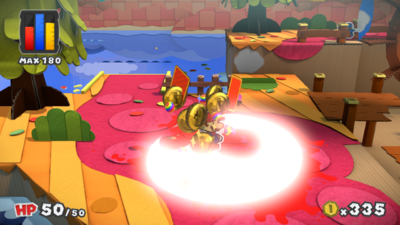
|
| In the fourth area, on the ground south of the entrance. | 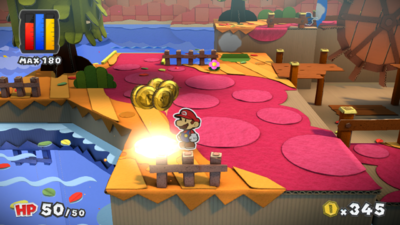
|
| In the fourth area, on the wall. | 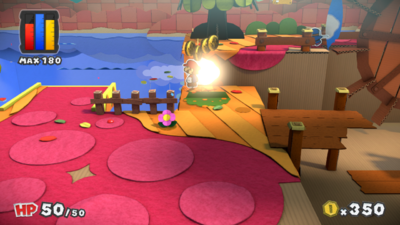
|
| In the fourth area, on the ground between two bushes. | 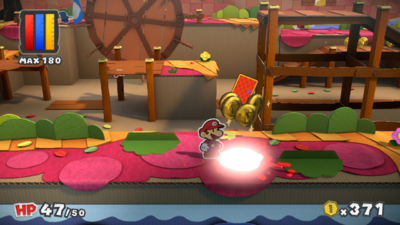
|
| In the fourth area, on a stream of water. This colorless spot is required to beat the level. | 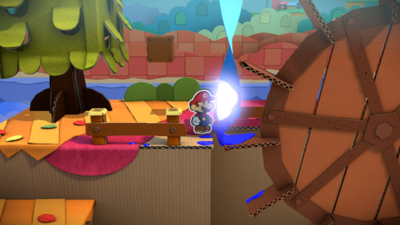
|
| In the fourth area, on the ground near a blue crate. | 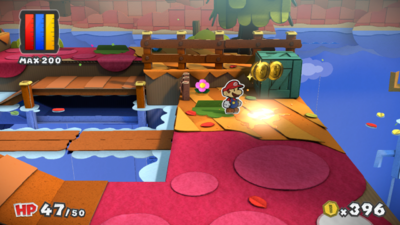
|
| In the fourth area, on the ground behind a bush. | 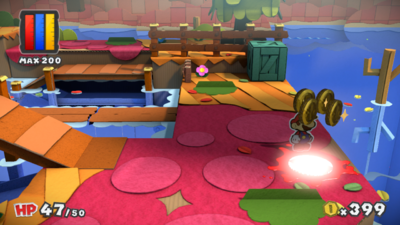
|
| In the fourth area, on a post that can only be reached from the right side. | 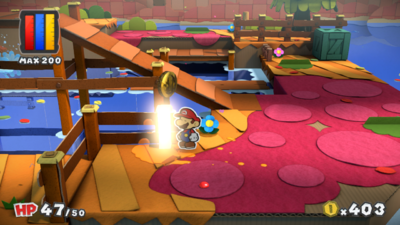
|
| In Inner Cherry Lake, on the ground. | 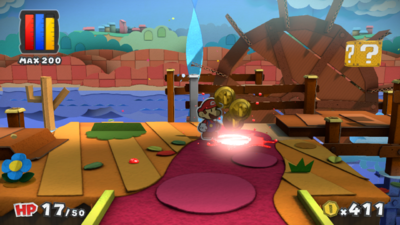
|
| In Inner Cherry Lake, on a post. | 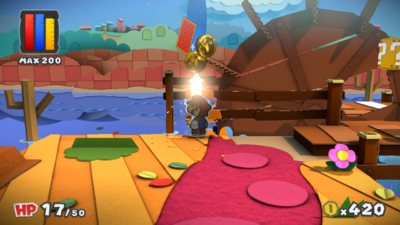
|
| In Inner Cherry Lake, on a plank behind the first waterwheel. | 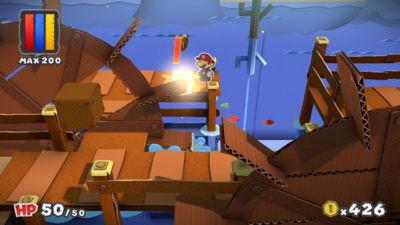
|
| In Inner Cherry Lake, on a plank after the second waterwheel. | 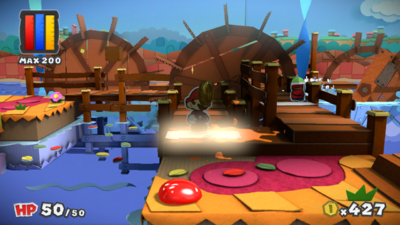
|
| In Inner Cherry Lake, on a plank after the second waterwheel. | 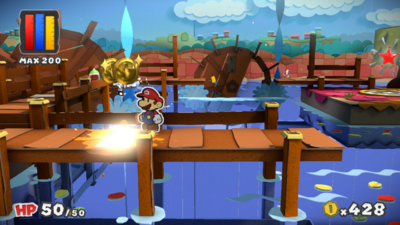
|
| In Inner Cherry Lake, on a plank before the third waterwheel. | 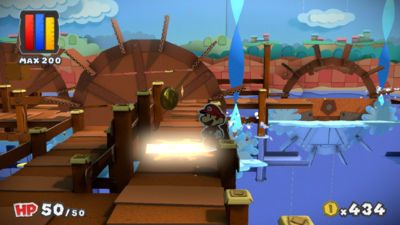
|
The Crimson Tower
| The Crimson Tower | |
|---|---|
| In the first area, on a green Toad. | 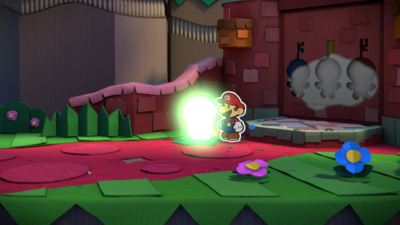
|
| In the first area, on the gate. | 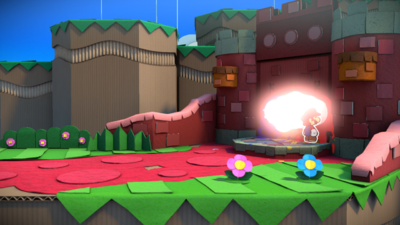
|
| In the second area, on the ground. | 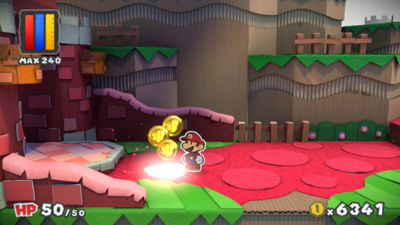
|
| In the second area, the Crimson Tower itself. | 
|
| In the third area, on the ground before the first conveyor belt. | 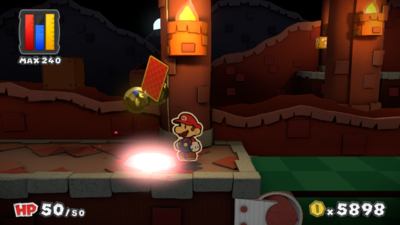
|
| In the third area, on the wall near the second conveyor belt. | 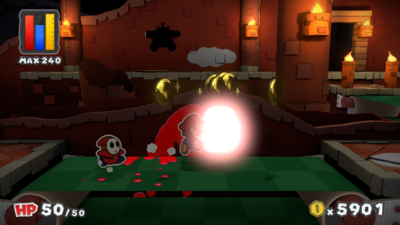
|
| In the third area, on the ground before the third conveyor belt. | 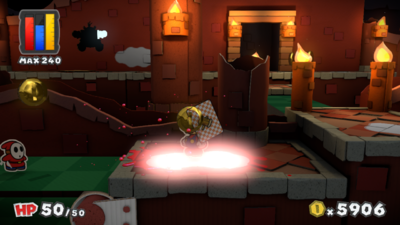
|
| In the third area, on the ground before the third conveyor belt. | 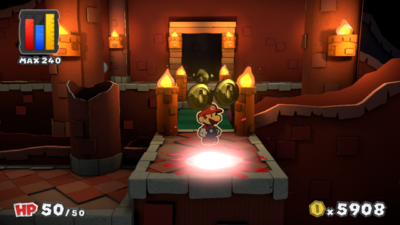
|
| In the third area, on the ground east of the staircase. | 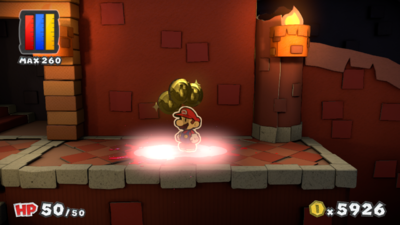
|
| In the third area, near the hole Morton leaves in the wall. | 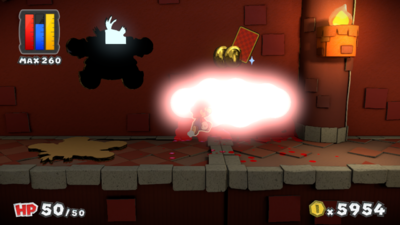
|
| In the third area, to the right of a ? Block. | 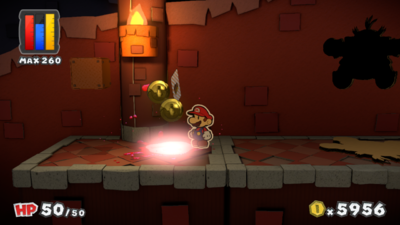
|
| In the fourth area, on a post on the third banister. | 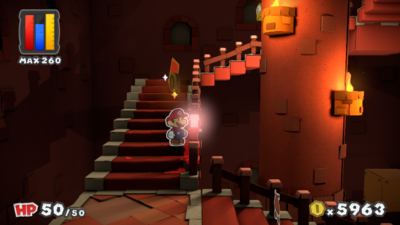
|
| In the fourth area, on a post on the fourth banister. | 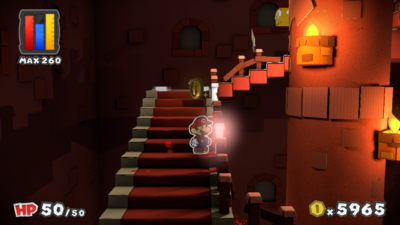
|
| In the fourth area, on a post on the fourth banister. | 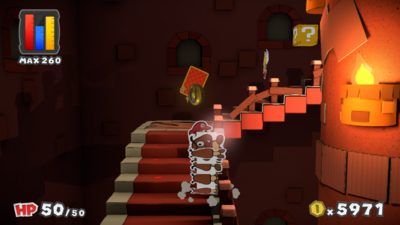
|
| In the fourth area, on a post on the fifth banister. | 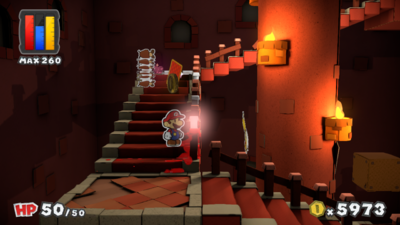
|
| In the fourth area, on a post on the fifth banister. | 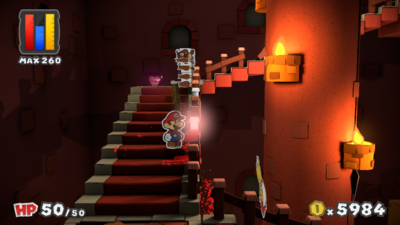
|
| In the fourth area, on a post on the fifth banister. | 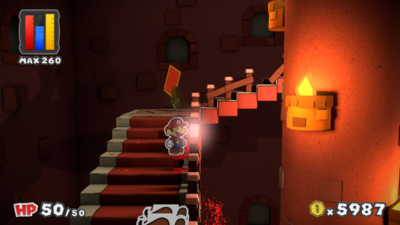
|
| In the fifth area, on the ground. | 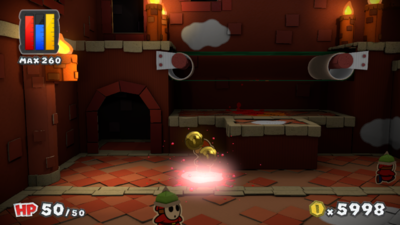
|
| In the fifth area, on the ground. | 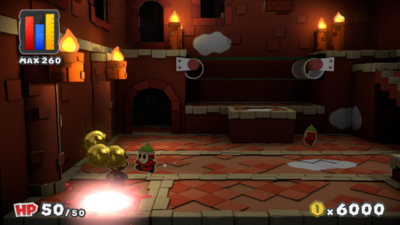
|
| In the fifth area, on the ground. | 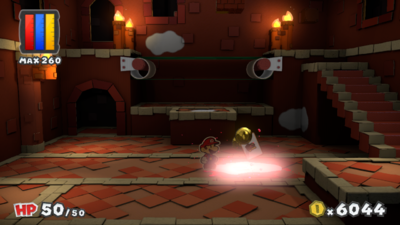
|
| In the fifth area, on the wall. | 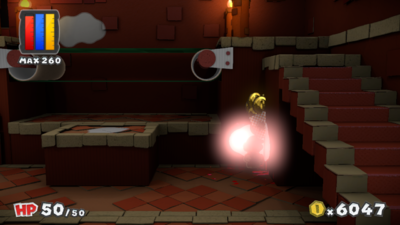
|
| In the fifth area, on the ground after jumping off the conveyor belt. | 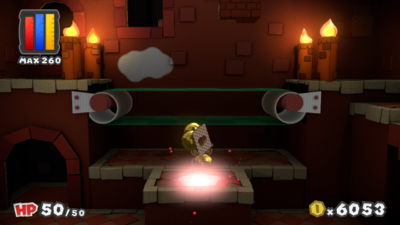
|
| In the fifth area, on the wall near the conveyor belt. | 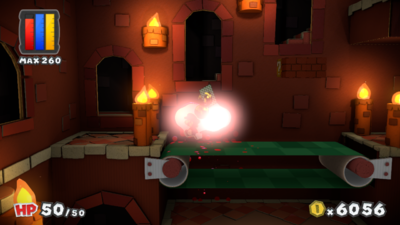
|
| In the fifth area, on a Toad. | 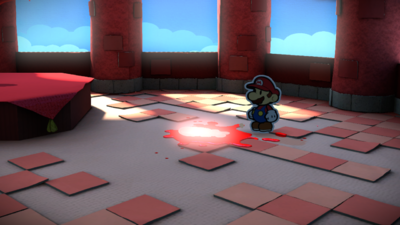
|
Indigo Underground
| Indigo Underground | |
|---|---|
| In the first area, south of the fence. | 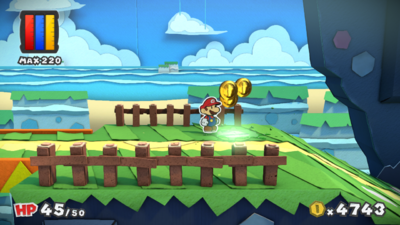
|
| In the first area, on the sloped ground. | 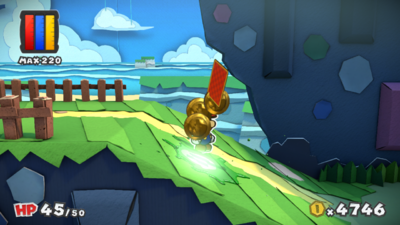
|
| In the first area, on the sloped ground. | 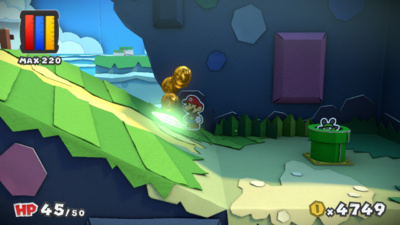
|
| In the second area, on a square-shaped part of the wall. | 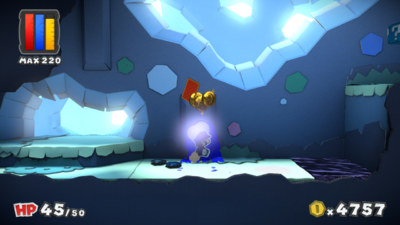
|
| In the second area, before the first moving block. | 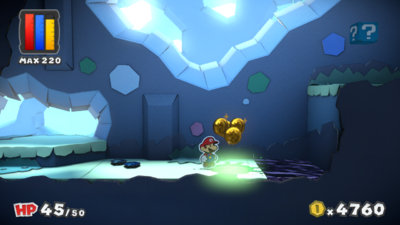
|
| In the second area, below the first ? Block. | 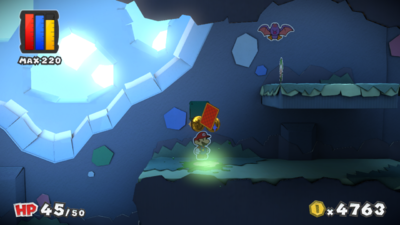
|
| In the second area, on the ground near three Swoops. | 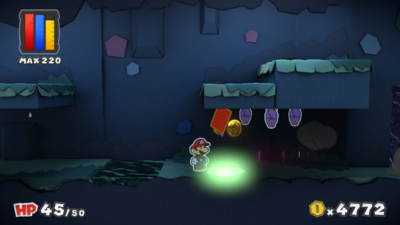
|
| In the second area, on the wall near three Swoops. | 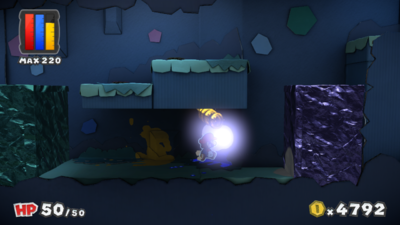
|
| In the second area, on the third moving block. | 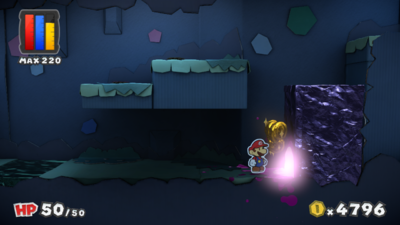
|
| In the second area, on the ground after the third moving block. | 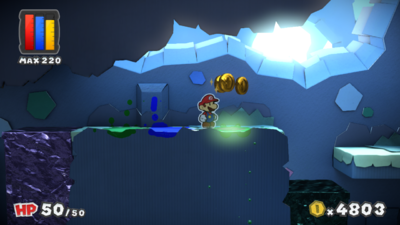
|
| In the second area, on the wall in a hidden alcove that can be accessed by walking behind the fourth moving block. | 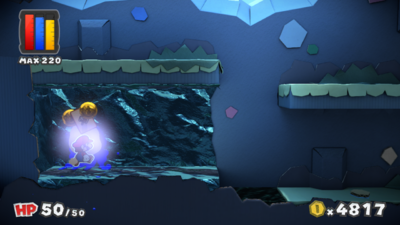
|
| In the second area, on a diamond-shaped spot on the wall. | 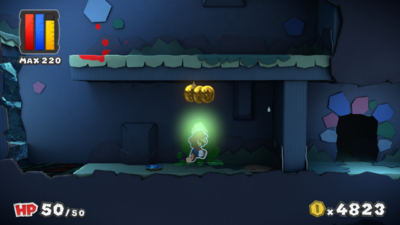
|
| In the second area, on the ground. | 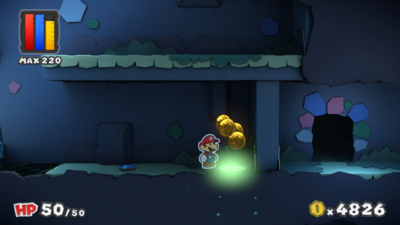
|
| In the second area, on the wall and only accessible from the top of green moving block. | 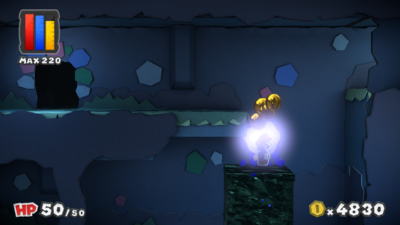
|
| In the second area, in a secret alcove to the right. | 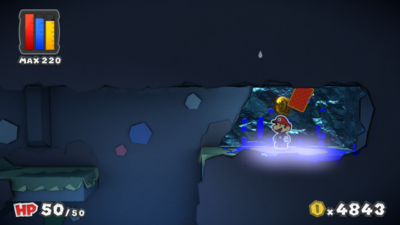
|
| In the third area, on the ground to the far west. | 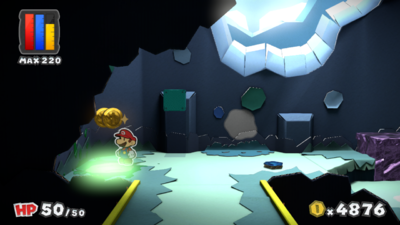
|
| In the third area, on the wall. | 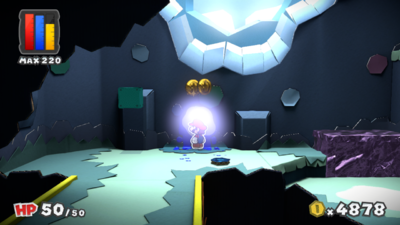
|
| In the third area, on the ground south of the first moving block. | 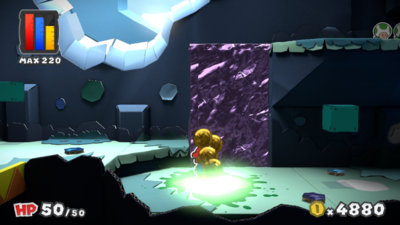
|
| In the third area, on the ground below a ? Block. | 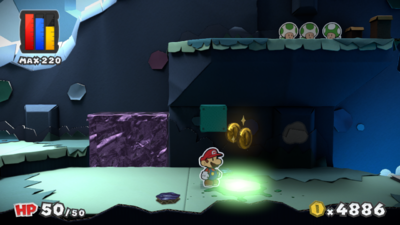
|
| In the third area, on the wall. | 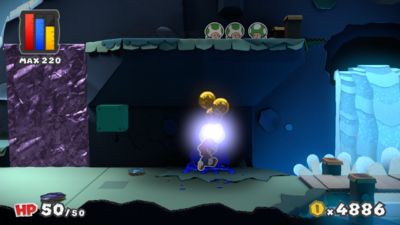
|
| In the third area, on the bridge. | 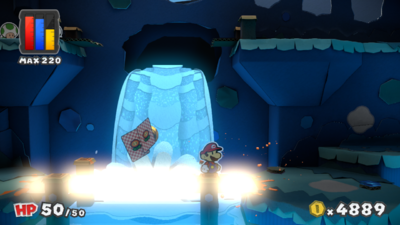
|
| In the third area, on the ground after the bridge. | 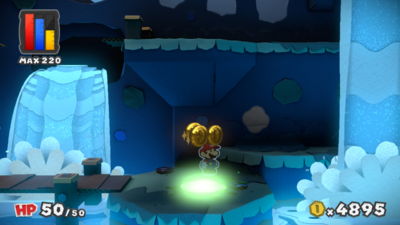
|
| In the third area, on the wall. | 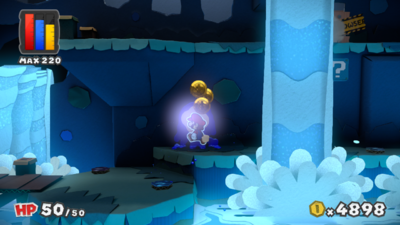
|
| In the third area, on the wall near the Save Block. | 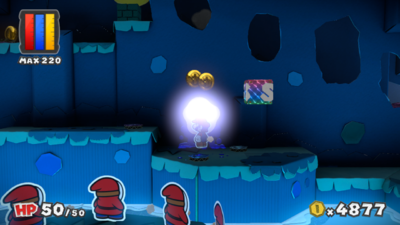
|
| In the fourth area, on the ground. | 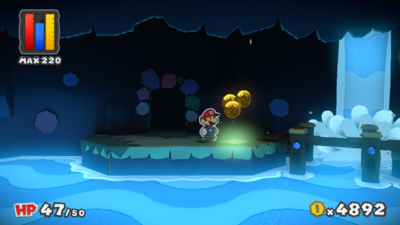
|
| In the fourth area, on the ground. | 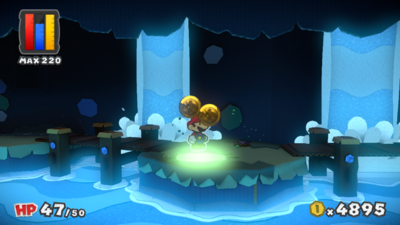
|
| In the fourth area, on the sloped ground. | 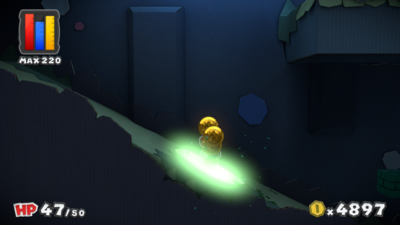
|
| In the fourth area, on the sloped ground. | 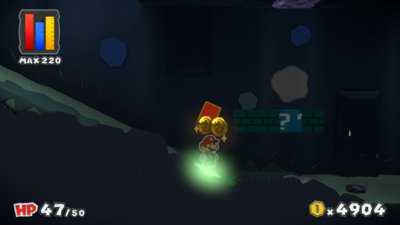
|
| In the fourth area, on the ground under a ? Block. | 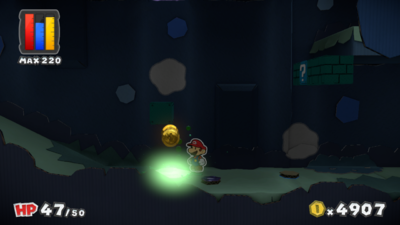
|
| In the fourth area, on the wall. | 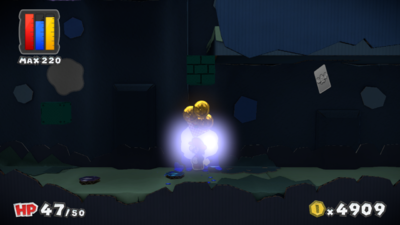
|
| In the fourth area, on a moving block. | 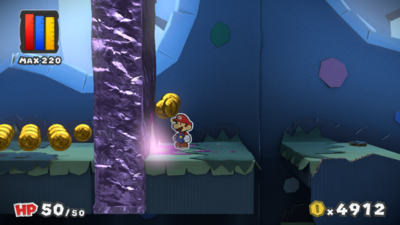
|
| In the fourth area, above a ? Block. This spot can be reached by going down a hole when the moving block has gone up. | 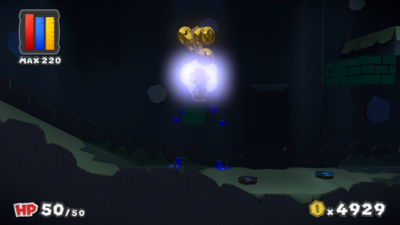
|
| In the fourth area, on the ground. | 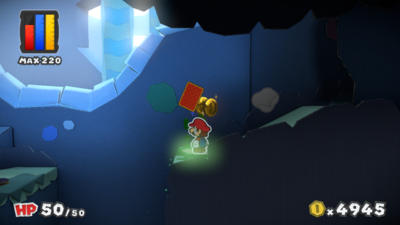
|
| In the fourth area, on the wall. | 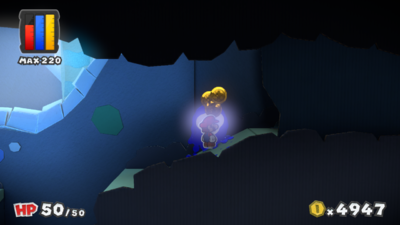
|
| In the fourth area, on a green Rescue Squad Toad. | 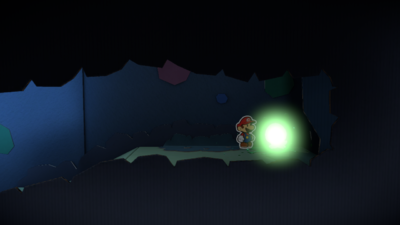
|
| In the third area, on a wooden board. | 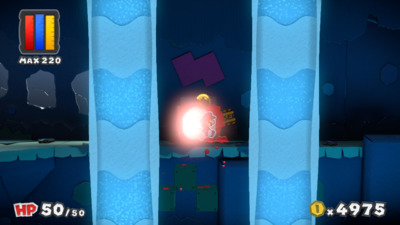
|
| In the third area, on the wall after the Brick Block. | 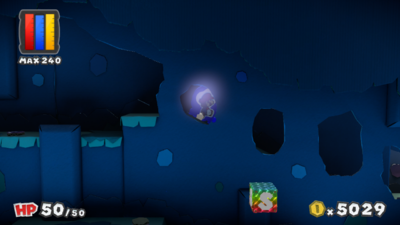
|
| In the third area, on the platform with the Lemon Thing. | 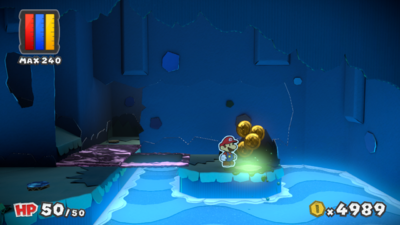
|
| In the third area, on the wall near the blue Mini Paint Star. | 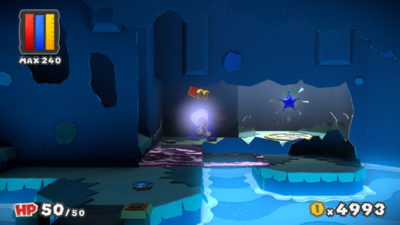
|
Bloo Bay Beach
| Bloo Bay Beach | |
|---|---|
| In the first area, on the wall near the Toad. | 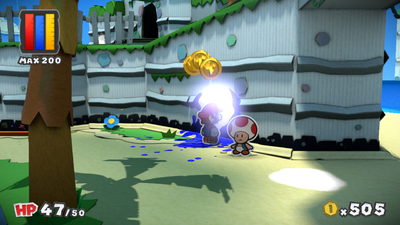
|
| In the first area, on the ground under the overhang. | 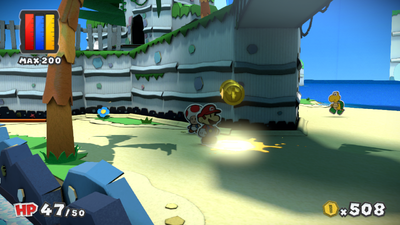
|
| In the first area, on the wall. | 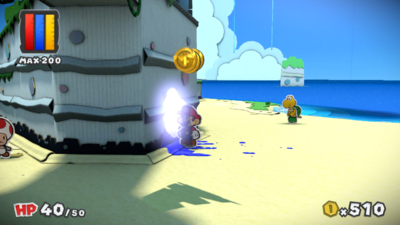
|
| In the first area, on the wall. | 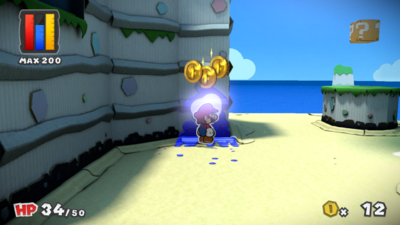
|
| In the first area, on the ground south of a ? Block. | 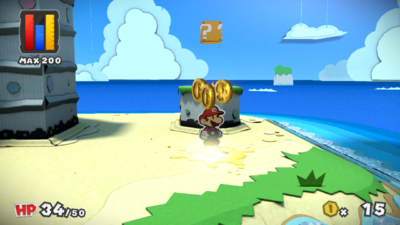
|
| In the first area, on the wall behind the rock structure. | 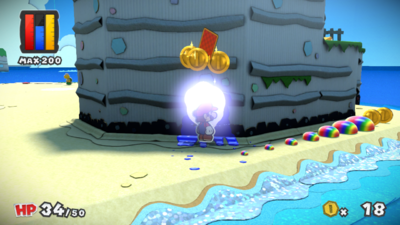
|
| In the first area, on the wall behind the rock structure. | 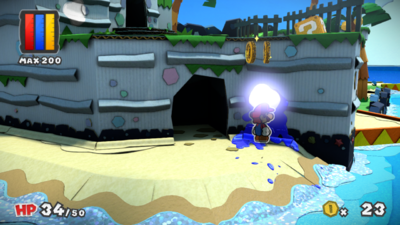
|
| In the first area, on the wall on top of the cliff. | 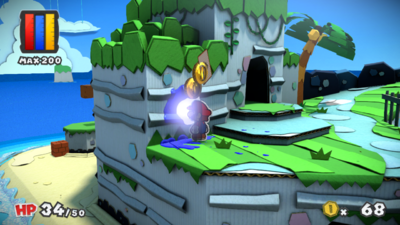
|
| In the first area, on the ground south-east of a palm tree on the cliff. | 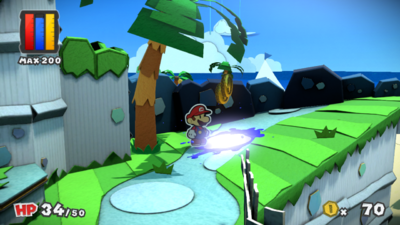
|
| In the first area, on a grain of sand near the ? Block. | 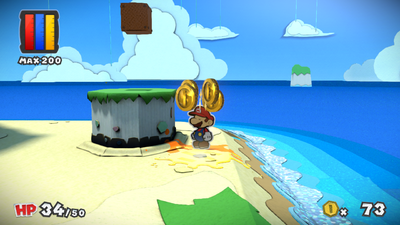
|
| In the first area, on the ground. | 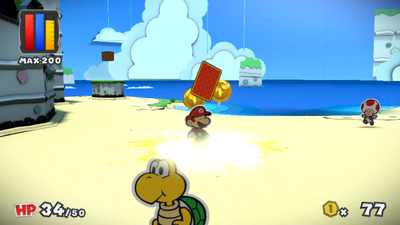
|
| In the first area, on the ground. | 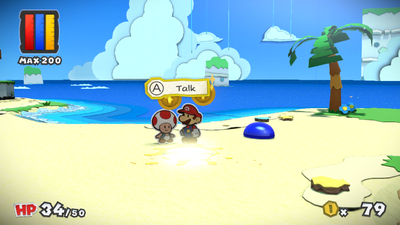
|
| In the second area, on the ground. | 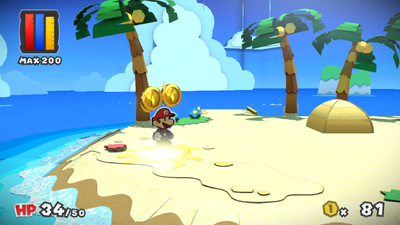
|
| In the second area, on the ground south of the fourth palm tree. | 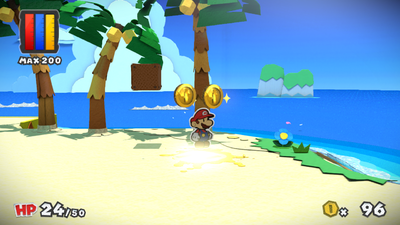
|
| In the second area, on the ground between the last two palm trees. | 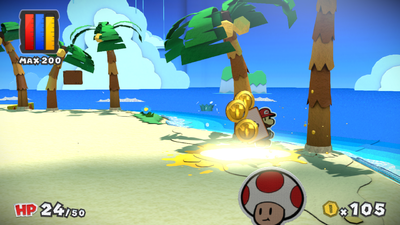
|
| In the second area, on the ground. | 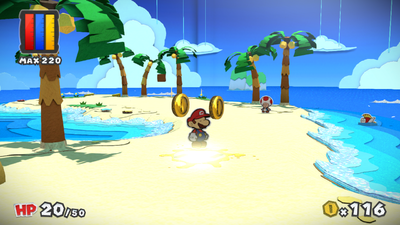
|
| In the second area, on the ground. | 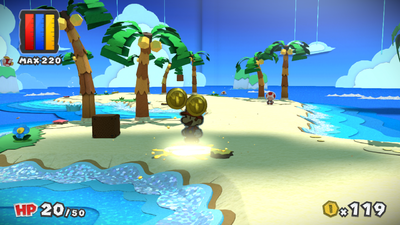
|
| In the second area, on the ground. | 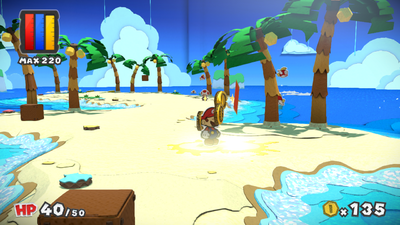
|
| In the second area, on the ground near the exit. | 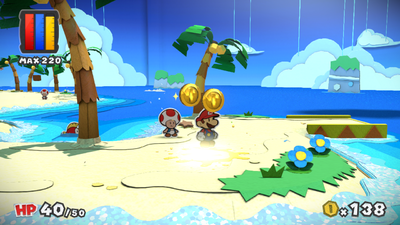
|
| In the third area, on a cardboard star. | 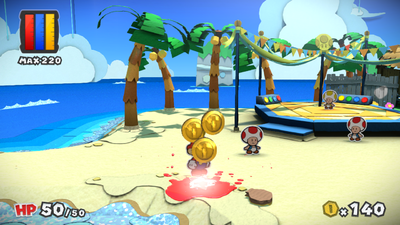
|
| In the third area, on the ground. | 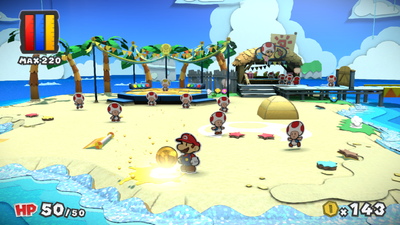
|
| In the third area, on the ground in the outline of a Toad's head. | 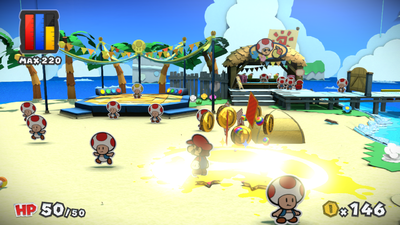
|
| In the third area, on a flower. | 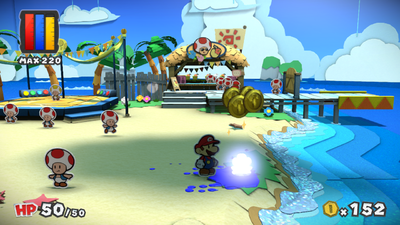
|
| In the third area, on a flower near the fence. | 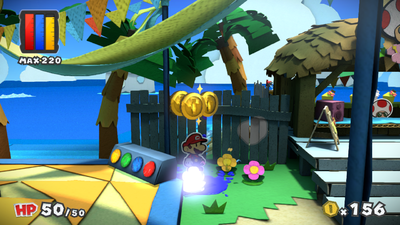
|
| In the third area, on the fence. | 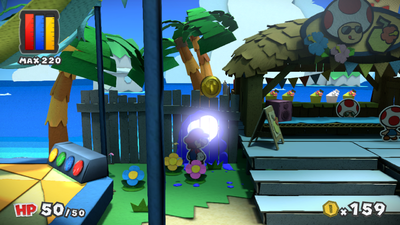
|
| In the third area, on a planter in the cafe. | 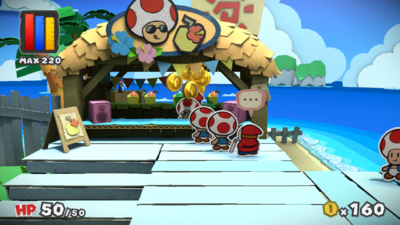
|
| In the third area, on the ground south of Luigi. | 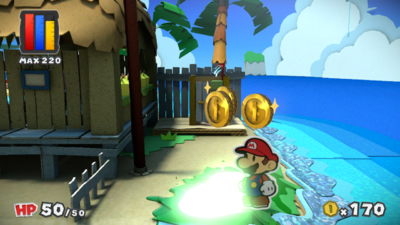
|
| In the third area, on a shell. | 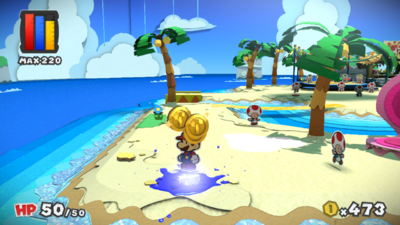
|
| In the third area, on the ground. | 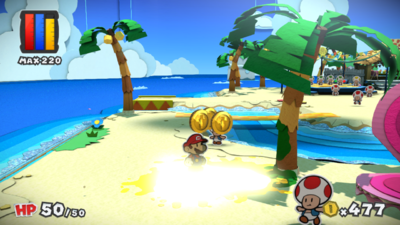
|
| In Blissful Beach, on the wall on the first rock. | 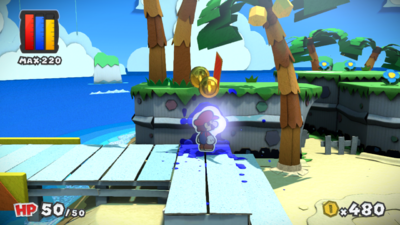
|
| In Blissful Beach, on the ground. | 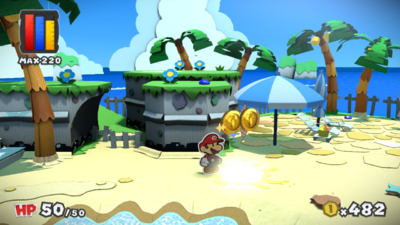
|
| In Blissful Beach, on a tile on the ground. | 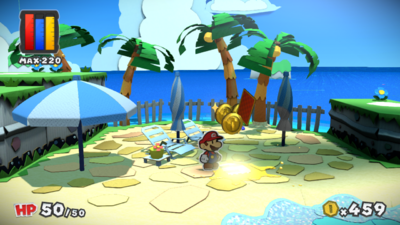
|
| In Blissful Beach, on an umbrella. | 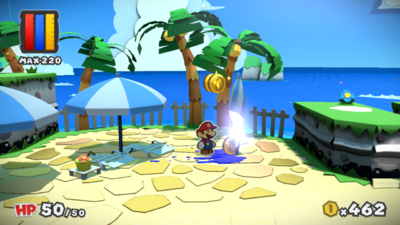
|
| In Blissful Beach, on a rock wall. | 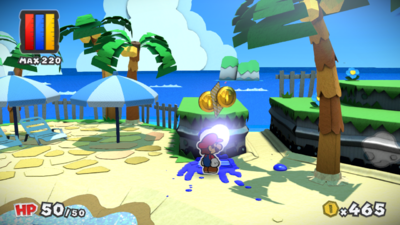
|
| In Blissful Beach, on a rock wall. | 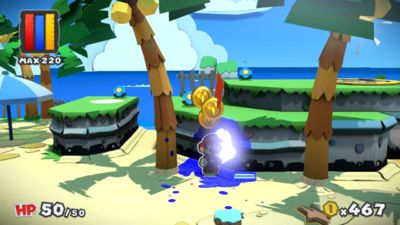
|
| In Blissful Beach, on a rock wall. | 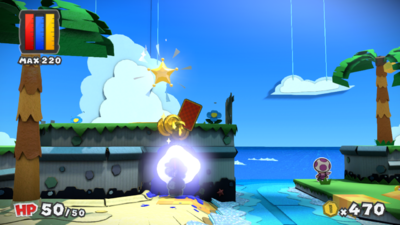
|
| In Blissful Beach, on the ground on a raised platform. | 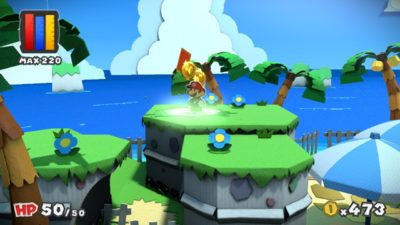
|
| In Blissful Beach, on the ground on a raised platform. | 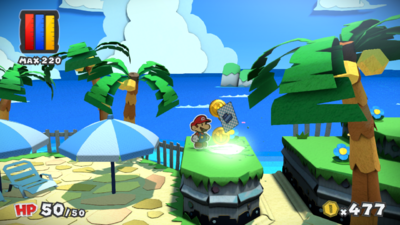
|
Sunglow Ridge
| Sunglow Ridge | |
|---|---|
| In the first area, on the gate. This spot is repainted after collecting the red Big Paint Star. | 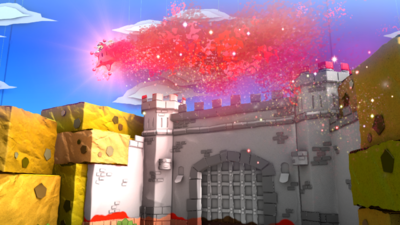
|
| In the second area, on a block. | 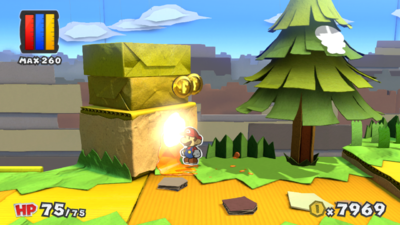
|
| In the second area, on the wall after jumping down from the ledge. | 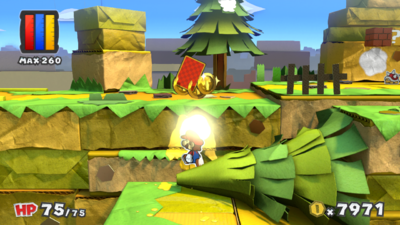
|
| In the second area, on the wall. | 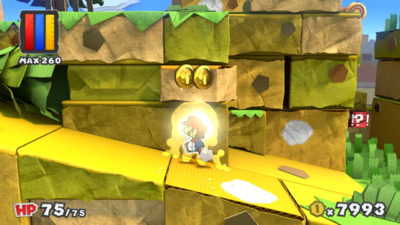
|
| In the second area, on the sloped ground. | 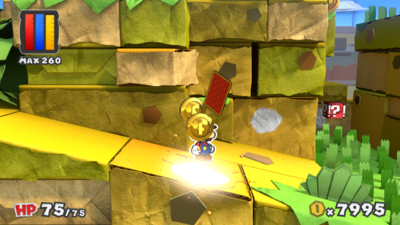
|
| In the second area, on the wall. | 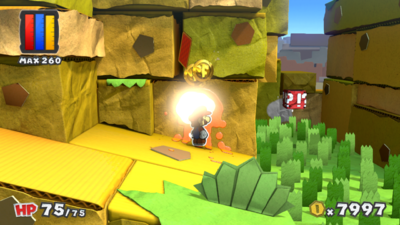
|
| In the second area, on the wall north of the Unfurl Block. | 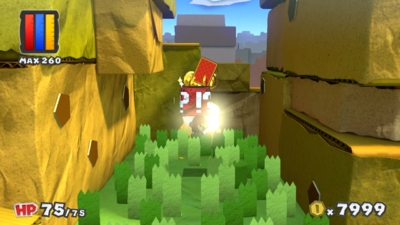
|
| In the second area, on a Toad. Mario must hammer a tree to get the Toad down first. | 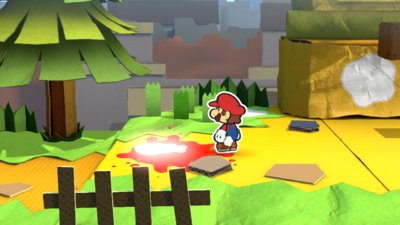
|
| In the second area, on the ground. | 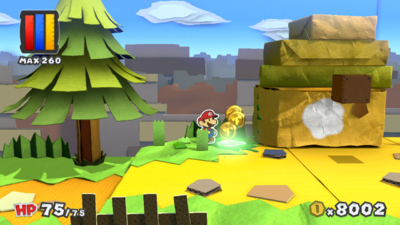
|
| In the second area, on the wall. | 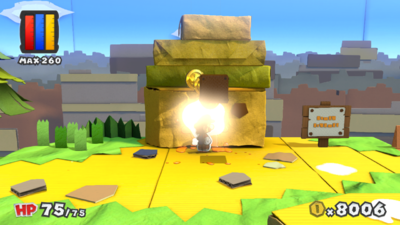
|
| In the second area, on the ground south of the sign. | 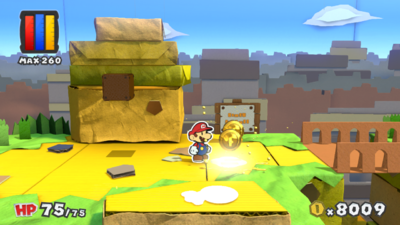
|
| In the second area, on a Toad south of the sign. | 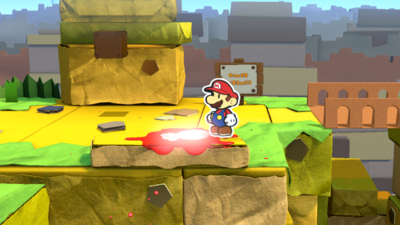
|
| In the second area, on a flower after the bridge. | 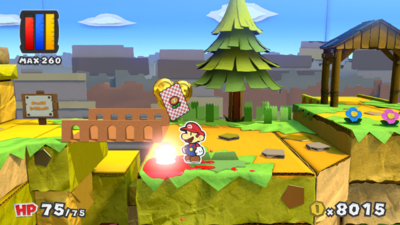
|
| In the third area, on the sign. | 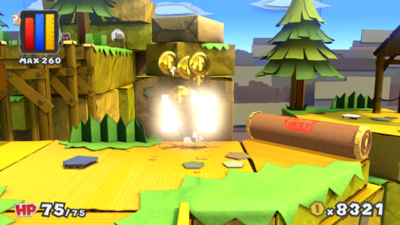
|
| In the third area, on the ground. | 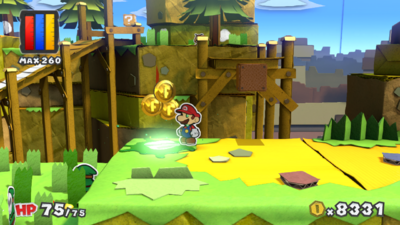
|
| In the third area, on the bridge. | 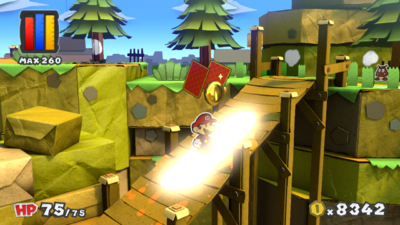
|
| In the third area, on the ground. | 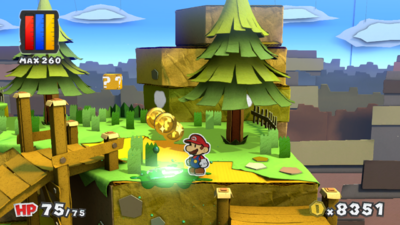
|
| In the third area, on the wall behind a tree. | 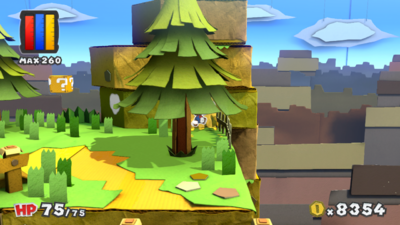
|
| In the third area, on the wall. | 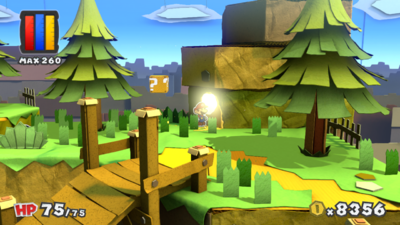
|
| In the third area, on a tree. | 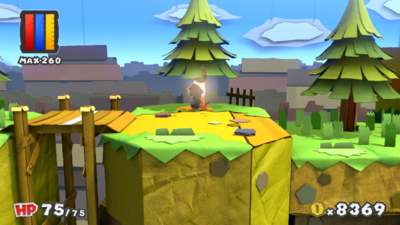
|
| In the third area, on a wooden plank on a bridge. | 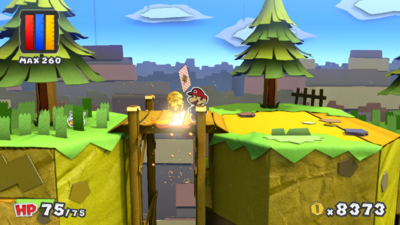
|
| In the fourth area, on the ground behind some grass. | 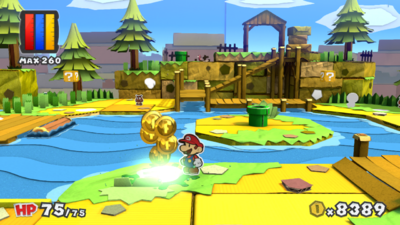
|
| In the fourth area, on the ground. | 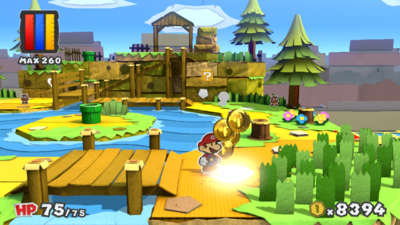
|
| In the fourth area, on the ground. | 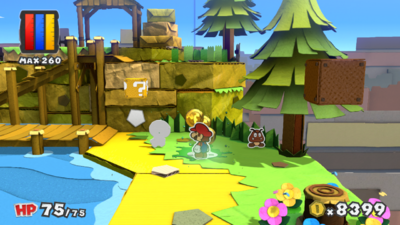
|
| In the fourth area, on a Toad. | 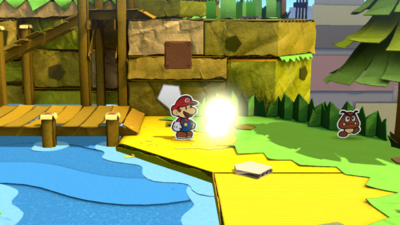
|
| In the fourth area, on the wall. | 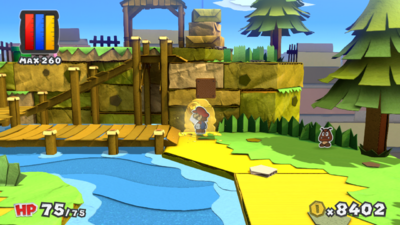
|
| In the fourth area, on the wall. | 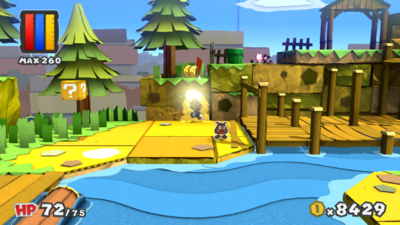
|
| In the fourth area, on the ground. | 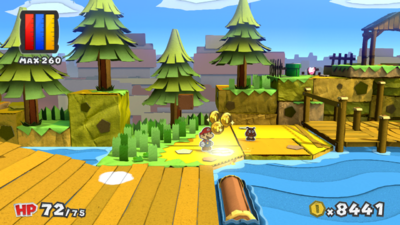
|
| In the fourth area, on the wooden slope leading to the mill. | 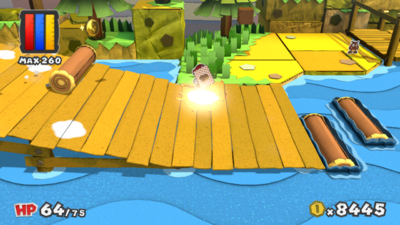
|
| In the fourth area, on the wooden slope leading to the mill. | 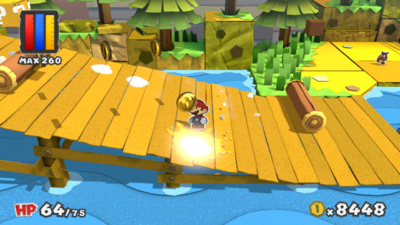
|
| In the fourth area, on the wooden slope leading to the mill. | 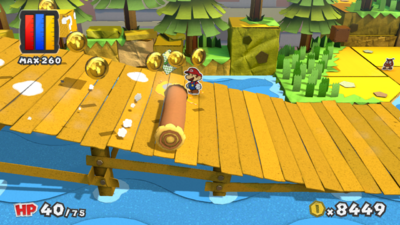
|
| In the fourth area, on the wooden slope leading to the mill. | 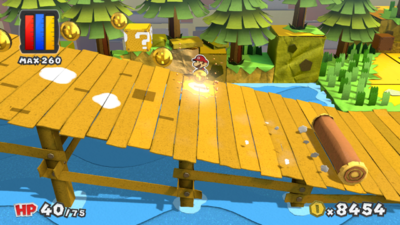
|
| In the fourth area, on the wooden slope leading to the mill. | 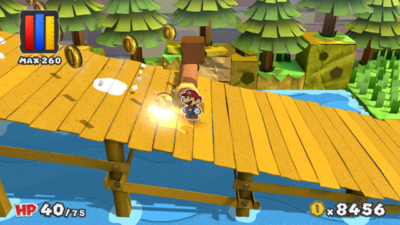
|
| In the fourth area, on the wooden slope leading to the mill. | 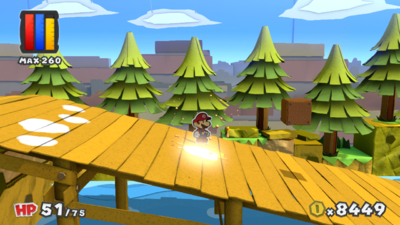
|
| In the fourth area, on the wooden slope leading to the mill. | 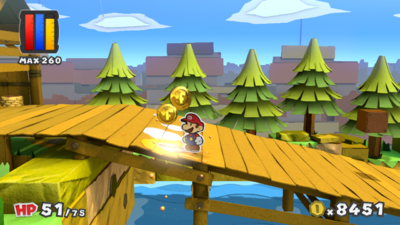
|
| In the fourth area, on the wooden slope leading to the mill. | 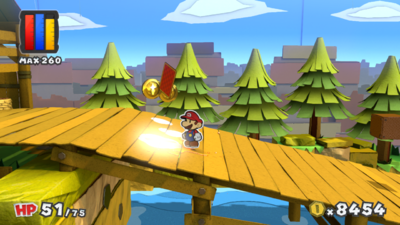
|
| In the fourth area, on the wooden slope leading to the mill. | 
|
| In the fourth area, on the wooden slope leading to the mill. | 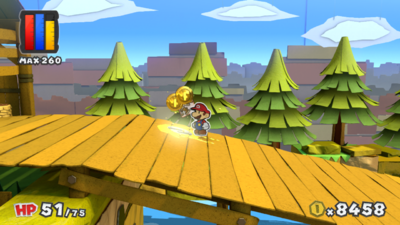
|
| In the fourth area, on a Toad in the lumber mill. | 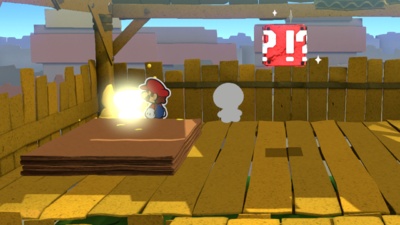
|
| In the fourth area, on a Toad in the lumber mill. | 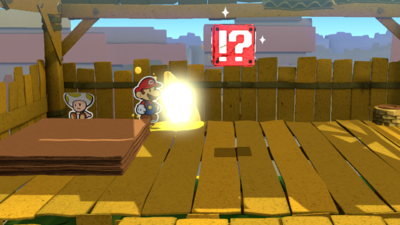
|
| In the fifth area, on the guard around the first bridge. | 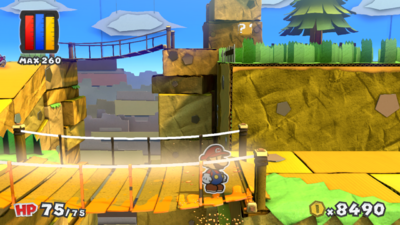
|
| In the fifth area, on the guard around the first bridge. | 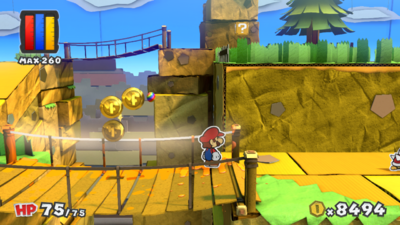
|
| In the fifth area, on the ground. | 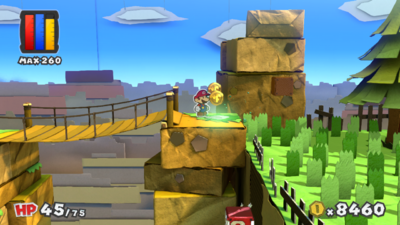
|
| In the fifth area, on the ground in a cave. | 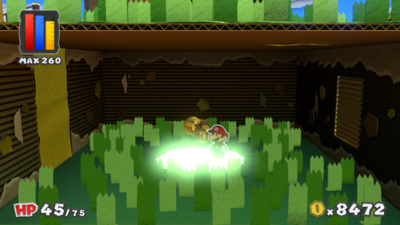
|
Daffodil Peak
| Daffodil Peak | |
|---|---|
| In the first area, on the ground. | 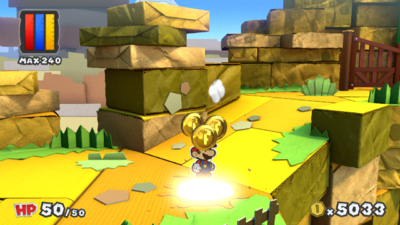
|
| In the first area, on the wall. | 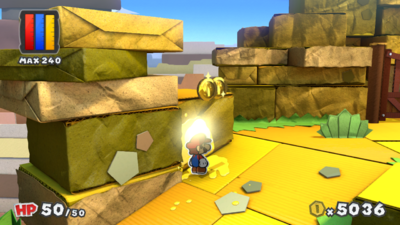
|
| In the first area, on the wall past the gate. | 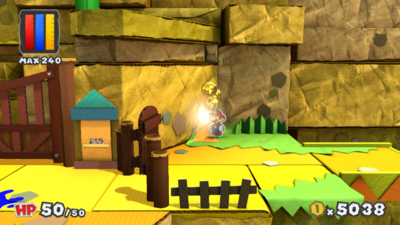
|
| In the cabin, under the rug. Mario must hammer the rug to flip it over first. | 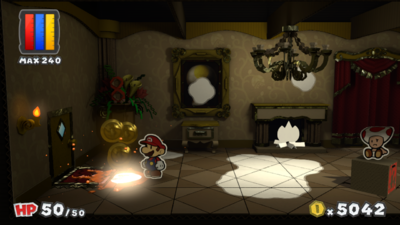
|
| In the cabin, between the dresser and the potted plant. | 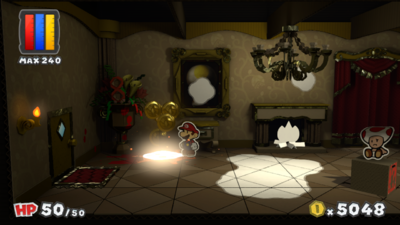
|
| In the cabin, on the painting. | 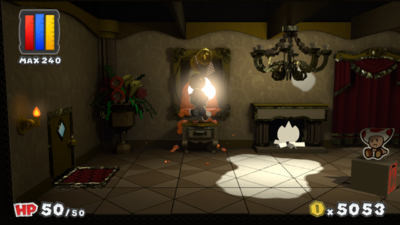
|
| In the cabin, on the ground. | 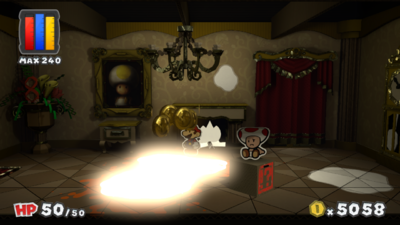
|
| In the cabin, on the fire in the fireplace. | 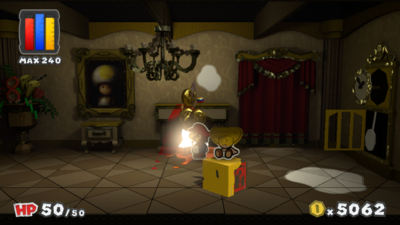
|
| In the cabin, on the wall above the fireplace. | 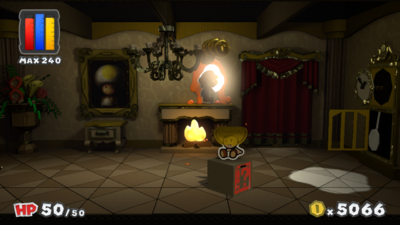
|
| In the cabin, on the ground. | 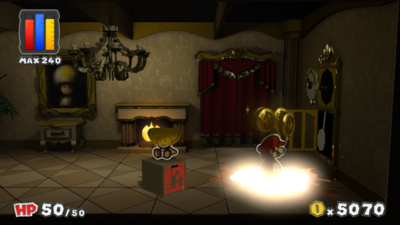
|
| In the cabin, on the clock. | 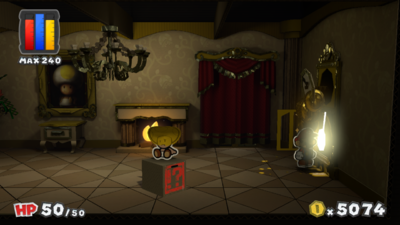
|
| In the cabin, past the window. | 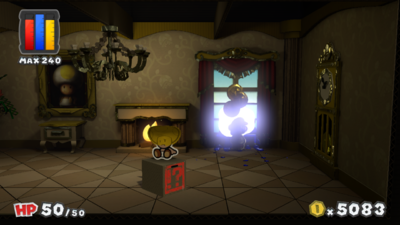
|
| In the cabin, on the chair. | 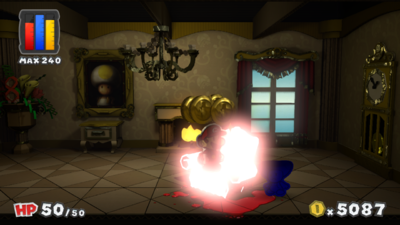
|
| In the second area, under the first ? Block. | 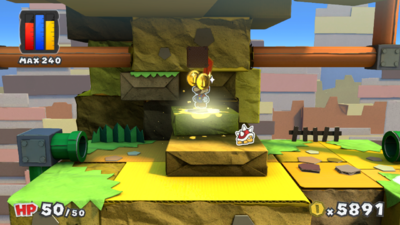
|
| In the second area, south of the pipe entrance. | 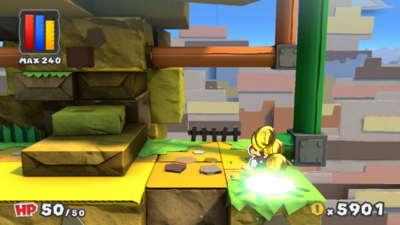
|
| In the second area, south of the exit to the first pipe. | 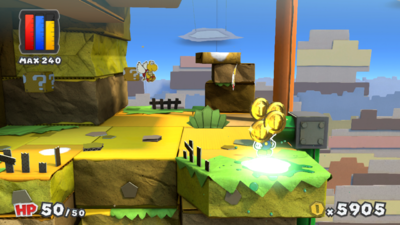
|
| In the second area, on the ground behind a bush. | 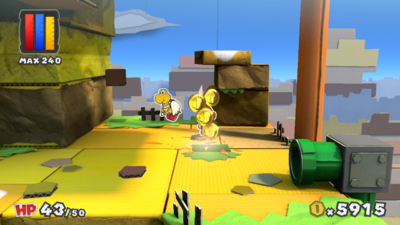
|
| In the second area, on the ground. | 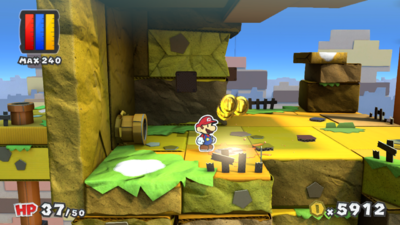
|
| In the second area, on the ground south of the yellow pipe. | 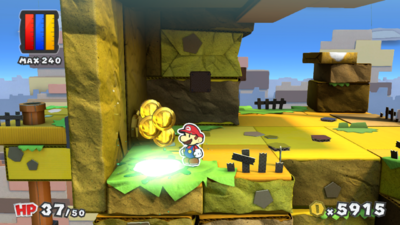
|
| In the second area, on the ground. | 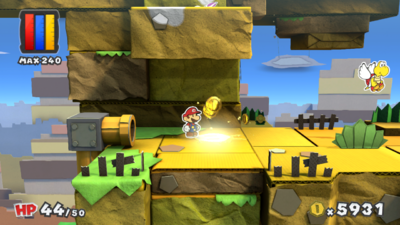
|
| In the second area, on the ground, hidden from view until Mario steps onto a lower platform. | 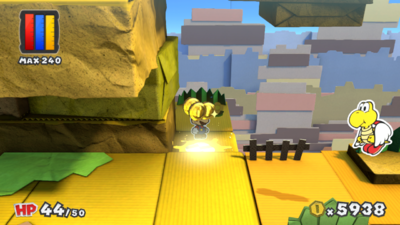
|
| In the second area, on a flower. | 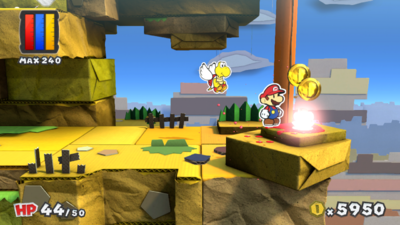
|
| In the second area, on top of a rock formation. This spot can be reached by jumping down from the area directly above it. | 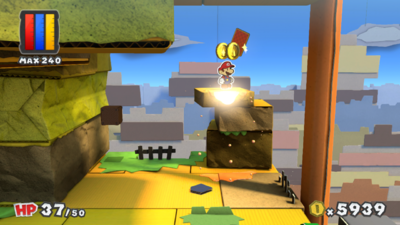
|
| In the second area, on a Toad. This Toad can be found by going behind the mountain and dropping behind it. | 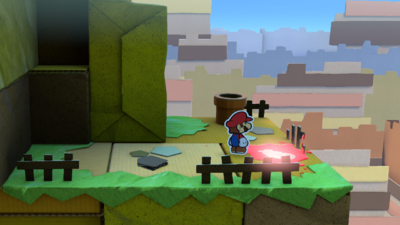
|
| In the second area, on the wall of the area with the Rescue Squad Toad. | 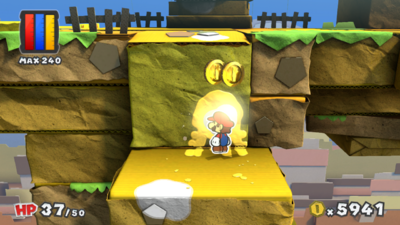
|
| In the second area, on the ground and wall of the area with the Rescue Squad Toad. | 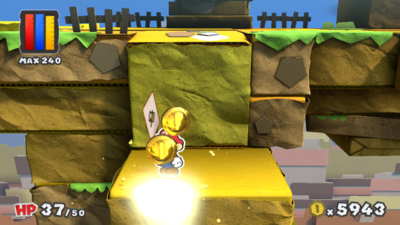
|
| In the second area, on the ground. | 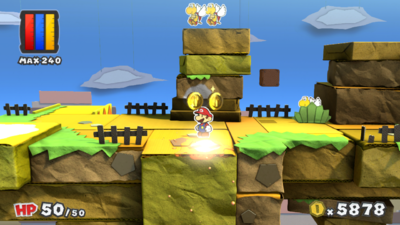
|
| In the second area, on the wall. | 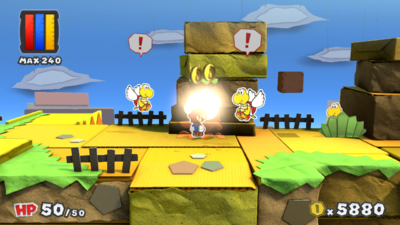
|
| In the second area, on the ground. | 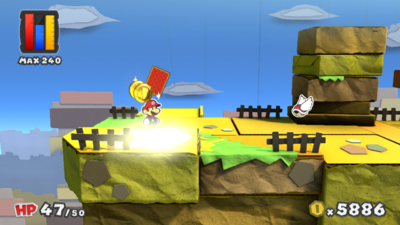
|
| In the third area, on the ground. | 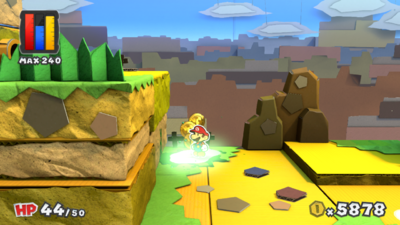
|
| In the third area, on the ground. | 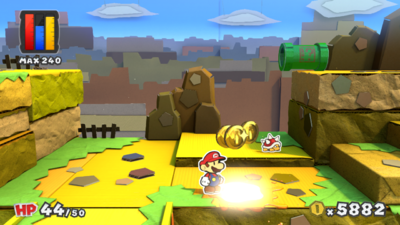
|
| In the third area, on the ground. | 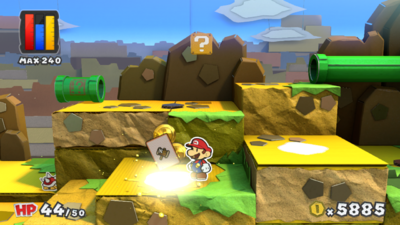
|
| In the third area, on the ground. | 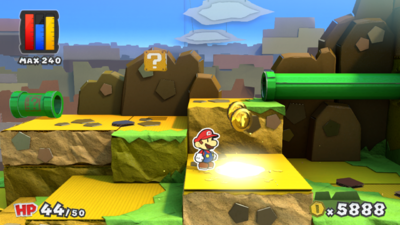
|
| In the third area, on the ground to the left of the first pipe's exit. | 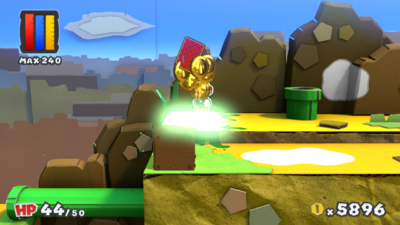
|
| In the third area, on the ground east of an ? Block. | 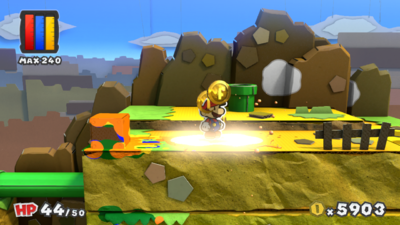
|
| In the third area, on the wall. | 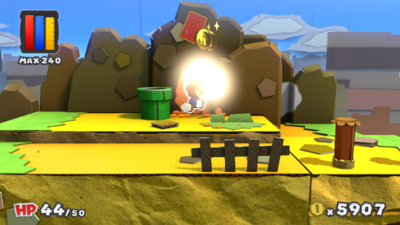
|
| In the third area, on the wall. | 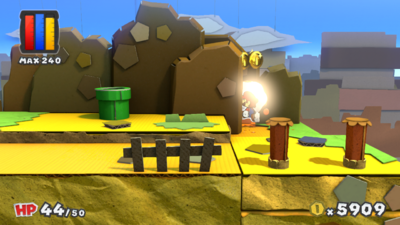
|
| In the third area, on the ground after the unfurled pipe. | 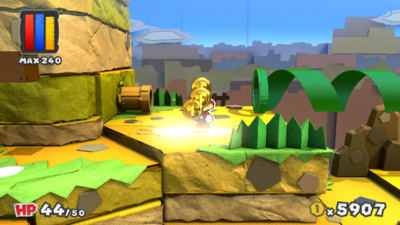
|
| In the third area, on the ground. | 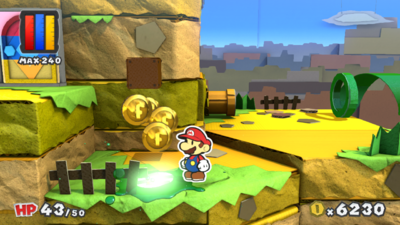
|
| In the third area, near the Spinning-Door. | 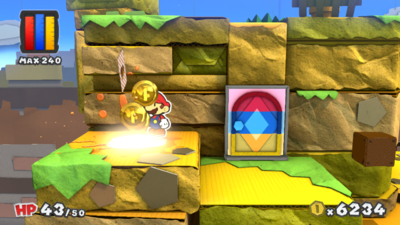
|
| In the fourth area, near the rightmost pipe. | 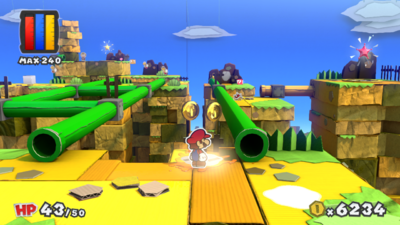
|
| In the fourth area, near the rightmost pipe. | 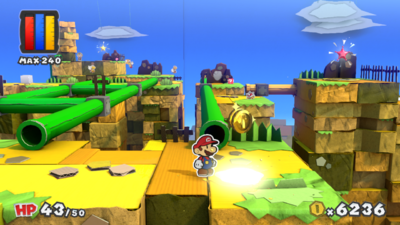
|
| In the fourth area, on the wall of the area with the Unfurl Block. | 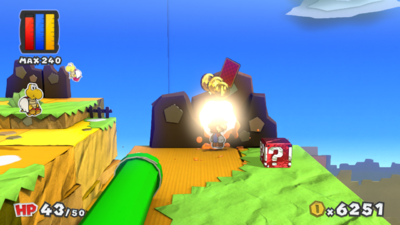
|
| In the fourth area, on the ground accessible from entering an orange pipe. | 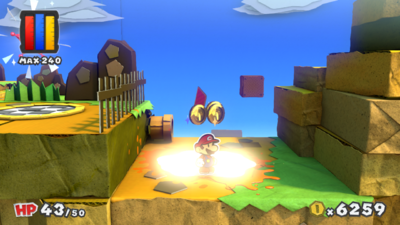
|
| In the fourth area, on the ground neat the leftmost pipe. | 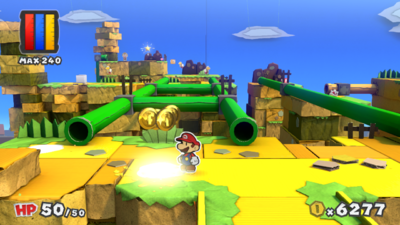
|
| In the fourth area, on the ground near the leftmost pipe. | 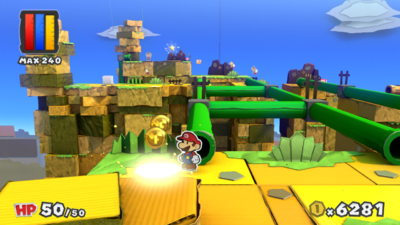
|
| In the fourth area, on the ground after entering the leftmost pipe. | 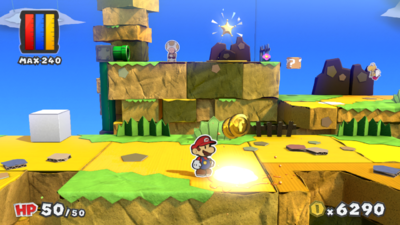
|
| In the fourth area, on the ground after entering the leftmost pipe. | 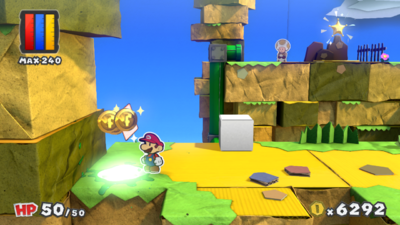
|
| In the fourth area, on an Unfurl Block. | 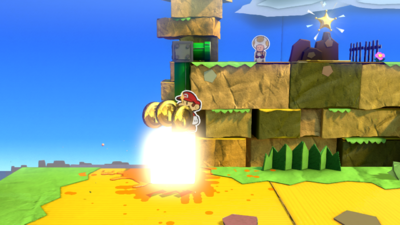
|
| In the fourth area, on the ground after entering the middle pipe. | 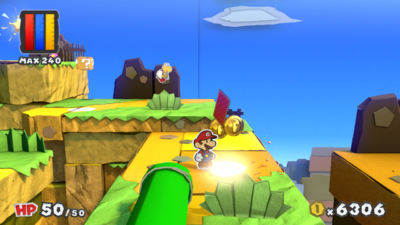
|
| In the fourth area, on the ground after entering the middle pipe. | 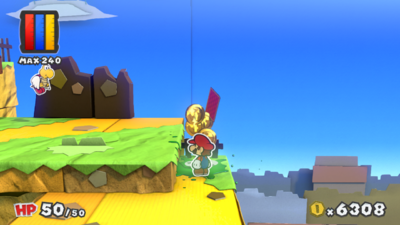
|
| In the fourth area, on the ground after entering the middle pipe. | 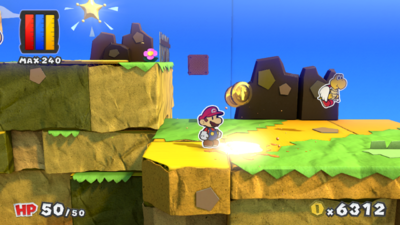
|
| In the first area, on the gatekeeper's head. | 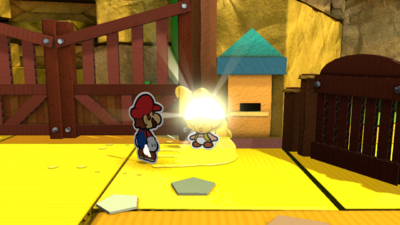
|
Château Chanterelle
| Château Chanterelle | |
|---|---|
| In front of the house, on the ground. | 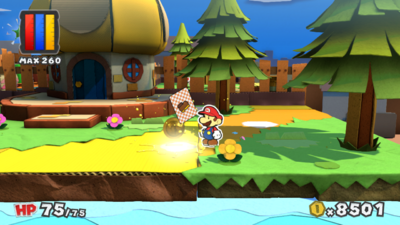
|
| In front of the house, on the ground. | 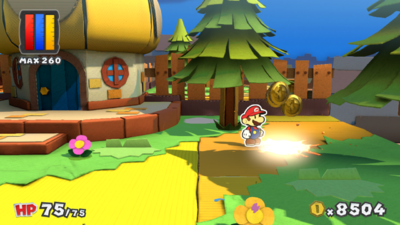
|
| In front of the house, on the ground. | 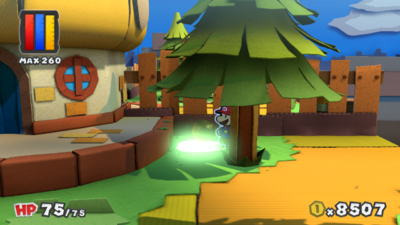
|
| Behind the house, on the fence near the barn. | 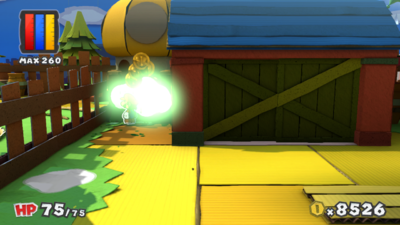
|
| Behind the house, on the ground. | 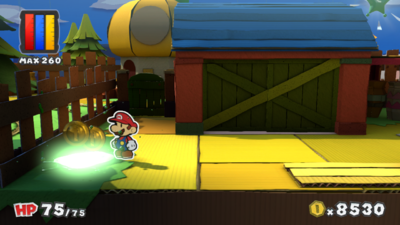
|
| Behind the house, on the ground. | 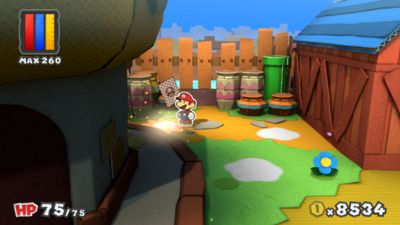
|
| Behind the house, on the ground. | 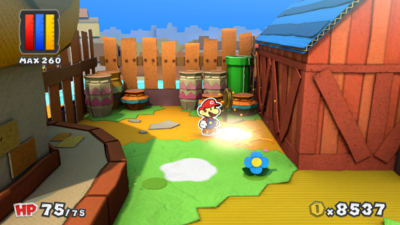
|
| Behind the house, on the ground. | 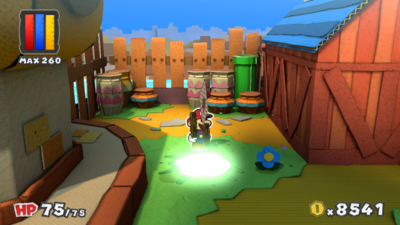
|
Marmalade Valley
| Marmalade Valley | |
|---|---|
| In the first area, on the ground. | 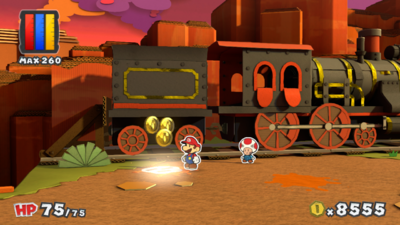
|
| In the first area, on the ground. | 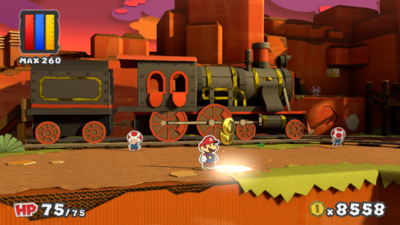
|
| In the first area, on the ground. | 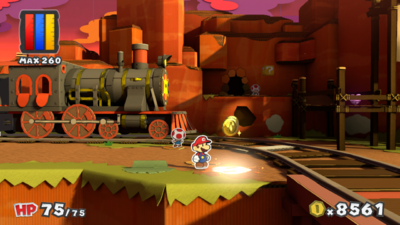
|
| In the first area, on the railroad tracks. | 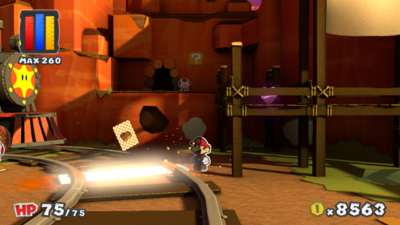
|
| In the first area, on the wall. | 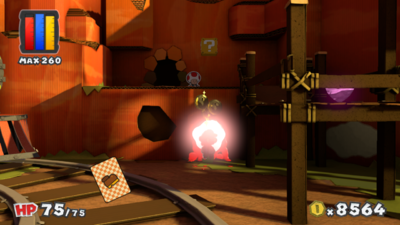
|
| In the first area, on the wall. | 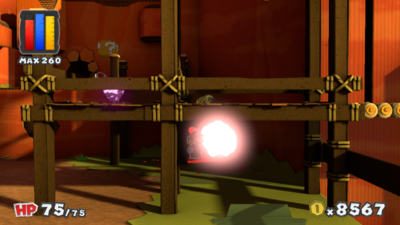
|
| In the first area, on a wooden platform. | 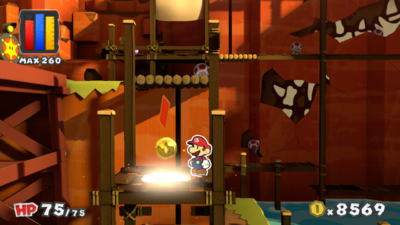
|
| In the first area, on the ground. | 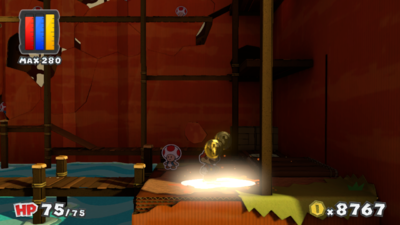
|
| In the first area, on the ground. | 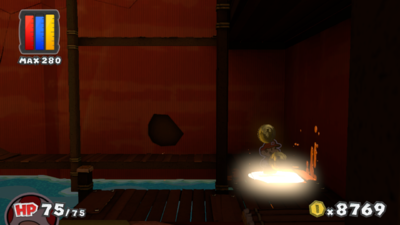
|
| In the first area, on the ground. | 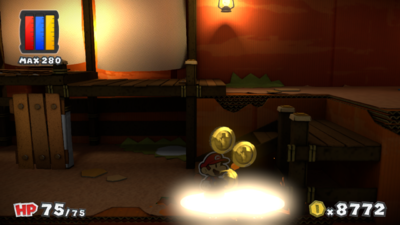
|
| In the first area, on the ground. | 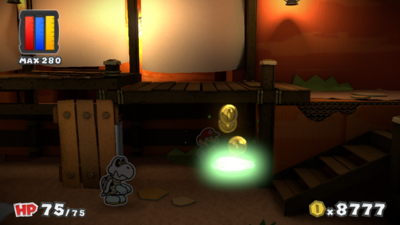
|
| In the first area, on the ground. | 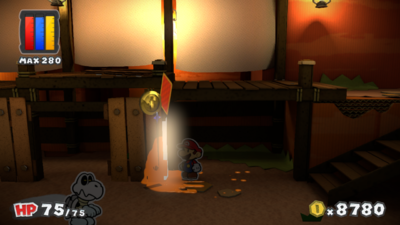
|
Mondo Woods
| Mondo Woods | |
|---|---|
| In the first area, on the ground. | 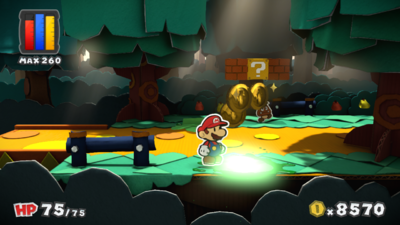
|
| In the first area, on the ground. | 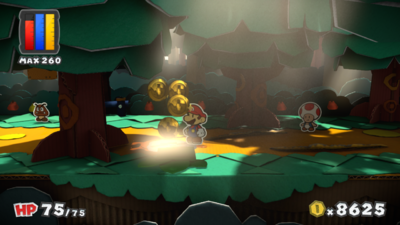
|
| In the first area, on the ground. | 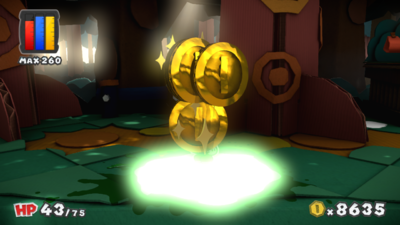
|
| In the first area, on the ground. | 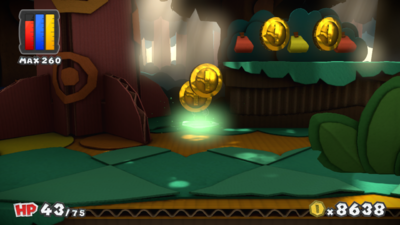
|
| In the first area, on a Brick Block. | 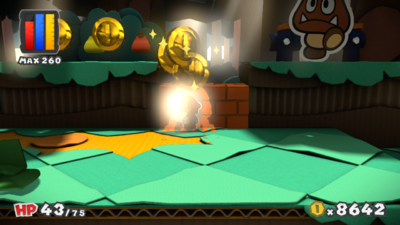
|
| In the first area, on the ground. | 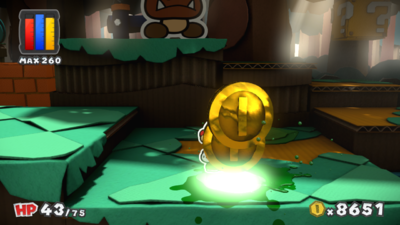
|
| In the second area, on a tree. | 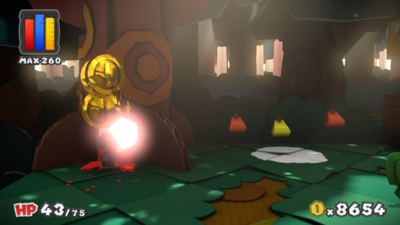
|
| In the second area, on the ground. | 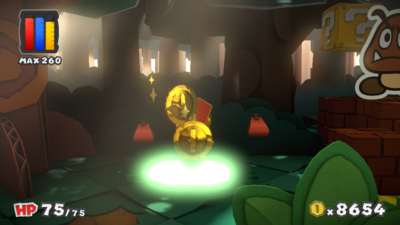
|
| In the second area, on top of a Brick Block. | 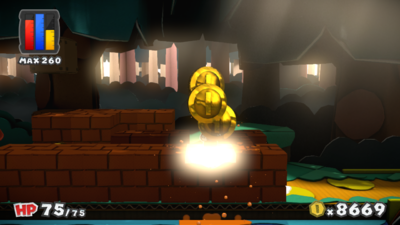
|
| In the second area, on the ground beneath a row of Brick Blocks. | 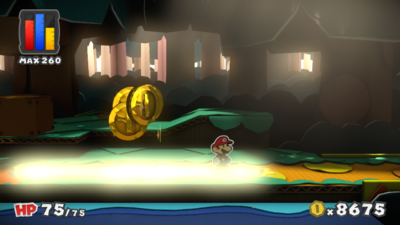
|
| In the area with the giant coin, on a tree. | 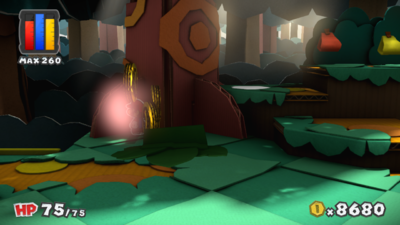
|
| In the area with the giant coin, on a raised platform. | 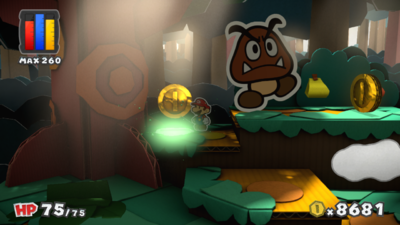
|
| In the area with the giant coin, on the wall. | 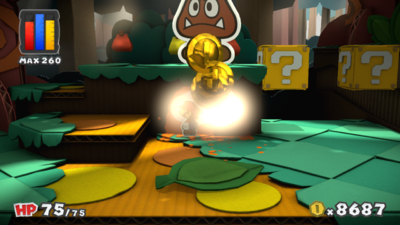
|
| In the third area, on the ground. | 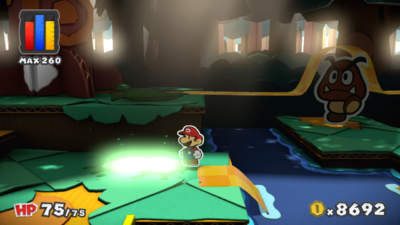
|
| In the third area, on a tree. | 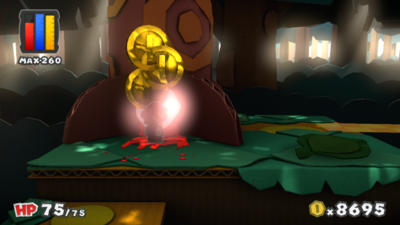
|
| In the fourth area, on a bush. | 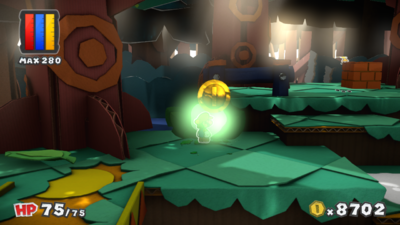
|
| In the fourth area, on the ground. | 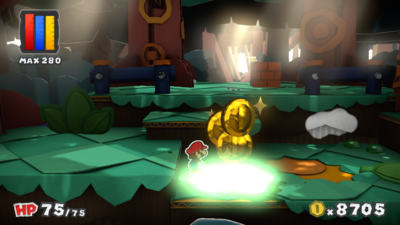
|
| In the fourth area, on the wall. | 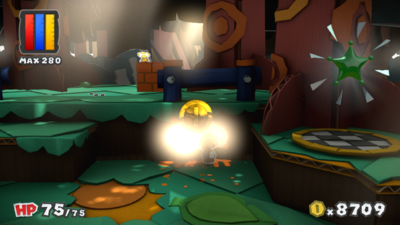
|
| In the area with the giant coin, on the coin. | 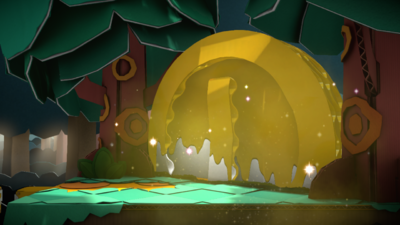
|
Cutouts
| Port Prisma | |||
|---|---|---|---|
| On the signs in the Blue District. | Required for completion | None | 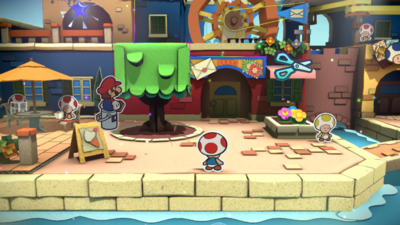
|
| Cherry Lake | |||
|---|---|---|---|
| In the first area, on the gate. | Required for completion | None | 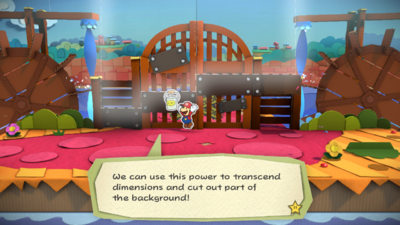
|
| In the second area, on the post south of where Mario gets a card slot upgrade. | Three Jump cards | In Cherry Lake, beyond the second waterwheel... | 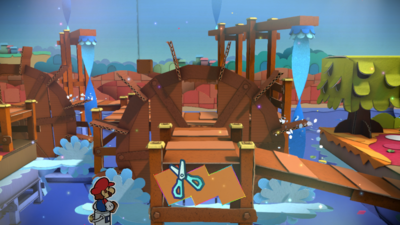
|
| In the third area, at the Scenic Viewpoint mountain. | Required for completion | None | 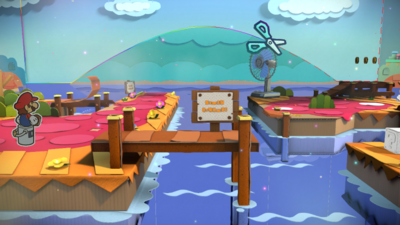
|
| In Inner Cherry Lake, while the waterwheel is aligned with the bridges. | Required for completion | None | 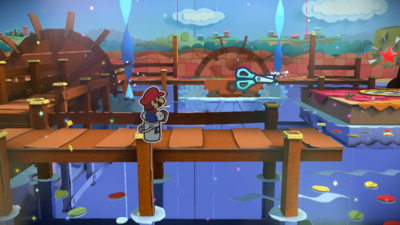
|
| The Crimson Tower | |||
|---|---|---|---|
| In the fourth area, where there is a break in the posts. | Two Hammer cards | In Crimson Tower... The central pillar of the spiral staircase... | 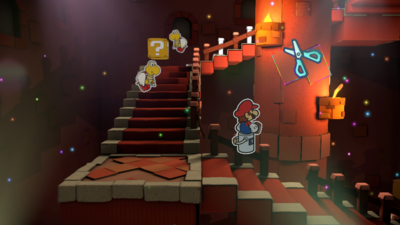
|
| In the fifth area, in the area with the broken platforms. | Required for completion | None | 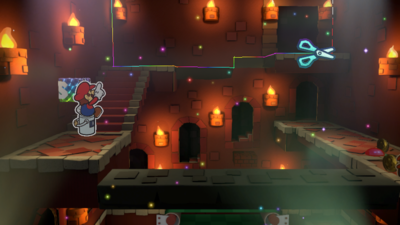
|
| Indigo Underground | |||
|---|---|---|---|
| In the first area, on a rock above the pipe. The Plunger Thing must be inserted. | Required for completion | None | 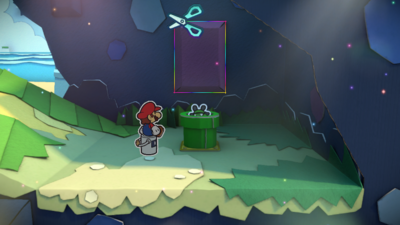
|
| In the fourth area, behind a waterfall. Cutting this out reveals a green Rescue Squad cadet. | Required for completion | None | 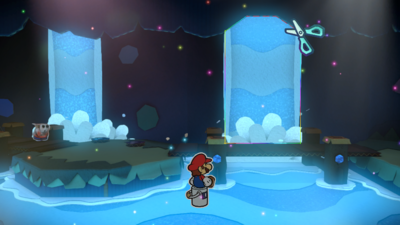
|
| In the third area, above the entrance to the yellow Mini Paint Star. | An Eekhammer Card and a Hopslipper Card | In Indigo Underground, above the entrance to the Mini Paint Star... | 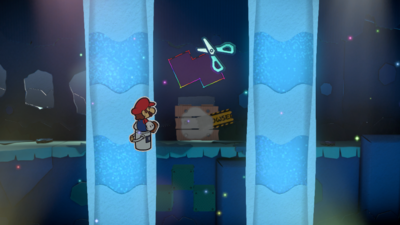
|
| Bloo Bay Beach | |||
|---|---|---|---|
| In the third area, behind the shower stall. Cutting this out reveals Luigi. | 300 Coins | HINT, ADD LATER | 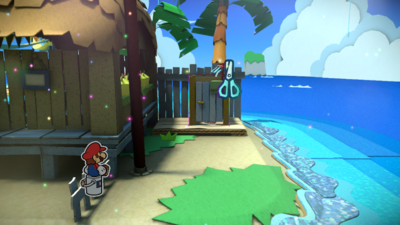
|
| At the end of Blissful Beach. | Required for completion | None | 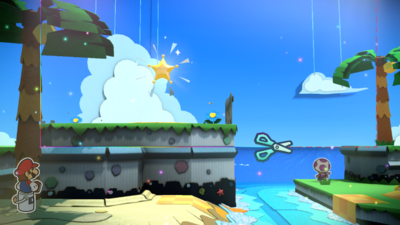
|
| In a rock in the first area. The Fan Thing must be inserted. | Required for completion | None | 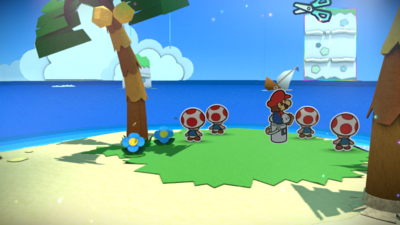
|
| Sunglow Ridge | |||
|---|---|---|---|
| In the third area, at a dead end. | A Hammer card, an Eekhammer card, and a KO Hammer card | Sunglow Ridge, at the foot of a single tree in a dead end... | 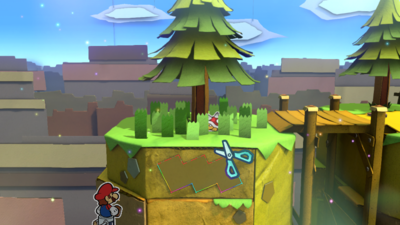
|
| In the fifth area, at the very end. | Required for completion | None | 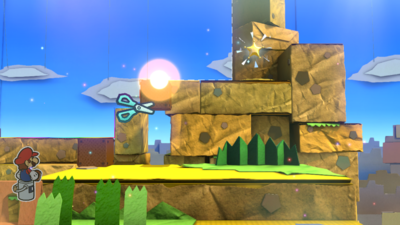
|
| Château Chanterelle | |||
|---|---|---|---|
| In the third area, . | Required for completion | None | 
|
HINTS: A steamy shower. Behind a sandy café. Don't flush the toilet! (Bloo Bay Beach?)
A green L waits in the valley you spread on toast. Stand on the log lift. (Marmalade Valley)
A face peeking out. An ancient Coliseum. No seats here, my friend. (I could NOT figure this one out for the life of me, probably The Golden Coliseum but I thoroughly searched that place)
Plants casting shadows. Shadows shining through the dark. Spotlight of the plum. (Plum Park?)
The hot-spring shadow. No one enters, no one leaves. And yet there he is... (A Redpepper level, I forgot because they suck)
Broken screen still works. No power needed at all. A letter lights up. (I remember this one but can't remember where it is, it's a Luigi one, Green Energy Plant?)
Golden Coliseum, on the back wall of a waiting room...
Fort Cobalt, underground, on a materials container...
Violet Isles, the harbor of Fortune Island... the rock wall visible beyond the ship...
Toad Trainworks, the wall of the factory without a passenger car...
Redpepper Volcano, in the background when you walk along the wall...
Emerald Circus, in the corner behind the stage, next to the stairs...
Violet Isles, Fortune Island... On the rock wall after the spewing smoke disappears...
The Hint Block is a Command Block that appears in Mario & Luigi: Dream Team and actually I'm not sure what else. Huh. I think it was in Paper Jam too but I'll have to double check. Here are the Dream Team hints. Warning, big text dump!
Snuff the Flames Dodge all ghostly flames, and the foe's flames will extinguish, allowing you to jump on it! It will reignite if you leave it alone, so concentrate on attacking while the ghostly flames are out.
Walk on Fire You'll take a little damage, but you can also extinguish ghostly flames by jumping on them.
Attack the Original There's only one real Dreamy Mario. This foe will only fall if you damage the real one. He'll create Dreamy Mario copies but the one there from the start is the real one. Keep track of him. You'll always get attacked after you jump on a Dreamy Mario copy, so be careful!
Watch the Thread Bloatula's thread sometimes snaps as it attacks. When the thread snaps, the foe will bounce over your heads, so be careful!
Hammer Away Jumping on a spiked enemy will always damage you. If you're battling a Thorb, use a hammer to attack!
The Right Attack Each time you attack a Flibbee it flips its top and bottom. Note where its stinger is pointing, and use the right attack. Stinger down? Jump! Stinger up? Hammer! Choose those attacks wisely.
Dodge Water Balloons Grobot launches large and small water balloons from its mouth. The large ones will bounce over your heads, so don't jump!
Balloon Run 'n' Dodge Grobot will also launch water balloons while it's chasing you. Watch Grobot's arms to see which will launch the balloons. If it readies both arms, you'll both need to jump together!
Drop the Captain The Dreamcap Captain will keep calling Dreamcap reinforcements. Your best bet is to defeat the Dreamcap Captain first!
Attack the Colony When Bowser takes damage, the Antasma bats counterattack. Any damage you take from the Antasma bats will get added to Bowser's HP. Targeting individual Antasma bats is too slow, so attack them all at once with the Luiginary Ball.
Flounderflage Colors Red Flounderflages attack Mario. Green Flounderflages attack Luigi. Memorize their colors before they coat themselves in sand.
Dodge Flounderflage When Flounderflages attack individually, they have two jumping patterns: they jump straight at you, or they jump over your head. Red Flounderflages jump straight at Mario and jump over Luigi. Green Flounderflages jump right at Luigi and jump over Mario. Stay calm! Don't jump when a Flounderflage goes sailing over your head!
Jump in Sandoon Mario and Luigi can still jump even if they're consumed by a Sandoon. When a Sandoon slams into someone, press the button of the character it consumed.
Magic Caccac Number Caccac's counterattacks equal the number of times it gets hit. The last counterattack is unique, so remember the number that appears above the Caccac.
Shock Bomb Surprise When Torkscrew goes underground, use a Shock Bomb. It won't be able to attack while it's flipped over!
Send Torkscrew Under After you damage Torkscrew enough, it will burrow into the ground to escape. Make it burrow quicker by using attacks that do a lot of damage at once, like the Bros. Attacks 3D Red Shell or 3D Green Shell.
Dreamy Sandoon Leap If Dreamy Sandoons rise up short, they'll stretch as they approach. Jump over those closest to Mario. Conversely, if they rise up tall, they'll shrink as they approach. Jump over the farthest ones!
Bomb Targeting When a Lob-omb tosses a bomb, watch the way it's held for a sign of where it will land. Right hand means behind Mario. Left hand means in front of Mario. Both hands means at Mario's feet. If the Lob-omb jumps, it's aiming for Mario's back! Watch out!
Real-Bomb Spotting When a Lob-omb throws 3 bombs, only the starred one is real! Don't let it out of your sight!
Skipdrill Volley Skipdrills coming from above will go flying wherever Mario is facing as he whacks them. You cannot directly attack the buried Skipdrills, so smash their buddies into them instead!
Jump In Time Ticksquawks attack after revolution of the needle. Jump right as it completes the circuit! The distance the needle travels may change with each attack. Time your jump carefully! Even if the shutter closes, the needle keeps moving behind it. Try to get the timing down before the shutter closes!
Target Big Massif Whenever you defeat Hooraws, Big Massif's POW will go up. Using Luiginary Attacks is risky! Try countering Big Massif's attacks to thin out the Hooraws without enraging Big Massif. Reduce the Hooraws' numbers, and then use Luiginary Attacks!
Coconut Trawling When a big coconut appears during Big Massif's turn, it's your chance to engage the Hooraws. The key: get the charging Big Massif to hit the coconut! Big Massif will charge toward Mario, so match your moves with the coconut to make him hit it!
Repel Big Massif! When Big Massif flies into the air, watch the Hooraws standing in four groups. Big Massif will always bounce off the group of Hooraws currently raising their hands. After bouncing off the last group, he'll come straight towards Mario! Face him and counterattack!
All-Out Offensive! Time is of the essence, so don't waste it on healing! Focus on powerful Luiginary Attacks only. Hitting Heavy Zest with the Luiginary Stack should work! You can mop up any leftover Hooraws with the Luiginary Ball.
Coconut Ricochet If you see a giant coconut appear during Heavy Zest's attack, it's your chance to hurt the Hooraws! The key is to make Heavy Zest charge headlong into the coconut! Heavy Zest charges at Mario, so match your movements with those of the coconut.
A Hopeless Cause? If Mario simply cannot defeat all enemies within 3 moves, you will get the chance to give up. Use it to better prepare before retrying! Stock up badge effects of the Strike and Master badges to deliver more damage at once! Mix the Virus and Master badges to low Heavy Zest's DEF. Buy those in the Wakeport shop!
Be Excellent It'd be ideal to stay safe and win with Luiginary Attacks. If getting Excellent hits is a bit challenging, get in some practice! To practice Luiginary Attacks, go to the Guide menu before the battle and choose Attacks. And if the Excellent hits just aren't happening, counters will also let you get some damage in.
Throw In the Towel If you want to leave the battle, you can always give up. After Mario has 3 attack turns, the host will come out and give you the option to give up.
Counter Thunder Sass When Thunder Sass goes flying, watch the Hooraws around you. Thunder Sass will rebound off of each of the Hooraw groups with their arms raised. After bouncing off the final group, he will fly straight at Mario. Turn that way, and let him have it!
Drop a Monolift A Monolift carrying four rocks looks pretty miserable. That's the time to stomp it flat.
Look Before You Leap Every time a Flibbee R attacks, it'll flip upside down. Watch where its stinger points, and choose the right attack! Jump when the stinger points down, and hammer it when the stinger points up!
Pi'illodactyl Bait As long as it's in the background, you can't attack a Pi'illodactyl. To defeat a Pi'illodactyl, you'll need to use a Taunt Ball! But be careful! It's really strong!
Once Burnt, Twice Shy When a Pi'illodactyl spouts tongues of flame, watch its legs as it charges up the attack. Right leg up is a sign that Mario will be attacked first, while left leg up means Luigi's first! If you avoid the fire, stay alert! The ground under your feet will be hot for a while, so keep hopping!
Head First! Mammoshka's weak point is the head—go on, give it a stomp! But if it puts on a spiky helmet, switch to a ground assault... When the spiky helmet comes out, try to get rid of it posthaste!
Snowball Breakout If you get trapped in a snowball, make getting out your priority. Press the button just as your legs touch the ground to spring free!
Orchestrated Effort The huge rocks Mammoshka lobs cannot be countered by one man! Swing your hammers in concert!
Through Fire and Ice Avoid enough Magmad attacks to make it cool enough to stomp. When a Magmad's body becomes darker, that's the time to jump! Iceads change color just like Magmads—you know what to do!
Bomb Targeting When a Lob-omb R hurls 1 bomb, watch the way it's held for a sign of where it will land. Right hand means behind Mario. Left hand means in front of Mario. Both hands mean at Mario's feet. If the Lob-omb R jumps, it's aiming for Mario's back! Watch out!
Real-Bomb Spotting When a Lob-omb R throws 3 bombs, only the starred one is real! Don't let it out of your sight!
Hammer Away Durapurl's leaping attack always comes out on the third shell opening. Raise your hammer ahead of time, and prepare to swing it as the shell opens for the third time. If you connect, it'll drop on the ground, so smack it some more before it can hide in its shell!
Defeat Lakitu Whenever a Lakitu attacks, it'll have Spinies in tow. If you can't thin out the Spinies, try defeating the Lakitu first. Using a Taunt Ball to enrage it might help defeat a Lakitu quickly. It'll attack you without fail, so use counters for big damage!
Dreamcap Priority Dreamcap Captain R will call in more and more Dreamcaps R. Prioritize the defeat of the Dreamcap Captain R first!
Wholesale Damage Private Goomp, Sergeant Guy, and Corporal Paraplonk... Defeat all three at once, or they rise again! Deal damage to all three at once with the Luiginary Ball!
Goomba Stompfest Towers made of Goombas. Give them a taste of your boots. If they get behind Mario, they can spread out and gang up on him. By then, it's too late to dodge...
Cannon Fodder After the Banzai Bill gets loaded into the Sgt. Guy Cannon, THAT is stomp time. Massive damage for everyone!
Dark Block Knock Midattack, hit Dark Blocks from below to weaken them. A weakened Dark Block will take extra damage from attacks!
Drub the Airtub The only way to deal damage to Shy Guy Airtub is with counters. To defeat a Shy Guy Airtub, use Taunt Ball to enrage it. It'll come closer to attack you, so keep on countering!
Go Viral Whenever a Virus gets attacked, it'll change color. If you can line up three or more Viruses of the same color, they'll all go down!
Drop a Monolift R Monolift R carrying four rocks looks really miserable. Stomp it out of its misery.
Egg Snatcher! When a Bandit appears carrying a Golden Egg, toss a Taunt Ball! This'll make it drop the egg. Bandits will flock to get it back, so smash the Golden Egg quickly!
Pi'illodactyl R Bait As long as it's in the background, you can't attack a Pi'illodactyl R. To defeat a Pi'illodactyl R, you'll need to use a Taunt Ball! But be careful! It's really strong!
Once Burnt, Twice Shy When a Pi'illodactyl R spouts tongues of flame, watch its legs as it charges up the attack. Right leg up is a sign that Mario will be attacked first, while left leg up means Luigi's first! If you avoid the fire, stay alert! The ground under your feet will be hot for a while, so keep hopping!
Don't Tease! If Popple starts teasing Wiggler, Wiggler will lash out at you with a powerful attack. Attack Popple when he comes out first to prevent his teasing!
Clinging Popple Sometimes, when Wiggler comes charging around, Popple can try to hobble Mario and Luigi. If you do end up getting grabbed, there'll be a delay between your button press and your jump, so plan for it when dodging!
Empty the Krubbish If you defeat a Krubbish after it swallows a Cocoknight R, the Cocoknight R will also get hurt. Prioritize stomping the Krubbish with the most Cocoknights R in it!
Poison Control The poison smog Krubbish spews comes from up high and down low. Move to the low areas and jump! The direction its mouth points to at the start will be the high lane. It can point either behind, in front, or straight at you. The tells it gives will number the same as its attacks, so pay close attention!
Laser Targeting When an Eyepi'illo starts circling, time your counters carefully! When you hit it, it'll fire a nasty laser beam wherever it happens to be pointing, so swing when it points away from Mario and Luigi! Of course, it wouldn't be a bad thing if it blasted some baddies.
Vault the Bees You shouldn't stomp on the bees that come out of a Beehoss. If you stomp them, they'll come back and attack you! You won't be able to dodge their return attack, so be sure to jump over the bees to dodge them!
Bee Free Bees that leave a Beehoss sometimes never return. Hitting the Beehoss at times like that will be consequence free! Defeat it while the bees are gone!
Telltale Signs Watch a Commander Lakitu for tells about Boomerang Bros. It'll show a tell just before a Boomerang Bro attacks, so pay close attention! If a Boomerang Bro attacks alone, its Commander Lakitu's moves will be the tell! The boomerang follows the same path as the Commander Lakitu.
Double Boomerangs When two Boomerang Bros. attack, the Commander Lakitu will signal the order of the attacks. If the Commander Lakitu in front waves a red flag, the attack will first target Mario, while a green one means Luigi!
Taunt to Victory A defeated Commander Lakitu will sometimes drop a neat little item. Use a Taunt Ball if you want to defeat a Commander Lakitu. You'll lose the benefit of tells about the Boomerang Bros. attacks, but it may be worth it!
Split Wings Pi'illodium will become a lot weaker if you destroy both wings. Attacks against a weakened Pi'illodium deal extra damage!
Pelicrump Watch Some Pelicrumps ferry Bob-ombs in their cavernous bills. They'll lob them at you and deal unavoidable damage, so try and get rid of those targets first! Keep an eye on those Pelicrumps... You might spot a Bob-omb!
The Log Roll Be ready when a Pelicrump brings a giant statue to the party! It'll chase Mario faster than he can run! Ride on the logs that the Pelicrump drops to run faster than the statue for a while! Jump on logs multiple times until the statue breaks!
Pop the Balloons Knock back Spritzbloom balloons by jumping as they descend. If one lands before you can hit it, avoid it by moving up or down.
Skipdrill R Volley Skipdrill R coming from above will go flying wherever Mario is facing as he whacks it. You cannot directly attack a buried Skipdrill R, so bash its buddies into it instead!
Blow Off the Ink Inky Piranha Plants are annoying enemies who obscure your screen. Blow into the mic to clean it off! Taunt Ball will knock them out, giving you time to defeat other monsters!
Avoid the Fire Bar Watch a Flaming Antasmaton's wingspan to predict its attacks. Folded wings mean fast speed, spread wings mean slow, and original size means normal speed.
Where to Walk? Chain Chomp will stare at Mario or Luigi before attacking. Be sure to check where it's looking before it flings its companion Walker Guy! But careful! If a Chain Chomp closes its eyes while it's rolling, the Walker Guy will fly at the opposite opponent!
Drub the Airtub R The only way to damage a Shy Guy Airtub R is with counters. To defeat a Shy Guy Airtub R use a Taunt Ball to enrage it. It'll come closer to attack you, so keep on countering!
Major Malfunction Dealing damage to a Mechakoopa makes it break down immediately. Broken Mechakoopa attacks are erratic, so be extra careful!
Nowhere to Hide! When Mechakoopas encircle Mario, they attack from all directions, one by one. Broken Mechakoopas run around and attack from the opposite direction of their original spot! Watch out!
Draw Heavy Fire When Mechakoopas start firing, try drawing their fire and moving away at the last moment. Shots faulty Mechakoopas fire come back around to hit them. Get broken Mechakoopas to fire many shots for maximum damage!
Mecha Column When Mechakoopa numbers drop, they'll all line up in one column. If they hop before charging out, they'll fly over Mario's head. Let them pass by without jumping. For broken Mechakoopas, the tell is reversed. If broken Mechakoopas hop, they'll charge straight at you! Incidentally, if you stomp a broken Mechakoopa, it'll run the other way. Make it collide with other Mechakoopas for easy damage!
Break the Chains Before an Antasman moves, it'll heal itself and those cohorts who are bound to it with magic. Use jumping attacks first to pick them off one by one!
Defeat Lakitu R Whenever a Lakitu R attacks, it'll have Spinies R in tow. If you can't thin out the Spinies R, try defeating the Lakitu R first. Using a Taunt Ball to enrage it might help defeat a Lakitu R quickly. It'll attack you without fail, so counter for big damage!
Beat the Real Kamek Kamek will make doppelgangers. He'll recover health if you hit his copies, so make sure not to miss the real Kamek!
Remember the Shapes The spells from Kamek's magic move in specific directions depending on their shape. [Square]: Comes from the front. [Circle]: Comes from the rear. [Triangle]: Comes from the right. [Upside-down triangle]: Comes from the left. Be careful! It's tricky to distinguish [triangle] from [upside-down triangle]!
Beat the Real Kamek Kamek will make doppelgangers. He'll recover health if you hit his copies, so make sure not to miss the real Kamek.
Remember the Shapes The spells from Kamek's magic move in specific directions depending on their shape. [Square]: Comes from the front. [Circle]: Comes from the rear. [Triangle]: Comes from the right. [Upside-down triangle]: Comes from the left. Be careful! It's tricky to distinguish [triangle] from [upside-down triangle]!
Use the Dry Bones Sometimes Kamek will leave his Dry Bones in charge and hide in the background. Kamek slowly restores his health back there, and you can't attack him with normal attacks. Counterattack the Dry Bones to get the chance to launch them into Kamek. It's hard to stomp on all the Dry Bones. If there are too many coming your way, break some of them using a Luiginary Attack. If that's tough, break all of the Dry Bones to bring Kamek back to the fore!
Defeat Kamek (Green) In the third battle with Kamek each of the 4 Kamek copies has a different role! The green one boosts the group's stats, so defeat that one first!
Remember the Shapes The spells from Kamek's magic move in specific directions depending on their shape. [Square]: Comes from the front. [Circle]: Comes from the rear. [Triangle]: Comes from the right. [Upside-down triangle]: Comes from the left. Be careful! It's tricky to distinguish [triangle] from [upside-down triangle]!
Keep in mind that the enemy's SPEED stat gets faster with the green Kamek copy's magic!
Giant-Broom Service Focus on the giant broom's moves to foresee its attack! When it sweeps on the same spot, that's its tell! It's going to attack Mario! Slide the Circle Pad at the right time to escape from the broom's trajectory.
Escape the Nightmare If you get hit by Antasma and fall asleep, you'll be caught in an endless nightmare. Jump out through the exit hole, or remain trapped forever! There is only one exit. All other holes are decoys. Jump through a hole to discover its nature. Find the exit, hurry!
Get In the Ring! When Antasma throws a ring, make sure you get inside it. If you stay outside of the ring, you'll always get hit by the shock wave...and that'll hurt badly! When Antasma raises his hand, the direction where the ring falls will change, so move toward the side where he raised his hand. It's easier if you stay in the middle to prepare yourself!
Inside the Ring Once you're in the ring, look at Antasma again! When Antasma drops both hands, the ring will shrink shortly thereafter. Wait a bit to jump and dodge it!
Wake Up, Sleepyhead! After Antasma goes to sleep, he'll start steadily regaining HP. When sleeping, Antasma is impervious to all attacks. Wake up Antasma by destroying all of the Antasmunchies ASAP! You can defeat Antasmunchies en masse with Luiginary Attacks!
Bye, Dreamy Bowser! Dreamy Bowser will block attacks to his body with his right arm. Defeat the right arm first to be able to damage his body. If Mario or Luigi gets caught, attack the left arm to free him.
Minion Mop-Up If the Koopa Corps show up, aim for Dreamy Bob-ombs first. When you defeat one, it'll explode, damaging nearby enemies! Use a Taunt Ball to enrage Dreamy Bowser and make him attack you. Deal damage to the Koopa Corps en masse!
Taunt Balls Ahoy Anger the Shy Guy Airtub DX with Taunt Balls to get it to attack. That's your chance to counter for massive damage!
Counter Offensive The Gold Beanie often flees. But hit it with a counterattack, and the Gold Beanie won't be able to flee on its next turn!
Gold Beanie's Tell Watch the Gold Beanie after countering its running attack. If it stumbles on its way back, it'll jump for its next attack! The timing of when it hits Mario will be slightly late, so wait a beat before swinging the hammer!
Creeping Beanie Be extra careful if the Gold Beanie calls a crowd of buddies! It'll hide behind its buddies to sneak up on Mario. Stomp on the enemies concealing the Gold Beanie to counter! While the Gold Beanie is hiding, it'll keep changing its position, so keep an eye on it!
Mix It Up There's a badge effect for every combination of badges held by Mario and Luigi. Check various badge combinations to find powerful badge effects that match your play style. You can even swap badges midbattle. Just touch the Badges icon on the Touch Screen!
Watch and Learn When you eat a Boo Biscuit, you won't be able to attack for a while but you won't take any damage either! Use those moments of peace to observe enemy attacks and plan your defense!
Slow and Steady Mess up an attack a few times, and you'll unlock Slow Attack Mode. In Slow Attack Mode, time will slow down mid-attack to make it easier. Practice makes perfect!
Bros. Attacks The quicker you defeat monsters, the fewer attacks you'll endure! Use Bros. Attacks to deal big damage and get it over with!
Restore Your BP! Using Bros. Attacks depletes BP. If you run out of BP, you can't use Bros. Attacks, so restore it by drinking syrup. Buy Syrup Jars from item shops or pick up any dropped by enemies you defeat.
Use Luiginary Attacks The quicker you defeat monsters, the fewer attacks you'll endure! Use Luiginary Attacks to deal big damage and get it over with!
Restore Your BP! Using Luiginary Attacks uses BP. If you run out of BP, you can't use Luiginary Attacks, so restore it by drinking syrup. Buy Syrup Jars from item shops or pick up any dropped by enemies you defeat.
Level Up! Enemies getting too strong? Go back to an earlier area and fight some monsters to level up. As you gain levels, you take less damage and deal more punishment. It makes battling a cinch!
Equip Strong Gear To make battles easier, equip stronger gear! If you're getting hit a lot, buy apparel with high DEF to reduce the damage you take. Stay safe! Buy gear in gear shops, or pick up spoils from defeated foes.
Use Badge Effects! When things are going poorly, try using badge effects to make your life easier. When it's your turn to move, touch the badge-effect icon twice the Touch Screen to use it!
Save Badge Effects As much as possible, save up your badge effects to the maximum you can stock. Saved-up healing effects make battles less scary! Stocking up on damage-dealing effects is also a good strategy!
Heal Early and Often If you take damage and get low on, eat a Mushroom to heal. Buy Mushrooms from item shops or pick up ones enemies drop!
Rise from the KO It gets harder to defend if either Mario or Luigi goes down, and your offense also suffers! Revive with 1-Up Mushrooms ASAP!
Heal before Battle You can use Mushrooms and Syrup Jars outside of battle, too. Go to the Items menu and recover before fighting. Battles go easier if you start with full HP and BP.