The Sphinx Sits on a Secret!
- “Museums bore Wario! Why'd we come here again? You think that the rest of my Whatsa-whoozit-stone is here?”
- —Wario, Wario: Master of Disguise
The Sphinx Sits on a Secret! is the third episode of Wario: Master of Disguise. In this episode, Wario infiltrates the Smithsnorian Museum in search of information about the Wishstone. Nigel B. Whistlebottoms patrol the museum, and they will summon backup and attack Wario on sight. Throughout the museum, Wario finds exhibits which serve as the answers to various riddles he has to solve in order to make progress.
Plot
After obtaining the first Wishstone piece in the previous episode, Wario comes to the Smithsnorian Museum to look for clues to the other pieces' whereabouts, despite his dislike of museums. Shortly after sneaking in, he meets the Sphinx. Goodstyle asks him about the Wishstone, but the Sphinx will only talk if Wario brings him the Pharaoh's three treasures. The Sphinx also tells Wario that in order to get to the treasures, he must solve riddles.
After bringing the treasures to the Sphinx, he tells Wario that he saw a guy in a suit carrying boxes out of the museum. Wario hears this description and assumes that Count Cannoli is responsible, becoming angry that he apparently robbed the museum before he could. Upon realizing that Wario is a thief, the Sphinx forces Wario to solve three riddles if he wants to go free. Wario solves them, and the Sphinx tells him to hurry and leave before the guards find out. Before they leave, Goodstyle asks about the guy in a suit he mentioned. The Sphinx tells them he may have been headed for a cave hidden by a perpetual blizzard, giving Wario his next destination.
Just after Wario and Goodstyle leave, Cannoli shows up exhausted. He had searched the museum from top to bottom but found nothing but junk. He overhears Wario and Goodstyle talking about the cave, so Cannoli heads for the cave himself.
Layout
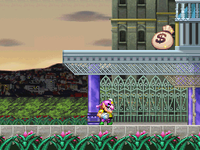
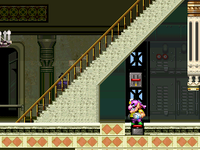
The episode starts at the entrance to the museum. There is a moneybag on a ledge which can be reached using one of Arty Wario's blocks. Inside the lobby, Wario can leap across several chandeliers to find a red treasure chest containing the Scary Wrestler Mask. The room on the right features some exhibits and a vault door. If the door is approached, Goodstyle will deduce that the door is electronically locked and that Wario must find a switch to open it. He will also go over the exhibits: a bear, a robin, a chick, and a dog. Back in the lobby, a staircase leads downward, where Wario will encounter two Nigel B. Whistlebottoms. While evading the guards, Wario can progress further downward and to the right to enter a large room. There is another guard in here, as well as many exhibits: glasses, a spider, a lizard, a calendar, an apple, a fly, a portrait of man, soap, and a comb. On the right side of the room is a button on a ledge which can be hit with one of Arty Wario's blocks, which spawns a ladder leading to the second floor of the room. Up here is another guard, a locked door on the left, and an open path on the right.
The room on the right has a door leading to a room with a moneybag, a Tooty Kamen, and a Noobis. Going to the left from here leads to an area with two Sir Lance-A-Lots on a ledge with a fake floor. The button on the ledge opens up the lower portion of the room, which has another Sir Lance-A-Lot and a staircase leading to a door. The door leads to the inside of the soap and comb exhibit, and Wario can explore it as well as all of the other exhibits in the room. Inside the glasses exhibit is a red chest containing the Mouse Trap Gum. There is also a purple chest near the fly and man exhibits with a map of the museum inside, and next to the calendar exhibit is a button that opens the locked door in the room.
Behind the door is the switch that unlocks the vault door from before. From here, Wario can crawl through some fake floors to reach the area where the first Nigel B. Whistlebottoms are. Inside the vault door room, Wario meets the Sphinx, who agrees to give Wario information about the Wishstone if he brings him the Pharaoh's three treasures. Underneath the Sphinx's pedestal is a hidden passage with four Mini Munchelangelos in it that leads to a door. The door takes Wario to a room with two moneybags and a path leading upward. Pressing a button opens a path to the left, but due to Wario not being able to drop through Semisolid Platforms yet, he must go up first. This takes him to a room with a big heart and a green chest containing the Sparky Guise Gem. This gives Wario the ability to turn into Sparky Wario, who can see in dark rooms, such as the one right on the other side of the door. There is a hole in the floor which Wario must jump over or he will fall back into the Sphinx's room. Two moneybags and a red chest containing the Matching Frilly Pink T-Shirts sit on a ledge. The room to the left features a Sphinx Simulator, which gives a random riddle after being activated by Sparky Wario. Answering it correctly gives Wario access to the next room, which has several moving platforms on pulleys, a gate, and two guards inside. The gate can be opened by drawing a block on the button behind it, which leads to the purple chest containing the Pharaoh's Underwear. The path on the left leads to a room with a hidden passage leading to a button. Pressing the button opens a gate, which leads back into the lobby.
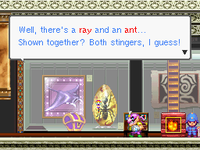
Wario can now return to the room behind the Sphinx's room and go left, encountering a Noobis and a Horkus Porkus on the way. This leads to a large outdoor area. Wario starts off in a metal walkway with a narrow ceiling and five Sir Lance-A-Lots. A hole on the left lets him drop down to a garden, where he will find a big heart, two Scare-Ohs!, and a purple chest with the Pharaoh's Nose Hair inside. Dropping down the hole on the right leads back to the room with the Tooty Kamen and Noobis in it. Going through the door reveals that a gate which had previously blocked Wario's path to a ladder is now gone (it opened when the vault door switch was pressed). Going up the ladder takes Wario to a room with a guard and some exhibits, namely a ray, an ant, a penguin, and a crane. There are two paths in this room; the one on the left leads to an area beneath the lobby's staircase with a Stankulus and a moneybag. The path on the right leads to another exhibit room with a guard; there are also a Ramenses II and a Horkus Porkus in here, as well as a big heart on the far right. The exhibits are a frog, a pear, and a rainbow.
Back in the ladder room, at the bottom of the ladder is an area with a guard and a smaller ladder leading further down. On the bottom-left corner is a big heart, and the path to the right leads to a tall room with another guard in it. In here, Wario can crawl through a hidden passage on the right which to access a room with a green chest. The chest is blocked off, and Wario must press two button simultaneously (by standing on one and drawing a block on the other) to release it. It contains the Captain Guise Gem. The next room features a pool of water with four Battle Salmon swimming in it and three Lurchins hovering above it. Wario can use his newly-obtained Captain Wario form to row across the water and obtain the Malodorous Keepsake treasure on the far left. There is a hole leading downward where Wario finds more Battle Salmon and a moneybag. The platforms lead back to the room where the first Sir Lance-A-Lots were.
Inside the tall room to the left of where the Captain Guise Gem was obtained, two moving platforms that cannot normally be seen or interacted with are revealed upon turning into Genius Wario. Pressing the button creates a small ledge that leads into another room. However, by climbing up the remaining moving platforms and crawling through a narrow passage, Wario can enter a higher portion of that room, which has a red chest with the Classy Bubble Pipe inside. The door in the room leads to an area with two guards, a Ramenses II, a Horkus Porkus, and a Noobis. There is a red chest on a ledge above the doorway; it contains the Infield Diamond Dirt. The ladder on the left takes Wario to another Sphinx Simulator. Solving its riddle lets Wario go into the next room, which has a guard and a Hat Switch. The door leads inside the frog, pear, and rainbow exhibits. Next to the frog exhibit is the Heat-Seeking Soccer Ball treasure. Wario can continue to the left to reach the ray, ant, penguin, and crane exhibits, where he'll find the Pharaoh's Pillow. There is also a ladder leading to the bear, robin, chick, and dog exhibits, where two moneybags and a big heart can be found. The hole in the floor leads back to the fly and man exhibits.
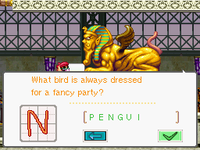
After obtaining all three treasures, Wario must return to the Sphinx to get the information he needs. However, once the Sphinx realizes he is a thief, he is required to answer three riddles in a row. These are taken from the same pool of riddles as the Sphinx Simulators. Getting any of them wrong results in a Game Over. After solving all three riddles, the episode ends.
Enemies
| Sprite | Name | Count |
|---|---|---|
| Nigel B. Whistlebottom | 13 | |
| Officer Kicksworth | Spawned by Nigel B. Whistlebottoms | |
| Sergeant Houndstooth | ||
| Dave | ||
| Tooty Kamen | 1 | |
| Noobis | 3 | |
| Sir Lance-A-Lot | 8 | |
| Mini Munchelangelo | 4 | |
| Horkus Porkus | 3 | |
| Scare-Oh! | 2 | |
| Stankulus | 1 | |
| Ramenses II | 2 | |
| Battle Salmon | 6 | |
| Lurchin | 3 | |
| Treasure Pest | 1 |
Treasure chest locations
A Treasure Pest will appear in place of one of the red chests, making it unobtainable on the first run.
| Treasure | Worth | Location | |
|---|---|---|---|
| Scary Wrestler Mask | $709 | On a ledge on the top-right of the first room of the museum. | |
| Mouse Trap Gum | $491 | Inside the glasses exhibit. | |
| Smithsnorian Museum Map | Inside the fly and man exhibit, in the same room as the glasses exhibit. | ||
| Sparky Guise Gem | In the room at the top-right corner of the museum shortly after where the Sphinx is. | ||
| Pompadour of Legend | $479 | Replaces the Sparky Guise Gem during subsequent runs of the episode. | |
| Matching Frilly Pink T-Shirts | $935 | In the dark room beyond where the Sparky Guise Gem is obtained. | |
| Pharaoh's Underwear | Behind a gate in the room with the moving platforms at the top of the museum. Obtained by using Arty Wario to hit a switch and open the gate. | ||
| Pharaoh's Nose Hair | In the large outdoor portion of the museum accessible from behind the Sphinx. Hitting the switch in the following room is necessary to open the gate that leads here. | ||
| Captain Guise Gem | In the small room at the bottom-right corner of the museum. Obtained by standing on one switch and drawing a block on the other switch to bring down the chest. | ||
| Panda Panzer | $6,000 | Replaces the Captain Guise Gem during subsequent runs of the episode. | |
| Malodorous Keepsake | $15,917 | Obtained in the water-filled room with Battle Salmon and Lurchins by using Captain Wario to jump from the water's surface. | |
| Classy Bubble Pipe | $54 | Obtained by climbing to the top of the room with invisible moving platforms and going through the highest passage to the room on the right. | |
| Infield Diamond Dirt | $7419 | On a ledge in the room beyond where the Classy Bubble Pipe is obtained. Obtained by either using the nearby statue as a springboard or using Arty Wario. | |
| Heat-Seeking Soccer Ball | $438 | Inside the frog exhibit. | |
| Pharaoh's Pillow | Inside the ray and ant exhibit. |
Names in other languages
| Language | Name | Meaning |
|---|---|---|
| German | Die Sphinx gibt Rätsel auf! |
The Sphinx gives Riddles! |
| Italian | Il segreto della Sfinge! |
The secret of the Sphinx! |
| Spanish | ¡El secreto de la esfinge! |
The secret of the sphinx! |


