Yo-yo Mario Karters to the Mario Kart: Wheel Tips Corner. Coincollector's here and ready to tell you the tip of the month. Let's begin.
Today I'll talk about one of the courses of the latest Mario Kart game: Mario Kart 7, Wuhu Island Loop. Wuhu Island Loop (aka Wuhu Loop in North America) is the first course of the Flower Cup and takes place in Wuhu Island, an element coming from Wii Sports Resort. Wuhu Island Loop's track is remarkable for being divided in three sections, a first in Mario Kart 7. This means that once racers have completed a section, they have completed a lap. Racers must find the line with the banners that show two stars and three stars on them that indicate the second lap and third lap respectively. The race is completed when the racers finally find the banner with the Mario Kart title and cross the line. Besides Wuhu Island Loop, there are two other courses that have this unique feature, but today I'll only talk about this course.
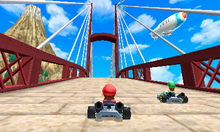
The first section of the track is simple and safe for beginners. Most of this part has wide fields of green grass and almost no obstacles to worry about. All players begin the race in a small town that leads quickly to a concrete road that goes to a bridge, and at the beginning of it there is the first set of Item Boxes. While crossing the bridge, you can find a ramp in the middle to do tricks. After crossing the bridge, racers bend in a soft S bend to the right with another ramp for tricks at the end of the turn. The course keeps going with the road bending gently to the left and then to the right. The track now follows in a straight line with a second set of item boxes split in two by a small median. Racers complete the first lap by crossing the line located in this part of the course.
The second section of the track is slightly harder. While crossing the line, racers must enter a tunnel with traffic. All the others vehicles in the way can bowl over the karts and drop their coins on the road. However, these obstacles can be surpassed quickly once exited the tunnel. The track continues between two masses of rock and later over a rocky cliff. Be careful not to be too near to the right side of the road or you will fall off from the edge. Racers make a turn to the left between two large rocky mountains. In this spot you can choose to take the concrete road or fall to the entrance of a tunnel at the bottom. The main way makes a C turn to the left and down there is a third set of item boxes. Next to it there is a row of two trick ramps to gain boosts. The alternate route is a passage where racers will find a blue pad that activates the kart's glider and fly over the stretch with the trick ramps. Turn to the left and then to the right in a large curve where you get the fourth group of item boxes and eventually the crossing line to finish the second lap. Watch out again with the traffic that gets in your way to the line.
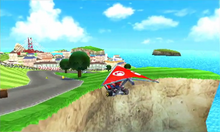
The third lap is less hard than the second, although the course now has more curves and their obstacles are simpler. After passing the second line, you'll swerve to the right and find another ramp for tricks. Racers follow the way over a cliff. Now swerve to the left where another ramp can be found, very near to the edge of the cliff. The last set of item boxes appear and the track splits again in two, a path of soil can be found to the right side of the main way, which sends you to the lighthouse of the island. The main route on the other hand has some crates that block your path. You can break up these crates making contact with them to reveal an item inside them, sometimes, but the best way is just avoiding them as they can make you slow down. In the road there is another median that splits the track in half. The other route sends you to the lighthouse lying over a cliff. In your way, you can obtain a boost from a pair of dash panels to take flight later by a blue pad at the end. You'll glide over a cliff and you can ascend a bit more with a Koopa Clown Car-like fan floating in the air. You'll land on the main way eventually which goes down to the town in an S bend. Two last jump ramps can be found at the sides of the track. After that, racers take the last turn to the left to return to the town and finish the race crossing the line where they started out.
If you're skilled enough, this track is not a big deal and despite the course having various obstacles, they are easy to avoid. The course also has their shortcuts. The most basic one is to cut the curves of the track by passing through the grass using a Mushroom or a Star. Some of these shortcuts even have a ramp over the grass for another boost - but frankly, they are not necessary to use. In the second section after the two trick ramps there is a row of platforms over the void. This shortcut is a bit hard to pull off as you need very good accuracy to take the boost pad and then use tricks to reach the other platforms while you pass over a perilous gap that makes you lose valuable seconds if you fail. The course also has another, perhaps obscure shortcut that is located on the way to the lighthouse. All you need here is to fall off and... whoops! Time's up for me to tell you more...
Well, Shy Guys, I hope you have enjoyed the tip of this month in the Mario Kart: Wheel Tips Corner of The 'Shroom. See you next time.


