The 'Shroom:Issue 194/Strategy Wing
Director's Notes
Written by: Hooded Pitohui (talk)
Hello, all of you readers of The 'Shroom, and welcome back to Strategy Wing! You know, it's hard keeping these offices clean. Whether I'm sweeping up Torkoal-produced ashes, reminding a Digimon to use the Portable Potty, or having to ask Waluigi Time to stop filling the offices with dirt and cobblestone, there's always some new, major mess to clean up! I could really use a break, like, maybe, say, a trip to the movies. You feel the same way sometimes, don't you? Well, luckily for both of us, The 'Shroom is celebrating cinema next month, with a light special theme focusing on movies. Now, games and movies are very different pieces of media, but if Dungeons and Dragons: Honor Among Thieves and The Super Mario Bros. Movie showed us anything this year, there are ways to combine them, so who knows what Strategy Wing will have in store for you next month.
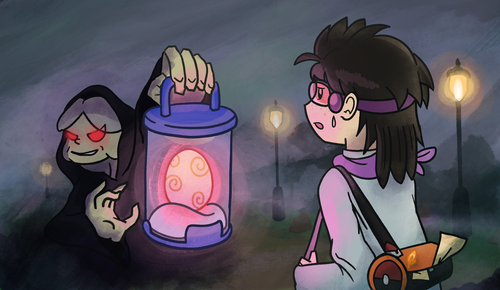
That, however, is next month. This month, I'm at least getting treated to a little screening of something special. The Van Shoeul, who you may know from his work in Van Shoeul's House of Ghouls over in Critic Corner, has come to Strategy Wing and contributed to a unique edition of Pitohui's Pokémon Academy. I can't promise the pitiful, horrific tale within will be a thriller... because Van Shoeul might sue me if I take his trademark line. I can promise, though, that Van Shoeul has given it his usual flair and written an entire intro for it, so be sure to take a look, and keep an eye out for a special, generous artistic contribution by GBA (talk) inside, too!
You'll find it nestled near the bottom of the page, just before Koops, Your Emblem is on Fire and above our poll and footer (keep voting in those SOTM polls), but before you find it, you'll find our other sections this month! We've got insomnia, we've got lights to brighten up the night, and... hmm, on second thought, maybe we shouldn't be installing these lights if people aren't sleeping...
Oh, wait, hang on. I think I hear a lightbulb breaking somewhere in the office, and I think I know what Digimon is responsible... I'll have to end my notes off here. The cleaning work is never do. I'll leave you with a reminder that you can join the Strategy Wing team at any time by going over to the sign up page and sending an application to our Statistics Manager, Meta Knight. Perhaps you want to look at level design likeFour Steps for a 3D World does, or perhaps there's an obscure gem you'd like to cover like File City Files does. Whatever you want, we'll find a place for you, and I'll be coming behind with a broom!
Section of the Month
Well, shucks, it seems our readers enjoyed last month's discussion of raising a Torkoal! Maybe it was discussing a few alternative options that did the trick? It certainly couldn't have been the emphasis on sunny weather, seeing as how a storm-filled Digging Deeper secured second place! It's not hard to cut through the rains and see why it might have done well, with all of the details it had about what to watch out for in a Minecraft world stuck in permanent stormy weather and what you could do to avoid it. Strategy Wing looks a little less like a meteorology office this month, but please do keep on voting and showing support to our writers all the same!
| STRATEGY WING SECTION OF THE MONTH | ||||
|---|---|---|---|---|
| Place | Section | Votes | % | Writer |
| 1st | Pitohui's Pokémon Academy | 8 | 44.44% | Hooded Pitohui (talk) |
| 2nd | Digging Deeper | 5 | 27.78% | Waluigi Time (talk) |
| 3rd | Four Steps for a 3D World | 3 | 16.67% | Hooded Pitohui (talk) |
Digging Deeper
Written by: Waluigi Time (talk)
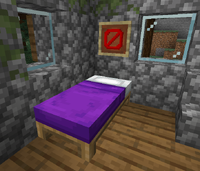
Hello there, 'Shroom readers, and welcome to more Digging Deeper! I hope you're well-rested, because this month we're covering the Insomniac Challenge! You can probably guess what this is going to be from the name alone. For Java Edition players, you'll want to be in a non-Hardcore world on version 1.13 or later to get the full effect of this challenge.
I'm already tired
This challenge is pretty simple. Don't use beds, ever! It seems like a simple thing, but beds fulfill some important functions that can shake the game up a lot if they're gone. Sleeping in a bed sets your spawn point so you can respawn at your base (or wherever you want) when you die, and skip through nighttime or thunderstorms. I probably don't need to spell out the implications of losing those options.
Since you won't be able to set your spawn point, you'll probably want to build your base very close to the world spawn. This could just be a starter base, and as you progress further in the game, maybe you could build another base farther away and have a minecart track going there. If you really don't want to build at spawn, then make sure that the way to your base is clearly marked in some way. A torch path is one of the easiest and cheapest options for this.
Dealing with night and thunderstorms is another thing. You could hunker down in your base until the danger passes, or go mining. When hostile mobs are able to spawn on the surface, less of them spawn underground because there's a cap on how many hostile mobs can spawn at once, so exploring caves is safer during those times. Also, be sure to use lots of torches to keep areas that you'll frequently use safe. Or relatively safe at least, considering what I'm about to talk about next...
The phantom menace
Now here comes the really fun part! After not sleeping for three nights, phantoms will begin to spawn in the sky at night or during thunderstorms. The longer you go without sleeping, the more likely they are to spawn, and in greater numbers. As of writing this, they can even spawn on the mushroom islands, where hostile mobs don't spawn otherwise (this appears to be a bug and may be fixed in the future). They are very annoying and a lot of Minecraft players don't like them much.
So, how do you deal with them? Luckily, there's a few options here. Phantoms will only spawn when you're above sea level (Y=64) and there aren't any opaque blocks directly above you. Staying indoors or underground will keep them from spawning. They don't spawn at all in the Nether or End, so you can hang out there too. Also, despite their name, phantoms can't pass through blocks, so you'll be safe inside as long as you haven't left any holes that they can get through.
You probably can't run forever, though. When it comes time to actually fight phantoms, you'll probably want to have a ranged weapon like a bow so you can attack them between swoops. It is completely possible to defeat phantoms entirely in melee combat, but the less opportunities that they have to hit you (and the less time you spend like a sitting duck) the better. Also, cats will hiss at phantoms that are attacking players and chase them away, preventing them from hitting you. You will definitely want some of them! If you can get some raw fish by fishing or killing fish and then find a village, you should be able to tame one pretty easily in the early game.
Dying will also reset the insomnia timer as if you slept in a bed to give you some relief from phantom spawning. Of course, it's not ideal, especially in this challenge where you can't set your spawn. You probably won't want to die intentionally just to get the phantoms off your back, but if you do end up dying at some point, it's worth keeping in mind.
If this really isn't your cup of tea and you'd rather focus on the other aspects of this challenge, phantom spawning can be disabled by running /gamerule doInsomnia false if cheats are enabled. Versions of Java Edition before 1.13 don't have them at all, so you could also play those older versions instead if you prefer (hence the recommendation at the beginning!). Any version from Beta 1.3 onward will work fine for the challenge.
No substitutions, please
If you're a little sneaky, you might be thinking about respawn anchors right now. I'm onto you! By using respawn anchors, you can avoid a lot of the challenge by being able to set a respawn point in the Nether. You could build a Nether portal right by your base, set up a respawn anchor right inside of it, and then have a quick respawn point. That doesn't solve the problem of sleeping through the night, but it does give you half of the bed's functionality back. I suppose which half is more important to you depends on how you normally play.
Whether you want to use respawn anchors in your playthrough is up to you. Personally, I wouldn't want to use them, but it might be interesting if the ability to set your spawn point is tied more heavily to game progression. Plus, respawn anchors are more high maintenance than beds. While you can use beds as much as you want, respawn anchors need to be charged with glowstone blocks. If they're out of charge, you can't use them.
Time to go sleep
That should pretty much cover it! A fairly basic challenge that shakes things up nonetheless. Hopefully you enjoy it if you decide to try it out.
Well, I have to be honest, I'm out of ideas for now! I might be back next month, maybe not. We'll see if I come up with anything. If you have any challenge ideas you'd like to see me write about though, feel free to let me know, or consider writing this section yourself!
File City Files
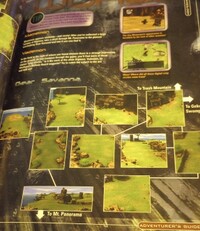
Welcome back to File City Files, the Midwest's best regional section for all Digimon World facts. Last month was quite the exciting section. We stopped Meramon from destroying File City, saved the life of Unimon, and, finally, we flashed forward to when Drimogemon finished his drill tunnel! This month isn't going to be quite as exciting, because we're going to start exploring the Gear Savannah (found by taking a left at the foot of Mt. Panorama) and we're also going to recruit a special trio of rookie Digimon that roam the wilds. With those plans, this month we're only going to spending time in Gear Savannah.
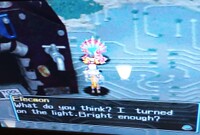
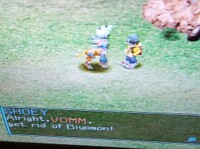
The first of the three rookie Digimon we find in the Gear Savannah is Elecmon. Once you enter the Gear Savannah, keep going up until you see a little red skunk-like Digimon. That's Elecmon, the electric Digimon. He patrols the screen that contains the entrance to factory town (move past it - we'll get to it). If you go up to Elecmon, he'll shock both you and your Digimon, causing around 500 damage, before taunting you. Do it again, and he'll ask you if you want to be here. Doing it a third time has him proclaim that you have guts. Declaring that you're going to be somebody someday, Elecmon than happily joins the city. Be careful when talking to Elecmon, because he always does around one fifth of your health, and there's no way to prevent him from shocking you. So, when you see him, make sure you're either fully healed or have healing items, because, despite the fact he doesn't fight you, Elecmon can kill you!
Purpose in City: Elecmon introduces electricity to File City, lighting the streets of the shopping district.
Using his electrical skills, Elecmon creates, essentially, street lights in the business district of File City. While these lights no doubt help prevent the chaos of Digimon wandering around in the dark, in the game itself these lights are nothing but an aesthetic effect that doesn't serve any purpose to the player. But they are a fun little detail that adds some charm to the city!
The Stubborn Salesman of the Savannah
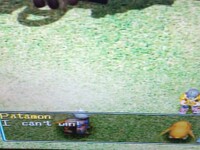
On the very next screen to the right, the next Digimon we're going to encounter roams. This time it's Patamon ,one of the anime's most important Digimon. Patamon hops around the screen and, if you make contact with him, he challenges you to a fight. Being a rookie Digimon, Patamon isn't a huge threat, having only 1,000 HP and three attacks (Dynamite kick, Wind Cutter, and Spinning Shot). Patamon isn't too tough, being only a rookie, but watch out, because Wind Cutter packs a mighty punch and has a fast charge time. The same is true with Spinning Shot. But if you have a champion, it shouldn't be that hard. Defeat Patamon and then Patamon offers to join the... oh, huh. Patamon wants a rematch... Well we're not about to back down from a rookie, so if he wants to rumble, we'll rumble! Obviously, it's still just a Patamon, so we take it down, and now Patamon agrees to... WHAT!? He wants to fight again? That's it, the gloves are off! No mercy will be granted! So, finally, after a third victory, Patamon finally breaks down crying, but, because we're a hero, we console Patamon and finally convince him to join the city! I'm gonna level. I don't like this one. It's not hard, but, like, you gotta do the same boss three times and each time they have full HP. Why don't I get full HP?!
It's just kind of an annoying thing that's a lot tougher than it should be, and mostly because Spinning Shot hits like a ton of bricks. The one good thing is, if you have a Digimon that can learn Spinning Shot, you have extra chances for your Digimon to learn it. Honestly, if you can learn Spinning Shot, you should savescum for it, because it's a very powerful move that can hit three targets!
Purpose in City: Patamon joins Unimon (or any other shopkeeps) in working at the towns store.
Taking a position at the town store, Patamon expands the item selection that the store has to offer. Using his connections in the File Island manufacturing community, the following items are now available:
- Large Recovery Floppy - 1000 bits
- Medium MP Floppy - 800 bits
- Omnipotent - 2000 bits
The first two items are aren't specific to Patamon and instead will become available as soon as your have two people working in the shop. The third item, the Omnipotent, is Patamon's special item that only Patamon has a license to sell. So you can only purchase it when Patamon is on the clock. It's a pretty good item. Though very expensive, costing 2,000 bits, in battle, it heals 1,500 HP and MP and erases status effects!
Hide and Go Capitalism
The final Digimon in our three-screen trio of Rookies is the bird Digimon, Biyomon, who is also one of the anime's most important Digimon. He sits on the screen below Patamon's, standing out in the open. If you talk to him, he will run away. But always a persistent hero, you naturally chase after him. Biyomon is a tricky one who will continue to run away from corner to corner, always fleeing from you, unless you position yourself to where you can send your Digimon after him, thus luring Biyomon to you so you can finally "talk".
This is actually the only time in the game where the game gives you the option to talk to your Digimon, as your have to choose to wait in the corner you're standing in and send your Digimon to box Biyomon in. To do this, you have to stand in one of the corners Bioymon was in. This then prompts you to send your Digimon after him. This one's a little odd, and I'm not 100% sure on the mechanics, but, basically, if you stand in one corner, eventually your Digimon will bring Bioymon to you. Once this happens, you find out this whole thing has been a big misunderstanding! It turns out that Biyomon thinks you guys are famous Digimon kidnappers, which obviously isn't true. Once you clear everything up, Biyomon happily joins the city!
Purpose in City: Biyomon, like Patamon, takes up work as a salesman in the item shop!
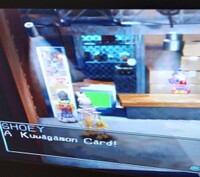
Biyomon, bringing with him his expertise in marketing, installs perhaps the most important thing inside the item shop, a machine that distributes collectibles Digimon Cards! For just 100 bits, you get a random Digimon card that can be sold for cash, collected for value, and even traded for items (more on that later).
This is a brilliant idea that's sure to bring in business from all over the island!!! (This isn't specific to Bioymon, by the way. Tt always happens when a third shopkeep is recruited). Important to note is that the machine that produces cards won't appear until you talk to each shopkeep individually. Once you've spoken to the three shopkeeps, it just conjures up out of thin air, defying time and space and appearing in the shop. Oh, also, Bioymon has his own special item that he has the exclusive contract to sell, that being the Super Recovery Floppy for 2,500 bits. This premium floppy recovers all HP and is an extremely useful item, even considering how expensive it is.
Learning New Moves the Easy Way!
So you might have noticed there's been some brief talk about learning new moves. You might be asking yourself, "How do I teach my idiot Digimon new moves? He's been stuck with one basic technique for like 14 hours and I'm sick of it!" Don't worry, readers, we've all been there! Well, don't worry, because I'm here to teach you the tricks to make your Digimon a better warrior! Now, the first question we need to answer is "how do you know what Digimon learn what moves?". And, you see, the answer to that question is really quite easy! You look that up in a different guide! Why? Because the game sure as hell won't tell you, and I neither know nor have the patience to learn! So, basically, when you get a Digimon, be it a rookie, champion, or ultimate, you look up a move list. I recommend as a resource. It's got a full list of Digimon and the moves they can learn.
So, now that we've got the hard part out of the way, we can get down to learning the moves, right? HAHAHAHAHAHAHAAHAHAHAHAHAHA! No. You see, the game has seven different types of moves, these being:
- Air
- Battle
- Earth
- Filth
- Fire
- Ice
- Mech
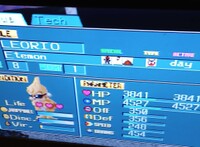
Your Digimon also have types, similarly to a Pokémon. Your Digimon is either going to have two or three types/natures, never just one. This is a very weird setup, because your Digimon, as far as my research suggests, will always have a first and a third nature, but it's not guaranteed to have a second nature. Which... just... Welcome to Digimon World, baby! These natures are going to determine what kinds of moves your Digimon can learn.
For example, on one file, I have an Etemon (the best Digimon), and his natures are Battle, Air, and Filth (you can find your Digimon's natures by clicking on the status screen). Because battle is his first nature, he primarily learns Battle moves and he has an easier time learning Battle moves. The actual percent chance a Digimon has to learn a move is really low, and I'm going to cite this discussion for a better breakdown on the mechanics. But, basically, if you have three natures, the standard learn rate is as follows:
- First nature = 25% chance to learn a move.
- Second nature = 16% chance to learn a move
- Third nature = 11% chance to learn a move
So, as you can see, even in your best situations, the chance of learning a move is one-in-four, and that sucks, because the way you actually learn moves is annoying, too. You fight a wild Digimon who happens to know a move that you can learn, and, then, after the battle, based on those chances I listed above, you either learn it or you don't!
On top of that, every move has its own stats. To learn, say, Prominence Beam, for example, (one of the best Fire moves in the game), well, let's get into how that works. If Fire is your Digimon's first nature, you have a 17% chance to learn it, which is bad, but if Fire is your third nature, that chance drops to 5%. Then there are moves that you cannot learn through combat if the type is your Digimon's third nature. Take Ultimate Poop Hell, the best Filth move. My Etemon can use the move if it is already known, but he cannot learn it on his own through combat, which is nonsense. This is one of the worst systems in the game, because, not only is none of this told to you by the game, but, like, even when you figure it out, the chances are so low that you can literally spend entire Digimons' lives with only one move because the game just doesn't give you another one.
There's nothing you can do to manipulate this, by the way. There's some misconceptions that either your brains stat or seeing the moves multiple times in battle can affect the chances of learning the move. That's incorrect. You always have a flat, percent chance as long as you see the move one time in combat, and all that matters is that you see it once. It's a very poor system that basically guarantees grinding to learn moves unless you get lucky. Now, it's a dumb system, but the game is clearly based around you running it with multiple Digimon, so there is a single saving grace. Unlike battle commands, you never forget moves. As long as you've learned a move at some point, any Digimon you get that can use that move will be able to equip it.
Just for completion's sake, there are other ways to learn moves. They're mostly inconvenient, but if you train the brain stat, there are certain numbers that give you a small chance to learn a move after you complete the training. If you Digivolve into a Digimon and you don't know any moves that it can use, the game will give you the weakest move of its primary type. Finally, and probably the most convenient, there's a Digimon named Sedramon that you can catch in Dragonfly Lake who will teach you a single technique every time you catch him. But as you can see, these are mostly fairly specific things, and your primary way of learning moves is going to be, unfortunately, through the bad combat learning system. That's going to be all for this month. Tune in next month as we continue exploring File Island.
Four Steps for a 3D World
Written by: Hooded Pitohui (talk)
Hello, all you readers of The 'Shroom, and welcome back to Four Steps for a 3D World. For those who haven't been following the section, what we're doing here is taking levels from Super Mario games directed by Koichi Hayashida and seeing if we can successfully identify the four steps that, according to a design philosophy Hayashida has discussed in interviews, a Nintendo-made 3D Super Mario level should take a player through.
According to Hayashida, these levels are (in the games he has influenced, at least) designed around an introduction that lets a player learn a mechanic in a safe environment, further development that builds on what the player is learning and introduces more complicated aspects of a mechanic, a twist that adds some kind of significant wrinkle or challenge to force players to consider the mechanic from a new angle, and a conclusion which gives players one final satisfying chance to show they've mastered the mechanic. Knowing these four steps, we're going to dissect levels from games he directed and see if we can tease out all four steps. Hopefully, by breaking the levels down like this, we can also gain some insight as to when it's advantageous or disadvantageous to stray from these four steps, too.
That said, for the third edition of this section, we're still going to stick to looking at a level that mostly follows these four steps. Last month, we looked at a level from the middle of the game, so, this month, as we round out our initial dissections of these levels, we're going to look at a level in the final world of the main storyline of the Super Mario 3D World. This late into the game, with players already familiar with much of their bag of tricks, will the developers still use their four steps without straying from them? Or will we see something a little different this month?
Follow me onto the ethereal Footlight Lane, and let's take a stroll down the disappearing path so we can find out together!
Usually, after a section like that, we'd have the final stretch before the flagpole and, with it, the conclusion of the level to discuss. Footlight Lane, however, does something a little bit different from the levels we've discussed before. After playing through this level multiple times for this section, I'm confident in saying that it returns to the development stage and repeats two of our four steps.
So, are there really six steps in this level? Did Hayashida lie to all of us? Well, no, he didn't lie. As for whether there's six steps, that's debatable. Maybe another person would play through this level and disagree with me. Maybe they would feel like both sections with Bullet Bills are extensions of the twist, or perhaps they would even go as far as to say that the rollers were still a part of the development section. Unless Nintendo decides to give us a breakdown of each individual level in Super Mario 3D World and how they view them, we might never know.
Instead of debating that, I'll ask that you, even if only for another paragraph, accept my conclusion that there's a second development step and a second twist step in this level. Let's ask why that might be the case? Is it that the teams under Hayashida don't always follow this structure rigidly? Is it different because it's a level late in the game? Is it something else? I think it's a combination of the first two factors. I'm sure that Nintendo's developers don't follow any structure rigidly if they think it inhibits a level from being the best they can be. If they have to use a variation on a formula that they're using to design levels, or have to discard all but the broadest strokes of it once in a while, I imagine they do those things without hesitation if they think it improves the level. These four steps might be the guidelines they follow, but they don't constrain themselves to following them exactly! I also think it is easier for levels that come late in the game to stray from the four step design. Players are already familiar with much of what a game has, and so these things can be reintroduced without needing to teach players how they work. Levels that come late in a game also tend to be longer, so you might have to repeat some steps or stray from them to fill it out.
If there's a takeaway from this level, I think it's that you shouldn't be afraid to reuse some of the four steps within a single level. Clearly, Nintendo isn't! Antepieces of some kind are an essential feature of good level design, preparing players for a challenge before throwing them into the deep end. Thinking in terms of "development, then twist" naturally leads to you including an antepiece in your level design to go along with whatever fun, frantic challenge you've set up. It's a good practice to follow, and if you want to include multiple exciting challenges in your level, like Footlight Lane does, it's not a bad idea to use multiple iterations of the "development, then twist" model so that you pace the player properly, and don't throw them right from one difficult section to the next without giving them a chance to prepare.
Now, with that, we've finally covered a level that doesn't follow our rigid four steps. What's interesting, though, is that, even while using a variation on the model, it still leans on those four steps heavily! Footlight Lane doesn't just meander around in its second half; the development and the twist are still there, recurring and building off the basics learned in the introduction. Will we find a level that drifts even further from the basic model, and, if we do, will it be better or worse for it? Maybe next month, we'll look to the heavens for an answer!
For this month, though, with a fourth edition on the way, three editions published, two tables in this edition, and one lengthy outro, that's all for Four Steps for a 3D World!
Pitohui's Pokémon Academy
Written by: Hooded Pitohui (talk) and Vincent Van Shoeul (talk)
Art by: GBA (talk)
Good evening, dear readers, and welcome to a very special performance of Van Shoeul's House of Ghouls. I'm your host, Vincent Van Shoeul. Tonight, we bring you a truly terrifying tale of a young Pokémon professor full of love for Pokémon and in possession of a talent for bringing out the best in them. That talent, along with his hubris-fueled belief that any Pokemon can excel in the right hands, drives him to madness as he's subjected to a fate beyond horror. So sit back and prepare to be scared as we bring you one of our most twisted tales yet: The Professors Regret's: The Bouncing Ball of Doom.
The subject of this month's piece is one Hooded Pitohui, age 25, noted Pokémon expert who some might say is a Pokémon Master. He was once a noted and popular trainer in his own right, one who helped to smash Team Flare at the battle of the Lysandre Labs. A popular boy wonder trainer always considered a media darling to win the Kalos Pokémon League, Hooded would find his dreams of holding the League crown go unfulfilled, competing three times and finishing 8th, 4th, and 5th. Following his last league, Mr. Pitohui decided to take a break from active training and accepted a position at the prestigious Kalos University of Battle and Science in Lumiose City as an adjunct Professor of Battle Tactics specializing in the use of Natures in battle. A popular professor, known for thoroughly detailed lectures and providing personalized notes for his students to study with, Mr. Pitohui's time as a professor only served to strengthen his love for Pokémon and, and likewise served to grow his desire to be a true Pokémon Master. Unfortunately for Mr. Pitohui, it was that same desire that would lead him to this horrifying fate.
Our tale begins on a nice spring day. With the university on break, Mr. Pitohui decided to plan a little excursion through Kalos, looking for new and powerful Pokémon to train. Waking up just as the sun rose, Hooded began biking through the seemingly empty Route 18 when, suddenly, a thick fog encompassed the surroundings.
"That's strange," he thought to himself.
"The weather didn't say anything about fog," he said aloud to himself.
Now, Hooded had traveled this route dozens of times, but the fog was so thick that even Mr. Pitohui couldn't tell where he was. Barely able to see, Hooded attempted to access his PC remotely so he could summon his Noctowl to clear the fog.
Attempting to use his Pokétch, Hood finds he's unable to access not only his boxes but any of his apps. "That's odd. Could it be that this fog is preventing me from having service?" he again thinks to himself as he staggers through fog that seems to be getting thicker.
As he staggers through the fog, he begins to hear the sound of running water as a warmth surrounds him and the smell of salt fills the air.
"A hot spring? But I've never heard of a hot spring being here before," he thinks to himself before being startled by a figure emerging from the fog.
"Hello, sonny," the figure says in a sweet voice, revealing herself to be a little old lady.
"Don't get many visitors around these parts," she says as Hood stares at her in disbelief.
"Y-y-es, sorry ma'am. Pardon my rudeness. You see, I was lost in the fog. My name is," Hood says before being interrupted.
"Oh, there's no need for introductions. You're Hooded Pitohui," she says sweetly.
"H-h-how did you know my name?" Hooded asks.
"Why, everyone knows who you are, sweetie. The boy wonder who helped stopped Team Flare and a favorite in all the tournaments. You're famous around these parts," she says, sticking her hand in the water.
"Yes... I suppose that's true," a clearly nervous Hood replies.
The old lady stirs the water a little bit before looking at Hood. "These springs here are good for the aging process," she says, smiling. "Even the Pokémon seem to agree. Sometimes I peer out on these springs and see them soaking away. Of course, they always scatter when they see me, but they did leave me a present," she says, pulling out an unusually small Pokémon Egg.
"An Egg!" Hood says, shocked looking at it. The Egg, as stated, was unusually small and bright pink with a certain shine to it.
"I wasn't planning on taking it, of course, but it was strange... No matter how many days I waited, the Egg just remained in the spring. Finally, I couldn't stand it, the poor dear abandoned by it's family! So I brought it home. Of course, I'm a little old to raise Pokémon, but it looks like this Egg's in luck! You're here, a Pokémon League Finalist and noted Pokémon expert! I'm sure you can give it a good home," she says sweetly, attempting to hand him the egg.
"I-I-I don't know. I mean, we don't even know what's in it," Hood stammers out.
"I don't see why that matters, dearie. After all, you once said there are no bad Pokémon, only bad trainers," The old lady replies.
"Of course, madam. I would be happy to give this Pokémon a good home," Hood says, taking hold of the egg.
"Thank you sweetie. I'm so happy it'll be given a good home," the smiling lady says as the fog begins to lift.
With the fog lifting, Hood bids the old lady adieu and begins heading back to the main road. In his hands, the Egg is strange. It's bouncy as if its shell is made of rubber. Having regained access to his apps, Hood attempted to place it in his PC for safekeeping, but the Egg refused to leave his possession. Thinking that was strange, Hood shrugged it off, deciding that it could be looked at more at the university .
But that is only the beginning of his nightmare. Soon, Hood would come face to face with true horror. The Egg refused to leave his possession. Attempts to hand it off would cause the eggshell to turn sticky like glue. Attempts to leave it another room would see the Egg bounce back into Hood's possession. Months went by. Hood would swear he could hear something inside, moving like a bouncing ball hitting a wall. But nobody else could hear it, as the Egg refused to hatch. Feeling that he was going mad, Hood finally decided to return the Egg to the old lady, but when he returned to Route 18, no hot spring could be found. Finally, one day, it happened. The Egg began to crack and out from the shell hatched something more horrifying then Hood could ever imagine.
"Now, now, don't panic, Hood," he told himself as he stared at the horror that had emerged from the Egg. "Remember, any Pokémon can be great if raised properly," he tries to remind himself, voice wavering. "Now, er, let's see, what would I tell the students at the university right about now?". He pulls out a handful of papers from a drawer, shuffling through them. "First, I would remind the students to refresh themselves on the guiding principles of our course, checking out the condensed syllabus I always place in a box at the start of class."
First, a Smogon University course, this course is not. No, this academy's lessons are designed to get trainers of any stripe thinking about how they can raise their Pokémon, and, as a result, aren't designed to keep up with the widely-accepted metagame for the series. In some cases, the way I've raised my Pokémon may even flies in the face of conventional wisdom. If you're looking for top-tier strategies, do check out Smogon, but if you merely want to get a little deeper into raising Pokémon while still doing things your own way, feel free to use this section as a reference.
Since we all know the importance of citing our sources, I also need to credit the design of some of the tables used in these lectures to Crocodile Dippy, author of the Pocket Handbook which can be found in early editions of Strategy Wing.Feeling a little more confident after reminding himself of his philosophy, Hood continues, pulling out another document. "Then I would remind them to seek the terminology handout if they need a refresher on the terms they'll commonly encounter in our course."
Base Stats: Base stats are the values associated with a particular Pokémon species, and are the same across every individual Pokémon of a given species. You have no influence on them. You can think of them as traits tied to a species. A chimp isn't ever going to be able to get as good as digging as a mole will be, and, likewise, an Abra is never going to have the defensive prowess a Shuckle has.
Individual Values (IVs): Individual values, as their name implies, are associated with individual Pokémon. They range from 0 to 31 in each stat, with 31 being considered a "perfect" IV and higher numbers corresponding to different stats. Magikarp A and Magikarp B will have the same base stats, but they may very well have different IVs. To stick with the animal analogy, one mole may be born with larger claws than another mole, and that first mole is probably going to have an easier time digging through dirt than the latter. Individual values are set in stone, strictly speaking, but you can use Hyper Training (from Generation VII onwards) to functionally get a perfect IV in a stat.
Effort Values (EVs): Effort values are the one thing you can easily change. A Pokémon can earn, primarily through battling, but also through means like the use of certain items or mechanics like Super Training, up to a total of 510 effort values, with up to 252 in any given stat. To finish off the animal analogy, no matter what kind of claws a mole is born with, moles who have more experience digging are probably going to be better at digging than moles which have never dug.
Nature: A Pokémon's nature is, more or a less, a stat modifier with a name meant to make it sound like a Pokémon has some personality. Natures will raise one stat by ten percent and lower another stat by ten percent. Some natures raise and lower the same stat, canceling out the effect and leaving stats unchanged. Natures can be functionally changed with the use of special mint items from Generation VIII onwards.
STAB: STAB stands for Same-Type Attack Bonus, and refers to the boosted power of moves that match the type of the move's user. To illustrate this, consider the case of a Lombre, a dual-type Pokémon which is both a Water-type and a Grass-type. Any Water-type moves Lombre uses will have their power boosted by 1.5x, and any Grass-type moves Lombre uses will, likewise, have their power boosted by 1.5x. (There are circumstances where this does not apply, and, while the 1.5x multiplier is typical, some games use other multipliers.)
"This isn't so bad," Hood tells himself, daring to peek over the pages in his hand to look at his new charge. "I think we might even be able to raise you, little-" Hood cuts himself off as he makes eye contact with the horror, those round eyes peering into his very soul. No, he dares not to speak its name... but... he must. "Now, let's not get off on the wrong foot, Igglybuff. We-We-We can do this, together." Staring into those eyes, devoid of kindness, Hood again hears the pounding that had for weeks tormented him, the bouncing of Igglybuff inside of its Egg. To deal with this horror, would he have to abandon his morals?
Feeling something inside of him slipping, changing and warping the longer he stares at Igglybuff, Hood begins to laugh maniacally. "It's entirely unorthodox and unsportsmanlike, little Igglybuff. I wouldn't resort to this for just any Pokémon, not even other unevolved Pokémon! But you, you, little Igglybuff, you're special, aren't you? You are destined to become a demon, raised to be as annoying a Pokémon to fight as possible!"
Continuing with his cackling, Hood soon begins tearing into his other filing cabinets, pulling out all sorts of papers with graphs and data tables, muttering to himself. "Three status conditions, the power to heal itself, and... well, no, no evasion-raising moves. I'm raising a horror, but I'm not a monster!"
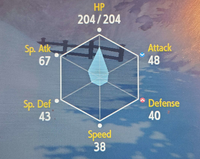
"Now, Igglybuff, you are what we researchers refer to as a Baby Pokémon, so your Base Stats are pretty poor," Hood told the Igglybuff. "You have passable HP, but all of your other stats are pretty much useless and will not make a difference if you face any Pokémon outside of highly constrained battle formats. Your second best stat is your special attack, little Igglybuff, so what we'll do is invest in your HP to make sure you can last as long as possible and in your special attack so you can at least do a little bit of damage."
"While we'll invest the 6 EVs we have after putting 252 EVs into each of those stats into your speed, it's only going to give you the chance to outspeed the slowest of Pokémon. If I were to posit another way to raise you, I might invest those 6 EVs into your defense and keep you as slow as possible to use on a team with Trick Room."
"Now, considering your abysmal attack stat and that we're choosing to focus on your special attack, we'll choose a nature for you that lowers your attack. Ideally we would choose a nature that also raises your special attack, so what we want for you is a Modest nature," Hood told the Igglybuff, digging into his supplies of mints only to discover, to his horror, that he had run of out Modest Mints! "Oh, well, this isn't ideal little Igglybuff, but it looks like you were born with a Bold nature. At least that lowers attack. It's not the best nature you could have, but it's fine."
"Now that we've considered your stats, what abilities do you have? Do you have any which synergize well with our plan for raising you?" Hood asks, opening his Pokédex. "Friend Guard is too situational, only being useful in battles where multiple Pokémon are on the field. Competitive, eh> Competitive is a very fine, highly sought-after ability that would rapidly boost your special attack if an opponent tried to lower your stats. It would be a great ability normally, but nobody is going to try to lower your stats when they can knock you out quickly with most any attack."
"Hmm, hmm, hah," Hood ponders, scrolling down. "Aha, I've got it! Cute Charm is perfect! Whenever a Pokémon of the opposite gender hits you with a move that makes direct contact, you will have a 30% chance of striking them with infatuation. A Pokémon that is infatuated can only successfully attack 50% of the time. That aligns perfectly with our goal to make you as annoying as possible, doesn't it, you little terror monster?"
"Now that we've decided on all of your stats and settled on an ability, what four moves can we pick to make all of Kalos tremble in fear of you?" Hood wondered to himself aloud, the image of the old lady on Route 18 stuck in his mind. "If we're to make it as difficult as possible for an opponent to do anything at all, let's add guaranteed Paralysis by equipping you with Thunder Wave. Yes, yes, and to make it even more difficult, we'll make it so you can confuse them with Sweet Kiss! Imagine how difficult it will be for a Pokémon afflicted by Infatuation, Confusion, and Paralysis to hit you!" Hood again laughs maniacally.
"Well, unless they switch out and clear the first two conditions," he muses. "Now, to give you an offensive option that can restore your HP when you're inevitably battered by attacks that slip through those conditions, let's give you Draining Kiss. It will run off your higher special attack and keep you in battle just slightly longer by giving you a quick recovery option."
"To round out the list," he says, "Hmmm? Sing? No, it's accuracy is too low. Encore, then? But what would that accomplish? You'll probably be slower than your opponent, so they would command the advantage in choosing what move they must use repeatedly, and they would be unwise to use anything other than an attacking move against you anyways, so the benefits to you are small. Charm? No, lowering stats won't make a difference for- Aha! I've got it, little Igglybuff," Hood declares. "Endure! It's perfect. Consider it. Just as your opponent thinks they're about to finish you off, you hang on with 1 HP. Then their many status conditions prevent them from attacking again immediately, giving you a chance to restore your HP with Draining Kiss. It's devious!"
| Draining Kiss | Special | The user steals the target's HP with a kiss. The user's HP is restored by over half the damage taken by the target. |
| Sweet Kiss | Status | The user kisses the target with a sweet, angelic cuteness that causes confusion. |
| Thunder Wave | Status | The user launches a weak jolt of electricity that paralyzes the target. |
| Endure | Status | The user endures any attack with at least 1 HP. This move's chance of failing rises if used in succession. |
"With all of the details worked out, surely you will be easy to raise, little Igglybuff. Here are the HP Ups, here are six Swift Feathers, and here are..." Hood rummages around his medicine cabinet, unable to find the Calciums in their usual place. "Well, no matter" he declares, a little nervous. "I'll get some funds and make a call to Chansey Supply."
Upon proceeding to his safe, however, Hood finds the unthinkable. He's out of money! There's not a single coin to be found. Frantically looking at his electronic accounts, he finds that he is also out of LP. Five HP Ups short, and eighteen Calciums short, Hooded Pitohui discovers the ultimate horror in this moment, finally discovering a Pokémon he cannot finish raising! Now, in his prime, Hood might have taken the Igglybuff out to raise it in the old-fashioned way, battling mass outbreaks of wild Pokémon, but in his growing madness he fails to see the options before him. "What I'll have to do," Hood declares to himself, rocking back and forth, "is write up a table that shows what Igglybuff's stats should be when it has all of its EVs, even though it won't match up with the picture my Pokédex prints out."
"I better leave a disclaimer about this, don't you agree, little Igglybuff?" Hood asks, before scooping up his new Pokémon. "Now, come, little Igglybuff," he says, truly a broken shell of his former self, "and we will conquer Kalos together!"
The moral of this story, dear readers? Why, should you ever find yourself-
Hmm. I'm afraid I'm going to cut the video off there, class. I think I'm taking a different moral away from this. Should I ever find myself short on time, I shouldn't bring in a video to fill the class session.
Well, I'm afraid that's all for this month, class. Our normal lessons will resume next month. I trust I will see you there.
Koops, Your Emblem is on Fire
Welp... let's just get right into it. As a bit of a warning I am very grumpy in the first video for reasons.
And... for the first time... we have no new recruits at all. This means I have nothing to talk about. Yes, nothing at all. Bye.
| The 'Shroom: Issue 194 | |
|---|---|
| Staff sections | Staff Notes • The 'Shroom Spotlight |
| Features | Fake News • Fun Stuff • Palette Swap • Pipe Plaza • Critic Corner • Strategy Wing |


